

We Love Our Quilting Community
At High Country Quilts we care deeply about community. With our experiences in retail, we know that a store is not only a place to shop but also a place for the community to gather and share. During this busy...


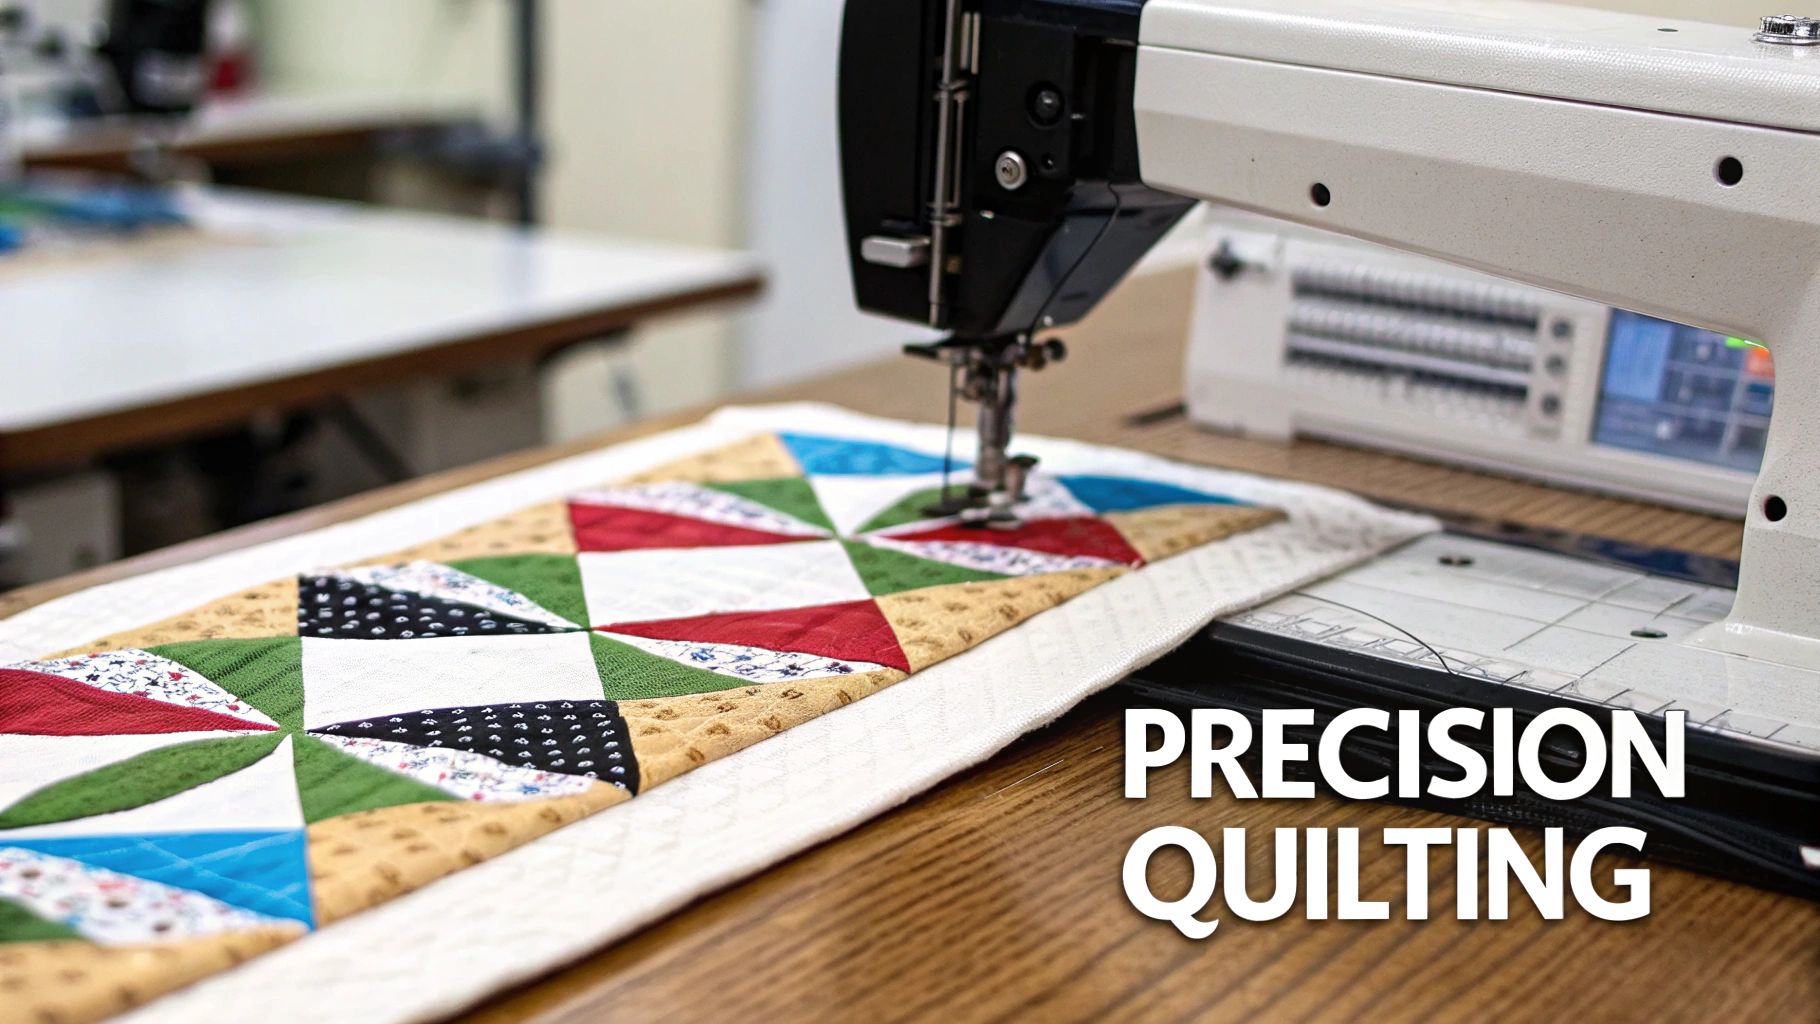
Have you ever looked at a quilt with stunningly sharp points and mind-bogglingly intricate designs and thought, how on earth did they do that? The secret weapon behind many of those masterpieces is a technique called foundation paper piecing (FPP).
It’s an incredible method that uses a printed paper pattern as a stitch-and-flip guide, letting you sew even the most complex shapes with absolute precision. This guide will walk you through everything you need to know to get started and fall in love with FPP.
If you've ever put a pattern back on the shelf because it just looked too difficult, foundation paper piecing is about to become your new best friend. It’s more than just sewing on paper; it's a completely different approach that guarantees accuracy, making those tiny pieces and sharp angles surprisingly easy to handle, no matter your skill level.
Instead of fighting with bias edges or trying to perfectly match up dozens of tiny fabric shapes, you simply sew your fabric directly onto a printed template. The lines on the paper become your guide, which takes all the guesswork out of the process. Every seam ends up exactly where it's supposed to be.
This clever technique has been around for centuries. While some trace its origins back to 15th-century Italy, it really took off in England during the 18th and 19th centuries as a frugal way to use up every last scrap of precious fabric. Quilters would use whatever paper they had—old letters, newspapers, even pages from catalogs—as their foundation. It’s a true testament to quilter ingenuity!
So, what makes this method so great compared to traditional piecing? Once you try it, the advantages are impossible to ignore.
At its heart, foundation paper piecing is like paint-by-numbers for quilters. It provides a structured path to a beautiful, complex design, boosting confidence and delivering professional-looking results every time.
FPP isn't just a technique; it’s a whole new way of thinking about building a quilt block. It shares some common ground with other precision-focused methods, but its benefits are unique. To see how it fits into the bigger picture, it's fun to explore the many different quilting styles quilters use today. Ultimately, FPP empowers you to tackle designs you might have once thought were impossible, turning intimidating patterns into your next exciting project.
Let's talk tools. Getting set up for foundation paper piecing is half the battle, but thankfully, you don't need a whole new studio. A few key items will make all the difference, turning what could be a frustrating process into something you actually enjoy. Trust me, the right gear will make your piecing more accurate and a whole lot faster.
While FPP feels like a modern technique, it has a rich history. It really took off in the quilting world around the 1990s, when teachers started developing specialty papers and rulers. I remember classes at events like the 1992 Houston Quilt Festival that brought FPP into the mainstream for so many of us. If you're a history buff, you can read more about the evolution of pieced quilts.
Okay, let's get down to the essentials. These are the tools I simply won't FPP without. They make life so much easier and your results so much crisper.
The "paper" in foundation paper piecing is a pretty big deal, and not all papers are created equal. Your choice will really depend on the project, your budget, and what you find easiest to work with.
Here’s a quick rundown of the most common options to help you decide what's right for you.
| Paper Type | Key Features | Best For | Potential Drawbacks |
|---|---|---|---|
| Standard Printer Paper | Cheap and always on hand. | Practicing new patterns or very simple blocks. | Can be a real pain to tear out, especially on dense seams. |
| Specialty FPP Paper | Lightweight, a bit see-through, and tears away like a dream. | Intricate patterns with lots of tiny pieces. | It costs more than regular paper. |
| Freezer Paper | The templates are reusable; you iron the paper to the fabric. | Anyone looking to reduce paper waste and avoid sewing through paper. | It's a slightly different process you have to get used to. |
| Vellum or Tracing Paper | Very transparent, making fabric placement foolproof. | Pictorial blocks where exact alignment is critical. | Can be slippery to work with and might curl from the iron's heat. |
I've found that starting with a specialty FPP paper makes learning the technique much less frustrating, but don't be afraid to experiment with what you have on hand.
For quilters who are just starting out, getting a handle on these foundational supplies is a great first step. If you feel like you need a broader overview of quilting basics before jumping into FPP, our guide on how to start quilting is a fantastic place to begin.
Once you have the basics covered, a few other things can make your FPP life even better. I always keep a simple school glue stick nearby to tack down that tricky first piece of fabric. And you’d be surprised how often a good pair of tweezers comes in handy for pulling out those stubborn little bits of paper from your seams.
My Go-To Machine Setting: Shorten your stitch length! I set mine to about 1.5mm to 1.8mm. This perforates the paper more thoroughly, making it tear away cleanly later. It also helps secure those tiny fabric pieces in tight corners.
If you’re sewing on a BERNINA, you’re in luck. Using the right presser foot is a huge advantage. I love the Patchwork Foot #97D for that perfect ¼-inch seam. For even better visibility, the Clear Foot #34D lets you see the printed line on the paper, so you know you're stitching exactly where you need to be. The right setup lets you focus on the fun part—watching your beautiful block come to life.
Alright, let's get to the good stuff. This is where the real magic of foundation paper piecing happens, as we move from just talking about it to actually doing it. You're about to sew your very first FPP block! To make things simple, I've created a free pattern just for this tutorial—go ahead and download it now. Print a few copies, just in case.
The thing I love most about FPP is that it’s all about the process. There's no guesswork here. You just follow a simple sequence of steps that, when you put them all together, create a stunningly precise result. For a moment, try to forget everything you know about traditional piecing and just trust the paper.
Before you even touch your sewing machine, a little bit of prep work will make your life so much easier.
First, take your printed pattern and trim around the block, leaving about a ¼-inch margin outside the solid final-size line. This just gets rid of the extra bulk and makes the paper easier to manage as you work.
Next—and this is a big one—shorten your stitch length. I can't say this enough. Dropping it down to somewhere between 1.5mm and 1.8mm is the sweet spot. A shorter stitch not only holds everything securely but also perforates the paper. When you're all done, the paper will tear away as easily as a postage stamp.
With your machine set, let's get the fabric ready. You don't need to cut precise shapes at all. In fact, you just want to cut generous chunks of fabric that are obviously bigger than the section they need to cover. I usually aim for at least a ¾-inch margin on all sides. It feels a little wasteful at first, but trust me, it’s much better than realizing your piece is just a little too small.
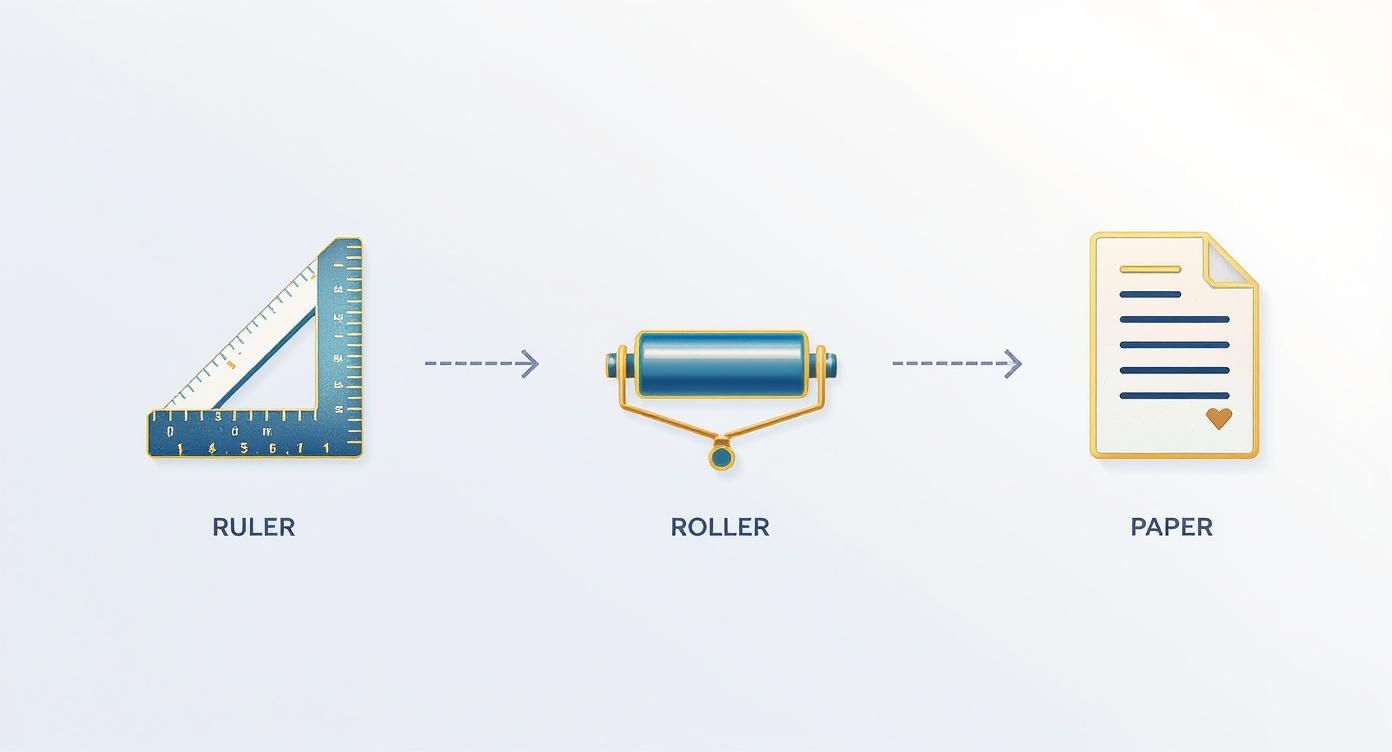
These are the core tools you'll be reaching for constantly: the ruler for trimming, a seam roller for quick pressing, and the foundation paper itself that guides every stitch.
Everything starts with section 1. Take your first piece of fabric (let’s call it Fabric 1) and place it on the unprinted side of the paper pattern. Make sure it completely covers section 1, plus plenty of extra fabric on all sides. The wrong side of your fabric should be touching the paper. A little dab from a glue stick here is a great way to keep it from shifting around.
Now grab your second piece, Fabric 2. Place it directly on top of Fabric 1, right sides together, so that its edge lines up with the sewing line between section 1 and section 2. You’ve basically made a fabric sandwich with the paper as the bottom slice.
Not sure about your placement? Just hold the whole thing up to a window or a lamp. You'll be able to see the outlines through the paper and confirm that both sections are fully covered.
With your fabric in place, flip the unit over so the printed side of the paper is facing up. Now, just sew directly on the line between section 1 and section 2. I like to start my stitches a few threads before the line and end a few threads after—this just helps lock the seam in place.
Time for the first press! Flip back over to the fabric side. Gently open up Fabric 2 and press it away from Fabric 1. You can use a seam roller to do this right at your machine, or you can take it over to the ironing board. If you use an iron, make sure it’s a dry iron—no steam!
Pro Tip: How you press your seams makes a huge difference in foundation paper piecing. Pressing them open can help reduce bulk, while pressing to one side can add a little extra strength. For a deeper look at the best methods, our guide on how to press seams properly has some fantastic insights that work perfectly here.
This little dance—position, sew, press—is the heart and soul of FPP. You're going to repeat these exact motions for every single piece you add.
This next step is the secret sauce that makes FPP so incredibly accurate.
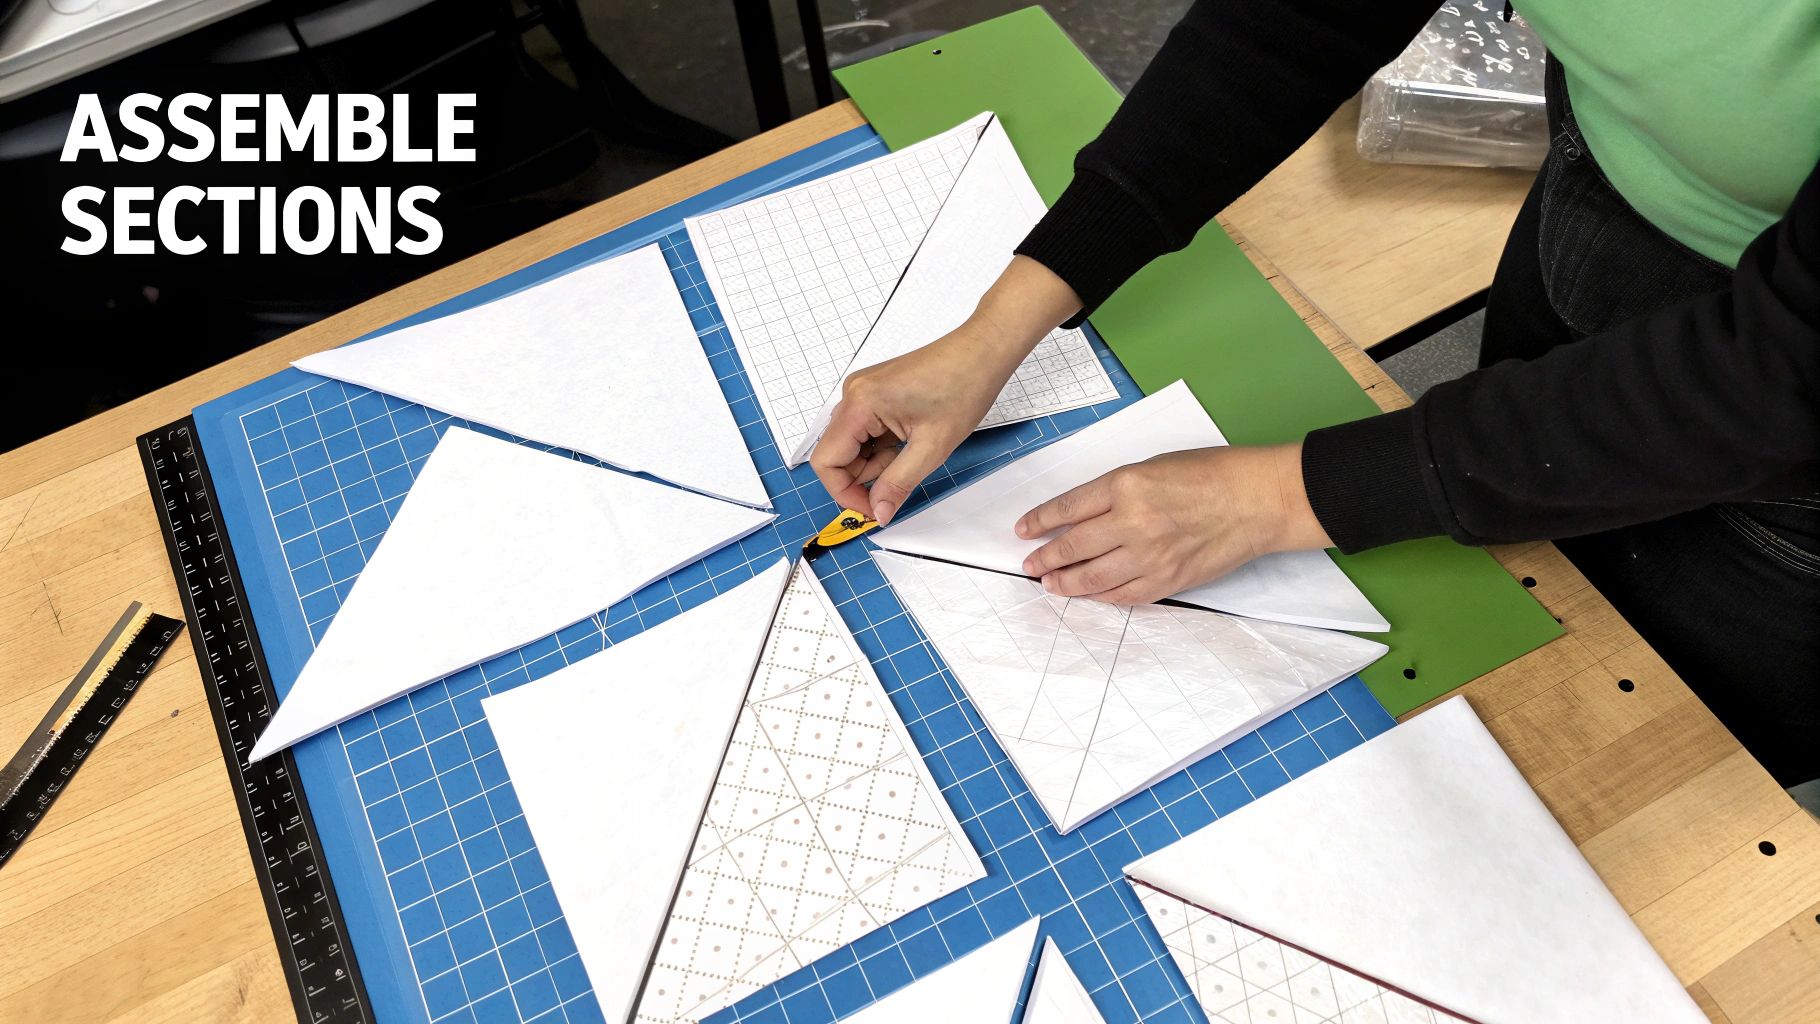
With Fabric 2 sewn and pressed, turn the unit back over so you're looking at the printed paper side. Find the next seam line on your pattern—the one between your current pieces (1 and 2) and the next one (section 3). Carefully fold the paper back along that line, using a ruler to get a sharp crease.
This fold creates a perfect straight edge for trimming. Now, grab your Add-A-Quarter ruler. See that little lip on it? That’s designed to catch right on the paper fold, letting you trim the excess fabric from your first two pieces to a perfect ¼-inch seam allowance. This step is absolutely key to getting those sharp points.
You now have a clean, perfectly trimmed edge, ready for the next piece. Take the fabric for section 3 (Fabric 3) and place it right sides together, lining it up with that freshly trimmed edge.
Just like before, flip it over and sew on the printed line that separates the previous sections from section 3. Remember to stitch a little bit beyond the start and end of the line.
Once it's sewn, flip to the fabric side and press Fabric 3 open. Then, you guessed it, you repeat the fold-and-trim process along the next numbered seam line. You’ll keep going with this same rhythm—place, sew, press, fold, trim—for every numbered section until the whole block is filled in.
After you've attached and pressed that final piece of fabric, your block is almost done! The very last thing to do is trim it to its final size.
Lay the block on your cutting mat with the printed side facing up. Take a standard quilting ruler and line up its ¼-inch mark with the solid outer line of your pattern. Carefully trim all four sides with your rotary cutter.
This final trim squares up your block perfectly and creates the built-in seam allowances you'll need for piecing. And that's it—a flawless quilt block made with complete confidence. Don't take the paper off just yet, though! That's the last step after you've joined all your blocks together.
You did it! Finishing your first foundation paper pieced block is a huge milestone. Now, the real magic happens when you start joining these perfect little units into something bigger. This is where the incredible precision of FPP really pays off, but it also brings up a new question: how do you get all those perfect points to match up when you join the blocks?
The trick is to treat your finished FPP units just like any other quilt block, but with one major exception—leave the paper on! It might be tempting to rip it off right away, but that paper is your best friend. It keeps everything stable and gives you a crisp, accurate seam line to follow as you sew.
To join two blocks, just place them right sides together. Your goal is to get the seams and points to nest perfectly. I find a simple pin is the best tool for this. I like to poke a pin straight through a key intersection point on the top block and check that it comes out at the exact same spot on the block underneath before I secure it.
Getting those "wow" moments where every point lines up flawlessly isn't about luck; it's all about technique. Honing this skill is what will take your quilt tops from good to absolutely stunning.
The number one struggle I see quilters face when joining blocks is point alignment. My go-to advice is this: press the seam allowance of one block in one direction, and press the seam of the connecting block in the opposite direction. This lets the seams "nest" or lock into each other, creating an almost foolproof guide for perfect alignment.
After you've gotten the hang of following patterns, you might start feeling that creative itch to design your own. It's a natural next step that opens up a whole universe of possibilities. Designing an FPP pattern is a bit like thinking in reverse—you're breaking a complete image down into smaller, numbered sections that can be sewn in a logical order.
The core concept is simple: any straight line can be a seam. You'll sketch out your design and then draw lines to divide it into numbered pieces. That numbering is everything, as it dictates the entire sewing process. Just like you did with your first block, you're always adding a new piece to the ones that came before it.
Don't forget to think about fabric at this stage, too. If you're dreaming up a larger project, you'll need a good idea of your yardage needs. For a great walkthrough on this, check out our guide on calculating yardage for quilts before you make the first cut.
Not too long ago, designing intricate patterns meant hours of painstaking drawing and redrawing by hand. Thankfully, technology has made the process much more approachable. Several software programs are now available specifically for quilt design, many of which include fantastic features for creating FPP patterns from scratch.
This blend of traditional craft and modern tech is always evolving. In fact, computer scientists have even developed algorithms to help generate FPP patterns automatically. A recent study introduced software that can take a simple line drawing and turn it into a valid, pieceable pattern, guaranteeing the design can actually be sewn. How cool is that? This kind of innovation is breaking down one of the biggest barriers for aspiring designers.
With these tools and a bit of practice, you’ll be on your way from following a foundation paper piecing tutorial to creating your very own works of quilted art.
Even the most seasoned quilters hit a snag every now and then. If you're feeling a bit stuck, take a deep breath—you're in good company. Foundation paper piecing is all about precision, which means a few common issues tend to pop up for just about everyone.
Think of this section as your personal FPP helpline. We'll walk through the usual suspects, from fabric pieces that mysteriously shrink to seams that just refuse to line up. The good news is that most of these headaches are minor and surprisingly easy to fix once you know what to look for.
This is, without a doubt, the most frequent FPP frustration. You've sewn your piece, you flip it over to press, and your heart sinks—it doesn't cover its section. The culprit is almost always underestimating the fabric you need to account for both the seam allowance and the angle of the seam.
To avoid this, my best advice is to always cut your fabric more generously than you think is necessary. A good rule of thumb is to make sure your fabric piece covers its designated area with at least a ¾-inch margin on all sides before you sew. A quick trick is to hold the paper and fabric up to a light source; it’s a fantastic way to check your coverage before making a single stitch.
It’s a classic scenario: you’ve pieced several beautiful sections, but when you go to join them, your sharp points get chopped off or the seams just don't meet. This problem usually creeps in during the final trimming of the block.
Be meticulous when you trim. Always align your ruler's ¼-inch mark directly on the solid outer line of the pattern, not just the edge of the paper. When it comes time to join blocks, these tricks work wonders:
An often-overlooked cause of shifting and misalignment is incorrect machine tension. If you notice your fabric puckering or stitches looking loose, it can throw everything off. Learning how to fix sewing machine tension is a fundamental skill that will improve every aspect of your quilting, especially FPP.
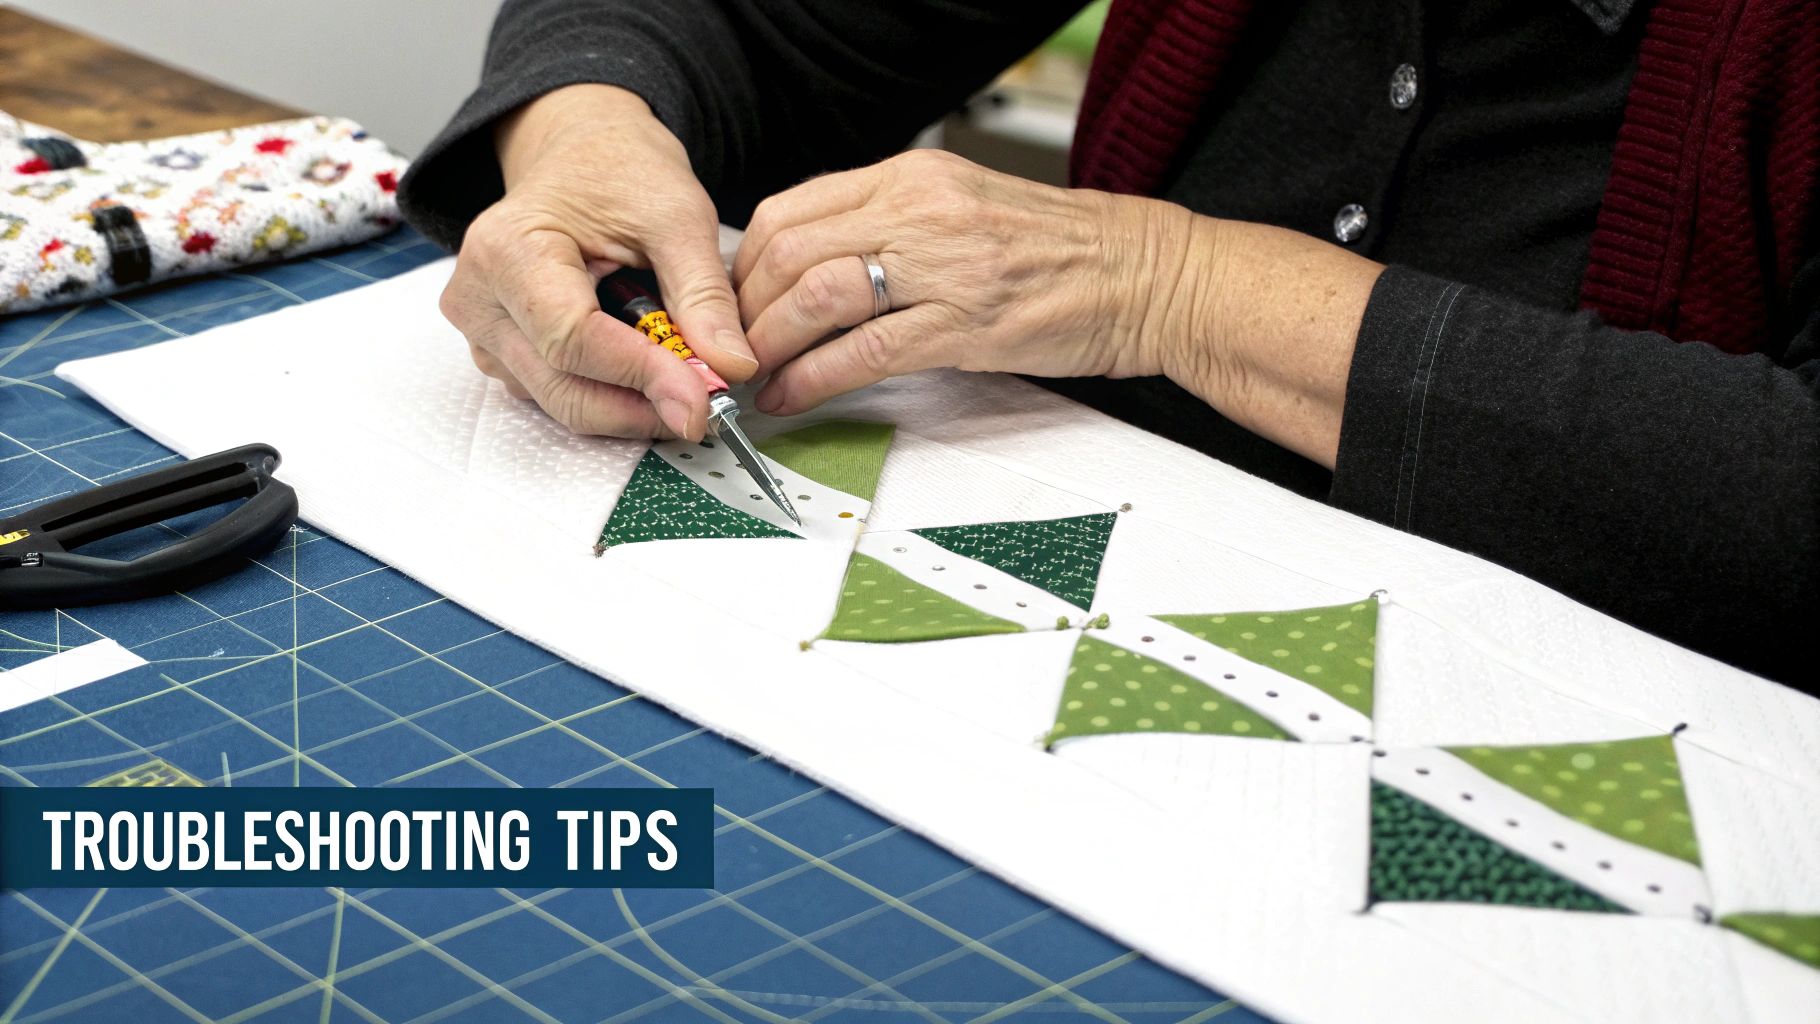
You’ve finished your gorgeous design, but now you're in a wrestling match with the paper foundation, and you're worried your stitches are going to pop. This is a tell-tale sign that your stitch length was too long.
A short stitch length—I recommend around 1.5 mm—is your absolute best friend in FPP. It perforates the paper so effectively that it practically tears away on its own. If you've already finished a project with a longer stitch length, don't despair! Try these tips:
Sometimes, seeing the problem and solution side-by-side makes all the difference. Here’s a quick cheat sheet for those common FPP hiccups.
| Problem | Likely Cause | Solution |
|---|---|---|
| Fabric doesn't cover its section after pressing. | Underestimated fabric size or seam angle. | Cut fabric at least ¾-inch larger than the section on all sides. Use a light source to check coverage before sewing. |
| Points are cut off when joining blocks. | Inaccurate trimming of the block. | When trimming, align the ruler’s ¼-inch mark with the pattern’s solid outer line, not the paper edge. |
| Seams won't align between units. | Blocks shifting during sewing; seam allowances not nested. | Pin through key intersection points. Press seam allowances in opposite directions to nest them together. |
| Paper is difficult to remove; stitches are pulling. | Stitch length is too long. | Use a short stitch length (1.5 mm) to perforate the paper. For completed projects, score seams with a pin before tearing. |
| Fabric puckers or distorts along seam lines. | Sewing machine tension is incorrect. | Check and adjust your machine’s tension settings. The thread should look even on both sides of the fabric. |
Understanding these common challenges is half the battle. When they pop up, you’ll have the know-how to solve them quickly and keep your project moving forward. Remember, every mistake is just a lesson in disguise, making you a more skilled and confident quilter.
As you get started with this amazing technique, a few questions are bound to come up. I've been there! This is where we’ll tackle some of the most common things I hear from quilters just like you, so you can feel confident and keep your project moving smoothly.
Getting these little details ironed out from the start makes a huge difference in how much fun you'll have. Let's get these common questions answered.
Honestly, while you can use a standard presser foot, a specialized foot is a total game-changer. Using an open-toe or clear patchwork foot lets you see the printed line on the paper perfectly as you sew, which is the whole secret to getting those super-accurate seams.
If you're sewing on a BERNINA, my go-to recommendations are the Patchwork Foot #97D or the Clear Foot #34D. The main thing is being able to see that line so you can stitch right on it. That's how you get every single seam exactly where it belongs.
This is one of the most critical settings you'll adjust, so listen up! A short stitch length is non-negotiable. I always set my machine somewhere between 1.5mm and 1.8mm.
Why so small? Two big reasons. First, it makes your seams incredibly secure, which is important when you’re dealing with small, often bias-cut pieces. More importantly, those tiny stitches perforate the paper like a postage stamp. This is what makes the paper tear away cleanly and easily later on. If you use a normal stitch length, you’ll be fighting to get the paper off and might even pull out your stitches in the process.
A short stitch length is the key to both strong seams and easy paper removal. Trust me on this—skipping this step is one of the biggest mistakes I see beginners make.
When you're just starting out, do yourself a favor and stick with a high-quality, 100% quilting cotton. It behaves beautifully—it's stable, it presses like a dream, and it's easy to handle. This lets you focus on nailing the technique without fighting your fabric.
For now, I'd steer clear of anything slippery, stretchy, or super thick. You can play with those once you've got the hang of the FPP basics.
As for prints, here are a few pointers to get you started:
Choosing the right fabric really sets you up for a win. Once you’ve mastered the basics with quilting cotton, you'll be ready to branch out and experiment with all sorts of fun textiles!
At High Country Quilts, we know that having the right tools and a little bit of guidance can make all the difference. Whether you're searching for the perfect fabric for that FPP project or need some expert advice on your BERNINA machine, we're here to cheer you on. Come see us in-store or explore our online selection to find everything you need for your next creation.
At High Country Quilts we care deeply about community. With our experiences in retail, we know that a store is not only a place to shop but also a place for the community to gather and share. During this busy...

Hi! We’re Adam and Renee Wheaton, the new owners of High Country Quilts! For more than 40 years, we’ve owned and operated vacuum and sewing businesses. Following in Renee’s father’s footsteps after he retired from All Discount Vacuum and Sewing in Colorado...


Leave a comment