

We Love Our Quilting Community
At High Country Quilts we care deeply about community. With our experiences in retail, we know that a store is not only a place to shop but also a place for the community to gather and share. During this busy...


Diving into quilting for the first time might seem like a huge undertaking, but it really just comes down to four main steps: gathering a few key tools, picking your fabric, sewing the quilt top, and then finishing it all up. Honestly, you can get started with a standard sewing machine and a handful of specific supplies, making your first quilt a totally doable weekend project.
This guide is designed to walk you through everything, making sure you feel ready and excited to go from that first fabric cut to the very last stitch.
Welcome to the wonderfully creative and surprisingly addictive craft of quilting! This is so much more than just stitching fabric squares together. It's your chance to make a beautiful, functional piece of art that tells a story—your story. Quilting is a timeless skill that's having a major comeback, bringing together a community of people who really appreciate unique, handmade things.
A lot of beginners think they need years of sewing experience or a massive budget to even start. That couldn't be further from the truth. My goal here is to take the mystery out of the process and break it down into simple, manageable steps that will build your confidence. You absolutely do not need the fanciest sewing machine or a room overflowing with fabric to begin.
At its core, quilting is about transformation. You take simple materials—fabric, thread, and some fluffy batting—and turn them into something with warmth, texture, and a whole lot of personal meaning. It could be a baby blanket for a new arrival, a cozy throw for your sofa, or a vibrant wall hanging. No matter what, each quilt carries a piece of you in it.
This guide will show you how to get started without breaking the bank, focusing on the skills that truly matter. We’ll cover:
Beyond being a creative outlet, finishing a quilt gives you a unique sense of accomplishment. It's a mindful practice that forces you to slow down and focus on creating something tangible with your own hands. When you start quilting, you're also joining a wonderfully supportive community, both online and in your local area, where people share tips, celebrate each other's work, and offer endless inspiration.
Quilting connects us to a rich history of craftsmanship while offering endless possibilities for modern expression. Every stitch is a step in a creative journey, turning simple cloth into a legacy of comfort and art.
You'll be amazed at how quickly you can pick up the basics and create something you're genuinely proud of. The secret is to start simple, give yourself grace during the learning process, and just enjoy the satisfaction of watching your idea come to life.
Ready to start your quilting adventure? Let's go.
Before you can make that first magical stitch, you need to gear up. Walking into a quilt shop for the first time can feel a little overwhelming—so many gadgets! But here's a secret from someone who's been there: you absolutely do not need to buy one of everything to get started.
Focus on a handful of high-quality, core tools. This will make your first quilting adventure so much smoother, more accurate, and honestly, way more fun. The goal is to build a reliable toolkit that works for you, not a pile of stuff that just gathers dust.
Let's break down the true essentials you'll reach for on every single project, from your first simple nine-patch to more intricate designs down the road.
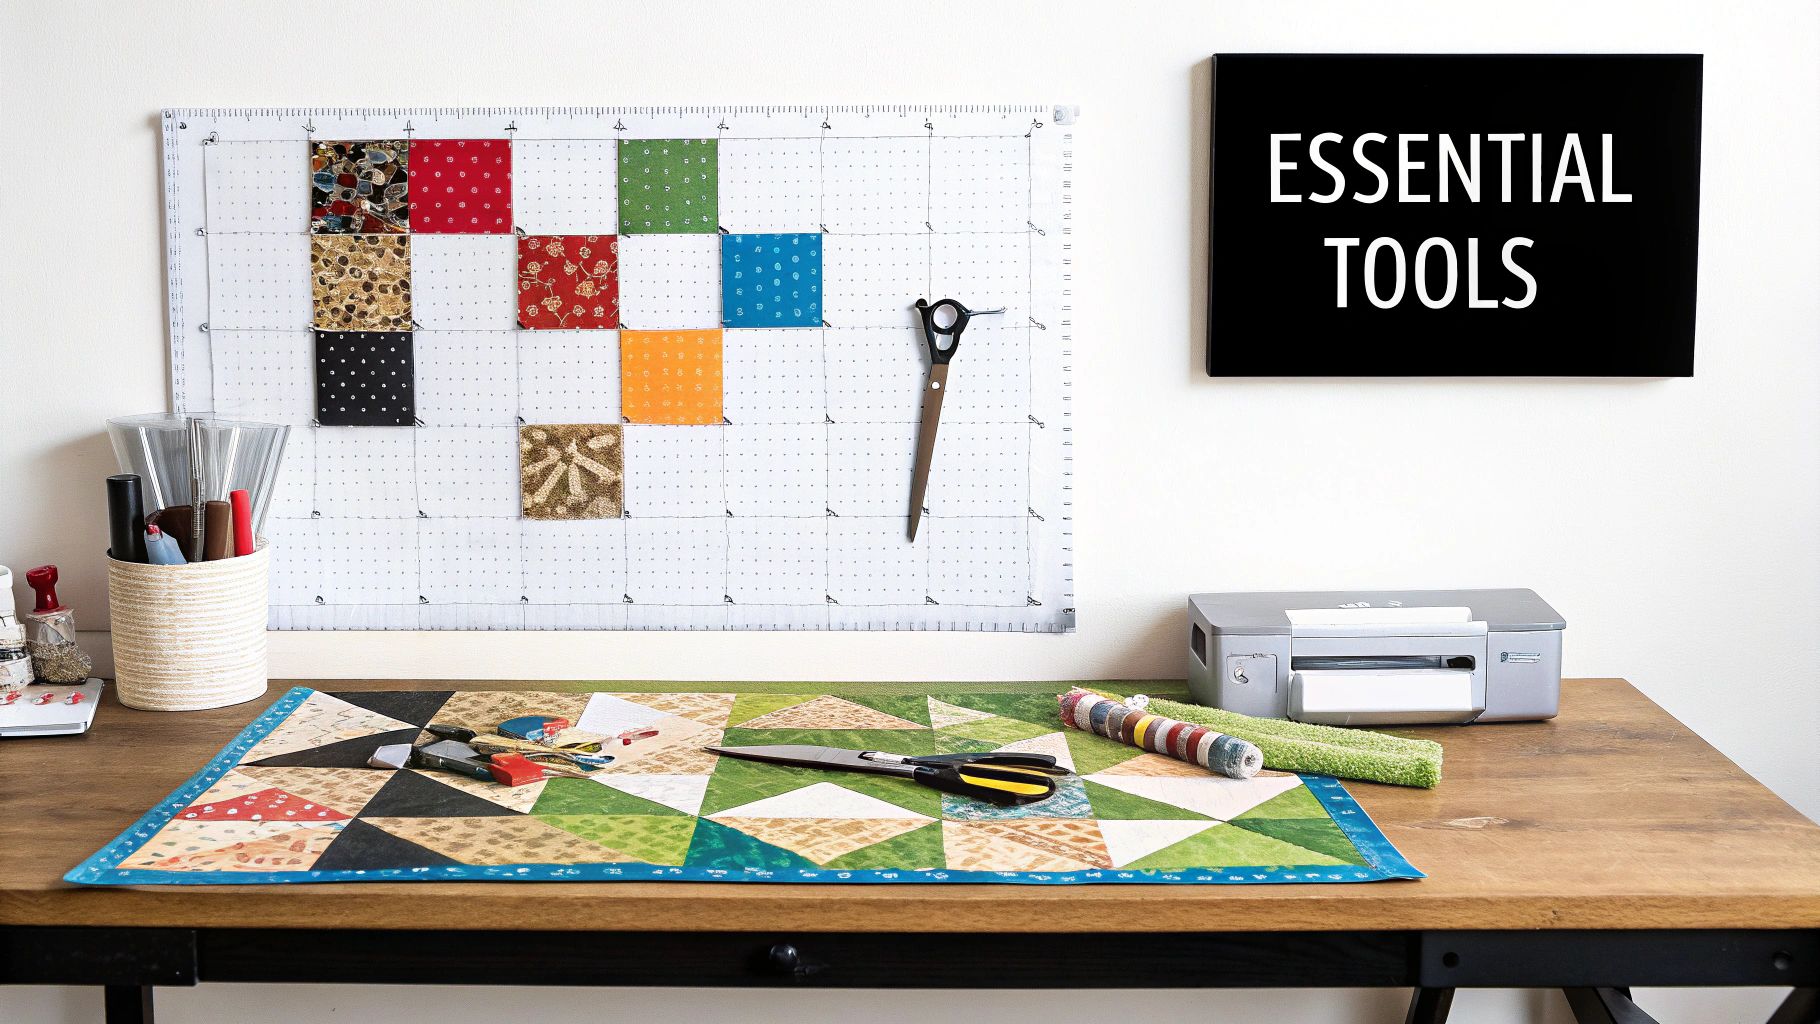
If you're going to invest anywhere, make it your cutting setup. I can't stress this enough: accurate cutting is the bedrock of a beautiful quilt. If your fabric pieces are wonky, your seams won't line up, and your points will look more like blobs. It's frustrating, and it's avoidable. This non-negotiable trio works in perfect harmony to give you crisp, straight cuts every single time.
Rotary Cutter: Think of this as a pizza cutter, but for fabric. It’s a complete game-changer. A 45mm rotary cutter is the perfect all-around size for a beginner, letting you slice through multiple layers of fabric with a speed and precision that scissors just can't touch. Just remember the number one rule: always retract the blade when you set it down! Safety first.
Self-Healing Cutting Mat: This mat is the rotary cutter’s best friend. It protects your tabletop, but its real magic is the unique material that allows the blade to sink in just enough for a clean cut without getting dulled. Then, it "heals" itself. An 18" x 24" mat is a fantastic starting size—plenty of room to work without taking over your whole dining table.
Quilting Ruler: This isn't your average desk ruler. A clear acrylic quilting ruler, usually a 6" x 24" one to start, is what you'll use to guide your rotary cutter. The grid lines, marked down to the eighth of an inch, are your key to measuring and cutting with dead-on accuracy.
You don't need a fancy, computerized machine that costs a fortune. Any reliable home sewing machine that can produce a nice, consistent straight stitch is all you need to piece your quilt tops. A "needle-down" function is a nice-to-have feature (it stops the needle in the fabric, which is great for pivoting), but it's definitely not a dealbreaker for your first quilt.
Along with your machine, you'll want to grab a few other small but mighty items:
Getting started is about having the right tools, not all the tools. A solid cutting system and a trusty sewing machine are your ticket to creating that first quilt with confidence.
You're joining a thriving community! The interest in quilting is growing, with market data showing that sales for beginner-friendly quilting supplies have climbed by nearly 10% each year between 2018 and 2024. If you're curious, you can explore more data on the global quilt market growth to see just how popular the craft has become.
To make things even easier, here's a handy checklist you can take with you to the store.
This quick-reference table breaks down exactly what you need and what to look for when you're shopping.
| Tool | Primary Function | Beginner's Tip |
|---|---|---|
| Rotary Cutter (45mm) | To cut fabric quickly, accurately, and through multiple layers. | Ergonomic handles are a lifesaver for longer cutting sessions. A fresh blade is your best friend—change it often! |
| Self-Healing Mat (18x24") | To protect your work surface and the rotary blade while cutting. | Always store your mat flat to prevent warping (under a bed is a great spot). Keep it away from direct sunlight and heat. |
| Quilting Ruler (6x24") | To measure fabric and guide the rotary cutter for straight lines. | Look for rulers with clear, easy-to-read markings. The little non-slip grips on the back are a fantastic bonus. |
| Sewing Machine | To sew fabric pieces together to create the quilt top. | All you really need is a reliable straight stitch. Don't worry about hundreds of decorative stitches yet. |
| Cotton Thread (50 wt) | To piece your quilt top together with strong, low-bulk seams. | A neutral grey or cream will blend with almost any fabric palette, making it perfect for your first several projects. |
| Pins or Sewing Clips | To hold fabric pieces together securely for accurate sewing. | Try both! Many quilters end up using a combination depending on what part of the project they're working on. |
| Iron & Pressing Surface | To press seams open or to the side for a flat, crisp quilt top. | Any basic iron will do. The key is to press, not to scrub the iron back and forth, which can stretch your fabric. |
With these items in hand, you'll be fully equipped to tackle your first quilt with precision and enjoy every step of the process.
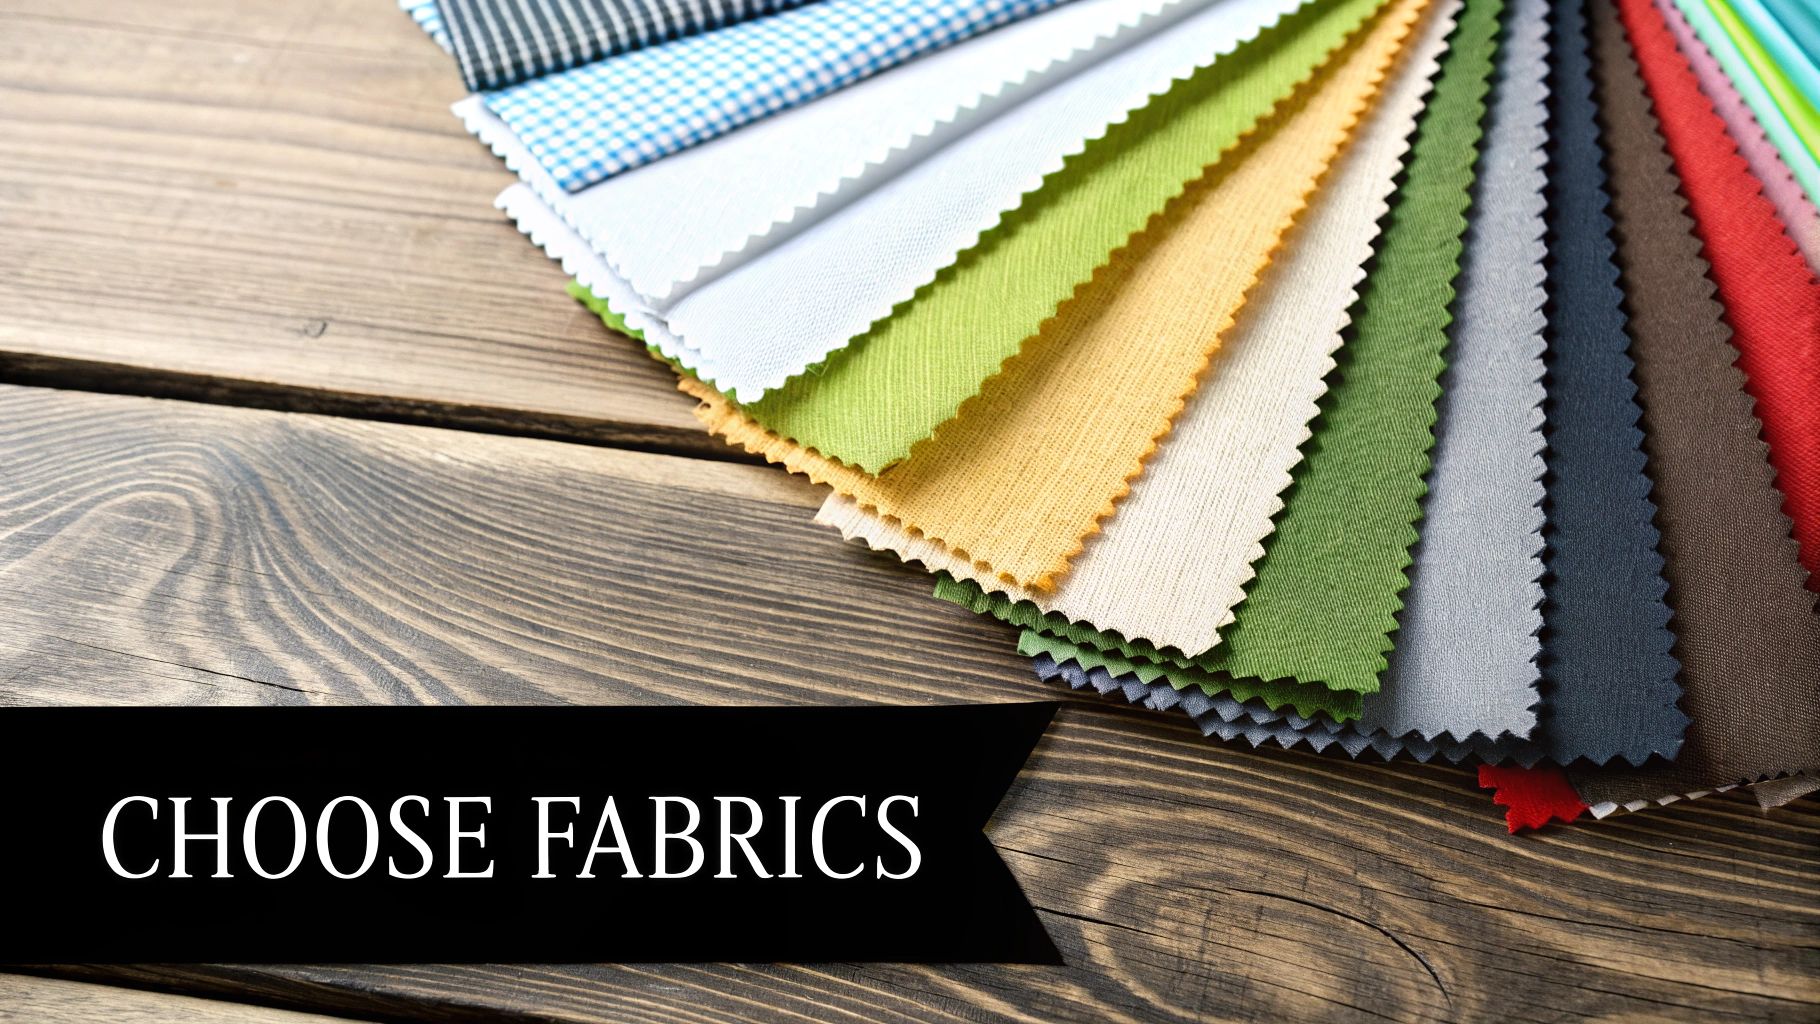
Here comes the fun part—picking out your fabric! This is where your quilt really starts to come alive. Walking into a fabric shop for the first time is an experience in itself, with a dizzying array of colors and patterns all vying for your attention.
To keep things from getting overwhelming and to guarantee a great result, I always tell new quilters to stick with 100% quilting cotton. It's the gold standard for a reason. This fabric is a dream to work with: it’s stable, presses like a charm, has minimal stretch, and holds its shape perfectly through all the steps of making a quilt.
Plus, quilting cotton comes in an unbelievable variety of prints and solids, so you'll have no trouble finding something that speaks to you.
Instead of standing in an aisle trying to coordinate a dozen different bolts of fabric, do yourself a favor and look for pre-cuts. These are little bundles of fabric that have been curated and cut into standard sizes by the manufacturer, usually all from the same designer collection. They completely remove the guesswork.
For anyone just learning how to quilt, pre-cuts are a fantastic, less intimidating way to build a small fabric stash.
Grabbing a pre-cut bundle is like having an interior designer pick your palette for you—it’s a surefire way to get a cohesive, beautiful quilt right from the start.
The fabric you choose is the heart of your quilt. Starting with high-quality quilting cotton and a coordinated pre-cut bundle simplifies the process, allowing you to focus on developing your skills rather than agonizing over color choices.
If you want to dive deeper into how colors play together, it can be really helpful to explore the general principles of color theory and how to find your ideal color palette to help guide your choices.
Once you've got the fabric for your quilt top, you need to think about what goes in the middle. This is the batting (sometimes called wadding), and it's what gives a quilt its warmth and dimension. Batting comes in different materials and thicknesses, which we call "loft."
For your first quilt, a low-loft batting is your best friend. It’s much easier to handle. Thicker, high-loft batting can be a real pain to quilt through on a regular home sewing machine.
You'll generally run into three main types of batting:
For anyone new to the craft, quilts made from cotton are the way to go; it's no surprise that cotton makes up about 42.7% of the material used in quilts due to its ease of use. And thanks to e-commerce, it's never been easier to find beginner-friendly kits, fabrics, and patterns. This, combined with tons of supportive online groups, makes getting started so much less daunting than it used to be.
You’ve gathered your tools, picked out your fabric, and now it's time for the real fun to begin. We're going to dive into creating a simple patchwork throw—a fantastic first project that’s all about nailing the fundamentals.
Take your time with this. Quilting is a craft of patience and precision, so try to enjoy the process of watching your creation come together, one seam at a time. It’s a marathon, not a sprint!
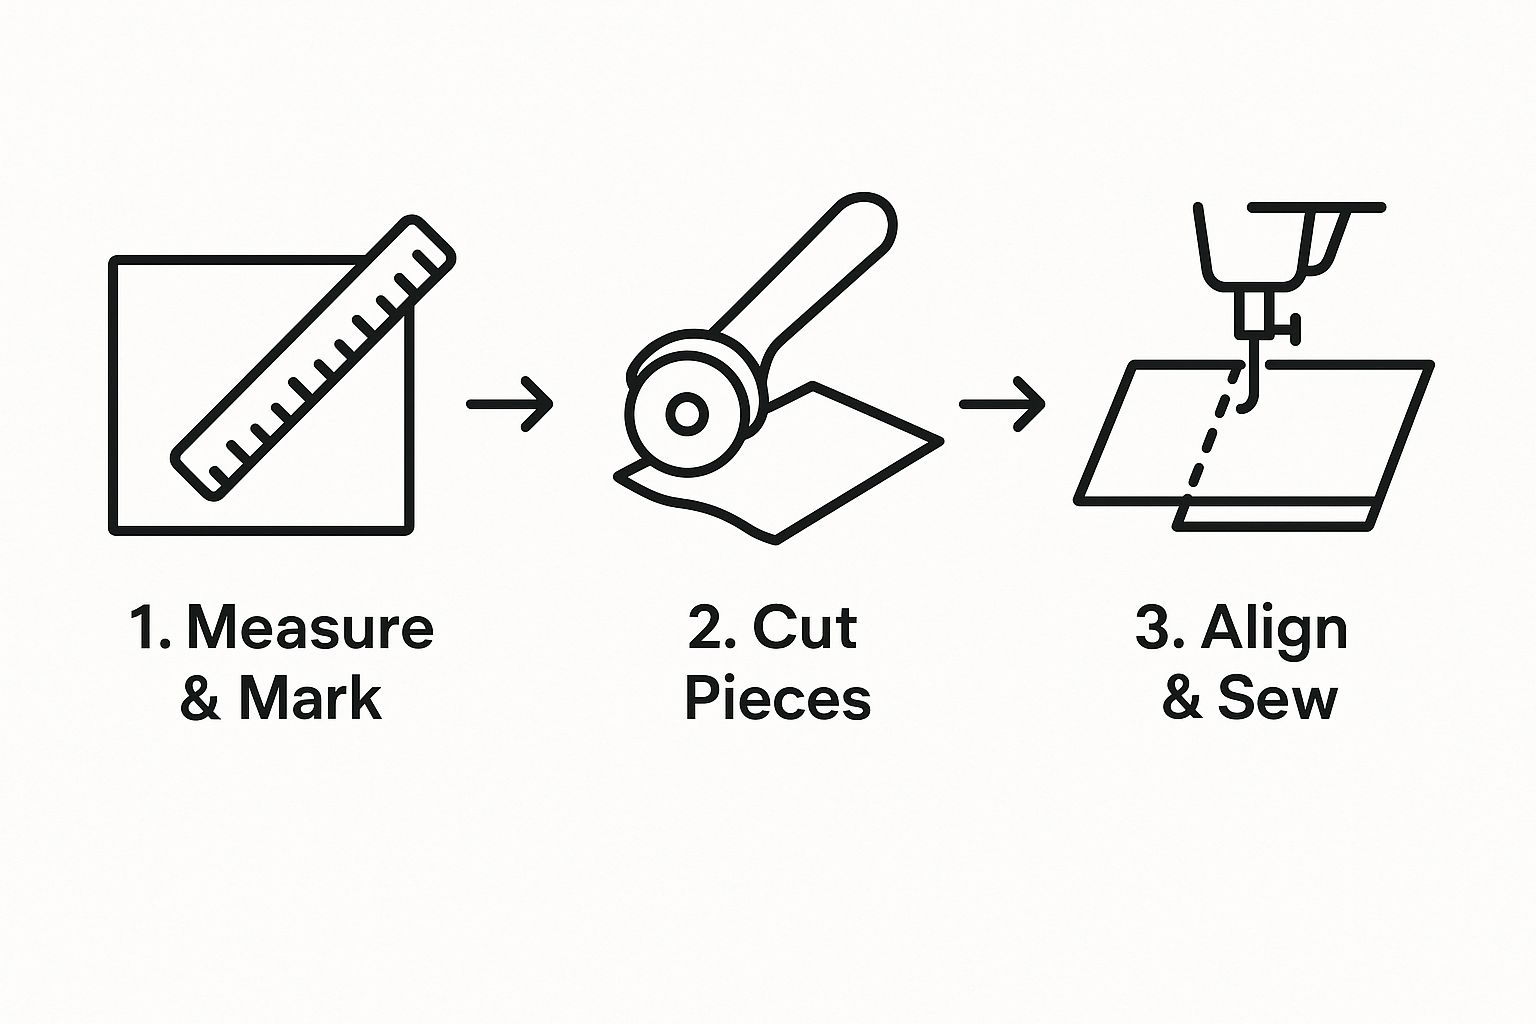
The secret to a great-looking quilt? Accurate cutting. Seriously, even tiny mistakes here can throw everything off later, making it a headache to match up your corners.
Before you even think about cutting, give your fabric a good press with a hot, dry iron. You want to get rid of every last wrinkle and crease from being on the bolt.
Once it's smooth, lay your fabric out on your self-healing mat. Line up the selvedge (that's the tightly woven edge) with one of the horizontal lines on the mat. Then, use your big quilting ruler to "square up" the fabric, which just means making a perfectly clean, straight edge to work from.
From this perfectly straight edge, you’ll cut your fabric into strips, and then turn those strips into squares.
This whole measure-cut-align rhythm is the foundation of piecing a quilt top. Get this down, and you’re well on your way.
With your neat stack of fabric squares ready to go, the creative part begins. Find a big, flat surface—the floor, a dining table, or a design wall if you have one—and start arranging your squares. Play with the colors and patterns until you land on a layout you absolutely love.
Pro-Tip: Snap a picture of your final layout with your phone! It's an easy trick to make sure you don't forget your arrangement when you start sewing.
Now, let's turn those squares into rows. Grab the first two squares in your top row, place them with their right sides facing each other, and pin them along one edge.
The single most important skill here is sewing a consistent quarter-inch seam allowance. Most sewing machines come with a special patchwork foot (sometimes called a quarter-inch foot) that makes this a breeze. If you don't have one, no worries—a small piece of painter's tape on your machine can act as a handy guide to keep your seams straight. Keep adding squares this way until each row is complete.
My Favorite Time-Saving Trick: Chain Piecing
To speed things up, try chain piecing. Instead of snipping the thread after sewing two squares together, just feed the next pair right under the needle. You'll end up with a long, connected "chain" of fabric pairs. When you're done, you can snip them all apart at once. It saves a surprising amount of thread and time!
Once your rows are all stitched together, it’s time to head back to the ironing board. A key technique here is to press, not iron. That means you lift the iron and place it down on the seam, rather than sliding it back and forth, which can stretch your fabric out of shape.
To get those perfect, sharp points where your corners meet, you'll need to press the seams of your rows in opposite directions. It’s a simple but brilliant trick.
This little detail allows the seams to "nest" or lock into each other when you join the rows. Pin your rows together, making sure those seams are snug, and sew them with that same quarter-inch seam allowance.
Congratulations, your quilt top is done! The next big step is making the "quilt sandwich." This is just the term for the three layers that make up a quilt: the backing, the batting (the fluffy middle part), and your pieced top.
For both your backing fabric and batting, you'll want them to be at least 4-6 inches larger on all sides than your quilt top. This extra bit gives you room to work.
Lay your backing fabric on a clean floor, wrong side up, and use painter's tape to pull it taut and secure it. Next, smooth the batting over the backing. Finally, center your quilt top, right side up, over the batting. You'll need to "baste" these layers together, which you can do with special curved safety pins or a temporary basting spray.
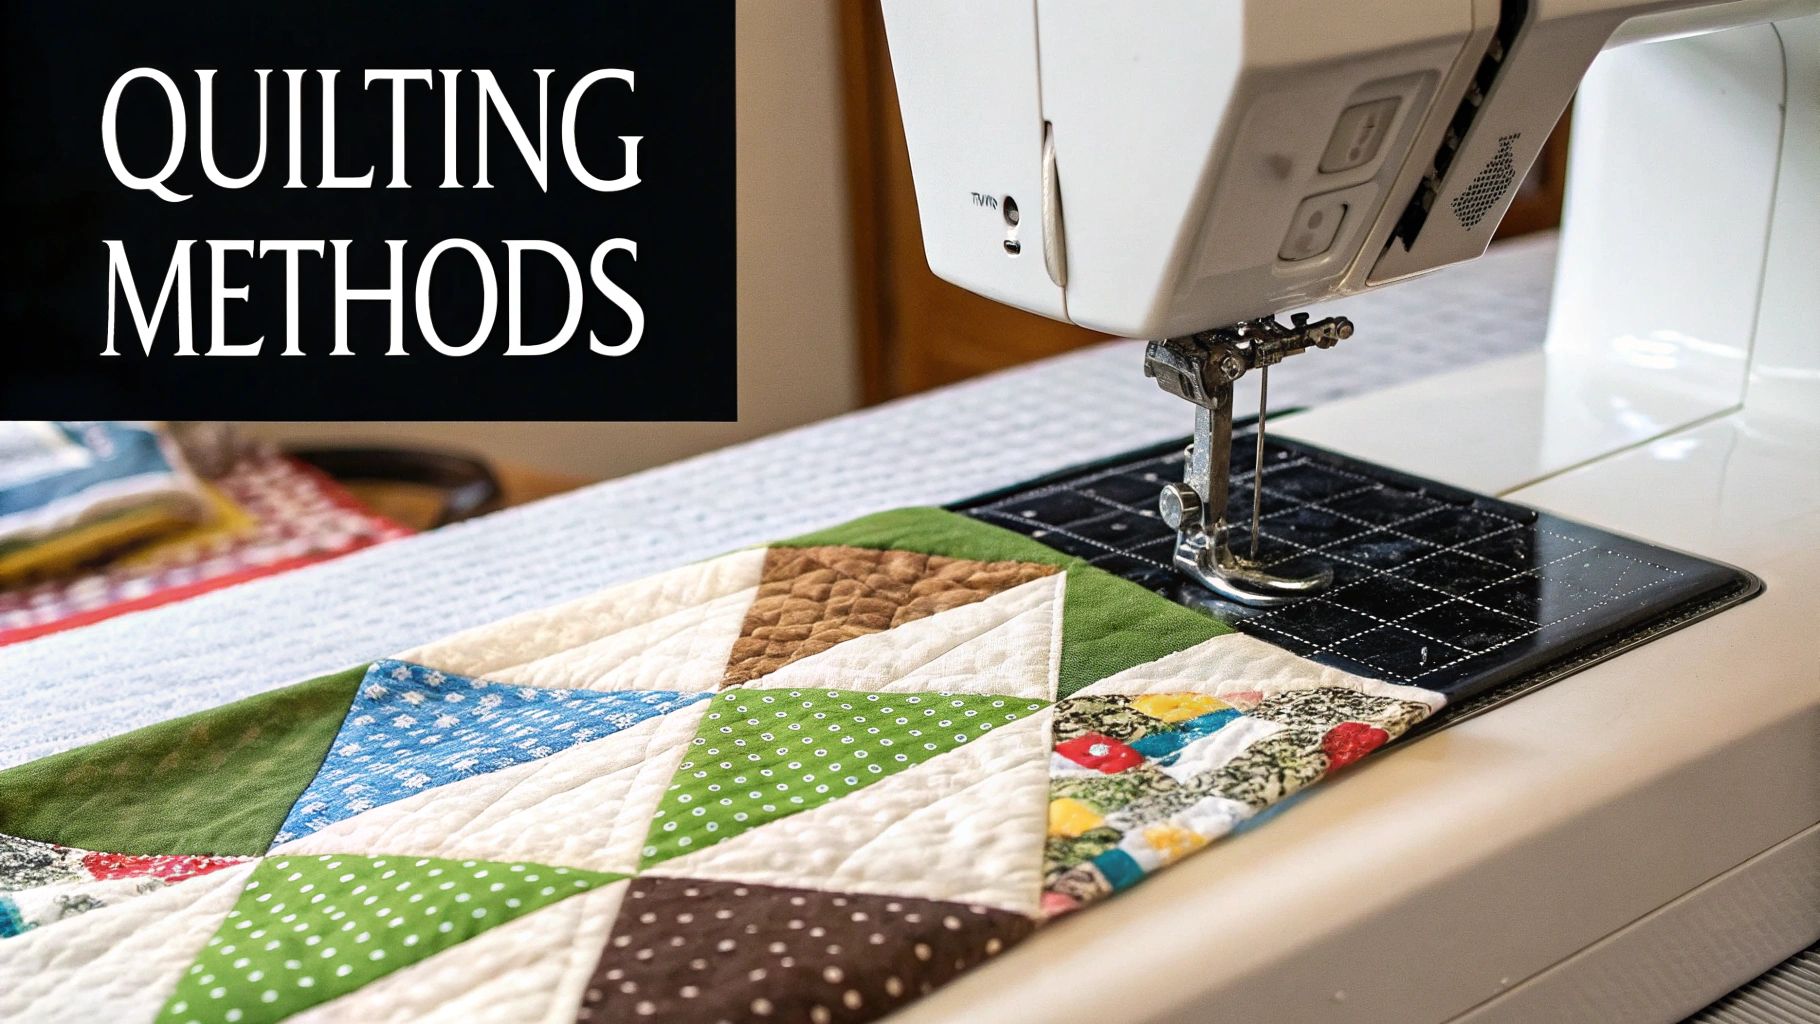
"Quilting" is the actual process of stitching through all three layers to hold them together and create that classic quilted texture. For a first project, the easiest way to do this is called stitching in the ditch. It’s exactly what it sounds like—you stitch directly inside the seam lines you already made.
This is where a walking foot for your sewing machine becomes your best friend. This special foot grips all three layers and feeds them through the machine evenly, which is crucial for preventing puckers.
Always start quilting from the center of the quilt and work your way out to the edges. This helps push any extra fabric or fullness outwards. Simply follow the "ditches" between your squares, and you’ll add a beautiful, subtle texture without distracting from your gorgeous fabric choices.
You're in the home stretch! The final touch is the binding—a fabric border that encases the raw edges of your quilt. It gives your project a clean, professional finish and protects it from wear and tear.
First, use your rotary cutter and ruler to trim the extra batting and backing so they're perfectly flush with your quilt top. For the binding itself, you'll cut 2.5-inch wide strips of fabric, sew them together end-to-end to make one long piece, and then press it in half lengthwise.
You'll sew this binding strip to the front of your quilt, mitering the corners to get those sharp, neat angles. To finish, you just wrap the binding around to the back of the quilt and secure it with a few simple hand stitches. It's the last, satisfying step that officially turns your project into a finished quilt.
Every quilter I know has a story about their first "oops" moment. It’s just part of the process. But if you can learn from some of our collective mistakes, you'll save yourself a lot of frustration and end up with a first quilt you can be truly proud of.
Let's start with one of the most common debates in quilting circles: to pre-wash or not to pre-wash? For a beginner, my advice is always the same: yes, pre-wash your fabric. Deeply colored fabrics, especially reds and blues, are notorious for bleeding dye in the wash. You definitely don't want that happening after you’ve pieced your quilt. Pre-washing also pre-shrinks the cotton, which helps prevent puckering down the road.
Here’s the thing about quilting: tiny mistakes have a way of multiplying. A cut that's just a hair off or a seam that's a little wobbly might not seem like a big deal on a single block. But once you start joining those blocks, those little errors compound, and suddenly your points don't match up and your rows are crooked. Mastering a couple of key skills from the get-go is non-negotiable.
The difference between a quilter who is frustrated and one who is having fun often comes down to their commitment to that quarter-inch seam. It's the single most important habit to build when you start.
This might sound nit-picky, but it makes a world of difference: you need to press your seams, not iron them. When you iron clothes, you slide the hot plate back and forth. In quilting, that motion is a recipe for disaster. It can easily stretch your carefully cut pieces, especially along the bias (the diagonal grain), which has the most give.
Instead, get in the habit of lifting the iron and placing it straight down onto the seam. Let it sit for a few seconds, then lift it straight up before moving to the next spot. This simple change of technique keeps your blocks perfectly square and your seams wonderfully crisp.
It's also worth noting that the quilting world is becoming more mindful of its environmental footprint. While historically less than 1% of global textile production used recycled fibers, quilters are now embracing eco-friendly materials like organic cotton. As a new quilter, you can start with good habits by choosing sustainable fabrics. If you're curious about this shift, you can explore more insights on sustainable quilting trends and see how the market is changing.
Don't let your sewing machine bully you. Most of the time, what seems like a major "machine issue" is actually a very simple fix. Before you get frustrated, run through this quick checklist.
By getting ahead of these common hurdles, you'll set yourself up for a much more enjoyable quilting journey and a beautiful quilt you'll cherish for years.
Jumping into a new hobby is exciting, but it almost always leaves you with a few lingering questions. Even after you've gathered your tools and picked your fabrics, some of the finer points might still feel a bit fuzzy. Let's clear up some of the most common questions I hear from brand-new quilters.
Think of this as our final little chat before you start stitching. My goal is to tackle those last bits of confusion so you can sit down at your machine with total confidence.
Honestly? No, you absolutely don't. While those fancy quilting machines with their huge "throat" space and specialized stitches are amazing, they are definitely not a requirement for getting started.
Any reliable sewing machine that can sew a decent straight stitch will work perfectly for piecing your first quilt top. The most important thing isn't the machine itself, but your ability to guide the fabric and sew a straight, consistent line. You can make many beautiful quilts on a basic machine before you ever feel the need to upgrade. Just focus on mastering the fundamentals with what you have.
Without a doubt, the simple patchwork square quilt—just like the one we're making in this guide—is the best place to start. It’s specifically designed to teach you the two most critical skills in all of quilting: accurate cutting and sewing a consistent quarter-inch seam.
Once you feel good about creating neat squares and joining them with perfect points, you'll be ready to move on to patterns with rectangles or even half-square triangles (HSTs). The key is to get comfortable with straight lines before you start tackling more complex shapes and angles.
This first project isn't just about making something pretty; it's about building muscle memory. The skills you drill into your hands making a simple patchwork throw are the exact same skills you'll use in every single quilt you ever make.
This is the classic "how long is a piece of string?" question, because it all depends on your pattern and the size you want to make. But for a small lap or baby quilt (something around 40x50 inches), using pre-cuts is a fantastic shortcut.
Here’s a quick-and-dirty fabric recipe for a beginner-friendly throw quilt:
Starting with pre-cuts like charm packs or jelly rolls is my favorite tip for new quilters. It lets you play with a beautiful fabric collection without having to buy a bunch of different yardage, saving you time at the cutting mat and money at the register.
This is a big one! People use these terms interchangeably all the time, but they refer to two completely different stages of the process. Getting this straight will make every pattern you read from now on much clearer.
Piecing is the first step. It's the art of sewing all your small, cut pieces of fabric together to create the quilt top. When you're sewing squares into rows and then sewing those rows together, you are piecing.
Quilting comes at the very end. This is the act of stitching through all three layers of your "quilt sandwich"—the pieced top, the fluffy batting in the middle, and the fabric backing—to bind them together. Those stitches are what create the lovely texture and dimension we all associate with a finished quilt.
Simply put: You piece the top, then you quilt the sandwich.
Ready to dive in and find your first set of fabrics and tools? As an authorized BERNINA dealer, High Country Quilts is here to help with expert advice, quality machines, and a gorgeous selection of fabrics. We’ve got everything you need to start your quilting adventure.
Come explore our collection online or visit us in the shop
At High Country Quilts we care deeply about community. With our experiences in retail, we know that a store is not only a place to shop but also a place for the community to gather and share. During this busy...

Hi! We’re Adam and Renee Wheaton, the new owners of High Country Quilts! For more than 40 years, we’ve owned and operated vacuum and sewing businesses. Following in Renee’s father’s footsteps after he retired from All Discount Vacuum and Sewing in Colorado...


Leave a comment