

We Love Our Quilting Community
At High Country Quilts we care deeply about community. With our experiences in retail, we know that a store is not only a place to shop but also a place for the community to gather and share. During this busy...


We’ve all been there—standing in the fabric store, bolt of beautiful cotton in hand, trying to do mental gymnastics. Will two yards be enough for that baby quilt? Is three yards overkill for the backing? That moment of uncertainty can be frustrating, but it doesn't have to be.
Let’s put an end to the guesswork. Calculating your fabric needs for a quilt really boils down to three key parts: the quilt top, the backing, and the binding. Once you get the hang of a few simple formulas, you'll be able to walk into any quilt shop with the confidence of a seasoned pro.
Figuring out your yardage isn't just about saving a few dollars (though that's a great perk!). It’s about setting your project up for success from the very beginning and making the whole process more enjoyable.
The real goal here is to trade that hopeful guess for a solid plan. When you know your numbers, fabric shopping becomes one of the most exciting parts of the quilting journey, not a source of stress.
Once you have your shopping list nailed down, you’ll be ready to hit your favorite retailers, like Jo-Ann Stores, and start your creative adventure.
Before you can even think about yardage calculations, you need to nail down two key measurements: the final dimensions of your quilt and the actual usable width of your fabric. Getting this right from the start is the secret to a smooth, headache-free project.
First, figure out the size of your finished quilt. Are you aiming for a throw to snuggle under on the couch, or do you need a California king to cover a huge bed? Don't just guess—grab a tape measure and jot down the final length and width you're aiming for in inches.
If you're unsure where to begin, standard mattress sizes are a great starting point.
Use this table as a starting point for your project. These are common dimensions, but feel free to adjust them to fit your specific needs.
| Quilt Size | Typical Width (Inches) | Typical Length (Inches) |
|---|---|---|
| Crib | 36 | 52 |
| Lap/Throw | 50 | 65 |
| Twin | 70 | 90 |
| Full/Double | 85 | 108 |
| Queen | 90 | 108 |
| King | 110 | 108 |
| Cal King | 102 | 115 |
Remember, these are just guidelines. You might want more or less drape over the sides of the bed, so customize away!
Now, let's turn our attention to the fabric itself. When you buy quilting cotton, the bolt will almost always say it’s 44/45 inches wide. Here’s a pro tip: never use that number in your math.
The true, usable Width of Fabric (WOF) is always less, typically around 40 to 42 inches. I always plan my projects using a conservative 40-inch WOF to be safe.
So, where did those extra inches go? They’re eaten up by the selvages—those tightly woven edges on either side—and a little bit of wiggle room for shrinkage if you pre-wash your fabric. Building your calculations around a 40-inch WOF is a smart habit that gives you a built-in safety net.
Think of the selvages and the outer inch of fabric as the crust on a loaf of bread. You need to trim it away to get to the good stuff inside. Planning with a 40-inch WOF ensures all your cut pieces come from the highest quality part of the fabric.
One last thing to keep in mind is the grain of your fabric. You have two:
The lengthwise grain is your best friend because it has very little stretch, making it much more stable. When you’re piecing a quilt back, always try to align your seams along this stronger grain. This simple step helps prevent the backing from sagging or stretching out of shape while you're quilting, ensuring your finished project lays beautifully flat.
With these fundamentals sorted, you're ready to tackle the yardage formulas with confidence.
The quilt top is where all the magic happens. It’s your masterpiece! But figuring out exactly how much fabric to buy can feel like a daunting math problem. Let’s walk through it together. Once you get the hang of the basic formula, you can apply it to just about any patchwork design.
We'll start with a simple throw quilt made of 6-inch finished squares. Let's say your finished quilt will be 54 inches wide by 66 inches long. A little quick math tells us you'll need 9 squares across and 11 squares down, which comes out to a grand total of 99 squares.
This is where many quilters get stuck—how do you turn "99 squares" into a yardage number? It's all about thinking in terms of strips.
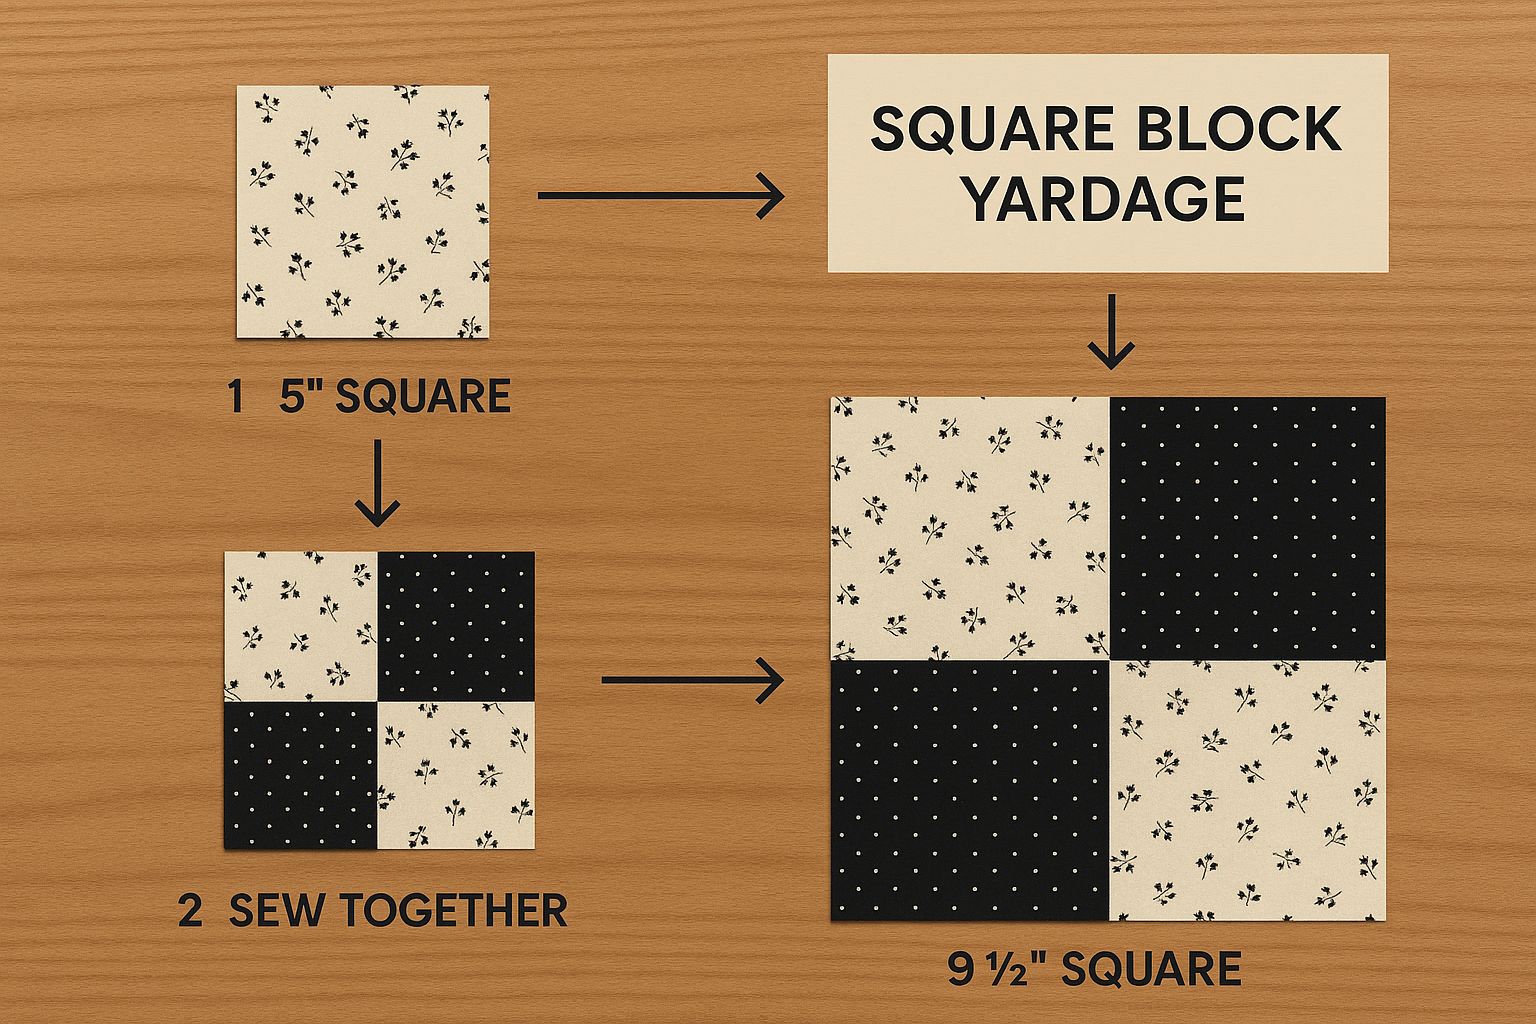
As you can see, you cut strips from your yardage first, and then you subcut those strips into your individual squares. So, the real question is: how many strips do we need?
Let's stick with our 99-square quilt. Most quilting cotton comes on a bolt that's about 42 inches wide after you trim the selvages—what we call the Width of Fabric (WOF). This is the key number for our calculation.
Here's how we figure it out for our example:
I always tell people to add a little "fudge factor" of about 1/4 to 1/2 yard for each main color. Think of it as your quilting insurance policy. It covers you for any cutting mishaps, pre-washing shrinkage, or tricky directional prints.
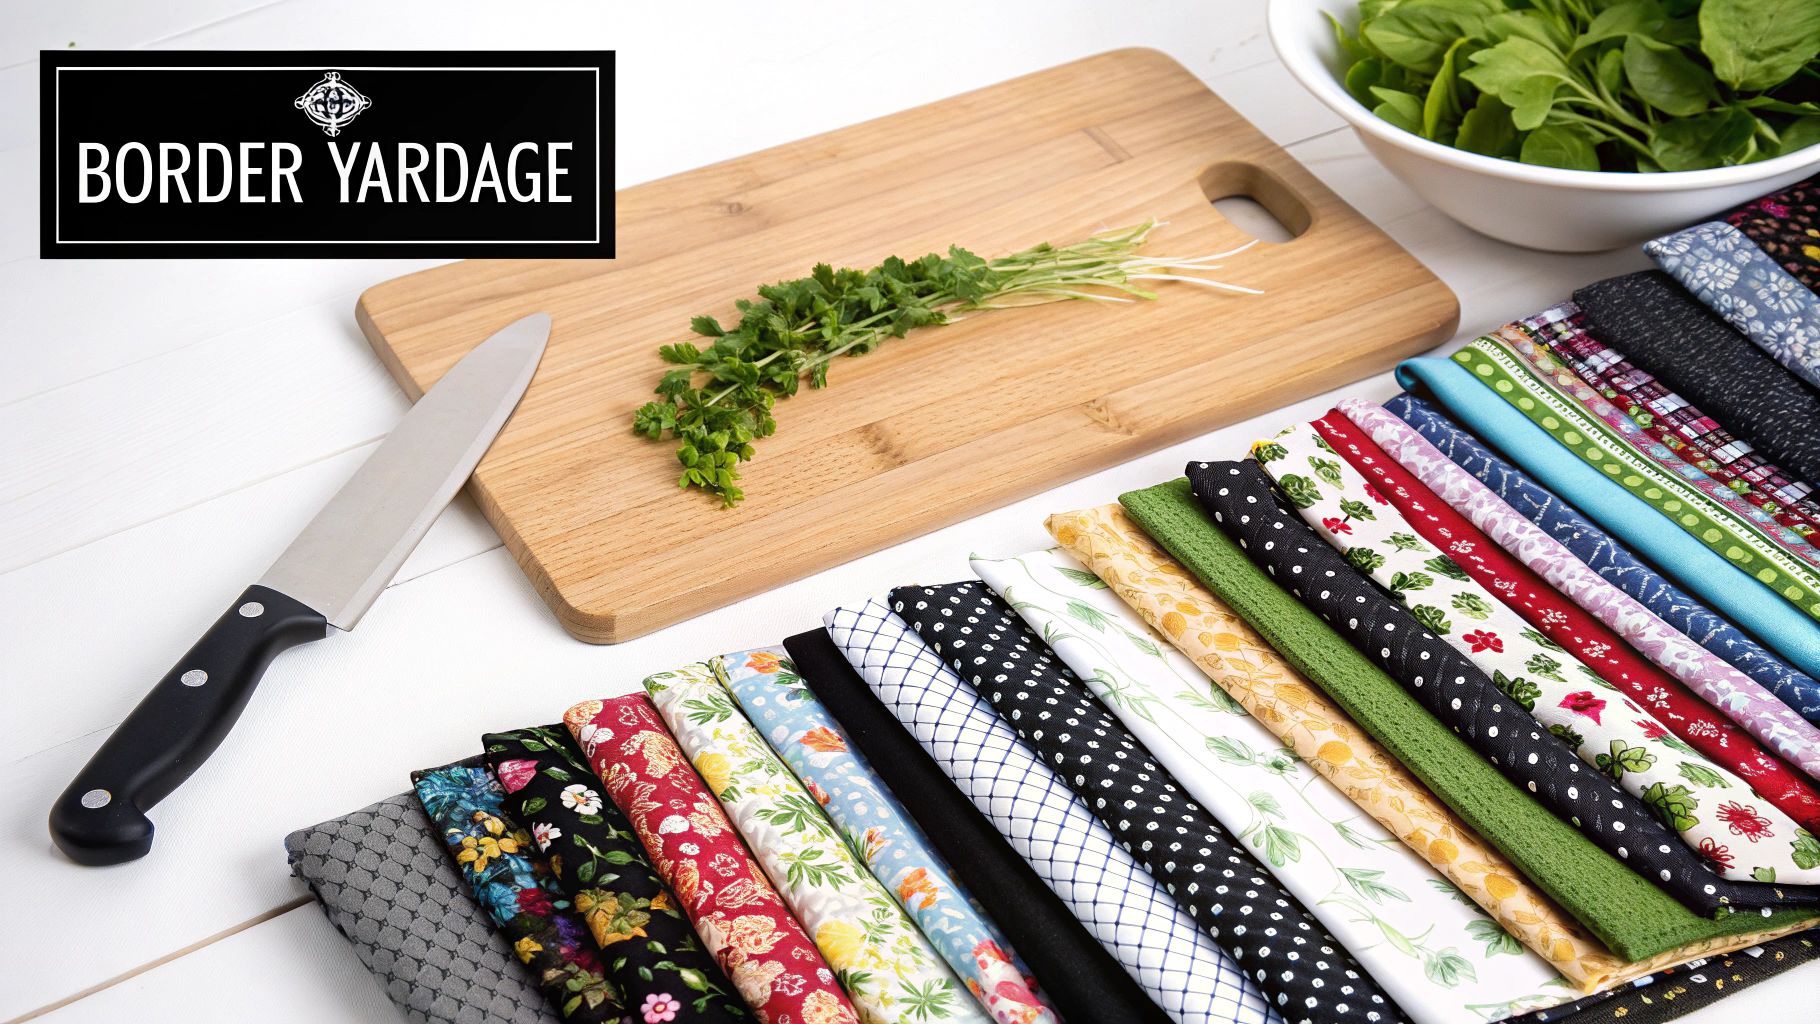
This exact same logic works perfectly for more complicated designs. The trick is to stop looking at the quilt top as one giant project and start breaking it down into its individual parts: the blocks, the sashing, the cornerstones, and the borders.
Calculate each one separately. For your sashing, figure out the total linear inches you need for all the pieces, then determine how many WOF strips you'll have to cut to get there. Do the same thing for your borders.
When you treat each component as its own little math problem, the whole process becomes much less intimidating. It’s just a series of small, easy steps that ensure you buy enough of every fabric you need without ending up with a ton of leftovers.
We've all been there. You finish a beautiful quilt top, you're excited to get it quilted, and then you realize... you didn't buy enough backing fabric. It's a classic mistake, but thankfully, it's an easy one to avoid with a little bit of planning.
The most important rule? Always add overage.
If you're sending your quilt to a longarmer, they need 4 to 6 inches of extra backing fabric on all four sides. This isn't just a suggestion; it's what they need to properly load your quilt onto their big machine. Even if I'm quilting at home on my domestic machine, I still add this extra room. It’s a safety net that gives me space to square up and handle any shifting.
So, for a 60" x 70" quilt top, your final backing piece needs to be at least 68" x 78".
Now for the next step. Most quilting cottons off the bolt have a usable width of about 40-42 inches. Unless you're making a baby quilt, you're almost certainly going to need to piece your backing together.
Here’s the quick formula to figure out how many pieces, or panels, you'll need to cut:
Let's stick with our example. We need a 68" wide backing and our fabric is 40" wide. The math is simple: 68 ÷ 40 = 1.7. Since we can't buy 1.7 panels, we round up and know we need 2 panels.
Next, we figure out the total length. Each of those two panels needs to be the full 78 inches long. So, we'll need a total of 156 inches of fabric (78 inches x 2 panels).
This is where quilters have relied on some tried-and-true math for generations to make sure they don't run out of material. A common method is to find your total length, divide by 36 (for inches in a yard), and then add a little extra just in case. If you're curious about the history behind these calculations, you can explore some classic techniques in this helpful video guide.
For our project, that means taking our total length: 156 inches ÷ 36 inches/yard = 4.33 yards. I would never buy exactly that amount. I’d round up and purchase 4.5 yards. This little bit of extra gives me peace of mind and covers any slight cutting errors or fabric shrinkage. It’s a simple process that guarantees you have enough fabric, every single time.
There's nothing more frustrating than getting to that last corner and realizing you're short on binding. It's the final touch! A little bit of math upfront saves a ton of headache later and ensures you have enough fabric to go all the way around with a comfortable overlap for joining the ends.
First, you need to find the perimeter of your quilt. Just add up all four sides. For a quilt that's 50" by 60", the math is (50 + 60) x 2, which gives you 220 inches. I always add an extra 10 to 12 inches for a good overlap to make joining the ends seamless. So, our total binding length needed is 230 inches.
If you want to get more comfortable with the numbers behind quilting, there are some great resources out there, like this guide to quilt calculations at Saroy.net.
Once you know the total length, you can figure out how many strips to cut. You'll divide your total length by the usable Width of Fabric (WOF). I always use 40 inches for my WOF to account for selvedges and potential squaring up. It's better to be safe than sorry.
Let's stick with our example:
Since you can't cut a partial strip, you always round up to the next whole number. For this project, you’ll need to cut 6 full strips of fabric.
Pro Tip: Never, ever round down. Rounding up to the next whole strip is your insurance policy. It guarantees you won't come up short after all that hard work.
Now for the final step: figuring out how much fabric to actually buy. All you do is multiply the number of strips by the width you plan to cut them. A 2.5-inch strip is a classic choice for a sturdy, double-fold binding.
Using our running example:
To get the final yardage, just divide that number by 36 (since there are 36 inches in a yard). That gives us 15 ÷ 36 = 0.42 yards. To be on the safe side, you'd head to the quilt shop and buy a 1/2 yard of fabric. This simple math ensures you have exactly what you need for a beautiful, stress-free finish.
Figuring out exactly how much fabric to buy can feel like a bit of a guessing game, even for seasoned quilters. One of the most common questions I hear is, "How much extra fabric should I actually get?"
https://www.youtube.com/embed/wu7Ncqgw92M
A good rule of thumb is to add an extra 1/4 yard for each of your main fabrics. If you're working with tiny pieces, a directional print, or something you know is prone to fussy cutting, I'd bump that up to 1/2 yard just to be safe.
My best advice? Always round up. There's nothing worse than getting to your last few cuts and realizing you're short. That frantic, last-minute hunt for a fabric that might be out of stock is a stress no quilter needs!
This little bit of extra yardage is your insurance policy. It covers you for a slip of the rotary cutter, unexpected shrinkage in the wash, or any last-minute design changes you decide to make. Remember, a standard 44-inch width-of-fabric (WOF) often gives you closer to 40 inches of truly usable fabric after you account for the selvages and potential squaring up. Factoring that in from the start saves a lot of headaches.
Let's break down where that "fudge factor" comes in handy:
So, does pre-washing your fabric change the math? Absolutely.
Cotton fabric can shrink anywhere from 3–5% after its first trip through the washer and dryer. That means the yardage you bring home from the shop won't be the same size once it's prepped for cutting. This is precisely why you should always pre-wash your fabric before a single cut is made.
Heads up: The extra fabric I recommend buying is designed to cover both potential shrinkage and give you a buffer. It's an all-in-one safety net.
When you're diving into your scrap bin, the calculation changes a bit. Instead of focusing on specific fabrics, you're thinking about the total area you need to cover.
First, figure out the total surface area of your quilt top in square inches by multiplying the finished length by the finished width.
Next, you'll need to convert that massive number into yards. You can do this by dividing the total square inches by 1,296 (which is the number of square inches in a square yard). Once you have that number, I still recommend adding a 1/4 yard buffer, just in case. This approach gives you a solid estimate of whether your scrap collection is up to the task or if you'll need to supplement it.
Quick Tip: Before committing to the whole quilt, make a small test block, maybe a 12-inch one. It’s a fantastic way to see if your scrap estimates are realistic and helps you avoid the disappointment of running out of a certain color halfway through the project.
Taking that one extra step can save you a world of frustration later on.
Ready to stock your stash accurately? Visit High Country Quilts for all your quilting fabric needs.
At High Country Quilts we care deeply about community. With our experiences in retail, we know that a store is not only a place to shop but also a place for the community to gather and share. During this busy...

Hi! We’re Adam and Renee Wheaton, the new owners of High Country Quilts! For more than 40 years, we’ve owned and operated vacuum and sewing businesses. Following in Renee’s father’s footsteps after he retired from All Discount Vacuum and Sewing in Colorado...


Leave a comment