

We Love Our Quilting Community
At High Country Quilts we care deeply about community. With our experiences in retail, we know that a store is not only a place to shop but also a place for the community to gather and share. During this busy...


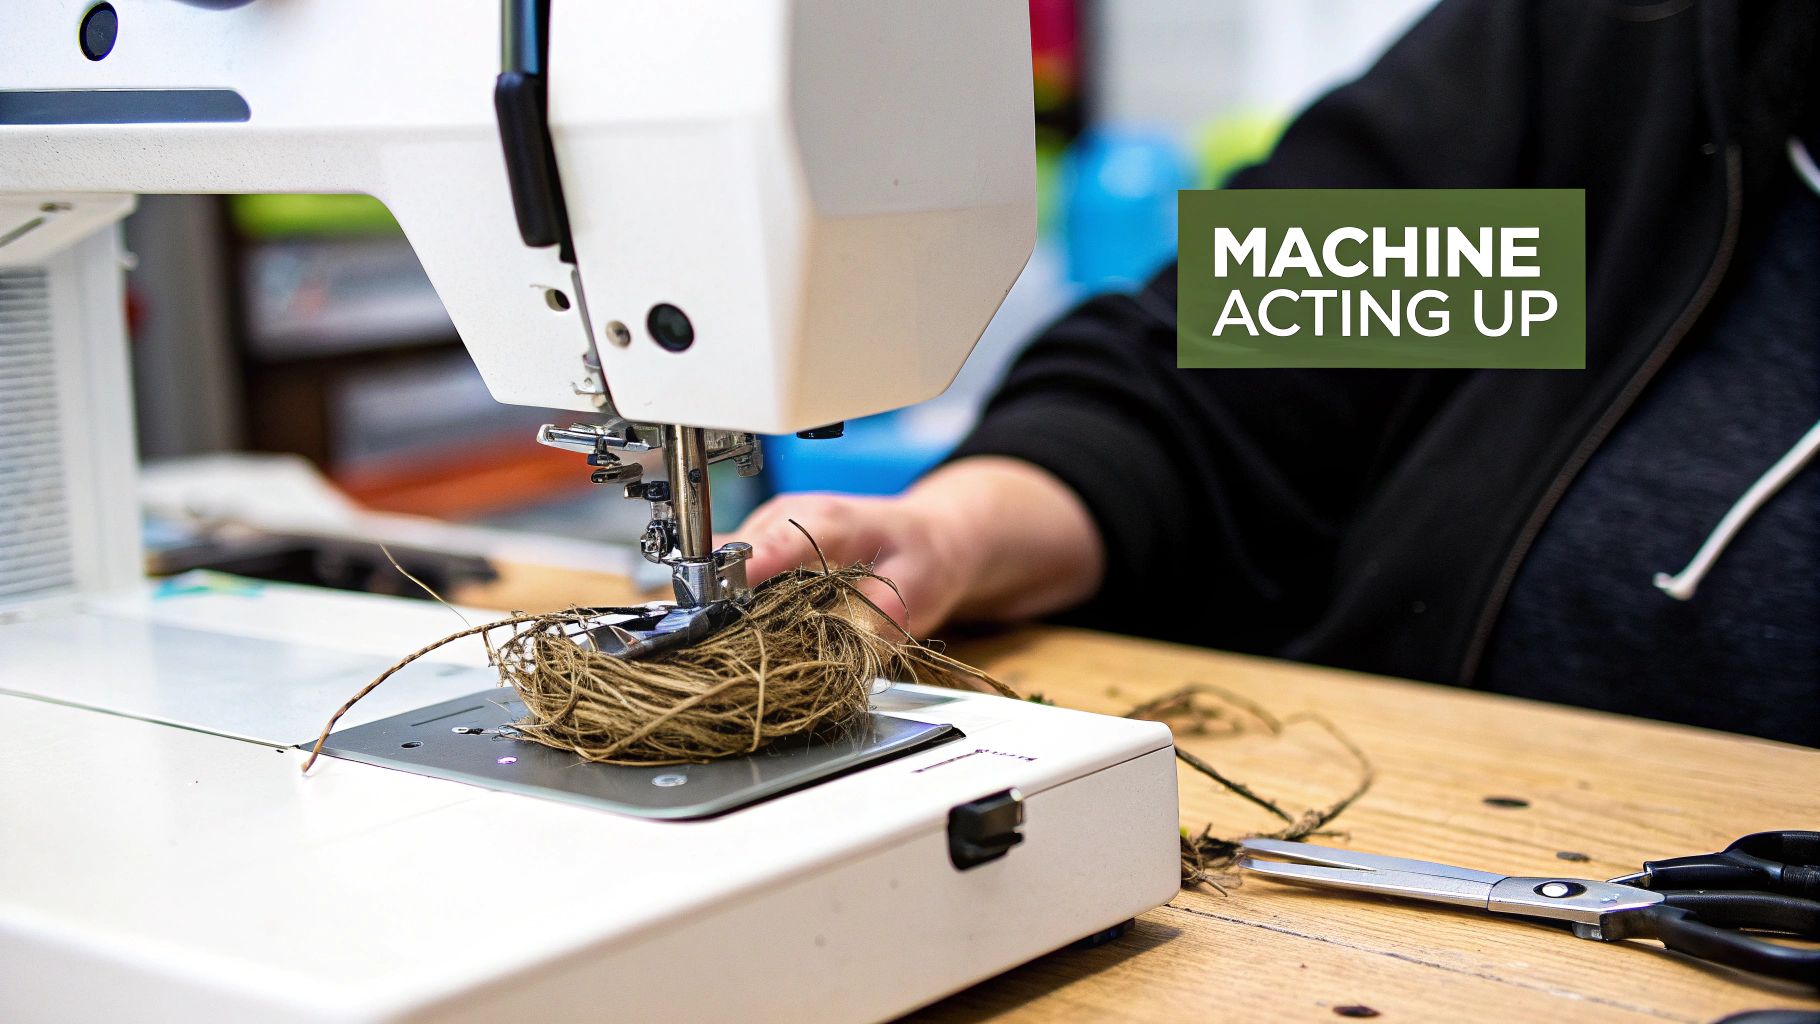
We’ve all been there. You’re in the zone, a perfect seam is taking shape, and then suddenly… a tangled, bird’s nest of thread. It’s a moment every sewer knows and dreads. This guide is all about getting you out of that jam, starting with a simple diagnostic mindset. I'll show you how to spot the easy stuff, like a dull needle or a threading mistake, before it feels like a total disaster. Learning these quick checks will solve most of your day-to-day sewing frustrations and get your confidence back on track.
It’s never just a minor annoyance, is it? A grumpy sewing machine can stop a creative project dead in its tracks. The good news is that most issues aren't signs of a catastrophic failure. They're usually just small misalignments or simple user errors that are surprisingly easy to fix once you know where to look.
Getting comfortable with troubleshooting is a game-changer for any sewer. It turns that sinking feeling of frustration into a solvable puzzle, empowering you to figure things out on your own. Instead of immediately thinking your machine is broken, you learn to run through a quick mental checklist of the usual suspects. Honestly, that shift in perspective makes all the difference.
More often than not, the reason your machine is misbehaving is one of a few common, simple things. Even after decades of sewing, these are the very first things I check when my stitches start looking wonky.
Before you even think about touching the tension dial or opening up the machine, always check these basics:
These three little things are a team. They have to work together perfectly to create a balanced stitch. If one is out of whack, the whole system goes down with it.
I like to think of it as being a detective. Every skipped stitch or weird clunking sound is a clue. For instance, if you're seeing ugly loops on the bottom of your fabric, your first instinct should be to investigate the top thread and its tension, not the bobbin. If the machine is skipping stitches entirely, the needle is your prime suspect.
Here's a pro tip: A huge mistake I see people make is immediately fiddling with the tension dials. I'd say 90% of what look like "tension problems" are really just threading mistakes or a bad needle.
This logical, step-by-step approach saves a ton of time and stops you from making adjustments that might actually make things worse. Of course, having the right machine to begin with sets you up for success. If you're looking for guidance, our article on how to choose a sewing machine is packed with helpful advice.
Sewing machines have come a long way, but the need for basic care hasn't changed. The global industrial sewing machine market was recently valued at around USD 3.41 billion, which just shows how vital these machines are. While your home machine might not be an industrial beast, the principle is the same: a little maintenance prevents a lot of headaches.
Before you can fix anything, you have to know what you’re looking at. Honestly, the best troubleshooting skill you can develop is simply understanding how your sewing machine works. You don’t need an engineering degree, but knowing the basic parts and their jobs will help you pinpoint problems in seconds.
Think of it this way: when you see a tangled mess of thread under your fabric—what we call "bird's nesting"—it's not just a random fluke. It's a clear signal. By understanding the relationship between the top thread and the bobbin, you can immediately start investigating the right culprit.
The journey of your top thread is where most stitch problems begin. It all starts at the spool pin and then winds its way through a series of guides and discs. Getting this path right is 90% of the battle for a perfect stitch.
The most important stop on this path is the tension assembly. This is usually a set of two metal discs that the thread passes between. Your tension dial, typically numbered 0 to 9, controls how tightly these discs squeeze the thread. If you crank it too high, it'll yank the bobbin thread up to the top of your fabric. Too loose, and you'll get ugly loops on the bottom.
Next up is the thread take-up lever—that's the arm that pops up and down while you sew. This little part has a huge job: it pulls thread from the spool, guides it down to the needle, and then cinches the stitch tight. If your thread slips out of the take-up lever (a very common mistake!), your machine won't be able to form a stitch at all. Our guide on how to thread a sewing machine has some great visuals that show this path clearly.
Underneath the needle plate, a whole different dance is happening. This is where the bobbin, which holds your bottom thread, lives inside its bobbin case. This duo has to work in perfect sync with the needle to lock your stitches together.
Here’s where the magic happens: as the needle dips down, it brings a loop of the top thread with it. In most modern machines, a rotary hook swoops in, grabs that loop, and spins it around the entire bobbin case. That single action is what locks the top and bottom threads together. It's an incredible piece of mechanical timing.
Of course, none of this matters if your fabric isn't moving. That's the job of the feed dogs, those little metal teeth under your presser foot. They grip the fabric and pull it along. If your fabric is stuck or puckering, there's a good chance your feed dogs are either clogged with lint or have been accidentally lowered.
Understanding this partnership is everything. A perfect stitch is a balanced tug-of-war between the upper thread tension assembly and the bobbin tension. When you see flawed stitches, your first thought should be: "Which side is winning?"
Once you know what each part is supposed to do, troubleshooting becomes so much easier. It stops being a frustrating guessing game and turns into a logical process. Instead of "my machine is broken," you'll find yourself thinking, "Okay, let's check the thread path and the tension first."
We've all been there. You're cruising along on a project, and suddenly you hear a loud thwack, or you pull your fabric away to find a tangled mess of thread underneath. It’s frustrating, but the good news is you can solve most of these mechanical hiccups yourself without a trip to the repair shop.
The trick is to learn how to read the clues your machine gives you. Every issue, from puckered seams to skipped stitches, tells a story. Once you know what to look for, you can get to the root of the problem in no time. It's really just about understanding how all the moving parts are supposed to work together.
This little decision tree is a great way to visualize the process. It shows how the vast majority of stitch problems come down to one of three things: your thread, your needle, or your fabric.
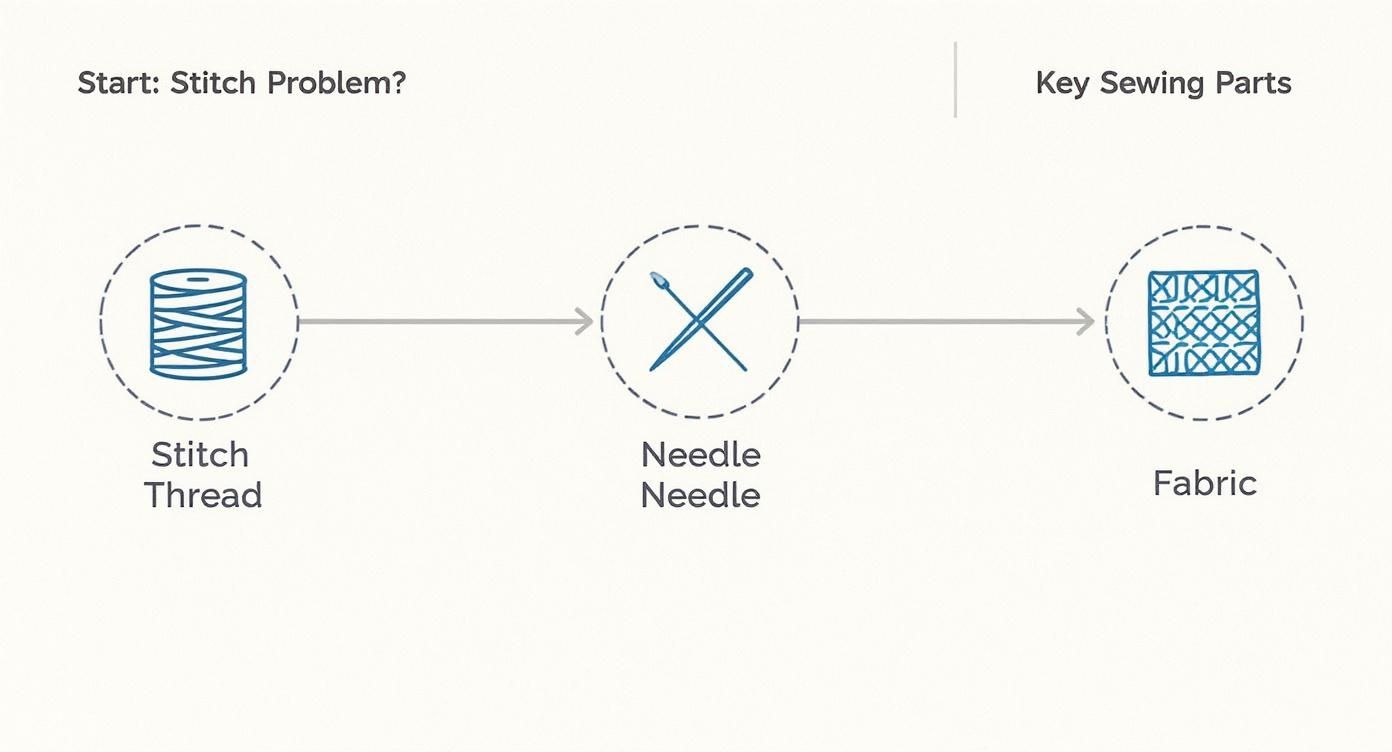
As you can see, it's best to check these three areas first before you start worrying that something is seriously wrong with your machine's mechanics.
A snapping needle is enough to make anyone jump, and skipped stitches can ruin the look of a whole seam. Interestingly enough, these two very different problems often stem from the exact same causes.
If your machine isn't forming a complete stitch, your first suspect should always be the needle.
These fundamental checks apply to every sewing machine, from a simple home model to a high-speed industrial one. In manufacturing settings, like apparel or automotive textiles, a broken needle or jammed thread can halt production, so quick, accurate troubleshooting is absolutely essential.
You know the look—your seam is all bunched up and wavy instead of lying flat. That’s puckering, and it’s a classic sign that your thread tension is off balance. The top and bottom threads are essentially in a tug-of-war, and the fabric is getting scrunched up in the middle.
But hold on. Before you start messing with the tension dial, check a few other things first. A very common culprit is simply threading the machine incorrectly. Double-check that your thread is properly seated in the tension discs. A dull needle can also be to blame, as it drags and pulls the fabric down into the needle plate instead of piercing it cleanly.
Here's a tip I learned years ago that has saved me countless headaches: Loops on the bottom of your fabric mean there's an issue with your top thread (usually tension or threading). If you see loops on top of the fabric, the problem lies with your bobbin.
If you've ruled out threading and needle issues, then it's time to adjust the tension. For a deep dive, our guide on sewing machine tension adjustment walks you through the whole process to help you get it just right.
And then there's the infamous "bird's nest"—that monstrous knot of thread that suddenly appears on the underside of your fabric. It looks like a bobbin disaster, but I can tell you from experience that this problem almost always starts with the top thread.
This happens when there's zero tension on your upper thread. The single most common reason for this? Threading the machine while the presser foot is down. When the foot is lowered, the tension discs are clamped tight, preventing the thread from slipping between them. So, the machine just feeds loose, uncontrolled thread down into the bobbin area, creating that tangled mess.
Luckily, the fix is straightforward.
Getting comfortable with these mechanical issues is all about being methodical. Instead of guessing, work through these common culprits one by one. You'll build confidence and learn to diagnose problems on your own, keeping you and your projects sewing along smoothly.
Let’s be honest, the moment an error code flashes on that bright LCD screen, it can feel a little intimidating. Modern computerized machines are wonders of engineering, but their electronics add a whole new dimension to troubleshooting. Unlike their mechanical cousins, a problem might not be a simple jam or a threading issue—it could be a sensor glitch or a software hiccup.
When your machine suddenly stops, freezes up, or flashes a cryptic message, it's easy to assume the worst. But don't panic! Most of the time, these machines are actually trying to help you by telling you exactly what’s wrong. You just need to learn how to speak their language.
Before you even think about grabbing your screwdriver or user manual, try the oldest trick in the tech book: turn it off and on again. Seriously. This isn't just a cliché; it’s a powerful first step for any computerized device.
Unplug the machine from the wall—don't just flip the switch. Give it a full 60 seconds. This allows the internal capacitors to fully discharge and clears any temporary glitches from the machine’s short-term memory. This simple power cycle can fix a surprising number of issues, from a frozen touchscreen to a stitch selector that’s gone haywire. If it works, you likely just had a minor software blip.
When a computerized machine stops working, it often gives you a clue in the form of an error code. These aren't random numbers; they are specific signals pointing you directly to the source of the problem.
This is where your user manual becomes your most valuable tool. Flip to the back, and you’ll almost certainly find a troubleshooting section that translates these codes into plain English.
When an error code pops up on a screen like this, it’s a direct message. For instance:
Looking up the code transforms you from a frustrated user into a detective. You can stop guessing and start fixing the exact issue.
Diagnosing an issue on a trusty mechanical machine is a very different experience from troubleshooting a modern computerized one. Here’s a quick breakdown of how you might approach the same problems on each type.
| Issue Type | Mechanical Machine Approach | Computerized Machine Approach |
|---|---|---|
| Skipped Stitches | Check needle type, size, and sharpness. Re-thread the top thread. | Check needle first, then look for error codes. A sensor might be blocked by lint. |
| Thread Nesting | Almost always a top threading issue. Re-thread with the presser foot up. | Re-thread, but also check the bobbin case for lint. A dirty sensor could be misreading thread tension. |
| Machine Won't Start | Check the power cord, foot pedal connection, and ensure the bobbin winder isn't engaged. | Check all power connections first. Then, look at the screen for an error code (like a presser foot warning). A simple reboot might be needed. |
| Uneven Tension | Manually adjust the top tension dial. Clean out the tension discs. | First, try re-threading. If that fails, consider a factory reset to restore default tension settings before making manual adjustments. |
As you can see, with computerized machines, you often have to consider the electronics in addition to the mechanical parts. Always rule out the simple software-related fixes first.
Just like a computer, your sewing machine’s "brain" needs a little care now and then. This usually comes down to two things: firmware updates and the occasional system reset.
A firmware update is a software patch released by the manufacturer. These updates can fix bugs, improve how the machine forms certain stitches, or even add new functionalities. It’s a good idea to check your manufacturer's website every so often. The process is usually simple—download a file to a USB drive, plug it into your machine, and follow the on-screen instructions.
If you’re dealing with a persistent, quirky problem that a reboot can’t solve, a system reset is your next step. This restores the machine to its original factory settings. While it will erase any custom stitches you’ve saved, it also clears out deep software conflicts. Think of it as a last resort before you call a service technician. The steps will always be outlined in your manual.
My Two Cents: Don't let the electronics scare you. Most computerized errors are designed to be solved by you, the user. The machine is trying to guide you to the problem, whether it's a blocked sensor or a simple step you forgot.
When you're tackling something intricate like machine embroidery, keeping your machine electronically happy is non-negotiable. Those beautiful, detailed designs require perfect communication between the software and the mechanical parts. For those who are diving into embroidery, our guide on choosing the right stabilizer for machine embroidery is a great next read, because the materials you use are just as critical as your machine's performance.

Honestly, the best way to troubleshoot your sewing machine is to avoid problems in the first place. A little bit of proactive care goes a long way, turning those frustrating breakdowns into a distant memory. Think of it less like a chore and more like a simple habit that protects your investment and keeps your machine humming.
A consistent maintenance routine doesn't have to be complicated. Just a few minutes of attention after you sew can prevent over 80% of the most common headaches, like skipped stitches and dreaded thread nests. It’s all about stopping lint and dust from building up where they cause the most trouble.
The most effective care happens in small, regular doses. You don't need to do a deep dive every day, but a few key tasks will make a massive difference.
After each sewing session, get into the habit of a quick lint sweep.
These tiny steps prevent the gradual buildup that leads to bigger problems. It’s the difference between a five-minute cleanup and a two-hour repair session.
Once a month, or after a really big project, it’s a good idea to spend a little more time on a deeper clean and check-up. This is when you’ll hit the spots that don’t need daily attention but are still critical for smooth operation.
Oiling is one of the most important monthly tasks. Just a tiny drop of high-quality sewing machine oil on the key metal-on-metal friction points is all you need. For most machines, this means the bobbin hook race. Always check your manual to see exactly where and how much to oil; believe me, over-oiling can be just as bad as not oiling at all.
If you work with specialty threads that cause friction or static, using a dedicated solution like a thread lubrication unit can be a game-changer for your stitch quality and your machine's health.
A well-maintained machine is a quiet machine. If you start to hear new clunks, squeaks, or grinding noises, it's often the machine's way of telling you it's thirsty for oil or choked with lint.
Beyond the machine itself, keeping your sewing space tidy makes maintenance so much easier. Learning how to organize craft supplies like a pro creates an environment that supports your craft and simplifies your routine.
A simple checklist can help you stay on track with these essential tasks.
| Task | Frequency | Tools |
|---|---|---|
| Clean Bobbin Area | After every sewing session | Small lint brush, dry cloth |
| Wipe Down Exterior | After every sewing session | Soft, dry cloth |
| Cover Machine | When not in use | Machine cover |
| Change Needle | Every 8-10 hours of sewing | New needle of the appropriate type |
| Oil Machine | Monthly (or as per manual) | Sewing machine oil, manual |
| Deep Clean | Every 3-6 months | Brushes, screwdriver (for plates) |
Sticking to this schedule will keep your machine running smoothly for years to come.
Finally, let's talk about the single most overlooked task: changing your needle. A sewing machine needle is a consumable part, not a permanent fixture. Its point gets dull and can even develop tiny burrs after just 8-10 hours of sewing.
Pushing on with a dull needle forces your machine to work harder, leading to all sorts of problems:
Make it a non-negotiable rule to start every new project with a fresh needle. It’s the cheapest insurance policy you can buy for both your machine and your beautiful projects. This one small step is a cornerstone of preventing sewing machine frustrations.
Reading a troubleshooting chart is one thing, but hearing how these fixes actually play out at the sewing table is where the real learning happens. Theory is great, but it's the stories from the trenches—that whole trial-and-error process—that lead to those amazing 'aha!' moments. Let's walk through a couple of scenarios that might hit a little too close to home.
Maria, a passionate quilter, was deep into a large free-motion project. For a few inches, her stitches were beautiful. Then, out of nowhere, they’d devolve into a mess of tiny, tight knots on top, yanking the bobbin thread all the way through. It was maddening.
She did all the usual stuff: re-threaded the machine (three times!), swapped in a new needle, and gave the bobbin case a good cleaning. But the problem kept coming and going, which was the most frustrating part.
Just as she was about to call it a day, she noticed something. The issue seemed to pop up most often when she was quilting around curves. On a whim, she pulled a long piece of thread directly off the spool and ran it through her fingers. Sure enough, she felt a tiny, almost unnoticeable snag every foot or so.
It wasn't the machine's tension at all. The culprit was a poorly wound spool of thread with a small defect. As the thread unwound, it would catch on itself, giving the top thread a sudden jerk and sending the tension sky-high. She switched to a new spool of the same color, and just like that, the problem was gone.
This is a classic reminder to look beyond the machine. Before you start taking things apart, always give your materials a once-over—the needle, the fabric, and especially the thread itself.
Now, let's talk about Mark. He was tackling a big project: reupholstering dining chairs with some seriously thick marine vinyl. His heavy-duty machine, usually a beast, suddenly started skipping stitches. Sometimes it would miss three or four in a row.
He tried everything he could think of. He put in a new, bigger needle. He slowed way down. He even fiddled with the presser foot pressure. Nothing worked.
Mark knew the machine was threaded right and the tension felt fine. His breakthrough came when he got out a magnifying glass to look at one of the skipped stitches. He saw a clean needle hole, but the top thread was completely missing. That was his clue: the hook wasn't catching the thread loop from the needle.
He realized that while he was using a heavy-duty needle, it was a standard universal point. The dense, slightly sticky vinyl was clinging to the needle just enough on the upstroke to make it flex a tiny bit, causing it to miss the hook timing. The fix was simple: he switched to a leather needle. That wedge-shaped point is designed specifically to pierce tough materials without sticking or deflecting. The skipped stitches stopped immediately.
This is the perfect example of why any good sewing machine troubleshooting guide will tell you that matching the needle type—not just the size—to your fabric is a non-negotiable step.
Sometimes you just need a quick fix to a nagging problem without digging through the entire user manual. I get it. Let’s jump into some of the most frequent questions I hear and get you back to your project.
Nine times out of ten, the culprit behind thread snapping mid-seam is either poor-quality thread or a worn-out needle. It's a classic case. Cheaper thread often has weak spots that just can't handle the machine's tension, and they’ll pop at the worst possible moment.
The other big offender is using a dull, bent, or incorrect needle for your fabric. Always start a new project with a fresh needle—it’s the cheapest insurance policy you can buy for good stitches.
Think of tension as a balancing act. Your machine’s default setting, usually around a 4, is a great starting point for most medium-weight cottons. But things change when you switch materials.
A sewer's best friend is a scrap of fabric. Before you touch your actual project, always run a test seam on a spare piece. This simple habit has saved me from countless hours with a seam ripper.
You've done everything right—you've cleaned the machine, put in a new needle, re-threaded the top and bottom, and you're still having issues. If you start hearing any grinding, clunking, or other unhappy mechanical noises, it’s time to stop.
Those sounds often signal a deeper issue, like the machine's timing being off, which isn't a DIY fix. Don't force it; you could cause more damage. This is when you pack it up and bring it to a trusted technician.
If you do only one thing, make it this: regularly clean out the lint from your bobbin area. It's amazing how quickly fluff and tiny thread bits can accumulate down there, and that buildup is the root cause of so many tension headaches and skipped stitches.
A quick sweep with a small brush after every few bobbins or after each big project is all it takes to prevent a world of frustration.
For everything from expert machine servicing to beautiful, high-quality fabrics, trust High Country Quilts. Come see what we have to offer and join our community at https://hcquilts.com.
At High Country Quilts we care deeply about community. With our experiences in retail, we know that a store is not only a place to shop but also a place for the community to gather and share. During this busy...

Hi! We’re Adam and Renee Wheaton, the new owners of High Country Quilts! For more than 40 years, we’ve owned and operated vacuum and sewing businesses. Following in Renee’s father’s footsteps after he retired from All Discount Vacuum and Sewing in Colorado...


Leave a comment