

We Love Our Quilting Community
At High Country Quilts we care deeply about community. With our experiences in retail, we know that a store is not only a place to shop but also a place for the community to gather and share. During this busy...


Ever tried to embroider a design only to end up with a puckered, distorted mess? The culprit probably wasn't your machine or your thread—it was likely the wrong (or missing) stabilizer for machine embroidery.
Think of stabilizer as the unsung hero of your embroidery projects. It's the temporary foundation you apply to your fabric before you start stitching. Its job is to keep the fabric from stretching, shifting, or bunching up under the rapid-fire pressure of the needle.
The secret to flawless embroidery isn't just about a great machine—it's about choosing the right foundation. Your project's success starts with the perfect stabilizer for your fabric and design.
Simply put, without a stabilizer, even the most advanced embroidery machine can produce a disappointing result. It’s the difference between a crisp, professional design and a homemade-looking mistake.
Imagine trying to paint a detailed portrait on a flimsy, loose piece of fabric. No matter how skilled you are, the canvas would move and warp, making clean lines impossible. A stabilizer does for your fabric what a taut, primed canvas does for a painter: it creates a firm, stable surface.
This solid base allows the needle to lay down each stitch perfectly, preventing the thread from pulling and distorting the fabric. For anyone serious about getting professional-quality results, this foundational support is non-negotiable.
And it seems a lot of people are getting serious about it. The home embroidery market is booming, driven by both creative hobbyists and small businesses creating custom apparel. If you want to dive deeper, you can read the full research about home embroidery equipment.
The physics of machine embroidery can be pretty rough on fabric. A needle punching through it thousands of times a minute, combined with dense thread, can easily overwhelm most materials. Without that crucial backing, you’re asking for trouble.
Here are just a few of the common issues that a good stabilizer prevents:
This infographic really drives home how a stabilizer works within the hoop to provide that essential support.
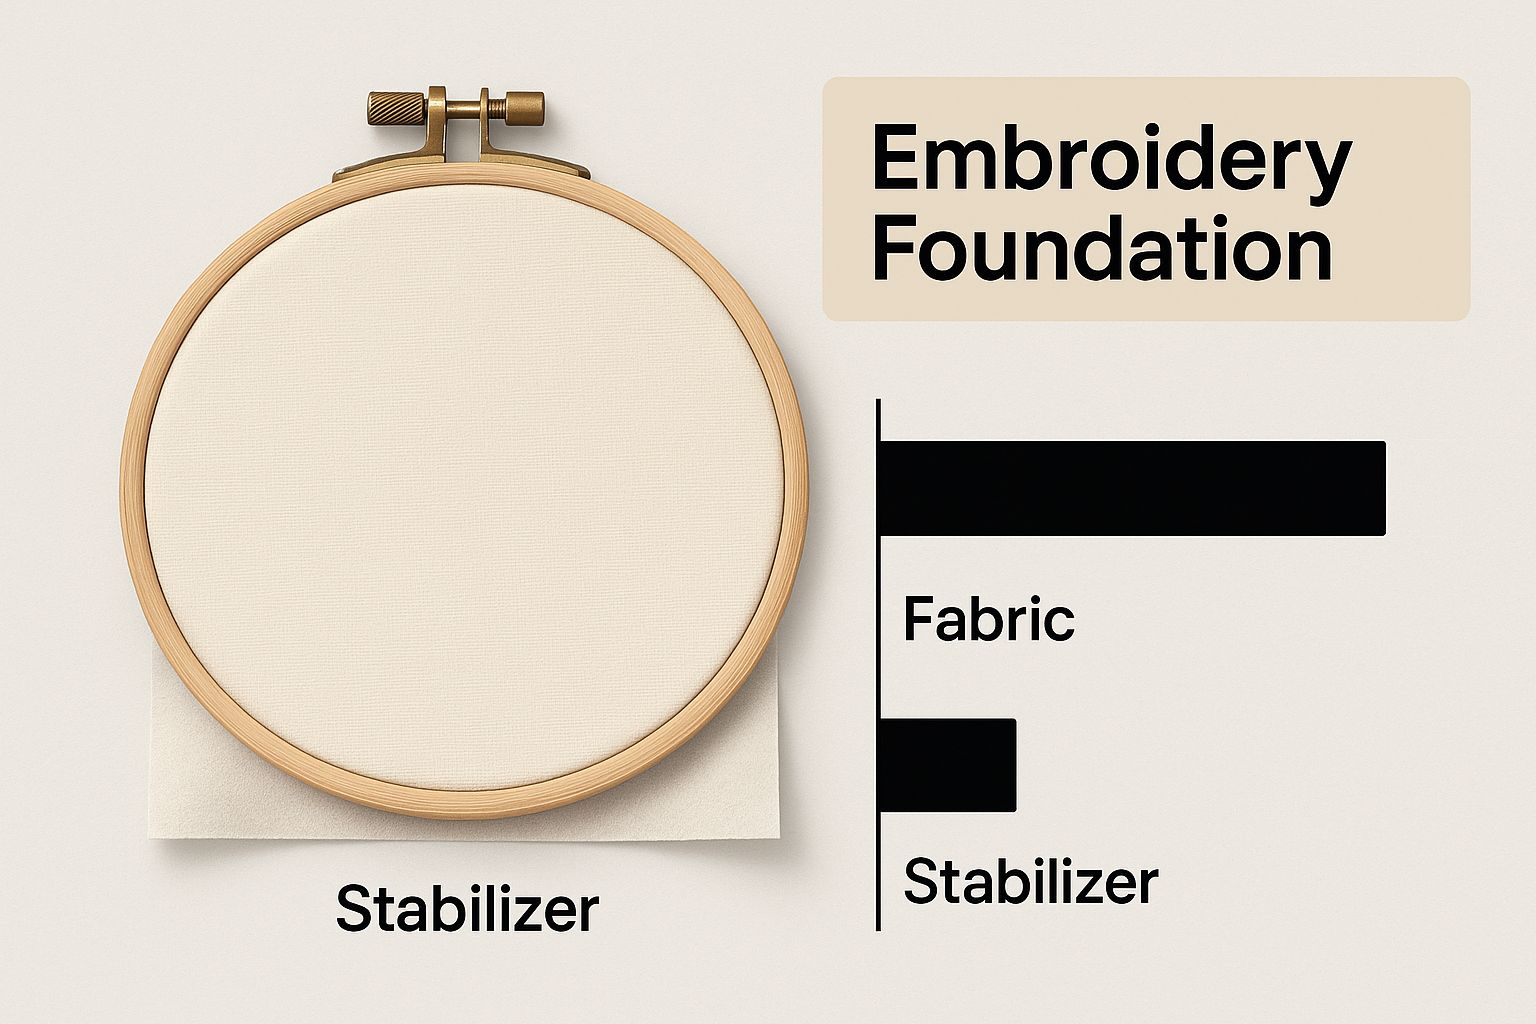
As you can see, it holds the fabric perfectly taut, which is the key to preventing all those embroidery headaches.
To solve these problems, stabilizers come in a few different flavors, each designed for specific fabrics and projects. Getting to know them is the first big step toward mastering your craft.
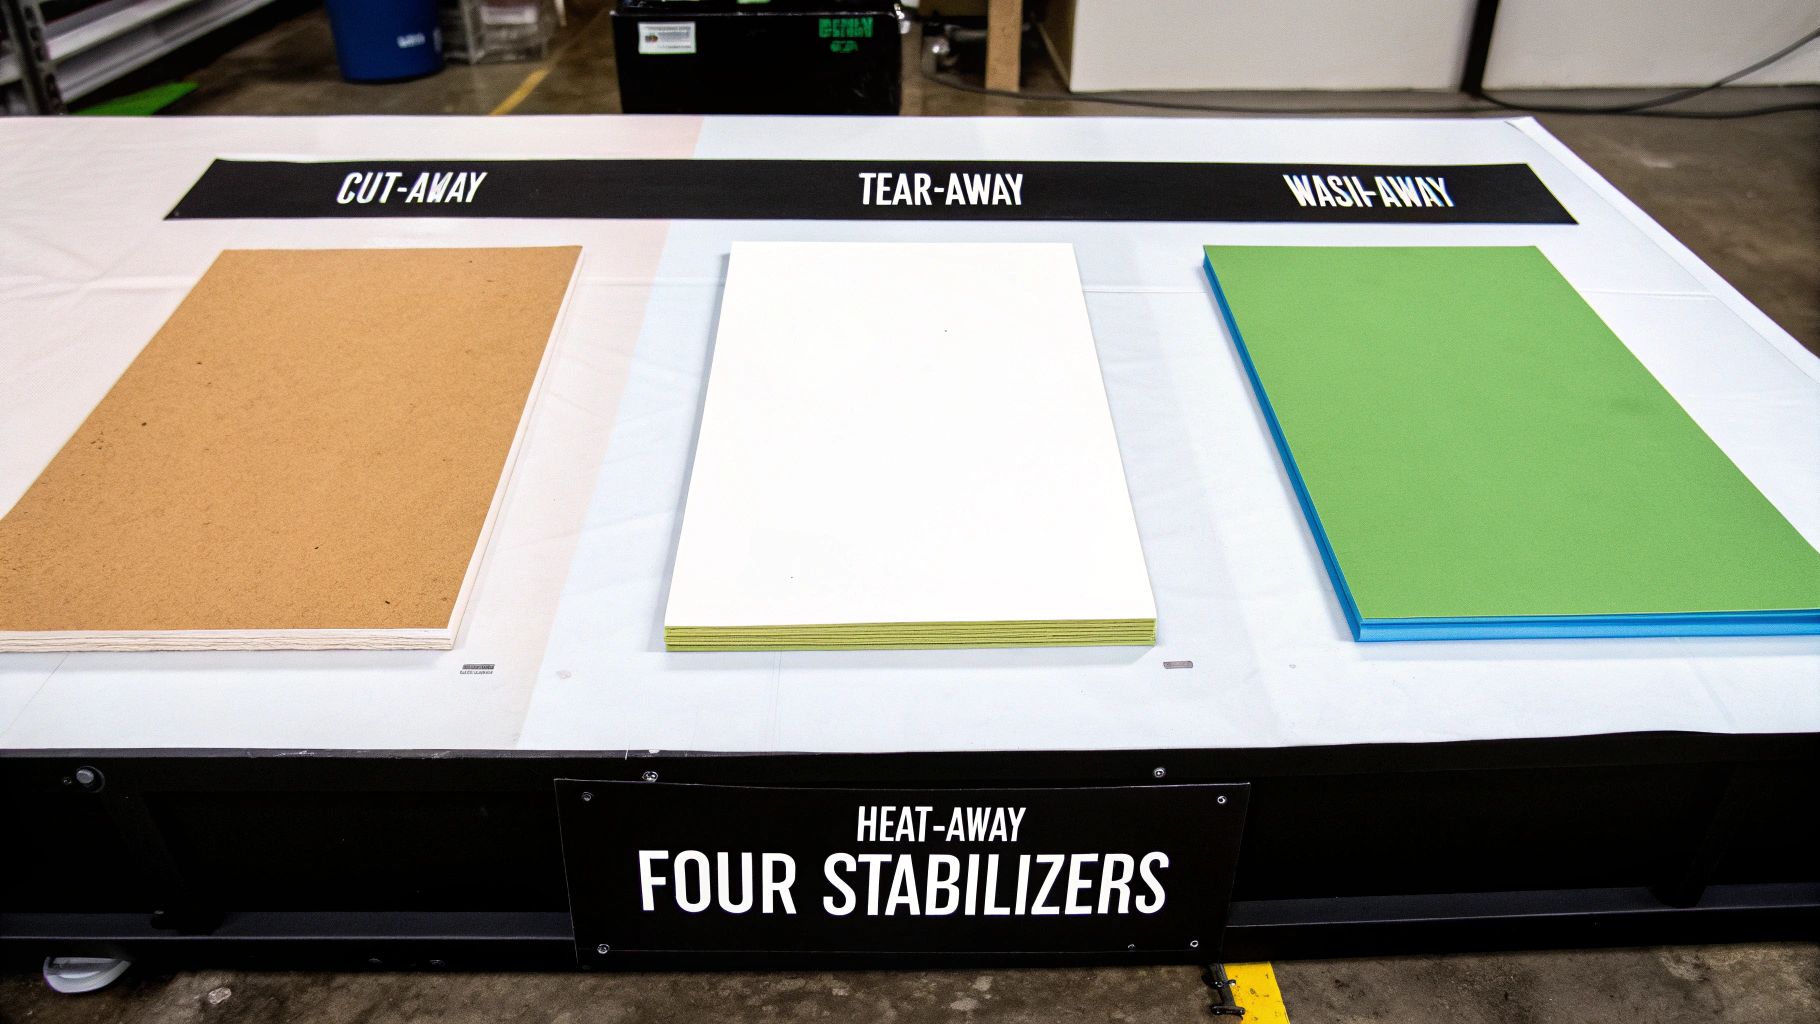
We'll be diving into the four main types, which are categorized by how you get rid of them once the stitching is done:
Don't worry, we'll walk through each one, breaking down what they are, when to use them, and how to get the best results. You'll be picking stabilizers like a pro in no time.
Stepping into the world of stabilizers can feel overwhelming at first, but it's really quite straightforward. The best way to think about them isn't by memorizing dry definitions, but by seeing each type as a specific tool for a specific job. The names themselves—cut-away, tear-away, wash-away, and heat-away—give you the biggest clue, telling you exactly how they're removed once the stitching is done.
Getting a handle on these four core categories is your first real step toward mastering machine embroidery. Each one is engineered to pair with certain fabrics and design styles, ensuring your projects look clean and professional every single time. This is the know-how that will let you choose the perfect stabilizer for machine embroidery without any guesswork.
Think of cut-away stabilizer as the permanent foundation for your embroidery. It's designed to stay with the fabric forever, offering solid, continuous support long after the needle has stopped. This makes it the undisputed champion for any fabric that stretches.
Knits are the perfect example. Materials like t-shirt jersey, sweatshirt fleece, and polo pique have a natural give. Without a permanent backbone, an embroidered design would warp, pucker, and lose its shape along with the fabric, especially after a few trips through the wash. Cut-away essentially becomes one with the fabric and stitches, creating a stable unit that prevents this from happening.
You'll want to reach for a cut-away stabilizer for projects like:
Once your design is complete, you just trim the excess stabilizer from around the design with a small, sharp pair of scissors, leaving about a ¼-inch border. That little bit that remains is what continues to support the stitches for the life of the garment.
If cut-away is a permanent foundation, then tear-away is more like scaffolding—it provides sturdy support during the "construction" phase but is removed completely when the job is done. This type is your go-to for stable, non-stretchy woven fabrics.
Imagine you're embroidering on denim, canvas, or a crisp quilting cotton. These fabrics don't really stretch, so they don't need long-term support. In fact, using a cut-away would just add unnecessary bulk and stiffness. Tear-away provides the temporary rigidity needed to get perfect stitches and then rips away cleanly, leaving a beautiful finish with almost no trace it was ever there.
Tear-away is the hero for projects where the back of the embroidery needs to be clean and soft against the skin, like on decorative towels, cloth napkins, or sturdy tote bags.
Just remember to be gentle when removing it. Always support the stitches with one hand while carefully tearing the stabilizer away with the other. This little trick prevents you from accidentally pulling or distorting your beautiful work.
Wash-away stabilizer is the true magician of the embroidery world. It’s made from a unique material that dissolves completely in water, making it the perfect choice when you need every last bit of stabilizer to vanish.
This makes it invaluable in two main situations: with delicate, sheer fabrics and for creating freestanding designs. For materials like organza, tulle, or chiffon, even a lightweight tear-away would be visible and ruin the airy effect. A wash-away provides the support you need and then disappears with a simple rinse, leaving only your thread behind.
It’s also the secret ingredient for making freestanding lace (FSL). You embroider a dense lace pattern directly onto the wash-away stabilizer, and once you dissolve the backing, you're left with a gorgeous, standalone piece of lace. It's perfect for making ornaments, jewelry, or delicate decorative accents.
Finally, we have heat-away stabilizer, which is a niche problem-solver for fabrics that absolutely cannot get wet. Think of materials like rich velvet, certain delicate silks, or synthetics that could be damaged or left with water spots by a wash-away stabilizer.
As the name implies, heat-away disappears with the touch of a hot iron. It often looks and feels like a thin, plastic-like film that crumbles away into a powder after being heated, allowing you to simply brush it off without any moisture. While you won't use it for everyday projects, it’s a lifesaver when you're working with sensitive or non-washable textiles.
Choosing between these four types is a lot less intimidating when you match the stabilizer's properties to your project's needs. Machine embroidery stabilizers are truly essential for fabric support, as they are the key to perfect stitch quality and durability. You can explore a detailed guide to learn more about fabric support with stabilizers on hooptalent.com.
To make things even clearer, this table breaks down the basics at a glance. Think of it as your cheat sheet for picking the right starting point for any project.
| Stabilizer Type | Best For | Removal Method | Ideal Fabrics |
|---|---|---|---|
| Cut-Away | Unstable, stretchy, and knit fabrics | Trimmed with scissors | T-shirts, fleece, sweatshirts, polo shirts |
| Tear-Away | Stable, woven fabrics with no stretch | Torn away from stitches | Denim, canvas, quilting cotton, linen |
| Wash-Away | Delicate fabrics and freestanding lace | Dissolves in water | Organza, tulle, batiste, sheer fabrics |
| Heat-Away | Fabrics that cannot get wet | Disintegrates with heat | Velvet, certain silks, non-washable items |
By keeping these fundamental differences in mind, you're well on your way to selecting the perfect stabilizer and getting that flawless finish you're after.
Okay, now that we've covered the four main families of stabilizers, let's get to the real question: how do you actually pick one? Choosing the right stabilizer for machine embroidery isn’t a guessing game. It's a skill, and getting it right is what separates an okay stitch-out from a truly professional one.
Think of it like cooking. You wouldn't try to sear a delicate piece of fish the same way you'd slow-roast a tough cut of meat. The stabilizer you choose needs to be just as thoughtfully matched to your fabric, your design, and the final look you're going for.
We can break this whole decision down into three simple questions. Once you get in the habit of asking them, you'll be able to walk up to any project and know exactly what you need.
The most important piece of the puzzle is your fabric. Hands down. Its weight, its stretch, and how it’s woven will tell you almost everything you need to know about the support it requires.
The first test is simple: does it stretch? If you pull on your fabric and it has any give at all—think t-shirts, fleece, or polo shirts—you must use a cut-away stabilizer. This is one of the golden rules of embroidery. Tear-away or wash-away stabilizers just can't provide the permanent foundation these fabrics need to stop the design from warping and stretching out of shape over time.
Now, if you're working with a stable, non-stretchy woven fabric like denim, canvas, or quilting cotton, you’ve got more options. A tear-away is usually your best friend here, giving you solid support during the stitch-out and then disappearing cleanly.
Next up, take a good look at your embroidery design. How many stitches are in it, and how tightly are they packed together? We call this design density. A light and airy name has a low density, but a solid, filled-in corporate logo is extremely high-density.
The more stitches your design has, the more support your fabric will need. A heavy design on a lightweight fabric is a recipe for puckering if you don't use enough stabilizer.
This is where the weight of the stabilizer comes in. They’re generally sold as light, medium, or heavy.
Here’s a pro tip: sometimes, two layers of a medium-weight stabilizer give you better, more flexible support than a single, stiff layer of a heavy-weight one.
Finally, ask yourself how you want the finished project to look and feel, especially on the back. This is huge for anything that will be worn against the skin or where the back of the stitching is visible.
You wouldn't want a scratchy, stiff piece of cut-away on a baby's onesie. For something like that, you’d reach for a soft mesh cut-away, often called polymesh. It gives you that crucial permanent support but is much softer and more flexible.
Or what about a decorative kitchen towel? You want a crisp, clean finish on the back, so a tear-away is perfect. It does its job and then gets out of the way, leaving no extra bulk. For something truly delicate, like an organza table runner, even a tear-away would be too noticeable. That's a job for a wash-away stabilizer, which will vanish completely, leaving just your beautiful stitches behind.
By walking through these three questions—fabric, design, and finish—you create a roadmap that leads you right to the perfect choice. Let’s see it in action.
Scenario A: Dense Logo on a Stretchy Polo Shirt
Scenario B: Simple Monogram on a Plush Towel
This simple framework turns choosing a stabilizer from a confusing chore into a logical, repeatable process. After a few projects, you'll be able to size up any job and pick your stabilizer with complete confidence.
Knowing which stabilizer to use is only half the battle. The real magic happens when you master how to apply and remove it. This is where you prevent those all-too-common frustrations—puckering, gummed-up needles, and wonky stitches—and create the perfect, stable canvas for your machine.
The first big choice you'll face is how to get the stabilizer and fabric working together. Your decision here directly affects how well your project holds up under the rapid-fire motion of the embroidery machine. A solid setup means your fabric stays taut and smooth from start to finish.
You’ve got two main ways to apply stabilizer: either hoop it right along with your fabric or "float" the fabric on top of a hooped piece of stabilizer. Each has its time and place, and knowing the difference is key.
Hooping: This is your bread and butter, the most common method out there. You just sandwich the stabilizer under your fabric and clamp them together in the hoop as one solid unit. It gives you the most secure hold possible.
This method is perfect for:
Floating: Floating sounds fancy, but it just means you hoop the stabilizer by itself and then stick your fabric on top using a temporary spray adhesive or a few well-placed pins. You float the fabric when hooping it directly would be a disaster.
This is your go-to technique for:
A quick tip on temporary spray adhesive: less is more. Give the hooped stabilizer a light, even mist—never spray your fabric directly. Let it sit for a moment until it feels tacky, then smooth your fabric down. This little trick saves you from a sticky needle and gummy residue later.
After the last stitch is lovingly placed, it’s time to remove the excess stabilizer. How you do this depends entirely on the type you used. Getting this part right is just as important as the stitching itself for a professional-looking finish.
1. Trimming Cut-Away Stabilizer
Cut-away is designed to stick around, but you still need to tidy up the edges.
2. Removing Tear-Away Stabilizer
The keyword here is gently. You don't want to pull and distort your beautiful new stitches.
3. Dissolving Wash-Away Stabilizer
It’s a simple process, but you have to be thorough to avoid a stiff, starchy mess.
4. Removing Heat-Away Stabilizer
This one requires an iron and a bit of care.
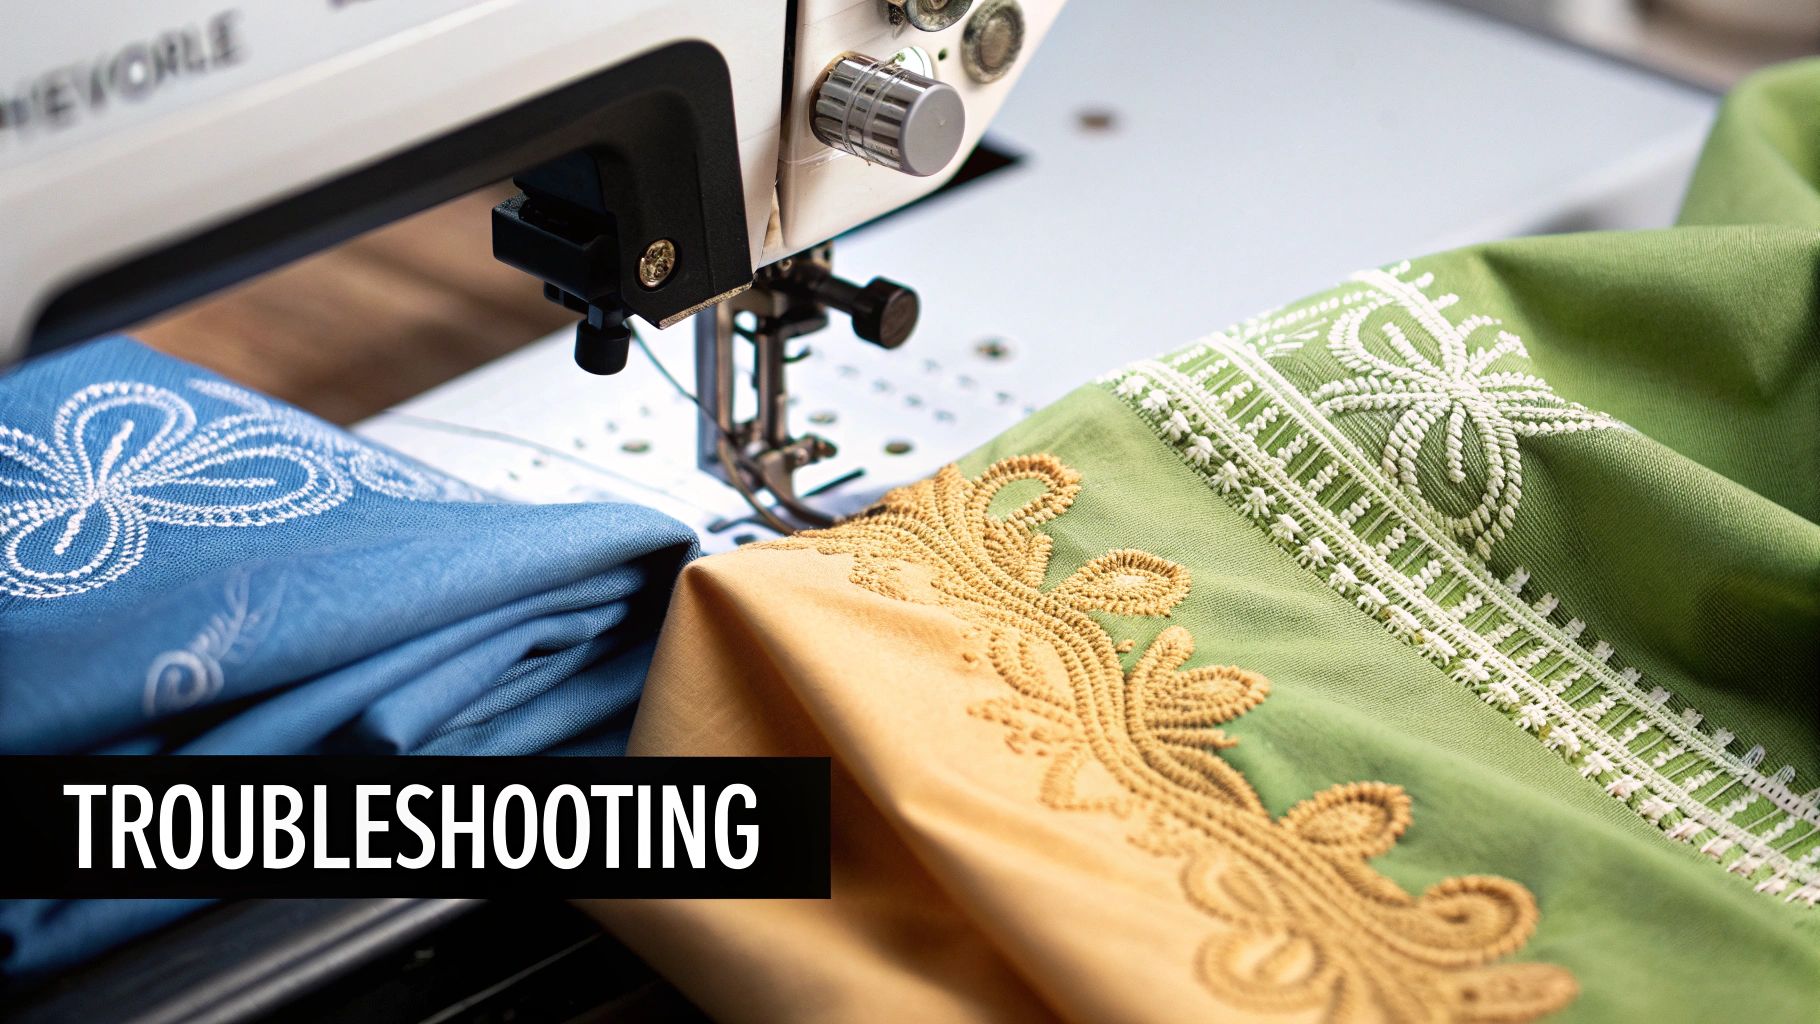
Even with the most careful planning, embroidery projects can go sideways. Every single one of us, from total beginner to seasoned pro, has stared at a project that just refuses to cooperate. Maybe you see dreaded puckering, outlines that don't quite match up, or a tangled mess of thread under the hoop.
Here’s the good news: these problems are rarely random acts of machine rebellion. More often than not, they are tell-tale signs that your stabilizer choice isn't quite right for the fabric and design you've chosen.
Don't think of these issues as failures. Instead, see them as your project sending you a clear message. Once you learn to read the signs, you can diagnose the problem and turn a potential disaster into a beautifully stitched design. Let’s walk through the most common frustrations and see how a quick stabilizer adjustment can be the perfect fix.
Puckering is the absolute number one complaint in machine embroidery. It’s that awful wrinkled, bunched-up look around your stitches. This is a classic symptom of a mismatch between your fabric and stabilizer, creating a tug-of-war that your fabric is destined to lose.
The Solution:
Nine times out of ten, puckering means your stabilizer is too lightweight for the design. The sheer force of the stitches is pulling the fabric inward, and the stabilizer just doesn't have the muscle to hold everything flat.
Have you ever finished a design and noticed the final outline doesn't line up perfectly with the filled sections? This frustrating issue is called a registration error. It happens because the fabric is shifting ever so slightly in the hoop while the machine is stitching.
The Solution:
This all comes down to security. Your fabric isn't being held firmly enough, allowing it to move around. The goal is to make your hooped fabric and stabilizer act like a single, immovable unit.
The key to perfect registration is eliminating any and all movement. Your hooped fabric and stabilizer should feel as tight as the top of a drum before you ever press the start button.
Here are a few ways to lock everything in place:
This is a familiar sight on any fabric with a fluffy texture or a pile, like terry cloth towels, fleece, or cozy minky fabric. The stitches seem to disappear into the material, making your design look muddy and undefined.
The Solution:
You need to give your stitches a smooth, stable surface to sit on top of. This is precisely what a stabilizer topping is for. A topping is a thin, film-like stabilizer (usually a wash-away type) that you place on top of your hooped fabric.
Think of it as a temporary stage for your stitches. It holds them up, preventing them from sinking into the fabric's pile. Once you're done stitching, the topping either tears away gently or dissolves completely in water. You're left with a crisp, professional-looking design that pops right off the surface, just like it should.
The world of embroidery never sits still, and the humble stabilizer is evolving right alongside it. As our machines get faster and designs grow more intricate, the demand for smarter, more capable materials is exploding. The future of stabilizer technology is really being forged in the world of high-speed commercial production, but the good news is those innovations are trickling down to all of us.
Think of these advancements as highly specialized tools. We're moving beyond just the four basic types into an era of hybrid and purpose-built stabilizers designed to solve very specific embroidery challenges. These new materials are engineered to perform under the intense pressure of a commercial machine, ensuring your stitch quality never falters, even at top speed.
One of the most exciting areas of development is in adhesive stabilizers. The newest self-adhesive, or “sticky,” backings are being formulated to be both stronger and gentler on fabrics. This helps eliminate the need for temporary spray adhesives, which means less gunk on your needles and hoops and a much cleaner embroidery process from start to finish.
We’re also seeing major refinements in toppings. Advanced water-soluble films are becoming incredibly thin and pliable, yet they dissolve more completely than ever. This leaves absolutely zero trace behind, even on notoriously tricky textures like velvet or delicate lace. These improvements are largely a response to commercial embroidery trends, which constantly push for greater efficiency and automation. You can see how future industry trends are shaping embroidery for a peek at what’s driving this change.
The big takeaway is that the stabilizer for machine embroidery you use tomorrow might look very different from what's on your shelf today. As the technology marches forward, these essential materials just keep getting more effective and easier to work with.
This constant improvement means there will always be a better, smarter way to tackle a difficult project. For anyone who loves embroidery, keeping an eye on these new products is the real secret to elevating your craft and getting those flawless, professional-looking results on any fabric you can imagine.
Even when you feel like you've got the hang of stabilizers, questions always pop up in the middle of a project. Let's tackle some of the most common ones I hear, so you can handle those tricky situations like a pro and keep your embroidery looking sharp.
You bet. In fact, layering is a secret weapon for many seasoned embroiderers. Sometimes, using two layers of a medium-weight stabilizer gives you better results than one super-stiff, heavy-weight sheet. This is especially true for dense designs on fabrics that are a bit shifty or delicate.
This trick gives you fantastic support without making the final product feel like cardboard. For the best possible stability, try placing the layers in a crisscross pattern—one sheet running vertically, the other horizontally. This little move provides support in every direction the needle is pulling.
A topping is a thin, film-like material you lay over your fabric before you start stitching. It's usually a wash-away or heat-away type and it’s an absolute must-have for anything with a texture, pile, or nap—think towels, fleece, corduroy, and velvet.
A stabilizer topping creates a temporary smooth runway for your stitches, preventing them from sinking and getting lost in the fabric's texture. It's the key to making your design pop with crisp, clean lines, instead of looking buried in fluff.
Once you’re done embroidering, the topping just disappears with a bit of water or the touch of a hot iron, leaving nothing behind but your gorgeous, professional-looking stitches.
Let me be direct here: no. I strongly, strongly advise against embroidering without a stabilizer for machine embroidery. Trying to skip it almost always ends in frustration, puckering, broken threads, and stitches that just don't line up.
A stabilizer's main job is to hold the fabric perfectly still while the needle is flying at high speeds. Even sturdy, woven fabrics benefit from at least a light tear-away stabilizer to ensure you get that flawless, professional finish every single time. Think of it as the essential foundation for great embroidery.
For all your cosplay, quilting, and sewing needs, explore the high-quality materials and expert resources at Famcut.com. Find the perfect foundation for your next project at https://famcut.com.
At High Country Quilts we care deeply about community. With our experiences in retail, we know that a store is not only a place to shop but also a place for the community to gather and share. During this busy...

Hi! We’re Adam and Renee Wheaton, the new owners of High Country Quilts! For more than 40 years, we’ve owned and operated vacuum and sewing businesses. Following in Renee’s father’s footsteps after he retired from All Discount Vacuum and Sewing in Colorado...


Leave a comment