

We Love Our Quilting Community
At High Country Quilts we care deeply about community. With our experiences in retail, we know that a store is not only a place to shop but also a place for the community to gather and share. During this busy...


At its heart, a quilting hexagon template is a simple tool with a powerful job: to help you cut perfect, six-sided shapes from fabric. These precise pieces are the building blocks for some of the most intricate and beautiful quilt patterns out there.
Whether you're using a sturdy acrylic ruler, a simple paper piece, or a printable guide, the template's purpose is to ensure every single hexagon is identical. That uniformity is the real secret behind those perfectly aligned points and stunning geometric designs, like the timeless Grandmother's Flower Garden quilt.
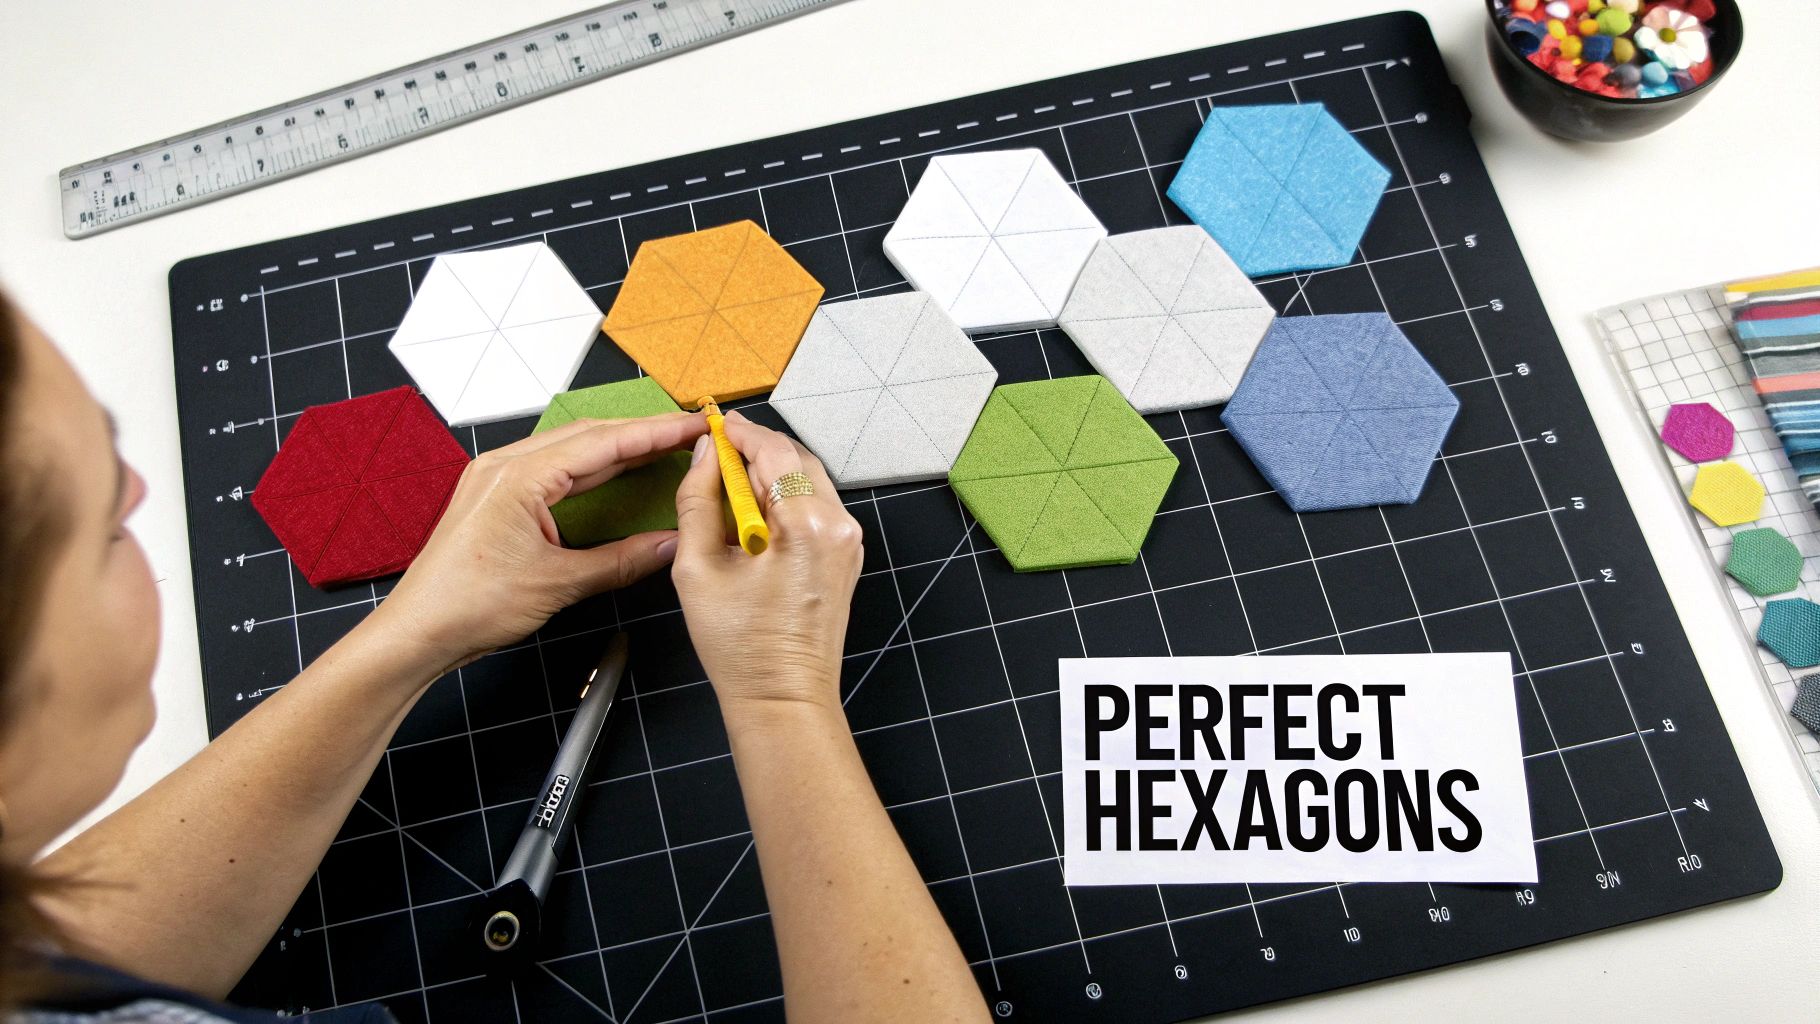
If you've ever been captivated by the interlocking beauty of a hexagon quilt, you've seen the magic of precision in action. The quilting hexagon template is the key to unlocking that magic, serving as the blueprint for every piece of fabric you cut. It guarantees accuracy from the very first snip.
This guide is here to walk you through everything, from the different kinds of templates you'll find to the best ways to piece them together. Think of using a template as more than just cutting; it's about setting yourself up for a successful, pucker-free finish.
A hexagon template is like the foundation of a house. If your foundation is measured and poured perfectly, everything you build on top of it will fit together just right. If it's off, you'll spend all your time trying to fix gaps and crooked walls—or in our case, mismatched points and bumpy seams.
Working with hexagons connects us to a long line of quilters. This classic shape has been a favorite for centuries, with the earliest known example of a hexagon patchwork quilt dating all the way back to 1770 in England.
The technique really took off in the 1830s. A major milestone was in 1835, when the popular Godey's Lady's Book published the first widely available pattern for a hexagon quilt, sharing detailed instructions for English Paper Piecing with a huge audience. You can explore the history of these traditional quilt patterns to see just how enduring this simple shape has been.
This guide will help you get comfortable with all things hexi. We'll cover:
By the time you're done reading, you’ll have the confidence and know-how to dive into your own gorgeous hexagon quilt.
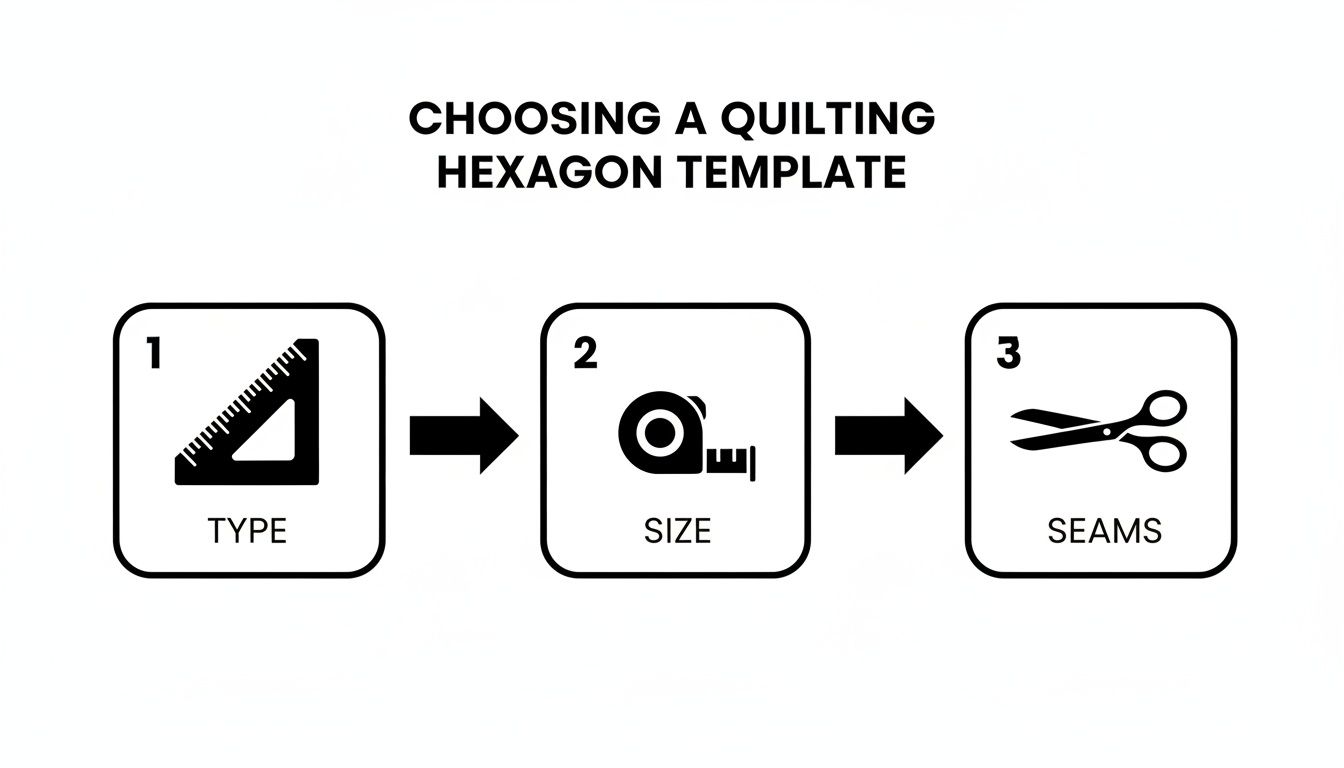
Picking the right quilting hexagon template is a lot like choosing the perfect paintbrush. The tool you land on will shape not just your final quilt, but your entire experience of making it. Are you planning a hand-sewn heirloom that will be passed down for generations, or a modern, machine-pieced quilt you want to finish this weekend?
Let's walk through the most common types. Think of them as different trails leading to the same gorgeous destination. Your personal style—hand-stitching versus machine, durability versus budget—will be your guide.
Most quilters find themselves deciding between sturdy acrylic templates and traditional paper pieces. They really are two different tools for two different jobs.
Acrylic templates are the workhorses for machine piecing. They're rigid, clear, and made to be used with a rotary cutter, which means you can slice through multiple layers of fabric in a flash. They almost always have the seam allowance built right in, so you can cut with confidence knowing every piece is the perfect size for sewing on your machine.
On the other side, you have paper templates, which are the heart and soul of English Paper Piecing (EPP). These are typically made of a lightweight cardstock, and you use them as a form to wrap and baste your fabric around. This technique is what gives EPP its signature precision, creating those razor-sharp points and perfectly matched seams that are a dream for hand-sewers.
Then there are printable templates, the go-to for anyone who loves a good DIY solution or needs an unusual size. You can find tons of them online, print them on cardstock, and cut them out at home. It’s a super affordable way to get started or to test-drive a few sizes before you commit to a set of acrylic or pre-cut paper pieces.
Pro Tip: Pay close attention to how a template is measured! Some are measured by the length of one finished side, while others are measured from point to point across the center. Getting this wrong can throw off the final size of your quilt, so always double-check.
The size of your hexagon makes a huge difference in your quilt's final look. Tiny hexies—think one-inch or smaller—create stunning, mosaic-like patterns that are incredible for detailed work. Go bigger with two or three-inch hexagons, and your project will come together much more quickly, giving you a great canvas to show off bold, beautiful fabrics.
Now, let's talk about the most important detail: the seam allowance. This is where people often get tripped up.
To help you decide, here’s a quick look at how these templates stack up against each other.
Choosing the right tool often comes down to weighing the pros and cons for your specific project. This table breaks down the key differences to help you find your perfect match.
| Template Type | Best For | Pros | Cons |
|---|---|---|---|
| Acrylic | Machine piecing, rotary cutting, speed | Durable, precise, reusable, fast for batch cutting | Higher initial cost, less portable for EPP |
| Paper (EPP) | English Paper Piecing, hand-sewing | Extremely precise, lightweight, perfect for on-the-go projects | Single-use (usually), requires basting, slower process |
| Printable | Custom sizes, budget projects, trying EPP | Very inexpensive, instantly available, infinitely customizable | Requires time to print and cut, less durable than other types |
| Rotary Rulers | Cutting strips for hexies, marking lines | Versatile, can be used for other shapes, marks multiple lines | Not a template for fussy cutting, may require more steps |
Ultimately, the best template really is the one that fits the project you have in mind.
For fast, machine-sewn quilts where you're cutting a lot of fabric at once, acrylic is your best friend. But for the quiet, meditative process of EPP, where every stitch is an act of love, nothing beats traditional paper pieces.
If you've ever marveled at the perfect, sharp points of a vintage hexagon quilt, you've seen the magic of English Paper Piecing, or EPP. It’s a classic hand-sewing technique that feels more like a meditative art than just stitching. Think of it as creating a beautiful mosaic, but with fabric.
The secret lies in wrapping each fabric piece around a sturdy paper template before sewing them together. This simple step is what guarantees those crisp seams and flawless points. It’s wonderfully forgiving for newcomers and a favorite portable project for quilters who love to stitch on the go. The paper acts as a guide and stabilizer, so every single hexagon holds its shape perfectly without any stretching or wonkiness.
The first step is always gathering your supplies. You'll need your chosen paper hexagon templates, fabric, sharp scissors, and either a fabric-safe glue stick or a needle and thread for basting.
You’ve got two main ways to do this, and honestly, the "best" method is just the one you enjoy most.
Once you have a little stack of beautifully basted hexies, the real fun begins—joining them together. The whipstitch is your best friend in EPP. It creates a seam that's both strong and almost invisible.
To start, place two basted hexagons with their right sides touching, making sure the edges are perfectly aligned. With a fine needle and thread that matches your fabric, make small, evenly spaced stitches that just catch the very edge of the folded fabric on both pieces. You’re sewing through the fabric folds, not the paper template inside.
Keep your tension nice and even. You don't want it so tight that the fabric puckers, but not so loose that you can see a gap. The goal is a seam that simply melts away when you open the pieces flat.
After you've stitched a few pieces together to form a "Grandmother's Flower" or another shape, you can start removing the papers from the hexagons in the middle. Gently pop the basting stitches or peel back the glued fabric edges and slide the paper template out. It's so satisfying!
For a deeper dive into the whole process, check out our complete guide on English Paper Piecing for quilts.
While there's a certain magic to the slow, meditative rhythm of hand-sewing, sometimes you just want to get a quilt top done. This is where your sewing machine comes in! Machine piecing hexagons is an incredible way to bring stunning quilts to life in a fraction of the time. What could be a years-long hand project might just become a weekend finish.
But let's be honest—this method comes with its own little puzzle: the Y-seam.
A Y-seam is exactly what it sounds like: it’s the point where three pieces of fabric meet, forming a perfect "Y" shape. With hexagons, this happens at every single corner where three points converge. The thought of sewing that tricky little intersection can be a bit daunting, but I promise, with the right approach and a good template, it's a skill you can absolutely conquer.
This is where specialized acrylic templates really shine. Many are designed with clipped or blunted corners, which are a game-changer. Those little details act as built-in guides, telling you exactly where to start and stop sewing to maintain your seam allowance. They prevent you from accidentally sewing into the next hexagon's path and help you get those points to line up beautifully.
Mastering the Y-seam isn't about complexity; it’s all about precision. The whole process boils down to sewing one seam, stopping, pivoting the fabric, and then sewing the next. It’s that simple.
Let’s walk through the steps for a frustration-free Y-seam:
By sewing each part of the "Y" on its own and pivoting at the corner, you sidestep all the puckers and bulk that can ruin your work. The payoff is a beautifully flat block with incredibly sharp points.
What if you're just not in the mood to tackle Y-seams? No problem. There are some brilliant workarounds that let you machine-piece your hexagons in simple, straight lines. The most popular trick is to sew your hexagons into diagonal rows first.
Instead of building out from a central flower, you just connect your hexagons edge-to-edge, creating long strips. Once you have a few of these rows made, you can sew the strips together. It creates a slight zig-zag seam, but it's far easier to handle than a true Y-seam.
For even better results when joining these long, potentially stretchy rows, a walking foot is your best friend. It helps feed both layers of fabric through evenly and prevents any shifting or stretching. You can find out more in our guide on how to use a walking foot for quilting.
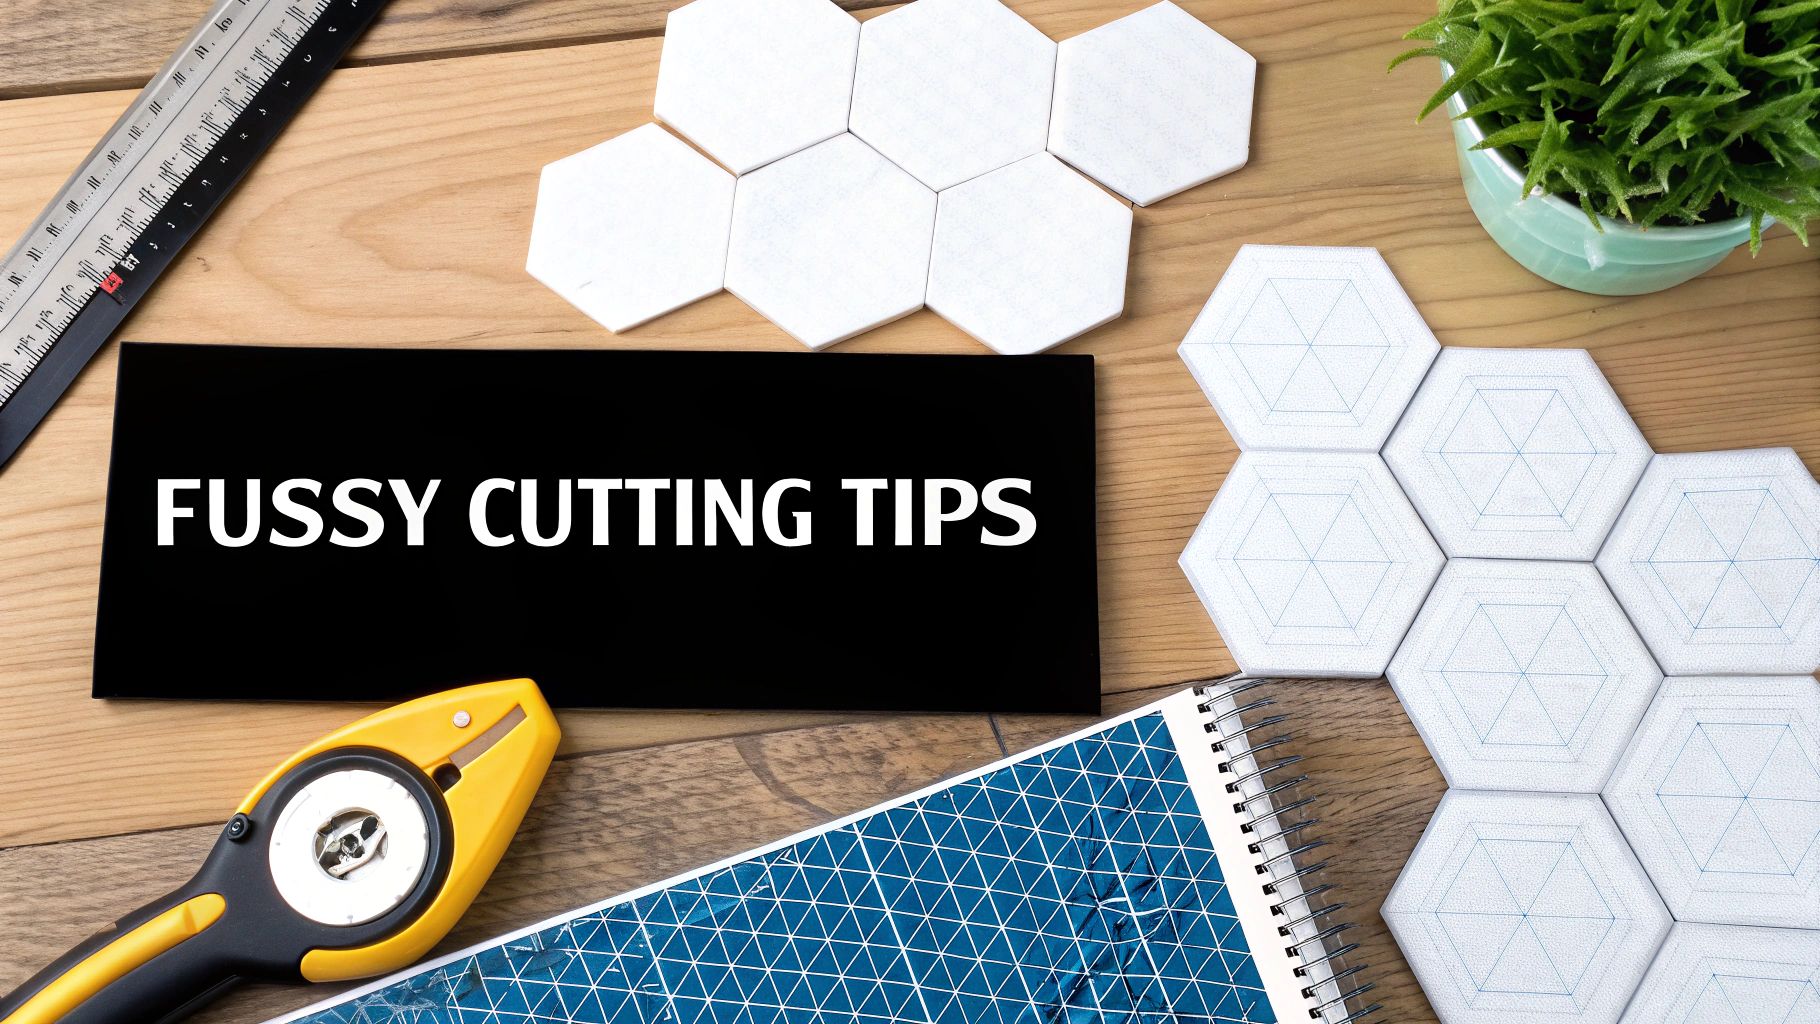
Once you’ve mastered the basics of piecing hexagons, the real fun begins. This is where you get to stretch your creative muscles and let your inner artist take over. One of the most powerful techniques in any hexie quilter's toolkit is fussy cutting.
Think of fussy cutting as precision quilting. Instead of randomly chopping up your fabric, you’re carefully centering your hexagon template over a specific part of the print. You might isolate a single rose, a perched bird, or a cool geometric detail. It’s this intentional placement that creates those jaw-dropping secondary patterns when you stitch the pieces together.
This is the secret behind those incredible kaleidoscope quilts. By cutting six identical motifs and joining them, you can make them radiate from a central point, forming a brand-new, symmetrical design. Imagine six tiny owls all looking inward—that’s the magic of fussy cutting! A clear acrylic template is essential for this, letting you see exactly what you're framing.
Your fabric choices are just as critical as how you cut them. The most dynamic hexagon quilts often play with a mix of large-scale prints, smaller blenders, and solid colors to create depth and guide the eye. Don't shy away from those "difficult" fabrics in your stash; a bold, oversized print that feels overwhelming elsewhere can become a show-stopping focal point in a hexagon flower.
When you're pulling fabrics and planning your layout, keep these ideas in mind:
A well-placed hexagon can act like a picture frame, highlighting the beauty of the piece next to it. Think about how each hexagon interacts with its neighbors to tell a cohesive color story.
The difference between a good quilt and a great quilt often comes down to the details. Perfectly matched points and a quilt top that lies flat are the ultimate goals. It all starts with the cut. Always use a sharp blade in your rotary cutter to get clean, crisp edges without any snagging. If you're looking for an upgrade, check out our guide to the best rotary cutters for quilting.
As you sew, keep your thread tension consistent to avoid any puckering along the seams. Finally, a good press can work wonders. Many English Paper Piecing experts swear by pressing seams to one side, swirling them around each intersection. This simple trick reduces bulk and helps the block lie beautifully flat.
Jumping into a new quilting technique always comes with a few questions. Trust me, we've all been there! Getting a handle on these little details beforehand can make all the difference, turning a potentially tricky project into a genuinely fun one. Let's tackle some of the most common things people ask when they start working with hexagon templates.
If you're just dipping your toes into the world of "hexies," I always recommend starting with a template that measures 1.5 to 2 inches on each side. It's the perfect happy medium.
This size is substantial enough that you won't feel like you're fumbling with tiny, delicate pieces, but it’s not so big that it becomes awkward to handle. Anything smaller than an inch can get really fiddly and requires a ton of precision, which can be frustrating when you're learning.
Your first hexagon project should be all about building confidence and enjoying the process. A 1.5-inch hexie lets you see your quilt top come together quickly, which is incredibly motivating.
Ah, the great pressing debate! The truth is, there isn't one right answer—it really comes down to how you're piecing your hexagons together.
Still not sure? Just grab some scrap fabric and make a little seven-hexagon flower. Press one half with swirled seams and the other with open seams. You'll quickly see which method you prefer.
If you're using paper templates for EPP, our in-depth guide can help you get the hang of it. You can learn more about how you paper piece and pick up some great tips.
Here at High Country Quilts, we know that the right advice is just as crucial as the right tools. We invite you to explore our templates, fabrics, and classes to get everything you need for your next quilting adventure. Come see what we have to offer at https://hcquilts.com.
At High Country Quilts we care deeply about community. With our experiences in retail, we know that a store is not only a place to shop but also a place for the community to gather and share. During this busy...

Hi! We’re Adam and Renee Wheaton, the new owners of High Country Quilts! For more than 40 years, we’ve owned and operated vacuum and sewing businesses. Following in Renee’s father’s footsteps after he retired from All Discount Vacuum and Sewing in Colorado...


Leave a comment