

We Love Our Quilting Community
At High Country Quilts we care deeply about community. With our experiences in retail, we know that a store is not only a place to shop but also a place for the community to gather and share. During this busy...


Ever wonder how seasoned quilters get those perfectly straight, pucker-free stitch lines? More often than not, the secret weapon is a walking foot. If you're ready to tackle quilting your own projects, this tool is an absolute game-changer.
Let's break down what makes this foot so special. A standard presser foot simply glides over your fabric, holding it down while the feed dogs underneath pull the bottom layer through. This works great for two thin layers of cotton, but a quilt sandwich is a different beast entirely.
A walking foot, on the other hand, has its own set of feed dogs on top. Think of it like giving your sewing machine all-wheel drive. The machine’s feed dogs pull the backing, and at the exact same time, the walking foot’s feed dogs grab and pull the quilt top.
This synchronized movement is the key. It ensures all three layers of your quilt—top, batting, and backing—move as a single, cohesive unit. This simple yet brilliant mechanism is your best defense against the shifting, stretching, and puckering that can otherwise plague a project.
Also known as an "even feed foot," this tool is essential for managing the sheer bulk of a quilt sandwich. By feeding the top and bottom layers in unison, it dramatically reduces fabric creep and allows for incredibly precise stitching, even across the thickest sections.
The efficiency gains are huge. Quilters often find it cuts down their quilting time by 30-50% compared to wrestling with a standard foot. In fact, some report up to a 70% decrease in frustrating fabric shifting. You can dig deeper into the history and mechanics of the walking foot on Wikipedia.
Ultimately, it means you spend less time fighting with your quilt and more time enjoying the process of creating beautiful, consistent stitches. It’s what turns a bulky, unwieldy project into a smoothly finished masterpiece.
Before we dive into how to use it, it's helpful to see a direct comparison of what makes this foot so different from the one that probably lives on your machine right now.
| Feature | Walking Foot | Standard Presser Foot |
|---|---|---|
| Feeding Mechanism | Has its own feed dogs to grip and move the top fabric layer. | A smooth sole glides over the fabric; only bottom feed dogs move fabric. |
| Best For | Quilting through multiple layers, thick fabrics, matching plaids/stripes, and slippery materials (vinyl, minky). | General sewing, piecing, hemming on 1-2 layers of standard fabric. |
| Result | Even, pucker-free stitches. Prevents layers from shifting. | Can cause the top layer to stretch or shift on thick or slippery projects. |
| Stitching Type | Primarily for straight or gently curving lines. | Versatile for straight stitches, zig-zag, and other decorative stitches. |
This table really highlights why the walking foot isn't just an accessory—it's the right tool for the job when it comes to quilting.
My Two Cents: Don't just save your walking foot for quilting! It's my go-to for attaching binding, perfectly matching plaids, or sewing with tricky fabrics like knits and velvets. Anytime you need to keep layers from sliding around, this foot is your best friend.
When you go to buy a walking foot, you'll likely see two common styles: open-toe and closed-toe.
Closed-Toe: This is the classic style with a solid plastic bar across the front. It’s sturdy and great for general straight-line quilting where you don't need to follow a precise line.
Open-Toe: This version has a wide "C" shaped opening in the front, giving you a much clearer, unobstructed view of your needle.
Personally, I almost always reach for my open-toe foot. That extra visibility is a lifesaver for detailed work like stitching-in-the-ditch, echo quilting, or following a marked design. While either will get the job done, the open-toe version gives you a serious advantage in precision.
Picking the right walking foot for your machine doesn't have to be a headache. It really all boils down to one simple thing: making sure the foot matches your sewing machine's shank type. Your machine is almost certainly either a low shank, high shank, or slant shank model.
If your machine's manual is long gone, don't worry. You can figure it out with a quick measurement. Just lower your presser foot and measure the distance from the center of the screw that holds the foot on, down to the base plate. A low shank is about ½ inch, while a high shank is closer to 1 inch.
Once you've got the correct foot in hand, installing it is a pretty simple mechanical task. After you do it once or twice, it'll become second nature.
First things first: turn off your sewing machine. Safety is always the priority.
Now, you'll need to unscrew and take off whatever presser foot is currently on your machine, along with the ankle (the little snap-on adapter). Your new walking foot will attach directly to the presser foot bar using that same screw.
The most important step—and the one people sometimes miss—is making sure the little C-shaped lever (or fork) on the side of the walking foot is positioned correctly. This lever must sit on top of the needle clamp screw. It's this physical connection that makes the magic happen, allowing the foot's feed dogs to move in perfect time with your machine's needle. If that lever isn't engaged, your foot simply won't "walk."
This infographic gives you a great visual of how the walking foot’s feed dogs work with your machine's feed dogs to evenly pull the quilt sandwich through.
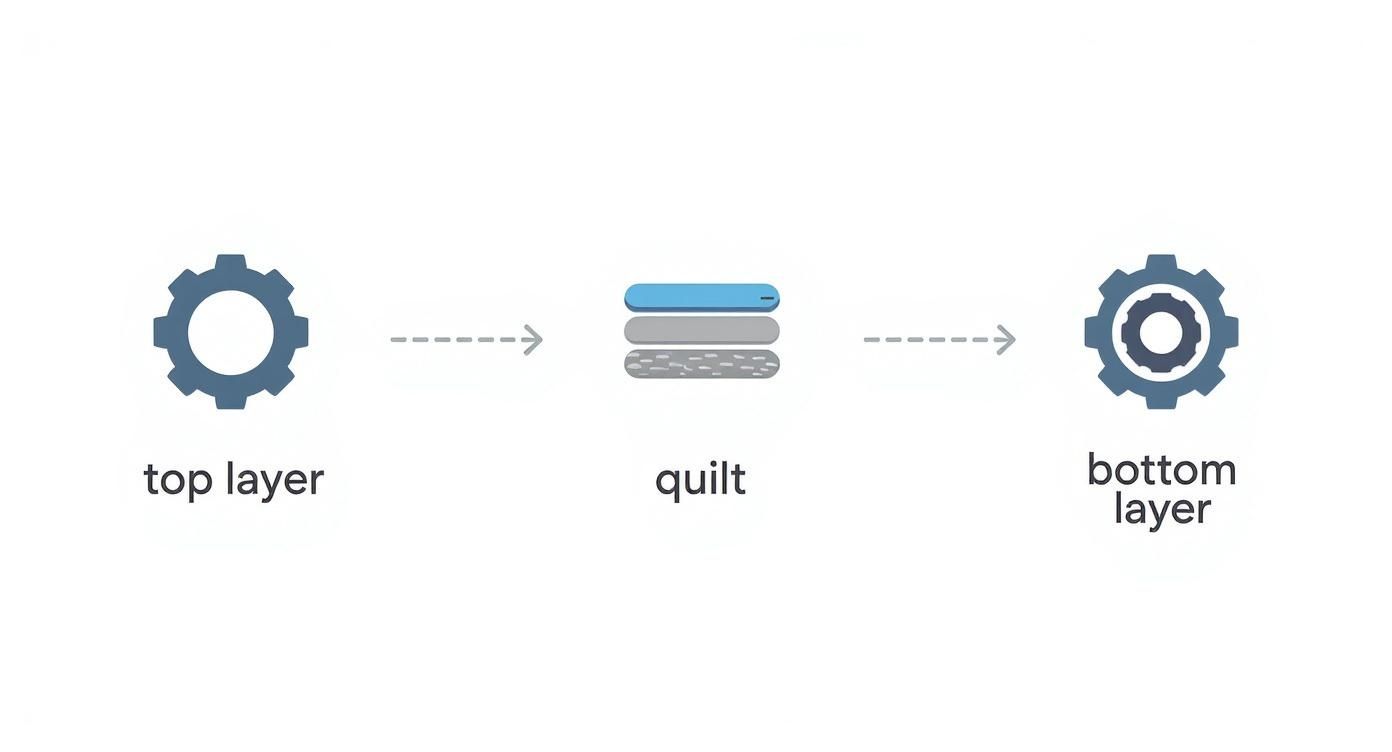
This synchronized movement is precisely what stops your fabric layers from shifting around and causing those frustrating puckers.
Pro Tip: Before you tighten the screw all the way, give the handwheel a slow turn toward you. Watch that C-shaped lever closely. You should see it move up and down with the needle bar. This little check takes two seconds and confirms you've installed it correctly before you even think about sewing a stitch.
With the foot securely attached, the final step is to re-thread your machine. A clean, unobstructed thread path is non-negotiable for good stitch quality. If you'd like a quick refresher, we have a helpful guide on how to thread a sewing machine that will get you set up perfectly. A little extra care here saves you from a lot of potential frustration later.
Now that the hardware is sorted, you're ready to prep your quilt and dial in your machine settings for some beautiful, pucker-free quilting.
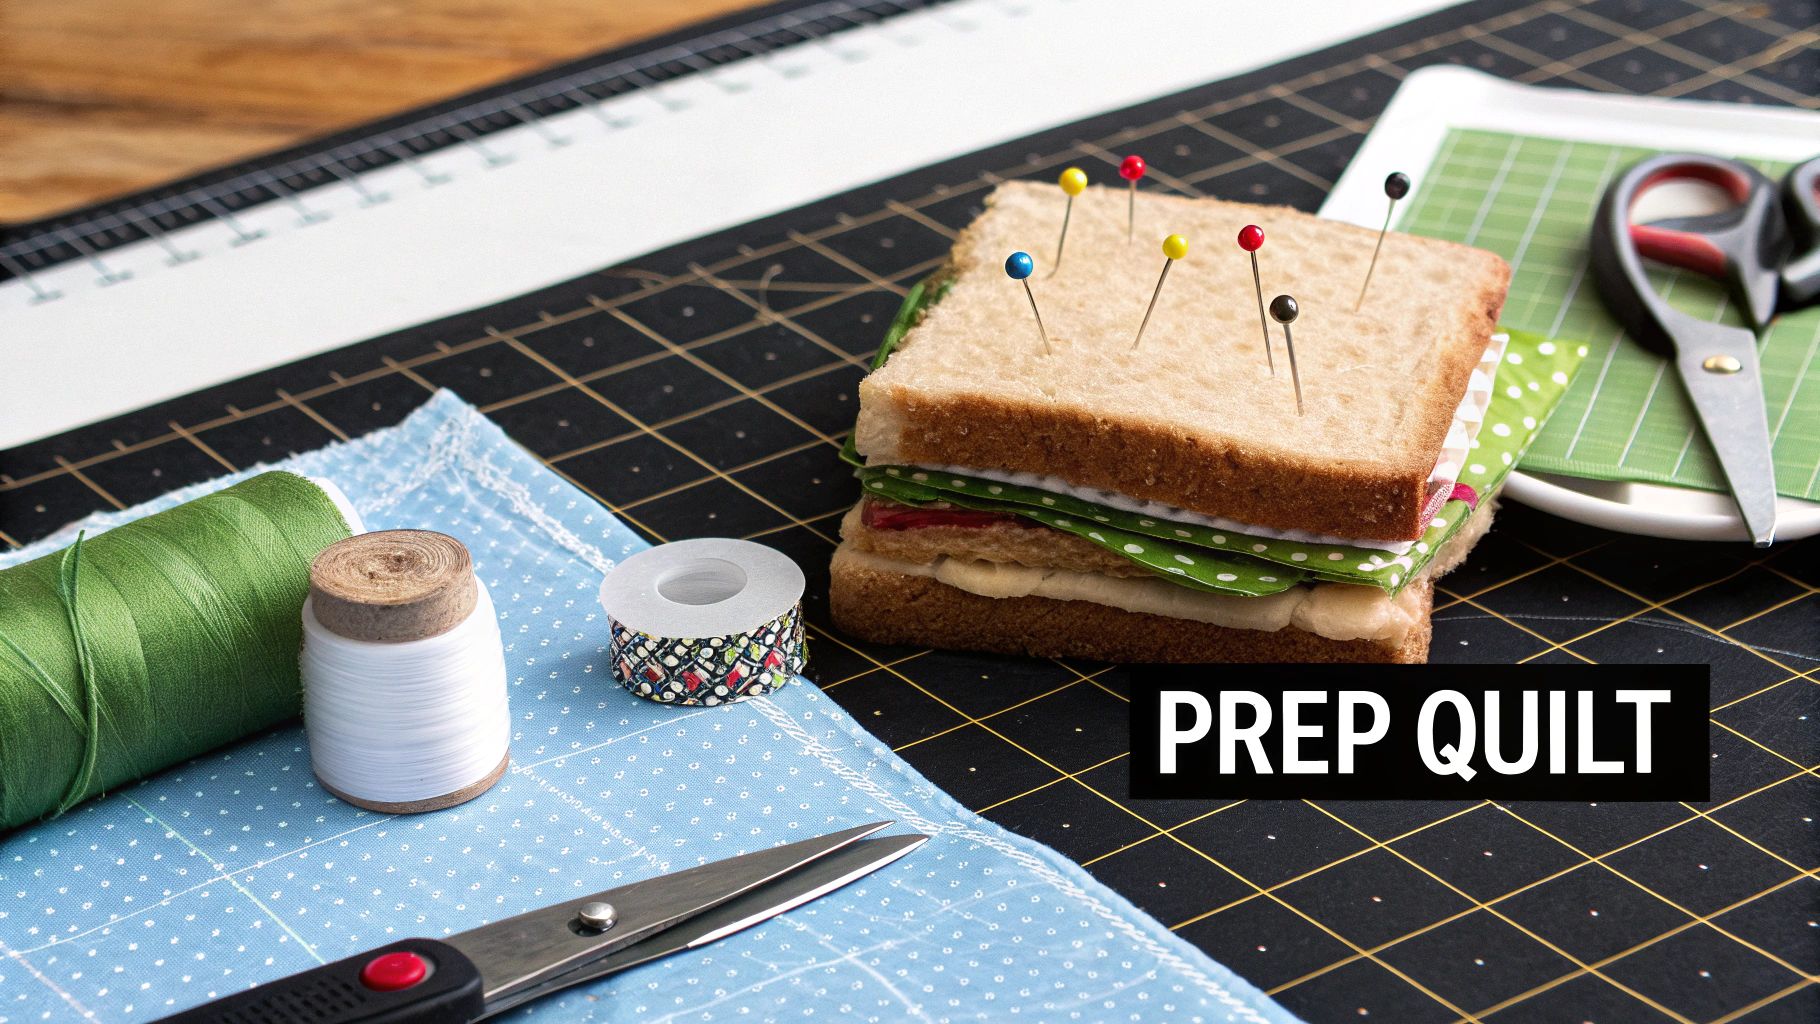
Trust me, a beautiful finish starts long before your walking foot ever touches the fabric. The secret to those perfectly even, professional-looking stitches is all in the prep work. Skip this, and you're in for a frustrating time. The first and most important job is to secure your quilt sandwich.
This process is called basting, and it's what keeps your quilt top, batting, and backing from shifting around while you work. There are a few ways to do it, and the best one for you really comes down to personal preference and the project at hand.
What works for a small wall hanging might not be the best choice for a king-sized quilt. Let's look at the main options.
If you want to explore these techniques more, our guide on how to baste a quilt breaks down the pros and cons of each one, helping you figure out what’s right for your project.
With your quilt basted and ready, let's get your sewing machine set up for success. A few small tweaks here make all the difference.
First, your needle. I always recommend starting a new quilting project with a fresh needle. For most quilt sandwiches, a 90/14 Quilting needle is your best bet. It has a slightly tapered point designed specifically to punch through multiple layers without shredding your fabric or causing skipped stitches.
Next, let's talk stitch length. When we're piecing a quilt top, we use a pretty short stitch. For quilting, you need to go longer. I usually set my machine somewhere between 3.0mm and 3.5mm. This longer stitch allows the thread to sit nicely on top of the quilt, gives a much more polished look, and prevents the fabric from puckering under the needle.
Taking a few extra minutes to baste well and adjust your machine settings is non-negotiable. It’s what allows the walking foot to do its job properly, preventing frustrating fabric bunching and skipped stitches down the line.
This prep becomes even more critical when you're working with lofty batting. In fact, using a walking foot can reduce common quilting frustrations like fabric bunching and even needle breaks by 20-40% when your batting is thicker than one centimeter. It really shows how much the right tool and proper prep work together.
Alright, now for the best part—actually quilting! Once your walking foot is attached and your quilt sandwich is ready, you'll feel the difference immediately. That old struggle of pushing and pulling your quilt through the machine transforms into a smooth, controlled glide. This is where the walking foot really shines, helping you lay down beautiful, even stitches you can be proud of.
Let's dive into some of the most practical and popular ways to use it.
One of the first techniques most quilters learn, and for good reason, is “stitching in the ditch.” It’s exactly what it sounds like: quilting directly inside the seam lines of your pieced quilt top. Your stitches will nestle right into that little "ditch" created where the fabric pieces meet, making them almost disappear.
This method is fantastic for securing your quilt layers without distracting from your beautiful piecing. It adds a lovely, subtle texture and is the perfect way to build confidence. If you want a deeper dive, we have a whole guide on how to master quilting stitch-in-the-ditch.
Ready to move beyond the seams? Creating a grid or perfectly spaced parallel lines is surprisingly simple with the right tool. Your walking foot should have come with a small, L-shaped metal bar known as a quilt guide. This little gadget is your secret weapon for even spacing, and it means you don't have to mark up your entire quilt top.
Look for a small hole on the back of the walking foot's ankle. Slide the guide bar in there and adjust it to your desired width—maybe an inch from the needle. After you've sewn your first line, just keep the guide bar aligned with that stitch line as you sew the next one. It acts as a perfect visual reference, ensuring every single line is parallel.
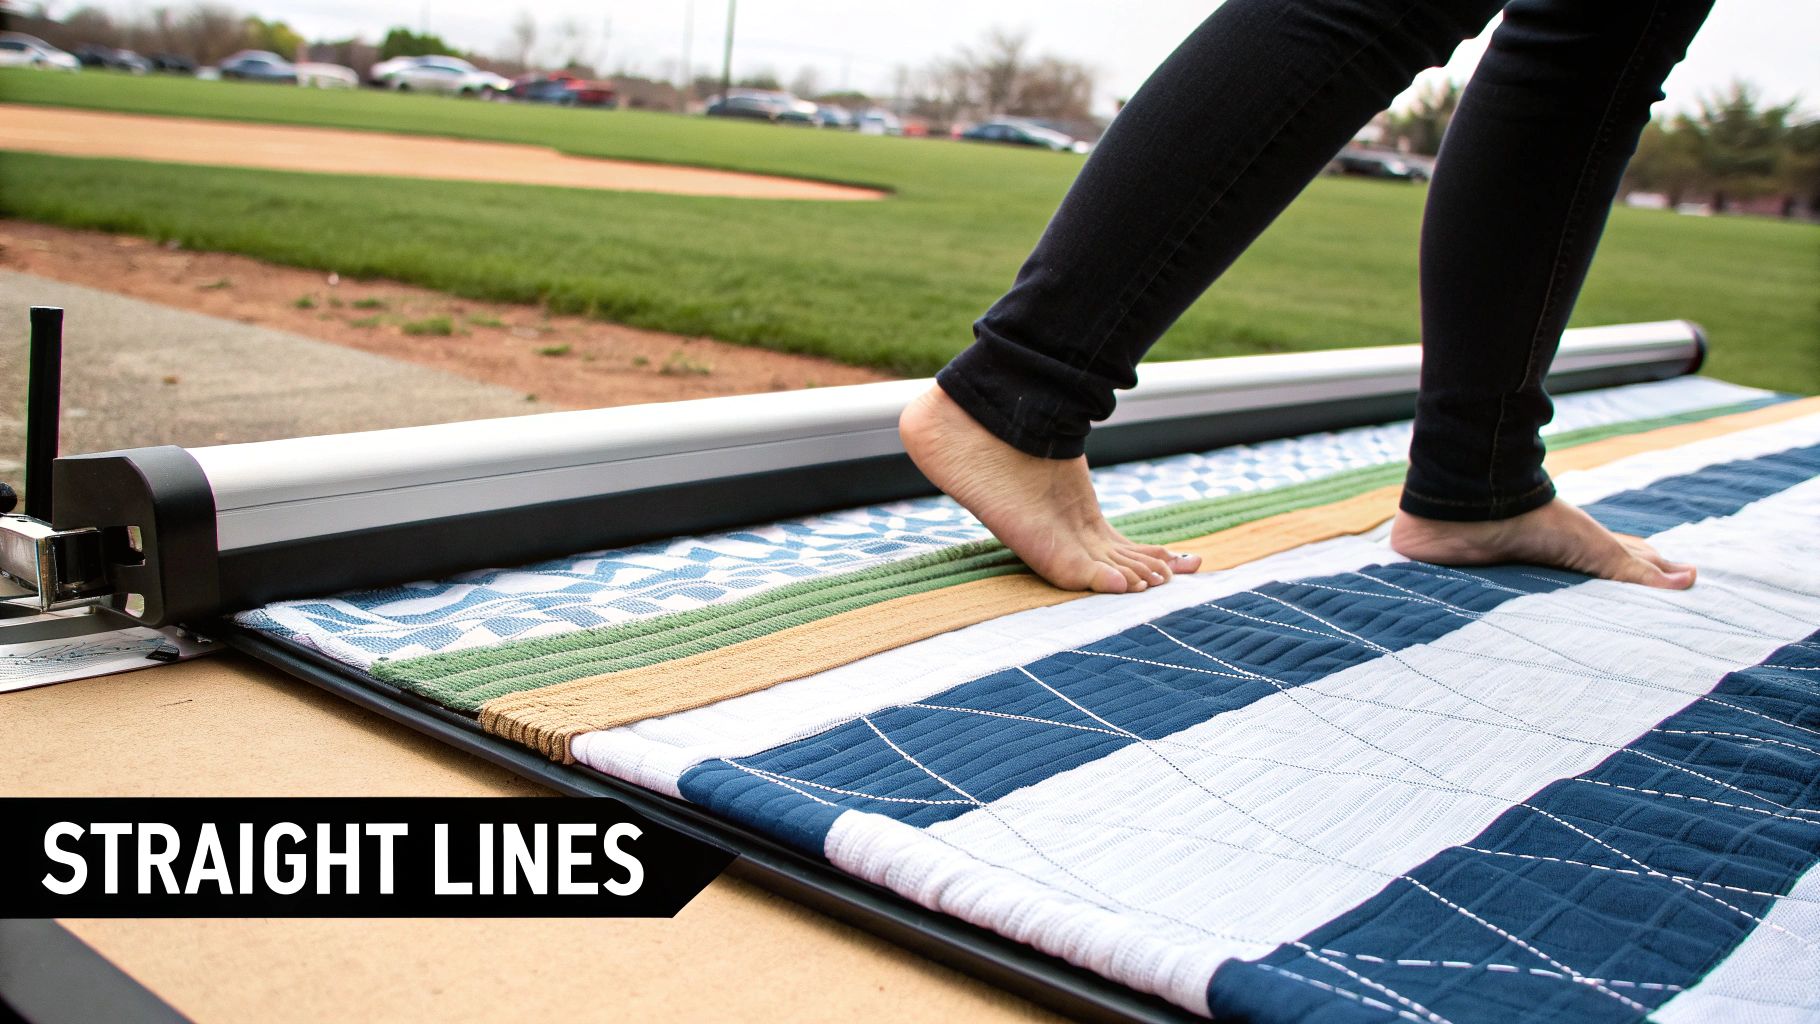
A Quick Tip on Workflow: Always, always start quilting from the center of your quilt and work your way out. This is a non-negotiable for me. It methodically pushes any extra fabric or fullness toward the edges, which is the single best way to prevent those dreaded puckers from showing up in the middle of your quilt.
Let’s be honest, guiding a large quilt through a home sewing machine can feel like a bit of a workout. The most important thing is to support the quilt’s weight. Never let it hang off the side of your table; the drag will pull on your needle and lead to skipped stitches or wonky tension. I find it easiest to roll up the side I'm working on so it can fit through the machine's throat, while the rest of the quilt is bunched up and supported on the table.
When it comes to starting and stopping your quilting lines, you need a way to lock those stitches without creating bulky, noticeable knots. Here are my two go-to methods:
Tools like the walking foot were game-changers, helping to fuel the rise of machine quilting back in the 1990s by finally solving the problem of fabric control. This innovation contributed to a 40-60% increase in machine quilting participation. It's no surprise that today, walking feet make up 20-25% of all quilting accessory sales in major markets.
Even with the best tools, you can run into a few snags. Here are some of the most common issues quilters face with walking foot quilting and how to fix them.
| Problem | Potential Cause | Solution |
|---|---|---|
| Puckered Fabric | Tension is too tight, or you're pushing/pulling the quilt. | Lower your top thread tension slightly. Let the walking foot do the work—your job is to guide, not shove. |
| Skipped Stitches | The needle is old, dull, or the wrong size/type. | Change to a new needle. For quilting, a 90/14 Topstitch or Quilting needle is a great choice. |
| Uneven Stitch Length | Inconsistent sewing speed. | Try to maintain a steady speed. If your machine has a speed control slider, use it to set a comfortable pace. |
| Wavy Seams | The quilt is dragging off the table, pulling on the fabric. | Ensure the entire weight of the quilt is supported on your sewing table or on your lap. |
Don't get discouraged if things aren't perfect right away. Every quilter has a learning curve, and mastering these little adjustments is part of the process. With a bit of practice, you’ll be quilting straight lines like a pro.
https://www.youtube.com/embed/CPpZCLWB2nk
Once you've gotten the hang of stitching in the ditch and sewing straight lines, the real fun begins. It’s easy to think of a walking foot as a one-trick pony, but that couldn’t be further from the truth. Moving beyond simple parallel lines is where you can really start to add some incredible texture and a professional finish to your quilts.
A lot of quilters get stuck thinking a walking foot is only for straight lines, but it's surprisingly versatile. With just a little practice, you can quilt beautiful grids, sharp cross-hatching, and even gentle, flowing curves. These designs give your quilt top a gorgeous, high-end look without ever having to drop your feed dogs for free-motion quilting. It all comes down to planning your design and learning how to steer the quilt sandwich smoothly.
When you're ready to tackle something more intricate than echo quilting, you'll need a good roadmap. Marking your quilt top beforehand gives you clear lines to follow, which is the secret to getting those precise, evenly spaced stitches that make a design pop. The trick, of course, is using a marking tool that disappears when you're done.
Here are a couple of my go-to methods for non-permanent marking:
The best quilting designs can fall flat without the right thread. Choosing a thread that either complements your fabric or provides a bold contrast can completely transform the finished quilt. If you're not sure where to start, we have a whole guide on picking the best thread for machine quilting.
Your walking foot is an absolute lifesaver when you're working with fabrics that love to misbehave. Think of slippery minky, stretchy knits, or even cuddly flannel—these materials are notorious for shifting and puckering under a standard presser foot. The walking foot’s even-feed action gently grips that shifty top layer, keeping it perfectly in sync with the bottom layer and preventing it from creeping.
Finally, one of the biggest improvements you can make has nothing to do with the foot at all—it’s about your speed. I know it’s tempting to floor it, but slowing down is a total game-changer, especially for walking foot quilting. A slower, more deliberate pace gives you so much more control when you're turning a corner or trying to follow a gentle curve.
Just remember, your only job is to guide the quilt, not to push or pull it. The walking foot and the machine's feed dogs do all the heavy lifting. Your hands are just there to steer. The moment you stop fighting the machine and let it do its job is the moment you unlock perfectly straight lines and beautiful, even stitches.
Even when you've done all your prep work, jumping into a new quilting technique always brings up a few questions. When it comes to using a walking foot, I see the same handful of issues pop up for quilters all the time. Let’s walk through them so you can get back to your machine with confidence.
One of the first things people ask is if this foot is a one-trick pony, just for quilting. Absolutely not! Your walking foot will quickly become one of the most versatile tools in your sewing room.
Any time you're trying to keep multiple layers from shifting, this is the foot to reach for. It's a lifesaver for matching plaids and stripes perfectly or getting a crisp, even finish when attaching binding. It also tames notoriously difficult fabrics like vinyl, leather, minky, or slippery satins that love to creep and slide all over the place.
It’s a quilter’s nightmare: you’re cruising along, and then you see it—a frustrating line of skipped stitches. Don't worry, this is almost always an easy fix.
Nine times out of ten, the problem is a dull or slightly damaged needle. My best advice? Always, always start a new quilting project with a fresh needle. A 90/14 Quilting or Topstitch needle is usually the perfect choice.
If a new needle doesn't solve it, double-check how you attached the foot. That little C-shaped arm on the walking foot must be sitting securely on top of the needle clamp screw. That’s the magic connection that makes the whole thing work. If it's not engaged, you're going to have problems. And remember, your job is to guide the quilt, not shove it. Pushing or pulling the fabric can actually bend the needle just enough to cause a skip.
This is a big one, and it causes a lot of confusion. People wonder if they should drop the feed dogs like they would for free-motion quilting. The answer is a hard no.
Never, ever drop your feed dogs when using a walking foot. The foot is specifically designed to work with your machine's feed dogs. The little teeth on the foot grab the top fabric while the machine's feed dogs grab the bottom, moving everything together in perfect time. Dropping them defeats the entire purpose.
Finally, if your stitches just look... off, it might be a tension issue. Puckering on the back or little loops on the top are tell-tale signs. A few small adjustments usually clear this right up. For a more detailed guide on getting it just right, check out our post on how to fix sewing machine tension.
Knowing how to handle these common hiccups can save you a ton of frustration and make your quilting experience so much more enjoyable. A little tip: keep a small brush handy to clear lint out of the foot’s mechanism. It'll keep it running like a dream for years.
At High Country Quilts, we're here to support your creative journey with the best tools, fabrics, and expertise. Explore our selection and get inspired at https://hcquilts.com.
At High Country Quilts we care deeply about community. With our experiences in retail, we know that a store is not only a place to shop but also a place for the community to gather and share. During this busy...

Hi! We’re Adam and Renee Wheaton, the new owners of High Country Quilts! For more than 40 years, we’ve owned and operated vacuum and sewing businesses. Following in Renee’s father’s footsteps after he retired from All Discount Vacuum and Sewing in Colorado...


Leave a comment