

We Love Our Quilting Community
At High Country Quilts we care deeply about community. With our experiences in retail, we know that a store is not only a place to shop but also a place for the community to gather and share. During this busy...


English paper piecing is a time-honored hand-sewing technique that involves wrapping fabric around paper templates and then stitching those shapes together. It's the secret behind some of the most stunning and intricate geometric patterns you've ever seen, like the classic Grandmother's Flower Garden. The real magic is in the incredibly crisp, perfect points you can achieve.
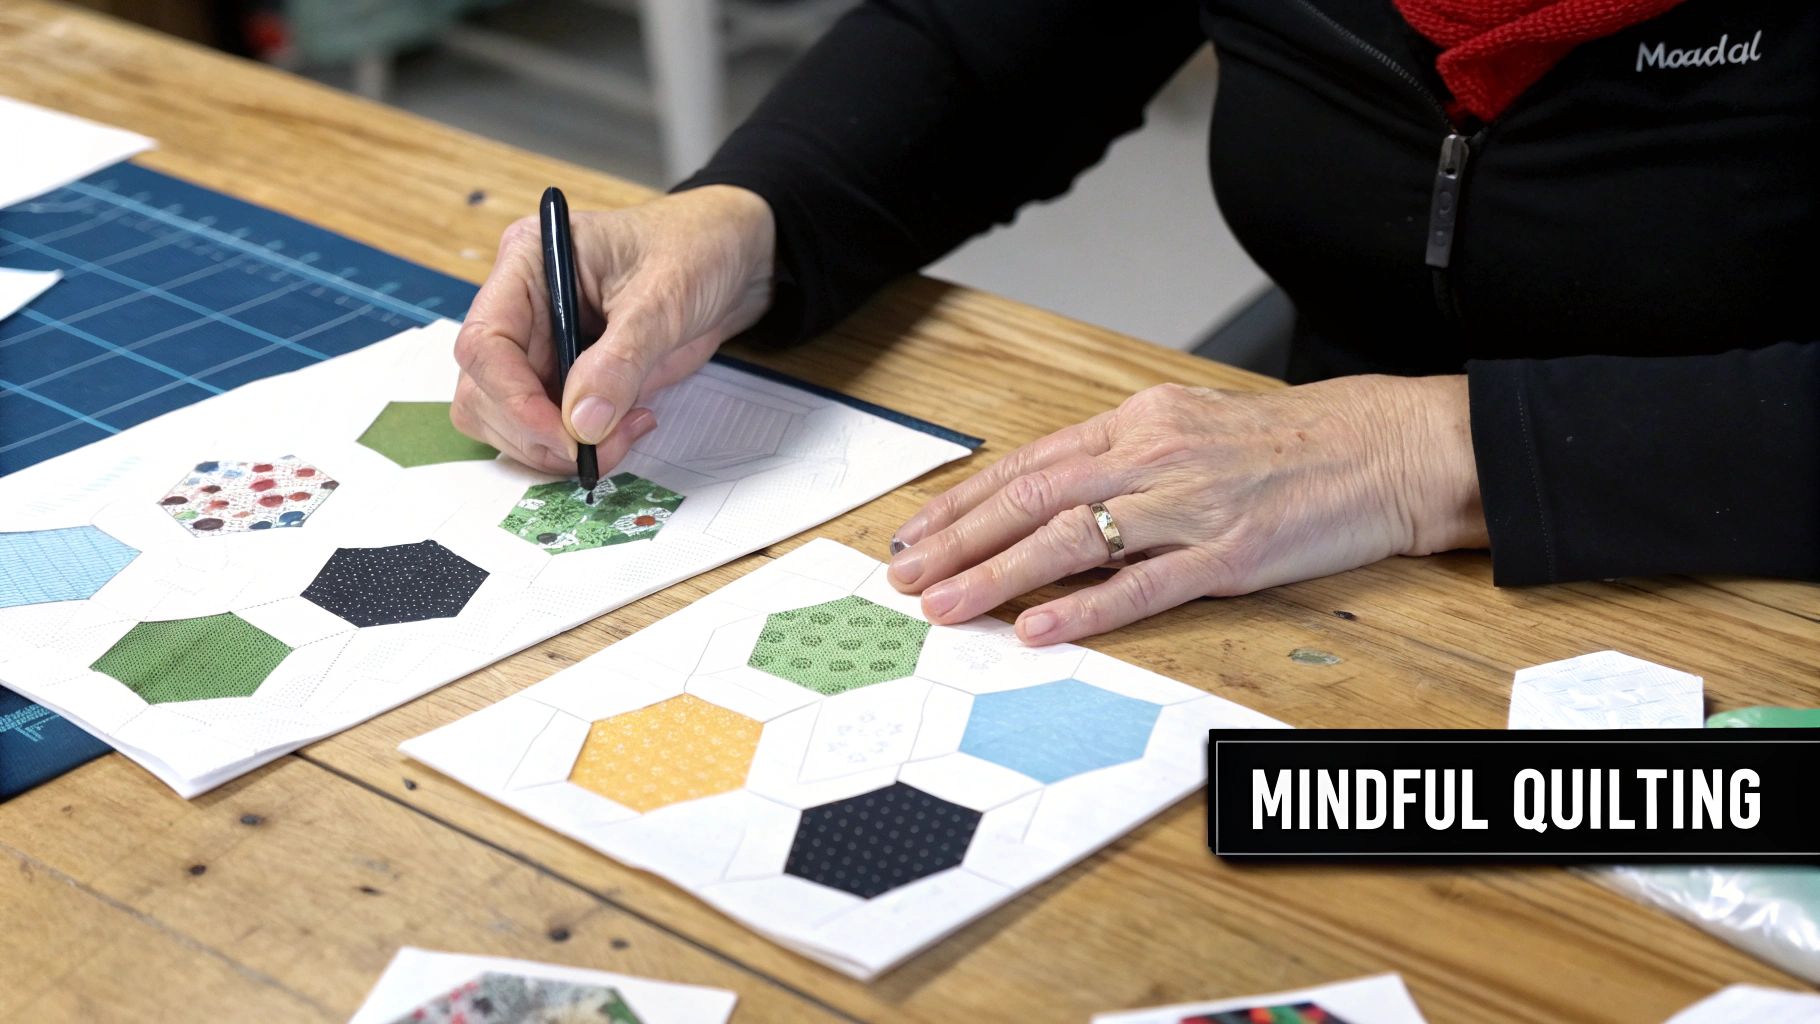
In a world of high-speed sewing machines, you might wonder why anyone would choose to sew by hand. But the slow, steady rhythm of English paper piecing for quilts—often called EPP—offers a uniquely satisfying experience. It's more than just another quilting method; it’s a mindful, relaxing practice that connects us to a long history of craftsmanship.
The roots of EPP go way back, with examples found in England as early as the 1770s. Back then, paper was a valuable resource, so quilters made their templates from whatever they could find—old letters, newspapers, even catalogs. This resourceful history adds a layer of heritage to every stitch. You can dive deeper into its origins and see how the first hexagon pattern was published in Godey’s Lady’s Book in 1835 on Faith and Fabric's blog.
So, why is this old-school technique still so popular today? A big part of the appeal is how well it fits into modern life.
EPP is incredibly portable. I can't tell you how many times I've tucked a small project bag into my purse to stitch on the go—in waiting rooms, on road trips, or just sitting on the couch. It’s the perfect "slow stitching" craft that provides a much-needed break from our screens.
Modern quilters are drawn to EPP for a few key reasons:
EPP isn't just about the finished quilt; it's about the journey of creating it. Each tiny stitch is a moment of care, resulting in a true heirloom piece that tells a story.
This timeless craft continues to inspire quilters today, bridging generations of makers and transforming simple fabric scraps into breathtaking works of art, one tiny piece at a time.
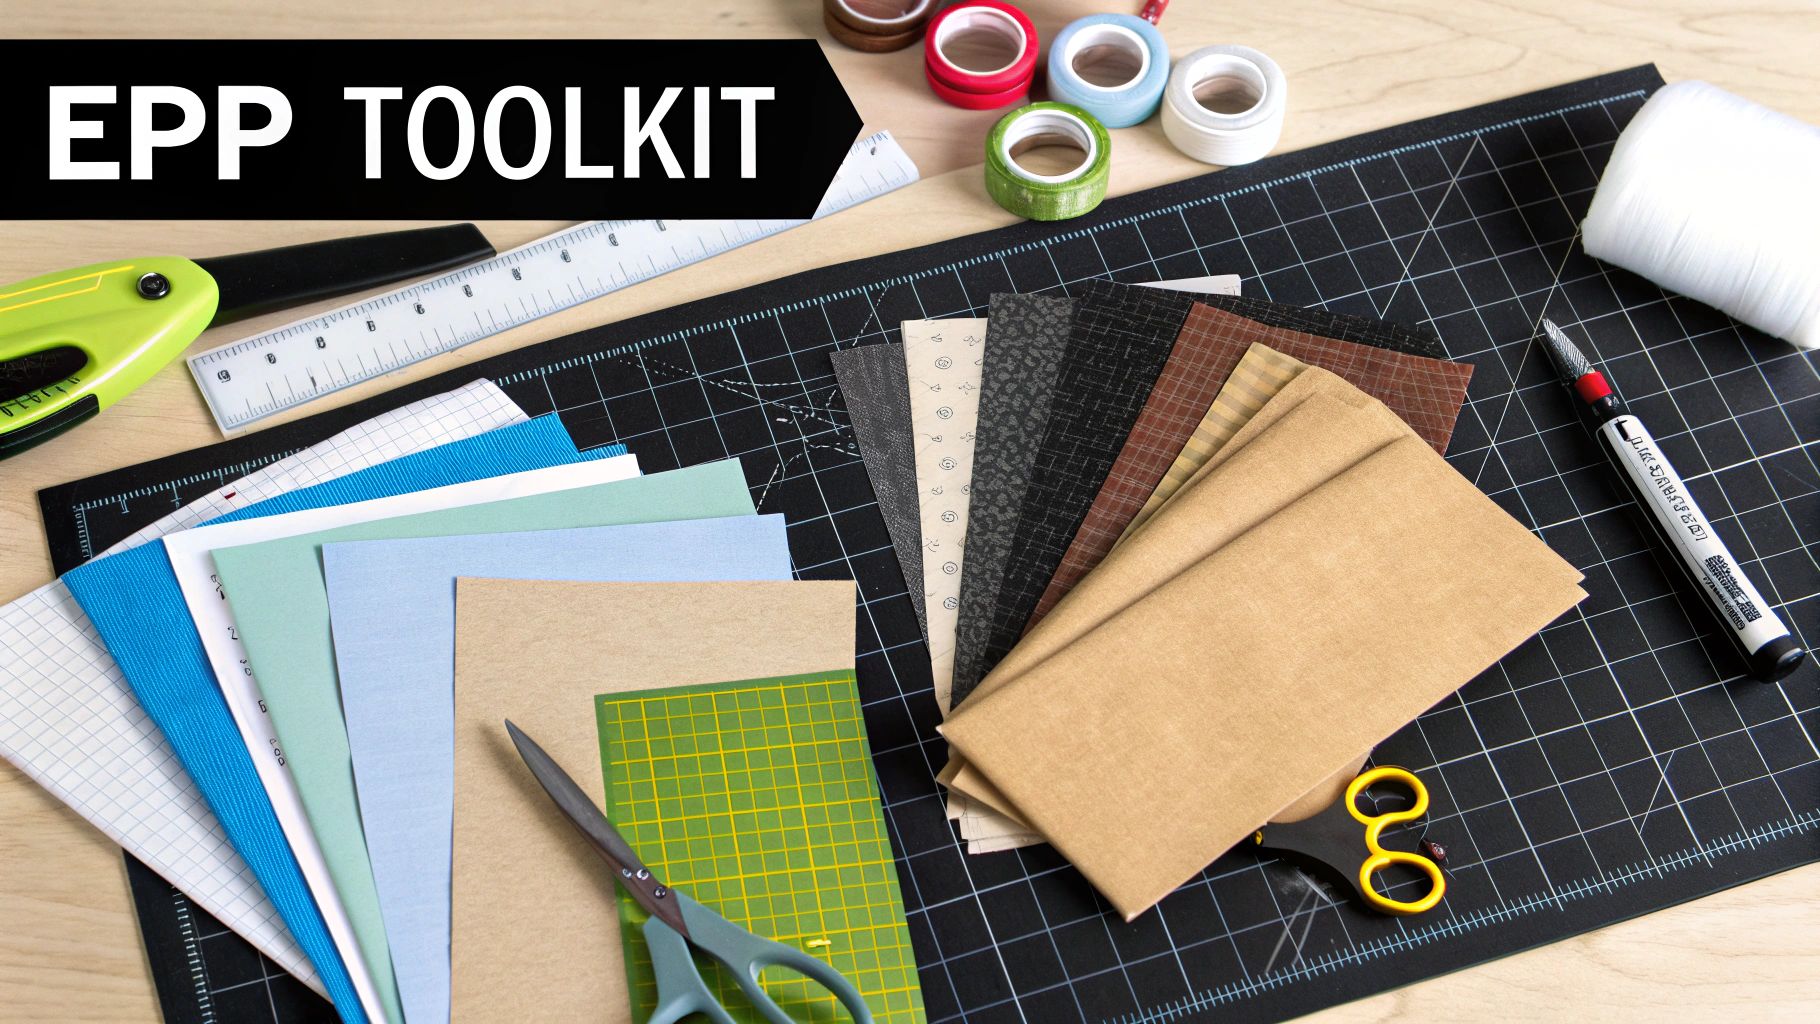
Let's talk tools. One of the best parts of English paper piecing for quilts is that you don’t need a sewing machine or a mountain of expensive gear. Your entire project kit can fit into a small pouch, making it perfect for stitching on the go.
But while the list is short, choosing the right tools makes a world of difference. Getting this right from the start will save you a lot of headaches later.
Your project really boils down to two key ingredients: fabric and the paper templates. For fabric, stick with a good quality 100% quilting cotton. It behaves beautifully—it’s stable, presses well, and holds a crease like a dream, which is crucial for getting those sharp points.
A little tip on fabric selection: small- to medium-scale prints are your friends here. Large, sprawling motifs tend to get chopped up and lost when you're working with small EPP shapes.
Now for the smaller gear. These are the items that will make your stitching precise and, frankly, much more enjoyable.
Basting is how you’ll wrap your fabric securely around the paper templates before you stitch them together. There are two main camps here: thread basters and glue basters. I’ve spent countless hours doing both, and each has its place.
Glue basting has become my go-to for its speed and razor-sharp results. A simple fabric-safe glue pen can secure your edges in seconds, creating incredibly crisp, flat pieces to work with.
For those tiny, intricate shapes, a liquid fabric glue with a precision applicator is a fantastic tool. Something like Roxanne Glue-Baste-It gives you pinpoint control for a secure hold that washes out completely when you're done.
Pro Tip: Less is more with glue! Just a few tiny dots of glue on the paper piece (not the fabric) are all you need. If you go overboard, it can make removing the papers a real chore later.
Let's break down the common ways to prep your pieces. There’s no single “right” way—it’s all about finding what feels best for you and your project.
| Preparation Method | Pros | Cons | Best For |
|---|---|---|---|
| Glue Basting | Fast and efficient. Creates very flat, sharp edges. Portable. | Requires a glue pen or liquid glue. Can make paper removal tricky if overused. | Beginners, projects with lots of small pieces, and anyone who values speed. |
| Thread Basting | Only requires a needle and thread. Papers are very easy to remove. | Slower than glue basting. Can sometimes create slightly softer edges. | Traditionalists, projects with larger pieces, or when you don't have glue on hand. |
| No Basting | Skips the prep step entirely. | Requires more skill to hold the fabric in place while stitching. Can lead to shifting. | Experienced EPP-ers who are very confident in their fabric handling skills. |
Ultimately, the goal is to find a system that makes you want to keep stitching.
With these core supplies in your toolkit, you're set up for success. You’ll be ready to tackle any EPP pattern with confidence, knowing you have the right tools to make the process smooth and rewarding from the very first stitch.
With your supplies gathered, it's time to get into the heart of what makes English paper piecing for quilts so addictive. This is where you'll find your rhythm, developing the muscle memory that makes the process feel so meditative and rewarding. We'll walk through everything from prepping your fabric to the final, tiny stitches that bring your quilt top together.
The very first thing to tackle is cutting your fabric. Being precise here is one of the biggest favors you can do for your future self, as it prevents a world of frustration down the line. A good rule of thumb is to cut a seam allowance of 1/4" to 3/8" all the way around your paper template. This gives you plenty of fabric to wrap over the paper without making your seams too bulky later on.
This simple infographic breaks down the core process, from that initial fabric cut to the final whipstitch.
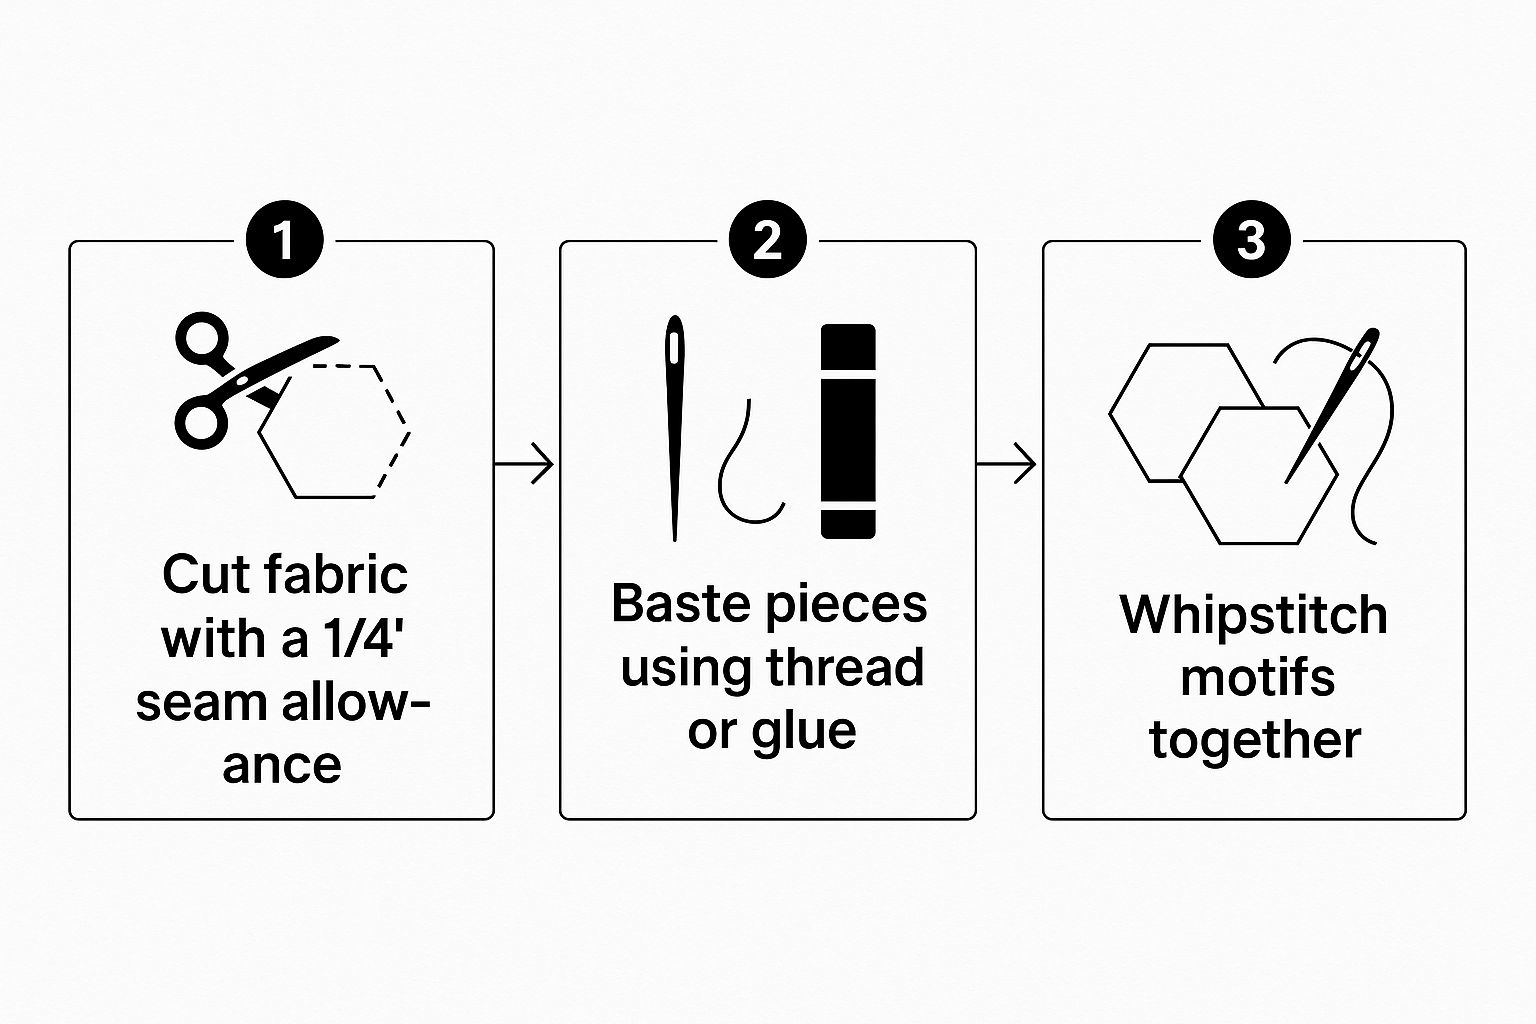
As you can see, it's a simple, repeatable cycle. Once you get the hang of it, you can do it almost without thinking.
Basting is how you wrap your fabric snugly around the paper piece, giving it that crisp, defined shape. The two main camps are glue basting and thread basting, and most quilters have a strong preference for one over the other.
Honestly, there’s no right or wrong answer here. I often find myself glue basting standard shapes like hexagons but switching over to thread for tricky curves or when I’m working with a more delicate fabric. I highly recommend trying both to see which one you enjoy more.
The whipstitch is the bread and butter of EPP. It’s what you’ll use to join all your beautiful little pieces together. The goal is to create a stitch that's strong enough to hold everything together but is practically invisible from the front of your quilt. The technique is simple: you just pass your needle through the very top edge of the folded fabric on two adjacent pieces.
To get started, place two basted pieces with their right sides facing each other, making sure the edges you want to join are perfectly aligned. You'll want to keep your stitches small and consistent—aim for about 1/16th of an inch apart. The key is to only catch a few threads from the fabric fold on each side. This is what keeps the stitches from peeking through to the front.
The real secret to a beautiful whipstitch is even, consistent tension. The stitches should be just snug enough to hold the pieces securely, but not so tight that they cause the fabric to pucker. Think of it as a gentle pull, not a tug-of-war.
If you’re new to hand sewing in general, taking a moment to brush up on the basics can make a huge difference. You can explore a variety of basic hand sewing stitches in our detailed guide, which will help build your confidence.
While hexagons are what most people picture when they think of EPP, the technique is incredibly versatile. It's a common misconception that EPP is just for "hexies." Back in 18th-century England, quilters were using all sorts of shapes! Diamonds, triangles, and squares were all popular choices for creating stunningly complex patterns. If you're curious, you can see some great examples of historic EPP shapes on Sew & Quilt's blog.
The true test of your EPP skill comes when multiple points have to meet up in one spot. Here’s my tried-and-true method for getting those junctions to lie perfectly flat:
Following this process lets your thread flow continuously around a motif, like a hexagon flower, which adds strength to the whole piece and keeps those points looking sharp.

This is where the magic really happens. You’ve put in the time stitching your individual motifs—those charming hexagon flowers or sparkling diamonds—and now you get to see them come together into something that actually looks like a quilt. Thoughtful assembly is what transforms all that hard work into a truly stunning finish.
Before you even think about joining a single piece, lay everything out. Use a design wall, a large table, or even a clean floor. This is your chance to play with the arrangement, step back to check your color balance, and make sure the overall design flows just the way you imagined. Trust me, this little bit of planning is your best defense against the dreaded seam ripper later on.
Once you love the layout, it's time to start stitching your larger sections together. I’ve found it’s much more manageable to work in rows or create larger "super blocks" instead of trying to join one tiny piece at a time across the whole quilt. This method helps keep everything flat and prevents the project from getting wavy or distorted as it grows.
As you connect these larger pieces, you’ll use the same whipstitch you’ve been using all along. The only real difference is that your seams will be much longer. Just take your time, keep your stitches consistent, and maintain that gentle tension to keep everything smooth.
Knowing when to pull the papers is a crucial skill in english paper piecing for quilts. It's a bit of a balancing act. You need the papers for stability while you stitch, but they have to come out before you can do the final quilting.
My rule of thumb is simple: a paper can be removed as soon as all of its sides are completely stitched to another piece.
This means you can start taking papers out from the center of your quilt top and work your way outwards. Doing this makes the project softer and much more flexible as it gets bigger, which is a huge help.
To get a paper out, just gently pry up a corner of the basted fabric and use a pair of tweezers or your fingers to pop the paper out. The key is to be gentle and avoid tugging on your stitches. For any pieces on the very outer edge of your quilt top, leave those papers in until the absolute end. They’ll keep your border stable and crisp.
A good press is the final step that takes your quilt top from looking handmade to looking polished and professional. I always press my finished EPP projects from the back first, using a dry iron on a medium heat setting. It’s best to avoid steam, as it can sometimes cause your fabrics to shrink or distort unexpectedly.
You can press your seams open or to one side—whichever helps them lie the flattest is the right choice for your project. A tailor's clapper is a fantastic tool here; it helps set your seams and gets them extra crisp. After you’re done with the back, flip the quilt top over and give the front a final, light press.
This meticulous pressing ensures every point is sharp and every seam is flat, creating a perfect canvas for quilting. Whether you’re sending it to a longarmer or making the quilt sandwich yourself, a perfectly flat top is non-negotiable. For more guidance on that next step, check out our detailed article on how to baste a quilt.
This attention to detail is part of the craft's long legacy. The first verified EPP projects date all the way back to early 18th century England, where quilters painstakingly hand-sewed fabric around paper templates before removing them—a process that has always demanded precision. You can dive deeper into this fascinating history over at Tourmaline & Thyme Quilts.
Every hand-sewing project has its own learning curve, and English paper piecing is certainly no different. Running into a few snags is just part of the process, and figuring out how to fix them is what really builds your skill and confidence as a quilter.
Don't let these little frustrations get you down. Think of them as opportunities to perfect your technique. Most common problems, like puckered stitches or fraying fabric, have straightforward fixes that will get you back to your happy place in no time.
One of the most common complaints I hear about English paper piecing for quilts is how to handle those bulky intersections where several points come together. If the center of your hexagon flower looks more like a lump than a crisp, flat meeting of points, the culprit is almost always too much fabric jammed into one tiny spot.
Here are a few things you can try to get things to lie flat:
A well-placed backstitch is your best friend. As you near a corner, taking one tiny stitch back on itself locks everything in place. This simple move ensures your points stay sharp and defined, even when the quilt is handled.
We all aim for perfect, invisible stitches, but reality sometimes has other plans. If your seams are puckering, it’s a classic sign that your thread tension is too tight. Your goal is to pull the whipstitch just snug enough to bring the fabric edges together, not so tight that the fabric starts to gather. If you spot a pucker, it's usually best to snip a few stitches, let the fabric relax, and redo that small section.
Fraying fabric can also be a real headache, especially with some of the more loosely woven cottons. If you find your edges are shredding as you work, try cutting your next batch of pieces with a more generous 3/8" seam allowance. That extra bit of fabric gives you a buffer, keeping the fraying away from your actual stitch line.
Fixing a mistake doesn't always mean starting over. If you realize you stitched in the wrong fabric piece after the fact, you don't have to rip everything out. Just carefully snip the whipstitches around that single piece, swap it for the right one, and stitch it back in. For a broader look at the philosophies behind hand sewing, our guide on hand quilting vs machine quilting offers some really helpful perspectives.
As you start your journey with English paper piecing for quilts, you're going to have questions. It’s totally normal! EPP has its own little quirks, but thankfully, most of the common roadblocks have simple solutions. I’ve put together this section to answer the questions I hear most often from fellow quilters.
Think of this as a chat with a quilting friend who's been there, done that, and made all the mistakes so you don't have to. Let's tackle these common questions and get you stitching with confidence.
This is one of those areas where personal preference plays a big role, but the community generally agrees on one thing: you want a thread that’s both fine and strong. The goal is to make your stitches melt into the fabric so they're virtually invisible.
Most EPP enthusiasts, myself included, reach for an 80wt or 50wt cotton thread. These fine threads are perfect because they sink right into the seam allowances without creating any extra bulk. Another fantastic choice is a quality polyester thread. It's incredibly strong and has a tiny bit of stretch, which makes it really forgiving as you pull your stitches tight.
Pro Tip: If you're not sure what color to use, grab a neutral shade like grey, beige, or taupe. You’d be surprised how well these colors blend into almost any fabric, light or dark, making your stitches disappear from the right side.
At its heart, EPP is all about the slow, meditative process of hand sewing. Basting your fabric to the paper templates and whipstitching the pieces together is what creates that incredible precision you just can't get any other way.
That being said, your sewing machine can definitely be your best friend in the later stages! Once you have larger EPP sections assembled and you’ve removed the papers, the machine is a huge time-saver. Many quilters, for instance, will use their machine to:
So, while the detailed piecing is done by hand, the machine can help you cross the finish line.
Yes, you absolutely do! Those little paper templates are the magic behind your perfect points and crisp shapes, but they're just a temporary guide. They are not meant to stay in the finished quilt.
If you left them in, your quilt would be stiff as a board, a nightmare to quilt through by hand or machine, and it certainly wouldn't be soft or washable.
A good rule of thumb is to pop out a paper template once all of its sides are securely stitched to another piece. This means you can begin removing papers from the center of your project as you work outward. This makes the quilt top much more pliable and easier to manage as it gets bigger. Just remember to leave the papers in along the very outside edges until you're completely done to keep them stable and sharp.
If you're new to EPP, make 100% quilting cotton your go-to. Seriously, it's the best fabric to learn with. It doesn't stretch, it presses beautifully, holds a crease like a dream, and comes in every color and print imaginable. It’s just very well-behaved and forgiving.
When you're picking out prints, try to stick with small- to medium-scale designs. Big, bold motifs often get chopped up and lost in the small shapes we typically use for EPP. A "fat quarter" bundle is a perfect way to start—you get a nicely coordinated stack of fabrics to experiment with without having to buy a ton of yardage. For more tips on this, our complete guide on how to start quilting has a ton of great info on fabric selection.
At High Country Quilts, we're passionate about giving every quilter the best tools and knowledge to create something they love. Explore our wide selection of premium quilting cottons and notions to get your next EPP project started. https://hcquilts.com
At High Country Quilts we care deeply about community. With our experiences in retail, we know that a store is not only a place to shop but also a place for the community to gather and share. During this busy...

Hi! We’re Adam and Renee Wheaton, the new owners of High Country Quilts! For more than 40 years, we’ve owned and operated vacuum and sewing businesses. Following in Renee’s father’s footsteps after he retired from All Discount Vacuum and Sewing in Colorado...


Leave a comment