

We Love Our Quilting Community
At High Country Quilts we care deeply about community. With our experiences in retail, we know that a store is not only a place to shop but also a place for the community to gather and share. During this busy...


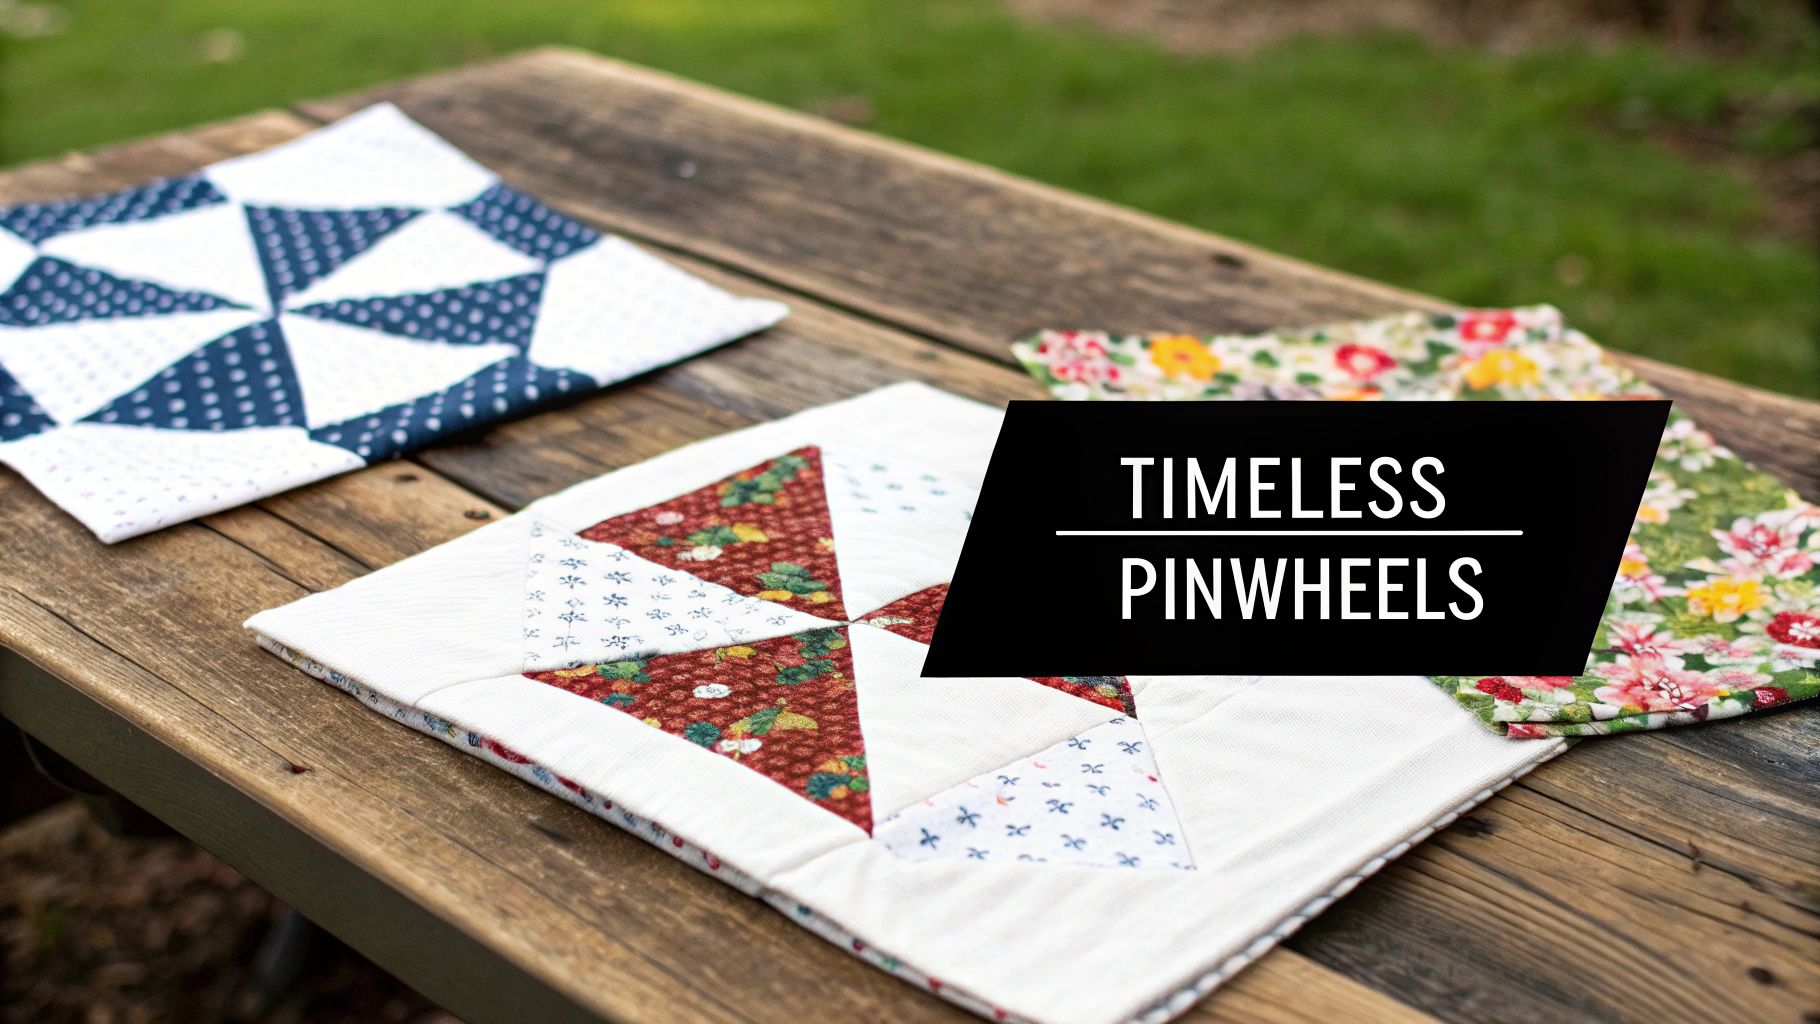
Pinwheel quilt blocks are all about movement. By sewing together Half-Square Triangles (HSTs), you create a lively swirl that brings any quilt top to life. From cozy, scrappy throws to chic modern designs, this block never gets old.
There’s something timeless about a spinning pinwheel. Its simplicity is deceptive—the eye can’t resist tracing those diagonal blades across the quilt.
For beginners, mastering the simple quilting ideas behind a pinwheel is pure magic. Nail the HST technique and you’ve unlocked countless layout options that look far more complex than they are.
Pinwheels date back to the 19th century, when quilting served both function and storytelling. Women pieced these blocks during the War of 1812, stitching hope into every seam.
One standout example is the 1812–1814 Pinwheel Quilt made by the Adams family. Today it’s preserved at the Smithsonian Institution as a testament to that era’s craftsmanship.
Even now, quilters turn to pinwheels for their adaptability:
The true beauty of the pinwheel quilt pattern is its ability to be both timeless and contemporary.
If you want to spread the joy of pinwheel quilting, explore strategies for blog growth on Pinterest to attract fellow makers and grow your audience.
Any seasoned quilter will tell you that a beautiful quilt doesn't start with the first stitch; it starts long before that. Taking the time to get your space, tools, and fabric ready is the secret to a smooth, fun project and a quilt you'll be proud of. Trust me, this prep work pays for itself over and over.

This is where all your precision comes from. Your rotary cutter, mat, and a good ruler are the absolute basics, but a few other items can really elevate your game. For pinwheels, a dedicated square-up ruler is a game-changer. It helps you trim those Half-Square Triangles (HSTs) perfectly so every point matches up flawlessly later on.
Before you even think about cutting, let’s get your toolkit in order. Having everything you need right at your fingertips means you can stay in the creative zone without any frustrating interruptions.
If you’re just building out your quilting toolbox, we have a complete rundown in our guide on how to start quilting.
The magic of a pinwheel quilt is all in the contrast. To get that wonderful spinning effect, you need a clear difference between your light and dark fabrics. This isn't just about color; it’s about value.
Think about pairing a deep, saturated floral with a light, low-volume text print, or a rich jewel tone with a soft pastel. A great way to test your choices is to take a black-and-white photo with your phone. If your fabrics blur together into one shade of gray, you don't have enough contrast.
The Pinwheel block has been around since the early 1800s, and for good reason! Its simple construction from Half-Square Triangle units makes it a truly timeless and accessible design for quilters of every skill level.
Pre-cut fabric bundles are a fantastic shortcut for pinwheel quilts, especially if you want a scrappy, coordinated look without all the upfront cutting.
If you're buying yardage, your first step is to have a plan. Know your final quilt dimensions and your block size, then you can calculate how many blocks you'll need. While a good pattern will give you a yardage chart, it’s always smart to double-check the math. My rule of thumb? Always buy an extra 1/4 to 1/2 yard more than the pattern calls for. That little bit of buffer is a project-saver when a cutting mistake happens.
Alright, this is where the fun really starts. We're about to turn those neat stacks of fabric into the spinning, dynamic pinwheel blocks that make these quilts so special.
The absolute heart of a pinwheel block is the Half-Square Triangle, or HST. Getting your HSTs right is the single most important part of this whole process, and believe me, it’s easier than it looks. We'll walk through my favorite, tried-and-true methods that quilters everywhere rely on for perfect points and flat blocks.
This is the classic way to make Half-Square Triangles, and for good reason. It’s incredibly accurate, easy to manage, and perfect whether you're making your first quilt or your fiftieth. The idea is simple: you take two squares of fabric and magically turn them into two identical HSTs.
Start by placing one light and one dark fabric square with their right sides touching. On the back of the lighter square, draw a single diagonal line from corner to corner. I use a simple mechanical pencil for this. Remember, this line is just a guide for your sewing—you won't be cutting on it just yet.
Now, head to your machine and sew a scant 1/4" seam on both sides of the line you just drew. What’s a “scant” quarter-inch? It’s just a hair shy of a true 1/4", which gives you a little extra room to account for the thickness of your fabric and thread when you press the seam open. It’s a tiny adjustment that makes a huge difference in accuracy. If you're on a BERNINA, the Patchwork Foot #97D is an absolute dream for nailing this seam allowance every time.
Once your two seams are sewn, take your ruler and rotary cutter and slice the unit in half directly on that pencil line you drew. Voila! You’ve got two HST units.
Pressing might not be the most glamorous step, but it’s just as critical as accurate sewing. When you go to press your HSTs, the goal is to get them perfectly flat without any distortion.
For pinwheels, I almost always press the seams toward the darker fabric. This keeps the darker print from peeking through the lighter side, giving you a much crisper look. My little trick is to first press the seam flat as-is (to "set" the stitches), then gently open the unit and press from the front.
If I could give just one piece of advice for perfect pinwheels, it would be this: trim your HSTs. Fabric has a mind of its own and can stretch or shift, no matter how carefully you sew. Squaring up each HST to its correct unfinished size is the only way to guarantee your points will meet perfectly and your final block will be the right size.
This is where a little bit of patience pays off big time. Taking a moment to trim each HST ensures all your components are identical. It’s the secret ingredient for a quilt top that lies beautifully flat and has those sharp, perfect points we all crave.
To trim, grab a square ruler that has a 45-degree line. Line up the ruler’s diagonal line with your seam line, then trim the two excess sides. Rotate the block, line up the freshly cut edges with the correct measurement on your ruler (like 2.5" or 3.5"), and trim the final two sides. We have a whole guide with more tips and pictures on how to square up quilt blocks if you want a deeper dive.
When you're working on a big quilt and need a mountain of identical HSTs, this method is a game-changer. It's especially brilliant for using up 10" layer cake squares.
It starts out a lot like the previous method:
Here’s the magic part. First, cut the large square into four smaller squares by cutting it in half vertically and then horizontally. Then, cut each of those new squares in half along the diagonal pencil line. Just like that, you have eight perfect HSTs ready to be pressed and trimmed. It’s a huge time-saver!
To take the math out of the equation, here’s a handy chart. It tells you exactly what size to cut your starting squares to get the finished block size you want, based on the classic two-at-a-time HST method we just covered.
| Finished Block Size | Finished HST Size | Trim HSTs To | Starting Square Size |
|---|---|---|---|
| 4" Block | 2" HSTs | 2.5" x 2.5" | 3" x 3" |
| 6" Block | 3" HSTs | 3.5" x 3.5" | 4" x 4" |
| 8" Block | 4" HSTs | 4.5" x 4.5" | 5" x 5" |
| 10" Block | 5" HSTs | 5.5" x 5.5" | 6" x 6" |
| 12" Block | 6" HSTs | 6.5" x 6.5" | 7" x 7" |
Just find the "Finished Block Size" you're aiming for in the first column, and the last column tells you what size to cut your initial light and dark fabric squares.
Now that your HSTs are pressed and trimmed to perfection, the final assembly is a walk in the park.
Lay out four identical HSTs on your mat to form the pinwheel shape. Keep an eye on the direction of the colors so they look like they’re spinning.
First, sew the top two units together and the bottom two units together to make two rows. Because you pressed all your seams toward the dark fabric, the seams at the center should "nest" or lock into each other perfectly when you pin them. This is key for getting that sharp point in the middle.
Finally, place the two rows right sides together, nesting that center seam again. Sew the final seam to join the rows. Once it's sewn, I like to pop the first couple of stitches in the center seam allowance, which lets you "twirl" the seams open on the back. This distributes the bulk and helps the block lie incredibly flat. Give it one last press, and you’re done. Step back and admire that perfect pinwheel
Once you have a beautiful stack of freshly pressed pinwheel blocks, the real fun begins. This is your chance to play with the arrangement and turn those individual blocks into a stunning, dynamic quilt top. The layout you choose can completely change the vibe of your quilt, taking it from classic and traditional to modern and full of energy.
Let's walk through a few of my favorite ways to arrange pinwheel quilt blocks. You'll see how simple changes in placement—or the addition of other simple elements—can create incredible secondary patterns and give your quilt a totally unique personality.
This visual gives you a quick look at the core of it all: making the Half-Square Triangles (HSTs) that form your pinwheels.
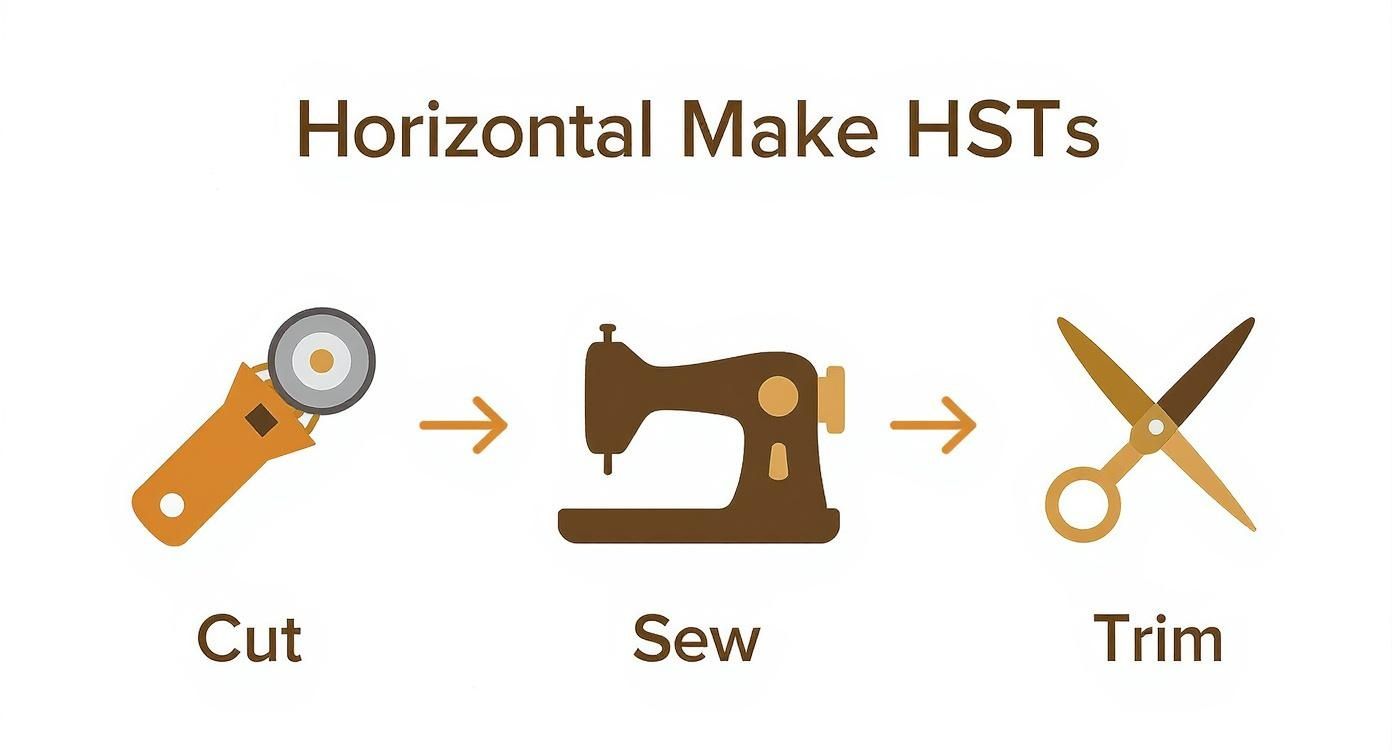
As you can see, that journey from a simple fabric square to a finished HST is all about precision. Nailing the cutting, sewing, and trimming is the foundation for any great pinwheel layout.
The most straightforward way to set your blocks is in a simple edge-to-edge grid. Don't let its simplicity fool you into thinking it's boring! This arrangement creates a powerful, mesmerizing sense of movement as your eyes dance across all those spinning blocks.
The secret to making this look shine is consistency. You'll want to make sure every single block is oriented in the same direction to create a uniform, swirling pattern. This layout is particularly fantastic for showing off a specific fabric collection or a planned color palette where the pinwheels are the undisputed star.
Want to give your blocks a little breathing room and a touch of traditional elegance? Sashing is your best friend. Sashing is simply the term for the fabric strips sewn between your blocks, creating a lovely frame around each pinwheel.
Framing each pinwheel with sashing brings a sense of order and structure to the quilt. It's a great choice when you want each block to stand out on its own while still being part of the bigger picture.
If you’re looking for something a bit more intricate, the "Double Pinwheel" (sometimes called a "Spinning Pinwheel") is an amazing option. It looks so much more complicated than it actually is! You achieve this effect by alternating your regular pinwheel blocks with simple four-patch blocks made from the same fabrics.
When you place them side-by-side, the corners of the pinwheels and the four-patch units work together, creating the illusion of a much larger, secondary pinwheel spinning behind the main ones. It's a truly clever arrangement that adds incredible depth and motion to the finished quilt.
Making a scrappy quilt is one of the most joyful ways to use up those treasured fabric scraps, but it can get chaotic in a hurry without a solid plan. The key to a beautiful scrappy pinwheel quilt is creating intentional order within all that wonderful randomness.
Here are a few of my go-to strategies for scrappy success:
No matter which layout you fall in love with, I can't stress this enough: lay your blocks out first! Use a design wall or even a clean spot on the floor. This lets you play with placement, check your color balance, and make absolutely sure you love the arrangement before you sew a single row together. This is the moment your quilt's story truly takes shape.
You've made it to the home stretch! Your quilt top is pieced, and it looks fantastic. Now comes the magic part: turning that flat top into a cuddly, finished quilt. Let's walk through quilting it, binding it, and tackling a few of those little issues that can sneak up on even the most experienced quilters.
https://www.youtube.com/embed/R8d9chgqtjM
The quilting itself is a key design element, and for a pinwheel quilt, you want it to complement all that beautiful movement, not fight with it. The best quilting designs add texture and support the pattern you've so carefully pieced together.
For a crisp, modern vibe, you really can’t go wrong with straight-line quilting. Following the diagonal lines of your pinwheels creates a gorgeous secondary geometric pattern. This is easy to do with a walking foot on your regular sewing machine. You can space the lines anywhere from a half-inch to a few inches apart, depending on how dense you want the texture to be.
If you’re leaning toward a softer, more traditional look, an all-over meandering stitch or a gentle, loopy free-motion design is perfect. The organic curves create a wonderful contrast against the sharp points and straight seams of the pinwheels.
It’s happened to all of us. You stand back to admire your work, and there it is—a point that just doesn't quite line up. Don't panic! Nine times out of ten, the culprit is a seam allowance that’s just a hair off that perfect scant 1/4".
If it's only slightly off, you can often gently ease the fabric into place when you sew your rows together. Pins are your best friend here. I like to push a pin directly through the seam on one block and see where it comes out on the other. If it's close, you can secure it with pins on either side to hold it in place as you stitch.
The secret to perfect points isn’t some complicated trick; it’s all in the prep work. If you take the time to double-check your seam allowance and trim every single half-square triangle to the exact same size, you'll prevent 90% of these matching headaches before they even start.
When four pinwheel points converge, you can end up with a seriously bulky lump in the middle of your block. This can make your quilt top look a little bumpy and can even be a pain to quilt over.
The best way to handle this is to "twirl" or "pinwheel" your seams on the back, which we covered when assembling the blocks.
But if you missed that step, you can still go back and fix it. Just grab your seam ripper and carefully pop the few stitches right at the center of that bulky intersection on the back of your quilt top. This little trick lets you press the seam allowances open in a tiny spiral, distributing all that fabric so it lies perfectly flat.
The binding is the final frame for your masterpiece. A neatly applied binding not only looks professional but also protects the edges of your quilt for years to come. It's a simple process of creating a long fabric strip, sewing it to the edge, and folding it over to the back.
Here’s the basic game plan:
After it’s attached, simply fold the binding over to the back of the quilt and stitch it down. You can do this by hand for a nearly invisible finish or run it through your machine for a quick and durable edge.
If you want a more in-depth look, our complete guide on how to bind a quilt has you covered with step-by-step photos and detailed instructions.
Even a seemingly simple block like a pinwheel can throw a curveball now and then. Over the years, I've heard a few questions pop up time and time again from quilters in my classes.
Whether it’s getting those center points to lie perfectly flat or figuring out how to use that gorgeous pre-cut bundle, let’s tackle some of the most common pinwheel puzzles.
This is the big one! The secret to a perfectly flat pinwheel block is a technique called twirling your seams. It’s a little quilting magic that distributes the fabric layers evenly right where they all meet.
Once you’ve stitched your four Half-Square Triangles (HSTs) together to form the block, flip it over. Gently pop a few stitches right at the center intersection with a seam ripper. This allows you to press each seam allowance in a circular, pinwheel-like direction. You'll be amazed at how much flatter it lies compared to just pressing everything to one side.
A few extra pressing tips I swear by:
Absolutely! Pre-cuts are a fantastic shortcut for making scrappy pinwheel quilts, and they get you sewing so much faster.
A charm pack, with its stack of 5-inch squares, is perfect for creating HSTs that finish around 4.5 inches. They're ideal for smaller projects like baby quilts or table runners. If you want to go bigger and work more efficiently, a layer cake is your best friend. Those 10-inch squares are perfect for the four-at-a-time or even eight-at-a-time HST methods, giving you a whole pile of coordinated blocks in no time.
"I've found that using pre-cuts can easily save 30% of my initial cutting time, and the design possibilities are still endless."
Ah, the quest for the perfect point! If your points aren't meeting precisely in the middle, it almost always comes down to one of three things: an inconsistent seam allowance, inaccurate trimming, or where your needle lands.
Even a tiny deviation from a scant 1/4" seam can throw a point off. That’s why trimming each HST unit to the exact size before you piece the block is non-negotiable. It creates a reliable foundation for everything to line up later.
| The Problem | What to Check | The Fix |
|---|---|---|
| Seam allowance is off | Use a 1/4" foot or a seam guide | Double-check and adjust your sewing gauge |
| HST sizes are inconsistent | Grab your favorite square-up ruler | Trim every single HST to the same exact size |
| Needle misses the intersection | Place a pin right where the seams cross | Slow down and guide your needle to hit the "X" |
The real secret to perfect points isn't luck; it's consistency in your seam allowance and precision in your trimming.
As you get into the rhythm of making your quilt, keep these little things in mind. Always press your blocks on a firm, flat surface—it really does lead to more consistent results than a wobbly ironing board.
When it's time to sew your blocks into rows, nest the seams together. You’ll feel them lock right into place, which is your cue that the points will align beautifully. I like to use fine silk pins to hold them steady without distorting the fabric. And before you sew a single row, lay everything out on a design wall or the floor. It's so much easier to spot a pinwheel spinning the wrong way before it's stitched in permanently!
Happy stitching!
Ready to elevate your pinwheel projects? Find premium fabrics, expert BERNINA support, and local studio quality at High Country Quilts. Explore our classes, notions, and beautiful collections online at https://hcquilts.com.
At High Country Quilts we care deeply about community. With our experiences in retail, we know that a store is not only a place to shop but also a place for the community to gather and share. During this busy...

Hi! We’re Adam and Renee Wheaton, the new owners of High Country Quilts! For more than 40 years, we’ve owned and operated vacuum and sewing businesses. Following in Renee’s father’s footsteps after he retired from All Discount Vacuum and Sewing in Colorado...


Leave a comment