

We Love Our Quilting Community
At High Country Quilts we care deeply about community. With our experiences in retail, we know that a store is not only a place to shop but also a place for the community to gather and share. During this busy...


Basting is simply the process of temporarily holding your quilt top, batting, and backing together before you do the actual quilting. This "quilt sandwich" is the foundation of your finished quilt, and getting it right is crucial for preventing the layers from shifting around, which is what causes those frustrating puckers and tucks.
A smooth, well-basted quilt makes the rest of the process so much more enjoyable and is the secret to getting that professional look we're all after.
Before you even think about making that first quilting stitch, the success of your entire project really hangs on how well you baste those layers together. I like to think of it as the foundation of a house—if it isn't solid and straight, everything you build on top of it is going to be a little bit off. Basting is what makes your three separate layers behave like a single piece of fabric under the needle.
A good basting job is your best defense against the most common quilting headaches. It holds everything securely in place, stopping the fabric from shifting, stretching, or bunching up while you're guiding it through your sewing machine or working on it by hand. The reward for your effort? A beautifully flat quilt with even stitches and a smooth back, completely free of those dreaded puckers.
The path to a perfectly basted quilt starts well before you even lay out your fabric. From my experience, skipping any of these prep steps is a recipe for trouble down the line.
Here's a tip I learned the hard way: your goal is to smooth the backing fabric until it's taut, not to stretch it tight. Think of smoothing a bedsheet, not pulling a trampoline. If you overstretch it, the fabric will try to spring back to its original size later, creating its own set of puckers.
Taking the time to get this prep stage right honestly transforms the quilting process. It turns what could be a frustrating struggle into a smooth, rewarding experience.
Alright, your layers are prepped, pressed, and ready to go. Now for the big question: how are you going to hold this quilt sandwich together while you work your magic? There’s no single right answer here. The best method really comes down to the quilt itself, how much space you have, and frankly, your own personal preference.
The three heavy hitters in the quilting world are safety pins, basting spray, and good old-fashioned thread basting.
Pin basting is the tried-and-true classic. It gives you incredible control, and you can easily adjust areas if you spot a pucker. It’s also cheap and accessible for everyone. On the flip side, basting spray is all about speed. If you're itching to get to the quilting part, this is your ticket. It gives a lovely, even hold without the bumps and lumps of pins.
No matter which route you take, the goal is always the same: keeping those layers perfectly smooth and aligned, just like you see here.
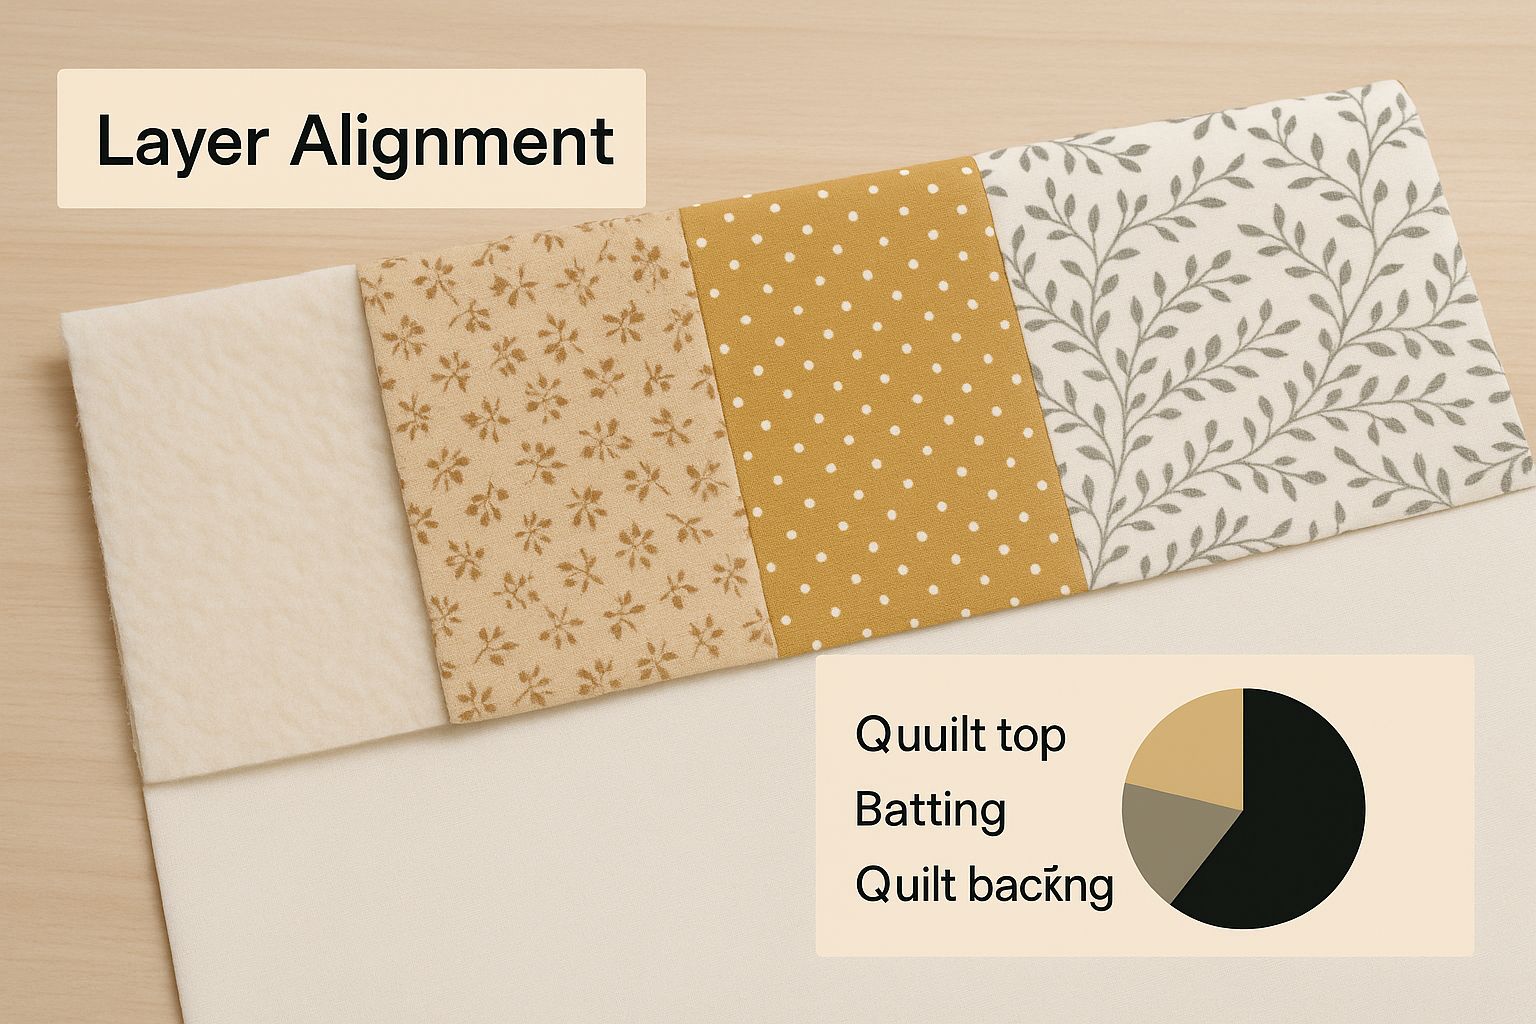
A wrinkle-free start is absolutely non-negotiable for a great finish. It’s the foundation of the entire quilting process.
Still on the fence? Let's break down the pros and cons of each approach. Think about the size of your quilt and whether you'll be machine or hand quilting. This side-by-side comparison should help you find the perfect basting method for your next project.
| Method | Best For | Pros | Cons |
|---|---|---|---|
| Pin Basting | Beginners, large quilts, and those on a budget. | Secure hold, easily adjustable, affordable, no fumes. | Time-consuming, can be tough on hands and back. |
| Spray Basting | Small to medium projects, and quilters short on time. | Very fast, creates a smooth surface with no bumps. | Requires good ventilation, can be messy (overspray). |
| Thread Basting | Hand quilting and delicate or heirloom quilts. | Soft, flexible hold, no distortion, very secure. | The most time-intensive method of the three. |
Ultimately, the choice is yours. Many experienced quilters have tried all three and have a favorite, but might switch it up depending on the project.
The traditional method of basting a quilt by hand with thread has deep historical roots and remains valued even in modern quilting practice. Thread basting uses long, loose running stitches to temporarily hold the quilt’s layers together, a technique dating back centuries when hand sewing was the primary means of construction. Today, it is still preferred for bulky or intricate sections because the stitches are easy to remove and less likely to distort the fabric. You can learn more about the different ways to baste your quilt on quiltingdaily.com.
Don't be afraid to experiment! What works for a small baby quilt might not be your go-to for a king-sized behemoth. Try a new technique on your next quilt—you might just discover a new favorite way to work.
https://www.youtube.com/embed/rHRsbSZpwTE
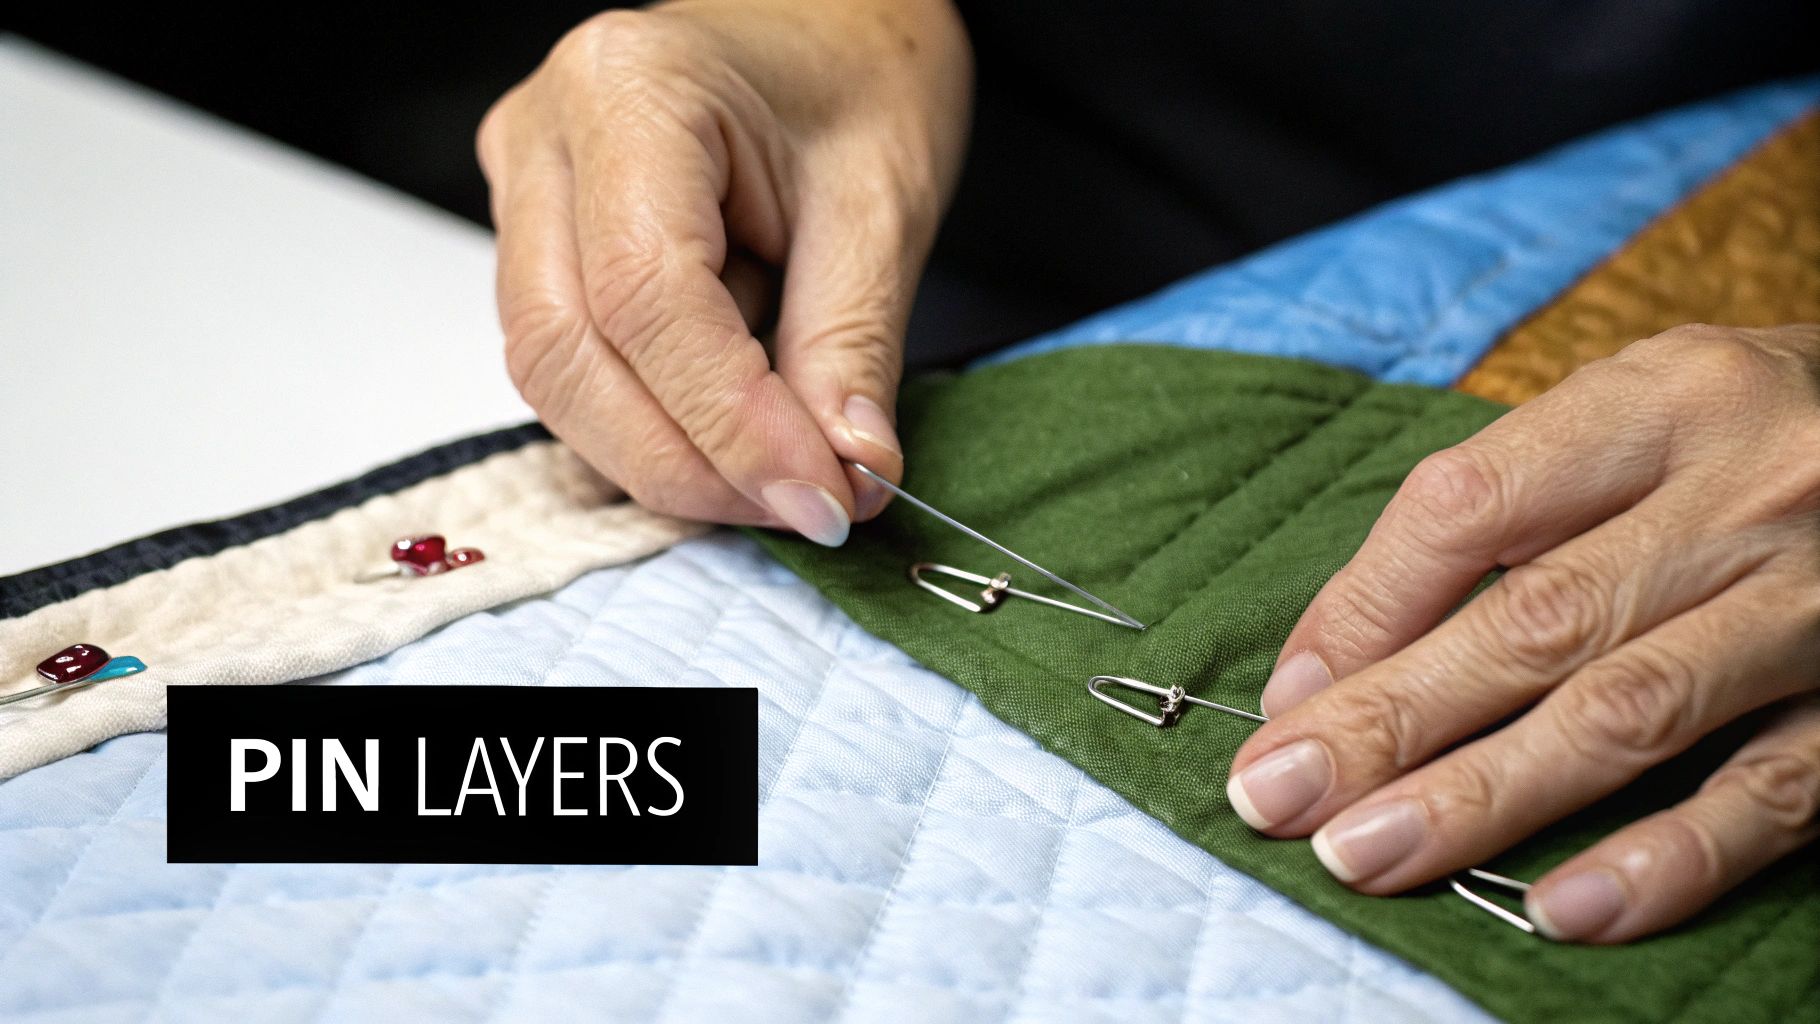
Pin basting has been my go-to for years, and for good reason. It’s a tried-and-true method that’s reliable, doesn’t cost much, and is incredibly forgiving. You get total control and can easily make adjustments on the fly, which is a lifesaver whether you’re working on your first quilt or your fiftieth.
But there’s a method to the madness. Just sticking pins in randomly is a recipe for puckers and shifting fabric. The real secret is to work from the center outwards.
Start by placing a single pin right in the heart of your quilt sandwich. Then, smooth the layers out from that central point with your hands and place the next pins, working your way out in a radiating pattern. Think of it like ripples spreading out in a pond.
You're aiming for a nice, even grid of pins. As a rule of thumb, I space them about a hand's width apart, which usually comes out to 4 to 6 inches. This keeps everything locked down securely.
Make sure you're using curved safety pins made for quilting. That little curve isn't just for looks; it makes it so much easier to scoop through all three layers—the backing, batting, and quilt top—without causing the fabric to bunch up.
Here’s a common mistake I see: people push the pin straight down. That almost guarantees a tiny pucker. Instead, you want to rock the pin through the layers. Open it, push the point down through the quilt sandwich, and let the curve of the pin naturally bring the tip back up to the surface a little ways over. Then, just fasten it.
This technique really took off in the 1990s as quilters were looking for a solid alternative to the painstaking work of thread basting. It was a huge time-saver, especially for bed-sized quilts that could take hundreds of pins. If you're a history buff, you can find some great community discussions on quilting history over at QuiltingBoard.com.
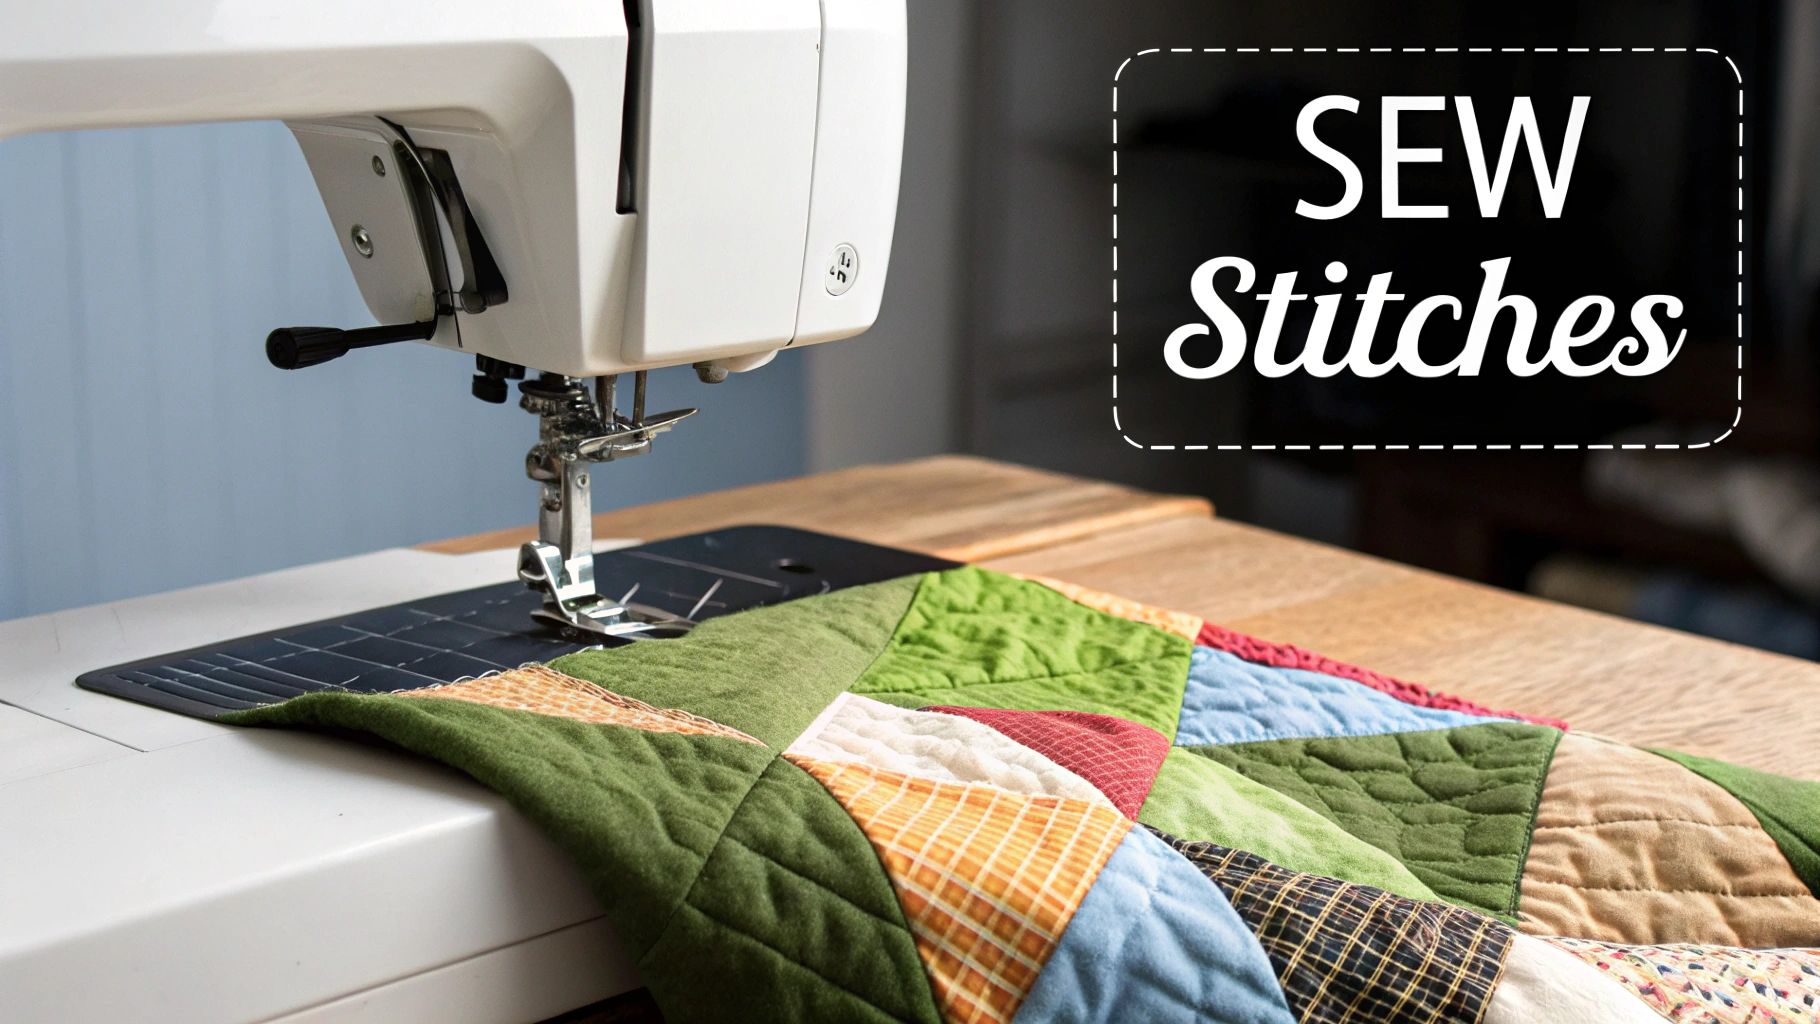
Let's be honest, closing a few hundred safety pins is rough on the fingertips. A handy little tool like a Kwik Klip can be a real finger-saver, as it’s designed specifically to close the pins for you. If you don't have one, the back of a metal spoon can give you just enough leverage to get the job done without the soreness. A little practice, and you'll have a beautifully flat and secure quilt top, all ready for the fun part—the quilting
When you're pressed for time or just dread the thought of all those pins, basting spray can feel like a miracle. It's easily the quickest way to put your quilt sandwich together, and it gives you an incredibly smooth surface without the little puckers that pins can sometimes cause. The trick, though, is in the technique—get it wrong, and you could end up with a stiff, sticky mess.
First things first, you have to prep your workspace. Basting spray is, at its heart, an aerosol glue, so good ventilation is non-negotiable. Seriously, open a window or two, or find a big, open room to work in. You’ll also want to protect your floor from overspray. An old sheet, a painter's plastic drop cloth, or even some large pieces of cardboard will do the job perfectly.
Once your backing and batting are perfectly smooth, go ahead and lay your quilt top over them. Take a moment to make sure everything is centered and free of wrinkles.
Now for the magic. Gently fold one half of the quilt top back onto itself, revealing the batting underneath. Grab your can of basting spray and, following the directions on the label, apply a light, even mist across the exposed batting. You're aiming for a light tack, not a soaking—think of it like a quick spritz of hairspray.
Starting from that center fold, use your hands to carefully smooth the quilt top back down onto the sprayed batting. Work from the middle out to the edges, pushing out any trapped air or wrinkles as you go.
Here’s a piece of advice I can't stress enough: only use a spray adhesive made specifically for quilting. These products are temporary, acid-free, and—most importantly—repositionable. If you see a wrinkle, you can just lift the fabric and smooth it back down. They're also designed not to gum up your sewing machine needle later.
With the first half done, just repeat the process on the other side. Fold the remaining half of the quilt top back, give the batting a light spray, and smooth it down from the center.
To finish, you'll flip the whole quilt sandwich over and do the exact same fold-and-spray process to secure the backing to the other side of the batting.
Even the most seasoned quilters run into trouble during basting. Let’s be honest, it happens. The number one frustration I see is the dreaded pucker on the quilt back. You think everything is perfect, you flip it over, and there it is. This almost always means the backing wasn't pulled quite taut enough before you started.
But don't despair! This doesn't mean you have to rip everything out and start over. If it's just one or two puckers, you can do a little spot treatment. Just remove the pins or stitches in that specific area, smooth the backing from the center out towards the edge, and then re-secure it. Easy.
Having trouble with spray basting? If you end up with stiff patches or your needle gets frustratingly sticky, you’ve likely just used a bit too much adhesive. You’re aiming for a light, even mist—less is definitely more. Keep a few alcohol swabs handy; a quick wipe will clean any gummy residue right off your needle.
If you’re a pin baster, you might see the fabric bunching up or distorting around the pins. This is a classic sign that the pin was pushed straight down through the layers instead of being gently scooped through. All you need to do is pull out the offending pin, smooth the fabric, and try again with that little scooping motion. It makes a world of difference.
Basting woes are as old as quilting itself. Quilters have been wrangling layers for centuries, with methods changing based on the tools and fabrics they had. For instance, the beautiful Nakshi Kantha quilts of South Asia rely on large running stitches to hold layers of old saris together—a technique that's been around for over 500 years. You can explore more about these fascinating global quilting traditions on Britannica.com.
Taking a deep breath and figuring out the why behind the problem is half the battle. A small, patient fix is often all it takes to get back on track and prevent a minor headache from ruining your beautiful quilt.
No matter how many quilts you've made, basting can throw a curveball now and then. Let's tackle some of the questions I hear most often from fellow quilters so you can baste with confidence.
My go-to spacing is about a hand's width apart, which works out to roughly 4 to 6 inches. For most projects with standard cotton batting and fabric, this is the sweet spot for keeping everything secure without turning your quilt into a pin cushion.
Of course, some quilts need a little extra attention. If you're wrestling with a slippery fabric like Minky or planning some seriously dense machine quilting, tighten that spacing up. Placing pins just 3 to 4 inches apart can make all the difference in preventing those frustrating little puckers later on.
This is probably the most common challenge out there! Not everyone has a giant, empty floor just waiting for a quilt. If that's you, don't worry. A large dining table works beautifully. You can even push two smaller tables together to create a larger, stable surface.
Another fantastic method for tight quarters is "board basting." You'll wrap each of your quilt layers around long, clean boards (like those from the hardware store). This technique allows you to baste in small, manageable sections while keeping perfect tension across the whole quilt. It's a real space-saver.
The biggest mistake I see quilters make is stretching the quilt back instead of just smoothing it. When you pull the fabric too tight, it inevitably relaxes later, causing wrinkles on your finished quilt. If this happens, the only real fix is to stop, un-baste that area, gently smooth the backing until it's just taut, and then baste it again.
Yes, you'll need to remove your basting, but when depends on the method.
At Famcut.com, we're passionate about equipping you for every step of the quilting journey. Find beautiful, high-quality fabrics and all the supplies for your next quilting project on our site.
At High Country Quilts we care deeply about community. With our experiences in retail, we know that a store is not only a place to shop but also a place for the community to gather and share. During this busy...

Hi! We’re Adam and Renee Wheaton, the new owners of High Country Quilts! For more than 40 years, we’ve owned and operated vacuum and sewing businesses. Following in Renee’s father’s footsteps after he retired from All Discount Vacuum and Sewing in Colorado...


Leave a comment