

We Love Our Quilting Community
At High Country Quilts we care deeply about community. With our experiences in retail, we know that a store is not only a place to shop but also a place for the community to gather and share. During this busy...


Calculating quilt backing is all about giving yourself enough room to work. The basic idea is to measure your finished quilt top and then add an extra 4 to 8 inches on all four sides. This extra fabric, what we call "overage," is absolutely essential for getting a smooth, pucker-free finish, whether you're quilting on a longarm or wrestling it through your domestic machine.
I know, figuring out exactly how much backing fabric you need can feel like you're back in high school math class, but I promise it's simpler than it looks. Nailing this step from the get-go is one of the most satisfying parts of the whole process. It saves you from future headaches, last-minute fabric store runs, and frustrating project delays.
A good calculation prevents two of the most common quilting frustrations: running out of fabric right when you're ready to quilt, or overspending on beautiful material that just gets lost in your scrap bin.
But more importantly, the backing is the foundation for the quilting itself. If you don't have enough overage, a longarm quilter will struggle to even load your quilt onto their frame. And if you're quilting at home, a too-small backing can cause the layers to shift, creating ugly puckers and tucks on the back.
Think of your backing calculation as the blueprint for a beautiful finish. It sets you up for a smooth and stress-free quilting stage, which is the key to a professionally finished quilt you can be proud of.
Taking a few extra minutes to measure twice and calculate once really pays off. Here’s what you get for that little bit of effort:
Getting the backing right isn’t just about the numbers; it’s about setting yourself up for a smooth quilting experience and a result you’ll be proud of for years to come.
This guide will walk you through the whole process, breaking it down into simple, easy-to-follow steps. If you want more ideas on what fabrics work best, check out our guide to choosing the perfect backing fabric for quilts. We'll cover everything from simple formulas to dealing with those tricky directional prints.
Before you can figure out how much backing fabric you need, you have to start with solid, accurate numbers. That all begins with your finished quilt top. So, grab a measuring tape and let's get the width and length.
Now, a little trick I've learned over the years: because fabric has a bit of give, you'll want to measure in three different spots for both the length and the width. I always measure across the middle and then again near each edge. Whatever the largest of those three measurements is, that's the number you'll use. This one small step can save you the major headache of finding out your backing is too small in one spot.
Next up is adding what we call "overage." This is simply extra fabric that you'll add to all four sides of your quilt top's dimensions. Think of it as a buffer zone, and trust me, it’s not optional—it’s absolutely critical for getting a beautifully finished quilt.
This extra space is what a longarm quilter needs to properly load the quilt onto their frame. It also accounts for any shifting or slight pulling that naturally happens as the layers are stitched together. Even if you're quilting on your home machine, this overage gives you a safe margin to work with and helps keep everything flat and pucker-free.
So, how much is enough? The standard practice is to add between 4 and 8 inches on all sides of the quilt top. Before you head to the fabric shop, it's a great idea to check with your longarmer for their specific preference. If you're quilting it yourself, a good rule of thumb is to add a bit less.
To make this easier, here’s a quick guide to help you remember.
This table breaks down the recommended extra fabric (overage) to add to your quilt top's length and width, depending on how you plan to quilt it.
| Quilting Method | Recommended Overage (Each Side) | Total Added to Length | Total Added to Width |
|---|---|---|---|
| Longarm Quilting | 6 inches | 12 inches | 12 inches |
| Home Machine Quilting | 3 inches | 6 inches | 6 inches |
| Hand Quilting | 3 inches | 6 inches | 6 inches |
As you can see, the difference between longarm and domestic machine quilting can easily mean buying an extra yard of fabric, which can be a 25-50% increase in material cost depending on the quilt size. Knowing this ahead of time is key. For a deeper dive, check out the great explanation of these quilting standards on broadclothstudio.com.
Let's walk through a real-world example. Say you just finished a lovely throw quilt top that measures 60 inches wide by 72 inches long, and you're sending it off to a longarmer.
Here’s how the math plays out:
There you have it. For this quilt, you need to end up with a single piece of backing fabric that is at least 72 inches by 84 inches. These two numbers are your foundation for figuring out how much yardage to buy. The same logic works for any project, and you can see more examples in our guide on how much material for a queen size quilt.
Pro Tip: I can't stress this enough: write these final dimensions down! Put a note in your phone or tuck a slip of paper in your wallet. Having your exact required backing size with you at the fabric store will save you from making a costly guess.
Once you have the final dimensions for your backing, the next step is figuring out how much fabric you actually need to buy. Most quilting cotton you'll find at the shop comes on a bolt that’s about 42 inches wide. Since very few quilts are narrower than that, you'll almost always have to piece two or more lengths of fabric together to create a backing that’s big enough.
This is where a little bit of math can save you a surprising amount of fabric and money.
You essentially have two ways to piece your backing: with vertical seams that run down the length of the quilt, or with horizontal seams that run across the width. Neither way is "better" than the other, but your quilt's specific dimensions will almost always make one option much more economical.
Let's keep working with our throw quilt example, which needs a final backing piece of 72 inches by 84 inches. This simple diagram shows how we got to that number.
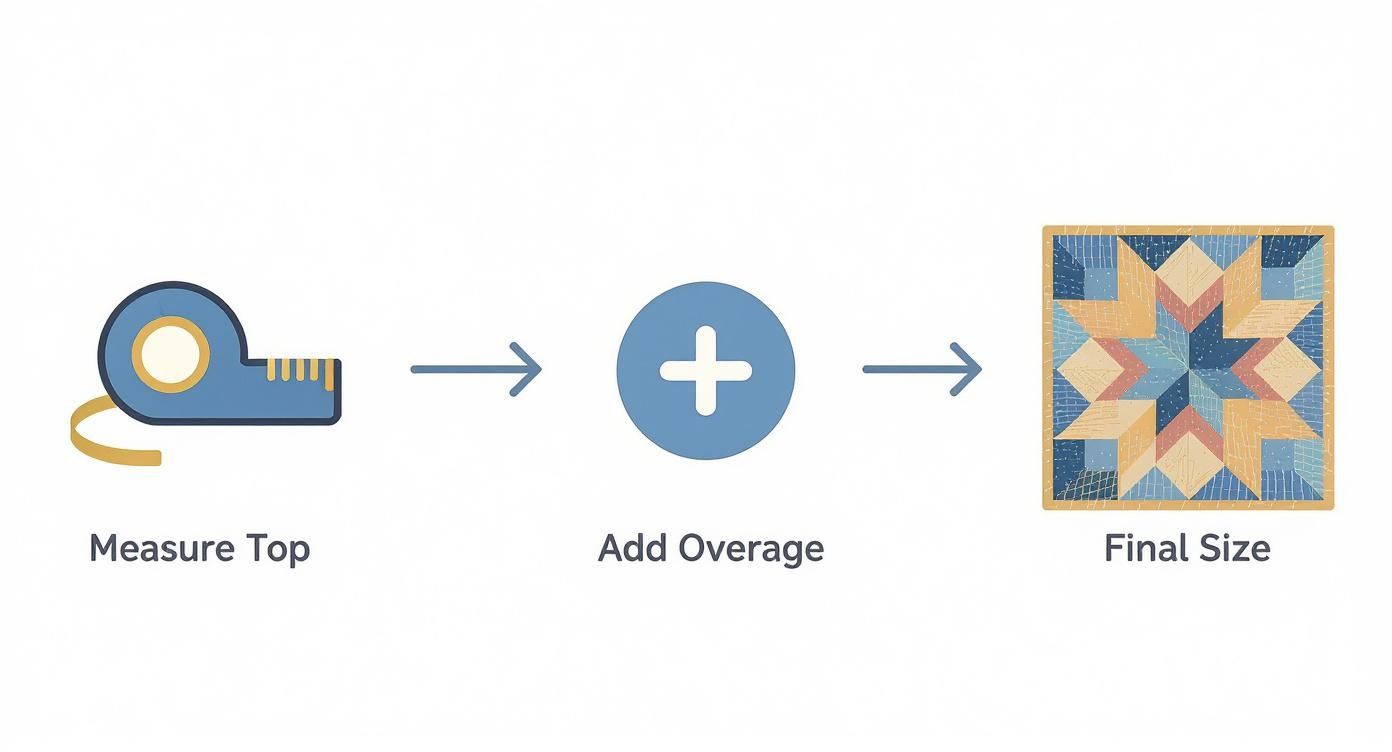
This process—measure the top, add your overage, and get the final size—is the starting point for every single quilt backing calculation you'll do.
When you piece with vertical seams, the panels of fabric run parallel to the length of your quilt. The key thing to remember is that the length of each fabric panel you cut will match the length of your required backing.
First, you need to figure out how many panels, or "Widths of Fabric" (WOF), you'll need. To be safe, let’s assume a usable fabric width of 40 inches after trimming off the selvages.
Each of those two panels needs to be 84 inches long (the full required length of the backing).
To be safe, you'd head to the cutting counter and ask for 4.75 yards of fabric.
Now, let's see what happens if we turn the whole plan on its side. For horizontal seams, the panels run parallel to the width of your quilt. This time, the length of each panel you cut will match the required backing width.
The math is the same, but we're plugging in different numbers.
Each of these three panels needs to be 72 inches long (the full required width of the backing).
For this same quilt, using horizontal seams means you'd need to buy a full 6 yards of fabric.
By running the numbers both ways, you can see a clear winner. The vertical seam method saves you over a yard of fabric on this single project! This simple comparison is a powerful tool for any quilter's budget.
The best orientation really just depends on your quilt's specific dimensions. Taking a few moments to calculate for both vertical and horizontal seams is one of the smartest quilting habits you can develop. If you're looking for more ways to plan your projects, our guide on calculating yardage for quilts has some other great tips that can help.
For larger quilts, especially anything queen-sized or bigger, piecing together multiple strips of standard fabric can feel like a whole separate project. This is exactly why 108-inch wide backing fabric is a total game-changer. It’s a fantastic time-saver that gives your quilt a beautifully smooth and professional finish, completely free of seams.
The math gets a whole lot easier, too. Instead of juggling calculations for multiple panels and figuring out which way to run your seams, you only need to worry about one thing: the length. Since the fabric is already wide enough to cover your quilt top (plus the extra for your longarmer), you just buy one single piece cut to the right length. It’s that simple.
Deciding on wide backing usually comes down to balancing convenience, aesthetics, and cost. It’s a clear winner for big quilts, but the benefits aren't always as obvious for smaller projects where all that extra width might just end up as waste.
Here are the main things I think about:
Let's walk through a real-world scenario. Imagine you just finished a queen-sized quilt top and your final backing measurement needs to be 98 inches by 104 inches.
If you were using standard 40-inch usable fabric, you'd be looking at buying and piecing three long panels, which comes out to roughly 8.75 yards. Yikes. But with 108-inch wide backing, the fabric is already wide enough to handle the 98-inch dimension. All you need is a piece that’s 104 inches long.
104 inches ÷ 36 = 2.89 yards
You’d head to the shop and buy 3 yards of wide backing. In this case, you not only skip all the piecing, but you also buy nearly 6 fewer yards of fabric! The availability of 108-inch backing has really shifted the economics for bigger projects, especially for any quilt with one side longer than 79 inches. It can potentially save quilters 30-40% on backing costs. The tradeoff is that designers produce about 15-20% fewer patterns for this width, so your creative options are a bit narrower.
Of course, sometimes a pieced back is exactly what a quilt needs to add a little extra character and charm. If you want to go that route, you should check out our complete guide on how to piece a quilt back. But for a fast, clean finish on a big project, wide backing is often the smartest choice you can make.
Sometimes, the straightforward math for quilt backing needs a few real-world adjustments. Fabrics can be tricky, each with its own personality and quirks. Ignoring these little details is often what leads to that frustrating moment of being just a few inches short.
Let's talk about one of the most common curveballs: directional prints. If your fabric has a clear up-and-down pattern—think stripes, marching animals, or a climbing floral vine—you can't just piece it any which way. To keep the design from going sideways, you'll almost always need to create vertical seams.
This single constraint means you lose the flexibility to orient your pieces for the most fabric-efficient layout. So, be prepared; you'll likely need to buy a bit more fabric than you would for a non-directional print. The best way to avoid any upside-down surprises is to sketch out your plan before you make the first cut.
Before you even think about cutting, a couple of prep steps can impact how much fabric you really have. Pre-washing and squaring up your fabric are two crucial tasks that seasoned quilters swear by.
Pre-washing your cotton backing is a smart move. Most cotton can shrink by 3-5% in that first wash, and if you skip this step, your backing might shrink after quilting while the top doesn't. This is what creates that classic, crinkly vintage look. If that’s not the aesthetic you're going for, wash and dry your fabric first. Just remember to add a little extra to your purchase—I usually add about ¼ yard for every 4-5 yards—to make up for any shrinkage.
Fabric also rarely comes off the bolt perfectly straight. Squaring up your yardage before cutting your panels is key to getting accurate pieces. This small step prevents wavy seams and distorted backing panels, giving you a much flatter and more professional foundation for quilting.
Don’t treat the yardage you buy at the store as your final usable amount. Always plan for a little bit of loss from squaring up and potential shrinkage. It’s the best way to ensure you actually have enough fabric to work with.
Not every backing needs to be a single, solid piece of fabric! Creating a pieced or "scrappy" backing is a fantastic way to use up leftover fabric from other projects and add a personal, creative touch to your quilt.
When you're planning a pieced back, the goal is the same: create a final piece that meets your required dimensions (your quilt top size plus the overage). You could add a single decorative strip down the center or create an entire patchwork of coordinating scraps. The main thing to remember is to account for extra seam allowances for every single piece you join together.
To get your creative juices flowing, you can explore more ideas in our guide on finding the perfect fabric for quilt backing.
Walking into a fabric store can be an overwhelming (but wonderful) experience. To keep you focused and make sure you don't forget a critical piece of information, I recommend jotting down a quick checklist before you go.
Here's a simple one you can use to stay on track.
| Check | Item/Information Needed |
|---|---|
| ☐ | Final Required Backing Width (Quilt Width + Overage) |
| ☐ | Final Required Backing Length (Quilt Length + Overage) |
| ☐ | Vertical Seam Yardage Calculation |
| ☐ | Horizontal Seam Yardage Calculation |
| ☐ | A picture of your quilt top for color matching |
| ☐ | Your preferred fabric type (cotton, flannel, etc.) |
Having this info on your phone or a scrap of paper in your wallet will save you from second-guessing your measurements at the cutting counter. Happy shopping
Even with the most careful calculations, some questions always seem to pop up. Getting your quilt backing right is more than just a math problem; it's about knowing how your chosen fabric will behave and anticipating any little quirks along the way. Let's tackle some of the common hurdles quilters face.
This is the great debate in quilting! I'm a big fan of pre-washing, especially for cotton backings which can shrink up to a surprising 5%. A quick spin in the machine gets rid of any factory sizing and, more importantly, prevents the backing from shrinking differently than your quilt top. That's how you avoid those dreaded puckers after the first wash.
The key here is consistency. If you pre-wash your backing, you should really do the same for all the fabrics in your quilt top. If you decide to skip the wash, that's fine too—just don't mix and match washed and unwashed fabrics. When in doubt, buying an extra quarter yard gives you a comfortable buffer for any unexpected shrinkage.
Directional prints can be stunning, but they do require a little extra thought. The main rule is that all your fabric panels need to face the same direction. This usually forces you into using vertical seams, because turning a panel sideways for a horizontal seam would put the print on its side.
You'll also need to account for matching the pattern at the seams, especially with large-scale designs. My go-to advice is to add the length of one full pattern repeat to your final yardage calculation. It feels like a lot, but it's better than realizing you're just a few inches short of a perfect match.
First things first: always trim off the selvages before you sew your panels together. Those tightly woven edges can shrink differently and create puckers along your seam line. For pieced backings, I recommend a slightly wider seam allowance, about a 1/2 inch, just for added strength and durability.
Once you've sewn your seam, press it open. This is a game-changer. It helps reduce bulk, ensures the backing lies perfectly flat, and makes the quilting process a whole lot smoother for you or your longarmer.
Absolutely! Cozy fabrics like minky and flannel make for an incredibly snuggly quilt. You just have to know how to handle them, as they have their own personalities.
While the math for measuring doesn't change, your prep work and sewing techniques might. It's always a good idea to do a little homework on your chosen fabric to guarantee a beautiful finish.
Here at High Country Quilts, we've curated a huge selection of beautiful backing fabrics, from classic cottons to luxurious wide backs. Stop by our store or browse online to find the perfect foundation for your next project. Explore our collection at hcquilts.com.
At High Country Quilts we care deeply about community. With our experiences in retail, we know that a store is not only a place to shop but also a place for the community to gather and share. During this busy...

Hi! We’re Adam and Renee Wheaton, the new owners of High Country Quilts! For more than 40 years, we’ve owned and operated vacuum and sewing businesses. Following in Renee’s father’s footsteps after he retired from All Discount Vacuum and Sewing in Colorado...


Leave a comment