

We Love Our Quilting Community
At High Country Quilts we care deeply about community. With our experiences in retail, we know that a store is not only a place to shop but also a place for the community to gather and share. During this busy...


What if your holiday countdown was more than just a series of little doors? Imagine creating a beautiful, handmade heirloom that becomes a cherished part of your family's traditions. I'm going to walk you through how to do just that by making your own set of fabric advent calendar ornaments.
We'll turn those beloved fabric scraps you've been saving into 24 tiny, quilted treasures.
Stepping away from the store-bought advent calendars lets you put a truly personal stamp on your holiday decor. This project is perfect for any quilter, from beginner to expert, who wants to create something with real heart. You don't need complicated skills—just a love for fabric and a bit of festive spirit.
The whole idea is to create a unique set of ornaments that tells a story through your choice of fabrics. It's a fun, creative project that begins with a little planning and ends with something you'll be proud to display.
Personalized decorations are becoming more and more popular. In fact, the global Christmas ornaments market was valued at a staggering $7.2 billion in 2023 and is only expected to keep growing. It just goes to show how much people value unique, meaningful holiday items.
With this guide, you’re not just making a decoration; you’re starting a new tradition.
I've found that making these ornaments is about so much more than just sewing.
Creating a full set of 24 ornaments is such a rewarding process. If you need some ideas for the calendar base itself, be sure to check out our complete guide on making a quilt advent calendar.

The secret to creating charming advent calendar ornaments that become treasured keepsakes starts with picking the right supplies. Think of it like baking a family recipe—the better your ingredients, the more delicious the outcome. When you start with quality, your finished pieces will show it.
We're going to lean heavily on quilting cotton for this project. There’s a reason it’s a quilter's favorite: it’s stable, presses beautifully, and comes in an endless sea of festive prints. It’s simply the perfect canvas for our little ornaments.
Before you make a single cut, do yourself a favor and pre-wash your fabric. I know it’s tempting to skip, but this step is crucial. It pre-shrinks the material and takes care of any potential color bleeding, so your tiny treasures won't get distorted after a season or two. It’s a non-negotiable step in my studio for any project I want to last.
Let’s talk about what goes inside. You’ll need some batting to give your ornaments a bit of substance. I find that a low-loft cotton or cotton-blend batting is just right. It provides that soft, puffy feel we're after without being so thick that it becomes a struggle to turn the small shapes right-side out.
Your thread choice matters more than you’d think, too. A good all-purpose polyester or cotton thread is perfectly fine, but don't be afraid to use a specialty thread if you want to add a little sparkle. If you want to dive deeper into the options, this guide on the best thread for quilting is a great resource.
The right tools can make the difference between a frustrating afternoon and a joyful creative session. For cutting small, precise shapes, you really can’t beat a sharp rotary cutter, a self-healing mat, and a clear acrylic ruler. They give you accuracy you just can't get with scissors alone.
Pro Tip: Your best friend for this project is a fresh blade in your rotary cutter. It will slice cleanly through multiple layers, preventing fraying and ensuring all your pieces are perfectly identical.
Finally, you'll need a reliable way to mark your fabric. My go-to is a water-soluble or heat-erasable fabric pen. These let you draw your sewing lines with precision, and the marks disappear with a spritz of water or a touch of the iron once you're finished.
To make things easier, here's a quick checklist of everything you'll want to have on hand before you start.
| Item Category | Specific Recommendation | Pro Tip |
|---|---|---|
| Fabric | Festive quilting cotton | Look for small-scale prints that won't get lost on a tiny ornament. |
| Batting | Low-loft cotton or cotton-blend | Scraps from larger quilt projects are perfect for this! |
| Thread | 40 or 50-weight all-purpose thread | Match your thread to your fabric, or use a neutral gray or beige. |
| Cutting Tools | Rotary cutter & self-healing mat | A smaller 28mm or 45mm rotary cutter offers better control for curves. |
| Marking Tool | Water-soluble or heat-erasable pen | Test your pen on a scrap first to ensure it removes completely. |
| Hanging Loop | Ribbon, baker's twine, or embroidery floss | Cut your loops to 6-8 inches before sewing them into the seam. |
Having all your supplies gathered and ready means you can focus on the fun part—the actual sewing

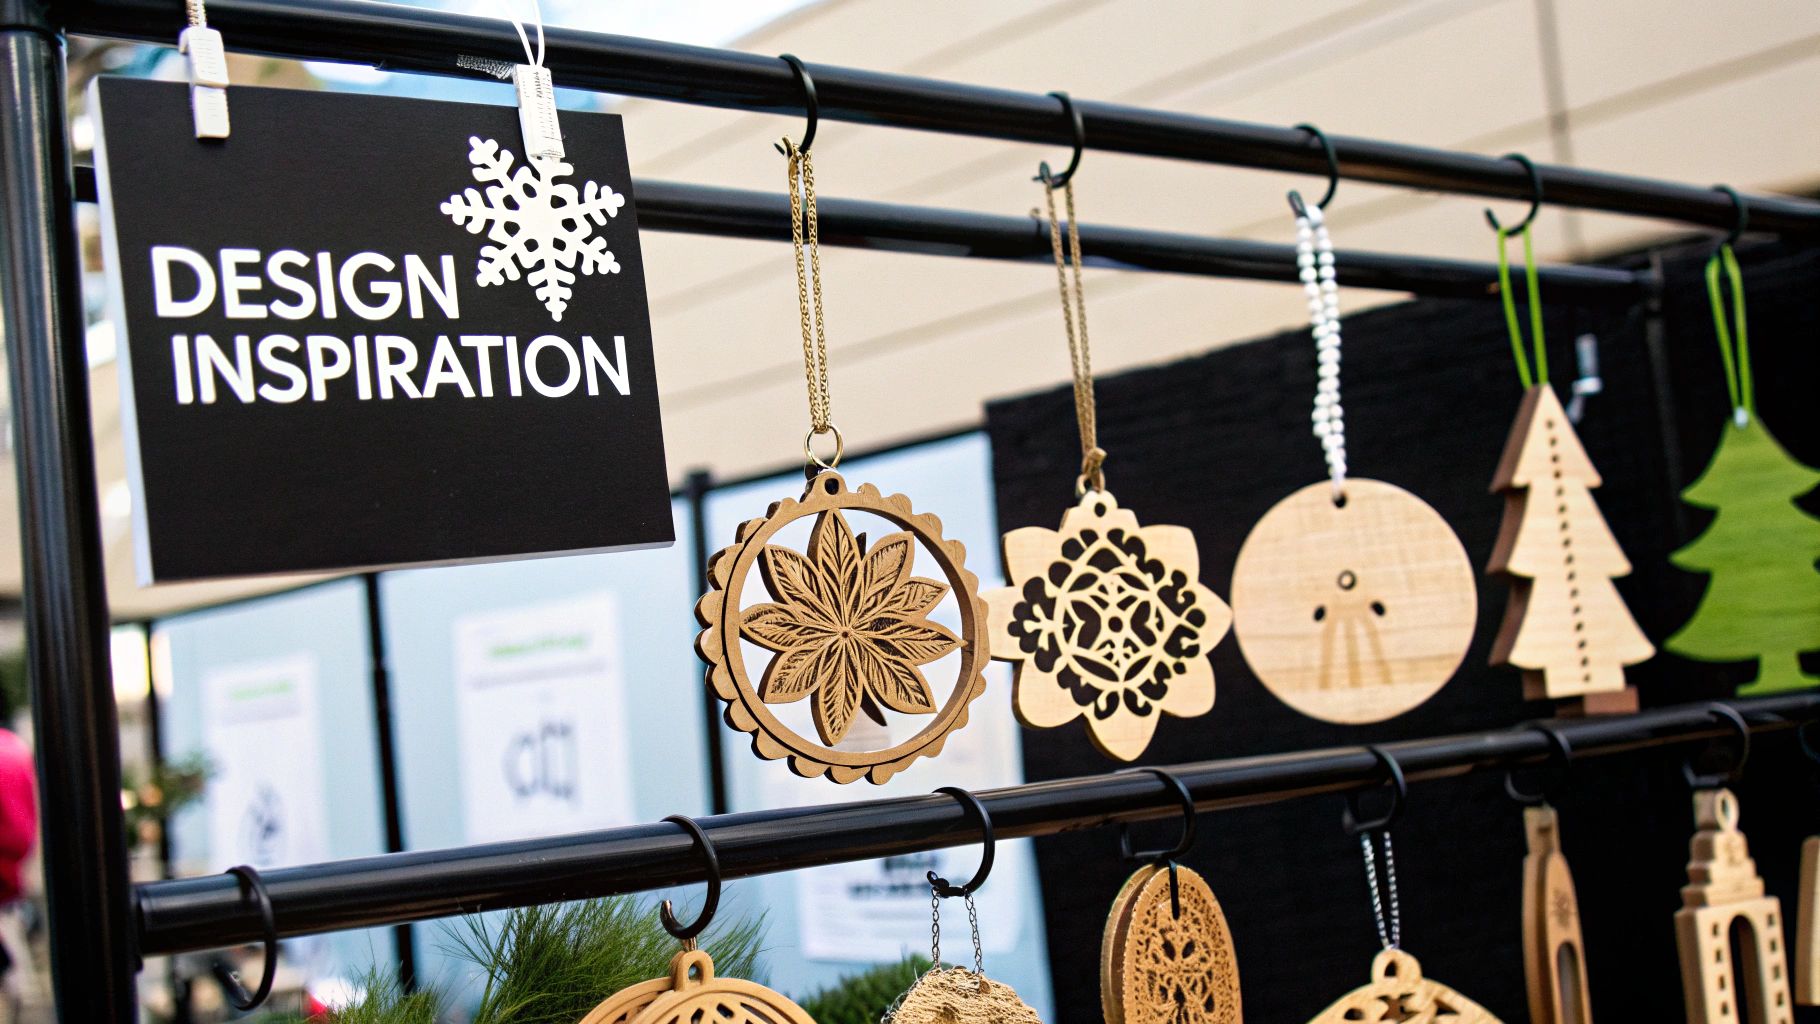
This is where the real fun begins and your creative vision for the advent calendar ornaments comes to life. You might lean towards classic shapes like stars and stockings, or maybe you're up for the challenge of creating tiny, intricate quilt blocks. Whatever you choose, the secret to a cohesive set of 24 ornaments is a good, sturdy template.
I’ve found that tracing my designs onto cardstock or even a repurposed cereal box works wonders. This small step is a game-changer for consistency, ensuring each ornament is uniform and giving your finished calendar a polished, professional feel.
With your template made, it's time to think about fabric. To make sure your ornament pieces complement each other beautifully, a little knowledge of the principles of color theory can go a long way. It’s what helps you pair prints and solids in a way that looks intentional and just works.
This project is the perfect excuse to play with fussy cutting. If you're not familiar, it's the technique of cutting your fabric to highlight a specific part of the pattern—like perfectly framing a tiny reindeer or a single holly leaf in the center of your ornament. It's a simple trick that elevates each piece into a miniature masterpiece.
As you cut, you'll end up with three pieces for every ornament: a front, a back, and a piece of batting. Trust me on this one: staying organized is key. I like to make little stacks for each ornament, keeping all three components together. This "assembly line" method saves a ton of headaches and makes the sewing process flow so much better.
A quick tip from my own experience: use small clips or pins to hold each set of three pieces together. When you’re ready to sew, you can just grab a stack and go, instead of digging through a pile of tiny fabric scraps.
The demand for handmade holiday items has absolutely exploded. Recent e-commerce data shows that in the last 90 days before Christmas, sales of decorations like these jumped by over 300%. Even more impressive, advent calendar sales have soared by a staggering 2,300% since early September.
If you’re tackling geometric designs with lots of little triangles or squares, using the right tool can make all the difference. For absolute precision and speed, I highly recommend a triangle shapes rotary cutting template. It’s a lifesaver when you're making a whole series of tiny quilt blocks.
Alright, with all your pieces cut and ready to go, it’s time for the fun part: heading to the sewing machine to bring these advent calendar ornaments to life. This is where those little stacks of fabric and batting finally start looking like the quilted treasures you envisioned.
First things first, we need to make a "quilt sandwich" for each ornament. It's a classic quilting term and a super simple process. Just lay your backing fabric right-side down, place your batting on top, and finish with your front fabric piece, right-side up. Take a moment to line up all the edges so everything is nice and square.
To keep the layers from wiggling around while you sew, you’ve got to secure them. You could use pins, but for tiny projects like this, I much prefer small binding clips. They're just easier to manage and they hold everything securely without poking holes or distorting the fabric. If you don't have any, these Wonder Clips by Clover are a game-changer for any sewing kit.
Once everything is clipped together, I like to add a few simple quilting lines. This not only binds the layers together for good but also gives the ornaments that lovely, textured, quilted look. Don't feel like you need to do anything fancy—a couple of straight lines stitched on a diagonal or even some gentle wavy lines will look absolutely beautiful.
Before you stitch around the outside, let's get the hanging loop ready. Cut a piece of ribbon or twine about six inches long. Fold it in half to create the loop, and then sandwich it between the front and back fabric layers at the top center of your ornament. The raw ends of the ribbon should poke out past the fabric, with the loop itself tucked safely inside.
Now you're ready to sew. Using a quarter-inch seam allowance, stitch all the way around the ornament, but remember to leave a small 1.5-inch gap open on one of the straightest sides. This little opening is how you'll turn the whole thing right-side out. And don't forget to backstitch at the start and finish to lock in your seam.
A Pro Tip: For a really polished look, take a moment to clip your corners and any curves before turning the ornament. Just snip close to the seam—but not through it! This little step makes a huge difference by reducing bulk, helping the seams lie flat and giving your ornament a crisp, clean shape.
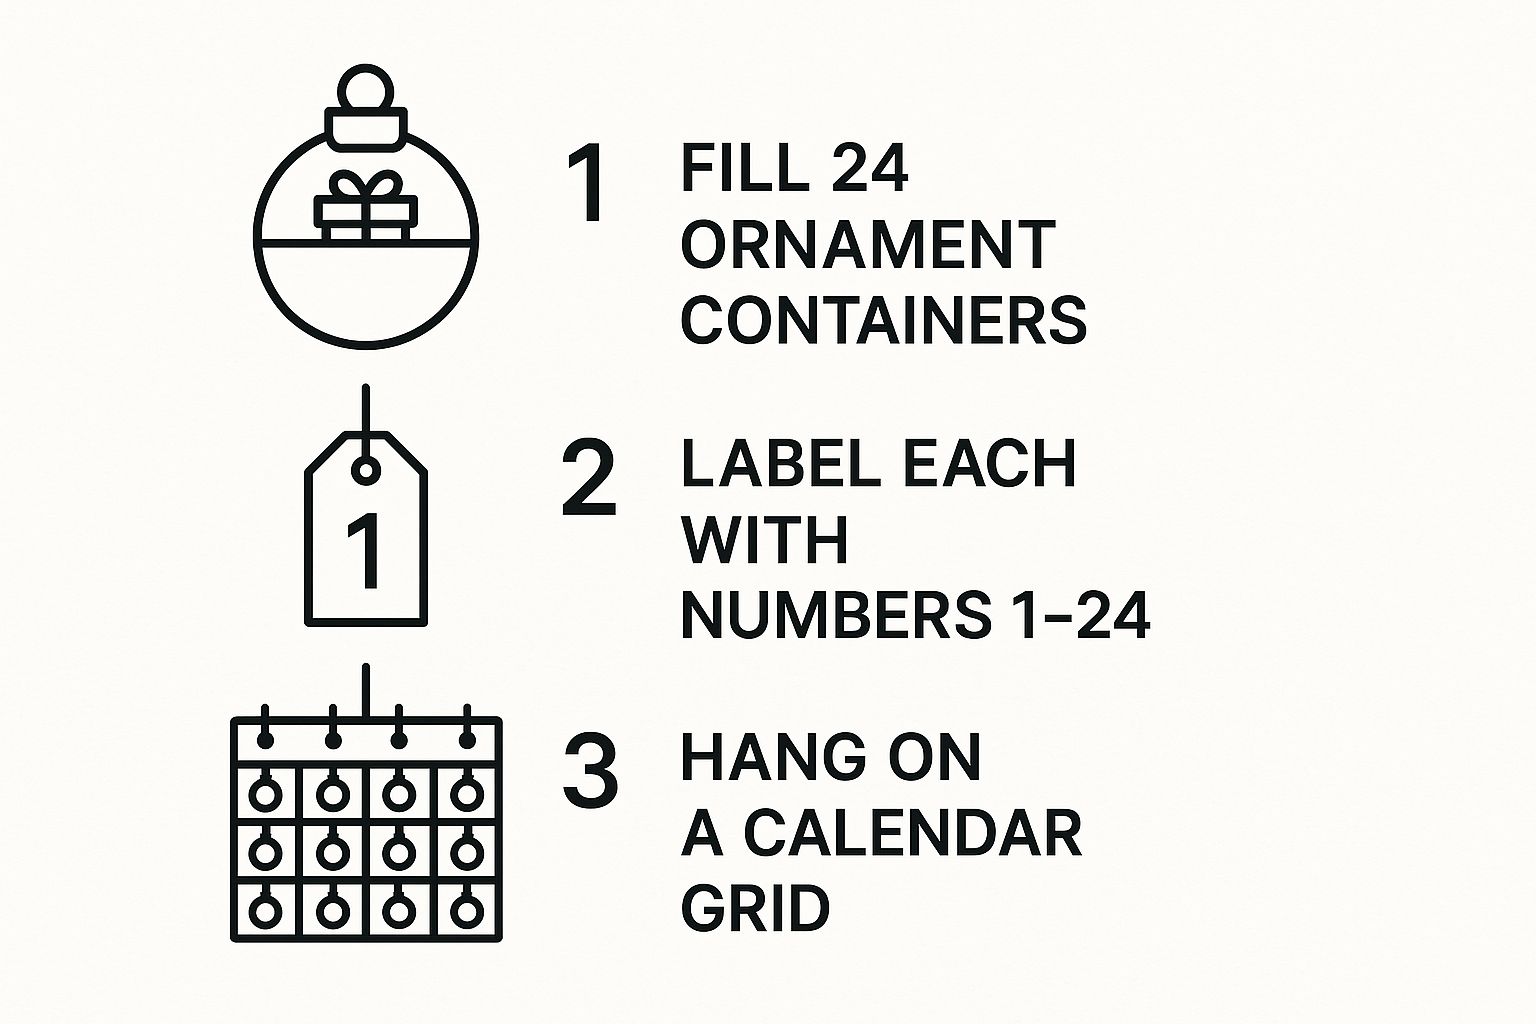
With your ornaments all sewn up, it's time to bring them to life. The numbers, from 1 to 24, are what officially turn these pretty little decorations into a real advent calendar. You've got a few different ways to tackle this, depending on the look you're going for and the tools you have on hand.
If you want a clean, modern vibe, stencils and fabric paint are fantastic. It’s a pretty straightforward way to get crisp, uniform numbers on every single ornament. For something a little more classic and handmade, you can't go wrong with hand embroidery. A simple backstitch or satin stitch adds a timeless, personal charm that I just love.
Of course, if you have an embroidery machine, now is its time to shine! This is the perfect way to get absolute precision, especially if you're using a fancy font or just want every number to be a perfect match.
Now for the fun part—the little details that make each ornament feel truly special. This is where you can inject a bit more of your personality into the project. Think about adding small embellishments that tie in with your fabric choices.
Here are a few ideas I've used over the years:
These are the small things that transform a craft project into a family heirloom. It’s no surprise that personalized, reusable advent calendars are becoming so popular.
More and more people are choosing to buy advent calendars for themselves or as gifts, moving away from disposable items toward things that can be cherished and reused year after year. You can see some of the data behind this trend over on Statista.com.
This growing trend really shows how much we all value creating our own holiday traditions, and a beautiful set of handmade ornaments is the perfect way to do just that.
You’ve done it! Twenty-four gorgeous little ornaments are all finished and ready to go. Now for the fun part: figuring out how to display your beautiful work and turn it into a real centerpiece for your holiday celebrations.
This is where you get to blend your new creations right into your existing decor. Think about your home's style. A classic, easy choice is a small, two-foot tabletop tree. It gives each ornament its own little spot to shine.
If your vibe is more rustic or minimalist, try finding a beautiful, sturdy branch from the yard. Hang it on the wall and let the ornaments dangle from it with different lengths of twine or ribbon for a really natural, earthy feel.
Another idea I love is using a big fabric panel or even a simple corkboard. You can pin each ornament onto a large piece of felt, which creates a wonderfully soft, traditional-looking wall hanging. Feel free to arrange them in a neat grid, a whimsical tree shape, or just a random scattering.
A little tip from my own experience: Don't hang the ornaments in numerical order! Mix them all up on your display. It turns the daily search for the right number into a fun little scavenger hunt for the kids (and adults!), adding an extra layer of excitement to the morning ritual.
Whatever you choose, your display is what truly brings the whole project together. It's the frame for your art, transforming a collection of individual ornaments into a stunning focal point for the entire season.
Whenever I start a new quilting project, a few questions always pop up. Here are some of the things people often ask when making these little fabric advent calendar ornaments.
My go-to is always quilting cotton. It’s just the perfect fabric for a project like this—it holds its shape, presses beautifully, and is tough enough to last for years of holiday traditions.
I'd steer clear of anything with a lot of stretch, like knits, or slinky fabrics like satin. They can be a real headache to work with on such a small scale unless you're a seasoned pro with those materials.
A good, sturdy template is the secret weapon here. Don’t just sketch your shape on a flimsy piece of paper. Trace it onto cardstock or even a clean piece of a cereal box.
Using that single, solid template to trace all 24 of your shapes onto the fabric is the only way to guarantee they'll all match perfectly.
A sturdy template really is non-negotiable if you want a professional-looking set. It takes out all the guesswork and makes sure your ornaments look like a cohesive collection when they're all hanging together.
You absolutely can. This is a wonderful project to do by hand. A simple, strong backstitch will hold everything together securely, and you can even add some lovely hand-quilted details for a special touch.
It’ll take a bit more time, of course, but hand-sewing is so relaxing and portable. It gives the ornaments a truly traditional, handcrafted feel.
If you end up making a bunch and decide to sell them, figuring out how to price handmade items is a super important next step. You want to make sure all your time and creativity are valued properly, and these unique ornaments are just the kind of thing buyers love.
At High Country Quilts, we have all the quilting cotton, notions, and expert advice you need to bring your holiday projects to life. Explore our collection at https://hcquilts.com.
At High Country Quilts we care deeply about community. With our experiences in retail, we know that a store is not only a place to shop but also a place for the community to gather and share. During this busy...

Hi! We’re Adam and Renee Wheaton, the new owners of High Country Quilts! For more than 40 years, we’ve owned and operated vacuum and sewing businesses. Following in Renee’s father’s footsteps after he retired from All Discount Vacuum and Sewing in Colorado...


Leave a comment