


We Love Our Quilting Community
At High Country Quilts we care deeply about community. With our experiences in retail, we know that a store is not only a place to shop but also a place for the community to gather and share. During this busy...


You've finished piecing a quilt block, but the seam still looks raised, and the towel under your iron keeps shifting across the wooden table. A wool pressing mat can help you get a flatter result, but it also changes where heat travels. Getting good results means protecting the fabric above the mat and the furniture beneath it.
A wool pressing mat isn't a universal ironing-board replacement, and it isn't permission to use maximum heat on every fabric. It's a dense, heat-retaining surface that works best as part of a layered setup, with a stable base, sensible iron settings, and a little patience while your work cools.
A wool pressing mat is a dense surface made from felted wool, commonly around 1/2 inch thick. Unlike a thin cover over a hollow ironing board, its felted fibers hold heat from the iron and release some of it back toward the fabric. That can help set a seam from above and below, making the mat useful for blocks and small pieced units.
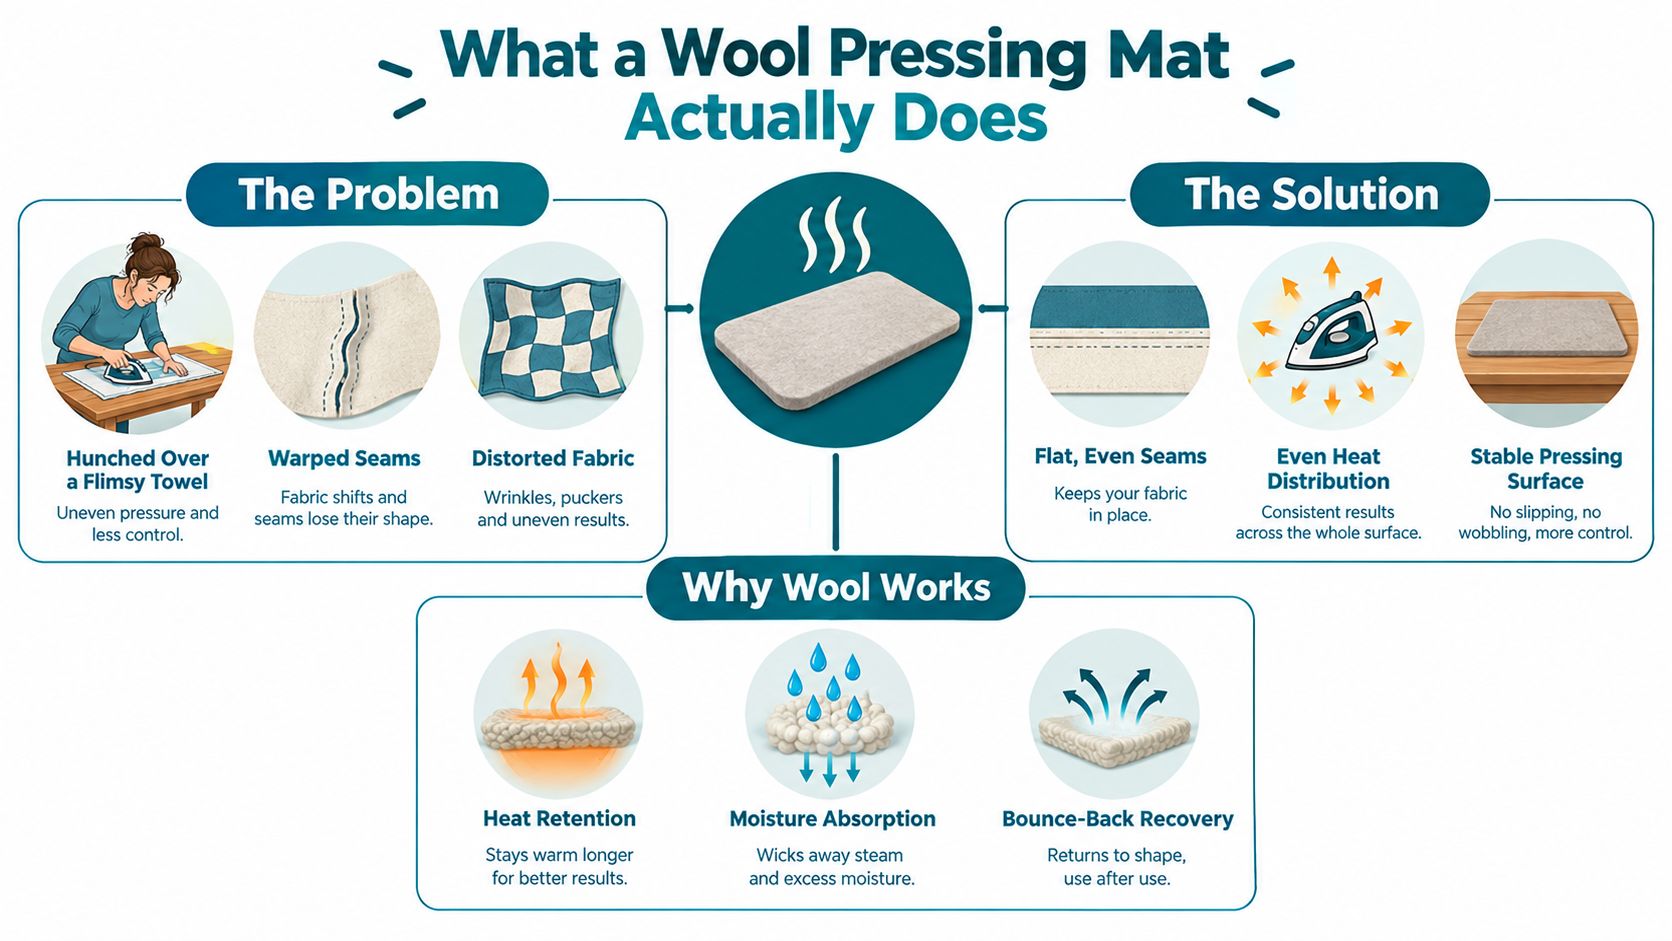
The material has a long history. Felt is made by interlocking fibers rather than weaving or knitting them, and Britannica's account of felt describes nonwoven felt as among the earliest textile goods. Wool fibers have microscopic scales. When moisture, heat, friction, and pressure act on them together, those scales can interlock, forming the dense felt structure used in pressing mats.
That structure explains both the mat's usefulness and its limits. The fibers and air spaces retain heat, but wool felt can also change with moisture, heat, movement, and compression. A mat's thickness and density affect how it behaves, so the words “wool mat” alone don't tell you everything about its performance.
Think of it as a thermal pressing surface, not a padded ironing-board cover. Its heat-retaining quality can help with seams, but heat can also travel through the mat toward the table. The setup beneath it matters just as much as the pressing technique on top.
Pressing and ironing use the same tool, but they're different motions. Pressing means lowering the iron onto the fabric, holding it briefly, then lifting it straight up. Ironing means gliding the iron across the cloth.
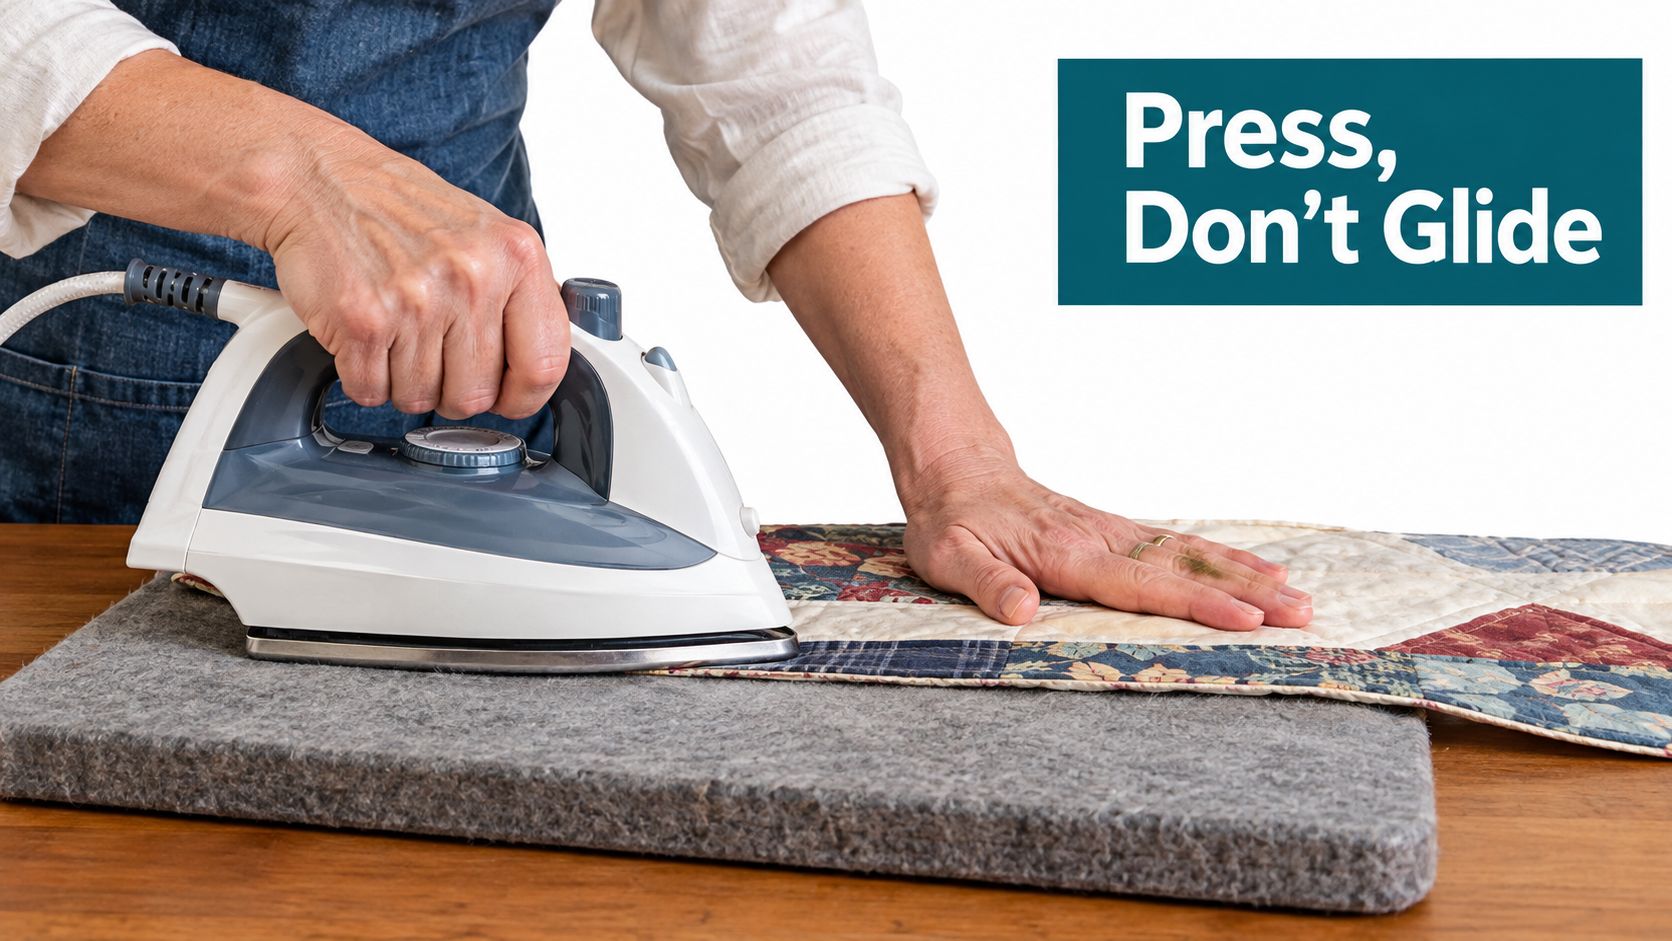
For a cotton quilt block, pressing helps set a seam without tugging the pieces out of shape. Sliding the iron can stretch fabric, especially along a bias edge, or shift a block that you've carefully aligned. The wool mat's retained heat can support this vertical motion, so you don't need to rub the iron back and forth to flatten a seam.
Wool appliqué needs a gentler approach. Wool is a protein fiber, and combining heat, moisture, and pressure can change its surface or cause shrinkage. Press lightly and in place through a pressing cloth rather than sweeping across the appliqué.
| Motion | What you do | Best use |
|---|---|---|
| Pressing | Lower, hold briefly, lift | Setting pieced seams and blocks |
| Ironing | Glide the iron across the fabric | Smoothing fabric when movement won't distort its shape |
If a seam looks uneven, resist the urge to iron it flat with a long stroke. Place the block on the mat, align the seam, and press in place. For appliqué, use a cloth and check the fabric after each short press. Choosing the motion for the material helps keep both the shape and the surface under control.
A quilt block can be perfectly pressed and still leave a mark on the table below it. Before switching on the iron, build a setup that protects both the furniture and the fabric. Wool helps retain heat, but it is not a guaranteed shield: heat and steam may pass through, so avoid placing the mat directly on delicate or lacquered wood. Set it on a stable, heat-resistant board or silicone pad, with the entire mat supported.
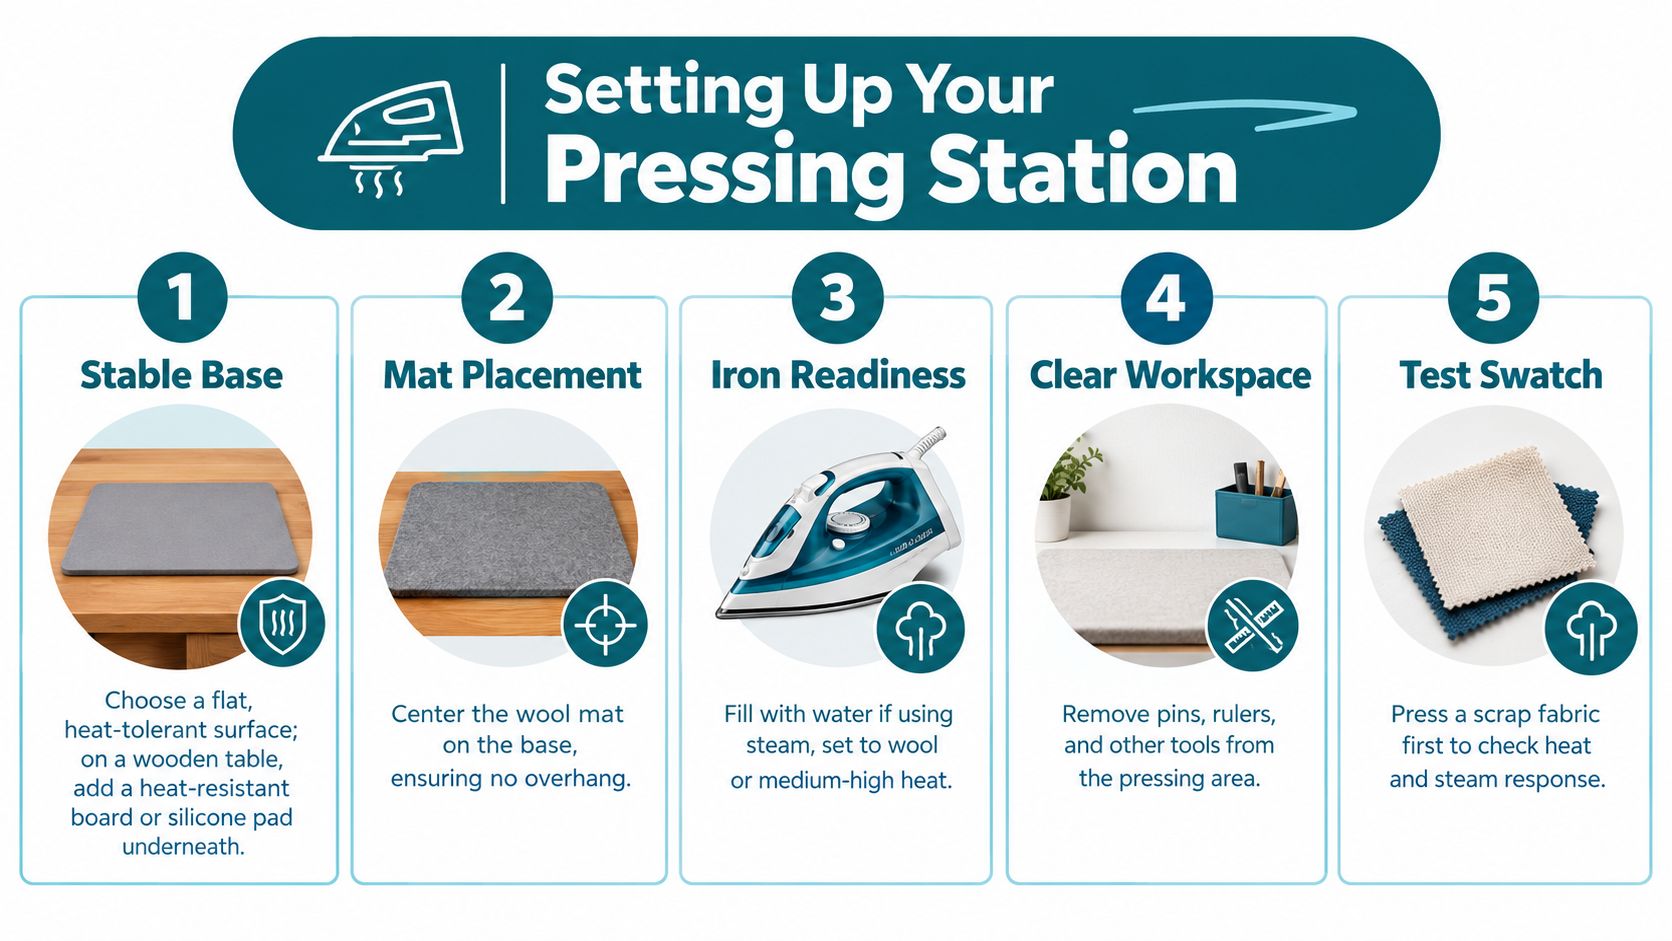
Center the mat and clear away pins, rulers, and other tools. If you plan to use steam, or are pressing dark fabric, synthetics, or protein fibers such as wool, place a clean cotton pressing cloth over the mat. It adds a barrier between the iron and fabric, which can help prevent residue or marks.
A wooden table needs a protective layer beneath the mat. Test the arrangement briefly with a fabric scrap and the iron setting you intend to use. After pressing, check beneath the layers for warmth or moisture before continuing. That check tells you more about how your particular setup behaves than the mat's thickness alone.
Use the same sequence each time: heat-resistant base, centered mat, pressing cloth when needed, scrap test, then project fabric. Keep the iron on its rest when you are not pressing. Do not leave it face-down on the mat. The insulation can hold heat around the iron, creating a risk for the mat and anything beneath it.
Here's a short demonstration of a pressing station in use.
| Work surface | Recommended base layer | Caution |
|---|---|---|
| Wooden table | Heat-resistant board or silicone pad | Avoid direct contact with delicate finishes; check for warmth or moisture |
| Stable sewing table | Heat-resistant layer appropriate to the surface | Don't assume the mat alone protects the tabletop |
| Ironing board | Secure, level board surface | Keep the mat supported and clear the area of tools |
A few moments spent checking the layers can prevent heat or moisture from reaching the table, while keeping the pressing area clear helps protect the fabric from stray tools.
Start with the block arranged so the seam is ready to press. Set it flat on the mat, with the seam where you can reach it without pulling or twisting the fabric. If the fabric is dark, delicate, or likely to transfer color, cover it with a clean pressing cloth.
Lower the iron straight onto the seam and hold it briefly. For quilting cotton, a vertical press of 2–5 seconds is a practical starting point, then lift the iron and inspect the seam before moving on. Don't drag the iron across the block. Let the fabric settle under the iron's weight rather than forcing it flat with extra pressure.
Lift, don't slide: Move the iron by picking it up and setting it down again. Your block will be less likely to stretch or skew.
Take a half-square triangle unit as an example. Align its edges on the mat and make sure the diagonal seam lies flat before you press. Press the seam in the direction your pattern calls for, lifting the iron cleanly rather than sweeping across the bias edges. Then let the unit cool flat before checking its shape or stacking it with other pieces.
Cooling is part of the pressing process, not an optional pause. Handling a warm seam too soon can let it shift before the fabric settles. The mat helps retain heat, so don't rush to pick up a block just because the iron is already off it.
Use the same careful motion for each seam, and check the result before continuing. If the unit looks puckered or distorted, stop and adjust the setup or technique on a scrap instead of trying to correct it with a harder press. Your furniture's protection still depends on the base layer beneath the mat, so keep that in place while you work.
Choose thickness for how you want the mat to behave, and size for the largest unit you want to press in one pass. Many mats are about 1/2 inch thick, but thickness and density vary. A documented 100% felted-wool mat measuring 38 by 38 centimeters, about 15 by 15 inches, is 15 millimeters thick, nearly five-eighths of an inch; its dense surface is also designed to hold pins temporarily during piecing (Echidna's mat specifications).
Felt can be manufactured across a wide range of densities and thicknesses. The historical manufacturing overview linked earlier describes felt weights from approximately 100 to 3,600 grams per square meter, and thicknesses from 1/32 inch to 3 inches. Those ranges show why “wool” alone isn't a useful quality specification. Check fiber content, thickness, density, and dimensions before choosing.
| Size (approx.) | Thickness range | Best for | Portability |
|---|---|---|---|
| 12 by 12 inches | Check the product specification | Individual blocks and small units | Easy to move and store |
| 15 by 15 inches | A documented example is nearly five-eighths of an inch thick | Blocks and small projects | Portable for a class or compact workspace |
| 17 by 17 inches or larger | Check the product specification | Larger blocks and more working room | Takes more space to store or carry |
A smaller mat is easy to keep beside a sewing machine, but you may need to reposition a large block or strip set. A larger mat offers more room, while a dense surface can also hold pins temporarily if you use the mat for piecing. For a larger quilt, expect to move the work rather than assume the whole project will fit at once.
Before buying, check whether the mat is felted wool or a blend, and confirm its stated dimensions and thickness. A dense 1/2-inch mat is a reasonable starting specification if you want a stable, heat-retaining surface. Match the size to the biggest block you regularly press without repositioning.
Set the iron for the fabric, not for the mat. The mat returns heat toward the fabric, but it doesn't make high heat safe for every fiber. Quilting cotton and wool appliqué need different treatment, and steam can narrow wool's margin for error.
| Fabric | Starting approach | Watch for |
|---|---|---|
| Quilting cotton | Use a controlled iron setting and press vertically for 2–5 seconds | Shine, color transfer, or distortion |
| Wool or wool-containing appliqué | Use the lower end of the wool range, about 110–148°C (230–300°F) | Shrinkage, felting, shine, or puckering |
| Dark, synthetic, or delicate fabric | Use a clean cotton pressing cloth and test a scrap | Color transfer, melting, or surface marks |
For wool, a pressing cloth is especially helpful. Use a slightly damp cotton or linen cloth, apply light pressure for a short interval, and check the result before pressing again. Let the piece cool flat for at least five minutes before judging whether it has changed shape. Moisture lowers the heat margin for wool, so aggressive steam can increase the risk of shrinkage or surface damage.
Don't borrow heat-press transfer settings for everyday quilting. A transfer needs heat and pressure to bond, while a seam press has a different purpose. Use a cautious setting and let a scrap test guide any adjustment. A technical ironing guide on wool notes how moisture changes wool's response to heat, which is another reason to test before pressing a finished piece.
Try a five-piece scrap test using the same fabric, mat setup, iron setting, and pressing method planned for the project. Inspect each scrap for shine, color transfer, odor, shrinkage, seam distortion, or a flattened mat surface. If any warning sign appears, change the setting or add a pressing cloth, then test again before moving to production pressing.
A wool pressing mat isn't a substitute for a temperature-controlled iron. Avoid leaving the iron face-down, especially at high heat, and keep a heat-resistant layer beneath the mat. A mat that retains heat can also pass heat toward the furniture underneath.
When you finish pressing, switch off the iron and let the mat cool flat. If you used steam, wait until the mat is completely dry before putting it away. Gently lift off loose lint and threads; soaking the felt can distort it. Store the mat flat in a dry place, where it will keep its shape between projects.
Don't machine-wash the mat, saturate it with steam, or spray starch directly onto it. Moisture and agitation can distort the felt, and starch may leave residue that transfers to fabric. Apply starch to the fabric instead, or use a separate pressing cloth, as explained in the wool mat care guidance.
| Symptom | Possible cause | Practical fix |
|---|---|---|
| Sticky residue on fabric | Starch sprayed onto the mat | Pause pressing, clean the surface gently, and apply starch to fabric instead |
| Warped or uneven mat | Too much moisture, heat, or movement | Dry the mat flat and avoid saturating it |
| Lingering odor | The mat or fabric stayed damp, or the iron was too hot for the material | Air the mat out, let it dry fully, and lower the setting after testing a scrap |
| Uneven pressing | The block shifted, the surface was unstable, or pressure varied | Recheck the layers, then press in place with even contact |
Treat the iron's resting place as part of the setup, not an afterthought. Return it to its iron rest whenever you pause. Leaving it face-down concentrates heat, which can scorch or compress the mat and create a fire hazard. Keep a heat-resistant layer beneath the mat, too, so retained heat is less likely to reach the table. The mat protects fabric during pressing, but it does not replace a safe surface underneath.
Let the mat, fabric, and table setup cool and dry before putting anything away.
High Country Quilts offers quilting fabrics, sewing machines, accessories, classes, and community events for makers at different stages. If you're choosing a wool pressing mat or building a safer pressing station, visit High Country Quilts to explore its sewing and quilting supplies and find tools suited to your projects.
At High Country Quilts we care deeply about community. With our experiences in retail, we know that a store is not only a place to shop but also a place for the community to gather and share. During this busy...

Hi! We’re Adam and Renee Wheaton, the new owners of High Country Quilts! For more than 40 years, we’ve owned and operated vacuum and sewing businesses. Following in Renee’s father’s footsteps after he retired from All Discount Vacuum and Sewing in Colorado...


Leave a comment