


We Love Our Quilting Community
At High Country Quilts we care deeply about community. With our experiences in retail, we know that a store is not only a place to shop but also a place for the community to gather and share. During this busy...


You're standing in a sewing shop, turning an embroidery hoop in your hands while a machine near the window stitches a flower onto fabric. The design looks too precise to be hand-drawn, yet the process seems more approachable than screen printing or industrial production. You may be wondering, what is machine embroidery, and whether a first project requires technical training, expensive software, or years of sewing experience.
The short answer is that machine embroidery uses a programmed design, a stabilized piece of fabric, and a computer-controlled needle to build an image with thread. The longer answer matters more for beginners, because good results depend on four connected choices: stabilizer, needle, thread, and hooping. Learn how those four parts work together, and the machine becomes far less mysterious.
Machine embroidery is the process of using a computerized or mechanically guided needle to stitch a programmed pattern onto fabric. Instead of deciding where to place every stitch by hand, you load a design file that tells the machine where to move, when to stitch, and when to change colors. The machine then repeats that path consistently, which makes it possible to reproduce a monogram, quilt label, logo, or decorative motif.
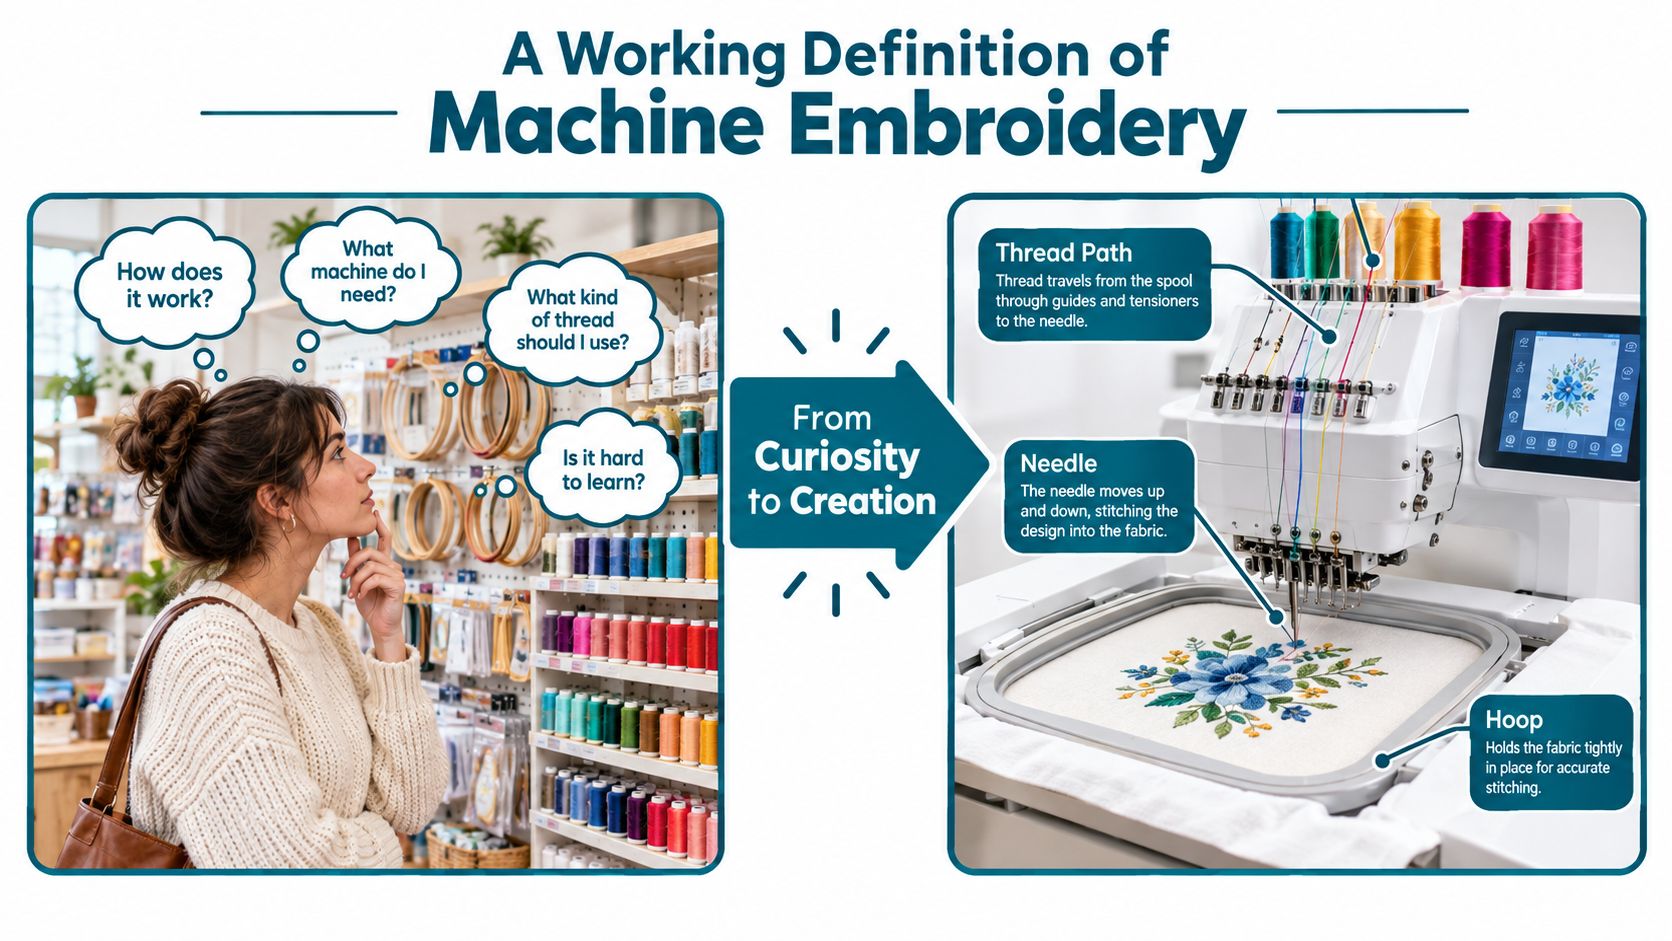
Hand embroidery works differently. Your hand controls the needle, spacing, direction, and tension, so small variations become part of the character of the finished piece. A machine embroidery design follows digital instructions instead. That doesn't make it less creative. You still choose the fabric, thread, placement, colors, and design, but the machine handles the repeated needle movement.
Screen printing creates another contrast. Screen printing places ink on the surface of fabric, while machine embroidery builds a raised, tactile design from thread. A stitched monogram has texture, weight, and a visible thread path that ink can't reproduce.
A new machine won't solve a poor setup. Stabilizer supports the fabric against the repeated needle movement. The needle must suit the fabric and thread. The thread affects appearance, strength, and tension. Hooping holds the material firmly enough for accurate movement without stretching it out of shape.
Practical rule: If a design puckers, breaks thread, or shifts out of alignment, check those four variables before blaming the machine.
The process follows a logical path. You select or create a design, prepare the fabric, choose a stabilizer, hoop the layers, load the correct file, and let the machine stitch. Afterward, you remove the stabilizer, trim loose threads, and press the finished piece.
That sequence explains why machine embroidery feels both creative and technical. You're not just pressing a button. You're preparing a small production system in which every part supports the next step.
Machine embroidery began as industrial textile automation, not as a weekend craft. Early Schiffli and Schiffli-derived machines helped factories produce decorative stitching at a scale and consistency that handwork couldn't match. Over time, mechanical control gave way to electronic control, and factory methods gradually influenced the computerized machines now found in sewing rooms.
Several milestones show how quickly the barriers fell. A history of machine embroidery identifies 1964 as a commonly cited turning point, when Tajima began manufacturing and selling multi-head automatic embroidery machines. Tajima introduced a 6-needle full-automatic color-change model by 1973, followed by bridge-type automatic machines with electronic 6-needle color-change technology by 1978.
Consumer access expanded in 1980, when the first computerized embroidery machines entered the home market. The first PC-based embroidery software appeared in 1982, making it possible to connect design creation with machine control in a more accessible way. Those milestones changed the task from manually encoding machine movements to preparing a digital design.
The effect was practical. A hobbyist no longer needed access to factory equipment to produce programmed embroidery. Computer controls made repeatable designs possible at home, while software created a path from an idea on a screen to a stitch file.
Modern machines continue that progression. Design files can be transferred through current storage methods, and consumer software lets makers adjust size, placement, colors, and stitch elements before stitching. Single-needle machines bring controlled embroidery to home studios, while multi-needle models make color changes more efficient for users who stitch frequently or work on personalized items.
The market reflects this broader role. Estimates place the global embroidery machine market at USD 1.20 billion in 2025, with a projection of USD 1.27 billion in 2026 and USD 1.7 billion by 2030, representing a projected 6.01% CAGR from 2026 to 2030, according to DataIntelo's embroidery machine market overview. These figures describe a manufacturing category serving apparel, home décor, and custom branding, not only a hobby technique.
Walk into a dealer showroom or sewing class and you may see three different ways to create embroidery. The right choice depends on the projects you want to make, how often you will stitch, and how much control you want over color changes and fabric movement. Whichever machine you choose, successful results still depend on four variables: stabilizer, needle, thread, and hooping.
A single-needle embroidery machine uses one needle position at a time. It can stitch a design in one color, then pause so you can change the thread when the file calls for a new color. This format works well for monograms, quilt labels, names, small home décor projects, and beginner practice.
The machine handles the planned movement, while you prepare the fabric and manage each thread change. That makes it a useful classroom format for learning how stabilizer supports fabric, how needle choice affects stitches, and how hooping keeps the material smooth. The tradeoff is hands-on color changes for multicolor designs. Check the embroidery field before selecting a large pattern, since the hoop size limits the area the machine can stitch.
A multi-needle machine holds several threaded spools and selects the needed needle as the design progresses. This arrangement suits colorful designs, personalized gifts, garments, and repeated projects where stopping for every color change would slow the work.
The extra needles can make production more efficient, but they do not replace preparation. You still need the correct stabilizer, a suitable needle, compatible thread, even hooping, and a properly prepared design file. More needles give you additional thread positions. They do not remove the need to understand how fabric and stitches behave.
A free-motion embroidery attachment turns a standard sewing machine into a hand-guided stitching tool. You lower or remove the feed dogs, move the fabric yourself, and create organic lines, stippling, sketch-like marks, or free-form motifs.
The result is closer to drawing with thread than following a fully programmed path. Your hands control the direction and stitch rhythm, so practice helps you coordinate movement with speed. This approach appeals to quilters and sewists who want direct control, but it does not offer the same automatic repeatability as a computerized embroidery machine.
| Machine Type | Best For | Skill Level | Typical Price Range |
|---|---|---|---|
| Single-needle flatbed | Monograms, quilt labels, small décor, learning programmed embroidery | Beginner to intermediate | Varies by model and dealer |
| Multi-needle | Multicolor designs, personalization, repeated projects, small-batch work | Intermediate to advanced | Varies by model and dealer |
| Free-motion attachment | Sketch-style work, stippling, organic quilting motifs | Beginner to advanced, with practice | Varies by sewing machine and attachment |
A BERNINA B500 embroidery machine represents the embroidery-only format. A BERNINA sewing and embroidery combination machine may fit someone who wants both functions in one machine. Compare the embroidery field, hoop options, file compatibility, and dealer or class support. Needle count matters, but it is only one part of choosing a machine you can use confidently.
A machine embroidery project starts on a screen but finishes in fabric. Each stage affects the next, so rushing through preparation often creates a problem that appears only after the needle begins moving.
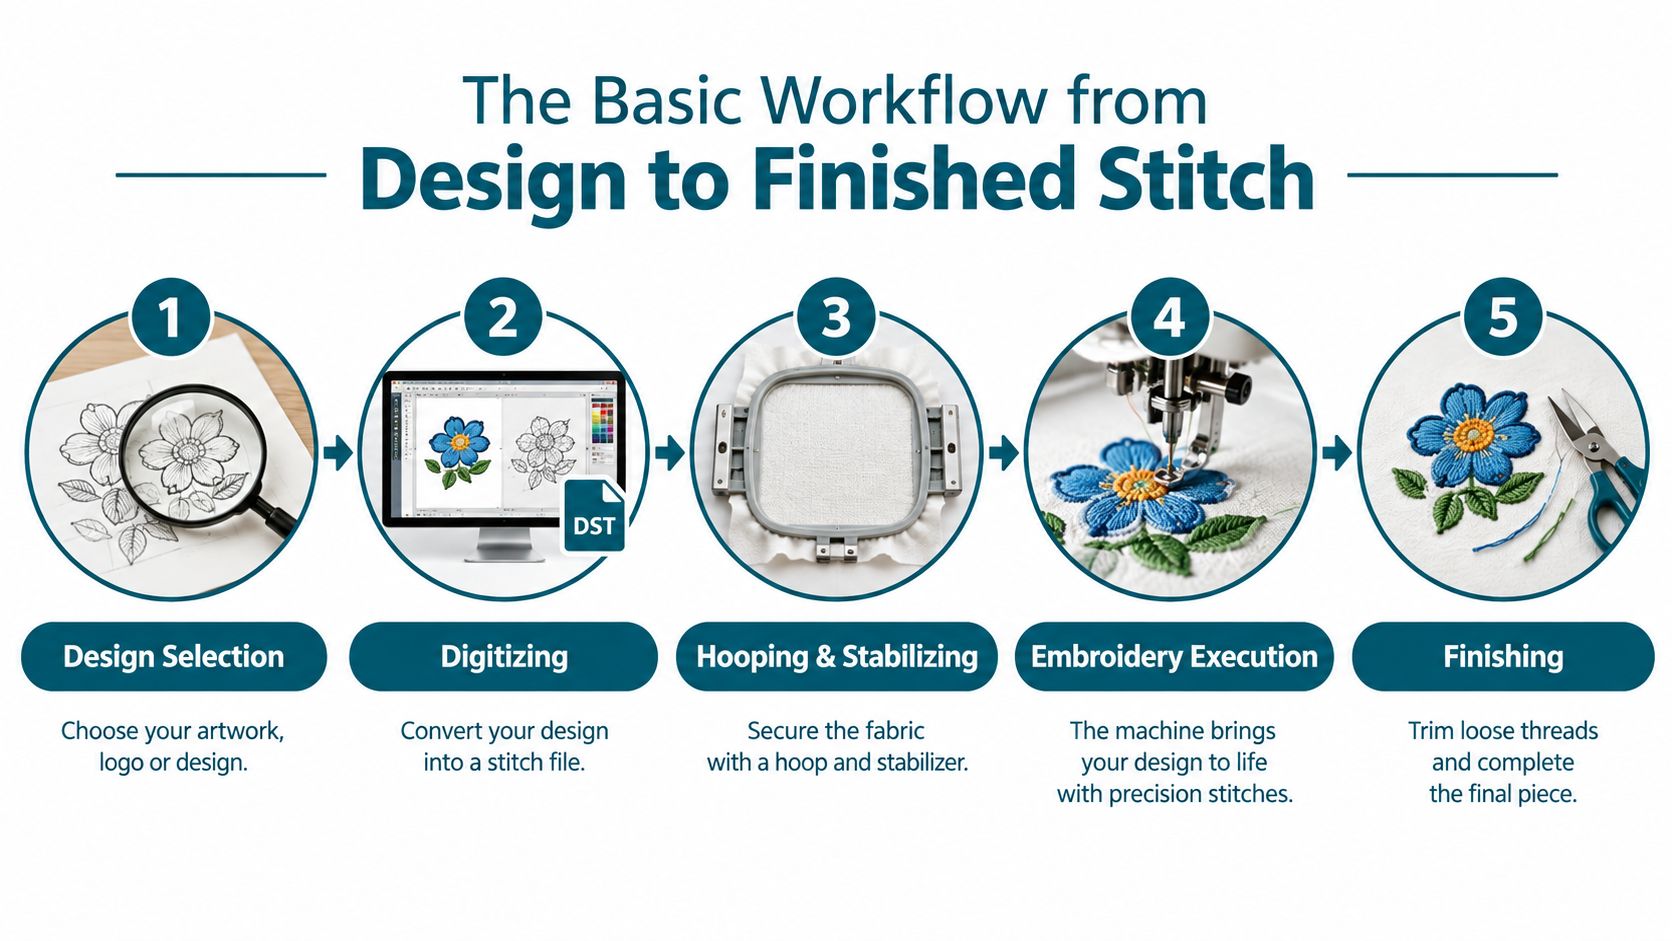
Begin with a design that fits the fabric, hoop, and project. You can purchase a pre-digitized design from a library or create artwork that will later be converted into stitch instructions. A small monogram on a tea towel needs a different approach from a dense filled design on a jacket.
Look at the design's size, stitch count, color stops, and intended fabric before loading it. A design that looks delicate on a computer screen may need simplified details or stronger support once it becomes thread.
Digitizing converts artwork into instructions the embroidery machine can read. The software assigns stitch types, directions, starts, stops, color changes, and densities. This is more than saving an image in a different format. A picture describes pixels or lines, while a stitch file describes needle movement.
The machine embroidery process resembles a CAD/CAM workflow. A technical embroidery information guide describes how a digitized design drives a computer-controlled machine that moves the hoop or pantograph in the X-Y plane beneath a stationary needle head.
Hooping places the fabric and stabilizer in a frame so the material stays controlled while the needle works. The fabric should be firm and smooth, not stretched beyond its natural shape. Choose the stabilizer according to fabric weight and design density, because the backing absorbs much of the stress that repeated stitching creates.
Load the compatible file, thread the machine, attach the hoop, and confirm the design placement. During stitching, the machine follows the programmed path, pauses for color changes, and may ask you to trim jump stitches. Watch the first part of the design. Early observation can reveal loose hooping, incorrect threading, or an unsuitable needle before the entire piece is complete.
This machine embroidery video demonstration can help you connect the digital file with the physical motion of the machine.
Remove the hoop carefully, then trim excess stabilizer and loose threads. Some stabilizers tear away, while others dissolve with water or remain permanently beneath the design. Press the fabric from the reverse side with a protective cloth when appropriate, and inspect the front for balanced coverage, clean edges, and unwanted puckering.
A starter kit should solve specific problems, not fill a drawer with every accessory on the dealer wall. Begin with materials that help you control appearance, support, and movement.
Thread choices shape the surface of the design. Rayon has a decorative sheen, polyester offers durability and washability, and cotton creates a more traditional matte appearance. A basic collection in useful colors, along with black and white, gives you room to practice without making every project a shopping expedition.
Embroidery needles have a larger eye to accommodate embroidery thread and a scarf designed to help protect the thread as the needle moves. The correct size depends on the thread and fabric. A lightweight woven fabric and a dense denim project shouldn't automatically use the same needle.
Stabilizer acts as a supportive substrate. It absorbs needle-and-thread stress so the fabric doesn't have to carry all of it. The machine embroidery stabilizer guide from Embroidize connects stabilizer weight with stitch count: under 5,000 stitches calls for light to medium weight, 5,000 to 15,000 stitches calls for medium to heavy weight, and over 15,000 stitches calls for heavy to extra heavy support.
| Fabric Type | Design Density | Recommended Stabilizer |
|---|---|---|
| Stretch knit or T-shirt fabric | Light to dense | Cut-away, often with additional temporary support |
| Stable woven cotton | Light to medium | Tear-away |
| Dense woven fabric | Medium to heavy | Heavier tear-away or cut-away, depending on the project |
| Lace or freestanding work | Open or thread-only design | Wash-away |
| Fabric needing surface protection | Any design with visible contact risk | Wash-away topper on the fabric surface |
The hoop size limits the embroidery field. Choose a hoop that accommodates the design without forcing the fabric into an awkward position. A hoop that's too small can't hold the design, while one that's unnecessarily large may make precise placement harder.
Machines speak different file languages. PES, DST, EXP, and JEF are common embroidery file formats associated with different machine ecosystems. Confirm the format required by your machine before transferring a design. A file can be perfectly digitized and still fail to load if it isn't saved in a compatible format.
A few terms will become familiar quickly:
A first project should be small enough to finish and useful enough to keep. Each item can teach one major skill without asking you to solve every embroidery problem at once.
Start with a single-color monogrammed tea towel. The flat fabric makes positioning easier, while the simple design lets you practice hooping and lightweight stabilizer selection. You'll also learn how a small placement error changes the balance of an everyday item.
A quilt label adds precision and meaning. It gives you a contained space for names, dates, or a short message, and it teaches you to check spelling and placement before starting the machine. A label also turns practice into permanent documentation that belongs on a finished quilt.
A simple project isn't a lesser project. It gives you enough repetition to notice what your hands are doing.
Next, try a small appliqué design on a child's garment or tote bag. The process introduces positioning, tack-down stitches, trimming excess fabric, and covering the raw edge with a satin stitch. Keep the shape uncomplicated so you can concentrate on the sequence rather than intricate cutting.
An in-the-hoop coaster or ornament shows how embroidery can help assemble a finished object within the hoop. You'll practice layering fabric, following color or placement stops, and removing the project without disturbing the edges.
Use a sample notebook as you work. Record the fabric, stabilizer, needle, thread, design, and any adjustments. Stitch one modest project at a time, and photograph each finished piece so you can compare your progress over the first three months. That record often reveals improvement that isn't obvious from one project to the next.
A first stitch-out can show exactly which of four variables needs attention: stabilizer, needle, thread, or hooping. Treat the sample like a small diagnostic test. Change one variable at a time, so you can identify the cause instead of guessing.
Puckering often means the fabric shifted or the stitches placed more stress on the material than its support could handle. Loose hooping and an unsuitable stabilizer are common causes. Re-hoop the fabric so it is taut but not stretched, then choose support that matches the fabric weight and design density.
Stitch the same design on a scrap using a firmer stabilizer. If that sample lies flatter, the original setup needed more support. The embroidery density glossary explains density through the spacing between neighboring stitch rows and also describes it as stitches per inch or stitch spacing. A dense design may need stronger support than a light outline, even on the same fabric.
A broken thread may point to a worn or unsuitable needle, an incorrect threading path, excessive tension, or a tangled bobbin. Stop the machine and remove the upper thread. Thread it again from the beginning, check the bobbin path, and install a fresh needle suited to the fabric and thread.
Keep your hands off the fabric while the machine stitches. Pulling can increase friction and shift the design. If the break returns in one color or section, inspect that thread path and look for dense stitching or a rough needle plate.
Registration problems occur when separate design elements stop lining up. A border can miss its fill, or an appliqué edge can sit away from its tack-down line. Check for hoop slippage, fabric movement, and skipped alignment marks.
If the design permits it, resew the alignment stitches first. Confirm that the fabric is secure and the hoop is firmly attached. A technical guide on embroidery machine timing describes the relationship between the needle and bobbin hook, including a 2.2 mm rise before the hook catches the thread loop. That detail helps explain why disturbed mechanical alignment can produce skipped or incomplete stitches.
Record the problem and your setup in your notebook. Comparing several stitch-outs makes recurring patterns easier to recognize and gives you a clearer starting point for a class or dealer-supported adjustment.
A first project often reveals more than a manual can. At a local BERNINA dealer, a one-on-one orientation can guide you through threading, hoop attachment, stabilizer choice, design loading, and evaluation of a sample stitch-out on your own machine. These steps connect the four variables that control results: stabilizer, needle, thread, and hooping.
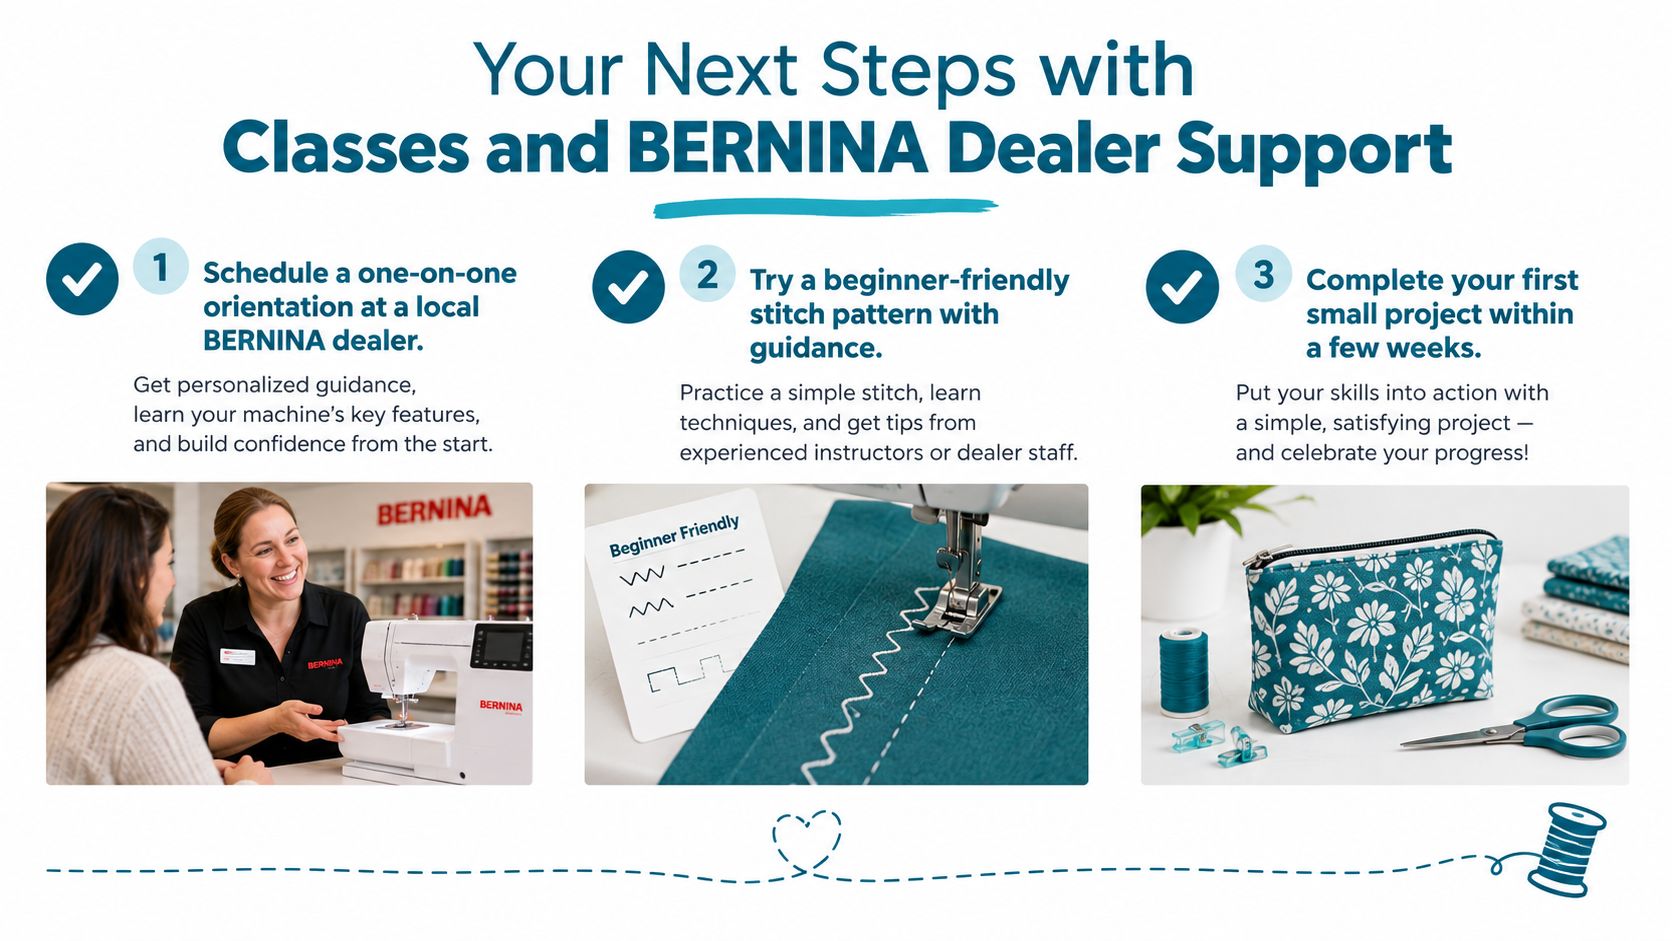
Choose a beginner class built around a monogram, towel edge, or quilt label. Each project keeps the design manageable while giving you practice with hooping, stabilizer selection, placement, and thread changes. If you own a BERNINA embroidery machine, High Country Quilts embroidery classes may provide local, machine-specific instruction and guided practice.
Bring a notebook. Record the fabric, stabilizer, needle, thread, hoop, and settings used for each sample. Ask the instructor to demonstrate how to identify the correct embroidery file format, wind or install bobbins, clean the needle area, and recognize early signs of tension trouble.
For your first shop visit, consider:
A weekly sit-and-sew or embroidery club at a Colorado Springs-area quilt shop can reinforce these habits. Repeated setup builds muscle memory, while in-person questions are easier to answer when someone can examine the fabric, hoop, needle, and thread together.
Take your first finished piece back to the shop for feedback. A teacher or dealer can identify what worked, suggest a suitable next project, and help you choose accessories based on the way you stitch.
High Country Quilts offers BERNINA sewing and embroidery machines, accessories, classes, and community events for makers in Colorado Springs. Visit High Country Quilts to review its embroidery support and choose a first project with guidance nearby.
At High Country Quilts we care deeply about community. With our experiences in retail, we know that a store is not only a place to shop but also a place for the community to gather and share. During this busy...

Hi! We’re Adam and Renee Wheaton, the new owners of High Country Quilts! For more than 40 years, we’ve owned and operated vacuum and sewing businesses. Following in Renee’s father’s footsteps after he retired from All Discount Vacuum and Sewing in Colorado...


Leave a comment