


We Love Our Quilting Community
At High Country Quilts we care deeply about community. With our experiences in retail, we know that a store is not only a place to shop but also a place for the community to gather and share. During this busy...


You've opened a beautiful bundle of coordinating fabric, read a pattern calling for fat quarters, and then wondered whether every piece will fit. The answer depends on more than the bundle's colors. You need to understand the cut, prepare it accurately, calculate the quantity, and check whether your project needs short patchwork pieces or long continuous yardage.
This guide explains how to use fat quarters from the first measurement to the final layout. You'll learn which projects suit them, how to cut them efficiently, and how to avoid the mistakes that leave beginners short on fabric.
A fat quarter isn't a regular quarter-yard cut. A standard long quarter measures 9 by 44 inches, while a fat quarter is typically an 18 by 22 inch rectangle. The wider shape comes from taking a half-yard from a 44-inch-wide bolt and cutting that piece in half crosswise, rather than cutting a narrow strip from selvage to selvage. The result is a shorter, broader piece that works better for many quilt blocks. Quilt Keeper Studio explains the standard fat-quarter cut and its usable area.
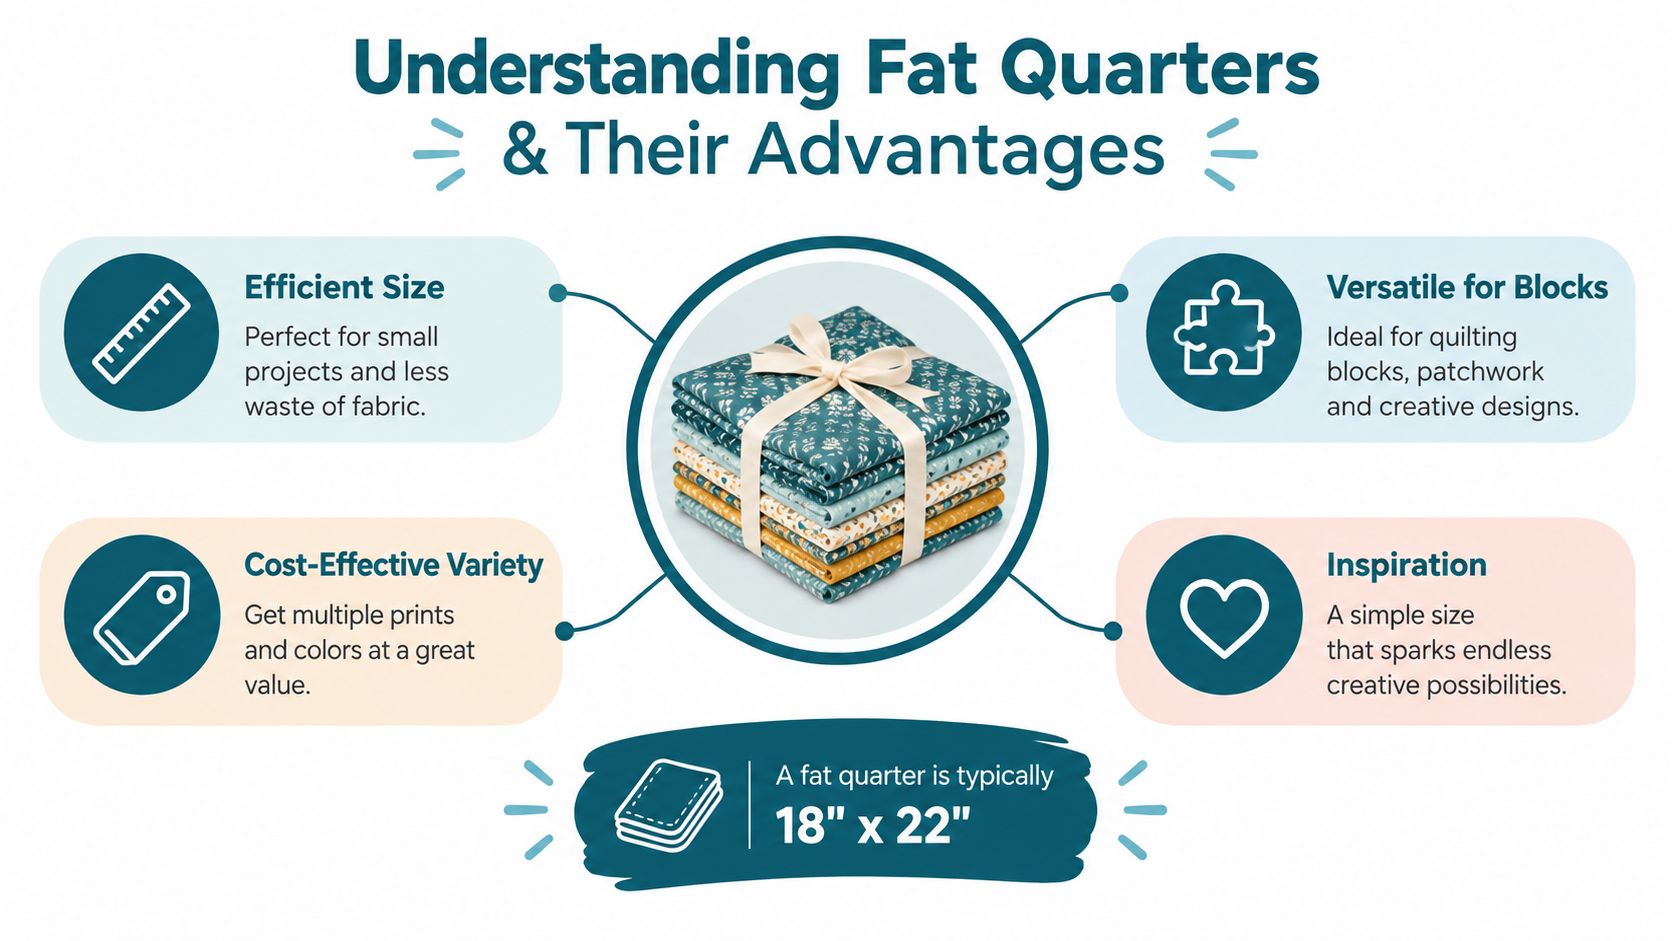
The usual 18 by 22 inch footprint equals 396 square inches of usable fabric, although small variations can occur because fabric widths and trimming needs differ. That extra cross-grain width is the practical advantage. You can cut squares, rectangles, templates, and larger patchwork units that may not fit comfortably across a long, narrow quarter.
Fat quarters offer variety without requiring a full yard of every print. One yard of fabric yields four fat quarters, making them a convenient way to buy small, project-ready pieces. A coordinated bundle can give you several prints for a sampler, scrap-style quilt, pillow, bag, or table runner while keeping the collection visually connected.
The shape also explains why many patterns are described as fat-quarter friendly. Their largest block pieces are planned to fit within the 18 by 22 inch rectangle, so you can cut directly from the precut instead of first converting a full yard into smaller pieces.
Practical rule: Check the largest required cut before buying. If that piece won't fit inside an approximately 18 by 22 inch rectangle, the pattern isn't truly fat-quarter friendly for that unit.
Choose a fat quarter when your pattern uses broad squares, block components, appliqué shapes, or several small pieces from each print. Choose a long quarter when you need length, such as strips, binding sections, or other cuts that depend on the fabric's full width. A fat quarter gives you a more flexible shape, but it can't replace yardage wherever the pattern needs a long, uninterrupted strip.
That distinction helps you shop with purpose. Fat quarters are excellent building blocks for patchwork, but they aren't a universal substitute for yardage.
A neatly folded fat quarter can look ready for cutting, yet packaging may leave ripples, a distorted edge, or an uneven selvage. Correcting those problems first helps every later measurement stay accurate. Prepare a sharp rotary cutter, a self-healing cutting mat, and a clear quilting ruler with visible measurement lines. High Country Quilts carries quilting fabrics and sewing accessories, including rulers, mats, and replacement blades suited to this stage.
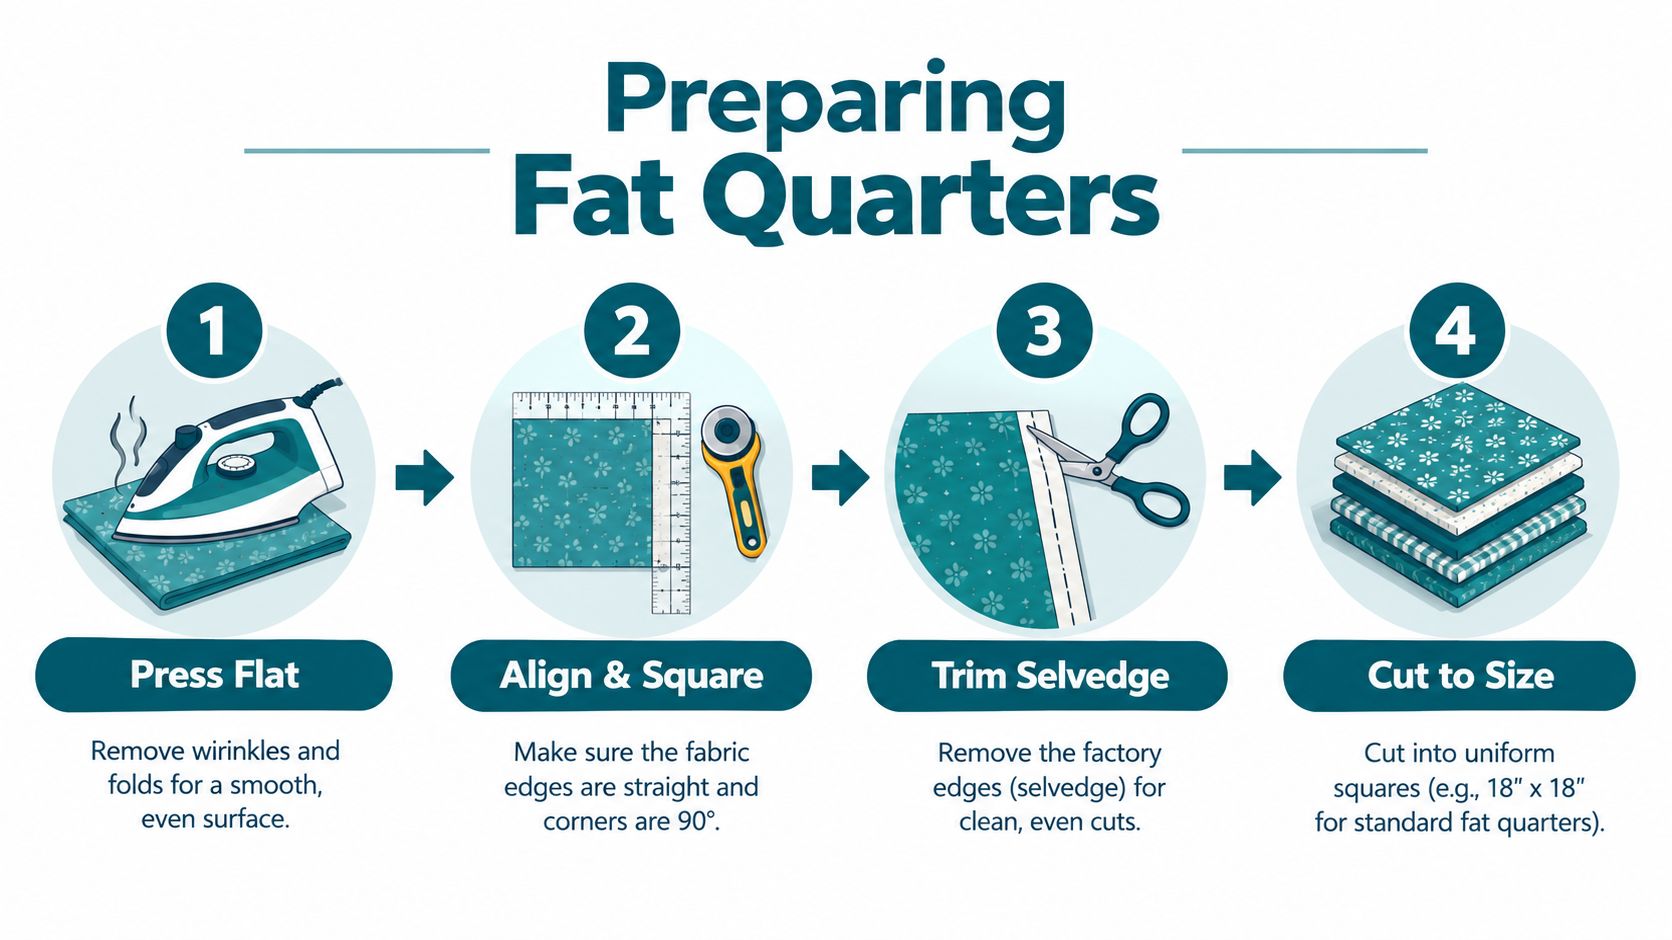
Open the fat quarter completely and press it gently to remove folds. Keep the iron moving without pulling or stretching the fabric. An edge stretched during ironing may shift back after cutting, making an accurate measurement appear wrong.
If you prewash fabric, wash and dry it before pressing and cutting. Otherwise, press it as it comes from the shop so the layers lie flat. Pressing gives the ruler a stable surface. Without it, hidden ripples can shift the fabric during a cut.
Lay the fabric on the cutting mat, matching the fold or another straight edge with a grid line. Set the ruler along a dependable grain line or a previously squared edge, then trim only enough to remove distortion. You are creating a trustworthy reference edge, not removing fabric to make the shape look perfect.
Trim the uneven selvage if the pattern calls for a clean edge. Check the print before making repeated cuts. Florals, stripes, and other directional motifs may need a marked orientation, especially when the finished blocks must face the same way.
Measure the first unit carefully, then repeat that measurement for the remaining pieces. Cutting matching units as a batch reduces small measuring differences that can accumulate when every piece is measured separately. A trimmed fat quarter can yield about 32 small 4.5-inch squares, according to this fat-quarter cutting guide. Treat that figure as a planning reference, because squaring, layout, and the usable fabric left after trimming affect the final yield.
Several compatible fat quarters can be stacked to speed the process, but too many layers may slide. Align the edges, press the ruler firmly, and guide the rotary cutter beside the ruler. If the blade skips threads or needs extra pressure, replace it.
Put safety first. Keep your free hand behind the ruler, close the cutter when you're not using it, and rotate the mat instead of twisting your body around a long cut.
After cutting, keep each print's units together. Label stacks by fabric or block position so accurately cut pieces do not become a confusing pile beside the sewing machine. This small organizing step also helps you compare the pieces with your pattern before sewing.
For a visual demonstration of the preparation sequence, watch the embedded tutorial below.
Start with the pattern's fabric list, then use a calculation to check whether its quantity fits the quilt dimensions. Mrs. Quilty's fat-quarter planning guide gives a practical rule: divide the quilt width by about 17.5 inches, divide the length by about 20.5 inches, round both answers up, and multiply the results.
For example, enter the width in the first division and the length in the second. Rounding up allows for the usable fabric area rather than treating every fat quarter as a perfect, untouched rectangle. The result remains an estimate. Block dimensions, sashing, borders, directional motifs, trimming, and waste can all change the number you need.
| Project Size | Fat Quarters Needed |
|---|---|
| Baby quilt | 6 to 9 |
| Lap quilt | 12 to 16 |
| Twin quilt | 20 to 30 |
| Queen quilt | 32 to 42 |
These ranges are summarized in Stitchin' Heaven's fat-quarter yardage guide. A separate planning reference lists broader ranges, including 8 to 16 for baby or crib quilts, 24 to 36 for twin quilts, and 36 to 50 for queen quilts. The difference is a useful warning: quilt size provides an outline, while the cutting plan determines whether the fabric works.
Find the pattern's largest cut and compare it with the usable rectangle left after squaring the fat quarter. A block may fit in total area but fail once the cutting layout is arranged. Draw the cuts on paper if the pattern uses several large pieces. That simple test can reveal a shortage before fabric arrives.
Look separately for borders, backings, sashing, and other long, continuous strips. Fat quarters suit small and medium pieces, while these longer sections usually need yardage, as Missouri Star Quilt Co. discusses in its guide to borders and other long strips.
Leave room for shrinkage and trimming instead of planning to use every last inch. Check directional prints, too. A bundle can contain enough total fabric yet lack enough correctly oriented pieces for a particular block. If the pattern demands many identical cuts or long strips, yardage may suit the project better than fat quarters.
A first project feels much easier when each fat quarter has a clear role. Choose a design built from repeated, manageable pieces, then focus on accurate cutting, a consistent seam allowance, and an orderly layout. Those habits often affect the finished result more than a complicated block.
A simple patchwork lap quilt works well for beginners because repeated units make mistakes easier to spot and correct. A project of this type may use about 12 to 16 fat quarters, with the exact amount depending on the finished size, block design, borders, and backing. Before cutting, confirm that each fat quarter can supply the required pieces after squaring and trimming.
Sort the fabrics into light, medium, and dark groups. Cut the squares or other units, then arrange them on a design wall, clean floor, or table before sewing. Join pieces into rows, pressing after each seam, and sew the rows together while matching intersections with pins or clips. Trim any unit that misses the required measurement before adding it to the quilt. One slightly oversized or undersized block can make later rows drift.
A coordinated fat quarter bundle provides a ready-made palette when choosing individual prints feels difficult. Check the bundle's contrast before buying, since coordinated colors can still contain fabrics with similar values.
A table runner applies the same patchwork principles on a smaller scale. Select a central arrangement, add a narrow frame if the pattern includes one, and plan separate yardage for any border that requires a continuous strip. The compact format makes straight seams and matching edges easy to inspect.
Match the print scale to the cut size. A large motif may disappear when divided into small pieces, while a small geometric print can create a steady rhythm. Lay out every unit first and photograph the arrangement before moving the pieces to the sewing machine. The photo acts like a map when the order becomes unclear.
Patterns designed for precuts can reduce guesswork. Browse fat-quarter-friendly quilting patterns, including projects described as fat-quarter and scrap friendly.
A pillow cover gives each fat quarter a visible role without requiring a full quilt. Piece the front from squares or rectangles, then choose the backing method specified by the pattern. This smaller panel offers useful practice with pressing, accurate corners, and keeping seam allowances consistent.
Check a centered motif before cutting. Measure the design and position it deliberately instead of treating the print as random. Trim the finished panel to the pattern's measurements so the corners remain crisp and the backing fits properly.
Save leftover units for a matching accessory or store them with the remaining fabric. Fat quarters also suit other small sewing projects, but the same check always applies: identify the largest required piece and confirm that it fits before making the first cut.
A coordinated bundle may look balanced on the shelf, yet the finished quilt depends on how the pieces work together. Start with value, or how light and dark each fabric appears. Hue and print scale matter too. Fabrics in different colors can share a similar value, causing nearby shapes to disappear into one another.
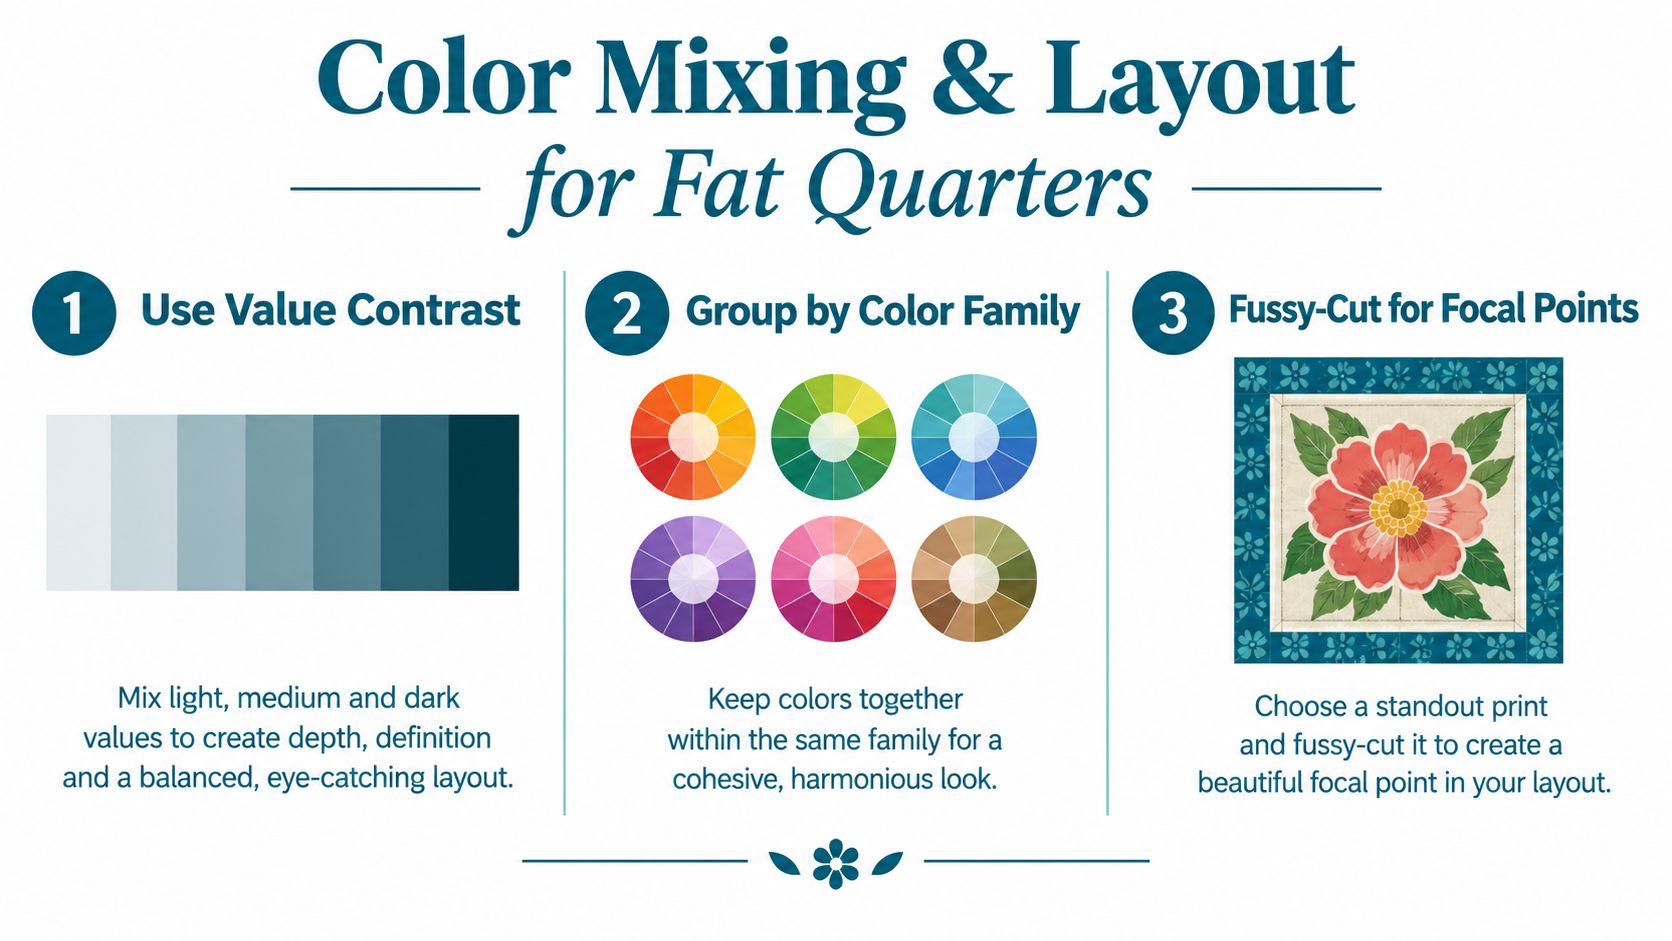
Before cutting, sort the fabrics into light, medium, and dark groups. The groups do not need equal representation. They need enough separation for the block shapes to stay readable. If the fabrics are hard to judge, photograph them in grayscale on your phone. Removing color makes the light-to-dark relationships clearer.
A simple layout test can prevent hours of unpicking.
Several colors can share one quilt without creating visual noise when their undertones relate. Place blues together, then greens, warm colors, or neutrals, depending on the collection. You might let the arrangement shift gradually from one family to another, or spread the families across the quilt for a scattered patchwork effect.
Use a design wall, clean floor, or notebook-sized planning grid. Move one print at a time and watch for areas where similar values collect. Repeat a strong print in more than one location so it supports the overall rhythm instead of becoming an isolated accent.
Fussy cutting places a chosen motif inside a template rather than allowing the cut to fall anywhere on the fabric. The method suits medallions, florals, animals, and other recognizable designs. Set the template over the fabric before cutting, then check both the motif's position and the amount of surrounding fabric the layout will use.
Layout check: Step away and view the arrangement from a distance. Repeated colors and gaps in value often stand out more clearly when individual pieces are no longer demanding your attention.
Plan the border at the same time as the interior blocks. A fat quarter's 18 by 22 inch footprint is poorly suited to long continuous strips, so borders may require separate yardage. Making that choice early protects the focal arrangement and gives the quilt a clean frame. It also helps determine whether fat quarters suit the project, rather than forcing every component from the same bundle.
Fold fat quarters neatly, keeping them out from under heavy items that can create lasting creases. Label each bundle with its dimensions and collection details, then store it in a breathable container away from direct sunlight. Follow your fabric and project preferences when deciding whether to prewash. Press any folds or wrinkles before cutting.
Maintain cutting tools, and store usable scraps with their parent bundle so future projects remain easy to plan. Before choosing a pattern, check its largest cut and yardage requirements. High Country Quilts carries fabric, sewing equipment, classes, and community events for different skill levels.
Visit High Country Quilts for fat quarter bundles, quilting supplies, and project-ready fabrics. Classes and workshops can build confidence in accurate cutting, piecing, and turning precuts into a finished quilt.
At High Country Quilts we care deeply about community. With our experiences in retail, we know that a store is not only a place to shop but also a place for the community to gather and share. During this busy...

Hi! We’re Adam and Renee Wheaton, the new owners of High Country Quilts! For more than 40 years, we’ve owned and operated vacuum and sewing businesses. Following in Renee’s father’s footsteps after he retired from All Discount Vacuum and Sewing in Colorado...


Leave a comment