


We Love Our Quilting Community
At High Country Quilts we care deeply about community. With our experiences in retail, we know that a store is not only a place to shop but also a place for the community to gather and share. During this busy...


You've probably been there. You find a cute applique pattern, pull fabrics from your stash, and then hit the same question almost every beginner asks: Do I really need to turn all those edges under?
If you want a method that's faster, easier to learn, and full of texture, raw edge applique is often the answer. It lets you cut shapes, fuse them in place, and stitch them down without folding the seam allowance under first. That saves time, especially on leaves, letters, flowers, and playful shapes with curves or points.
I teach a lot of beginners in Colorado Springs who want a clear starting point, but they also want honest advice about what happens after the project leaves the sewing room. Will it fray? Will the edges lift? Is it fine for a wall hanging but not ideal for a child's quilt? Those are the questions that matter. So let's build this step by step, then talk about how raw edge applique holds up with washing, wear, and use.
You cut a flower, a letter, or a leaf, place it on your background, and stitch it down without folding the edge under first. That is raw edge applique. The fabric edge stays visible on purpose, which gives the design a little texture and keeps the prep much simpler than turned-edge methods.
For beginners, that difference matters right away. You are not trying to tuck under tiny points or smooth every curve with a needle. You are building a picture with fabric shapes, almost like making a collage, then securing those shapes so they stay where you want them.
Historically, applique itself has very old roots. Scholars and museums trace applique traditions back thousands of years, with early examples connected to ancient Egypt and Asia, including an Egyptian canopy quilt dated to about 980 B.C. (history of applique techniques). That history helps beginners see raw edge applique in the right light. It is a practical style choice, not a lesser version of quilting.
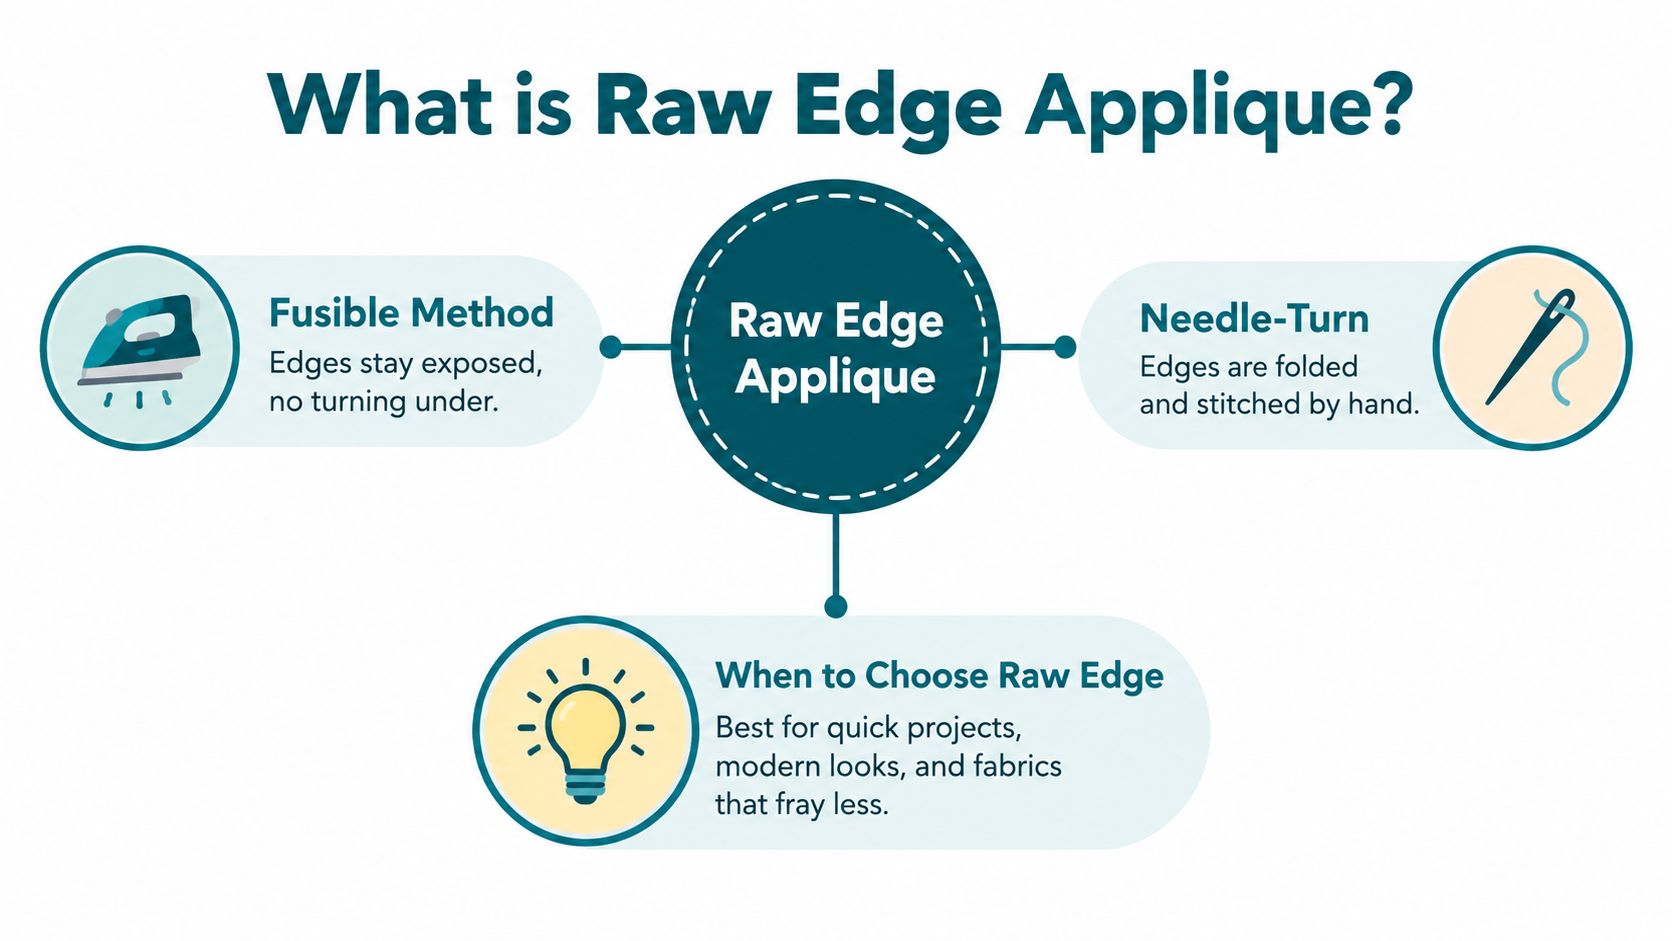
Needle-turn applique gives you a folded edge that looks tucked, smooth, and formal. Raw edge applique leaves the cut edge exposed, and the stitching often becomes part of the design itself.
Museum guidance on applique methods notes that modern raw edge work leaves the edge unturned and is commonly used in machine applique because it allows speed and design flexibility (Illinois State Museum applique history). If needle-turn is like fine hand finishing on a hem, raw edge is closer to sketching with fabric on your sewing machine. Both are valid. They create different looks and ask different things from your time and patience.
Raw edge applique is a strong choice when you want to get shapes onto the quilt top accurately without a lot of handwork first.
It works especially well for:
This method also helps if you like to audition fabrics before committing. Fuse or pin the shapes in place, step back, and check the balance before you sew. That is reassuring for newer quilters.
If you are comparing styles for a future project, browsing a broader applique pattern collection can help you spot the difference between crisp turned-edge motifs and the more relaxed look of raw edge shapes.
A good beginner question is not “Is raw edge applique right or wrong?” A better question is “Does this finish match the look I want and the amount of prep I want to do?”
Choose raw edge applique if you want:
Reconsider it if your main goal is a fully tucked, traditional finish with no exposed edge at all. In that case, needle-turn or another turned-edge method may fit better.
The key is expectation. Raw edge applique is meant to look like layered fabric with a stitched edge, and that visible edge is part of its charm.
You have a cut flower ready to place, the iron is hot, and the shape looks perfect on the pressing board. Then you pick it up, set it on the background, and one petal twists just enough to throw the whole block off. Fusible raw edge applique solves that beginner problem well. It lets you lock in placement before you stitch, so you can focus on accuracy and later decide how much wash-and-wear the finished piece needs to handle.
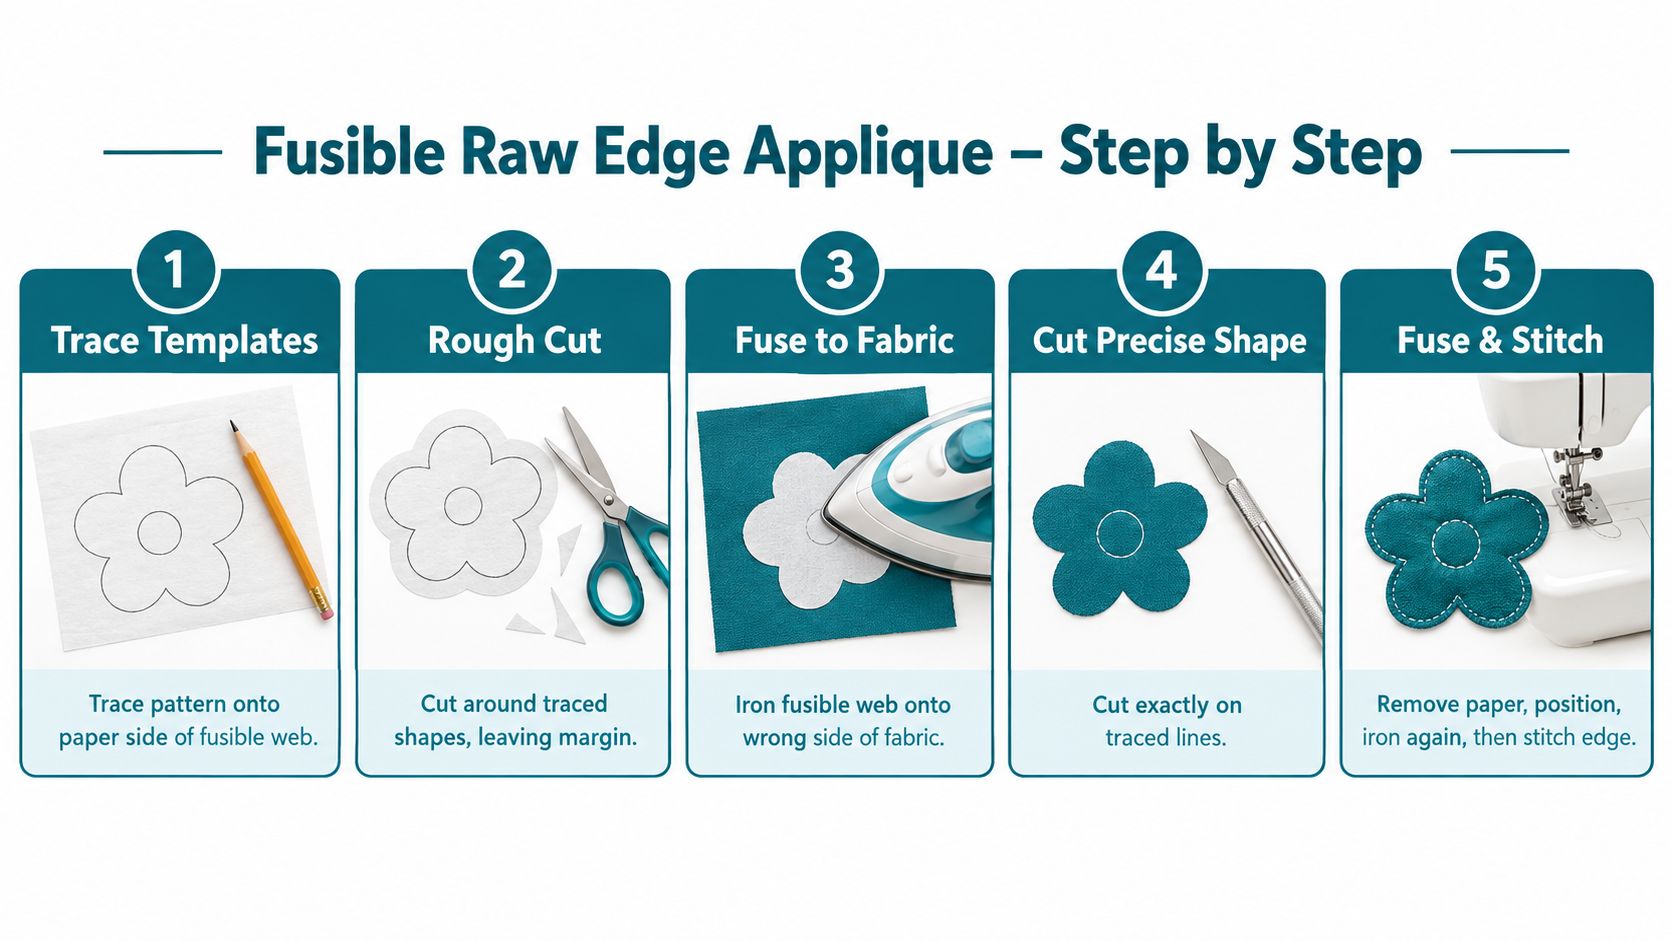
A clean fusible applique shape usually starts with two cuts. First, rough-cut the fusible web outside the traced line. Then fuse it to the wrong side of the applique fabric and cut the final shape accurately on the line afterward (two-stage fusible cutting method).
That order keeps sticky adhesive off your good fabric scissors and gives you a cleaner edge, especially on curves.
Peel off the paper backing and place the shapes on the right side of the background fabric. If the layout needs balance, mark a center line or lightly fold the background to find the midpoint first (placement and alignment tips).
That one preparation step saves a surprising amount of resewing.
If your background is thin, loosely woven, or likely to pucker, add a stabilizer before final stitching. A soft tear-away or a light cut-away can make the difference between a crisp edge and a rippled one. This matters even more on kids quilts that will be washed often. Wall hangings can get by with less support because they are handled less.
Fusible web is a positioning aid, not the final hold. A securing stitch keeps the edges from lifting with use and washing, which is why even quick raw-edge projects should be stitched after fusing (raw edge applique tutorial).
Here's a video if you'd like to watch the flow before trying it at your machine.
Set up your station in the same order you will use it. Template and pencil first, fusible web next, then fabric, iron, pressing surface, and scissors. That small bit of organization makes the process feel much calmer.
After the shape is fused, let it cool before you move it. Warm adhesive shifts more easily than cooled adhesive, much like a cookie that holds its shape better after it comes off the hot pan.
One more tip beginners appreciate. Inner corners and directional shapes need extra attention. On a shape like a star, trim neatly into each inside angle without overcutting, and on letters or arrows, lay the cut piece on the background before final pressing to confirm the direction is correct. Catching that at the ironing board is much easier than after stitching.
If your first try feels clumsy, start with a leaf, heart, or chunky initial. Those shapes teach tracing, fusing, placement, and careful cutting without asking you to wrestle with tiny points.
You fuse a cheerful flower onto a quilt for a grandchild, wash it a few times, and notice the petal edges starting to fuzz more than you expected. The applique is still attached, but it does not wear the same way a wall hanging would. That difference usually comes down to stitch finish, fabric, and whether the background had enough support while you stitched.
Your stitch choice sets two things at once. It shapes the look of the applique, and it also affects how the raw edge holds up through washing, handling, and everyday use.
A light straight stitch and a dense satin stitch can both be correct. They belong on different projects.
A straight stitch gives a quiet outline and leaves the raw edge more visible. It works well if you want a softer, slightly frayed finish over time.
A zigzag covers more of the cut edge, like putting a wider fence around the shape. It still looks relaxed, but it usually holds up better on quilts that will be used and washed often.
A blanket stitch adds a visible handmade outline. Many quilters choose it for folk-art motifs or projects where the stitching should be part of the design, not hidden.
A satin stitch gives the fullest edge coverage. It creates a bold border and is often the strongest choice for fabrics that fray easily or for applique that will see a lot of wear.
Free-motion stitching can work well too, especially for sketchy flowers, animals, or art-quilt shapes. The tradeoff is control. It asks more of your hands and your machine practice than the other finishes.
| Stitch Type | Best For | Edge Distance and Settings | Fray Control | After-Wash Wear Tendency |
|---|---|---|---|---|
| Straight stitch | Wall hangings, light-use decor, subtle outlines | Stitch close to the edge, often about 1/8 inch away | Low to moderate | Usually develops soft edge fuzz first, especially on quilting cotton without stabilizer |
| Zigzag stitch | Kids quilts, everyday projects, shapes needing more hold | Stitch close so the swing catches the raw edge consistently | Moderate to strong | Holds the edge more securely through repeated washing than straight stitch in most cotton projects |
| Blanket stitch | Decorative quilts, folk-art looks, visible hand-crafted style | Stitch near the edge with even spacing | Moderate | Wears well if the bite lands close enough to the edge, but open spacing can let corners fray sooner |
| Satin stitch | Dense outlines, high-fray fabrics, bold graphic motifs | Tight zigzag placed to cover the edge fully | Strong | Shows the least visible fray, though dense stitching can stiffen the edge |
| Free-motion stitch | Art quilts, sketchy organic outlines | Varies by style and control | Varies | Depends heavily on how often the line returns to the edge and how well the background is stabilized |
For beginners, I like to frame this as a wear test question: will this project hang, be cuddled, or be handed down?
On quilting cotton, straight stitch usually looks the softest after several washes, but it also lets the most edge bloom show. Zigzag often lands in the middle. It keeps the shape secure without building as much thread weight as satin stitch. Satin stitch tends to show the cleanest edge after repeated washing, especially on points and curves, as long as the fabric underneath is stable enough to prevent tunneling or puckering.
Stabilizer changes the result more than many beginners expect. On the same cotton applique, adding the right support under the background usually keeps zigzag and satin stitches flatter and helps prevent edge ripple after laundering. Pellon explains that stabilizer choice should match the fabric and stitch density, especially for machine applique and satin stitching on fabrics that need extra support (Pellon stabilizer guidance).
For a wall hanging, a straight stitch can be lovely. You get a lighter outline, a little texture at the edge, and less visual weight around each shape.
For a child's quilt or a table topper that will be washed often, zigzag is a practical starting point. It gives more protection without making every applique look heavily outlined.
For an heirloom-style piece, the answer depends on the look you want. If you want crisp, polished edges that stay neat over time, satin stitch is often the safer choice. If you want a decorative, handcrafted outline, blanket stitch may suit the design better, but keep the stitch bite close enough to the raw edge that wear does not sneak in at the corners.
At High Country Quilts, this is often the point where beginners realize they are not choosing the "best" stitch. They are choosing the stitch that fits the life of the quilt.
On a BERNINA machine, foot visibility matters. An open embroidery foot helps you see exactly where a blanket, zigzag, or satin stitch is landing. For straight stitch, a clear view of the edge matters more than using anything fancy.
If you test only one thing before stitching the block, test this: one scrap with no stabilizer and one with stabilizer, using the same stitch. It is the fastest way to see whether your chosen finish will stay flat, fray softly, or need more support after washing.
Thread also changes the final look. Matching thread softens the outline. Contrast thread turns the stitching into a frame. Both can be beautiful if they match the job the applique needs to do.
You have your shape fused down, you lower the presser foot, and the first few stitches already look wrong. The edge ripples, the background puckers, or the thread sits on top like it does not belong there. In beginner applique, that problem usually starts with setup, not skill.
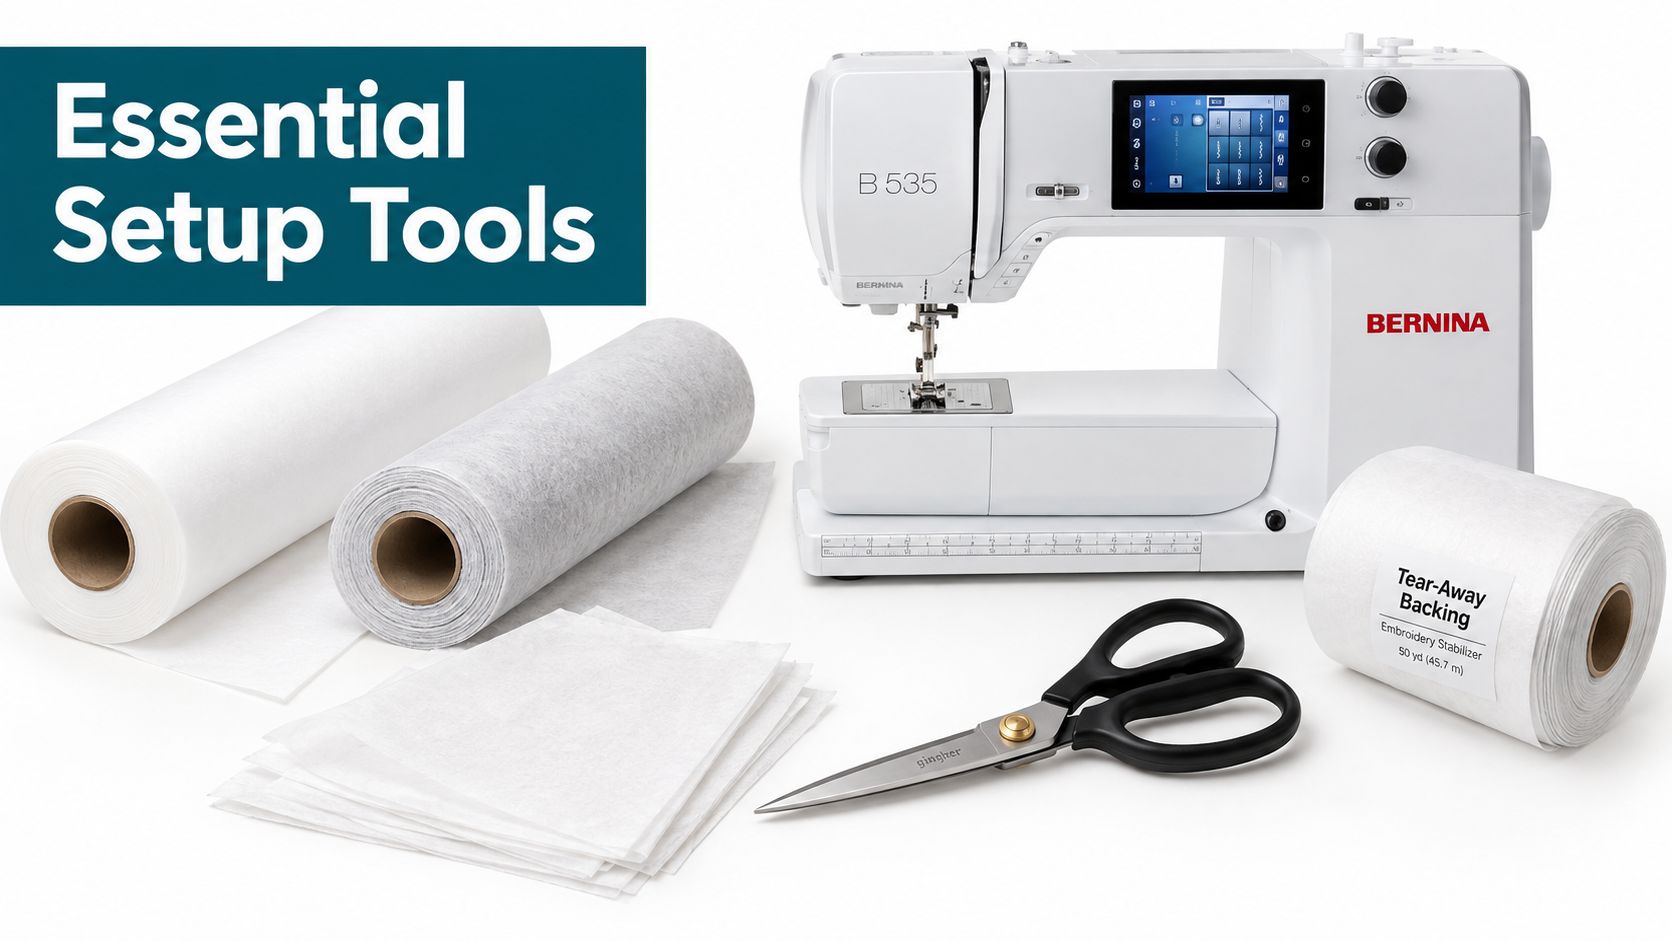
A small, well-chosen kit does more for raw edge applique than a drawer full of gadgets. If you are deciding where to spend money first, put it into the items that affect cutting accuracy, clean stitching, and wash durability.
Start with these:
Fabric choice matters here too. A tightly woven quilting cotton usually behaves predictably. A loose weave frays sooner and can look fuzzy after washing unless the stitch finish is close and supportive. Batiks often fray less because the weave is dense, while linen blends may need more testing before you commit to them on a frequently washed quilt.
Thread deserves a quick note. Cotton thread blends beautifully into traditional quilting cottons, but polyester often holds up better to repeated washing and kid-level use. If you are making a baby quilt or a couch quilt that will be used hard, durability may matter more than a soft, matte look.
Stabilizer is the part many beginners skip, then wish they had not.
It helps the background act like a firm tabletop instead of a soft mattress while the needle forms stitches. Without that support, dense stitching can sink, draw up, or tunnel.
A simple rule works well:
If this part feels confusing, treat stabilizer like underlayment under flooring. You do not always see it, but you notice when it is missing.
Raw edge applique usually looks best when the stitch lands close enough to control the edge without chewing it up. One technical guide recommends close edge stitching and notes that tighter stitch spacing improves edge control for fused applique (raw edge applique technical guide).
On your machine, that translates into testing before you stitch the block.
Use this checklist:
Small changes show up quickly in applique. A dull needle may drag the top fabric. A bulky thread may look lovely on a wool applique sample but too heavy on a small cotton leaf. A background with no support may stitch fine as a straight line, then pucker once you sew a dense satin edge around a circle.
BERNINA machines give you very good stitch control, which is helpful for applique, but the machine still needs the right basics under it. An open embroidery foot is often a comfortable place to start because you can see the raw edge clearly as you guide curves and corners.
For a first test, keep the setup simple. Choose one stitch, one thread, and one stabilizer option. Sew one sample that you would hang on the wall and another sample that you would wash often. If the washed sample curls, frays more than you like, or feels stiff, change one variable at a time. Try a different stabilizer, a closer stitch, or a different thread before changing everything at once.
One applique-specific option you may run across is the Plain and Simple pattern sold by High Country Quilts, which lists applique as its technique. That is a factual example of a beginner-friendly pattern that starts with applique already built into the construction.
You finish a cute appliqued block, wash it once, and one petal starts curling at the tip while another sheds fuzzy threads. That usually does not mean you did raw edge applique "wrong." It means the finish you chose did not match how that project will be used.
Raw edge applique always changes a little with handling and washing. The goal is controlled wear. For a wall hanging, that may mean a soft thread halo around the shape. For a child's quilt, it means the edge still sits flat after repeated laundering. For an heirloom piece, it means very little visible fray and no lifting at the points or curves.
Three things create most problems. The fabric frays more than expected, the fused bond was weak before stitching, or the stitch finish was too light for the job.
Fabric behavior matters more than many beginners expect. A tightly woven quilting cotton usually stays tidier than a loose weave, homespun, or linen blend. A straight stitch can look lovely on a leaf for a seasonal hanging, but that same finish often looks tired sooner on a quilt that gets washed often. Stabilizer plays a similar role. It works like the backing behind a buttonhole. It helps the fabric hold its shape while the stitching secures the edge.
Some softening at the edge is part of the style. A little fuzz outside a straight stitched shape can add texture.
These signs point to a construction problem rather than normal wear:
If you see lifting, check the basics first. Was the adhesive fully fused with enough heat and press time. Did the piece cool in place before you moved it. Did the stitch catch the outer edge all the way around. Beginners often find that one tiny gap at a point becomes the spot that starts peeling in the wash.
A simple sample tells you more than guesswork. Stitch two or three test shapes, wash them the way the finished project will be washed, and compare the edges.
Here is a practical benchmark for common beginner choices:
| Use case | Fabric and support | Stitch finish | After washing and wear |
|---|---|---|---|
| Wall hanging | Quilting cotton on quilting cotton, no added stabilizer or a light tear-away | Straight stitch set just inside the edge | Light fray is common and often attractive. Higher chance of curling on sharp points if handled often. |
| Kids quilt | Tightly woven quilting cotton with lightweight cut-away or wash-away support during stitching | Narrow zigzag | Better edge hold than straight stitch. Usually keeps curves flatter and limits fray to a small soft edge. |
| Kids quilt, heavy use | Quilting cotton with support under the background, especially on larger motifs | Satin stitch | Strongest hold of these three. Least visible fray after repeated washing, but can feel stiffer if the stitch is too dense. |
| Heirloom or low-wear decorative project | Fine cotton or lawn with very stable background and careful pressing | Tiny blanket stitch or very narrow zigzag | Clean outline with gentler texture than satin. Good choice when you want a finished look without a heavy thread ridge. |
Those are not lab results. They are realistic sewing-room expectations. The pattern is consistent, though. More open stitches allow more edge wear. Denser stitches hold better but can add stiffness. Looser fabrics fray faster than tight quilting cotton, especially at points and outside curves.
Choose your edge finish the way you choose shoes for the day. Slippers are fine indoors. Hiking boots make more sense on a rocky trail.
Use that same logic here:
If an edge is already lifting, repress it carefully and let it cool flat. Then stitch the edge if it was only fused before. If fraying is heavier than you want, switch to a stitch that covers more of the cut edge on the next block. If the background puckers, add support behind the fabric while stitching and make sure the machine is not pulling the layers as you guide.
One more tip from the teaching table in Colorado Springs. Sample the narrowest point in your design, not just a big easy circle. A broad flower petal may behave beautifully, while a skinny stem shows you right away whether your fabric, stabilizer, and stitch choice can handle real use.
Your first raw edge applique project teaches you more if it has a real job to do. A sample square shows how to trace and stitch. A usable project shows what happens after pressing, handling, washing, and living with the piece for a while.
Start with a project that matches the kind of wear you expect.
The point is not just to finish three cute projects. It is to notice how the method changes with the job.
Repeat one shape three times. Use the same fabric each time, then change only one thing: the stitch, the stabilizer, or the fusible. That gives you a fair comparison.
Try this on scraps before you commit to a full project:
This small test works like a fabric road test. A wall piece may still look lovely with a softer edge after handling. A kids quilt sample usually tells you fast if a straight stitch was too light for the job.
Keep the first shapes bold and roomy. Skinny stems, sharp serifs, and tiny inside points ask more from your stitching and your fusible.
Mark centers before fusing. Let the fused shape cool flat before sewing. If you are undecided between two finishes, choose based on use first and appearance second. That habit saves frustration later.
If you want help choosing fusibles, stabilizers, thread, or a BERNINA setup that handles applique cleanly, High Country Quilts offers quilting supplies, machine support, and classes for beginners and experienced makers alike. Stop in if you're in Colorado Springs, or explore online if you're ready to start your next raw edge applique project with a little more confidence.
At High Country Quilts we care deeply about community. With our experiences in retail, we know that a store is not only a place to shop but also a place for the community to gather and share. During this busy...

Hi! We’re Adam and Renee Wheaton, the new owners of High Country Quilts! For more than 40 years, we’ve owned and operated vacuum and sewing businesses. Following in Renee’s father’s footsteps after he retired from All Discount Vacuum and Sewing in Colorado...


Leave a comment