


We Love Our Quilting Community
At High Country Quilts we care deeply about community. With our experiences in retail, we know that a store is not only a place to shop but also a place for the community to gather and share. During this busy...


You've got a stack of beautiful fabric on the cutting table, the pattern is open, and the rotary cutter suddenly feels much more serious than it did in the shop. One inaccurate strip can affect every block that follows, but accurate quilting cuts aren't a matter of having a perfect eye. They come from a calm routine: prepare the fabric, plan the layout, make a controlled cut, and test the result before committing to the whole quilt.
Learning how to cut fabric for a quilt is really learning how to remove uncertainty one small decision at a time. The method below works for ordinary yardage, fat quarters, directional prints, reclaimed fabric, and uneven remnants. It also treats accuracy as a feedback loop, so a small error becomes useful information instead of an expensive surprise.
The moment you pick up a rotary cutter, remember that it isn't a standalone tool. Accurate cutting depends on three pieces working together: a rotary cutter, a self-healing cutting mat, and a clear acrylic ruler.
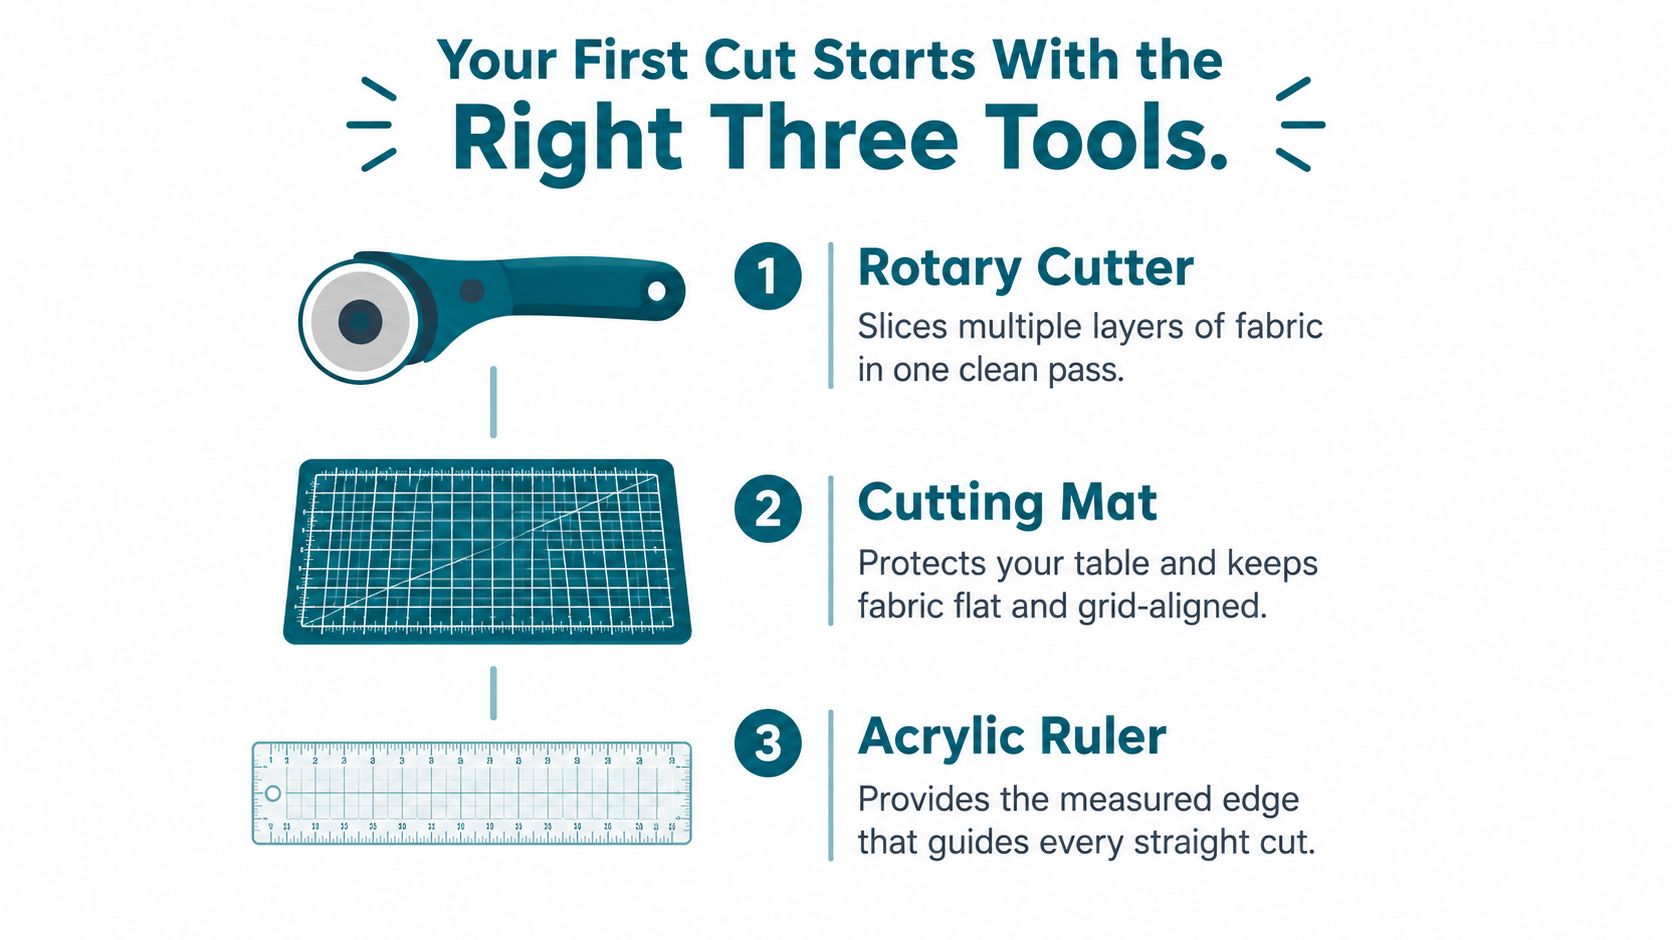
The cutter provides the blade, the mat protects the work surface and gives you alignment lines, and the ruler creates the measured edge that guides the blade. Remove one part and the system becomes less predictable. A ruler without a stable mat can shift. A cutter without a ruler can wander. A mat without a sharp, controlled blade can drag the fabric instead of slicing it cleanly.
Rotary cutting replaced much of the older template-and-scissors process. Before rotary cutters, quilters commonly traced shapes on the wrong side of fabric, added a seam allowance of approximately 6.4 millimeters, or 0.25 inch, and cut pieces individually with dressmaking scissors. That method worked, but it was slow and physically demanding, particularly for patchwork made from many small pieces. The history of the rotary cutter records that OLFA introduced the first rotary cutter in 1979 for garment making, after which quilters adopted it quickly.
Place the mat on a firm, comfortable surface. Stand if that gives you better control over the ruler and blade, and keep your wrist as straight as you can. Position the fabric so the cutting path moves away from your body, never toward your fingers.
Keep your non-cutting hand fully on the ruler, with fingers spread and clear of the ruler's edge. Close the cutter or engage its safety guard as soon as the blade leaves the fabric. Don't reach across an open blade to reposition the fabric.
Safety habit: The ruler should stay still before, during, and after the cut. If it moves, stop, close the cutter, and reset instead of trying to rescue the line.
Choose a ruler long enough for your usual strips, with clear measurement marks and a surface that grips fabric. You don't need a large collection on your first day. A longer rectangular ruler handles strips, while a square ruler becomes useful when trimming blocks and small units. Replace or turn the mat when deep grooves begin catching the blade, and change the blade when it leaves threads connected behind the cut.
During the 1970s and early 1980s, cardboard and Mylar templates, acrylic rulers, and self-healing mats increasingly supported repeatable cutting. By the mid-1980s, rotary cutters and acrylic rulers were closely associated with strip piecing and machine-pieced quilts. That means the basic rotary-cutting setup has supported mainstream quilting technique for more than four decades, since its 1979 introduction. The tools aren't a passing trend. They're a practical system designed for repeatable work.
Before the first measurement, decide how the fabric will behave through the quilt's life. Sort pieces by fiber and care method, then choose whether to wash them before cutting or leave them unwashed. Either approach can work. Combining washed and unwashed fabrics can produce different shrinkage, which may pull seams out of alignment after laundering.
For quilting cotton, allow for approximately 2–5% first-wash shrinkage. To replace the amount lost, divide the finished yardage you need by the share of fabric expected to remain after washing. For example, if you need 4 yards finished and expect 3% shrinkage, divide 4 by 0.97 and buy about 4.1 yards. The University of Idaho fabric-care guidance recommends testing a representative 12-inch swatch when the fabric's behavior is uncertain.
Snip or finish the cut edges before laundering to reduce fraying. Wash and dry the fabric using the care method planned for the finished quilt, then press it without stretching. Locate the selvage and use it as a reference. A freshly washed edge is not necessarily straight.
Washing can relax the weave and leave the crosswise edge skewed. Fold the fabric selvage to selvage, then place the fold or lengthwise grain against a line on the cutting mat. Align the ruler so the first trimming cut is square to the fold and follows the grain. The selvage helps you orient the fabric, but it cannot prove that the cut edge is square. Reclaimed fabric may have old seams, uneven wear, or missing sections, so inspect and mark usable grain before trimming. Directional prints also need an intentional orientation, while irregular pieces may require smaller cuts or a revised layout.
Use each preparation step as a feedback loop: trim a reference edge, check it against the mat lines, then confirm the fabric still lies flat before measuring the next piece. If the grain shifts, stop and square the fabric again instead of carrying the error into every cut.
| Unit | Finished Size | Cut Size | Notes |
|---|---|---|---|
| Fat quarter | Varies by pattern | Approximately 18 by 20 inches as a starting size | Iowa State Extension describes a fat quarter this way, but check the actual piece before cutting. |
| Square | Smaller than cut size | Pattern measurement | Include the seam allowance required by the pattern. |
| Half-square triangle | Finished square measurement | Finished size plus 7/8 inch for the paired-square method | The diagonal creates bias edges and needs extra fabric. |
The Iowa State University Extension introduction to quilting describes fat quarters as approximately 18 by 20 inches and notes that scissors, a ruler, and a pencil or fabric marker can cut them. A rotary cutter, mat, and cutting ruler make repeated cuts easier. Its consistent 1/4-inch seam allowance also gives beginners a useful construction baseline.
Precuts need separate judgment. Washing may fray or distort manufactured dimensions, so follow the maker's care guidance rather than automatically prewashing a fat quarter bundle, strip set, or other precut. If exact dimensions matter, measure each piece before cutting into it.
Most beginner patterns ask you to cut a combination of straight strips, squares, and half-square triangles. Treat each as a small production routine rather than one long session. That makes it easier to count pieces, spot mistakes, and stop before fatigue affects your hands.
Fold prepared fabric with the grain, keeping the fold aligned to a horizontal or vertical mat line. Square the leading edge first. Then place the ruler's required measurement on that edge, press firmly with your free hand, and make one steady cut along the ruler.
For a strip that must finish at a pattern's specified width, use the pattern's cut measurement, not the finished measurement. Keep the ruler aligned at every cut, and don't slide the ruler while the blade is still moving. If the strip is long, make sure the fabric hasn't bowed away from the mat lines.
When you have enough strips, stack only pieces that are flat and aligned before subcutting them into squares or rectangles. Cutting a strip into repeated units can save time, but a crooked first cut will repeat the same error across every piece.
Place the ruler over the strip and align its edge with the strip's long cut edge. Use the ruler markings to measure the required square size, then cut across the strip. Check the first unit before continuing.
A square needs parallel sides and matching dimensions. If the first piece is slightly off, don't keep cutting in the hope that the difference will disappear. Re-square the strip or correct the ruler position, then continue.
Half-square triangles are different because the diagonal cut creates bias edges. The starting squares must be larger than the desired finished units so you have room for the seam and later trimming.
Utah State University Extension's half-square triangle method adds 7/8 inch to the desired finished square size. For two 3-inch finished half-square triangles, cut two 3 7/8-inch squares, one from each fabric. Mark a corner-to-corner diagonal, sew a scant 1/4-inch seam on both sides of the line, and cut on the marked diagonal.
The word scant matters here. A seam that is slightly narrower than a full quarter inch preserves the intended unit size in this method, but your machine and pattern may call for a different adjustment. Practice on scraps, press the seam as directed, and trim the completed unit only after checking its dimensions.
For straight-grain strips and squares, keep the grain stable. For bias-cut pieces, use the 45-degree ruler line and handle the fabric gently. The guidance on cutting binding on the bias explains that bias cuts provide more stretch and drape than straight-grain cuts, while a consistent 1/4-inch seam allowance helps maintain stable, low-bulk joins.
A cut map is a simple drawing or written layout that shows where each piece will come from the fabric you own. It prevents the common mistake of cutting the first attractive strip, then discovering that the remaining fabric can't produce the larger pieces.
Begin with an inventory. Write down the usable length and width of every piece, excluding frayed edges, holes, stains, seams, and areas weakened by wear. List the required cuts from largest to smallest, then sketch rectangles inside the available fabric. Nest smaller pieces in the spaces left beside or between larger ones.
Directional fabric needs a different plan from a small all-over print. Mark the top of the motif on your sketch, then orient every cut so the design faces the intended direction. Fabric with nap, such as some velvets or brushed materials, also needs a consistent orientation, even when the print itself isn't directional.
A stripe or large motif may require more fabric than a purely mathematical layout. Preserving visual continuity can justify additional waste when the alternative is a broken stripe, a mismatched motif, or a seam that exposes a worn garment panel.
Reclaimed fabric needs an even more careful inspection. Stabilize stretchy or previously worn areas before cutting, identify the strongest grain direction, and mark usable rectangles directly on a paper diagram. Remove clothing seams when they interfere with structural stability, but preserve a seam when it contributes character or strength.
Better layout rule: The most fabric-efficient arrangement isn't always the best quilting arrangement. Protect the motif, grain, and structure first, then reduce scraps within those limits.
For distorted fabric, cutting slightly larger and trimming later can be safer than forcing an exact measurement onto a warped surface. That approach works especially well for reclaimed pieces and motifs that must line up across seams. It doesn't replace accurate cutting, but it gives unstable fabric a controlled path to a square finished unit.
A 2025 study of small-scale textile production found that 90–95% of identified waste consisted of cutting scraps, which were commonly burned or sent to landfill. The textile-production study supports a practical reason to map cuts carefully, especially when working with denim, clothing panels, or uneven remnants. Use the scraps intentionally for small units, test pieces, or future patchwork.
The video below can help you visualize the relationship between layout and cutting movement.
A measurement can look correct and still produce an inaccurate quilt. The ruler may have shifted, the fabric may have moved, the blade may be dragging, the pressing may have stretched a seam, or the seam guide may be wider than intended. Instead of guessing which problem occurred, test the complete chain before cutting the project fabric.
Cut five test squares from scrap fabric using the same ruler, mat, and cutting position you plan to use for the quilt. Stack them only after checking that their edges match. If one square differs, inspect the cut before assuming the entire setup is wrong.
Sew a single test unit using the same machine, thread, presser foot, and seam guide. Use the intended seam allowance, then press the unit according to the project instructions. Measure the finished piece, and check whether opposite edges are parallel.
This test separates several problems:
If the finished unit is wrong, change one factor at a time. Adjust the seam guide if the cut squares are right but the sewn unit is not. Reposition the ruler or square the fabric if the raw pieces are inconsistent. Don't alter both the cut size and seam width at once, because you won't know which change solved the problem.
Grain alignment matters because straight-grain pieces resist stretching differently from bias pieces. A consistent 1/4-inch seam helps keep joins stable, but the correct setting must be verified with your own machine and technique.
Diagnostic habit: Test the full path from fabric to finished unit. The finished measurement tells you more than a ruler reading taken before sewing.
Repeat the check whenever you change fabric type, use a new pattern, switch machines, or begin working with reclaimed fabric. Accuracy isn't a one-time promise made at the cutting table. It's a repeatable loop that lets you correct a small deviation before it spreads through the quilt.
A strip comes out angled, so you reach for a new ruler. Before buying anything, trace the error back through the cutting process. Equipment sometimes needs attention, yet many inaccurate cuts begin with fabric that was not settled, a line that was hard to see, or a posture that made control difficult.
| If you notice | Check first | Habit to change |
|---|---|---|
| Uneven first edge | Fabric was cut before it relaxed or was squared | Press, align the grain, and square the edge before measuring |
| Angled strips | Fold or ruler was not aligned to the mat | Match the fold and ruler to the mat lines |
| Fabric shifts | Too little downward pressure or an awkward posture | Spread your hand over the ruler and stand for long cuts |
| Threads remain attached | Blade is dragging | Inspect the blade and avoid cutting paper or pins |
| Finished units are inconsistent | Seam guide varies | Sew a test unit and adjust the guide before bulk cutting |
The selvage gives you a useful grain reference, although it cannot prove that every other edge is square. Washing can relax the weave, while reclaimed fabric may have stretched during use. Directional fabric adds another check: confirm that stripes, printed motifs, or nap point the intended way before cutting. Irregular pieces may need a stable reference edge created first, rather than being measured from a worn or curved side.
A person with reduced hand strength may work more accurately with an ergonomic cutter, shorter sessions, or smaller batches. Someone with visual limitations may prefer a high-contrast ruler, strong lighting, larger markings, or paper templates. Scissors remain a sound choice for slow, controlled work, especially with fat quarters and small shapes.
As noted earlier, Iowa State's beginner guide treats scissors, a ruler, and a pencil or fabric marker as workable tools for fat quarters. Rotary equipment can make repeated cuts easier. Precision comes from stable fabric and a line you can see and control, whatever tool produces it.
Small habits protect that control. Keep the ruler down until the blade has finished its stroke. Keep pins, paper, and the acrylic ruler out of the blade's path. Stop when your grip or posture deteriorates. Cut a small batch, inspect the pieces, and use what you find to adjust the next batch. The cut becomes a feedback loop: each group gives you a chance to correct the process before an error reaches the whole quilt.
Start with one washed and pressed quilting cotton, one fat quarter, and a few scraps. Practice a straight strip, a square, and a half-square triangle, then run the five-square test before cutting your project fabric. Keep the cut map beside the mat, because prep and layout come before the blade, and accuracy improves through feedback.
High Country Quilts offers quilting fabrics, precuts, rotary cutters, rulers, sewing supplies, classes, and hands-on support for beginners in Colorado Springs. Bring your questions, a fat quarter bundle, or a half-finished project to High Country Quilts, and let the team help you choose the right tools or next class for confident cutting.
At High Country Quilts we care deeply about community. With our experiences in retail, we know that a store is not only a place to shop but also a place for the community to gather and share. During this busy...

Hi! We’re Adam and Renee Wheaton, the new owners of High Country Quilts! For more than 40 years, we’ve owned and operated vacuum and sewing businesses. Following in Renee’s father’s footsteps after he retired from All Discount Vacuum and Sewing in Colorado...


Leave a comment