


We Love Our Quilting Community
At High Country Quilts we care deeply about community. With our experiences in retail, we know that a store is not only a place to shop but also a place for the community to gather and share. During this busy...


The Fiskars rotary cutter and ruler combo is a 45 mm spring-action blade fused to a 6" x 24" acrylic ruler with a printed grid and angle guides. It's designed to measure and cut fabric in one controlled pass, especially for strips, squares, borders, and basic triangles.
You may be looking at it on your cutting mat right now, wondering which part to hold, whether the blade is already safe, and how a ruler can possibly make cutting easier. The short answer is that this tool combines two familiar quilting jobs, measuring and slicing, but you still need the right hand position and cutting habit. Once those are clear, the tool feels much less mysterious.
Set the tool on your cutting mat and start with the ruler body, not the blade. The clear acrylic section is marked as a 6" x 24" ruler, with a measuring grid and highlighted numbers designed to remain visible against light or dark fabric, as documented in the Fiskars product information. That long, transparent surface is what lets you see the fabric while keeping your measurement in place.
Along the ruler is a rail-guided 45 mm rotary blade. The blade uses spring action, and the rail helps guide the cutter while also acting as a hand guard. The grid is printed on both sides, so right-handed and left-handed users can work from the direction that feels most natural. Instead of setting a separate ruler beside a separate cutter, you move one matched tool across the fabric.
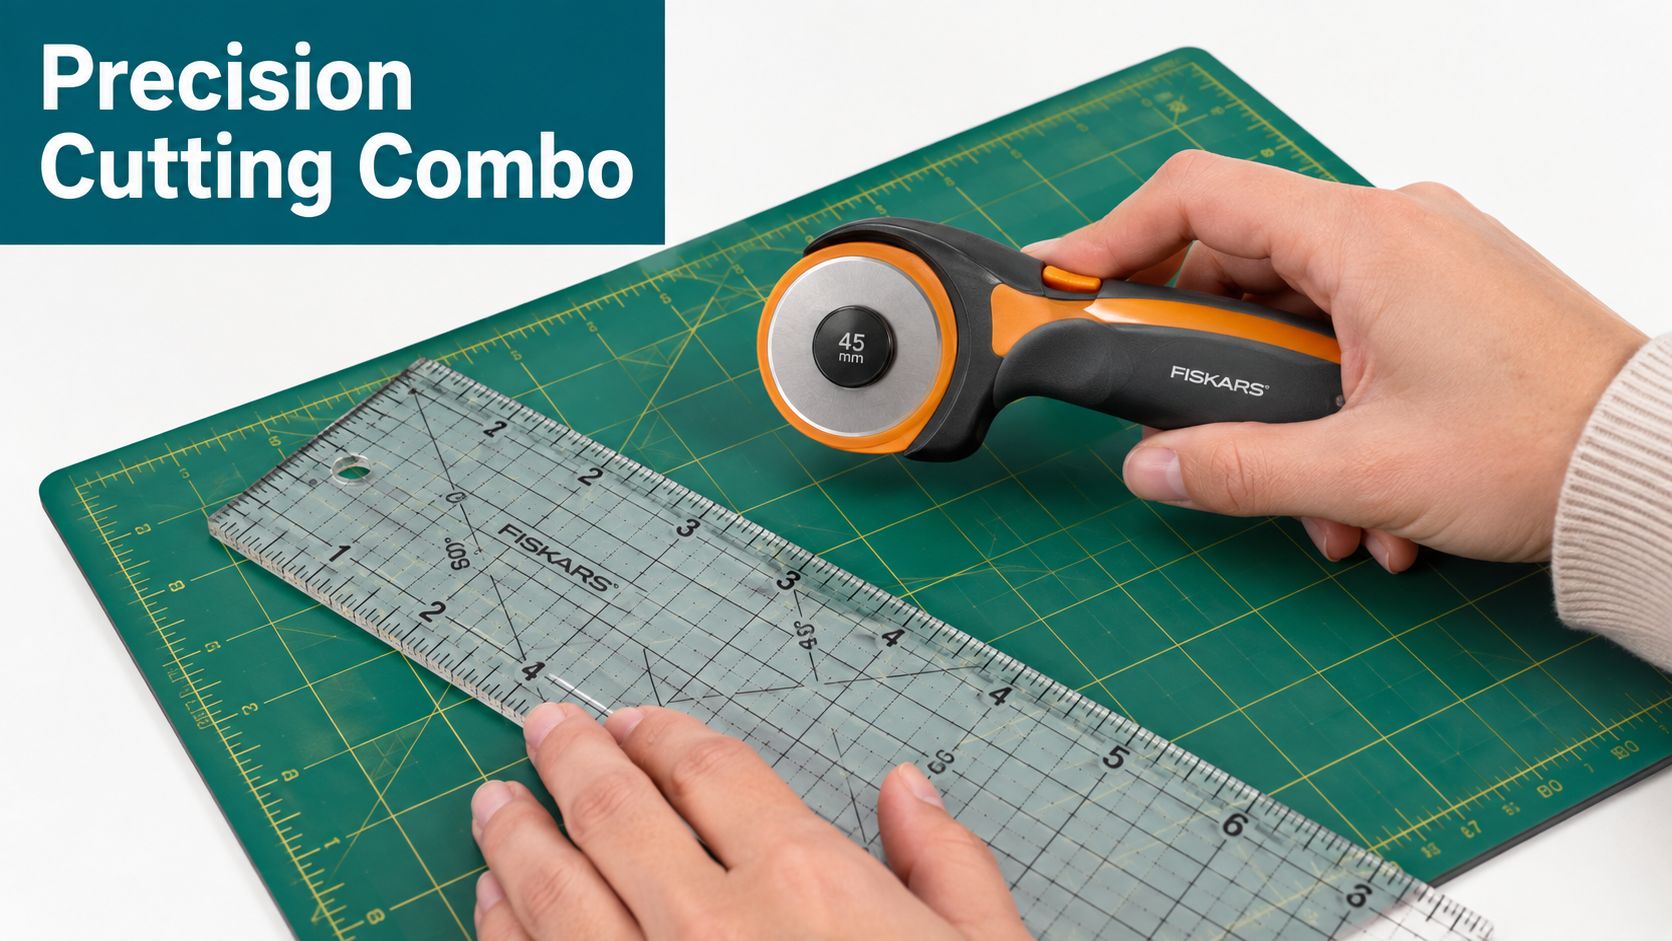
The printed grid helps prevent the gradual drift that turns a straight strip into a slightly crooked one. Place the desired measurement line along the fabric edge, then use the other grid lines to check whether the ruler is sitting square instead of trusting your eye.
The angle guides answer another common question: “How do I cut this triangle without guessing?” The combo includes highlighted 30-degree, 45-degree, and 60-degree lines, which support angled quilting cuts and triangle work, as described in this Fiskars combo listing. Those marks don't replace careful alignment, but they give you a visible target.
The handle and safety lock address the mistake that happens away from the cutting mat. When you carry the tool in a project bag or set it beside your machine, the blade should be locked and closed. During a cut, the spring-action blade engages only while you're using it, then retracts between strokes. Your hand should press the ruler body firmly, while the cutting hand moves the blade along the rail. Think of the ruler as a straight track and the blade as the train that must stay on it.
Quilters once relied heavily on cardboard templates, pencils, fabric chalk, and scissors. That method could work for individual shapes, but repeating the same strip width across many pieces demanded patience and a steady hand. A small measuring error at the cutting table could become a larger fitting problem at the sewing machine.
Rotary cutting changed the physical motion. Rather than opening and closing shears around a shape, the quilter could press a ruler over the fabric and roll a circular blade along its edge. A self-healing mat gave the blade a surface designed for repeated cutting, while the ruler grid made measurements visible during the pass.
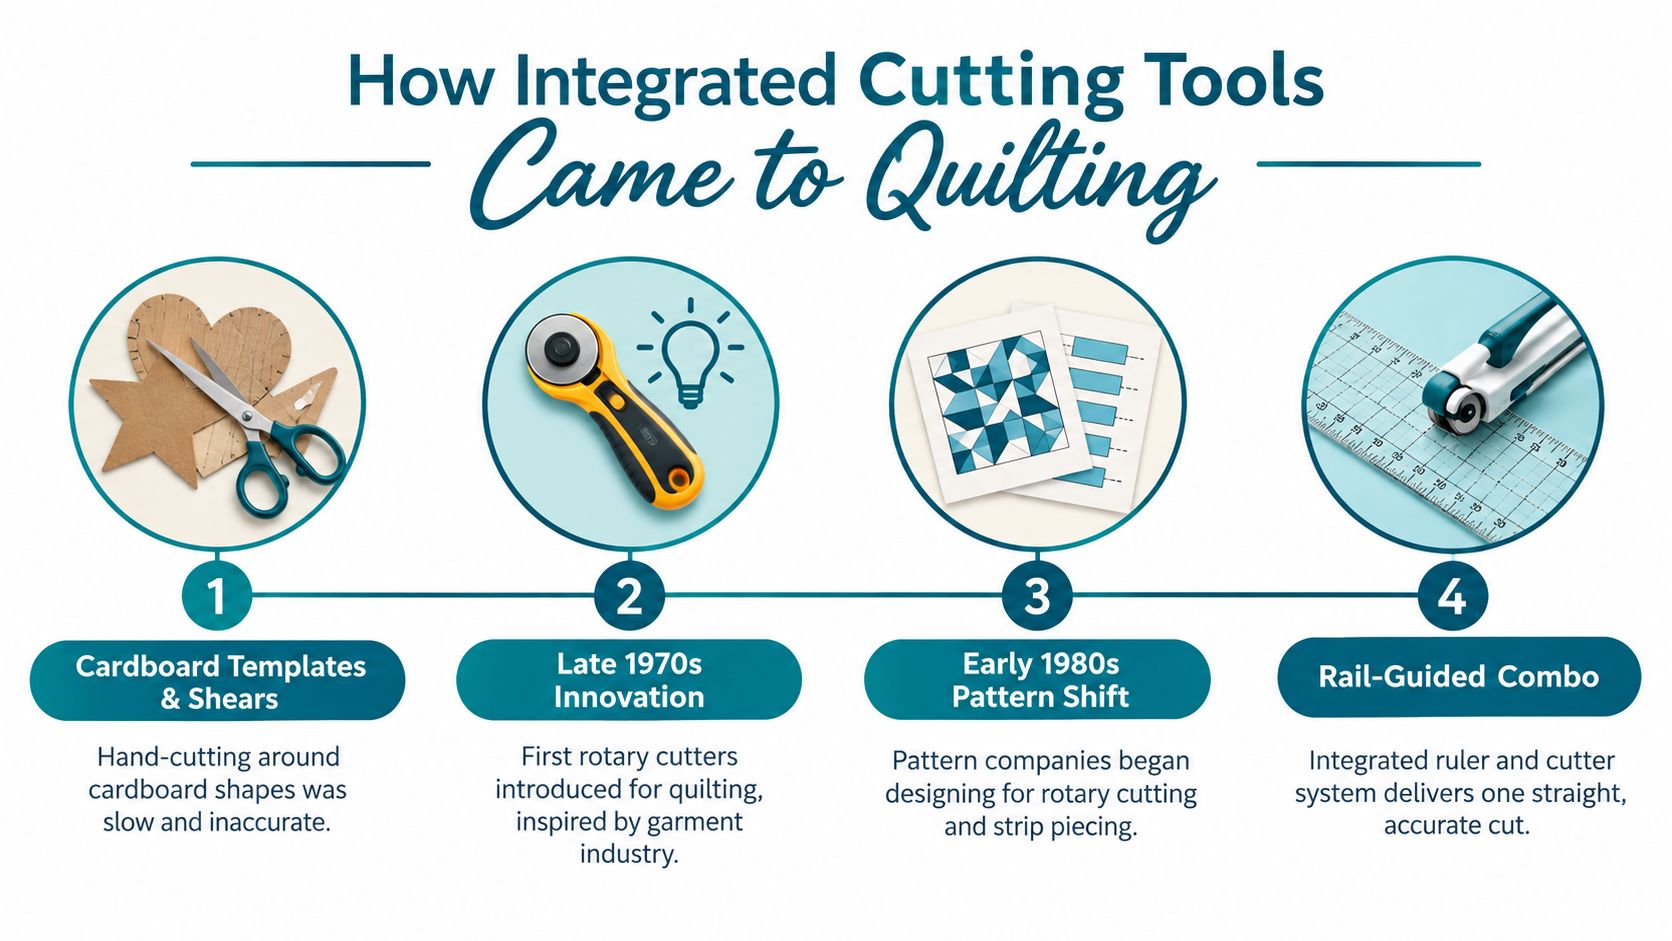
Fiskars' rotary-cutting history reaches back to U.S. patents granted in 1992 and 1994, as recorded in independent patent references summarized by the company's product history. The modern combo belongs to that longer development, where the blade, ruler, and cutting path work together rather than asking a beginner to coordinate two separate tools.
You can see the company's continuing interest in integrated cutting products on the Fiskars patents page, which lists products including a rotary-ruler-scissors-snip 4-piece set and the U.S. design patent identifier US D816,451. The important lesson isn't the patent language. It's why the tool feels intuitive: the grid exists to guide your measurement, and the rail exists to guide your blade.
Choose the ruler size based on the fabric and workspace you use most, not on whether you're a beginner. Fiskars has documented the combo family in both 6" x 24" and 12" x 12" formats, according to its catalog entry for rotary cutters. The long format gives you reach for strips and borders, while the square format gives you a compact surface for block work.
The 6" x 24" combo is the practical starting point for many cutting tables because its length supports long, straight cuts. It's especially useful when you're cutting strips from a larger piece of fabric or trimming a long edge. The 12" x 12" version takes less room and suits square-up work, small blocks, and compact cutting spaces.
Some listings also refer to other ruler lengths, but the verified Fiskars combo references establish the 6" x 24" and 12" x 12" options. Use the table below to match the documented sizes to the type of cut you're making.
| Ruler Size | Best Beginner Cuts | Workspace Needed |
|---|---|---|
| 6" x 24" | 2 1/2" strips, long borders, 5" squares cut from strips, angled cuts along longer fabric edges | A broad, flat cutting area |
| 12" x 12" | 5" charm squares, block trimming, small square pieces, triangle work | A smaller table or compact mat |
| 6" x 24" plus careful repositioning | 10" layer-cake squares and 6 1/2" triangle squares when the fabric is aligned and the ruler is moved deliberately | Enough room to reposition without shifting the fabric |
A 5" charm square is smaller than the ruler's width, so either format can support the measurement when the fabric is stable. A 10" square needs a more deliberate setup because the 6" ruler width doesn't cover the full shape in one placement. For that reason, don't choose the long ruler because it makes every cut one-handed or automatic. Choose it because it gives you a strong straight edge and useful reach.
For a first purchase, the 6" x 24" combo is the more versatile starting point for strip-based quilting. Add the square format when trimming blocks becomes a regular part of your projects. You can view the Fiskars rotary cutter and ruler combo options alongside mats and other cutting supplies, then choose the size that fits your actual table.
Your first cut should feel slow and deliberate. Put the cutting mat on a flat, hard surface so the mat and ruler don't rock. A soft or uneven table can make the ruler shift just as the blade reaches the fabric edge, which is how a measurement that looked correct becomes a crooked cut.
Fold or position the fabric smoothly, with no bubbles underneath. Place the ruler over the fabric and align a printed grid line with the edge or fold. Don't begin by releasing the blade and wandering around the mat. Keep the blade locked until the ruler is positioned and your non-cutting hand is ready.
Press down on the ruler with your non-cutting hand. Keep your fingers tucked behind the raised rail or another secure grip area, and stay away from the blade path. Avoid placing fingertips on the curved edge where the ruler can move under pressure. The goal is firm downward pressure, not a tense grip that makes you lose balance.
Practical rule: The hand holding the ruler should stabilize the fabric and acrylic. It should never reach toward the moving blade to “help” the cut.
Release the safety lock only when you're ready to cut. Guide the spring-action 45 mm blade along the rail, rolling it away from your body with even pressure. Don't saw back and forth, lift halfway through, or push harder because the fabric feels resistant. A clean pass comes from a sharp blade and a stable guide.
A dull blade gives you useful warnings. Watch for fabric snags, ragged edges, skipped fibers, or the need for extra pressure. More force is the wrong response because it reduces control. Stop, lock the cutter, and inspect the blade instead.
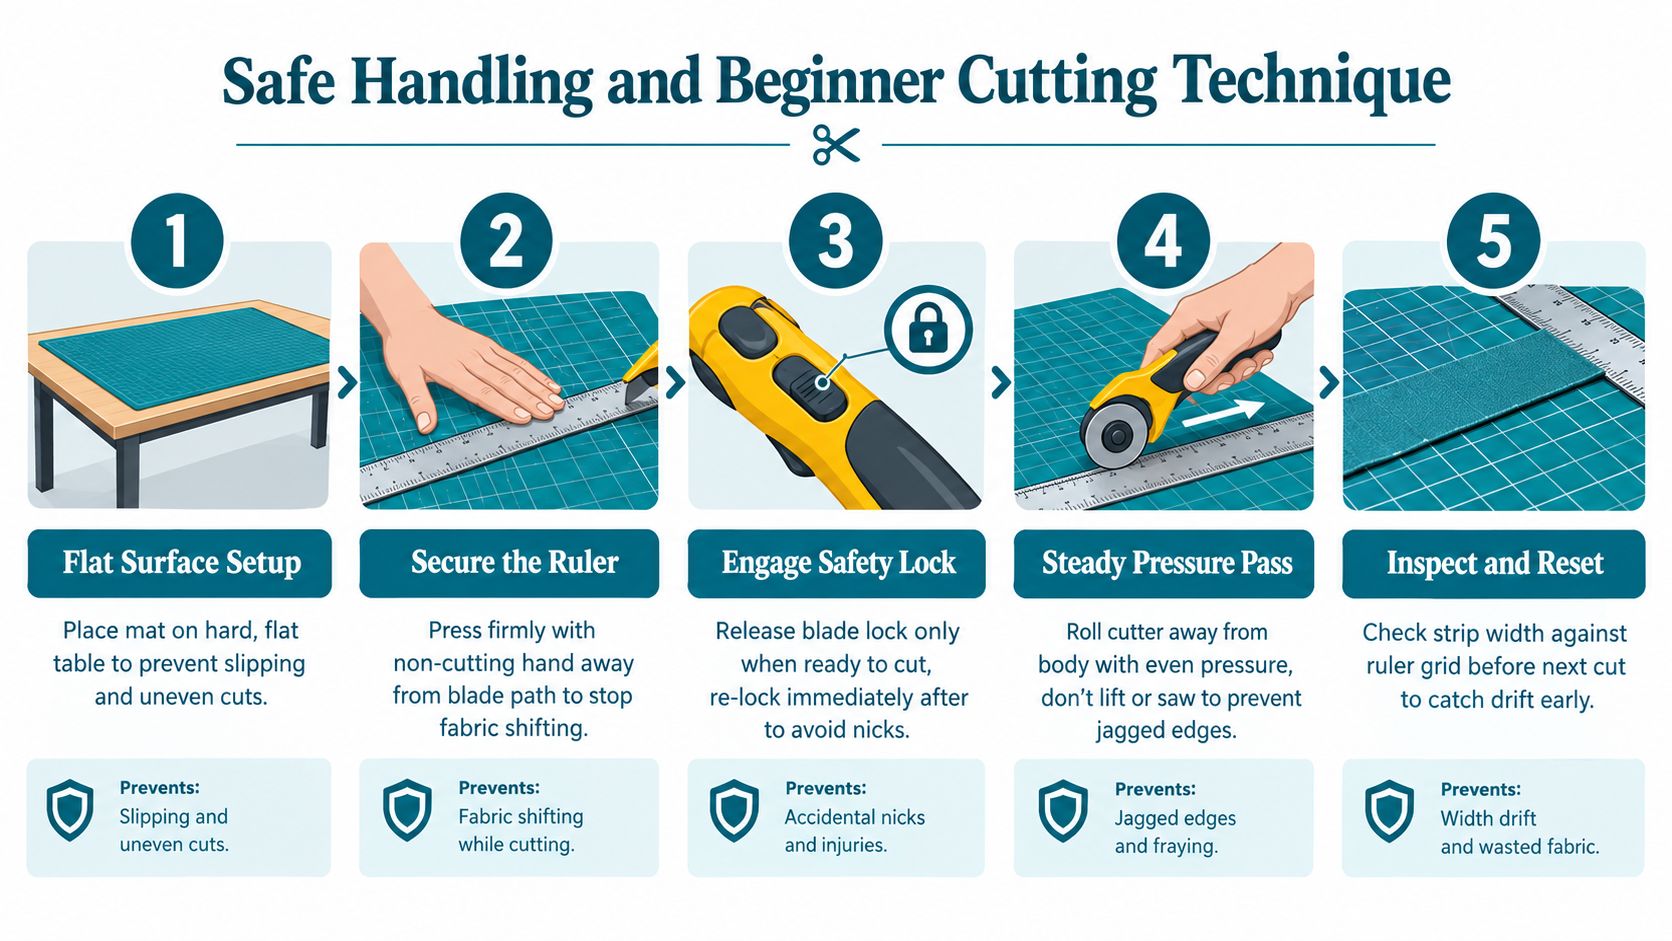
Before slicing, check the measurement twice. Align the grid with the fabric fold, confirm that the ruler hasn't rotated, and then make one steady pass. When the cut is complete, lock the blade and replace the safety cap before setting the tool down.
For broader safety guidance on ruler stability, hand protection, locked cutters, and dull blades, review these rotary-cutting safety tips for quilters. A hand guard or protective glove can be worthwhile if you're still learning where your fingers naturally rest.
The combo becomes easiest to understand when you give it a small, repeatable job. Start with fabric that's pressed and lying flat. Don't try to solve several alignment problems at once. Make the ruler, fabric, and blade agree before you cut.
For a strip suitable for a jelly-roll-style project, place a fat quarter on the mat with its long edge aligned to the mat's reference lines. Set the ruler so the 2 1/2" grid line marks the strip width. Use the center vertical mark to check that the ruler remains square to the fabric edge before engaging the blade.
The beginner mistake here is aligning only one corner. The near edge may look right while the ruler angles away across the fabric. The grid gives you a second check, so compare the line at both ends before cutting. Once the ruler is secure, make one smooth pass along the rail.
To square up a charm square, begin with a piece of fabric larger than the finished measurement or with a precut that needs checking. Use the 5" measurement on the grid and align the ruler edge with the side you're trimming. The 6" width gives you a broad contact area for smaller square work, while the long ruler lets you see the fabric's direction clearly.
Don't chase a small uneven edge by rotating the fabric after every cut. Stabilize the piece, trim one side, then reassess the next side. If the fabric shifts, the next measurement is no longer trustworthy.
For a half-square triangle, place the 45-degree angle guide along the diagonal seam or intended diagonal. Keep the ruler's straight edge aligned with the portion you're trimming, and check that the angle line doesn't drift as you prepare the cut.
This prevents a common bias-edge problem. A diagonal that is only slightly off can make the triangle edges uneven, which then makes the unit difficult to sew accurately. The printed angle is a guide, not a substitute for holding the fabric flat.
| Project | Fabric Setup | Ruler Line Used | Mistake Prevented |
|---|---|---|---|
| Strip cut | Pressed fat quarter with long edge aligned to the mat | 2 1/2" grid line and center vertical mark | Crooked strips caused by checking only one end |
| Charm square | Stable square of fabric or precut needing a trim | 5" grid measurement | Uneven sides from rotating the fabric too often |
| Half-square triangle | Triangle unit with seam or diagonal visible | 45-degree angle guide | An inaccurate diagonal and drifting bias edge |
Once you have a strip, subcut it into 2 1/2" squares using the same principle. Align the strip, check the measurement at more than one point, secure the ruler, and make a clean pass. The motion is smaller, but the habit is identical.
Good cutting depends on three surfaces staying reliable: the mat, the blade, and the ruler. Treat the combo as a small cutting system rather than a disposable gadget, and your checks will become part of the normal quilting routine.
Start with the mat. Rotate it during regular use so you're not always cutting in the same channel. When deep grooves begin to interfere with the printed lines or catch the blade, replace the mat rather than forcing the cutter across damaged areas. Old grooves can pull fabric out of position and make a straight ruler edge less useful.
Test the 45 mm blade on a single layer of quilting cotton. A clean edge suggests the blade is still working well. If fibers skip, snag, or look ragged, stop increasing pressure. Those signs point toward blade maintenance or replacement, not a need to press down harder.
Follow the manufacturer's instructions for the specific blade housing when changing or handling the blade. Keep the cutter locked while you work, and make sure the replacement blade is seated securely before cutting. The spring-action design should return to its safe position when you release the cutting action.
A sharp blade should reduce effort. If your hand is working harder and the edge is getting worse, pause before the next pass.
The acrylic ruler needs a gentle cleaning routine. Wipe it with a lint-free cloth and mild soap if necessary, then dry it without soaking the printed surface. Avoid products that leave a slippery film, because the ruler must maintain stable contact with the fabric and mat.
Store the cutter locked and covered. Keep the combo flat rather than leaning it against a shelf or leaving weight on the acrylic ruler. Before every session, check the lock, inspect the blade area, and make sure the grid is readable. A few quiet checks can prevent a rushed cut and protect both your fabric and your fingers.
You've now got the central idea: the Fiskars combo joins a 45 mm spring-action blade with a printed-grid ruler for controlled strip, square, and triangle cutting. The tool won't make every decision for you, but it puts the measurement and cutting path in the same place, which makes your practice easier to evaluate.
Start with a project that gives you repeated straight cuts without demanding complicated piecing. A two-color patchwork table runner is a manageable place to practice strip alignment. A strip-pieced baby quilt top gives you more repetition, while a half-square triangle sampler pillow introduces the 45-degree guide without making the entire project depend on perfect results.
During the first week, focus only on straight strips. Cut scrap fabric, label the measured width, and compare the first and last sections of each strip. This teaches you whether the ruler shifts, whether your hand pressure is consistent, and whether you're trying to cut too quickly.
During the second week, add squares. Practice trimming and subcutting, then keep a labeled swatch with the intended measurement. During the third week, introduce half-square triangles and use the angle guide alongside the seam or diagonal. End each session by locking the cutter, covering it, and writing down what felt steady or awkward.
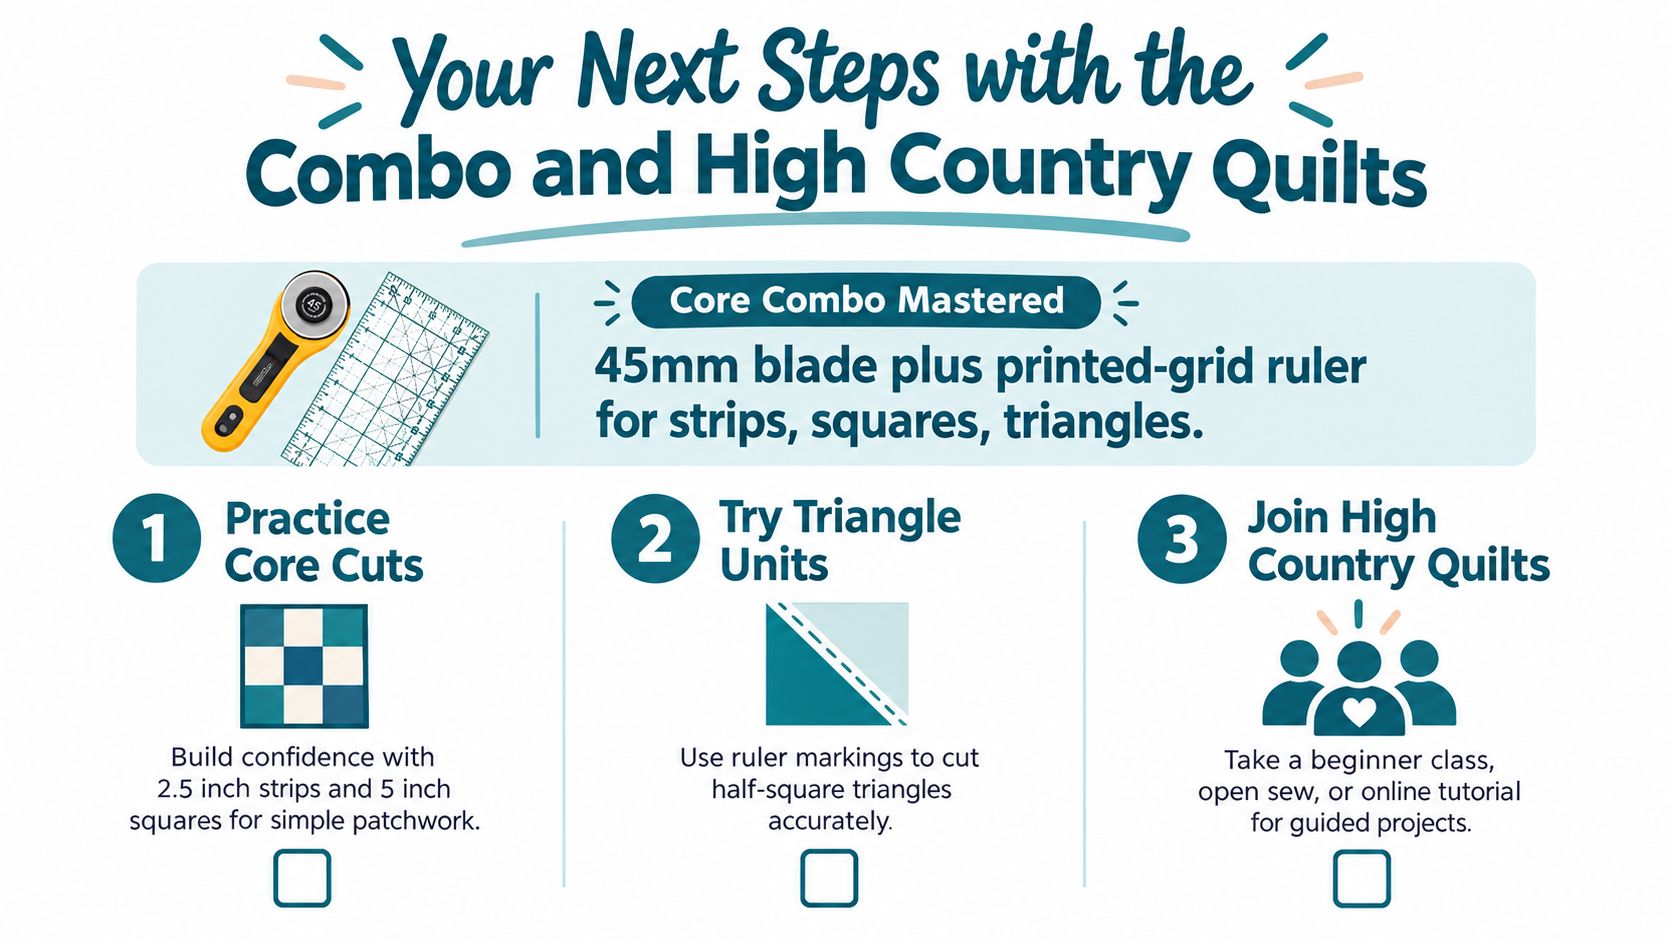
Keep your first cuts instead of throwing them away. A labeled swatch shows progress more clearly than memory does, and it gives an instructor something specific to discuss. You can also share photos of your first cuts with the High Country Quilts community for gentle feedback, whether you're working locally in Colorado Springs or learning through online quilting resources.
The next supplies should follow the project in front of you. A beginner-friendly fat-quarter bundle gives you fabric for practicing strips and squares. Replacement blades support clean cutting when the original blade becomes dull, and a self-healing mat sized for the 24" ruler gives you a stable surface for long passes. These are practical additions, not requirements to buy everything at once.
If you're ready to choose a tool, gather fabric, or plan your first guided project, visit High Country Quilts to explore quilting fabrics, cutting supplies, classes, and community learning options. Start with the combo, a suitable mat, and scrap fabric, then bring your questions and labeled practice cuts to the next step.
At High Country Quilts we care deeply about community. With our experiences in retail, we know that a store is not only a place to shop but also a place for the community to gather and share. During this busy...

Hi! We’re Adam and Renee Wheaton, the new owners of High Country Quilts! For more than 40 years, we’ve owned and operated vacuum and sewing businesses. Following in Renee’s father’s footsteps after he retired from All Discount Vacuum and Sewing in Colorado...


Leave a comment