

We Love Our Quilting Community
At High Country Quilts we care deeply about community. With our experiences in retail, we know that a store is not only a place to shop but also a place for the community to gather and share. During this busy...


Stitch in the ditch is one of those wonderfully simple yet powerful techniques every quilter should have in their back pocket. At its heart, it's about quilting directly in the seam line—that little "ditch"—where two pieces of fabric join. The magic is that the stitches sink down into that seam, securing your quilt top, batting, and backing without stealing the show.
It’s the secret weapon for making your piecing work the star, rather than the quilting stitches themselves.
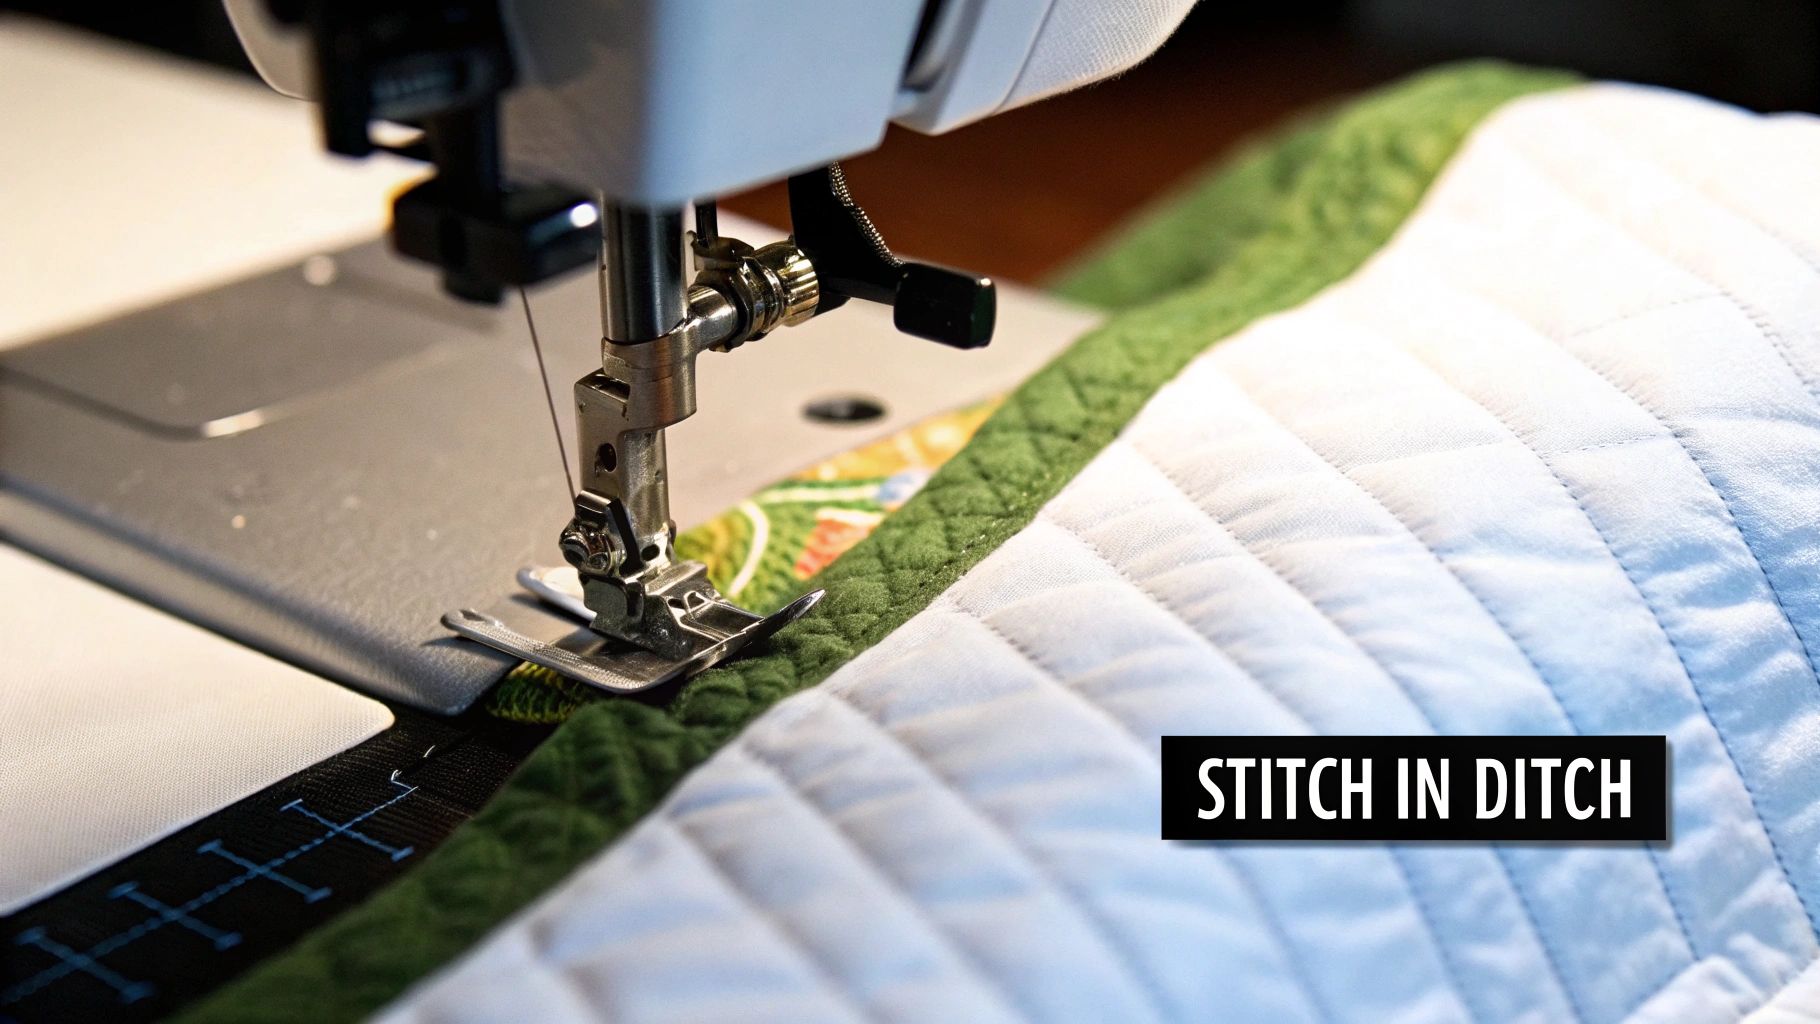
Imagine the hidden framework of a well-built house; it's essential for stability but isn't part of the decor. Stitch in the ditch works the same way for your quilt. By sewing right along the existing seams, you're anchoring all three layers of your quilt sandwich together, creating a stable, durable piece that will last.
The real beauty of this method is how subtle it is. Instead of laying down a new decorative pattern on top of your quilt, you're simply tracing and reinforcing the design you so carefully pieced together. This makes it a fantastic choice for quilts with intricate block patterns or bold fabrics, letting your hard work shine without distraction.
This technique really took off in the mid-20th century, right alongside the growing popularity of home sewing machines. As quilting saw a massive revival—growing an incredible 150% in the U.S. between 1970 and 1980—stitch in the ditch became a go-to method for its clean, professional finish. You can dive deeper into quilting history and techniques over at I See Stars Quilting.
Here's a quick look at why so many quilters love this foundational technique.
For a quick reference, this table breaks down the essentials of the stitch in the ditch method.
| Aspect | Description |
|---|---|
| Primary Goal | To invisibly quilt along existing seam lines, securing the quilt layers. |
| Best For | Quilts with intricate piecing, modern designs, or when you want the fabric to be the focus. |
| Main Benefit | Enhances the pieced pattern by adding definition without visible quilting lines on the quilt top. |
| Key Skill | Sewing a straight, consistent line precisely within the "ditch" of a seam. |
This technique is all about adding structure and definition in the most understated way possible.
Here are a few of the top reasons it's such a valuable skill:
So, you’ve spent hours piecing together a beautiful quilt top. The last thing you want is for your quilting to steal the show, right? That’s where stitch in the ditch comes in—it’s a quilter’s secret weapon for getting a polished look without distracting from the patchwork.
Think of it as the perfect supporting actor. It works behind the scenes, adding strength and definition so your fabric choices and intricate piecing can get the standing ovation they deserve. It's the ideal way to make your patterns pop. You can even design your own geometric quilting patterns and use ditch stitching to really make them shine.
This clever technique actually got its start in garment sewing way back in the 1940s before quilters adopted it around the 1960s. It’s a workhorse for a reason. A well-loved quilt needs to survive anywhere from 50-100 washes in its lifetime, and ditch stitching locks all three layers together securely. It's so effective that a whopping 72% of quilters in Australia and Canada use it to outline their blocks, adding just enough definition without any competing texture.
This technique really shines in a few key situations. Once you know when to pull it out of your toolbox, you’ll be amazed at the clean, professional finish it gives your quilts.
Here are the best times to put it to work:
By quilting in the seam, you are simultaneously adding strength and texture while letting the fabric and piecing remain the primary focus. It is the definition of functional beauty in quilting.
That gorgeous, invisible stitch-in-the-ditch look doesn't just happen by magic. It all starts with setting yourself up for success before the needle even kisses the fabric. Think of it like a chef prepping ingredients—a little prep work with your tools and machine settings makes the whole process smoother and gets you that professional, pucker-free finish we all crave.
The number one enemy of stitch-in-the-ditch quilting is fabric shifting. When those layers slip and slide, you get puckers. Your best friend in this fight is a good quilting walking foot. This foot has its own set of feed dogs that grip the top layer of your quilt, working in sync with the machine's feed dogs below. This ensures all three layers of your quilt sandwich move together as one perfect unit.
While a walking foot is the classic choice for preventing shifting, you also have another fantastic option: a dedicated stitch-in-the-ditch foot. These feet are pretty neat—they have a little metal guide, sometimes called a "blade," right down the center.
You just let that guide ride right in the seam line, and it does the hard work of keeping you perfectly on track. It's like having a little rudder steering your quilt, making it almost effortless to stay in the ditch, even over long seams.
Lots of quilters I know absolutely swear by a quilting foot with a built-in guide. It's a total game-changer for accuracy because you can feel when you're in the right spot instead of just relying on your eyes.
So, which foot should you use? Let's break down the pros and cons.
This quick table can help you decide which foot is the best fit for your current project and quilting style.
| Foot Type | Pros | Cons | Best For |
|---|---|---|---|
| Walking Foot | Amazing at preventing puckers and fabric shifting across the whole quilt. A true workhorse for all straight-line quilting. | Can be a bit bulky, which sometimes makes it tricky to see exactly where your needle is dropping. | All-purpose ditch quilting, especially on large quilts or quilts that aren't perfectly basted. |
| Ditch Quilting Foot | The center guide gives you incredible precision for staying right in the seam. It's fast and super accurate. | It doesn't help feed the fabric, so your quilt needs to be well-basted to prevent shifting. | Projects where pinpoint accuracy is the top priority and your quilt sandwich is very secure. |
Ultimately, the best foot is the one that gives you the most confidence and the best results.
With your foot chosen, just a couple more tweaks to your machine will make all the difference. Always start with a fresh needle! A sharp 80/12 or 90/14 Universal or Quilting needle will pierce cleanly through all those layers without a struggle.
Next, lengthen your stitch a little. A setting between 2.0mm and 2.5mm is usually the sweet spot. A slightly longer stitch helps the thread sink down into the ditch and disappear. In fact, most quilters find that a 2.2mm stitch length with minimal tension tweaks works beautifully on about 90% of fabrics.
These small adjustments are huge for avoiding those frustrating puckers that can pop up in nearly 30% of projects where seams weren't pressed well. Before you start on your actual quilt, grab a scrap sandwich made from the same materials and do a quick test. Check your thread tension to make sure it's balanced, and you're good to go
Alright, with your machine and supplies ready to go, let's walk through how to actually do this. Getting a perfect, invisible stitch isn't magic; it's just a matter of following a few key steps. We'll start with the prep work, because great quilting always starts with a great foundation.
The secret to a good "ditch" is created way back when you press your quilt top. You need to give your needle a clear path to follow.
The trick is to always press your seams to one side, usually toward the darker fabric. This creates a tiny ridge on one side of the seam and a shallow valley—the "ditch"—on the other. That little valley is exactly where you're aiming to stitch.
Once your quilt top is pressed and ready, it's time to build the sandwich.
With your quilt sandwich prepped, a few tweaks to your sewing machine will set you up for success. The three big things to check are your presser foot, stitch length, and tension.
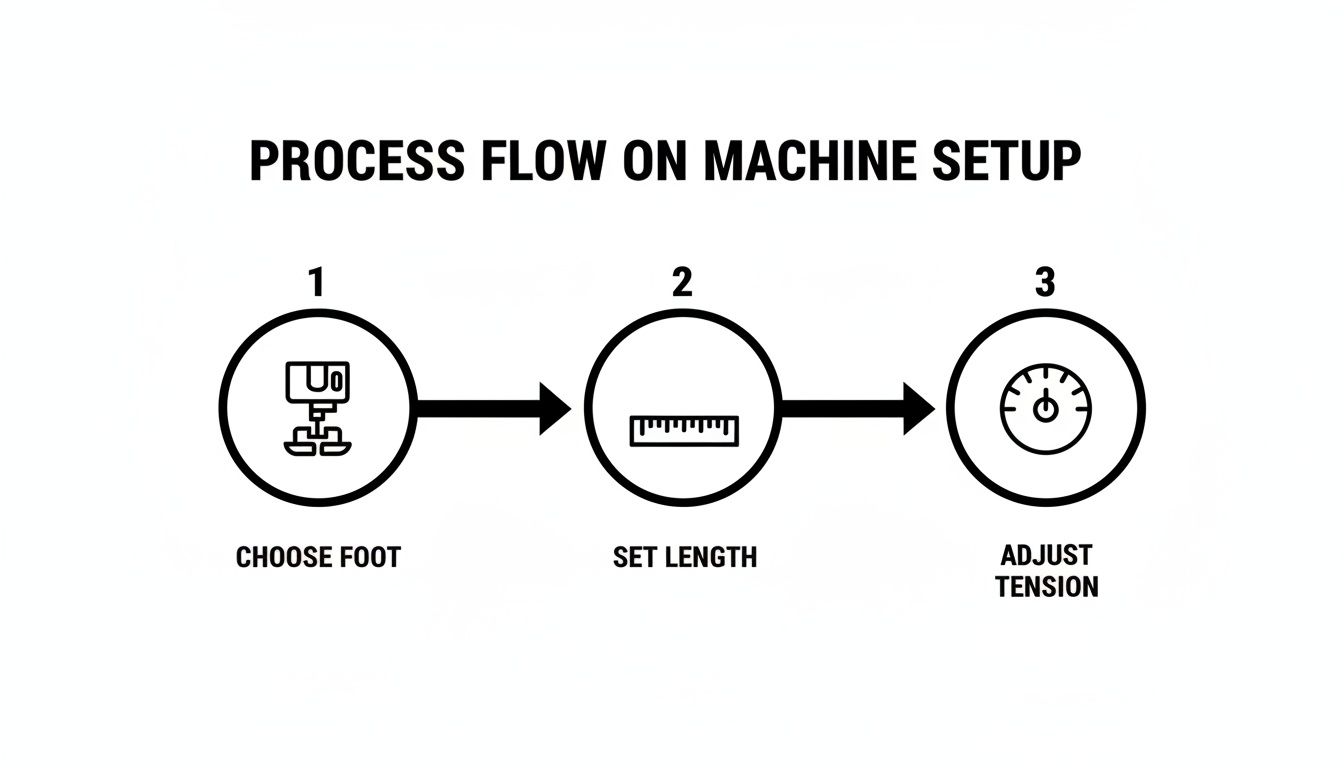
Getting these three settings right before you sew a single stitch makes all the difference in the world.
And now, the fun part! It's always a good idea to start quilting from the center of your quilt and work your way out. This strategy helps push any fullness or slack in the fabric toward the outer edges, preventing ugly puckers from getting trapped in the middle.
My Favorite Trick: As the quilt moves toward the needle, use the fingers of both hands to gently pull the fabric apart right at the seam. This opens up the ditch ever so slightly, making it much easier to see and follow.
When you're ready to start a line of stitching, lower your needle manually right into the seam. Take a couple of stitches forward and then a couple in reverse to lock them in. Now, just sew at a slow, steady pace. Let the machine do the heavy lifting; your only job is to guide the fabric and keep the needle running perfectly along the low side of that seam.
When you reach the end of the seam, lock your stitch again just like you did at the beginning, and you're done
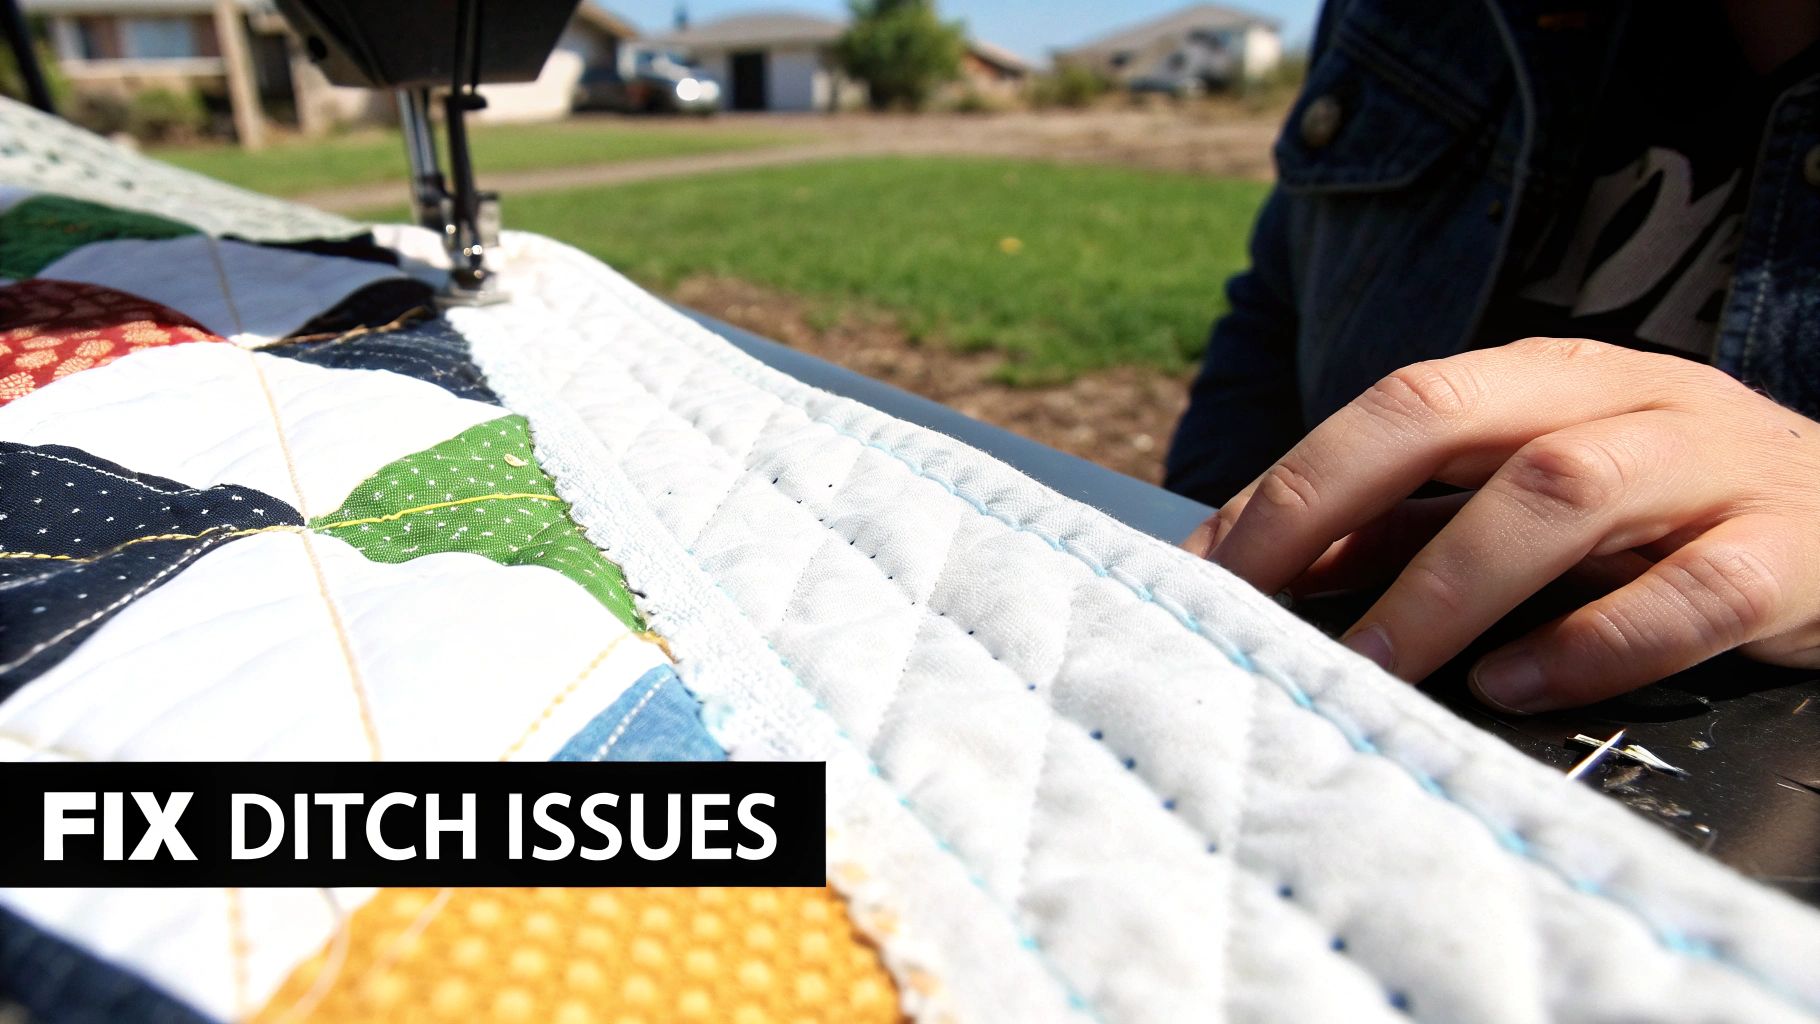
Even with the most careful prep work, things can go a little sideways when you're stitching in the ditch. It happens to all of us! But don't worry, nearly every common hiccup has a straightforward fix.
Instead of feeling frustrated, think of these moments as part of the process. Learning how to troubleshoot is what turns you from a beginner into a seasoned quilter who can handle anything.
The Problem: Your stitching line just won't stay in the seam. It keeps popping out onto the quilt top, looking wobbly and obvious. Or maybe your machine is completely skipping stitches, especially where multiple seams come together.
The Fix: Nine times out of ten, the culprit here is speed. Simply slowing down gives you so much more control to guide the quilt accurately. If you still find your needle drifting, a specialty stitch-in-the-ditch foot with that little center guide is a total game-changer. It practically does the steering for you.
For those frustrating skipped stitches, the first thing to check is your needle. A fresh, sharp needle—usually an 80/12 or 90/14—is essential for punching through all those layers cleanly. A dull needle just can't do the job.
The Problem: You look down and see little wrinkles, puckers, or even tiny folds forming along your stitch line. This is probably the most common challenge quilters run into.
The Fix: Puckering is almost always a sign that your quilt layers aren't playing nicely together. Here’s what to check:
HollyAnne Knight of String & Story has a fantastic tip for this. She suggests "massaging" the fabric into place. If you see a puffy area, use a denser quilting design in that spot to help "eat up" that extra fabric and ease it in.
Mastering the details is what really makes a quilt sing. Let's dive into some of the most common questions we hear from quilters who are just getting the hang of stitching in the ditch.
This is a great question, because the right thread is your secret weapon for making those stitches completely vanish. You're looking for something strong, but fine enough that it can nestle right down into that seam.
Here's a pro tip: to really hide your stitches, match the thread to the fabric on the "high" side of the seam—the side your needle is just barely piercing. That way, if you wander out of the ditch for a second, the stitch will be much harder to spot.
Yes, this is non-negotiable! Pressing your seams to one side (I usually press toward the darker fabric to prevent shadowing) is what actually creates the "ditch." It’s a simple but critical step.
When you press this way, you create a little valley on one side of the seam and a tiny ridge on the other. Your needle travels right along that low side, tucked up against the ridge. This gives you a fantastic physical guide to follow and helps your stitches sink right in and out of sight. If you press your seams open, there’s simply no ditch to follow, making the whole process more difficult and far less effective.
You absolutely can! Long before we had our fancy machines, this was the way it was done. It’s a beautiful, traditional technique that typically uses a simple running stitch or a backstitch if you want a little more strength.
Sure, it takes more time, but hand stitching in the ditch gives you amazing control and adds a subtle, handcrafted texture to your quilt that is truly special. It's a wonderful choice for smaller projects, or for anyone who simply loves the peaceful rhythm of hand sewing.
At High Country Quilts, we have all the threads, notions, and friendly advice to help you master this essential quilting skill. Explore our selection of quilting supplies today and find exactly what you need for your next beautiful project.
At High Country Quilts we care deeply about community. With our experiences in retail, we know that a store is not only a place to shop but also a place for the community to gather and share. During this busy...

Hi! We’re Adam and Renee Wheaton, the new owners of High Country Quilts! For more than 40 years, we’ve owned and operated vacuum and sewing businesses. Following in Renee’s father’s footsteps after he retired from All Discount Vacuum and Sewing in Colorado...


Leave a comment