

We Love Our Quilting Community
At High Country Quilts we care deeply about community. With our experiences in retail, we know that a store is not only a place to shop but also a place for the community to gather and share. During this busy...


Ever wonder how a shirt collar stays so perfectly crisp or a handbag holds its shape without flopping over? The secret isn't in the main fabric alone. It's all thanks to interfacing, a special material that acts as the hidden support system for your sewing projects.
Think of it as the unseen framework of a garment. Just like a building needs a sturdy frame to stand tall, your fabric often needs a little extra help to achieve the desired structure and stability.
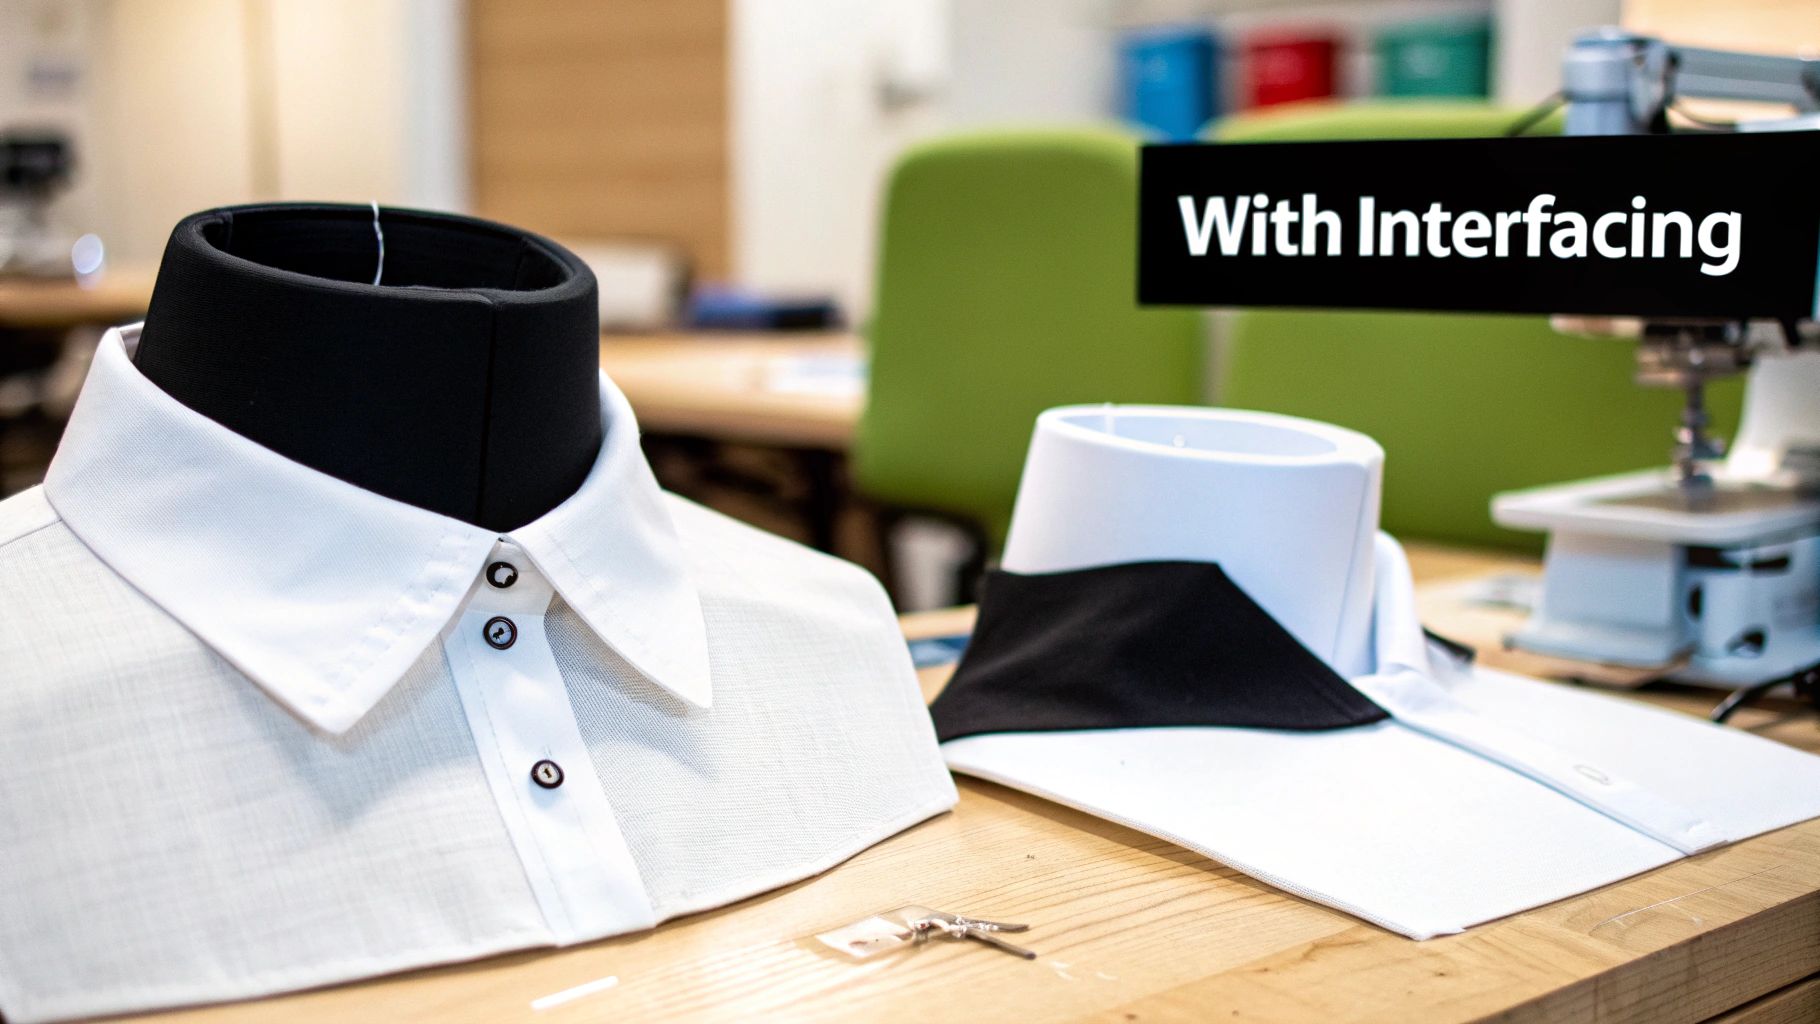
Interfacing is a separate layer of fabric that you apply to the wrong side (the inside) of your primary material. It’s what gives collars their form, prevents buttonholes from tearing, and keeps waistbands from collapsing.
It's truly the difference between a project that looks homemade and one that has a polished, professional finish. Without it, delicate fabrics would lack substance, and key structural areas would simply wilt. Interfacing steps in to provide that crucial support where your main fabric just can't do it alone.
The idea of reinforcing fabric is nothing new. For centuries, tailors would hand-sew stiffening materials like horsehair canvas into suits and gowns. But everything changed in the mid-20th century with the invention of fusible interfacings. These modern materials, with their heat-activated adhesives, took off in the 1950s and completely changed the game for both home sewers and the garment industry. You can learn more about the history of clothing production on fortunebusinessinsights.com.
Today, interfacing is an essential tool for an incredible range of projects, not just clothing:
By understanding how to choose and apply the right interfacing, you gain complete control over your fabric. You can take a soft, drapey textile and give it the structure needed to hold a sharp, tailored silhouette.
Mastering this skill is a true game-changer. It will elevate the quality, durability, and overall look of everything you make at your sewing machine.
So, what exactly is interfacing, and why do sewing experts talk about it all the time? Think of it as the secret scaffolding inside your projects that takes them from looking homemade to professionally finished.
It performs three critical jobs that fabric alone just can't handle. Interfacing is the real reason a shirt collar stays crisp wash after wash, instead of wilting into a floppy mess.
First up, interfacing provides structure and shape. Your main fabric might be gorgeous, but it often doesn't have the backbone needed for key parts of a garment.
Interfacing is what gives a collar its sharp, defined points. It's the magic behind a waistband that sits flat and supports you, or the reason a button placket lies smooth and firm. Without it, all those crucial elements would be limp and shapeless, completely failing to hold the design's intended silhouette.
Next, interfacing is a powerhouse for reinforcement, especially in areas that take a lot of stress. Let's be honest, fabric can be delicate where it gets pulled, handled, or punctured.
Here are a few places it makes a huge difference:
This added strength dramatically boosts the lifespan of your creations. It's how you ensure all your hard work results in a truly durable piece that can stand up to real-world wear and tear.
Finally, interfacing adds body to fabrics that are either too lightweight or overly drapey for the job. Ever tried making a structured tote bag out of simple quilting cotton? On its own, the fabric would just collapse into a soft pile. Fuse some interfacing to it, and that same cotton suddenly has the substance it needs to stand up straight.
Interfacing gives you the power to tell your fabric how to behave. You can take a delicate, flowing material and give it the weight and presence needed for a more tailored, structured design.
This is a game-changer for materials like rayon, silk, or lightweight linen. Interfacing stops them from looking flimsy and gives them a much more substantial, high-quality feel. Once you get the hang of using it, you unlock the ability to create polished, durable, and beautifully structured pieces every single time.
Once you've grasped the "what" and "why" of interfacing, it's time to dive into the different types you'll encounter. Walking into a fabric store can be a bit overwhelming—there are so many options! But don't worry, they all fall into a few main categories.
Learning to tell them apart is the secret to choosing the right one and getting professional-looking results every time.
The first major fork in the road is how the interfacing attaches to your fabric. You'll either be ironing it on or sewing it in.
Fusible interfacing is probably the most popular choice for home sewers, and for good reason. It has a heat-activated adhesive on one side. A quick press with a hot iron, and it permanently bonds to your fabric, making the two layers act as one. It’s a fantastic, time-saving option for adding crispness to shirt collars, cuffs, and button plackets.
On the other side, we have sew-in interfacing. This is the more traditional style, and it has no glue. Just as the name suggests, you simply treat it like another layer of fabric and stitch it into your seams. It's the go-to for delicate or textured fabrics that can't take the heat of an iron—think velvet, sequins, or certain synthetics. Sew-in provides a softer, more natural support that’s often favored in classic tailoring.
Beyond how it attaches, interfacing is also defined by how it’s made. This is just as important, as the construction dictates how it will behave. The three main types here are woven, non-woven, and knit.
Woven Interfacing: This kind looks and acts just like a piece of regular fabric. It has a clear grainline, so you have to be mindful of cutting it in the right direction, just like your main fabric. It offers a very natural drape and is perfect for tailoring where you want to add support without making the garment stiff.
Non-Woven Interfacing: This is what most people picture when they think of interfacing. It feels more like a sheet of paper or felt because the fibers are bonded together randomly rather than woven. The biggest advantage? No grainline! You can cut your pieces in any direction, which is great for saving fabric. It gives a crisp, stable finish, making it a workhorse for bags, crafts, and structured garments.
Knit Interfacing: Got a stretchy fabric? You need a stretchy interfacing. Knit interfacing has built-in, one-way or two-way stretch, allowing it to move and flex right along with fabrics like jersey or knits. If you tried using a non-stretch interfacing on a knit T-shirt neckline, the seam would become rigid and you'd likely hear stitches pop the first time you tried to pull it over your head.
To help you choose the right product at a glance, here’s a quick comparison of the different types.
| Interfacing Type | Construction | Application Method | Best For | Key Characteristic |
|---|---|---|---|---|
| Woven | Woven fibers with a clear grainline | Fusible or Sew-In | Tailored garments, structured blouses, collars | Drapes like fabric, provides natural support |
| Non-Woven | Fibers bonded together randomly | Fusible or Sew-In | Bags, crafts, plackets, general use | No grainline, adds crispness and stability |
| Knit | Knitted fibers with built-in stretch | Fusible | Knit garments, necklines, hems, cuffs | Stretches with the fabric, prevents distortion |
This table should serve as a handy reference, but the best way to learn is by feeling the different types in your hands and trying them out on fabric scraps.
This infographic does a great job of showing the three core jobs of interfacing, which really explains why we need these different types for different projects.
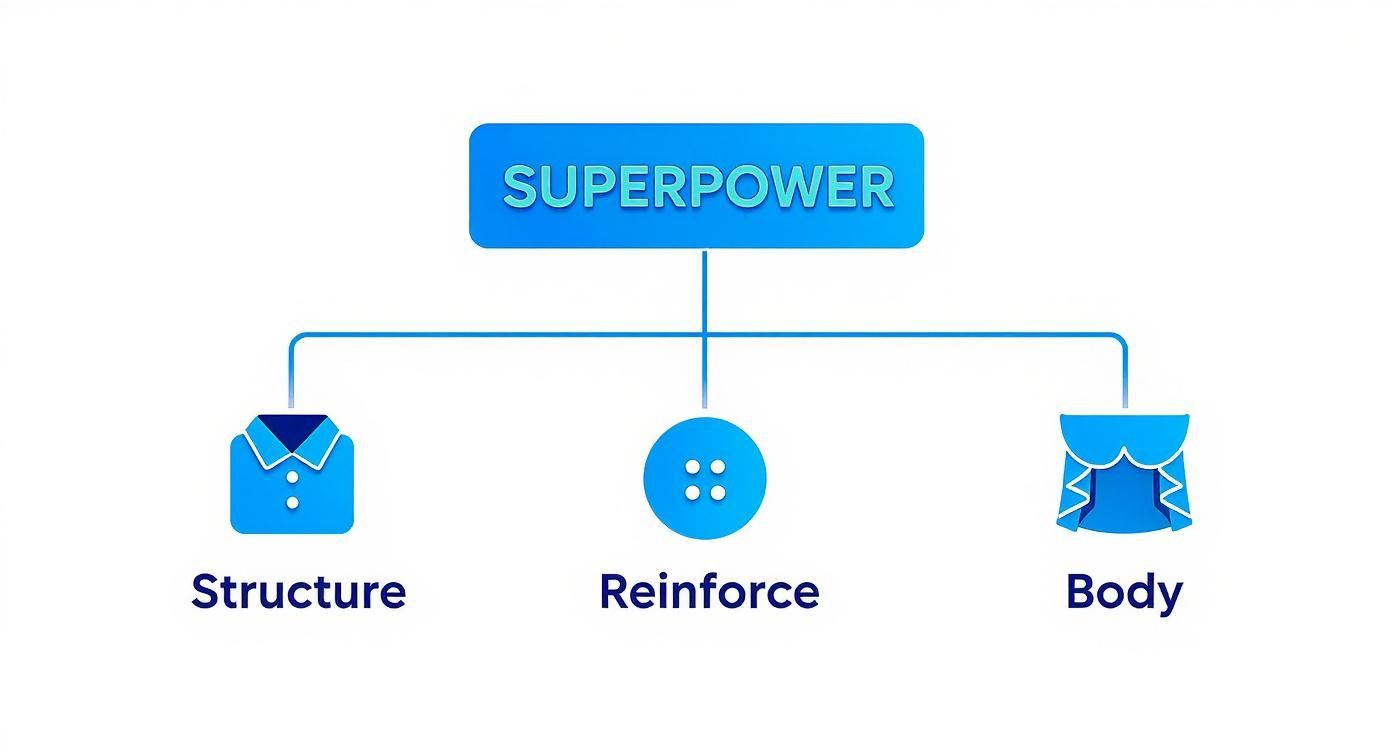
As the diagram shows, whether you need to add structure, reinforce a high-stress area, or just give some body to a flimsy fabric, there's an interfacing out there designed for exactly that.
The importance of this simple material goes far beyond the home sewing room. Interfacing is a cornerstone of global apparel manufacturing. The demand is massive; the global sewing machines market was valued at around $4.10 billion in 2018 and is projected to hit $7.44 billion by 2032, with the Asia-Pacific region dominating production. You can read more about these kinds of apparel industry market trends. This industrial-scale reliance just proves how essential interfacing is to creating quality, long-lasting clothing.
Picking the right interfacing can feel overwhelming, but it really boils down to one golden rule: your interfacing should always be the same weight as, or slightly lighter than, your main fabric. This single principle is your North Star. It’s what stops you from accidentally turning a flowy silk into something that feels like cardboard.
Think about it this way—you wouldn't try to reinforce a delicate piece of tissue paper with a heavy chunk of cardboard. It’s the same logic in sewing. A heavyweight interfacing will completely dominate a lightweight fabric, making it stiff and unnatural. On the flip side, an interfacing that’s too light won’t give you the support you need. Nailing this balance is the first, and most important, step.
Once you’ve got that down, you can fine-tune your choice by looking at four other key factors. By asking yourself a few simple questions about your project, you can walk yourself right to the perfect match every single time.
To get past the golden rule, you have to think about your fabric and what you want the finished piece to do. This isn't about memorizing complicated charts; it’s about developing an instinct for your project’s needs.
Here’s the mental checklist I run through every time:
By mastering this selection process, you take control of your material. You're no longer just sewing fabric; you're engineering it to perform exactly how you envision, a skill central to both bespoke tailoring and large-scale garment production.
Let’s bring this down to earth with a couple of real-world examples. Say you’re making a simple T-shirt from a soft cotton jersey. To keep the neckline from stretching out, you’d grab a lightweight fusible knit interfacing. It’s light enough not to overpower the soft cotton, and its stretch allows it to move with the knit fabric.
Now, picture a tailored wool blazer. For the lapels and collar, you need a crisp shape that still feels natural. This is where a medium-weight woven sew-in interfacing would be perfect. It adds body and structure without making the wool feel stiff or boardy.
This kind-of decision-making is fundamental across the entire sewing industry. Within the $6.25 billion global sewing machine market, knowing how to pair fabric with the right support material is what separates amateur work from professional quality. The industrial machine sector, valued at over USD 3 billion in 2023, is built around handling these complex layers with precision. You can explore more on the growth of the sewing industry at Grand View Research. It just goes to show how essential interfacing is to building beautiful, durable garments, whether you’re making one or one million.
You've picked the perfect interfacing for your project. Great! But that's only half the job done. The real magic happens when you apply it. A sloppy application can lead to bubbling, stiffness, and a host of other frustrations, but getting it right is the key to that professional, polished look we all want.
Whether you're using a fusible or a sew-in type, mastering the application is what turns a limp piece of fabric into a perfectly structured part of your garment. Let's walk through how to get a smooth bond and a clean finish, every single time.
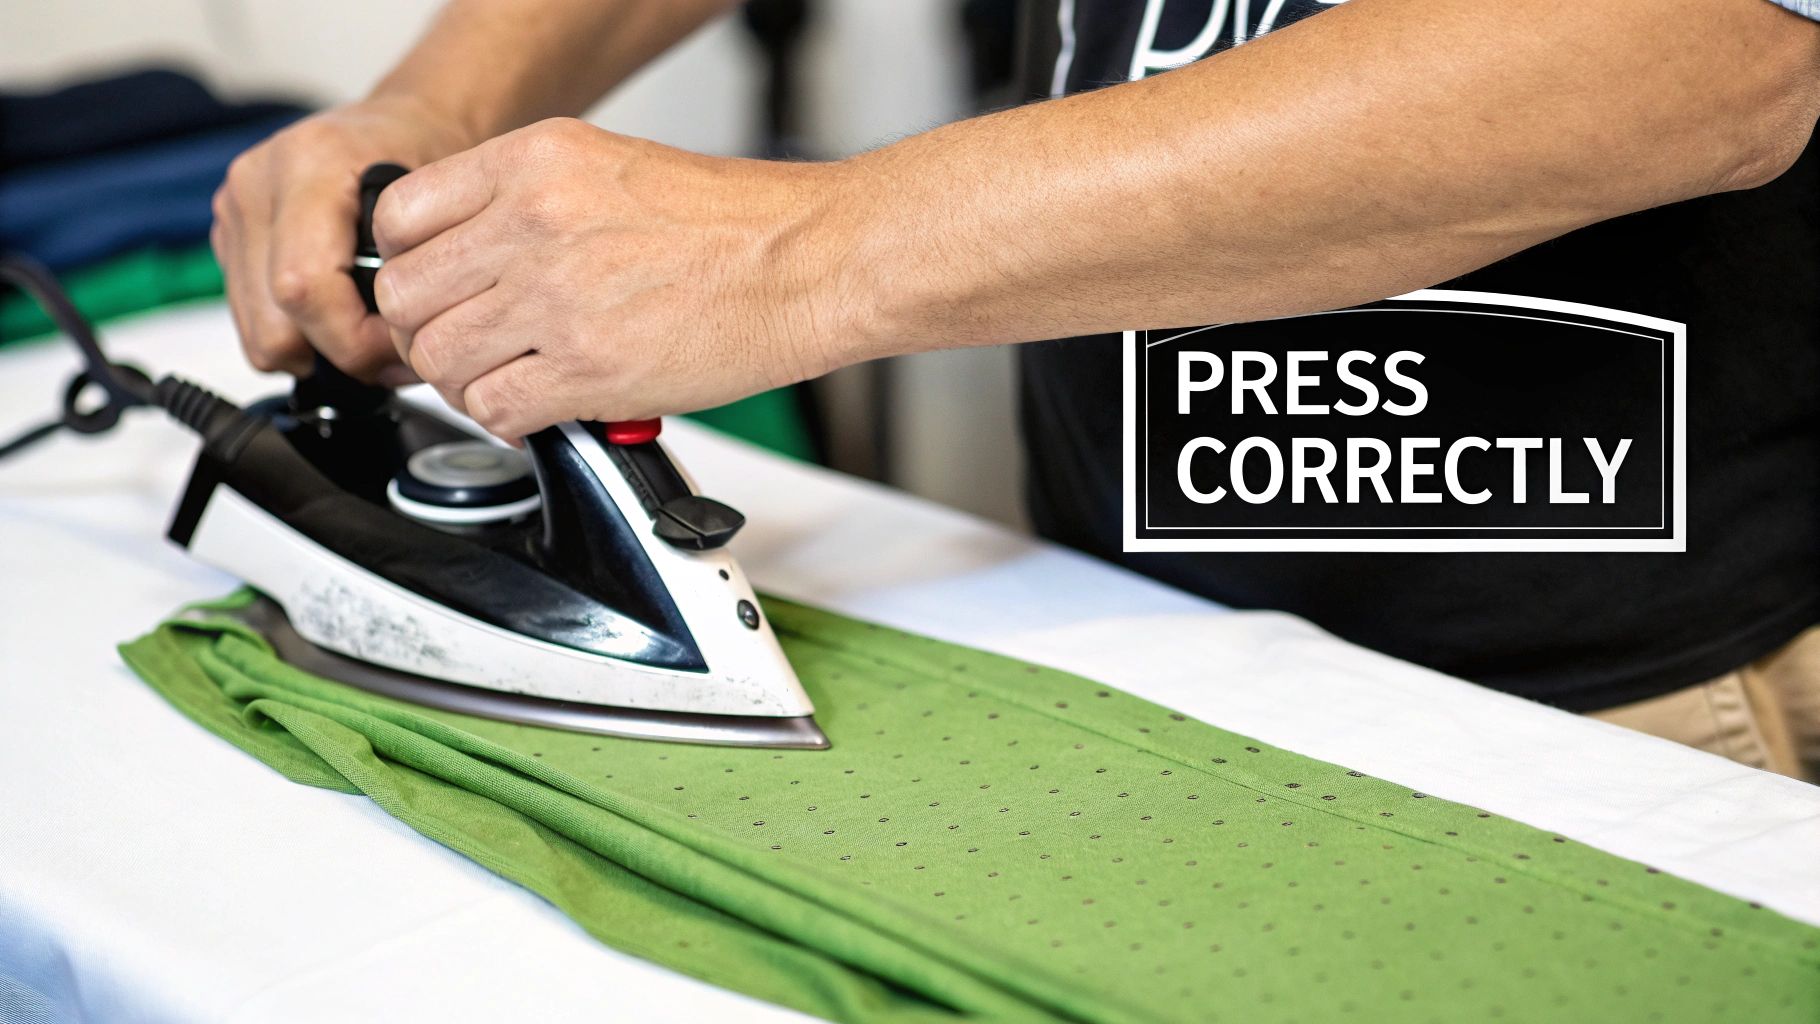
Fusible interfacing, with its handy heat-activated glue, is a go-to for many of us because it’s quick and creates such a neat finish. But here's the number one mistake I see people make: they iron it. You need to press, not iron. Sliding a hot iron back and forth can stretch your fabric and the interfacing, resulting in a weak, bubbly bond.
For a perfect fusion, just follow these steps:
When you’re working with fabrics that can't take the heat, like velvets or certain synthetics, sew-in interfacing is your best friend. It provides a softer, more natural structure, and applying it is as simple as treating it like another layer of fabric.
Just lay the sew-in interfacing on the wrong side of your fashion fabric. To keep it from shifting around while you sew the rest of your project, baste the two layers together, either by hand or machine, about ⅛ inch inside the seam allowance. Once that's done, you can handle them as one piece. For areas that need to be crisp and flat, like collars and cuffs, you can trim the interfacing's seam allowance after stitching to cut down on bulk.
The goal of application is to make the interfacing an invisible partner to your fabric. A good application is one you can't see but can definitely feel in the quality and structure of the final piece.
Even the most seasoned sewists run into trouble now and then. You might see some bubbling, find that your interfacing just won't stick, or end up with a piece that feels stiff as a board. Don't worry—most of these problems are totally fixable. The key is figuring out what went wrong.
Here’s a quick guide to help you figure out and fix the most common interfacing headaches.
| Problem | Potential Cause | Solution |
|---|---|---|
| Bubbling or Wrinkling | Uneven heat; fabric wasn't pre-shrunk; ironing motion was used instead of pressing. | Re-press the area with a damp press cloth and the 'press and hold' technique. Ensure both fabric and interfacing are pre-shrunk next time. |
| Poor Adhesion | Iron temperature was too low; not enough pressure or time during pressing. | Increase iron temperature slightly and re-press each section, holding for the recommended time with firm, even pressure. |
| Stiff or "Cardboard" Feel | The interfacing chosen is too heavy for the fashion fabric. | Unfortunately, this can't be fixed after fusing. Always test on a scrap first and remember the golden rule: use interfacing that is slightly lighter than your main fabric. |
| Adhesive on Iron | Iron was too hot; no press cloth was used. | Clean the iron plate while warm using an iron cleaner stick. Always use a press cloth to prevent this in the future. |
Taking a moment to diagnose the issue will not only save your current project but will also make you a pro at applying interfacing for all your future makes.
Even with the basics down, a few questions always seem to pop up once you actually start handling interfacing. Nailing down the answers to these common sticking points is the last step before you can really use it with confidence. This is where we'll tackle those nagging "what if" scenarios that show up mid-project.
Think of this as your quick-reference guide for troubleshooting on the fly.
You can, but it’s not always a simple one-for-one swap. Using a stable, lightweight fabric like cotton organdy or muslin as a sew-in interfacing is an old-school technique, sometimes called "self-fabric" interfacing. It’s a great trick for historical garments or anytime you need a very specific, natural drape that modern interfacings just can’t match.
That said, it isn't a perfect substitute. These fabrics don't have a fusible side, so they always have to be sewn in. They also won't give you the same crisp, paper-like structure you’d get from a dedicated non-woven interfacing. If you're just starting out, I’d recommend sticking with commercial interfacings until you get a feel for how different fabrics work together.
Yes. Don't skip this. It's especially crucial for any sew-in interfacing made from natural fibers like cotton. Just like your main garment fabric, these materials will shrink in the wash. If you attach an un-shrunk interfacing to a pre-shrunk fabric, that first laundry day will be a disaster—the interfacing will tighten up and cause the outer fabric to pucker and bubble.
Pre-shrinking is your insurance policy against a ruined garment. A few minutes of prep saves you the heartache of a project that gets mangled after its first wash.
It’s pretty simple to do. For sew-in types, just soak the interfacing in warm water for about 20 minutes, gently squeeze out the extra water, and let it air dry. You can even pre-shrink fusible interfacing by hovering a steamy iron over it, just be careful not to let the iron's surface touch the adhesive dots.
This is one of the most common mistakes, and it can completely ruin the feel of your project. Using an interfacing that’s heavier than your fashion fabric will simply overpower it. The interfaced area will become stiff, bulky, and almost board-like, killing the fabric's natural drape. The final result looks awkward and usually feels uncomfortable to wear.
Imagine adding a stiff, heavyweight interfacing to the collar of a silky rayon blouse. Instead of a soft, elegant roll, you'd get a rigid, clunky collar that looks totally out of place. This is why the golden rule is so important: always choose an interfacing that is the same weight as, or slightly lighter than, your main fabric. It ensures the support does its job quietly in the background, enhancing the fabric instead of fighting it.
This really depends on the type of interfacing and what you're trying to accomplish.
Sew-In Interfacing: Always cut sew-in interfacing with the seam allowances. It has to get caught in the seams to stay put, so the interfacing piece needs to be the exact same size as the fabric piece you’re backing.
Fusible Interfacing: For fusible types, it’s usually better to trim the seam allowances off the interfacing pattern piece before you cut and fuse. Fusing interfacing all the way to the fabric's edge adds extra layers inside the seam, creating a lot of unnecessary bulk. Trimming it away first helps your seams lie flatter and look much cleaner—a must for getting sharp points on collars and cuffs.
At Famcut.com, we believe that understanding your materials is the key to unlocking your creative potential. From cosplay to quilting, having the right tools and knowledge makes all the difference. Explore our wide selection of supplies and join a class to continue your sewing journey with us! Visit us at https://famcut.com to learn more.
At High Country Quilts we care deeply about community. With our experiences in retail, we know that a store is not only a place to shop but also a place for the community to gather and share. During this busy...

Hi! We’re Adam and Renee Wheaton, the new owners of High Country Quilts! For more than 40 years, we’ve owned and operated vacuum and sewing businesses. Following in Renee’s father’s footsteps after he retired from All Discount Vacuum and Sewing in Colorado...


Leave a comment