

We Love Our Quilting Community
At High Country Quilts we care deeply about community. With our experiences in retail, we know that a store is not only a place to shop but also a place for the community to gather and share. During this busy...


Ever wrestled with a quilt only to find the top layer has shifted and bunched up by the time you reach the end of the seam? It's a frustratingly common problem, and it's exactly what a walking foot is designed to solve.
Think of it as adding all-wheel drive to your sewing machine. It’s a special presser foot attachment that has its own set of feed dogs, which grip the top layer of your fabric. This allows it to pull the top fabric through at the exact same speed as the machine's built-in feed dogs are moving the bottom layer.
Your standard presser foot is passive—it just presses down on the fabric, relying completely on the feed dogs below to move everything along. This works fine for simple cottons, but introduce multiple layers, slippery fabrics, or knits, and things can get messy.
A walking foot, on the other hand, is an active participant. It mechanically moves in sync with the lower feed dogs, creating a perfect feeding action from both the top and bottom. This coordinated movement is a game-changer for tricky materials.
Here's where you'll really see the difference:
To really see the difference, let's break down how these two feet compare side-by-side.
| Feature | Standard Presser Foot | Walking Foot |
|---|---|---|
| Feeding Action | Passive; only pushes down on the fabric. | Active; has its own feed dogs that pull the top fabric through. |
| Best For | General sewing on single layers of non-stretchy fabrics. | Quilting, matching patterns, sewing knits, vinyl, and leather. |
| Main Function | Hold fabric flat against the lower feed dogs. | Ensure even feeding of multiple or difficult fabric layers. |
| Common Problems | Can cause fabric layers to shift, pucker, or stretch. | Prevents shifting, puckering, and stretching for a clean finish. |
This table makes it clear: while a standard foot is the workhorse for everyday sewing, the walking foot is the specialist you call in for the tough jobs.
A walking foot is probably the single most impactful tool that will make a difference in your quilting. It works with the lower feed dogs of your machine so that all layers of your quilt sandwich feed through evenly.
Getting the hang of this tool will absolutely level up your sewing game. For some hands-on guidance, be sure to check out our collection of free sewing lessons and start building your confidence and skills.
So, what’s the secret behind a walking foot? It's all about its clever, yet surprisingly simple, mechanical design. The real magic lies in a C-shaped arm that you hook right over your sewing machine's needle clamp screw.
This little connection is the key to everything. As the needle bar goes up and down, it pulls that C-shaped arm along for the ride. This motion powers a second set of feed dogs located on the bottom of the walking foot itself.
What you get is a beautifully coordinated dual-feeding system. While your machine’s regular feed dogs are doing their job pulling the bottom layer of fabric through, the walking foot’s feed dogs are grabbing the top layer and moving it forward at the exact same time. They work in perfect unison.
Imagine two people trying to carry a large, fragile sheet of glass. If only one person moves, the glass is going to slip and crash. But if they both walk forward at the same pace, the glass stays perfectly level and moves smoothly. That’s precisely what a walking foot does for your fabric layers.
This infographic gives a great visual of how the top and bottom layers move together.
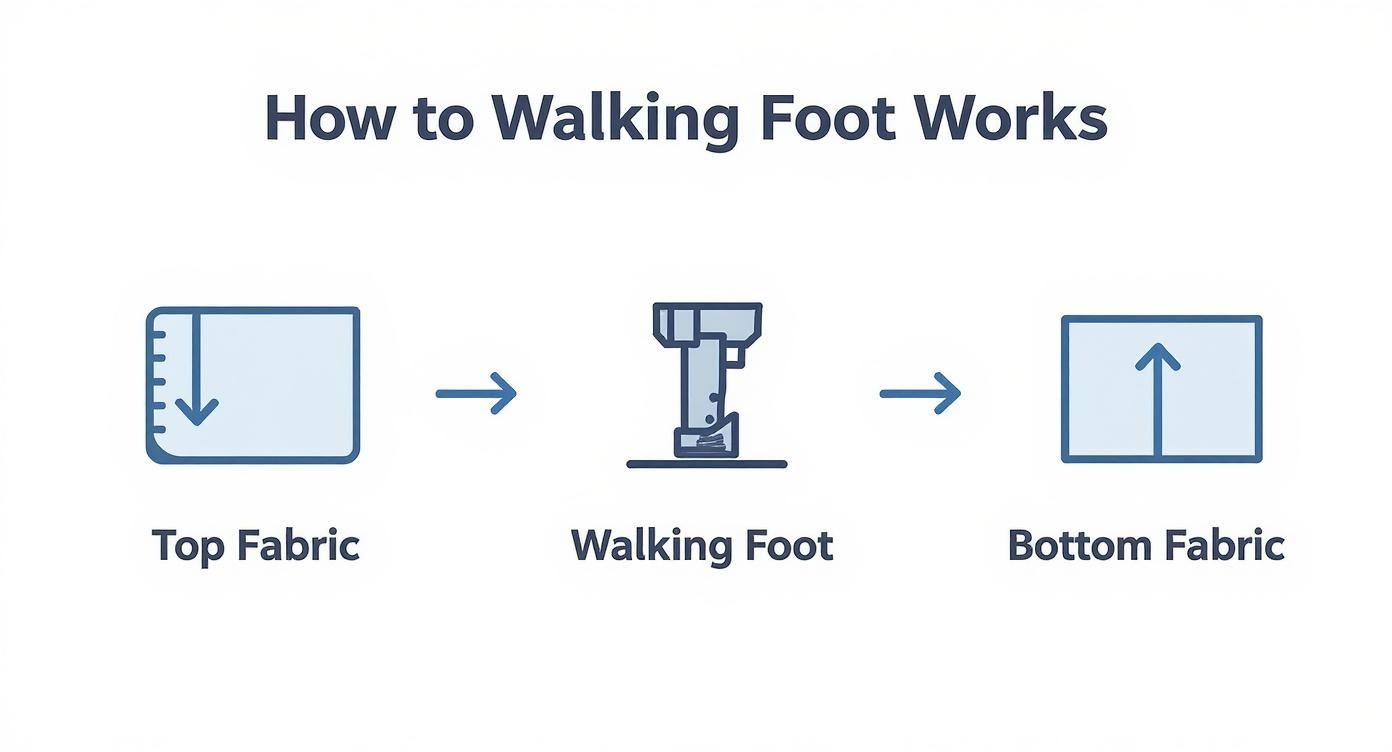
As you can see, the foot isn't just passively sitting on the fabric—it's actively pulling the top layer forward while the machine pulls the bottom.
This synchronized movement is what creates a stable "fabric sandwich," a term quilters often use. All your layers move under the needle as one cohesive unit, which is a lifesaver when you’re dealing with tricky materials. It completely eliminates the shifting, puckering, and general frustration that comes from fabric layers moving at different speeds. It’s especially helpful for:
The walking foot’s main job is to stop the presser foot from pushing the top layer of fabric ahead of the bottom layer. By actively feeding the top layer, it ensures every piece of your project arrives at the needle at the same time.
Once you understand this simple mechanism, it’s easy to see why this attachment is so indispensable. For more great ideas to level up your sewing, be sure to check out the tips and tricks on our blog.
If you've ever felt that frustrating mix of hope and dread when starting a tricky seam, the walking foot is about to become your new best friend. It’s the kind of tool that takes your sewing from “homemade” to “handcrafted,” solving some of the most common headaches and saving you a ton of time and fabric in the process.
One of its biggest claims to fame is the total elimination of puckered seams and shifting fabric. You know the feeling—you start with perfectly aligned layers, but by the end, the top piece has crept forward, creating a little bunch. This is a classic problem with quilting. A walking foot makes sure your top fabric, batting, and backing all move through the machine as one perfect unit.
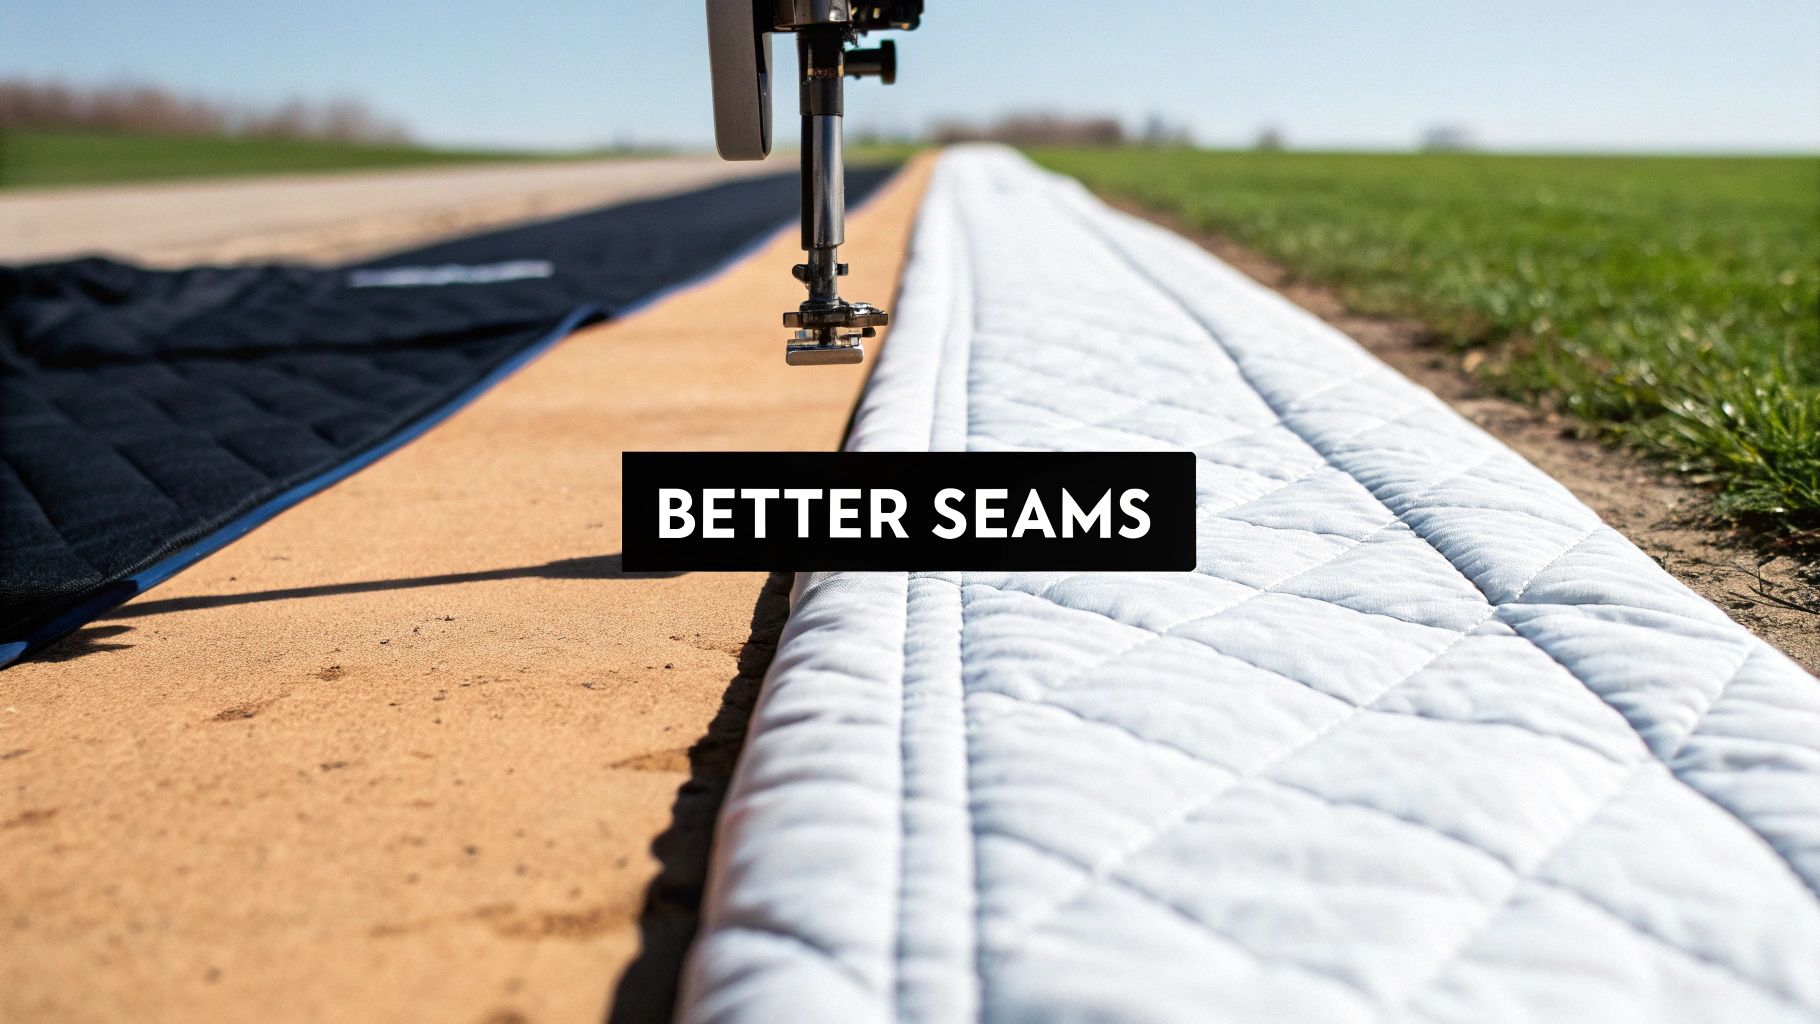
This synchronized feeding action is what delivers those beautiful, straight, and even stitches every single time. It's an absolute game-changer for topstitching bulky seams or finishing the edges of a quilt.
Trying to match plaids, stripes, or a big floral print can feel impossible with a standard foot. No matter how many pins you use, things just seem to wiggle out of place. A walking foot holds everything steady, keeping your patterns perfectly lined up from one end of the seam to the other. It’s almost like magic.
It also tames those notoriously difficult fabrics. Slippery silks, stretchy knits, and even sticky materials like vinyl or leather suddenly become manageable. They glide right through your machine without stretching, pulling, or sticking.
The walking foot is probably the #1 thing that will make a difference in your quilting. It works with the lower feed dogs of your machine so that all the layers of your quilt sandwich feed through the machine evenly.
So, what does this all mean for your projects? It boils down to higher quality work with way less stress.
By grabbing and moving all the layers of your fabric together, a walking foot gives you the control you need to get polished, impressive results on even your most ambitious projects.
Knowing how a walking foot works is a great start, but the real magic happens when you know exactly when to use it. This amazing tool isn't meant for every single seam, but for certain jobs, it’s the difference between a frustrating mess and a flawless, professional finish.
Think of it as your secret weapon for any project with multiple layers, slippery fabrics, or bulky materials. By feeding the top and bottom layers of fabric through at the same time, it stops all that annoying slipping and sliding that causes puckers and mismatched seams.
Quilting is probably what the walking foot is most famous for, and there’s a very good reason for that. When you're sewing a quilt sandwich—that’s your quilt top, the fluffy batting, and the backing fabric all layered together—a standard presser foot will push the top layer forward, creating a wrinkled mess.
A walking foot is an absolute game-changer for these key quilting steps:
A walking foot is probably the #1 thing that will make a difference in your quilting. It works with your machine's feed dogs to pull all the layers of your quilt sandwich through evenly.
Choosing the right foot can feel tricky, but this simple guide breaks it down. Here's a quick look at when to reach for your walking foot versus when a standard foot will do the trick.
| Project or Fabric Type | Recommended Foot | Why It's the Best Choice |
|---|---|---|
| Straight-line quilting | Walking Foot | Prevents the quilt sandwich layers from shifting, puckering, or bunching up. |
| General seaming on cotton | Standard Foot | It’s all you need for basic seams on stable, single-layer fabrics. |
| Matching plaids or stripes | Walking Foot | Ensures patterns align perfectly at the seams without slipping. |
| Sewing with vinyl or leather | Walking Foot | Stops sticky fabrics from dragging and causing uneven stitches. |
| Hemming jeans (denim) | Walking Foot | Powers through thick, bulky layers for a clean, straight hem. |
| Topstitching a collar | Standard Foot | Offers better visibility for precise edge stitching on simple layers. |
| Attaching quilt binding | Walking Foot | Feeds the thick, multi-layered edge evenly for a professional finish. |
Ultimately, if your fabric is thick, layered, slippery, or patterned, grabbing your walking foot is almost always a good call.
A walking foot isn't just for quilts! It’s an incredible tool for making professional-looking clothes and bags, too. Anytime you need to match patterns, like plaids or stripes on a shirt, this foot will make your life so much easier.
It’s also brilliant for thick materials like canvas, denim, or any project with heavy interfacing. Even tricky materials like craft foam used for costumes get a boost. If you want to learn how to make cosplay armor, you'll see how a walking foot can give you incredible control over those bulky layers. It makes sure your topstitching is perfectly straight, even when going over thick seams, giving your projects that polished, high-end look.

Before you can start enjoying what a walking foot can do, you've got to make sure you get the right one for your specific sewing machine. The single most important detail to get right is the shank height.
This is simply the distance from the presser foot screw down to the bottom of the foot when it’s in the lowered position. Most home machines these days are low shank, but you can't just assume. Always check your machine’s manual first—using the wrong shank size means the foot won't work properly and could even damage your machine.
Don't have the manual handy? No problem. There's a quick and easy way to figure it out yourself.
Choosing the correct shank size is non-negotiable. Taking a minute to measure can save you from buying the wrong foot and dealing with a whole lot of frustration later on.
Once you've got the correct walking foot in hand, putting it on is pretty simple. It’s almost exactly like changing any other presser foot, with just one small extra step involving that little C-shaped arm.
Even after you get the hang of what a walking foot does, a few practical questions always pop up. Let's walk through some of the most common ones so you can sew with confidence and sidestep those little frustrations.
This is probably the number one question I hear. The short answer is yes, but be careful. The foot is really built to move forward, and backstitching can sometimes cause a tangled mess of thread underneath.
A much safer way to lock your stitches is to just drop your stitch length to zero for a few stitches at the beginning and end of your seam.
Great news here—you have options! A walking foot is perfect for straight stitches, but it also plays nicely with many decorative stitches, like a gentle serpentine or wavy stitch.
The main thing to avoid are stitches that have a backward motion built into them. These will fight against the walking foot's mechanics, which could lead to a jam or even damage your foot. When in doubt, always try a new stitch on a scrap of fabric first.
The whole point of a walking foot is to feed fabric evenly. It’s a versatile tool, but its design shines with stitches that move in one direction—forward. This is the key to getting those perfectly smooth, pucker-free results.
Another hot tip is to watch your speed. It's tempting to floor it, but your walking foot will give you the best results at a slow to medium speed. Going slower gives that dual-feed mechanism the time it needs to grip and move all your layers in perfect sync.
Getting your machine settings right is half the battle. If you're also working with a serger, something like our Essential Serger Reference Tool can be a lifesaver for remembering what works.
And don't forget about yourself! Sewing for hours can be tough on your body. A comprehensive study on musculoskeletal health found that a staggering 88% of sewing machine workers reported lower back pain over a 12-month period. Remember to take breaks, stretch, and make sure your sewing setup is comfortable. The right tools are important, but so is taking care of the person using them.
At Famcut.com, we're here to support your creative journey with the best tools, tips, and community support. Explore our full range of products and resources at https://famcut.com to take your projects to the next level.
At High Country Quilts we care deeply about community. With our experiences in retail, we know that a store is not only a place to shop but also a place for the community to gather and share. During this busy...

Hi! We’re Adam and Renee Wheaton, the new owners of High Country Quilts! For more than 40 years, we’ve owned and operated vacuum and sewing businesses. Following in Renee’s father’s footsteps after he retired from All Discount Vacuum and Sewing in Colorado...


Leave a comment