

We Love Our Quilting Community
At High Country Quilts we care deeply about community. With our experiences in retail, we know that a store is not only a place to shop but also a place for the community to gather and share. During this busy...


Every great embroidery project starts with one tiny, crucial step: threading the needle. It's the moment that can either kick off a joyful creative flow or start a battle of wills with a stubborn piece of thread. This guide is here to make that process simple and second nature, whether you're working by hand or on a machine.

Threading your needle the right way is the foundation for every single stitch you make. If you rush it, you can end up with frayed thread, skipped stitches, and a whole lot of frustration. It’s a small skill, but it has a huge impact on everything from the smoothness of your satin stitch to the neatness of your lettering.
If you’ve ever found yourself squinting at that tiny needle eye, you're in good company—it's a common hurdle for every stitcher. But mastering this one skill puts you in line with a massive global community. The embroidery market was valued at USD 3.3 billion in 2025 and is expected to hit USD 8.0 billion by 2034, growing at a 10.3% CAGR. You can see the full details in this embroidery market report. That growth is fueled by people just like you, picking up a needle and creating something beautiful.
Once you can thread a needle without a second thought, you'll notice a few things change for the better:
At High Country Quilts, we see it happen in our classes all the time. The moment a student learns a reliable threading method, their whole demeanor changes. Their confidence shoots up, and suddenly they're ready to tackle more complex designs. It's a small win that opens up a world of creativity.
In the next sections, we'll walk through some tried-and-true advice to make this crucial first step a breeze. We'll cover everything from simple hand-threading tricks to the magic of a good needle threader.
Let's get back to basics and talk about threading a needle the old-fashioned way. Once you master this, you can start stitching anywhere, anytime, without fumbling for extra gadgets. The goal is to make threading a needle feel as second-nature as picking up your hoop.
Your success actually starts before the thread even gets near the needle. The secret is a clean, sharp cut. Always snip the end of your thread with good scissors at a 45-degree angle. This creates a nice, crisp point that’s less likely to unravel.
If you’re working with a particularly fuzzy thread, like wool, a tiny bit of thread conditioner or even beeswax can work wonders. It helps tame those unruly fibers into a single, stiff point that’s much easier to control.
First up is the classic pinch and push technique. It's a go-to for a reason. Just pinch the prepared end of your thread tightly between your thumb and forefinger, so only the tiniest tip is showing. Then, bring the eye of the needle down onto that stiff tip and simply push it on through. This is my favorite for standard cotton floss.
For slicker threads like rayon or those notoriously tricky metallics, give the loop method a try. Fold the thread over the needle itself, about an inch from the end. Pinch that loop firmly and slide the needle out. You’re left with a sturdy, folded loop that’s much easier to guide through the eye than a single, wobbly strand.
I once watched a student in one of our High Country Quilts classes get so frustrated with a beautiful metallic thread. She kept trying to poke a single frayed end through. The moment I showed her the loop method, she threaded it on the first try—it was a real lightbulb moment for her.
This is a fundamental skill, especially for detailed projects. For example, some market research predicts that counted embroidery will hold a 44.8% market share by 2025. In techniques like that, precise and easy threading is everything.
Here at our Colorado Springs shop, we often recommend self-threading needles to beginners. They genuinely reduce frustration for about 80% of our new students. To see how these trends are shaping the craft, you can find more insights on the embroidery equipment market here.
Let's be honest, threading an embroidery needle can be one of the most frustrating parts of the craft. Whether you're working with a tiny eye or multi-ply floss, sometimes your eyes and fingers just don't want to cooperate. This isn't a time to tough it out—it's time to grab a tool. Using a needle threader isn't a shortcut; it's a smart move that saves your vision and lets you get back to stitching faster.
The go-to gadget for most of us is the classic wire-loop needle threader. You know the one—a small handle with a very fine, diamond-shaped wire loop. It’s a beautifully simple design. That flexible wire is big enough to easily poke your thread through, but it collapses down to pull even a thick strand through the most stubborn needle eye.
Using one is a breeze. Just push the wire loop through the eye of your needle. Then, feed an inch or so of your thread through the wire loop (which is so much easier to see!). Now, gently pull the threader back out, and it will bring the end of the thread right through the needle's eye with it.
A little tip we share all the time in our quilting classes at High Country Quilts: pull the threader straight back, not at an angle. Wiggling it around is the fastest way to snap that delicate wire. Be gentle with it, and your threader will be your trusty sidekick for a long, long time.
If you're doing a lot of hand embroidery, you might consider upgrading to a desktop needle threader. These handy devices hold the needle steady for you and push the thread through the eye with a simple press of a lever. A real game-changer for serious stitchers.
And for all the machine embroidery folks, don't forget about the magic of built-in threaders! So many of the modern machines we carry at High Country Quilts, especially the BERNINA models, have fantastic, reliable automatic threaders. If yours ever starts giving you trouble, the first thing to check is your needle. Make sure it’s inserted all the way up and is in its highest position. This one simple check fixes the issue 90% of the time.
Jumping into machine embroidery is exciting—the speed, the precision, it’s a whole new world. But first things first: you have to thread the machine. Don't let all those guides and levers spook you. Most modern machines, especially the BERNINA models we love here at High Country Quilts, are designed to be user-friendly, with numbered or color-coded paths that literally show you the way.
Following that path is non-negotiable. It’s what keeps your thread flowing smoothly from the spool all the way down to the needle. The journey usually starts at the spool pin, winds through the upper tension discs (the secret to great stitch quality), and then pops up through the take-up lever. Every single one of those guides is there for a reason—to prevent tangles and maintain the perfect tension for beautiful, even stitches.
Let's be honest, the best invention on modern machines is the automatic needle threader. It's a true game-changer that saves your eyes and your sanity, getting you to the fun part faster. To use it, you just bring the needle to its highest point, slip the thread into a little guide, and press a lever. A tiny hook magically shoots through the eye of the needle, grabs the thread, and pulls a loop through to the back. It’s that simple.
The tools for this job have really come a long way, from simple manual aids to the sophisticated systems built right into our machines.
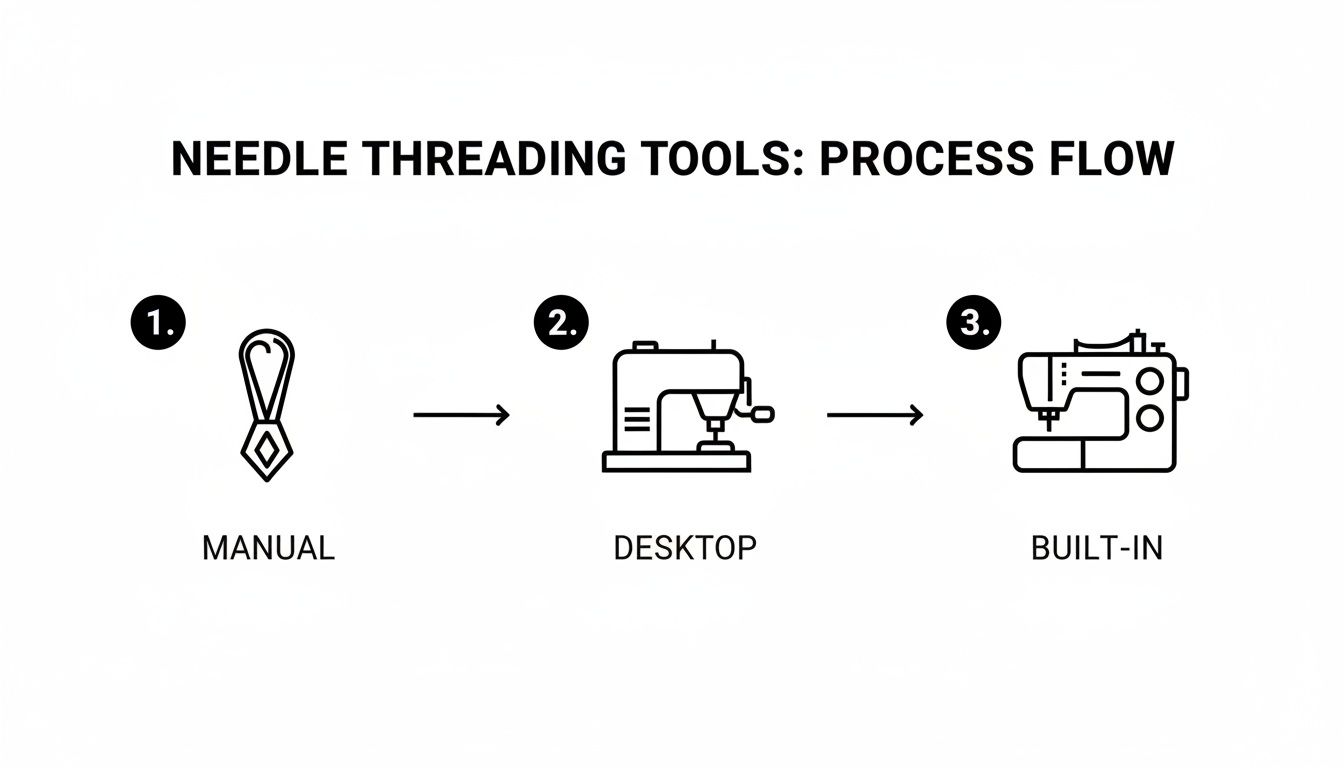
This evolution is what makes modern embroidery so accessible. What once was a frustrating task is now practically effortless on many machines.
A tip from our workshop floor: If your thread keeps shredding or your stitches look funky and loopy, don't just check the needle. Unthread the whole machine and start over from scratch. You'd be amazed how often missing just one tiny guide is the culprit. A careful re-threading almost always fixes it.
It's pretty amazing when you think about how far we've come. Barthélemy Thimonnier’s sewing hook invention in 1829 was the first step, and it helped boost French production by a massive 300%. Fast forward to the 1950s, and pioneers like Japan's Tajima were building computerized machines that could hit 1,200 stitches per minute, which improved threading efficiency by an unbelievable 90%. If you're a history buff, you can learn more about the embroidery market's incredible growth. Knowing the backstory really makes you appreciate the brilliant engineering that makes our creative lives so much easier today.
We’ve all been there. You’re ready to start a beautiful new project, and suddenly you’re in a battle with a tiny needle eye. It’s a frustrating moment for even the most seasoned stitcher, but don’t let it ruin your flow. Knowing a few quick troubleshooting tricks can get you back to creating in no time.
One of the biggest culprits we see is thread shredding or fraying right as you try to pull it through the eye. When this happens, it's usually a clear sign that your needle and thread aren't a good match. The needle's eye is likely too small for the thread you're using, and that friction is literally tearing the fibers apart.
The fix is usually pretty simple: grab a needle with a larger eye. For example, if you’re working with a standard six-strand cotton floss, you'll have much better luck with an embroidery needle in a size 7 or 8. Those needles have a longer, more accommodating eye that lets the thread pass through without a fight.
A frayed thread is your project’s way of telling you something isn’t right. Before you blame the thread, always check your needle first. It’s the most common and easiest problem to solve.
Another classic issue is the thread slipping right back out of the needle after your first couple of stitches. To stop this from happening, just leave a longer tail after you thread it. I recommend about three to four inches. That little bit of extra length gives you enough slack to prevent the end from popping out as you get started.
Machine embroiderers, don't despair if your automatic threader suddenly stops working! Before you start thinking it’s a mechanical failure, check one simple thing: make sure your needle is inserted correctly and pushed all the way up. An improperly seated needle is the number one reason an automatic threader gets misaligned.
Here’s a quick reference table to help you diagnose and fix these common hiccups on the fly.
| Problem | Likely Cause | Quick Solution |
|---|---|---|
| Thread Fraying | The needle eye is too small for the thread's thickness. | Switch to a needle with a larger eye (e.g., size 7 or 8 for six-strand floss). |
| Thread Unthreads | The tail left after threading is too short. | Leave a longer tail, about 3-4 inches, after threading the needle. |
| Bent Needle Tip | The needle is old, damaged, or the wrong type for the fabric. | Replace the needle immediately with a fresh, sharp one suited for your project. |
| Auto-Threader Fails | The needle is not inserted correctly or pushed all the way up. | Re-insert the needle, ensuring it is fully seated in the machine's clamp. |
Most threading troubles are just minor adjustments waiting to happen. A quick check of your needle and technique is usually all it takes to get back to stitching.
Over the years, we've heard just about every question there is when it comes to threading needles. Whether in our classes or just chatting with folks on the shop floor at High Country Quilts, a few puzzles seem to pop up time and time again. Let's clear up some of those common snags.
This is the classic frustration, but don't worry—it’s almost always an easy fix. The first place I always tell people to look is the needle itself. Is it dull, bent, or maybe just the wrong size for your thread? A needle that’s too small for the thread you're using will shred it every time.
Another big culprit is machine tension. If it's cranked up too high, it's like a tug-of-war your thread is destined to lose. Finally, take a hard look at your thread. Old, dusty thread that's been sitting on a shelf for years becomes brittle. Sometimes, simply swapping to a fresh spool of quality embroidery thread is all it takes to solve the problem for good.
If you want the absolute path of least resistance, look for a self-threading needle. Some people call them calyx-eyed needles. They have a tiny, clever slot at the top instead of a closed eye. You just pull the thread down into the slot and—pop!—it’s threaded. It feels a bit like magic.
Of course, you could also just grab a needle with a bigger eye to begin with, like a chenille needle, provided it works for your fabric.
But honestly, the real game-changer for any needle is a simple needle threader. It's a tiny, inexpensive tool that turns a squint-inducing task into a two-second job. I think every sewing kit is incomplete without one.
Technically, yes, the thread will go through the machine. But I really, really advise against it. Machine embroidery thread is built differently; it’s designed to withstand the incredible speed and friction of an embroidery machine.
Using regular all-purpose sewing thread will likely cause a cascade of problems:
For the health of your machine and the quality of your work, always stick with thread made specifically for machine embroidery. It just works better.
Feeling ready to thread up and get stitching? Explore our huge selection of high-quality embroidery threads, needles, and tools at High Country Quilts. We have everything you need to bring your projects to life. Shop our collection today!
At High Country Quilts we care deeply about community. With our experiences in retail, we know that a store is not only a place to shop but also a place for the community to gather and share. During this busy...

Hi! We’re Adam and Renee Wheaton, the new owners of High Country Quilts! For more than 40 years, we’ve owned and operated vacuum and sewing businesses. Following in Renee’s father’s footsteps after he retired from All Discount Vacuum and Sewing in Colorado...


Leave a comment