

We Love Our Quilting Community
At High Country Quilts we care deeply about community. With our experiences in retail, we know that a store is not only a place to shop but also a place for the community to gather and share. During this busy...


The starburst quilt pattern is one of those designs that just stops you in your track—it’s an absolute showstopper. With points radiating out from a central hub, it creates this incredible sense of energy and movement. But here's the best part: it looks way more complicated than it actually is.
At its heart, the pattern is built from some of quilting’s most fundamental units, like half-square triangles and flying geese. This makes it a fantastic project for anyone who’s comfortable with the basics and is ready to tackle something with a real "wow" factor. It’s the perfect design to show off a fabric collection you’ve been saving for something special.
There's a good reason the starburst quilt keeps popping up in both modern and traditional quilting circles. The visual payoff is huge. Your eyes are immediately drawn to those sharp, radiating points, creating a design that feels both intricate and full of life.
What I love most about it is the sheer versatility. You can take this one pattern and get so many different looks depending on your fabric choices.
When you make a starburst quilt, you're also connecting with a rich tradition. It’s a creative spin on the classic star quilt block, a design motif that has been a cornerstone of American quiltmaking for generations.
The Amish, who truly embraced quilting around 1870, are especially known for popularizing star patterns. They saw incredible symbolic and aesthetic power in them, a tradition that continued well into the 20th century. You can find some fascinating background on the history of star quilts in quilting traditions.
This pattern isn’t just a set of instructions; it’s a piece of history. Each block you create is part of a long lineage of artisans who have used the star motif to tell stories and create beauty.
Ultimately, making a starburst quilt is an amazing skill-builder. It really pushes you to be precise with your cutting and piecing. You'll get plenty of practice nesting seams and getting those points to meet perfectly. And let me tell you, the satisfaction you feel when those sharp, bursting stars come together is a feeling you won't forget.
The secret to a stunning Starburst quilt begins long before you even touch a needle or thread. It starts with the story you want to tell through your fabrics. Choosing the right materials doesn’t just make for a smoother quilting experience; it completely defines the personality of your finished piece.
When it comes to fabric, 100% quilting cotton is the gold standard for a very good reason. It holds a crisp press, frays less than other materials, and stands up to all the handling that comes with piecing those intricate star points. While you can certainly experiment, quilting cotton provides the stability you really want for the sharp, precise seams that make a Starburst block shine.
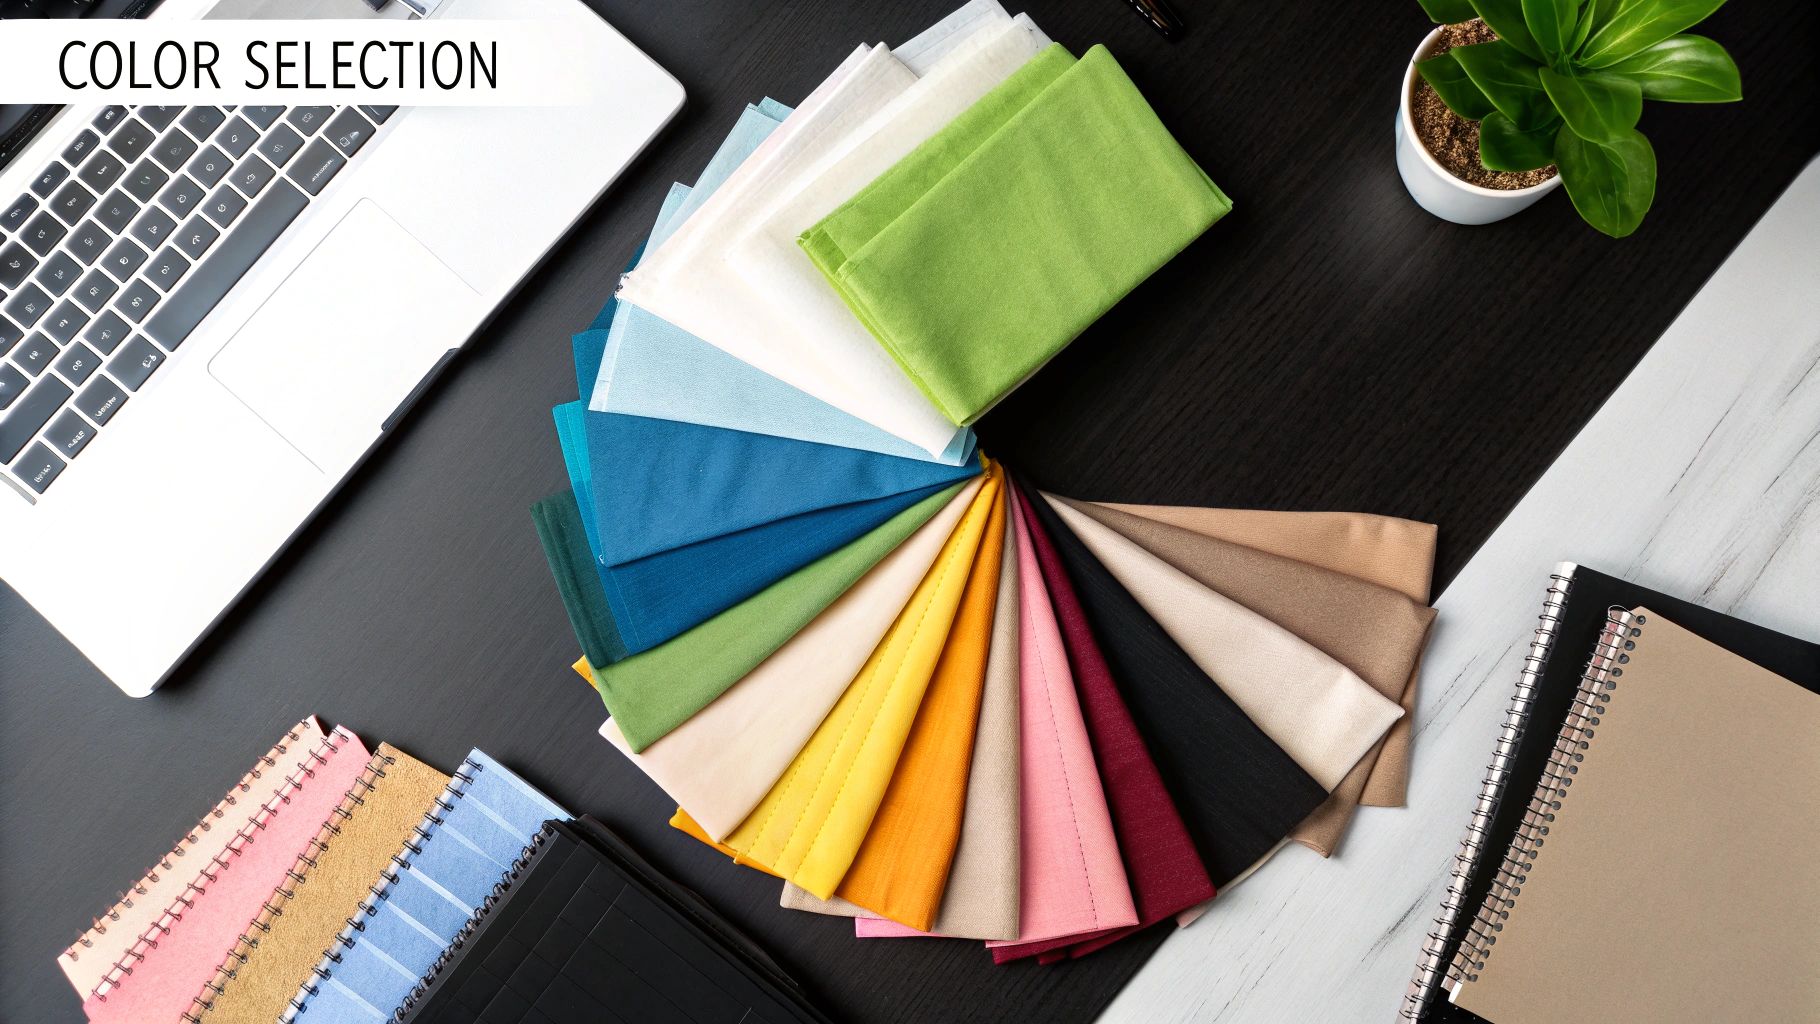
The real magic of the Starburst design is all in the contrast. For that "burst" effect to truly pop, you need a clear, undeniable difference between the fabrics you choose for your star points and the fabric you use for the background.
Here's a little trick I always use: the "squint test." Lay your fabrics out next to each other and squint your eyes until they blur. If the star and background fabrics blend into one muddy color, you probably need more contrast. If they stay distinct, you're good to go.
Before you start shopping, it's helpful to have a rough idea of how much fabric you'll need. Yardage can vary wildly based on your quilt's size and design, but here’s a quick reference guide to get you started for a popular throw size.
| Fabric Component | Suggested Yardage |
|---|---|
| Star Points (Various Colors/Prints) | 2.5 to 3 yards total |
| Background Fabric | 3.5 yards |
| Backing Fabric | 4 yards |
| Binding | 0.5 yards |
This table should give you a solid baseline for your shopping list, ensuring you have enough to complete your project without too many last-minute trips to the fabric store.
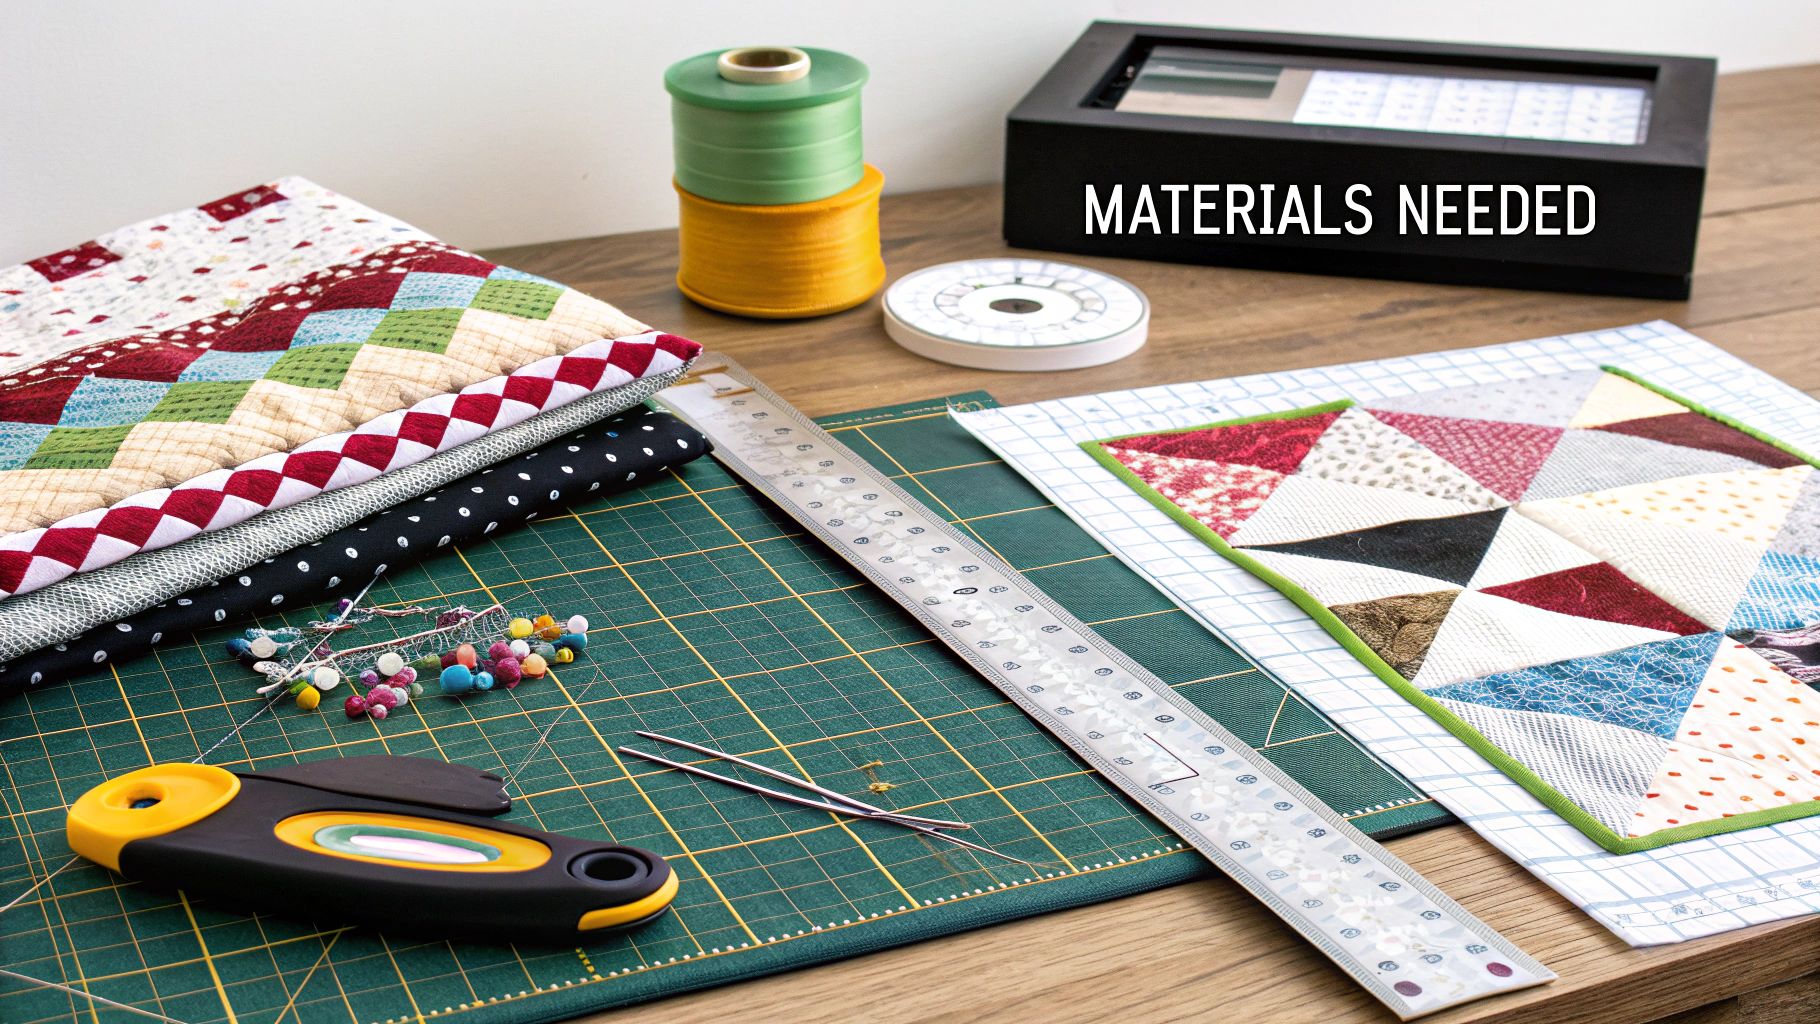
Once you have your fabric picked out, it's time to gather the tools that will save you from future headaches. Precision is everything with a Starburst quilt, so having the right gear is non-negotiable.
Here’s a quick rundown of what you'll want to have on hand:
Getting these tools ready before you begin will set you up for a much smoother and more enjoyable process from the very first cut.
The true foundation of a stunning starburst quilt isn't your sewing machine—it's your cutting mat. Every single sharp point and perfectly nested seam begins with a precise, accurate cut. I can't tell you how many times I've seen a beautiful quilt top get derailed because the initial cuts were just a little bit off. Even a tiny error of 1/16th of an inch can multiply across a block, leading to major frustration and wonky points down the road.
Think of your fabric and rotary cutter as your chisel and marble. You're sculpting the core shapes—half-square triangles (HSTs) and flying geese—that will come together to form those gorgeous, radiating stars. Rushing this stage is the number one mistake I see new quilters make. So, take a deep breath, measure twice, and then cut once. It pays off, I promise.
The Starburst block is built from two of the most classic units in quilting: half-square triangles and flying geese. The good news is, there are some really clever methods to make these efficiently, saving you a ton of time and fabric.
This little graphic breaks down the basic flow of turning your fabric into the triangle segments you'll need for those star points.
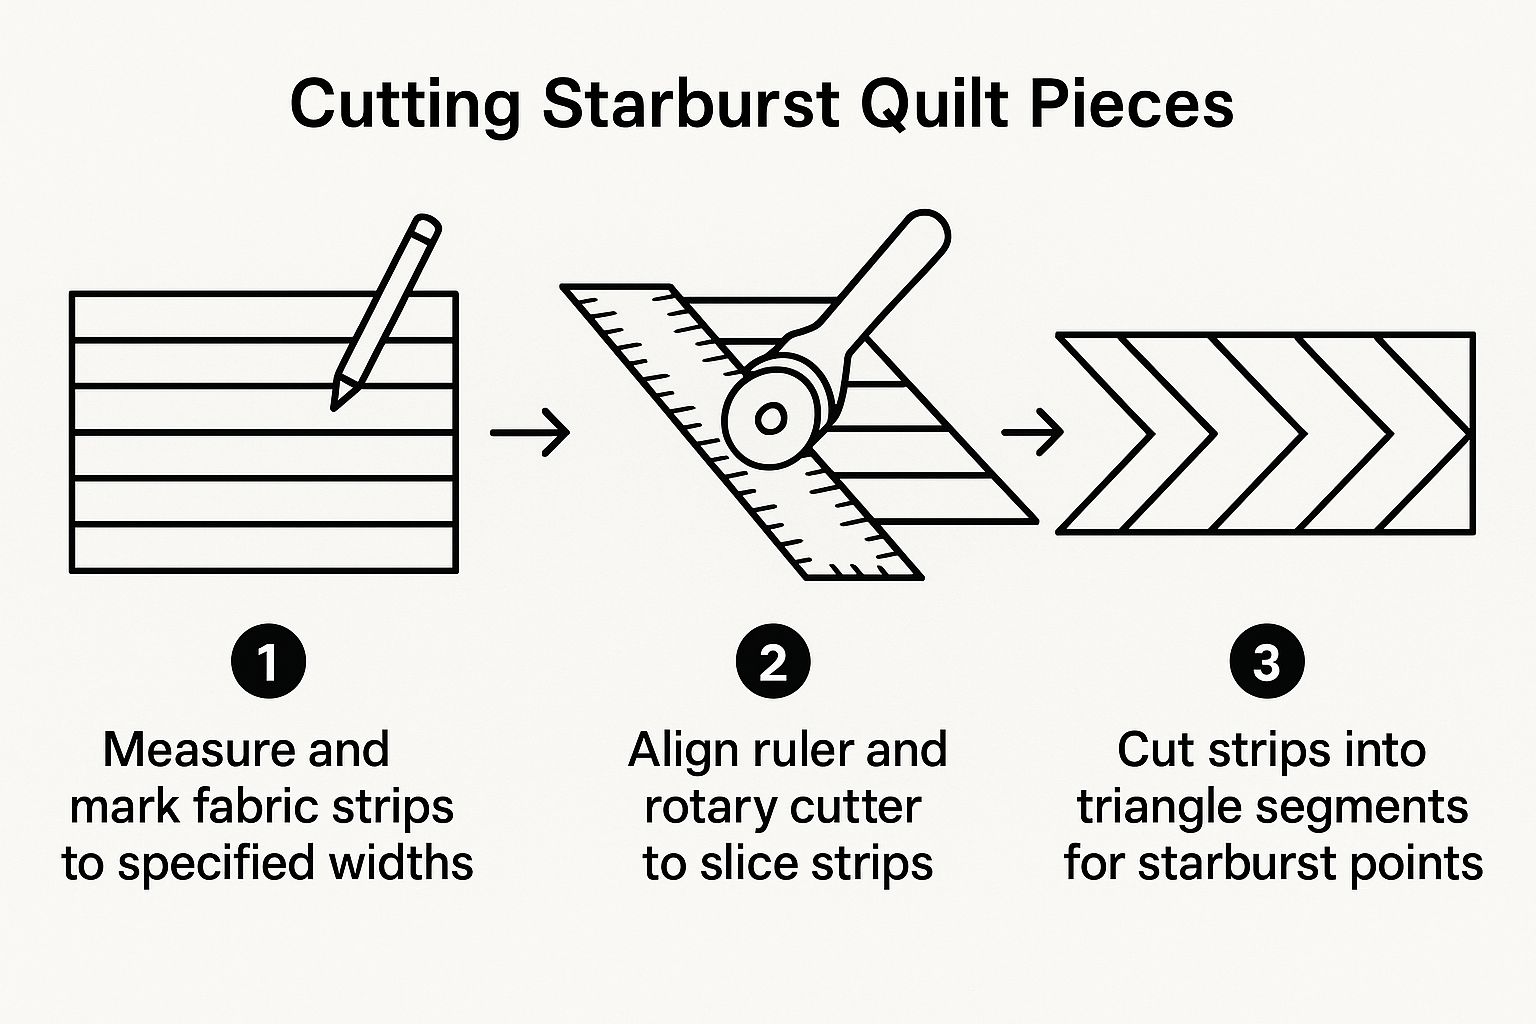
As you can see, it's all about a logical progression from larger pieces to smaller, more precise units. That's why accuracy at every single step is so critical.
Working with pre-cuts like Layer Cakes (10-inch squares) or Fat Quarters is a fantastic shortcut to a beautifully coordinated quilt. To get the most bang for your buck, though, you need a smart cutting plan. Before you even think about making that first slice, grab a piece of paper and sketch out how you'll sub-cut your pieces. For instance, a single 10-inch Layer Cake square can be cut strategically to give you all the pieces for several HSTs or a full set of no-waste flying geese, with some leftover bits to spare.
If you take away only one thing from this section, let it be this: square up your units. After you sew and press your HSTs or flying geese, you absolutely must trim them to their precise unfinished size. This step gets rid of the "dog ears" and corrects any little stretching that happened during sewing, making sure every unit is perfectly identical.
Seriously, squaring up your units is the secret sauce for a successful starburst quilt. This is where a small, square quilting ruler with a crisp diagonal line becomes your most valuable tool. Line up the ruler's diagonal with your seam line and trim the excess fabric from two sides. Then, just rotate the block and trim the other two sides. The result is a perfect square.
This careful trimming is what guarantees that when you start piecing your blocks, all those points will line up flawlessly. It’s the one step that elevates a quilt from "good" to "wow."
To make this even easier, consistently accurate tools like a seam guide with a built-in ruler can help you maintain a perfect quarter-inch seam from the start, which makes the whole squaring up process a breeze. Remember, the precision you put into cutting and trimming is what lets that starburst pattern truly shine.
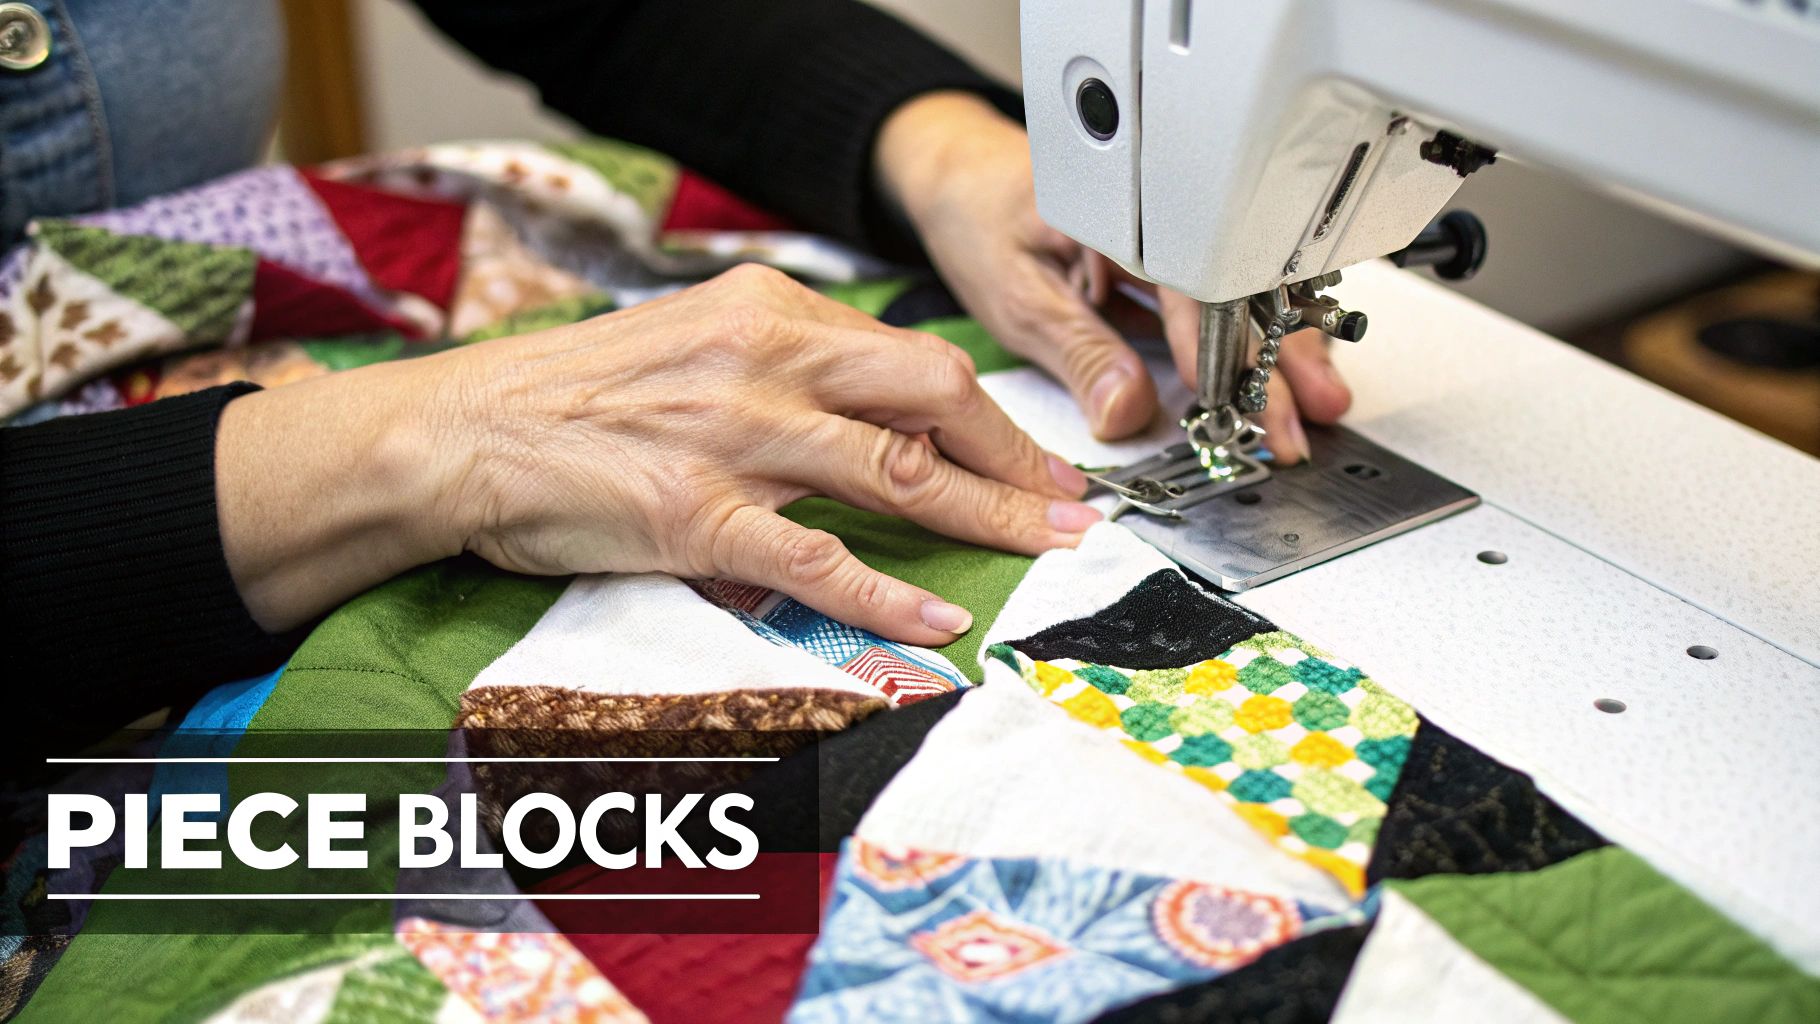
Now for the best part. With all your pieces cut and organized, you get to watch those stacks of fabric transform into dazzling starburst blocks. This is where the magic happens, and all that careful prep work really starts to pay off.
The key to piecing these blocks successfully is consistency. You’ll hear experienced quilters talk about a “scant quarter-inch seam” all the time, and for a good reason. If your seams are even a thread too wide, you risk sewing right over the sharp points of your stars. Go too narrow, and your finished blocks won't be the right size. It's a small detail that makes a huge difference.
How you press your seams is just as important as how you sew them. The main goal here is to get rid of as much bulk as you can, especially in the center of the star where all those points converge.
For putting together the smaller units, like your half-square triangles, pressing the seams to one side is usually the best approach. This creates a little ridge that lets you "nest" your seams when you join pieces together. They'll practically lock into place, giving you incredibly accurate points with very little effort.
When it's time to join the final units to form the star, you might want to switch things up. Pressing those central seams open can be a real lifesaver. It distributes the fabric bulk evenly and helps the block lay beautifully flat.
And if you want to speed things up, chain piecing is your new best friend. This is a fantastic technique for any quilt that has a lot of repeating units. Instead of sewing and snipping one pair at a time, you just feed your pieces through the machine one after another, creating a long chain of connected units. You'll be amazed at how much time and thread you save.
When you create a starburst quilt, you're not just stitching fabric; you're connecting with a powerful artistic tradition. The star motif has deep cultural significance that predates many common quilting patterns. In Plains Indian art, star designs held mythological importance, and when quilting was introduced in the 1800s, Native American women wove these symbols into their textile work, continuing a rich visual heritage. You can learn more about the cultural history of Native American star quilts to appreciate the deeper story.
Even the most seasoned quilters run into a few hiccups now and then. Don't stress if things aren't perfect right away—most issues are totally fixable.
Once your quilt top is all pieced together, a clean binding is what gives it that professional-looking finish. For quilters who want to take their binding to the next level, a specialized attachment can be a fantastic investment. Exploring tools like the BERNINA binder attachment can help you get a perfect edge every single time.
You've done the hard work, and now you have a beautiful stack of starburst blocks ready to go. This is where the magic really happens—turning all those individual pieces into a single, stunning quilt top. The first thing to do is lay out your blocks on a design wall or a big, clean patch of floor.
Now’s the time to play artist. Step back and squint a little. See how the colors and values interact. Are you going for a smooth rainbow gradient? A classic checkerboard? Or maybe a completely random, scrappy look that sparkles? There’s truly no wrong way to do this, so just trust your gut and arrange them until you love what you see.
Once you’ve settled on a layout you're happy with, it’s time to start sewing them into rows. The real secret to getting everything to line up perfectly is to nest your seams. If you've been pressing your block seams to one side, this part is easy.
When you place two blocks with their right sides together, the seams should fit snugly against each other, almost like they're locking into place. This little trick is what makes your corners and points meet up so precisely, giving your quilt that sharp, professional finish. I always sew my blocks into horizontal rows first, pressing the seams of each row in opposite directions (row one to the left, row two to the right, and so on).
After your rows are complete, you can sew them together. Again, you'll nest those long seams to keep the whole quilt top perfectly aligned. Taking your time here prevents the top from getting wavy or distorted and ensures everything stays nice and square.
Borders aren't just for making your quilt bigger; they’re the frame for your artwork and can completely change the final look. The absolute key to getting flat, flawless borders is to measure properly. Whatever you do, don't just cut a long strip and sew it on, hoping for the best—that’s a recipe for a wavy quilt.
Pro Tip: For a truly accurate measurement, always measure your quilt top through the center, not along the raw edges, which can easily stretch out of shape. Measure vertically down the middle for your side borders and horizontally across the middle for the top and bottom ones.
A simple, straight border using your background fabric gives a clean, classic finish that really lets the starbursts pop. But if you’re feeling a bit more ambitious, a pieced border made from leftover half-square triangles can be a fantastic way to echo the star points in your design.
Some quilters take this idea to an incredible scale. For instance, 'Jenny's Starburst Quilt Enlarged' is a massive 93 by 105 inches and is built from 224 individual blocks. It’s a perfect example of how a well-planned border can beautifully contain and complement a complex design. You can see more of this impressive Starburst quilt project to get some inspiration. If you're interested in creating more decorative edges, specialized tools like a classic ruffler foot can also open up a whole new world of creative finishing touches.
With your quilt top pieced and pressed, you’re holding what we call a "flimsy." Now for the magic part: turning that beautiful top into a real, huggable quilt. This involves making a "quilt sandwich," which is simply your quilt top, the fluffy batting in the middle, and your backing fabric.
First, find a large, flat space—the floor works great for this. Lay your backing fabric down with the wrong side facing up, and smooth it out until it's perfectly flat and taut. Then, layer the batting on top, followed by your quilt top, right side up.
The next step, basting, is crucial. This is how you temporarily secure the three layers to prevent any shifting or puckering while you quilt. I usually use curved safety pins every few inches, but you could also use a temporary spray adhesive or even long, loose hand stitches.
The quilting itself is what truly holds the sandwich together and adds that final layer of texture and design. A starburst pattern gives you so many fun options to play with.
A quick tip on thread: A neutral color will let your fabric choices shine, while a contrasting thread can add another bold, graphic element to the finished piece. There's no wrong answer, it just depends on the look you're going for!
The binding is the final frame for your masterpiece, giving it a clean, durable edge. To start, cut several 2.5-inch wide strips of your chosen binding fabric. You'll sew these together end-to-end on the diagonal to make one continuous strip long enough to go around the entire quilt.
Once your strip is assembled, press it in half lengthwise, wrong sides together. This double-folded strip is your binding.
Line up the raw edges of the binding with the raw edge of your quilt top and sew it down with a standard quarter-inch seam allowance. As you approach a corner, stop stitching a quarter-inch from the edge, backstitch, and then fold the strip up to create a crisp mitered corner. It sounds tricky, but after the first one, you'll get the hang of it.
Finally, wrap the folded edge of the binding around to the back of the quilt. You can stitch it down by hand for a nearly invisible finish or use your machine for a quicker, sturdy edge. This last step encases all the raw edges and gives your starburst quilt that polished, professional look you'll be proud of for years to come.
When you first dive into a starburst quilt, a couple of questions almost always come up. It's totally normal—those sharp points and bias edges can feel a little intimidating! Let's walk through the most common ones I hear from fellow quilters.
I get this one a lot: "Can I use something other than quilting cotton?" And while I love experimenting with different textiles, for a starburst pattern, quilting cotton is really your best bet.
The reason is stability. You're dealing with a ton of bias edges in these blocks, and a stable, high-quality quilting cotton won't stretch out of shape nearly as much as other fabrics might. This is key to getting those crisp, perfect points everyone is after.
Ah, the dreaded bulky center where all those diamond points meet. This is probably the number one frustration with this pattern, but there's a simple fix that makes a world of difference.
Press your final seams open. I know many of us are dedicated "press to the side" quilters, but for this block, pressing the seams open is the secret. It distributes all that fabric bulk evenly and helps your block lie beautifully flat. A flat block is a happy block, especially when it comes time to quilt everything together.
If you've pressed your seams open and still feel like there's too much bulk, here's a little trick I swear by. You can use a seam sealant, like Seams Sew Fast, to lock in the stitches right at the center. Once it's dry, you can safely trim away a bit more of that excess fabric without worrying about your seams coming undone. It's a small step that dramatically improves the finish of your quilt top.
At High Country Quilts we care deeply about community. With our experiences in retail, we know that a store is not only a place to shop but also a place for the community to gather and share. During this busy...

Hi! We’re Adam and Renee Wheaton, the new owners of High Country Quilts! For more than 40 years, we’ve owned and operated vacuum and sewing businesses. Following in Renee’s father’s footsteps after he retired from All Discount Vacuum and Sewing in Colorado...


Leave a comment