

We Love Our Quilting Community
At High Country Quilts we care deeply about community. With our experiences in retail, we know that a store is not only a place to shop but also a place for the community to gather and share. During this busy...


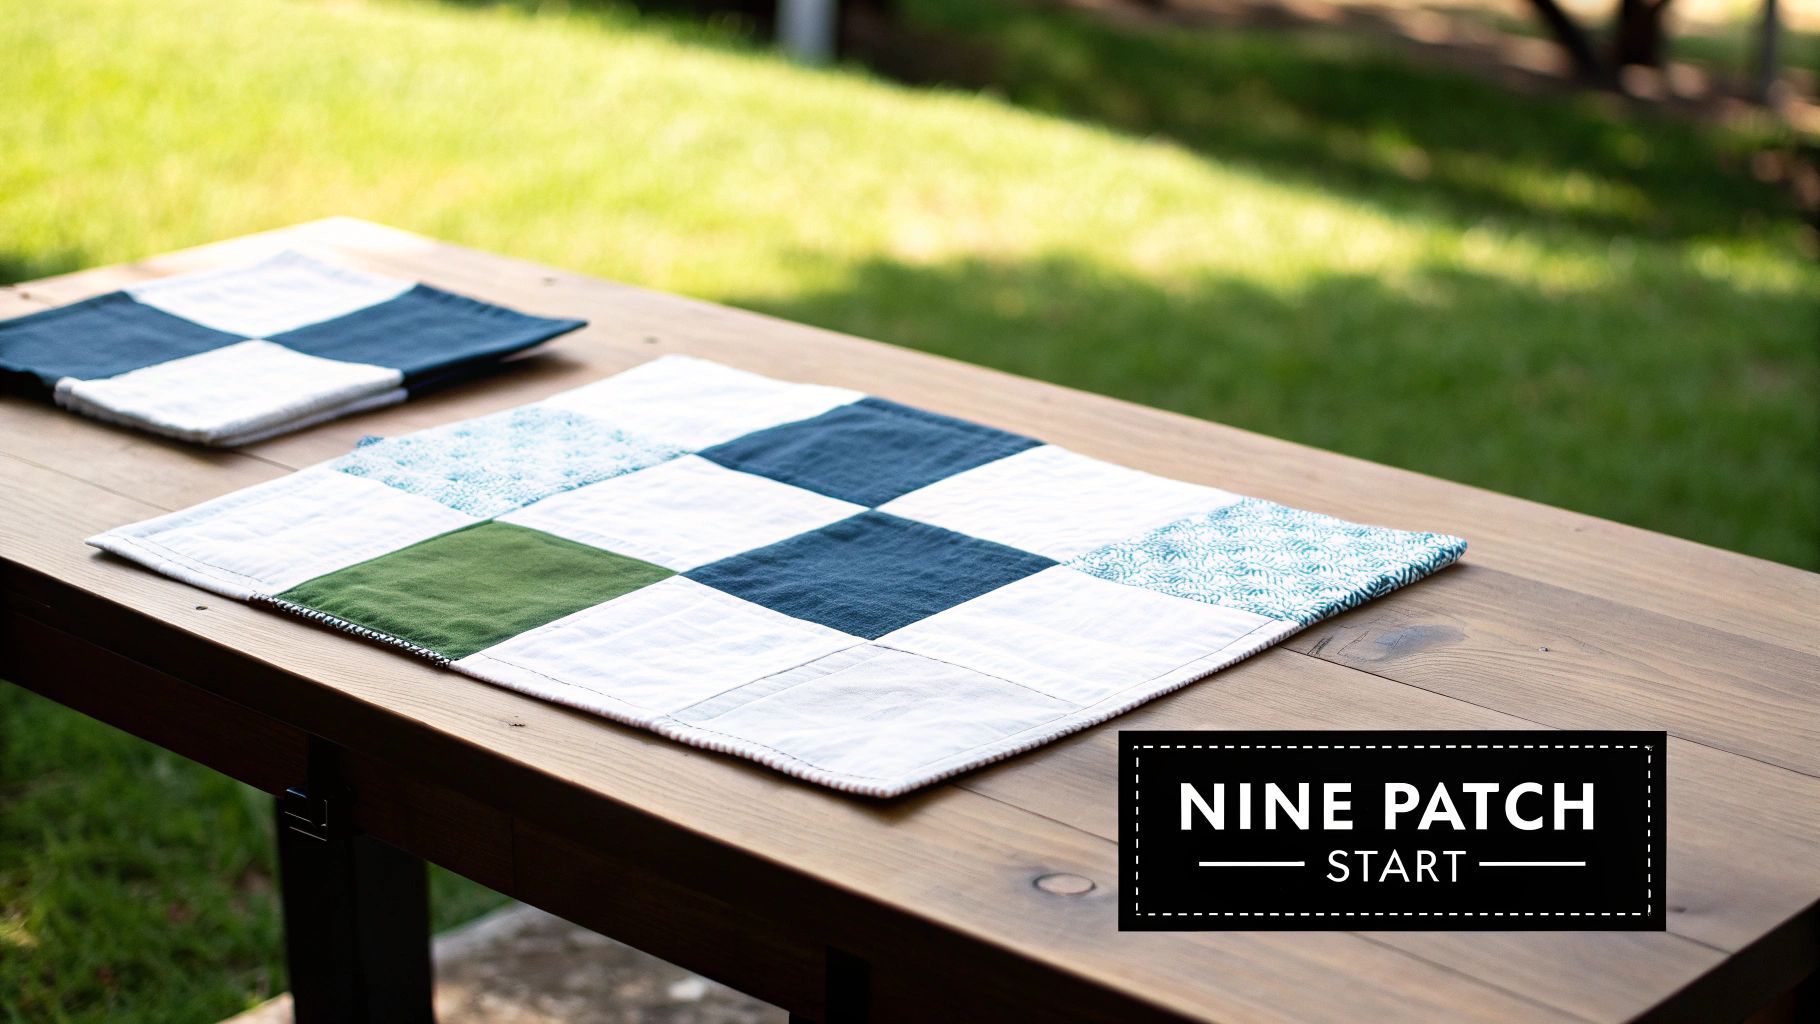
If you’re looking for the perfect entry point into quilting, you’ve found it. A simple patchwork quilt, made by sewing basic squares or rectangles together, is where nearly every quilter begins. For this guide, we'll be focusing on the classic Nine Patch block—it's one of the most forgiving and straightforward designs out there, making it absolutely ideal for your first project.
Welcome to the wonderfully creative and rewarding world of quilting! If you've ever found yourself admiring a beautiful handmade quilt and thinking, "I could never do that," I'm here to prove you wrong. Starting with a simple patchwork pattern takes all the mystery out of the process, breaking it down into small, enjoyable steps that will build your confidence from the very first stitch.
The real beauty of patchwork is just how accessible it is. You don't need years of sewing experience or a huge arsenal of complicated skills to create something truly special. It really just comes down to mastering a few core techniques, like accurate cutting and sewing a consistent seam allowance. You'll get the hang of it with a little practice, I promise.
There are a few key reasons I've chosen the Nine Patch block as the foundation for this tutorial. First and foremost, it's exceptionally easy to piece together. The block is made of just nine small squares arranged in a simple three-by-three grid, which lets you focus on the fundamentals without feeling overwhelmed by a complex pattern.
The Nine Patch is also incredibly versatile. You can create a stunning visual impact just by playing with the arrangement of light and dark fabrics. This makes it a fantastic project for using up fabric scraps or dipping your toes into color theory on a small, manageable scale.
This pattern isn’t just a modern favorite for beginners; it’s a cornerstone of quilting history. When you sew a Nine Patch, you're connecting with a craft that has been passed down through generations, transforming simple fabric squares into a work of art and comfort.
This design is one of the most enduring and straightforward patchwork patterns, long valued for its resourcefulness. Back in the 19th century, pioneer women relied on it heavily because they had very little time or fabric to spare. Young girls often learned to sew Nine Patch blocks as an essential skill long before they even learned to read. If you're curious, you can explore more on the history of this foundational quilting pattern and its important role on American homesteads.
By the time you finish this guide, you’ll realize that making a quilt isn’t about perfection right out of the gate. It's about enjoying the creative journey and watching a stack of fabric become a cozy, beautiful quilt you can be truly proud of.
Before you make that first exciting cut, let's talk prep. I know it's tempting to jump right in, but trust me, a little thoughtful preparation is the secret ingredient that turns a pile of fabric into a beautiful quilt. This isn't just about gathering supplies; it's about setting a solid foundation for your project and heading off common frustrations at the pass.
The fun really begins when you're choosing your color palette. Think about the story or feeling you want your quilt to have. Are you picturing a soft, soothing baby quilt with pastels, or maybe a vibrant throw blanket with bold, contrasting colors? For your first simple patchwork quilt, I suggest picking out 5-7 coordinating fabrics. That’s enough to create wonderful variety without feeling overwhelming.
You absolutely don't need every fancy gadget out there to get started. However, having the right core tools will make your quilting life so much easier and more accurate. Precision is what really elevates a homemade quilt into a handmade masterpiece, and these items are your best friends for getting there.
Here's my can't-live-without-it checklist for any patchwork project:
These three tools are designed to work together as a system. When you use them properly, you ensure every single one of your fabric squares is uniform, and that consistency is the key to having your blocks fit together flawlessly.
Alright, let's talk about a crucial, and sometimes debated, step: pre-washing your fabric. For anyone new to quilting, I always, always recommend it. Why? Because cotton fabric can shrink up to 2-5% the first time it's washed. Pre-washing means all that shrinking happens before you sew, which prevents your beautiful finished quilt from puckering and warping later on.
Think of pre-washing as a simple insurance policy for your hard work. It also removes excess dyes that could bleed onto lighter fabrics—a mishap that is truly heartbreaking after you’ve poured hours into a project.
The process is simple. Just machine wash your fabrics on a gentle cycle using a mild detergent. I like to toss in a color catcher sheet to absorb any loose dye, just in case. After that, tumble dry on low and press with a hot, steamy iron while the fabric is still just a little damp. This helps knock out even the most stubborn wrinkles and gets your material perfectly ready for cutting.
Once your fabric is washed, pressed, and looking sharp, you're ready for the really fun part—turning it into beautiful quilt blocks.
Before you start cutting, it's helpful to know how much fabric you'll actually need. The number of squares—and therefore the yardage—depends entirely on the size of the quilt you want to make.
Here is a quick reference table to help you plan. It breaks down the fabric requirements for common quilt sizes if you're using standard 5-inch squares, also known as "charm squares."
| Finished Quilt Size | Approximate Dimensions | Number of 5-Inch Squares Needed | Estimated Fabric Yardage (42" width) |
|---|---|---|---|
| Baby Quilt | 36" x 45" | 80 squares | 1.25 yards total |
| Lap / Throw Quilt | 54" x 63" | 168 squares | 2.5 yards total |
| Twin Quilt | 63" x 81" | 252 squares | 3.75 yards total |
| Queen Quilt | 81" x 99" | 440 squares | 6.5 yards total |
Keep in mind that these yardage estimates are for the quilt top only and don't include the fabric needed for the backing, binding, or any potential cutting mistakes. It's always a good idea to buy a little extra, just to be safe
Alright, this is where the magic really starts. You've got your beautiful stack of fabric, and now we're going to turn it into the building blocks of your quilt. Getting this part right—the cutting and the sewing—is what makes all the difference. It's the foundation for a quilt you'll be proud of.
Your rotary cutter, ruler, and mat are your best friends here. A quick tip from experience: always start with a fresh blade. A sharp blade glides through the fabric, preventing snags and giving you those crisp, clean edges you need. Before you make that first cut, line up your fabric's selvedge (the finished, non-fraying edge) with a line on your cutting mat. This squares everything up and gives you a perfectly straight line to work from.
This simple workflow is what every quilter, from beginner to expert, follows before sewing a single stitch.
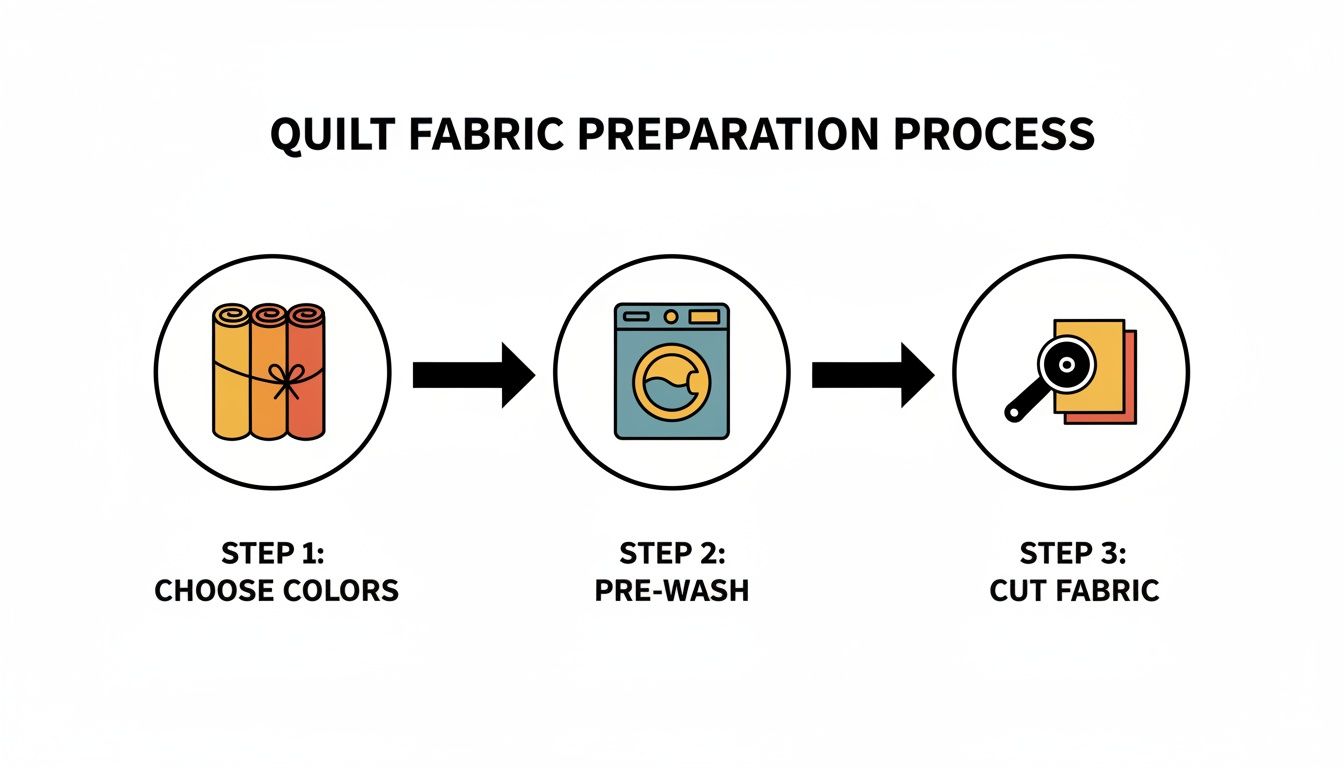
Nailing this sequence—choosing your palette, pre-washing, and cutting—sets your project up for success from the very beginning.
If there's one golden rule in quilting, it's the quarter-inch seam allowance. This is the non-negotiable standard for piecing. Keeping that seam consistent is the secret to getting blocks that fit together perfectly and points that match up beautifully.
Most sewing machines have a special quarter-inch presser foot, which is a huge help. It has a little guide on the side that your fabric edge hugs as you sew. Don't have one? No problem. You can easily make your own guide.
Before you touch your precious quilt fabric, grab a few scraps and sew some test seams. Pull out a ruler and measure them. You’re looking for a true quarter-inch. It sounds fussy, but even a tiny 1/16th of an inch variance adds up quickly, potentially throwing off a finished block by almost half an inch.
With your seam allowance dialed in, it's time to assemble your Nine Patch blocks. The most efficient way to do this is a technique called chain piecing. Instead of sewing two squares together, stopping, cutting the thread, and starting again, you just keep feeding pairs through the machine one after the other.
You'll end up with a long string of pieces connected by threads. It saves a ton of time and thread, and once you get into a rhythm, it's incredibly satisfying. When you're done, you just snip all the connecting threads at once.
Learning how to chain piece is a game-changer. It takes piecing from a slow, one-at-a-time task to a smooth, fast-paced flow. This is how you'll build real momentum on your simple patchwork quilt pattern.
Last but not least, let's talk pressing. How you press your seams is just as critical as how you sew them. The main goal is to reduce bulk where all those seams come together, which helps your quilt top lie nice and flat.
For a Nine Patch block, the best approach is pressing seams to one side in alternating directions.
Why bother? Because when you sew the rows together, those seams will "nest" into each other. They'll lock together like tiny puzzle pieces, making it almost effortless to get those perfect, sharp corner points where the squares meet. And always remember to press with an up-and-down motion, don't iron back and forth. Sliding the iron can stretch your fabric and distort your beautiful new block.
You've done the hard work of creating a beautiful stack of Nine Patch blocks. Now for the really fun part—watching your quilt top come together. This is where all those individual pieces start to look like a real quilt, and you get to see your design emerge.
First things first, you need a space to audition your blocks. A clean floor works great, but a large table or even a piece of flannel tacked to a wall can serve as your "design wall." Lay out all your Nine Patch blocks and just play. Move them around. Swap a few. Step back and squint. See how the colors and patterns talk to each other. Are you aiming for a balanced, symmetrical look, or do you prefer a more random, scrappy vibe? There’s no wrong answer here; it’s all about what makes you happy.
Once you’ve landed on an arrangement you love, you might want to consider adding sashing. Sashing is simply strips of fabric—usually a solid or a subtle print—that you sew between the blocks. Think of it like a frame for each of your little masterpieces. It gives the blocks definition and creates a lovely grid-like secondary pattern.
For a simple patchwork quilt pattern like this, a sashing strip that finishes at 2 inches wide is a fantastic choice. It’s just enough to separate the blocks without distracting from them.
A few reasons you might love sashing:
This block-and-sashing style has a long, rich history. Block-based quilting really took off after 1840, as machine-made fabrics became more accessible and women had more time for creative pursuits. It was a huge shift from the whole-cloth quilts that came before. If you're a history buff, you can discover more about the history of American quilt patterns and see how these techniques we still use today came to be.
Okay, it’s time to head back to the sewing machine. Let’s assemble the quilt in horizontal rows. Pick up the first two blocks in your top row, place them right sides together, and stitch along the right-hand edge with that trusty quarter-inch seam. Keep adding blocks one by one, chain-piecing them if you like, until you've completed the entire row. Do this for every row in your layout.
The real secret to getting those perfect, pointy corners where four blocks meet? It’s a brilliant little trick called nesting seams. Since you pressed your seams in opposite directions earlier, the seam allowances where the blocks join will fit together like little puzzle pieces.
When you’re ready to join your rows, lay Row 1 on top of Row 2 with right sides together. As you line them up, you can actually feel the seam allowances "lock" into place. Wiggle them a bit with your fingertips until they feel perfectly snug against each other. Pin at each of these intersections—don't skip this, as it prevents things from shifting while you sew. This one small step makes all the difference.
Stitch the rows together with your quarter-inch seam, removing the pins as you approach them. Press these long, horizontal seams open to reduce bulk, or to one side if you prefer. Continue adding rows this way until your quilt top is complete.
Now, take a step back and have a good look. You did it! You’ve turned a pile of fabric squares into a beautiful, cohesive quilt top.
You've pieced your quilt top, and it looks incredible! Now for the truly magical part: turning that beautiful sheet of fabric into a real, cozy quilt. This is where we’ll make the "quilt sandwich," add the quilting stitches that give it that classic texture, and wrap it all up with a neat binding.
The quilt sandwich is just what it sounds like: three layers. You have the backing fabric on the bottom, a fluffy layer of batting in the middle, and your gorgeous quilt top sitting right on top. Here’s a pro tip: make sure your backing and batting are at least 4 inches wider on all sides than your quilt top. This extra fabric is your safety net, giving you plenty of room to work and preventing things from shifting around as you quilt.
First, you'll need some space. A large, clean floor is perfect for this.
The goal here is to make sure every single layer is perfectly flat and free of puckers. You can hold it all together with curved safety pins placed every 4-5 inches or by using a temporary spray baste.
With your sandwich basted and ready, it’s time to actually quilt. These are the stitches that go through all three layers, holding everything together for good. Since this is your first simple patchwork quilt pattern, let's keep the quilting simple but effective.
One of the easiest methods is called “stitching in the ditch.” This is exactly what it sounds like—you sew directly in the seam lines of your patchwork. It’s a fantastic way to secure the layers without visually interrupting your design.
Straight-line quilting is another great choice for beginners. You can sew lines diagonally across your quilt or "echo" the patchwork by sewing a quarter-inch away from each seam. If you have a walking foot for your sewing machine, now is the time to use it! It’s a game-changer for feeding all three layers through evenly and preventing any bunching.
Don’t worry about perfection on your first try. Seriously. The goal is to secure the layers and add that wonderful quilted texture. Every stitch you make is part of your quilt’s story, a little testament to the time and care you put into it.
This process of making something beautiful and functional from simple materials has a long, rich history. During the Great Depression, for instance, an estimated 80% of quilts were made from recycled feedsacks as households made the most of every scrap. Quilters created over 10 million quilts during that time, turning a necessity into a powerful form of art and community. You can learn more about the history of Depression-era quilting to see how resourcefulness has always been at the heart of this craft.
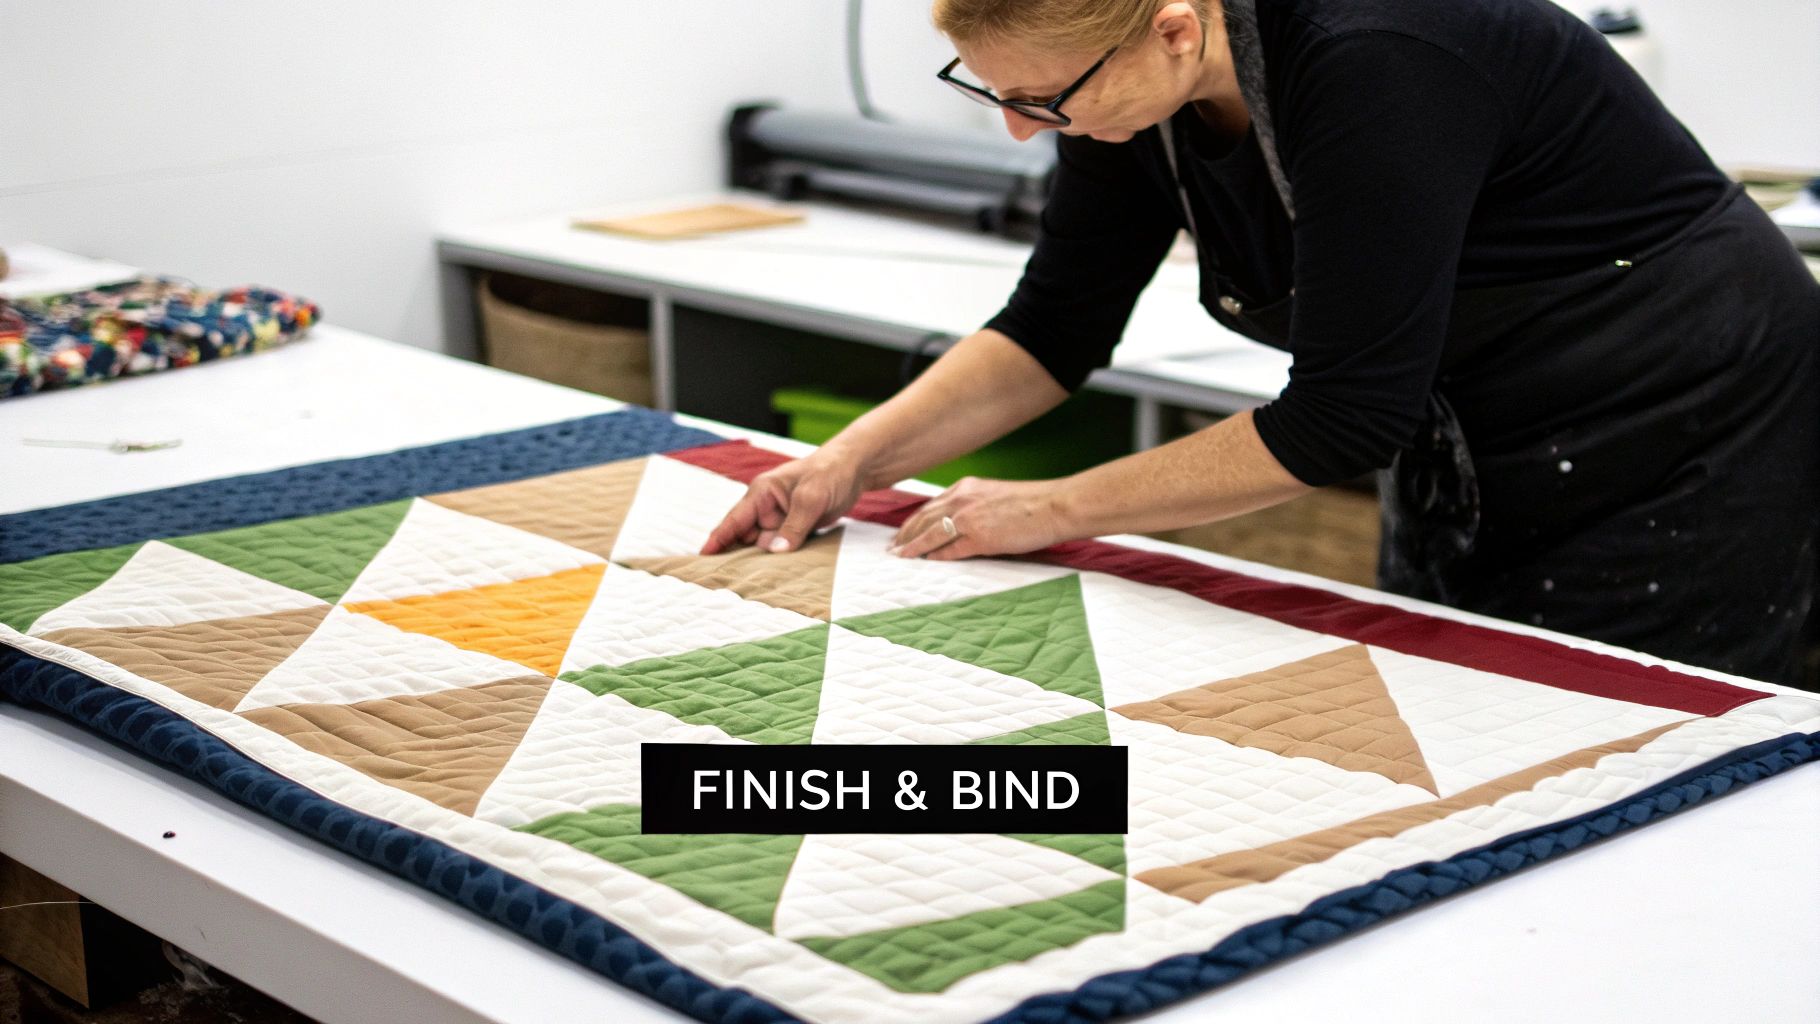
The binding is the fabric frame that encloses all the raw edges, giving your quilt a clean, professional finish. It’s the final step! First, use a rotary cutter and ruler to trim the excess batting and backing so they're perfectly even with the edges of your quilt top.
Next, you'll make the binding itself.
Now, align the raw edge of your folded binding with the raw edge of your quilt top. Starting in the middle of one side, sew it on with a quarter-inch seam. When you get near a corner, stop sewing, fold the binding up and away from the quilt, then fold it back down along the next side to create a neat mitered corner. Continue sewing.
Once you’ve attached the binding to the entire front of the quilt, all that's left is to wrap the folded edge around to the back and hand-stitch it down. It’s a relaxing final touch that creates a beautiful, invisible finish.
Even with the best instructions in hand, you're going to have questions as you start your first simple patchwork quilt. It happens to everyone! Think of this as your personal quilting helpline, where I’ll tackle the most common things I hear from beginners.
Getting these little details right from the start can make a huge difference and give you the confidence to keep going.
One of the biggest debates in quilting circles is whether or not to pre-wash your fabric. My advice for anyone starting out? A resounding yes.
Pre-washing does two critical things. First, it preshrinks the cotton, which prevents your finished quilt from getting all puckered and distorted after its first trip through the laundry. Second, it rinses out any excess dye that could bleed onto your lighter fabrics. It's a simple step that acts as an insurance policy for all your hard work.
"What's the best thread for piecing?" This is another question I get all the time. You’ll want to look for a high-quality, 50-weight, 100% cotton thread.
This specific weight is the sweet spot—it’s strong enough to hold your quilt together for years but fine enough that it won't create bulky buildup at the corners where all your seams meet. I always suggest starting with a neutral color like a soft gray or cream. It blends in beautifully with almost any fabric choice, making it a super versatile staple for your sewing box.
Consistency is far more important than speed, especially when you're just getting started. Taking the time to master these small details will pay off in a beautifully finished quilt you can be truly proud of.
Finally, let’s talk about the one skill that can make or break a quilt top: the perfect quarter-inch seam. Hands down, the most reliable way to get this right is by using a dedicated quarter-inch presser foot, which has a handy little guide built right in.
If you don't have one, no worries! You can easily create your own guide. Just place a strip of painter's tape or even a stack of sticky notes on your machine's bed, lined up perfectly with the quarter-inch mark.
Before you ever touch your project fabric, always sew a test seam on a few scraps to check your accuracy. It’s a tiny step that saves major headaches and ensures every piece of your quilt puzzle fits together just right.
At High Country Quilts we care deeply about community. With our experiences in retail, we know that a store is not only a place to shop but also a place for the community to gather and share. During this busy...

Hi! We’re Adam and Renee Wheaton, the new owners of High Country Quilts! For more than 40 years, we’ve owned and operated vacuum and sewing businesses. Following in Renee’s father’s footsteps after he retired from All Discount Vacuum and Sewing in Colorado...


Leave a comment