

We Love Our Quilting Community
At High Country Quilts we care deeply about community. With our experiences in retail, we know that a store is not only a place to shop but also a place for the community to gather and share. During this busy...


The secret to a great sewing room isn't just about having the right stuff—it's about creating a space that works with you, not against you. A truly functional and inspiring room is born from smart planning and organization, building a system that feels like a natural extension of your creative process.
Before you rush out and buy a single bin or shelf, take a breath. A truly organized sewing room comes from a thoughtful strategy, not just more containers. The real first step is creating a personalized plan by getting honest about what you have and how you actually work.
This planning stage is what separates a cluttered room from a creative sanctuary. It saves you from wasting money on storage that doesn't fit your needs and ensures every piece you bring in has a purpose. Think of it as drawing the blueprint for your happy place.
Okay, time to get real. You need to do a full inventory. Pull everything out—the bolts of fabric you couldn't resist, the fat quarter bundles, those stray bobbins hiding in corners, and even the UFOs (unfinished objects) you've tucked away. Knowing the sheer volume and type of your supplies is the only way to plan properly.
And this isn't just you; sewing is booming! The global sewing supplies market was valued at USD 5.24 billion and is expected to hit USD 7.81 billion by 2032. That’s a whole lot of fabric and notions needing a home.
Once you see what you've got, think about how you create.
A well-designed sewing room should feel like a helpful assistant, anticipating your needs. The goal is to arrange your space so that your tools and materials are exactly where you expect them to be, right when you need them.
This simple three-part process—Assess, Zone, Organize—is the foundation for building a better workspace from the ground up.
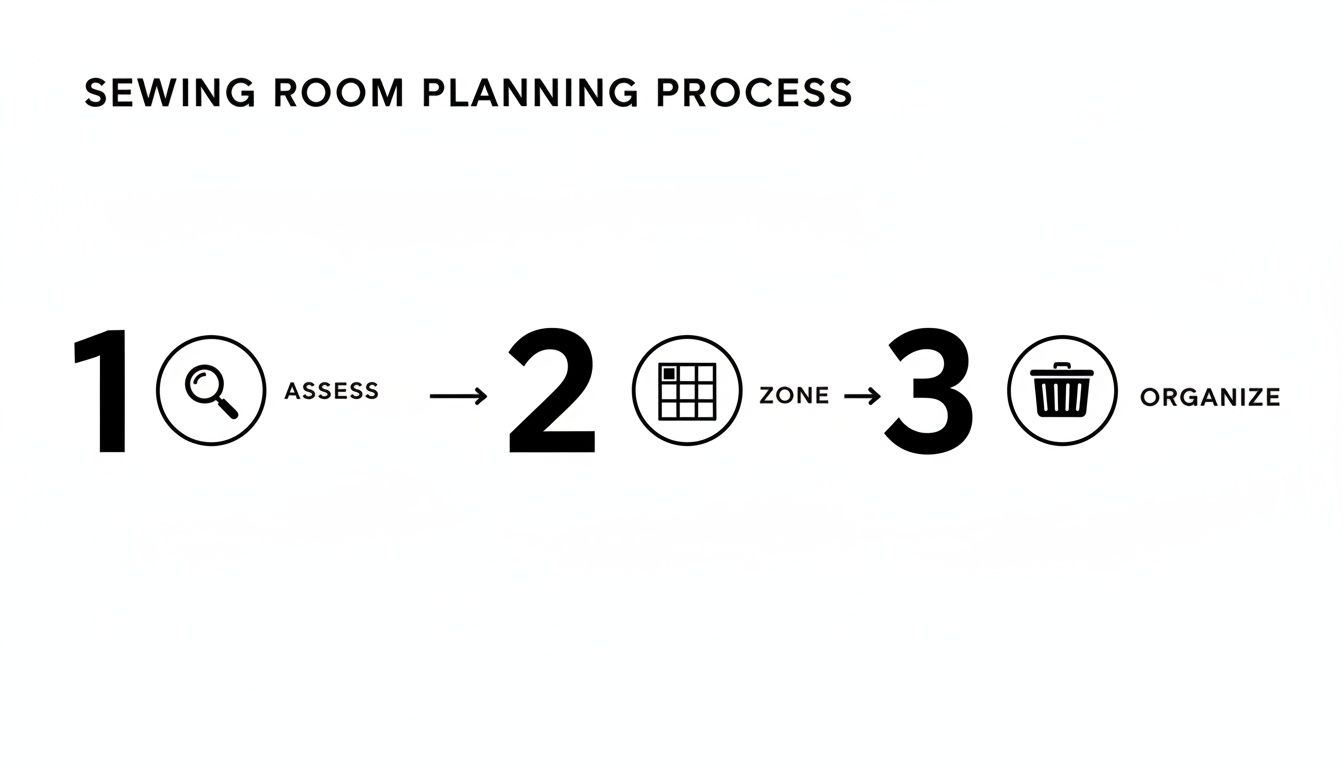
Starting with a clear assessment of your inventory and workflow prevents you from just shuffling clutter around. It sets the stage for a truly logical and intuitive layout.
Every sewing space, from a dedicated room to a small corner, needs distinct zones for different tasks. At a minimum, you'll have a cutting zone, a sewing zone, and a pressing zone. Arranging these in a logical flow is a game-changer, saving you from constantly running back and forth across the room.
To help you visualize this, I've put together a simple blueprint.
Use this quick-reference guide to define the essential work zones in your sewing space and assign key activities and storage needs to each.
| Zone | Primary Activities | Essential Storage Needs |
|---|---|---|
| Cutting Zone | Measuring fabric, rotary cutting, pattern tracing, laying out pieces. | Large, flat cutting mat surface; storage for rulers and rotary cutters; drawers or bins for marking tools. |
| Sewing Zone | Machine sewing, serging, hand-stitching. | Thread racks, bobbin storage, containers for seam rippers and snips; easy access to machine accessories. |
| Pressing Zone | Ironing fabric, pressing seams, applying interfacing. | Heat-resistant surface for iron; wall storage for pressing tools; a safe spot for the iron to cool. |
| Project & Supply Storage | Storing fabric, patterns, notions, and works-in-progress. | Shelving for fabric bolts, clear bins for scraps, file boxes for patterns, drawer units for notions. |
Mapping out these zones on paper first helps you see how the workflow will function before you move a single piece of furniture. If you’re working with a smaller area, looking into effective storage solutions for small spaces can spark some brilliant ideas for using vertical space or hidden nooks.
By the time you're done with this initial planning, you won't just have a vague idea—you'll have a clear, personalized roadmap to transform your sewing room.
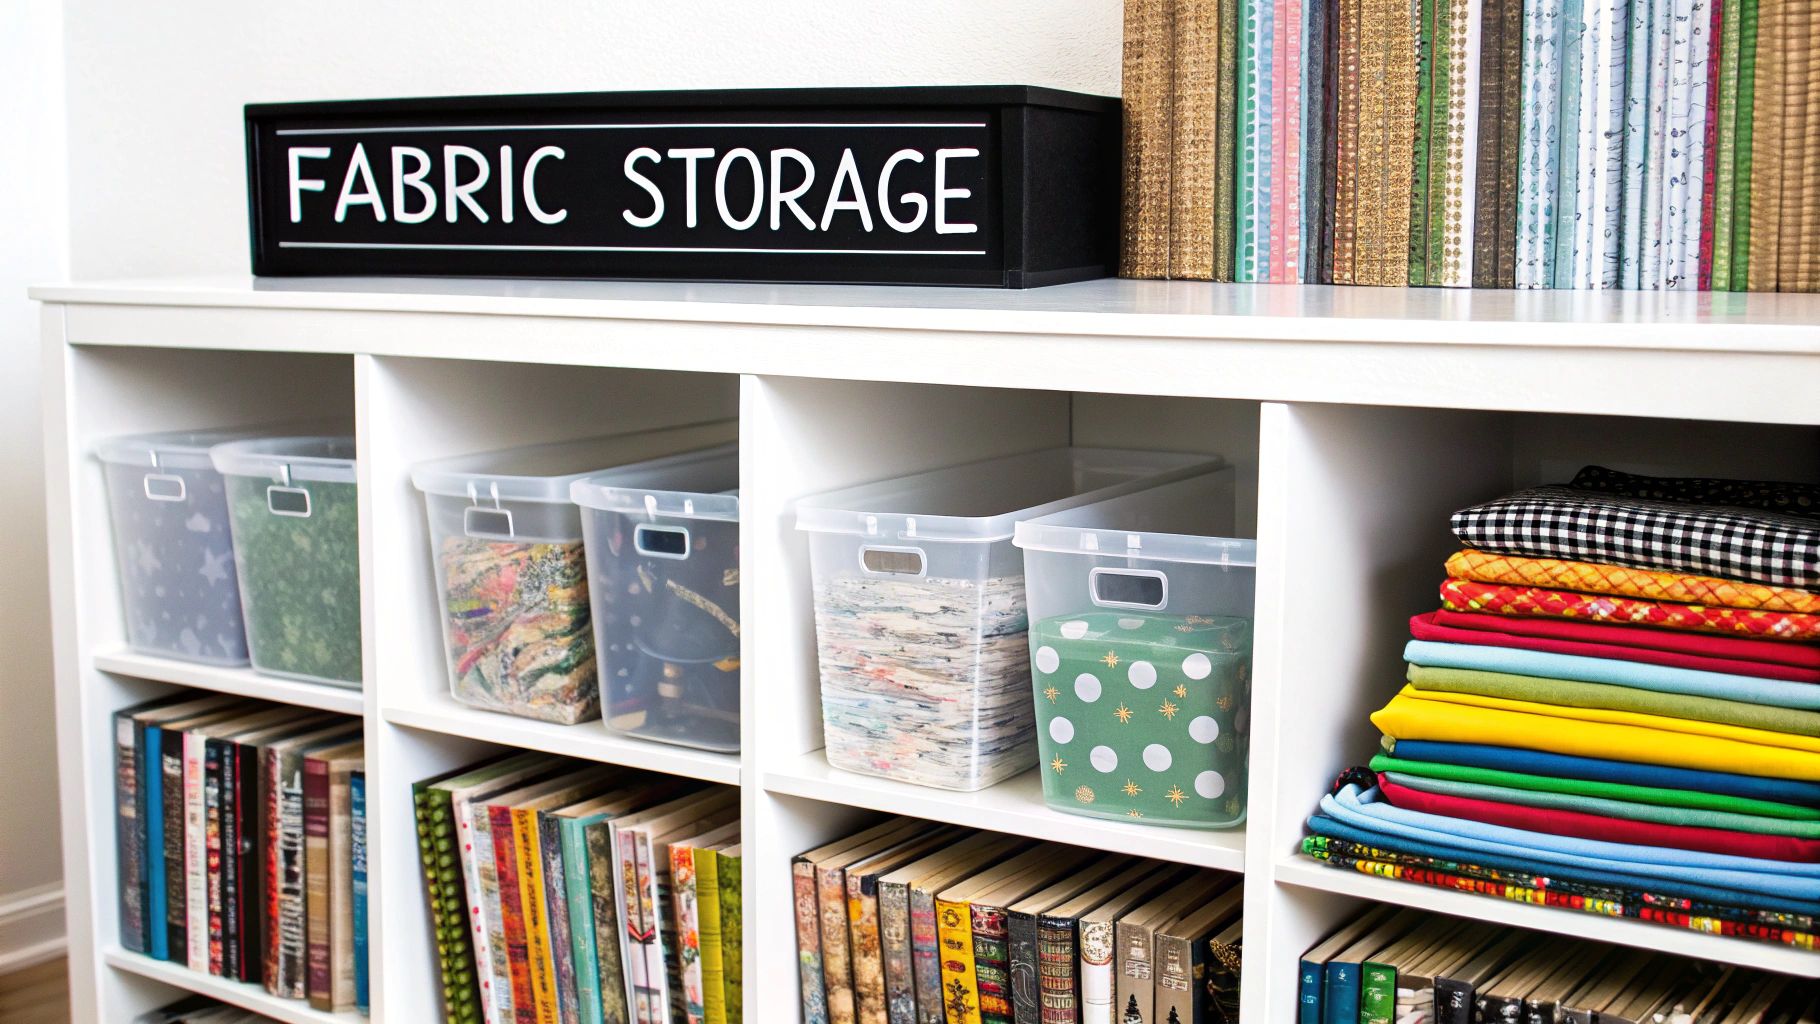
Let's be honest, fabric is the heart of our sewing rooms, but it can quickly become the biggest source of chaos. That beautiful, inspiring stash can turn into a fabric mountain that hides the very materials you want to use. It's time to tackle it head-on with some smart, practical storage solutions that work for any size collection.
The goal here is simple: make your fabric visible, accessible, and protected. When you can see what you have, you'll actually use it and stop buying duplicates of that one floral print you forgot you owned. This means we're moving past the "shove it in a plastic bin" method and creating a system that feels like your own personal fabric shop.
One of the best tricks I ever learned for organizing fabric yardage is to treat it like a library. By wrapping your fabric around acid-free comic book boards, you create tidy "mini-bolts" that are all the same size and incredibly easy to manage. This is an absolute game-changer, whether you're a quilter or a garment sewer.
Just fold your fabric to the width of the board, wrap it snugly, and secure the end with a pin. Suddenly, you can file your fabric on a bookshelf or in a cube shelving unit. It’s that easy.
Why does this work so well?
I like to organize mine by color, but you could sort by designer, fabric type, or project—whatever works for the way your brain thinks. This filing system transforms a messy pile into a beautiful, functional display.
Ah, scraps. They're an inevitable—and valuable—part of sewing, but they can get out of control in the blink of an eye. The trick is to give them a home and a purpose. Don't let your precious remnants become a jumbled, unusable mess.
Clear containers are your absolute best friend for this. I use stackable clear drawers to sort smaller scraps by color. Seeing that rainbow of options makes it fun to "shop your stash" for little projects like appliqué or patchwork. For things like fat quarters or jelly rolls, shallow photo storage boxes or a flat-file drawer will keep them perfectly flat and sorted.
An organized scrap system isn't just about tidiness; it's a creative tool. When your scraps are sorted and visible, you'll find yourself reaching for them constantly, sparking new ideas and cutting down on waste.
So what do you do with the awkward stuff? I'm talking about bulky fleece, rolls of vinyl, or fluffy batting. These materials just laugh at the idea of being folded onto a board. For these, the answer is to think vertically and get them up off the floor.
One of my favorite solutions is a simple multi-rod pants hanger. You can drape larger cuts of fleece or minky over the rods, keeping them wrinkle-free and tucked away in a closet. For those rolls of vinyl or interfacing, a tall laundry basket or even a gift wrap organizer stuck in a corner works perfectly to keep them contained and upright. These kinds of creative sewing room storage solutions are exactly what you need for those odd-sized materials that just don't play by the rules.
It’s always the little things, isn't it? The stray bobbins that roll under the table, the loose buttons, the handfuls of pins—they’re often the biggest culprits when your creative space starts to feel chaotic. Getting a handle on these essential notions, threads, and tools is all about creating simple, intuitive systems where everything has a place to live.
When you're not spending precious minutes hunting for a seam ripper, you can stay focused on the project in front of you. A smooth, frustration-free workflow is the real goal here, and having your tools right where you need them makes all the difference.
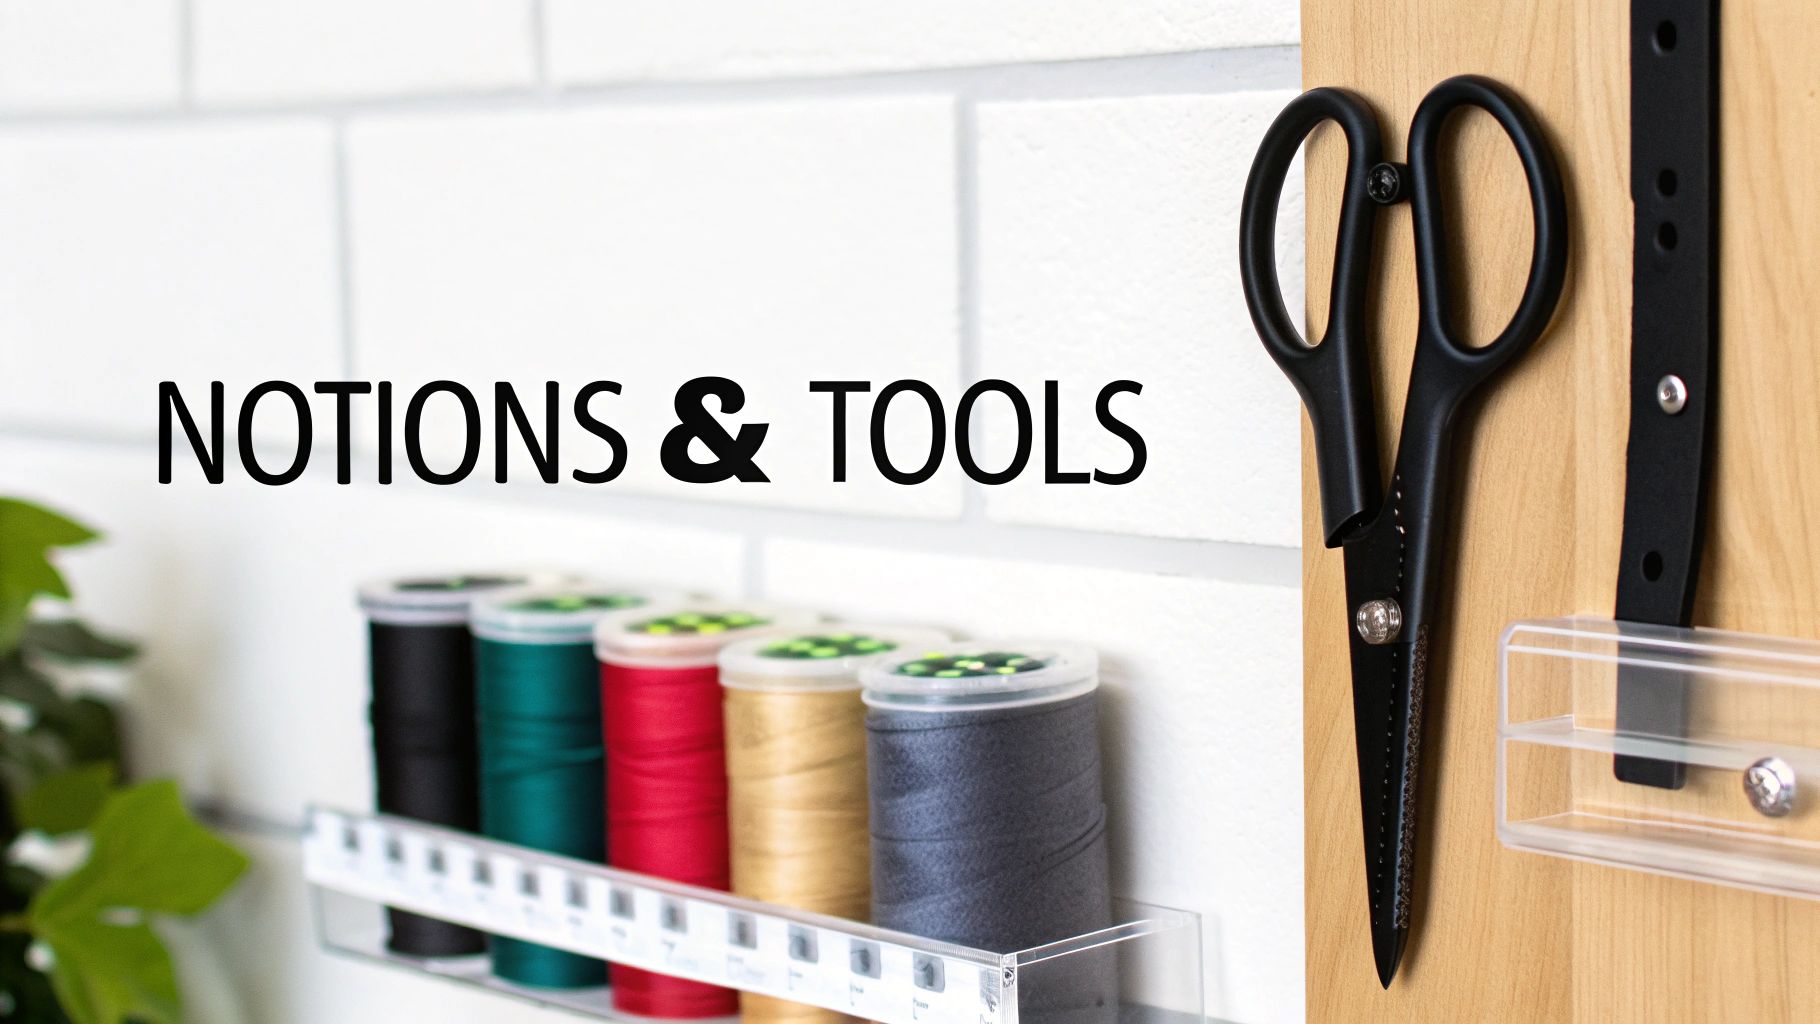
Look up! Your walls are some of the most under-utilized real estate in your sewing room. Taking advantage of that vertical space gets frequently used items off your work surface while keeping them visible and within arm's reach.
A pegboard is a classic for good reason—it’s a completely flexible canvas for your tools. Mix and match hooks, baskets, and small shelves to hold everything from scissors and rotary cutters to marking pens. I also love using a simple magnetic knife strip from a kitchen supply store. It’s perfect for keeping metal tools like snips, bobbins, and that ever-elusive seam ripper ready to grab.
The best systems are the ones you don't have to think about. When a tool is easy to see and easy to grab, you're also far more likely to put it back in its proper place, which is the key to long-term organization.
For most of us, sewing thread is more than just a supply; it’s a full-blown collection. The global sewing thread market is valued at a staggering USD 3.66 billion, so it’s clear we invest a lot in our stashes! You can find more detail on the growth of the global sewing thread market in recent industry reports.
A wall-mounted thread rack is a fantastic way to both organize your spools and create a colorful piece of functional art. For the bobbins, a dedicated bobbin box or a clear case is a must-have to prevent that tangled mess I call "thread spaghetti." It’s a simple fix that makes finding the matching bobbin for your spool a breeze.
Not every tool needs a permanent spot on a wall. A rolling cart is one of the most versatile pieces you can own, acting as a mobile command center for your most-used items. I often load one up with everything for a specific project and just roll it right up to my sewing machine, then tuck it away when I'm done.
For all those tiny bits and bobs—buttons, snaps, beads, and machine needles—clear acrylic drawers or small, labeled containers are a lifesaver. Being able to see what’s inside at a glance is everything. I personally use a shallow, multi-compartment hardware organizer (like you'd find at a home improvement store) for my presser feet; it keeps them protected and easy to identify. These little systems bring a sense of calm to the smallest pieces in your collection.
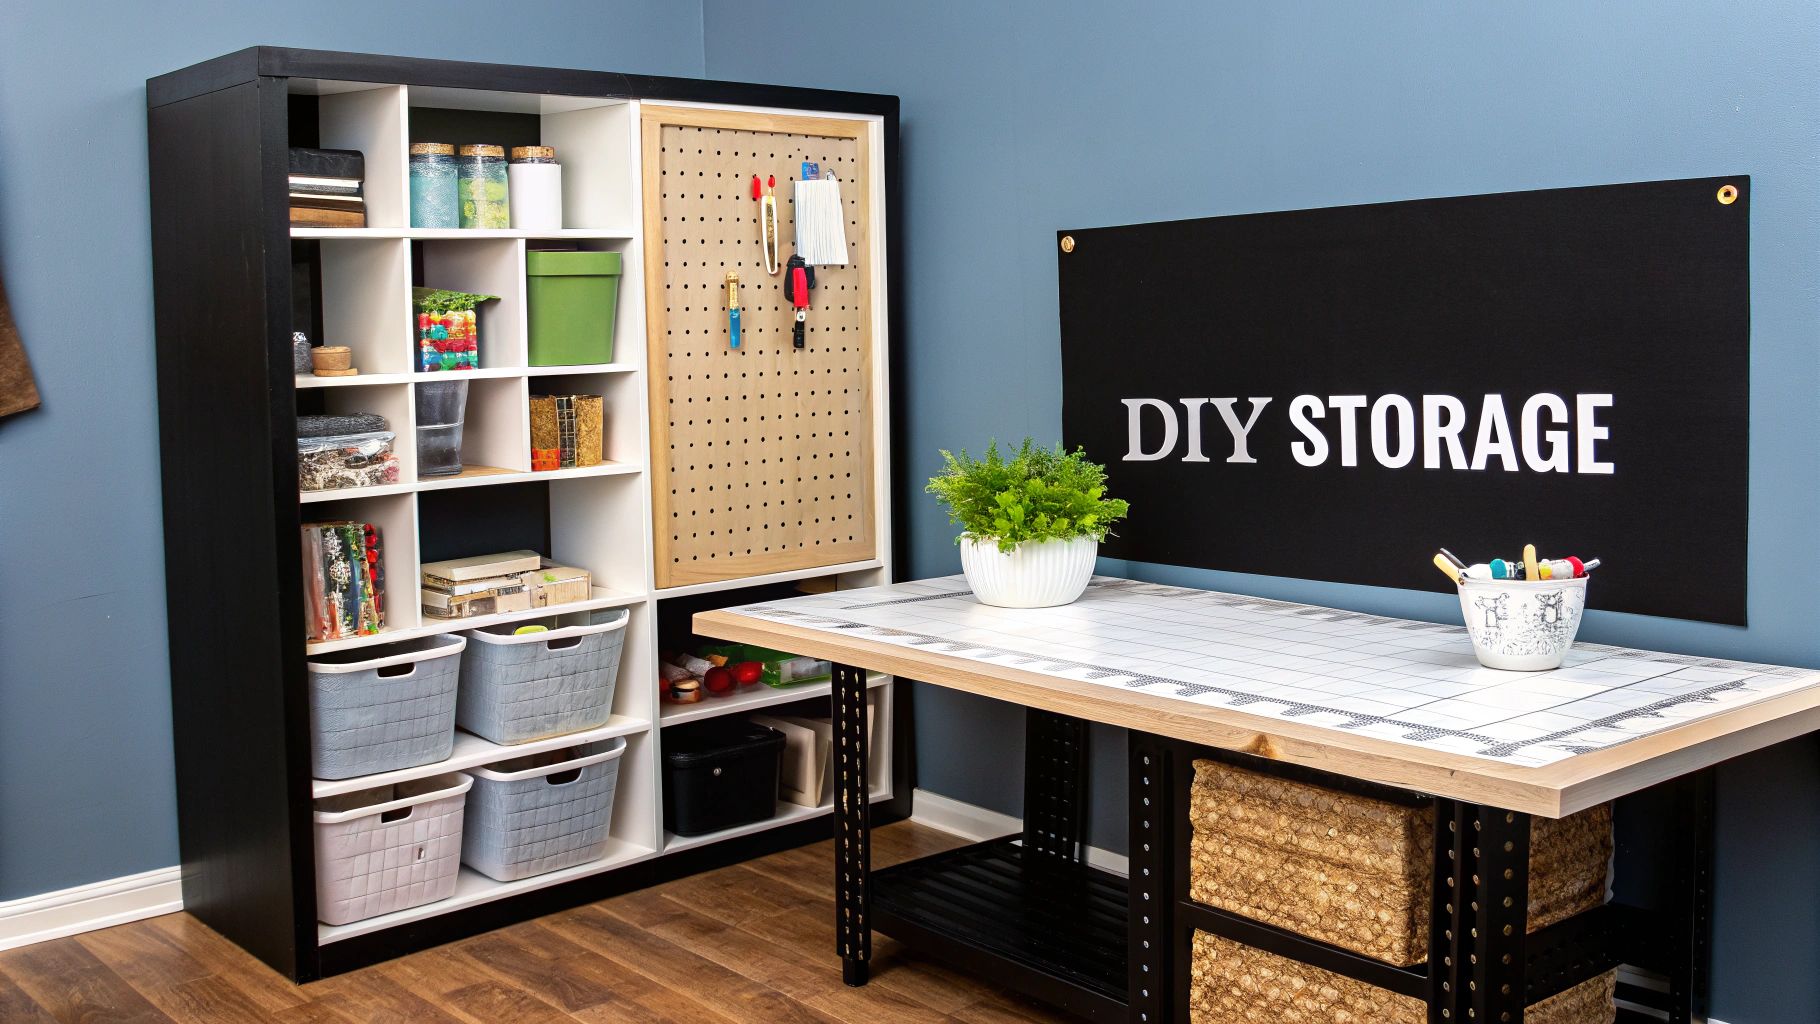
You don't need to hire a custom cabinet maker to get brilliant storage. As a sewer, you’re already a talented maker, so let's put those skills to work on some budget-friendly DIY projects. These ideas prove that truly functional sewing room storage solutions are well within your reach.
These simple builds use common materials you can grab from any hardware or craft store. They’re designed to solve those classic sewing room frustrations, like keeping rulers from getting scratched or finding a bigger cutting surface without losing your entire floor space. Here are a couple of projects you could genuinely tackle this weekend.
One of my favorite DIY hacks is creating a large, counter-height cutting table using inexpensive cube shelving units. This project is a game-changer because it gives you a massive work surface and tons of built-in storage for fabric bolts or bins.
Here’s the basic idea:
With this single project, you get an ergonomic cutting station and a place to organize a huge chunk of your stash, all in one go.
We all know the struggle of keeping long quilting rulers and cutting mats from getting warped or scratched. A simple DIY wall-mounted rack is the perfect fix. It gets them off your table but keeps them right where you can see them.
A great DIY project doesn't have to be complicated. The most effective solutions are often the simplest ones that solve a daily frustration, like knowing exactly where your favorite 24-inch ruler is every single time.
For those who love a hands-on approach, building your own solutions is incredibly rewarding. A comprehensive DIY closet organizer guide can offer some fantastic inspiration for maximizing vertical storage, and you can easily adapt those concepts for your tools. Something as simple as a small strip of wood with a groove cut into it, or even just a few wooden dowels screwed into the wall, can create the perfect home for your most-used rulers and templates.
Having a tidy room is one thing, but creating one that actually works for you? That's the real goal. The best sewing room storage solutions are only half the battle; the way you arrange your space dictates how you move, create, and feel while you're in it. A little thought put into ergonomics and a logical layout can completely transform your sewing sessions from frustrating to seamless.
It all comes down to minimizing the extra steps. We want to build a space that feels intuitive, where you can reach for something almost before you consciously realize you need it.
If there's one core concept for an efficient sewing room, it's the "sewing triangle." This is all about arranging your three main workstations—your sewing machine, your cutting table, and your ironing board—in a tight triangular setup. The idea is to move between these key zones with just a step and a pivot.
This simple layout is a game-changer. It dramatically cuts down on the time you waste walking from one side of the room to the other. Think about it: when you're piecing a quilt or putting together a garment, you're constantly moving from sewing a seam, to pressing it open, to trimming the next piece. A tight triangle keeps you in the creative flow.
A great layout should feel effortless. When your most-used stations are just an arm's reach away, you cut down on physical strain and mental clutter, letting your creativity run the show.
Sewing for hours on end should be a joy, not a pain in the neck—literally. Ergonomics isn't just some fancy term; it's about setting up your space to support your body and prevent injuries.
Pay close attention to these three areas:
Making these small tweaks can have a massive impact on how long you can comfortably sew. This isn't just a niche hobby; the fabric and craft store industry in the U.S. brings in USD 4.6 billion in revenue. That's a lot of people investing in their passion! You can read more about the thriving sewing retail sector to see the numbers. Investing in your comfort is just as crucial as buying good fabric.
By being strategic about your layout and ergonomics, you elevate your room from just a place where you store your stuff into a highly functional studio that truly fuels your creativity.
You’ve done it. You’ve wrestled the chaos into submission and set up some brilliant storage solutions in your sewing room. The tricky part? Keeping it that way. The truth is, an organized space isn’t a one-and-done project; it’s really just a collection of small habits that stop the clutter from creeping back in.
The secret is to make maintenance a natural part of your creative flow, not another chore on the to-do list. This isn't about being perfectly tidy all the time. It's about putting sustainable systems in place so your creative sanctuary stays functional and inspiring for years.
Long-term organization really boils down to small, consistent actions. Instead of letting things pile up into a mess that demands another weekend-long overhaul, just try to build tiny tidying moments into every sewing session. These little routines are what make the difference between lasting order and a temporary fix.
A fantastic starting point is the 15-minute tidy-up. Before you shut the door on your sewing room for the day, just set a timer for fifteen minutes. You'll be amazed at how much you can get done—putting rulers away, snipping stray threads, and tossing fabric scraps back into their bins.
Another habit I swear by is the ‘one in, one out’ rule. Any time you bring home a new piece of fabric or a shiny new tool, something you no longer use has to go. It’s a simple rule that keeps your stash from overflowing your carefully planned storage.
We all know that works-in-progress (WIPs) can quickly become a major source of clutter. To keep the beautiful chaos of an active project contained, I highly recommend creating dedicated project boxes. Grab a clear bin or even a decorative basket to hold all the fabric, thread, and notions for one specific project. This keeps everything in one spot and makes it so much easier to dive back in.
If you take away only one thing, let it be this: labeling is the single most important habit for staying organized. When every container, drawer, and shelf has a clear label, you eliminate the guesswork. You’ll find what you need in seconds and, just as importantly, you’ll know exactly where it goes when you’re done.
Simple, clear labels are your best friend in the fight against future messes. It doesn’t matter if you use a fancy label maker or just handwritten tags—this small step is what holds your entire system together, making it almost effortless to maintain.
Even the most organized sewist hits a storage snag now and then. Let's tackle some of the most common challenges with a few practical solutions you can put into action this weekend.
Honestly, this really depends on the size of your scraps and what you plan to do with them. If you have tons of small, irregular bits, try sorting them by color into clear bins or even big glass jars. I love this method because you can visually "shop" your stash when you need just the right color for an appliqué or a string-piecing project.
For larger, more uniform pieces—think leftover charm squares, jelly roll strips, or layer cake squares—I've found that stackable photo storage boxes or shallow drawers work beautifully. This keeps them flat, sorted, and ready to go for any project that calls for pre-cuts.
When you're working with a small space, you have to think vertically. Every inch of wall space is prime real estate. Put up shelves that go all the way to the ceiling for your fabric and install a pegboard for hanging rulers and cutting tools. And don't forget the back of your door—an over-the-door shoe organizer is a surprisingly brilliant way to store patterns and notions without taking up a single bit of floor space.
A rolling cart is your absolute best friend in a small room. It can be a mobile project station holding everything you need for what you're currently working on. When you're finished for the day, you can just tuck it away in a closet or corner.
For those classic paper patterns, you can't beat a good old-fashioned filing system. A small filing cabinet or even a few magazine holders on a bookshelf work perfectly. I sort mine by garment type—dresses, tops, pants—but sorting by brand also works. The goal is to stop them from becoming a crumpled, unusable mess.
And for digital patterns? It's all about creating a folder system on your computer that makes sense to you (mine looks something like Patterns > Dresses > Indie > [Designer Name]). Just make sure you back it all up to a cloud service regularly. You don't want to lose that collection
At High Country Quilts we care deeply about community. With our experiences in retail, we know that a store is not only a place to shop but also a place for the community to gather and share. During this busy...

Hi! We’re Adam and Renee Wheaton, the new owners of High Country Quilts! For more than 40 years, we’ve owned and operated vacuum and sewing businesses. Following in Renee’s father’s footsteps after he retired from All Discount Vacuum and Sewing in Colorado...


Leave a comment