

We Love Our Quilting Community
At High Country Quilts we care deeply about community. With our experiences in retail, we know that a store is not only a place to shop but also a place for the community to gather and share. During this busy...


Welcome to the wonderful, creative world of quilting! I know it can seem like there's a mountain of gear to buy, but getting started is actually much simpler than you think. You really only need a handful of core tools for cutting, sewing, and measuring to get your first beautiful project off the ground.
Diving into a new hobby can feel like learning a whole new language, but quilting is one of the most welcoming crafts out there. It’s all built on simple, repeatable steps. The secret to a frustration-free start? Gathering the right tools from the get-go.
Think of it like setting up a kitchen. A sharp knife and a good cutting board make all your prep work smooth, safe, and enjoyable. In quilting, a quality rotary cutter and a self-healing mat do the same thing—they stop your fabric from slipping and ensure every piece fits together just right.
Investing in a few solid items from the beginning helps you build good habits right away. Precise cuts, straight seams, and accurate measurements are the building blocks of every quilt you'll ever make. Starting with the right supplies means you’ll spend less time fighting with your fabric and more time falling in love with the creative process.
To help you start smart, let's separate the absolute must-haves from the "nice-to-have" tools you can add to your collection later on. This keeps your budget in check and prevents your new creative space from getting cluttered before you've even sewn a single stitch. The goal is to build a functional toolkit, not an exhaustive one.
There are a ton of beginner quilting kits out there, and this quick comparison gives you an idea of what to look for.
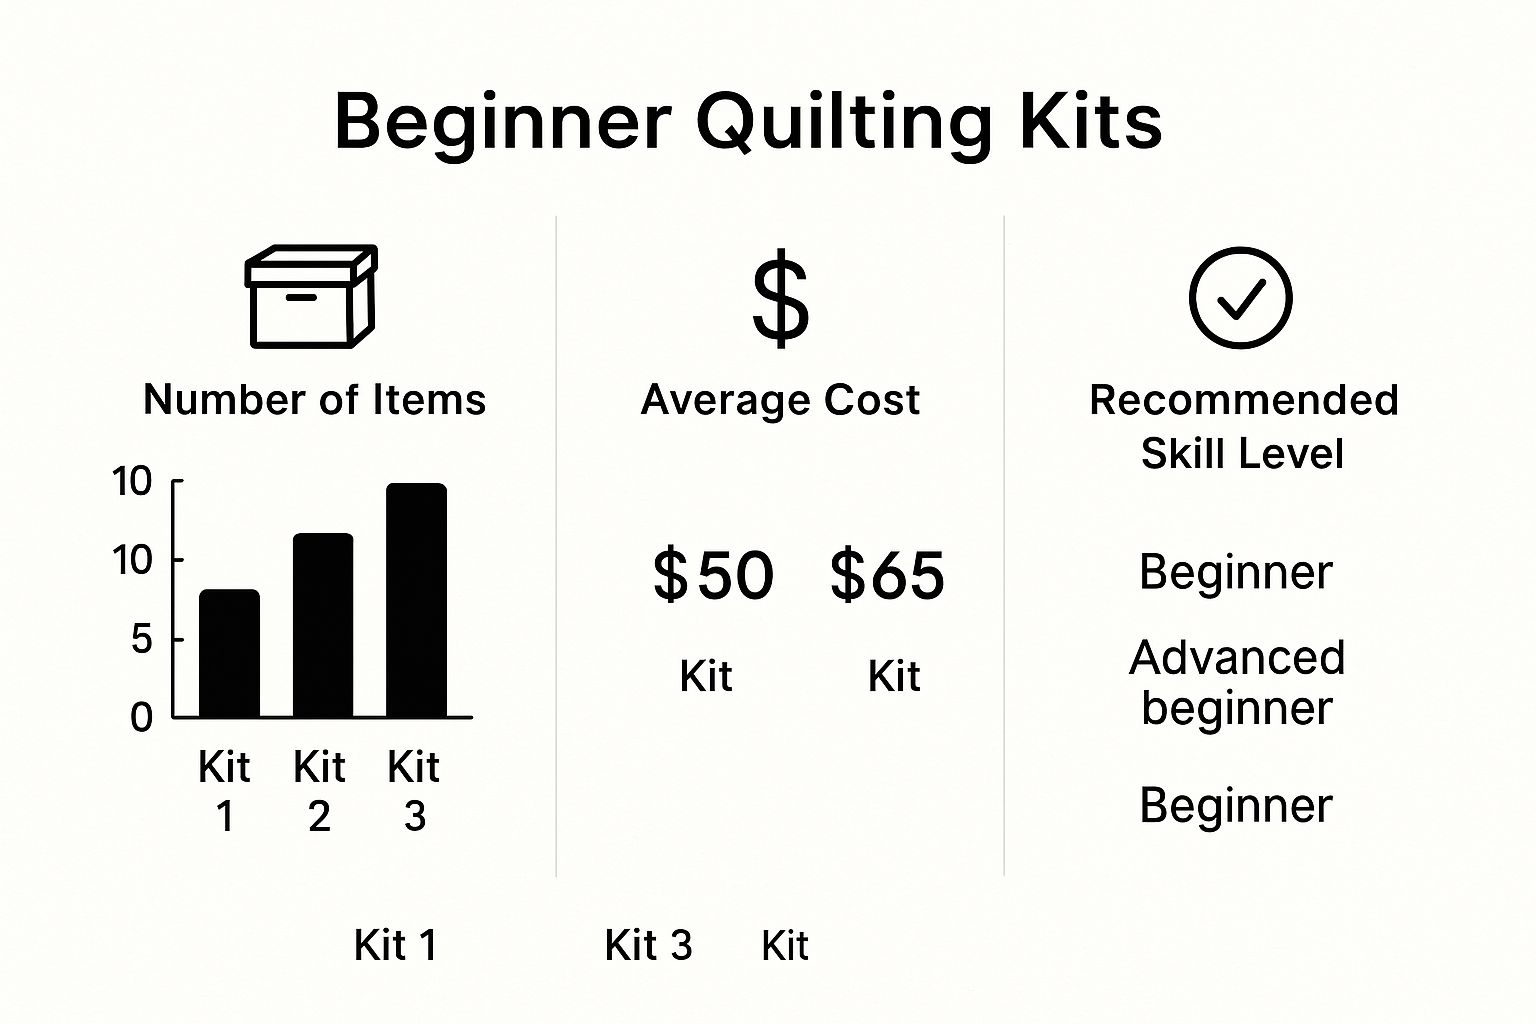
As you can see, a bigger kit doesn't always mean a better one. The most important thing is that it contains those foundational tools for accurate cutting and piecing.
You’re in good company, by the way. The global quilt market recently hit a value of approximately USD 5.32 billion, and in the U.S. alone, the market generates $4.5 billion from an estimated 9–11 million active quilters. Best of all, about 18% of those quilters are new to the craft, so there's a huge community of people starting this journey right alongside you. You can find more insights into the growing quilting market on the Craft Industry Alliance website.
A common mistake I see new quilters make is buying too many specialty gadgets at once. My advice? Focus on mastering the basics first. A good rotary cutter, mat, and ruler will handle over 90% of the work for your first several quilts.
To make your first shopping trip a breeze, I've put together a simple table that breaks down what you truly need now versus what you can pick up later as your skills grow.
This table clearly separates the essential tools you should buy now from the optional supplies you can acquire later.
| Supply Category | Must-Have Items | Nice-to-Have Items (For Later) |
|---|---|---|
| Cutting Tools | Rotary Cutter, Self-Healing Mat, 6"x24" Ruler | Smaller Rulers, Specialty Shape Rulers |
| Sewing & Piecing | Quality Cotton Thread, Sewing Machine Needles, Pins | Magnetic Pin Bowl, Seam Ripper, Wonder Clips |
| Marking & Measuring | Fabric Marking Pen (water-soluble) | Seam Gauge, Hera Marker, Starch Spray |
| Fabric | 100% Quilting Cotton (Pre-cuts are great!) | Fusible Webbing, Specialty Fabrics (linen, etc.) |
Focus on grabbing everything in the "Must-Have" column, and you'll have a fantastic foundation for building your skills and confidence.

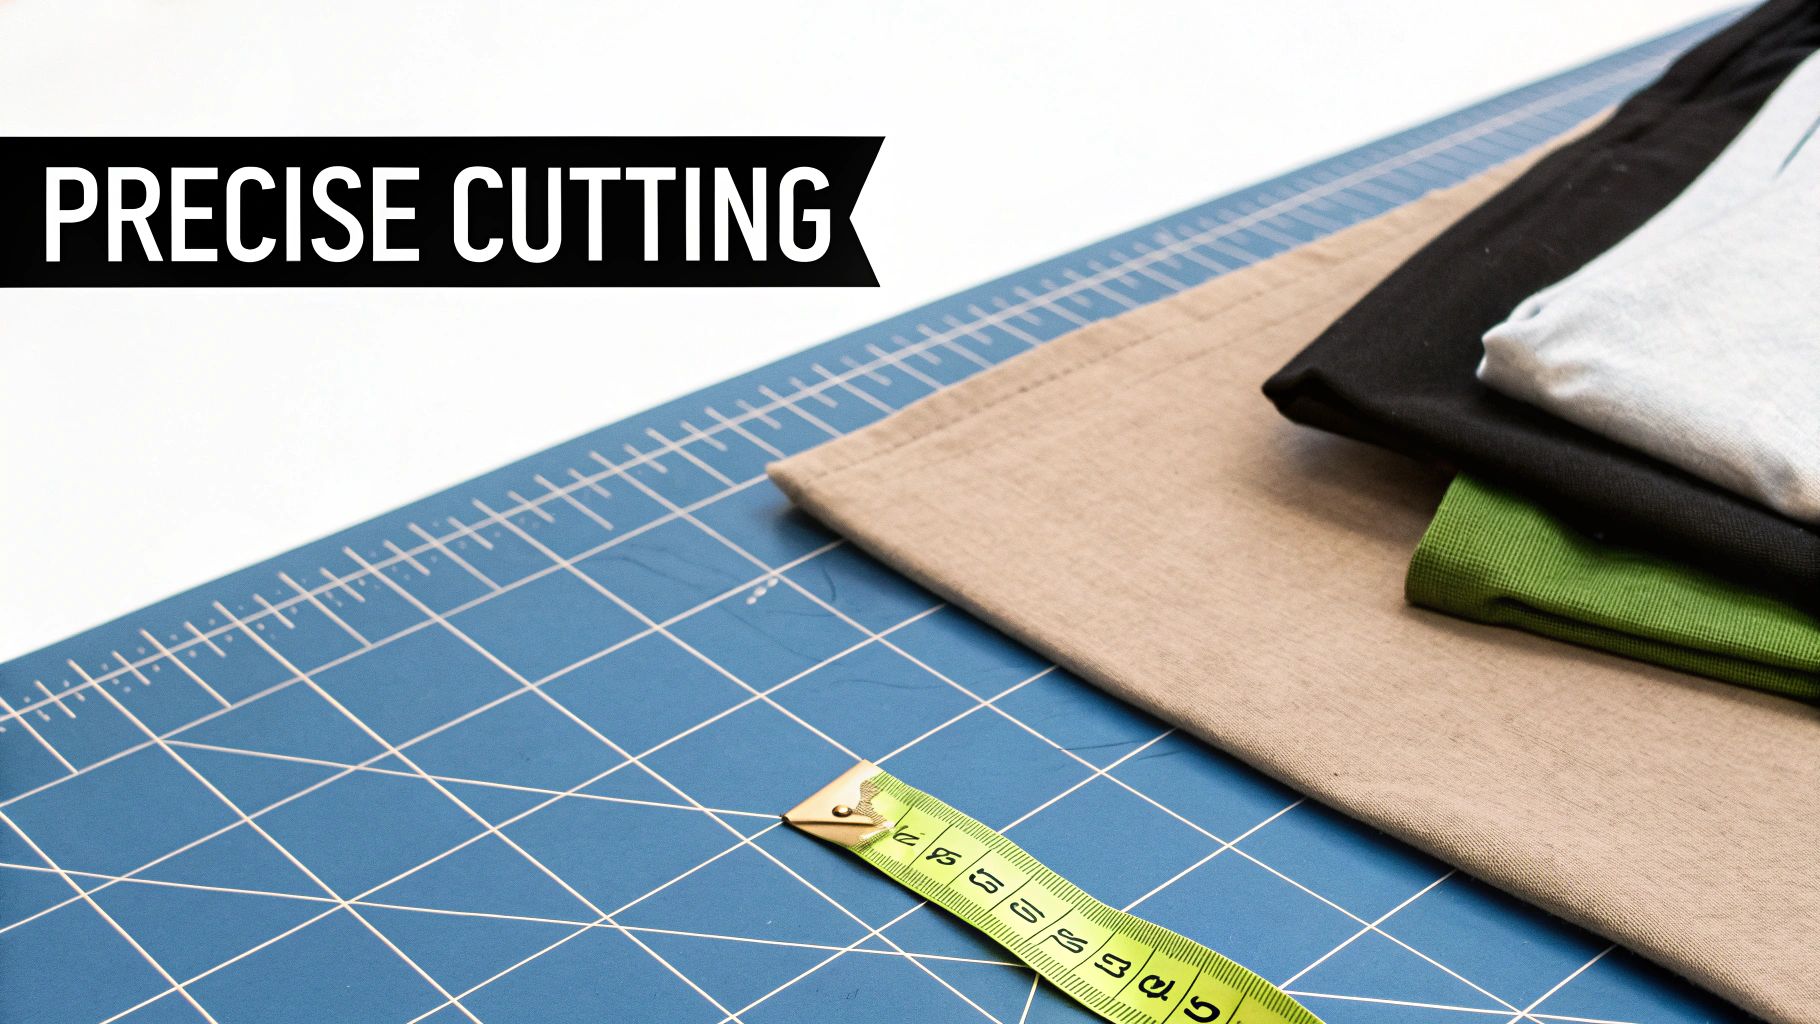
Here's a little secret that every seasoned quilter knows: a beautiful quilt doesn't start at the sewing machine. It starts with a perfect cut. The precision you achieve here is what makes your fabric pieces fit together like a dream, giving you those crisp points and beautifully straight seams.
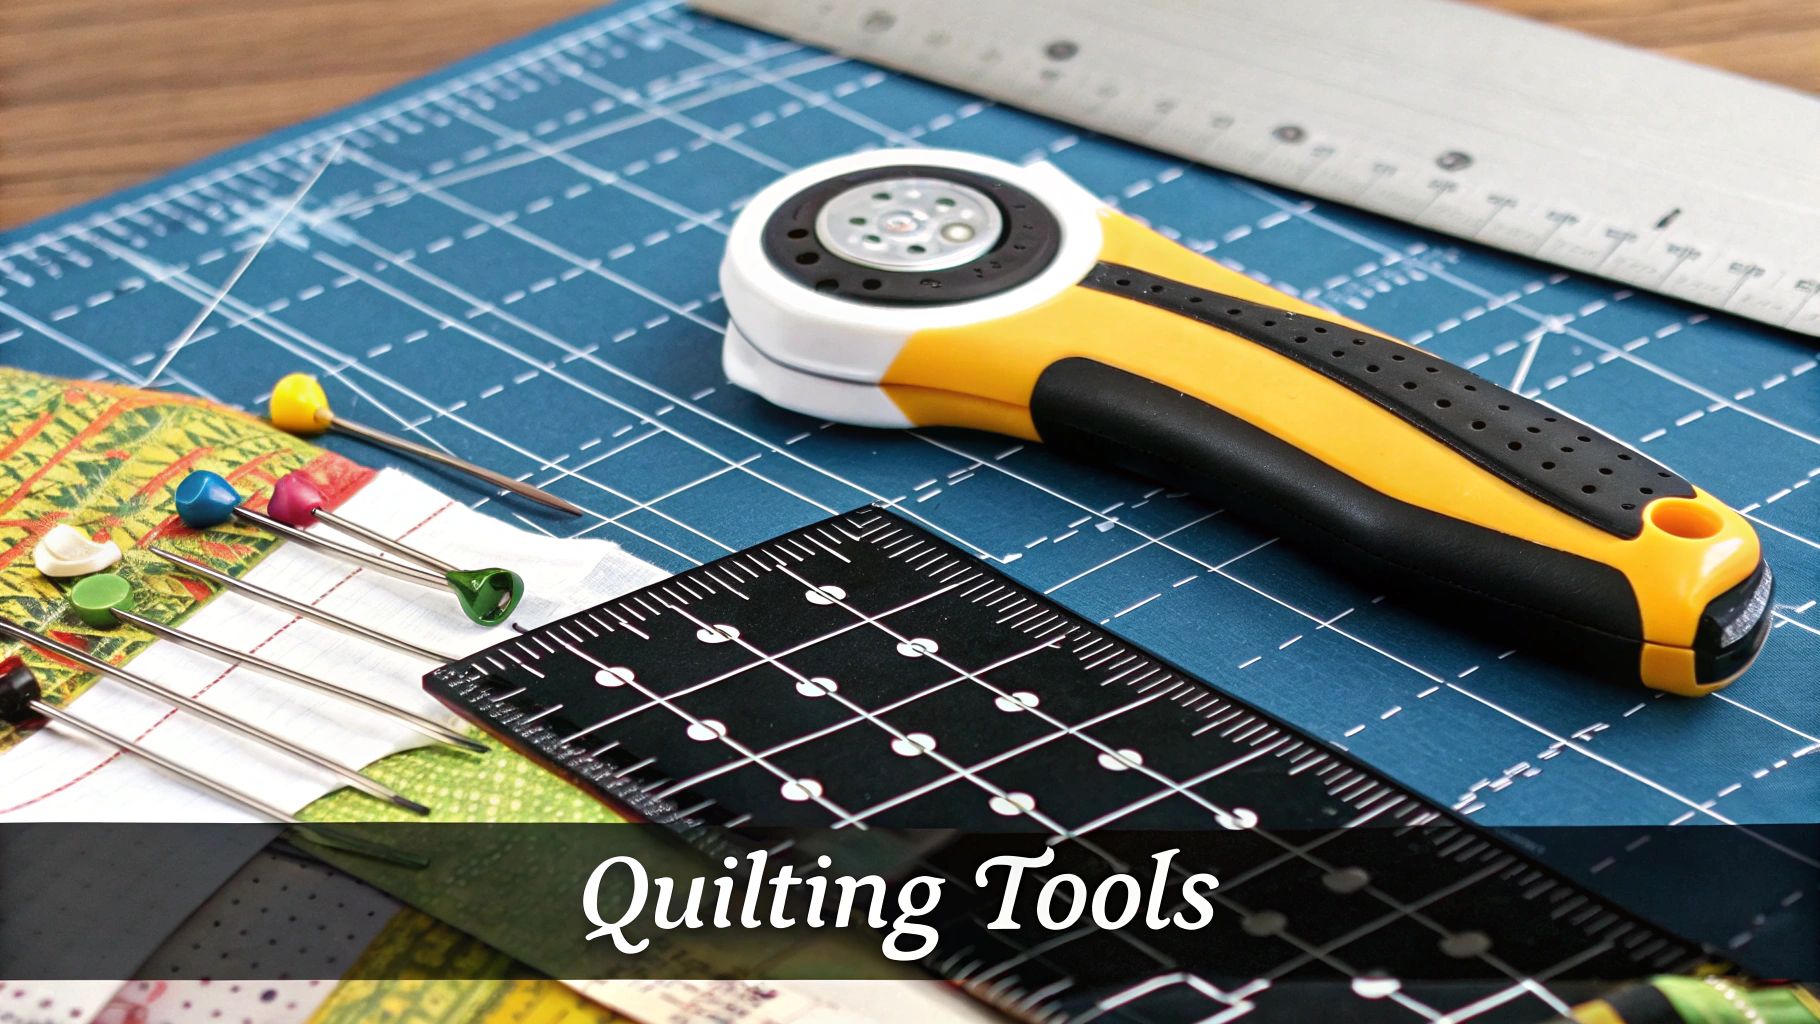
You might be tempted to just grab a pair of fabric scissors, but the modern quilting world runs on a trio of tools that work together in perfect harmony. Think of it like a chef's setup—a sharp knife, a solid cutting board, and a guide for making every slice uniform. For us, the rotary cutter is our knife, the self-healing mat is our cutting board, and the quilting ruler is our trusty guide.
This system is a true game-changer. It lets you slice through multiple layers of fabric at once with speed and accuracy, guaranteeing that every piece is identical. That kind of consistency is the key to getting your final quilt top to lay flat and look polished.
A rotary cutter is essentially a pizza cutter for fabric, with a razor-sharp blade that glides right through the cloth. They come in a few different sizes, but the 45mm rotary cutter is the gold standard for a reason. It's the perfect all-rounder—big enough for long, straight cuts but still nimble enough for gentle curves down the road.
When you’re picking one out, focus on two things: safety and comfort. Look for a model with an ergonomic handle that feels good in your hand and, most importantly, a blade guard that's easy to use. Get into the habit of retracting that guard the second you put the cutter down. It’s the single best safety habit you can build.
And remember, a sharp blade is a safe blade. When your blade gets dull, you have to push harder, which is when slips and mistakes happen. You’ll know it’s time for a fresh blade when your cutter starts skipping threads instead of making a clean slice.
Pro Tip: Don't skimp on your rotary cutter. Spending a few extra dollars on a quality tool from a trusted brand pays off. A well-made cutter feels more balanced, lasts forever, and you'll always be able to find replacement blades. It's one of the most important quilting supplies for beginners to get right.
This mat is the quiet hero of your cutting setup. Its surface has a magical quality—it’s designed to be cut into without getting destroyed. The rotary blade sinks just a tiny bit between the material's fibers, which then magically "heal" and close back up. This preserves both the life of your mat and the sharpness of your blade.
When it comes to your first mat, size really does matter. An 18" x 24" mat is a fantastic starting point. It’s big enough to handle fabric folded off the bolt but not so huge that you can't find a place to store it. Those grid lines printed on it? They're your new best friend for lining up fabric and rulers to make sure every cut is perfectly square.
The quilting ruler is the final piece of this cutting puzzle. It anchors your fabric and gives your rotary cutter a perfectly straight edge to follow. For anyone just starting out, a 6" x 24" acrylic ruler is the undisputed champion.
This ruler is long enough to cut across the entire width of your fabric, which is something you'll do all the time. Its clear markings, usually down to the 1/8-inch, make precise measurements a breeze. You'll also notice handy angled lines (like 30, 45, and 60 degrees) that will become invaluable once you start tackling more complex quilt blocks.
So, how does it all come together for a flawless cut?
Once you get the hang of this trio, your confidence will soar. You’ll be well on your way to creating gorgeous, precise quilts right from your very first project.
If your cutting tools are the skeleton of a quilt, then fabric and thread are its heart and soul. They bring the color, the feel, and the personality to life. I still remember the feeling of walking into a fabric shop for the first time—it can be an overwhelming sea of choices. But trust me, getting started is simpler than you think.
The goal is to pick materials that work with you, not against you. The right fabric and thread make everything easier, from sewing straight seams to creating a quilt that will last for years. Let’s walk through how to choose these essentials with confidence.
When you're new to quilting, you want to focus on your skills, not wrestle with tricky fabric. That’s why 100% quilting cotton is the undisputed champion for beginners. Think of it as your new best friend—it’s stable, predictable, and incredibly forgiving.
Unlike slippery silks or fussy knits, quilting cotton has a nice, tight weave that holds its shape. This means it doesn't stretch or fray much when you cut it, and it feeds smoothly through your sewing machine. The result? Straighter seams and less frustration. It also presses beautifully, giving you those crisp, flat seams that are the hallmark of a well-made quilt.
This isn't just my opinion; the entire quilting world agrees. Cotton makes up about 42.7% of the global quilt market, mainly because it's so affordable and easy to handle. To meet that demand, global fiber production jumped from 112 to 116 million tons in a single year. You can read more about quilt market trends to see just how essential this fiber is.
Quick Tip: A simple way to check cotton quality in the store is to hold it up to a light. If you can see right through it, the thread count is probably too low. You want a fabric that feels substantial and looks opaque—that's the good stuff that will stand up to years of snuggles and washes.
One of the best things to happen for new quilters is the pre-cut bundle. These are curated collections of coordinating fabrics that have already been cut into standard sizes for you. They are a game-changer.
Why are they so great?
You'll see these popular types in any quilt shop:
Starting your first project with a pre-cut is one of the smartest moves a new quilter can make.
Okay, let's talk about thread. It might seem like a tiny detail, but it’s literally the glue holding your masterpiece together. Using cheap, weak thread is a recipe for disaster. It will snap, tangle, and gum up your machine with lint. Don't do it!
For piecing your quilt top, what you need is a good, all-purpose thread. I always recommend a 50-weight (50 wt) 100% cotton thread. The "weight" just refers to its thickness—the higher the number, the finer the thread. A 50 wt thread is the sweet spot: it’s strong enough for durable seams but fine enough that it won't add bulk.
As for color, you can’t go wrong with a neutral shade like gray, cream, or beige. These colors blend in with almost any fabric, saving you the hassle of changing your thread constantly. When you pair quality fabric with a reliable thread, you’re setting yourself up for success from the very first stitch.
While the sewing machine and rotary cutter get all the glory, a handful of small, inexpensive tools are the real unsung heroes of quilting. Think of them as the support crew working backstage—they aren't the stars of the show, but without them, the whole performance would fall apart. These are the little things that turn a frustrating job into a process you can actually enjoy.
Honestly, these small investments are what make quilting feel less like a chore and more like a creative escape. They help you wrangle all those tiny details, fix the inevitable "oops" moments gracefully, and protect the precious accuracy you worked so hard to achieve. Trying to quilt without them is a fast track to puckered seams, broken threads, and a whole lot of head-scratching.
Let's start with the most critical, and most overlooked, tool of all: your sewing machine needle. Sewing with a dull or damaged needle is like trying to chop tomatoes with a butter knife—it just makes a mess. A fresh, sharp needle is designed to glide effortlessly through your cotton fabric, creating perfect little stitches without snagging or pulling the threads.
A dull needle, on the other hand, doesn't pierce the fabric; it punches through it. This brutal approach is what causes skipped stitches, shredded thread, and can even leave permanent little holes in your beautiful fabric. The fix is so simple and cheap, there's no reason to skip it.
Get into the habit of changing your needle with every new project, or after every 8-10 hours of sewing. This tiny step is probably the single most effective thing you can do to improve your stitch quality and protect your work.
For quilting with standard 100% cotton, a universal or quilting needle in size 80/12 or 90/14 is the perfect place to start. Just keep a fresh pack nearby, and you'll always be set up for success.
Next up are two tools that are basically two sides of the same coin: pins to hold your work together, and a seam ripper for when it all needs to come apart. They beautifully represent the two realities of quilting—the pursuit of precision and the need for a little forgiveness.
Pins are your best friends for keeping fabric pieces perfectly lined up as they go under the needle. Without them, fabric will shift, and you’ll lose those sharp points and perfectly matched corners. When you're shopping, you’ll see two main kinds:
And then there's the seam ripper. I’m not exaggerating when I say this is every quilter’s best friend. Making a mistake isn't a failure; it’s just part of the process. A good seam ripper lets you quickly and cleanly take out a crooked seam without harming your fabric, turning a potential disaster into a minor, fixable detour. Learn to love this tool—it’s a sign you’re learning!
Finally, there are a couple of little helpers that you’ll want to keep within arm’s reach of your machine at all times. They add that final touch of accuracy and convenience that makes everything feel a bit more professional.
A simple fabric marking tool is a game-changer for drawing guidelines. For beginners, a water-soluble or air-erasable pen is fantastic. You can use it to draw diagonal lines for making half-square triangles or to map out your quilting pattern, knowing the marks will vanish with a spritz of water or just over time.
Lastly, get yourself a small, sharp pair of thread snips or tiny scissors. Keeping these right next to your machine lets you snip your threads the second you finish a seam, which keeps your project and your workspace neat and tidy. It’s so much easier than grabbing your big fabric shears for one tiny thread. It's these small but mighty tools that really elevate your craft from a hobby to an art form.
Let's be honest: your sewing machine will be the biggest and most important purchase you make for your new quilting hobby. Walking into a sewing machine shop or scrolling through options online can be totally overwhelming. You’ll see machines with hundreds of stitches, flashy digital screens, and price tags that make you gulp.
But I'll let you in on a little secret that seasoned quilters know well: the best machine for a beginner isn't the one with the most bells and whistles.
At its heart, quilting is all about creating beautiful things from simple, strong, straight lines. Your goal should be to find a reliable workhorse that does the basics flawlessly. A complicated machine can be a huge source of frustration, leaving you wrestling with the user manual instead of actually sewing. A good, straightforward machine, on the other hand, builds your confidence and lets you focus on your craft.
Let’s cut through all that noise and get right to the features that truly matter when you're starting out.
When you're comparing models, do your best to ignore the siren song of a hundred decorative stitches. They look fun, but trust me, you'll rarely—if ever—use them for piecing a quilt top. Instead, you need to zoom in on three things that are absolutely essential for accurate quilting.
First and foremost, you need a machine with a rock-solid straight stitch. This is the stitch you will use for 99% of your piecing. Look for a machine known for creating a consistent, even stitch, one that doesn't skip or bunch up the fabric. This is the key to strong seams that will hold your quilt together for years to come.
Next up is adjustable stitch length. This feature lets you make your stitches shorter or longer with the turn of a dial. For joining fabric pieces, a shorter stitch length (around 2.0-2.5 mm) creates a really secure seam. Later, when you're quilting the layers together, you might want a slightly longer stitch. Having this control is a game-changer.
Finally, make sure the machine either comes with a quarter-inch presser foot or can be fitted with one. Since almost every quilt pattern relies on a perfect quarter-inch seam, this little attachment is your best friend. It has a guide on the side that makes sewing a precise seam allowance practically foolproof.
A common trap for beginners is thinking that more features equal a better machine. In reality, a simple mechanical machine with excellent stitch quality will serve you far better than a computerized one that's a headache to operate. Always prioritize build quality over feature count.
Once you've found a machine that nails the basics, there are two key accessories that will make your life so much easier, especially when you’re ready to quilt your "quilt sandwich" (the top, batting, and backing).
The first is a walking foot, sometimes called an even-feed foot. Think about pushing a thick sandwich of fabric, batting, and backing through your machine. The little metal teeth under the fabric (the feed dogs) pull the bottom layer along, but the top layers can drag behind, causing ugly puckers and tucks.
A walking foot solves this problem completely. It has its own set of feed dogs on top, gripping the upper fabric and moving it in perfect time with the bottom layer. This accessory is non-negotiable for the quilting stage and for attaching the final binding.
The other helpful feature is the ability to drop the feed dogs. This allows them to retract below the machine's surface, so you can move the fabric freely in any direction—which is exactly what you need for free-motion quilting. You might not try this on your very first project, but having this capability means your machine can grow with you as your skills advance.
The world of quilting is always evolving, too. We’re seeing more tech make its way into the craft, from AI-powered pattern design to smart machines that simplify complex steps. The average new quilter is incredibly passionate, spending about six hours a week on their craft and starting around 11 projects a year, which fuels a lot of this innovation. You can get a glimpse of the future by reading about how technology is shaping the quilt market.
For now, though, choosing a solid, reliable machine is your first and most important step into this wonderful world.
Jumping into quilting is a blast, but it's totally normal to have a few questions as you start gathering your gear. Think of this as a chat with a seasoned quilter, where we’ll clear up the common head-scratchers and get you started on the right foot.
Getting these little details down from the get-go helps you build good habits. It’s the difference between feeling confident and feeling frustrated. With these answers in your back pocket, you’ll be ready to build a toolkit that really works for you.
If there's one habit to build early, it's taking good care of your cutting tools. A little bit of maintenance goes a long, long way in keeping you safe, ensuring your tools last, and getting those perfectly precise cuts your quilts deserve.
Let's start with your rotary cutter. The blade is the star of the show, and the number one rule is to always retract the safety guard the second you put it down. It’s a simple flick of the thumb that prevents nasty accidents and protects that super-sharp edge from getting nicked. You'll know it's time for a fresh blade when you find yourself pressing harder or the cutter starts skipping threads instead of slicing cleanly. Swapping it out is easy—just be careful with the old blade!
Your self-healing mat needs a bit of love, too. To keep it happy and flat for years, just remember a few things:
These small steps will make a huge difference, saving you money and a whole lot of frustration down the road.
Ah, the great debate! Ask ten quilters and you might get ten different answers. There really is no single "right" way, but knowing the pros and cons will help you decide what’s best for your project.
So, why pre-wash? It does a few things. First, it rinses out any leftover chemicals or stiffeners from the manufacturing process, making the fabric a bit softer. It also pre-shrinks the cotton, so you don't get any unexpected puckering after you wash your beautiful, finished quilt for the first time. The biggest reason, though, is to get rid of any excess dye—especially with bold reds and deep blues that have a reputation for bleeding onto lighter fabrics.
On the other hand, many quilters today skip pre-washing entirely. Modern, high-quality quilting fabrics have very little shrinkage and are much more colorfast than they used to be. These quilters love the crisp, stable feel of unwashed fabric, which they find makes cutting and piecing more accurate.
As a beginner, a safe bet is to pre-wash your dark and vibrant fabrics just to be sure they won't run. If you decide to live on the edge and not wash, you can always toss a few color-catcher sheets in the laundry with your finished quilt to soak up any stray dye.
You've got some fantastic options here, and honestly, using a mix of them is usually the best approach. Each place has its own perks.
Your local quilt shop is an absolute treasure. The people working there are almost always passionate quilters themselves. They can give you fantastic, personalized advice, help you find that perfect fabric, and answer your questions on the spot. Plus, you get to be part of a wonderful local crafting community.
Large craft stores are great, too. They have a wide selection of all the basics and often run amazing sales and have coupons you can use. This is a huge help when you're first building your stash and trying to stick to a budget.
And of course, online retailers open up a whole world of possibilities. You can find an almost infinite selection of fabrics, notions, and tools from everywhere. It’s the best way to track down a specific fabric line you’ve fallen in love with or find a specialty gadget you can’t get locally.
Ready to start building your perfect quilting toolkit? The team at High Country Quilts is here to help you every step of the way. From premium BERNINA sewing machines to a stunning selection of fabrics and notions, we have everything you need to bring your creative vision to life. Stop by our Colorado Springs store or explore our offerings online.
Find your quilting essentials at https://hcquilts.com today
At High Country Quilts we care deeply about community. With our experiences in retail, we know that a store is not only a place to shop but also a place for the community to gather and share. During this busy...

Hi! We’re Adam and Renee Wheaton, the new owners of High Country Quilts! For more than 40 years, we’ve owned and operated vacuum and sewing businesses. Following in Renee’s father’s footsteps after he retired from All Discount Vacuum and Sewing in Colorado...


Leave a comment