

We Love Our Quilting Community
At High Country Quilts we care deeply about community. With our experiences in retail, we know that a store is not only a place to shop but also a place for the community to gather and share. During this busy...


Welcome to the wonderfully relaxing and rewarding world of quilting English Paper Piecing, or EPP as it’s often called. Imagine creating a beautiful mosaic, but instead of tile, you’re using fabric. EPP uses temporary paper templates to help you craft incredibly precise shapes that fit together perfectly, forming stunning, intricate designs. It's a portable, meditative craft—ideal for using up those precious fabric scraps and creating heirlooms one stitch at a time.
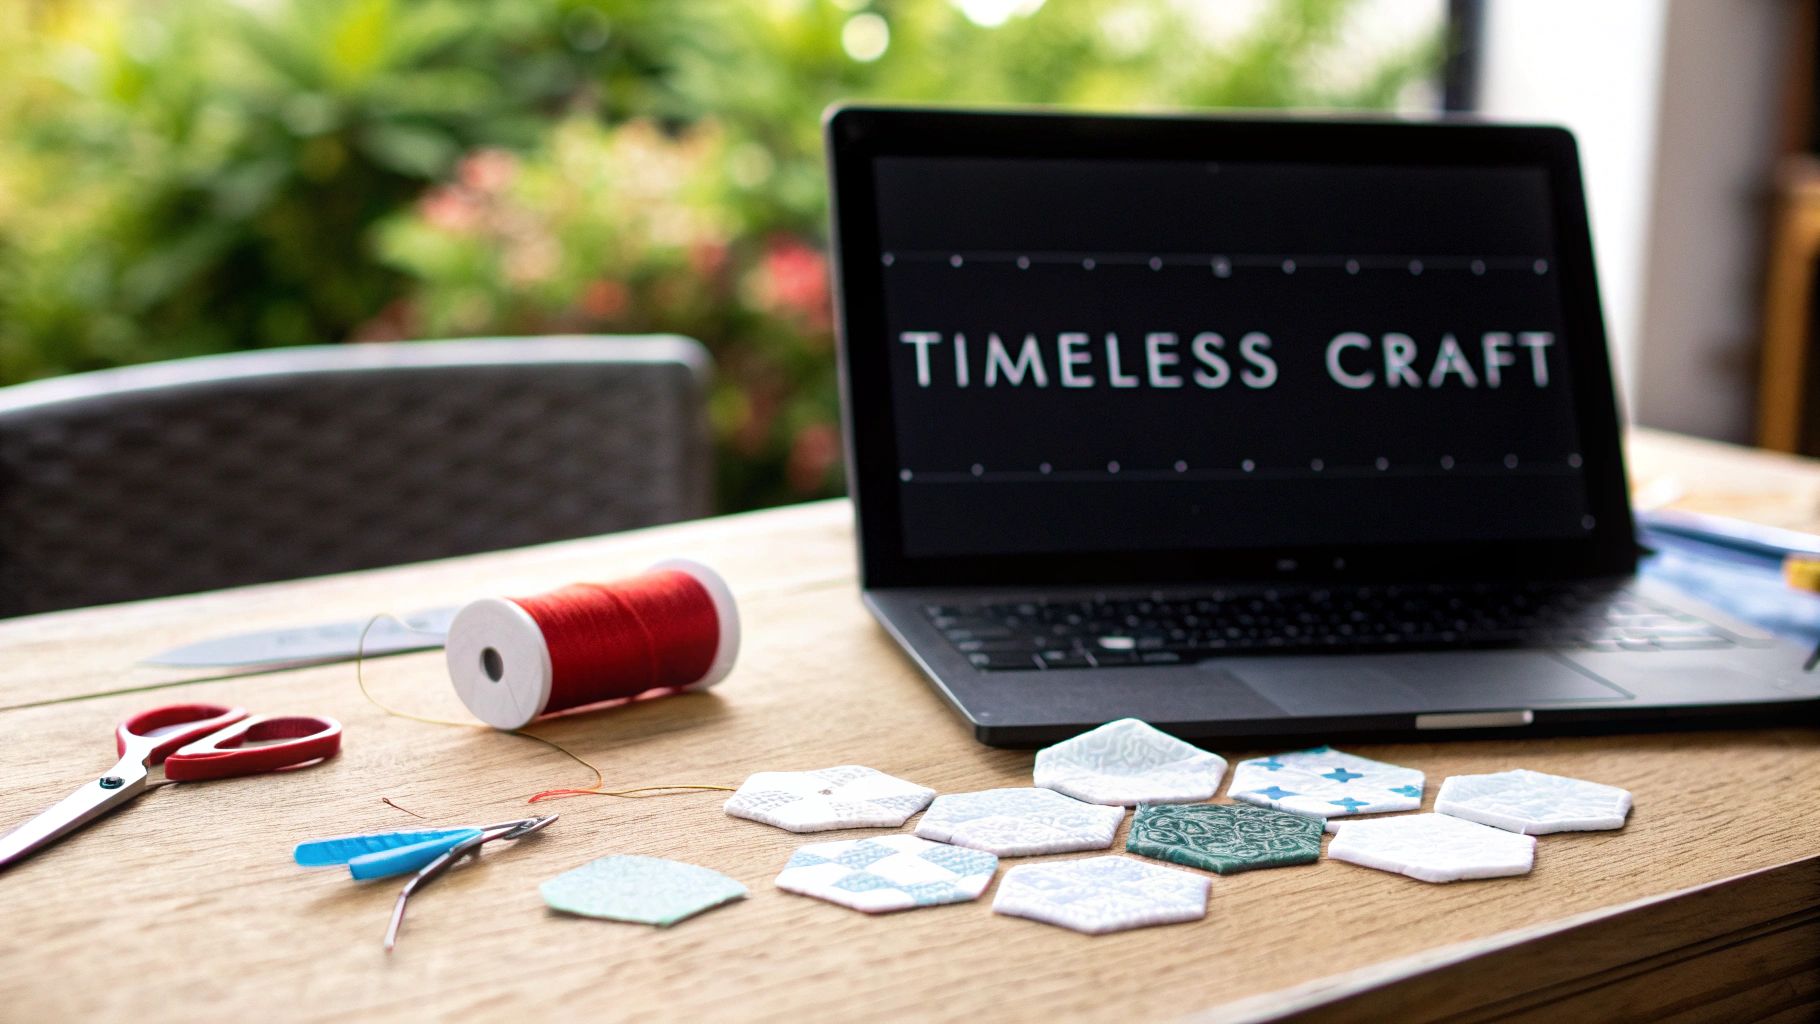
English Paper Piecing is so much more than just another quilting technique; it’s a direct link to a long history of artistry and making beautiful things from humble materials. At its heart, EPP is all about wrapping a piece of fabric around a paper template to stabilize it. Then, you simply hand-sew these shapes together. It’s this simple idea that unlocks the ability to create complex patterns with sharp points and perfect intersections—the kind of results that can be a real headache to get right on a sewing machine.
The process itself is a wonderful example of "slow stitching." It’s a mindful, deliberate practice that provides a peaceful escape from the everyday hustle. And because your project is built from small, manageable pieces, EPP is wonderfully portable. You can easily tuck a little bag of hexagons and a needle into your purse to work on anywhere, from a waiting room to a cozy evening on the sofa.
The appeal of English Paper Piecing is truly timeless. Its origins can be traced all the way back to England in the 1770s. It really took off after Godey's Lady's Book published the first hexagon pattern in 1835, bringing the technique into households everywhere. Because it was a fantastic way to use up tiny scraps of fabric, EPP was an economical way for people to create beautiful textiles, particularly during tough times like the Great Depression. You can explore more about its journey through the centuries, a history that is literally woven into every hexagon.
The beauty of EPP lies in its precision and portability. It transforms the act of quilting into a relaxing, portable art form, allowing you to create intricate designs with accuracy, one stitch at a time.
It's easy to see why EPP remains so popular. For many of us, quilting English paper piecing is the perfect way to use those treasured fabric scraps—the ones too small for bigger projects but far too lovely to throw away. It's also incredibly beginner-friendly. You don't need a sewing machine or a room full of specialized tools to get started.
This guide is designed to walk you through the entire journey, from your first stitch to your finished project. We'll cover everything you need to know:
Whether you're just starting your quilting adventure or you're a seasoned stitcher looking for a new passion, you’ll soon see how anyone can master this beautiful and historic art form.
Getting started with English Paper Piecing doesn't mean you need to buy out the entire quilt shop. The beauty of EPP is its simplicity, but having the right tools on hand will make every stitch a pleasure, not a chore. Think of it as setting up your creative workspace—a few key items will make all the difference.
Let's start with the most exciting part: the fabric! EPP is a fantastic "scrap-buster," so it's the perfect opportunity to dive into that treasured collection of leftover fabrics you've been saving. Of course, you can also use pre-cuts like jelly rolls or charm packs for a coordinated look right out of the gate. Pre-cuts, first introduced by Moda way back in 2006, really changed the game for modern quilters by saving tons of cutting time and sparking new design ideas. It’s all part of a long tradition of making quilting easier for everyone. For a deeper dive, check out the fascinating history of patchwork trends.
These are the absolute must-haves. With just these few things, you can create beautiful, precise EPP blocks. They're the foundation of the whole technique.
The right tools don’t just make the process easier—they become an extension of your hands. A sharp needle, fine thread, and precise templates are what allow you to achieve the flawless, professional-looking results that EPP is known for.
Once you have the basics down, a few extra goodies can seriously improve your EPP experience. These aren't strictly necessary, but they can add a lot of speed, comfort, and precision to your work.
Here’s a quick guide to help you decide what you need now versus what you might want later. Think of the "Essential" column as your starting lineup and the "Optional" list as your bench players—great to have when you need them!
| Tool | Purpose | Category |
|---|---|---|
| Small, Sharp Scissors | Essential for accurately trimming fabric around templates and snipping threads cleanly. | Essential |
| Fabric Glue Pen | A fast, mess-free alternative to thread basting for securing fabric to paper templates. | Optional |
| Rotary Cutter & Mat | Speeds up the process of cutting fabric, especially when working with larger pieces or strips. | Optional |
| Thimble or Needle Gripper | Protects your fingers during long stitching sessions and helps pull the needle through fabric layers. | Optional |
Ultimately, choosing your tools is the very first creative step in your quilting English paper piecing journey. Start with the essentials, and don't hesitate to experiment with different accessories to see what feels right for you. A well-loved toolkit is one that lets you forget about the tools and lose yourself in the meditative joy of stitching.
This is where the real fun of English paper piecing begins. With your tools gathered, it's time to turn those flat pieces of fabric into precise, three-dimensional shapes that are ready to be stitched together. It all boils down to two essential skills: basting the fabric to your paper templates and then joining those pieces with a strong, nearly invisible stitch.
I like to think of basting as wrapping a tiny gift. The paper template is the gift, and your fabric is the wrapping paper. Your goal is to fold and secure the fabric snugly around the paper, creating crisp, clean edges that will line up perfectly with their neighbors. This careful prep work is the secret ingredient behind the stunning accuracy EPP is famous for.
There are two main ways to baste your pieces, and just about every quilter I know has a strong preference for one over the other. Neither is right or wrong—it’s all about finding the rhythm that feels best for you.
At its core, the process is simple: you start with your fabric, use templates to create your shapes, and then join them with thread.
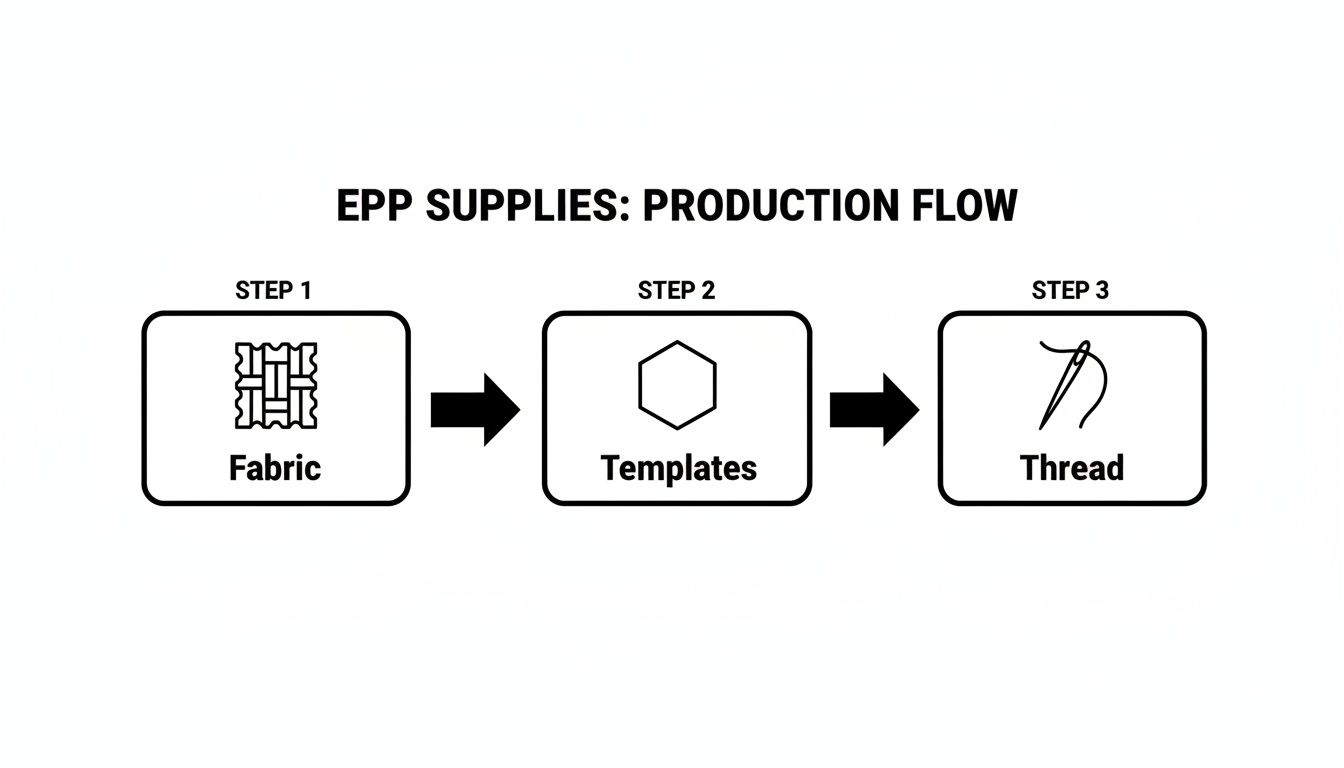
This little diagram shows how even the most complex EPP project follows this fundamental path, from raw materials to a finished unit.
Let's break down the two main contenders.
This is the old-school method, relied upon by generations of quilters. It involves using a needle and thread to tack the fabric's seam allowance down around the paper template.
A more contemporary approach, glue basting uses a fabric-safe glue pen to tack down the seam allowances. You just run a thin line of glue along the paper's edge and press the fabric over it.
Honestly, your basting choice is personal. My best advice? Try both! Make a few hexagons using each technique and see which one you actually enjoy doing. The best method is always the one that keeps you happily stitching.
Once your pieces are all basted and ready to go, it's time to join them. The star of the show here is the whipstitch. This simple but mighty stitch is what holds your entire EPP project together. When you do it right, it creates a strong seam that is virtually invisible from the front.
Here’s the basic idea: You hold two basted pieces with their right sides together, making sure the edges you want to join are perfectly aligned. Then, you pass your needle through the very edge of the fabric folds, catching just a few threads from each piece with every stitch.
Mastering the whipstitch is all about practice and keeping a few key details in mind. Consistency is your goal here; it’s what gives EPP that polished, professional look.
This combination of careful basting and neat stitching is the entire foundation of English paper piecing. By taking your time with these core skills, you're setting yourself up for success and making sure every piece you create is something you can be truly proud of.
Okay, you've got your neat little fabric-wrapped pieces basted and you’ve got the hang of the whipstitch. Now for the fun part! This is where those individual shapes start coming together to form something beautiful and recognizable—the moment you see the magic happen.
The humble hexagon is the workhorse of so many classic quilting English Paper Piecing designs. With its six equal sides, it fits together perfectly, creating patterns that feel both simple and incredibly intricate all at once. Think of each hexagon as a little tile; by arranging them with different colors, you can build a stunning mosaic.
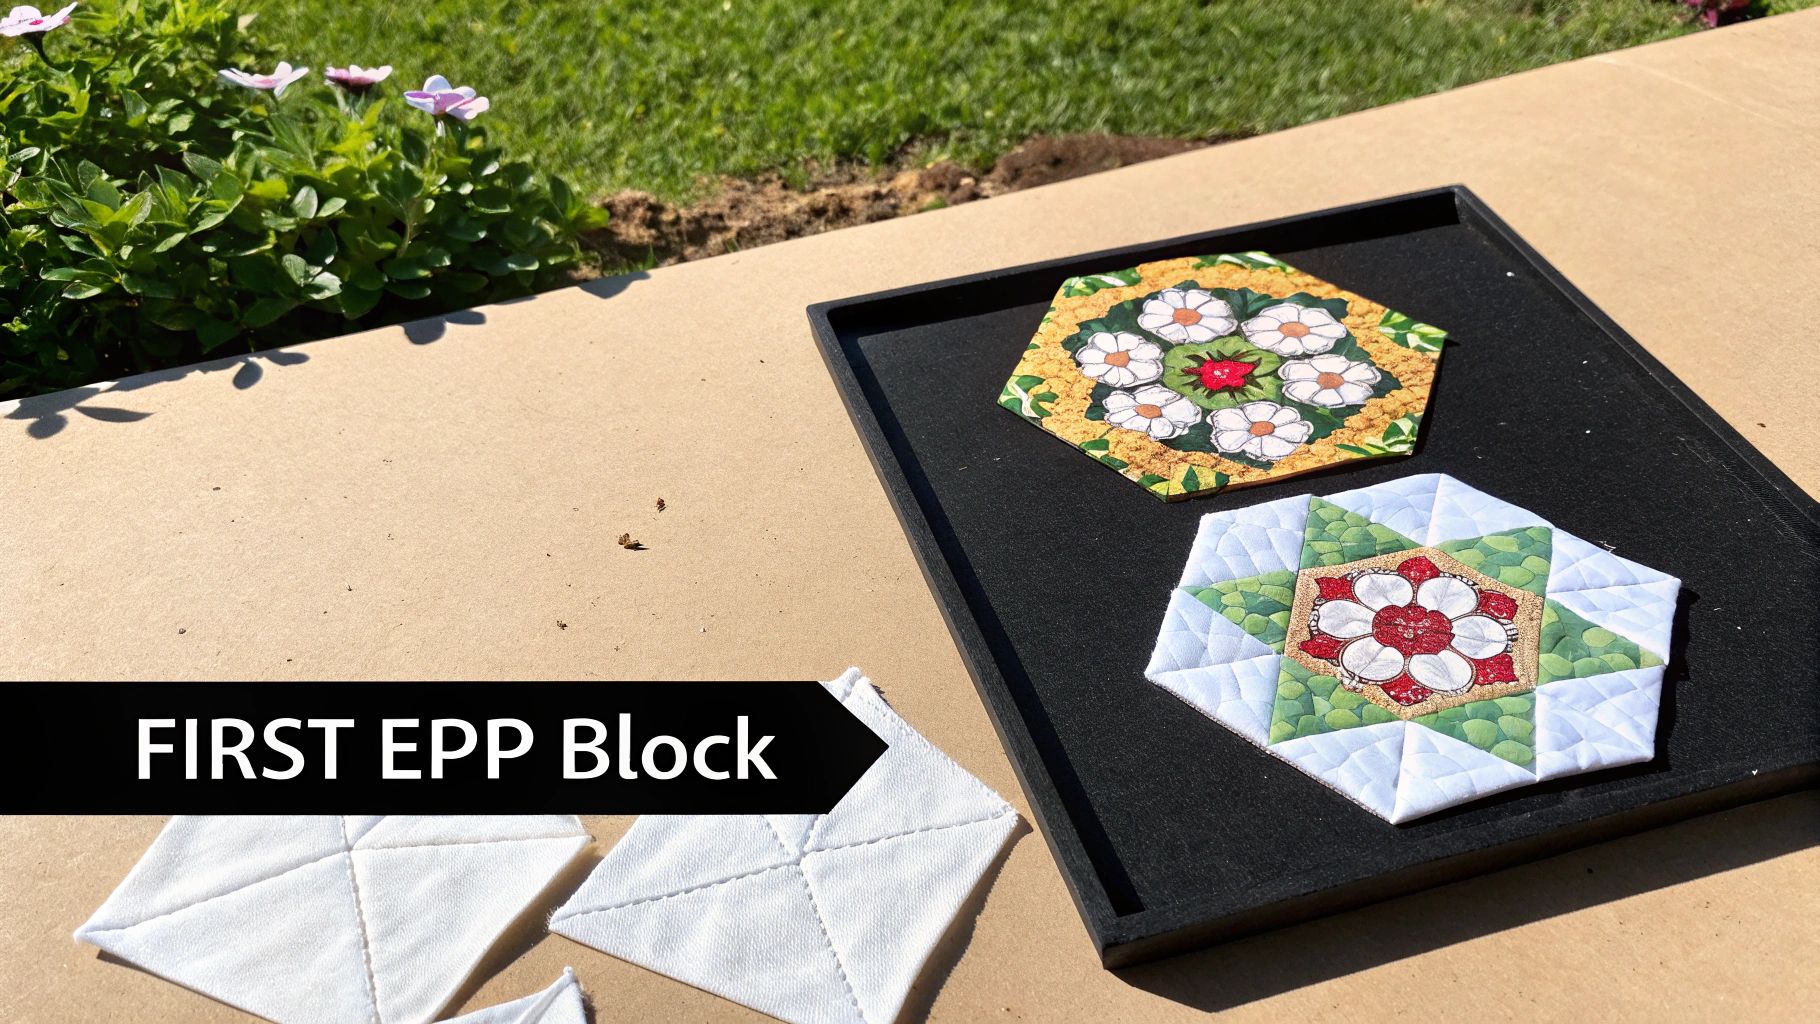
One of the most beloved and iconic EPP patterns has to be the "Grandmother's Flower Garden." It's a fantastic first project because it's built entirely from hexagons and really drills in the fundamentals of block construction. The pattern is simple: a center hexagon, a ring of six "petal" hexagons, and sometimes another ring after that.
Let's walk through building one. It’s just a matter of stitching one piece to the next in a logical circle.
Looking at historical examples, like those beautifully documented in this Selvedge Magazine article, you can see how quilters have always used whatever scraps they had to create these vibrant, timeless patterns. It's a tradition we carry on today.
Ah, the "Y-seam." It's the spot where three seams converge, forming a 'Y' shape. For machine quilters, this can be a real headache. But with English Paper Piecing? It's surprisingly simple. The paper templates inside your fabric are doing all the hard work for you.
Because the paper holds a perfect, crisp edge, you don't have to wrestle the fabric into submission. You can just pivot your pieces at the corner. Once you've stitched the first two seams of the 'Y', the third one naturally lines up, ready to be stitched. The key is to stay flexible—don't be afraid to gently bend and fold the paper templates to get your needle right where it needs to go.
Think of a Y-seam not as a corner you have to force, but as a hinge. The paper templates create a perfect pivot point, allowing you to swing the next piece into place for a flawless join every single time.
While hexagons are the undeniable star of the EPP show, they're really just the beginning. Once you start playing with other shapes, a whole new universe of quilting English paper piecing design opens up.
By mixing and matching these shapes, you can go far beyond simple repeating patterns. Try adding a ring of diamonds around a hexagon to build a star, or frame your flower blocks with triangles. The only limits are your imagination and the size of your scrap bin! Now that you’ve built your first block, you have the skills you need to tackle almost any EPP pattern out there.
As you stitch your final pieces together, your EPP panel starts to feel like a real accomplishment. This is the exciting part, where you get to transform all that patient work into a finished, polished quilt top that will last for years.
The most common question I hear from new EPP enthusiasts is, "When do I take the papers out?" The answer is simpler than you might think: you can pull out a paper template once all six of its sides are fully stitched to its neighbors. Think of the papers as scaffolding; once a piece is completely surrounded and supported, it doesn't need the paper form anymore.
To get a paper out, just reach behind your work with a pair of tweezers or the tip of a seam ripper and gently pop it free. If you thread-basted, it should come out with almost no effort. For glue-basted pieces, you might need to carefully peel the paper away from the fabric. Just be gentle—you don't want to pull on your stitches or distort the fabric.
Interestingly, our modern habit of removing papers is a relatively new one. Back in the 18th and 19th centuries, paper was a valuable resource. Quilters used what they had on hand for templates—old letters, newspapers, pages from catalogues. These papers were often left inside the quilt on purpose, adding an extra layer of warmth as they softened and broke down over time. It's a fascinating practice that inadvertently preserved little bits of history, creating what some call textile traces that tell a story.
Even the most seasoned stitcher runs into a few hiccups now and then. Don't worry about it! Most issues are simple to fix and are just part of the learning process.
Remember, the goal is progress, not perfection. Every single quilter has had to unpick a stitch or smooth out a pucker. It’s all part of the craft, not a mistake.
Once your EPP panel is complete and all the papers are out, you have a couple of great options for making it part of a larger quilt.
Taking those final steps is incredibly rewarding. By carefully removing your papers and touching up any little issues, you're ensuring your beautiful handiwork will be around to be loved and admired for a very long time.
As you get started with English Paper Piecing, you’re bound to have a few questions pop up. It happens to everyone! Here are the answers to some of the most common things quilters ask, so you can keep stitching with confidence.
For EPP, you want a thread that’s strong but also very fine, so your stitches practically disappear. Most seasoned EPP stitchers swear by a 50wt or 80wt cotton thread. Cotton is a fantastic choice because it has very little stretch and holds a knot beautifully.
While a fine polyester thread can also do the trick, the real key is matching your thread color to your fabric as closely as possible. This is your secret weapon! It helps the stitches blend right in, giving your work a polished look, even when you're just starting out.
At its heart, English Paper Piecing is a hand-sewing craft. The whole magic of it—wrapping fabric around paper and carefully whipstitching the pieces together—is really meant for the control you can only get with a needle and thread. It’s how you achieve those incredibly sharp points and perfect seams.
That said, your sewing machine definitely has a role to play! Many quilters use their machine to speed up the final assembly. You can machine-appliqué your finished EPP motif onto a background fabric or stitch on the borders. It’s a great way to marry the best of both worlds.
The real soul of EPP lies in the meditative, portable process of stitching by hand. While a machine is a huge help for finishing, the piecing itself is an art best done with a simple needle and thread.
Yes, you definitely do! Think of the paper templates as scaffolding for a building—they are essential for creating the shape, but they aren't part of the final structure. If you left them in, your quilt would be stiff, heavy, and nearly impossible to quilt through later.
The right time to remove a paper is after it's been completely stitched to its neighbors on all sides. Once it’s fully enclosed, the fabric will hold its perfect shape all on its own, and the paper can be gently pulled out.
Once your beautiful EPP project is all pieced, quilted, and bound, you can treat it just like any other handmade quilt. The best approach is to wash it on a gentle cycle with cold water and a mild detergent that's safe for colors.
For a little extra peace of mind, you can pop the quilt into a large mesh laundry bag to protect all that delicate handiwork. Tumble dry on the lowest heat setting, or better yet, lay it flat to air dry. A little gentle care will ensure your masterpiece lasts for generations.
There's something wonderfully meditative about English Paper Piecing. It's often a quiet, personal craft, filled with moments of focused creativity. But the real magic often happens when you share that passion with others, turning a solo hobby into a shared experience that weaves individual stitches into a strong community fabric.
Here at High Country Quilts, we believe connection is just as important as creation. That's why we’ve built a warm, welcoming space right here in Colorado Springs for quilters of all skill levels to gather, learn, and grow together. Whether you're just basting your first hexagon or you're deep into joining complex rosettes, you've got a place here with us.
Jumping into a new technique can feel a bit daunting, but you definitely don't have to go it alone. We host a whole range of workshops and classes designed specifically for English Paper Piecing. These sessions are all about creating a supportive, friendly environment where you can ask any question that pops into your head, master new skills, and get hands-on guidance from our seasoned instructors.
Quilting is a craft of connection—to history, to creativity, and most importantly, to each other. A simple tip shared in a workshop or a word of encouragement can be just as valuable as a perfectly sharp needle.
Our classes run the gamut, covering everything from the fundamentals of basting and whipstitching to more advanced pattern construction. It's the perfect chance to meet other EPP lovers, get a peek at what they're working on, and spark some inspiration for your next project.
Beyond the classes, our shop is a quilter's paradise. We've spent years carefully curating a beautiful selection of fabrics, from bold, modern collections to timeless reproduction prints. You’ll also find all the specialized tools that make EPP such a pleasure:
Don’t just read about quilting—come live it with us. We’d love for you to become part of our local quilting family at High Country Quilts, where your passion for stitching connects you with a vibrant community.
Ready to find your creative community and all the supplies you need? Visit us at High Country Quilts online or stop by the shop to explore our classes, fabrics, and EPP tools.
At High Country Quilts we care deeply about community. With our experiences in retail, we know that a store is not only a place to shop but also a place for the community to gather and share. During this busy...

Hi! We’re Adam and Renee Wheaton, the new owners of High Country Quilts! For more than 40 years, we’ve owned and operated vacuum and sewing businesses. Following in Renee’s father’s footsteps after he retired from All Discount Vacuum and Sewing in Colorado...


Leave a comment