

We Love Our Quilting Community
At High Country Quilts we care deeply about community. With our experiences in retail, we know that a store is not only a place to shop but also a place for the community to gather and share. During this busy...


The pineapple quilt pattern is one of those designs that just stops you in your tracks. It’s got this wonderfully intricate, layered look that perfectly captures the texture of a real pineapple. Think of it as a Log Cabin block that decided to get a little fancy. You still start with a square in the middle, but then you build out with rounds of fabric strips that create a stunning radiating effect. It's a fantastic way to make contrasting colors really pop.
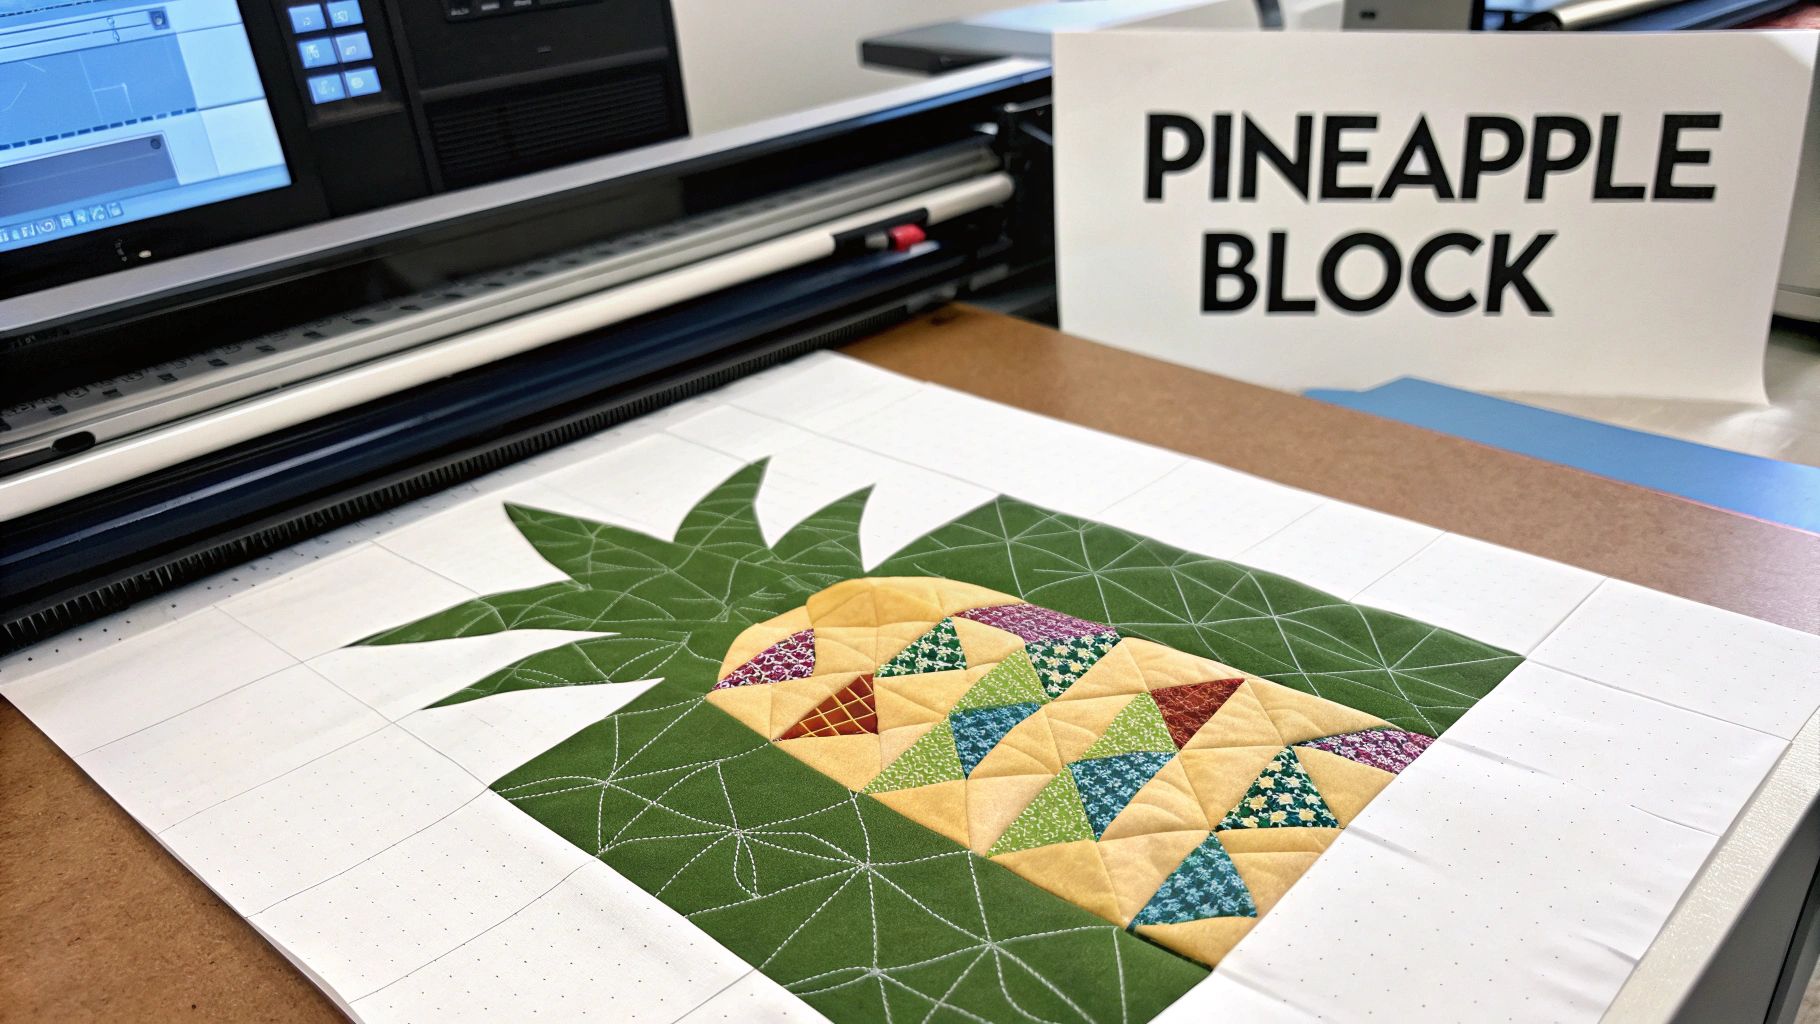
There's a special kind of magic to the pineapple quilt pattern. At a glance, it looks incredibly complex, almost intimidating. But once you sit down and start sewing, you discover a rhythmic, deeply satisfying process that quilters at any stage of their journey can get lost in. The dynamic lines and the potential for seriously dramatic color play make it a go-to for anyone wanting to create a showstopper.
It’s more than just a pretty design, though. The pineapple block is steeped in history. The pattern really took off in American quilting back in the 19th century as a clever evolution of the Log Cabin. This happened right when pineapples themselves became a huge cultural symbol of warmth, welcome, and hospitality in homes. If you're curious, you can see some incredible historical examples over at The Metropolitan Museum of Art's collection. This history adds such a beautiful layer of meaning to a pineapple quilt, making it the perfect housewarming gift or a special touch for a guest room.
So, what is it that makes this pattern a perennial favorite in the quilting world? From my experience, it boils down to a few key things:
The real beauty of the pineapple block is how it turns simple fabric strips into something so lively and intricate. It's a perfect example of how basic quilting skills can build something truly extraordinary.
When you get down to it, there are two main ways to piece a pineapple quilt block, and each has its own vibe.
Your first route is traditional strip piecing. This is where you sew your fabric strips around the center square, press them open, and then trim the block at an angle before sewing on the next round. It has a more free-form, almost improvisational feel to it.
The other popular method is foundation paper piecing (FPP). With FPP, you're sewing your fabric directly onto a printed paper pattern. This is the secret to getting those razor-sharp points and perfectly sized blocks every single time. It’s the method of choice for anyone who, like me, loves precision. We’ll walk through both approaches in this guide so you can find your favorite.
Every great quilt starts with a little bit of prep work. Before you dive into cutting and sewing, let’s talk about setting yourself up for success. Taking a few moments to gather the right supplies not only makes the process easier, but I find it’s also a great way to get excited about the project ahead. This is where you build the foundation for the beautiful pineapple quilt you're about to create.
Choosing your fabrics is easily the best part of starting a new quilt. The pineapple block is all about high contrast—it’s what makes that iconic design really sing. You’ll need a good mix of both light and dark fabrics to create that stunning visual pop. Whether you’re planning a classic two-color quilt or a wild, scrappy version, the core idea is the same.
Want a great shortcut? Precuts are your best friend here. Jelly rolls, with their coordinated 2.5-inch strips, or fat quarter bundles take the guesswork out of matching prints and ensure everything plays together nicely.
You definitely don't need a studio full of gadgets, but a few key tools are non-negotiable if you want the crisp, clean lines that make a pineapple block so striking.
My Go-To Tip: If you're sewing on a BERNINA machine from our shop, this is the perfect time to use the Dual Feed function. If you don't have Dual Feed, a walking foot works just as well. It gives you incredible control when sewing through multiple layers and tricky bias edges, which helps prevent any stretching or warping in your blocks.
It’s interesting how fabric availability has shaped quilting history. Back in the 19th century, Log Cabin and pineapple quilts really took off when the "calico craze" made colorful printed cottons widely available and affordable. You can actually read more about this history over on AccuQuilt's blog. It's a great reminder that the 100% cotton quilting prints we use today are the perfect modern choice for this timeless design.
For your pineapple quilt, you'll need to pull together a few key components:
Figuring out how much fabric you need can sometimes feel like a bit of a puzzle. To help you out, I've put together a chart with some solid estimates to get you started.
These estimates are based on a quilt made with standard 12-inch finished pineapple blocks. Keep in mind that your actual yardage might vary slightly depending on your specific pattern or the width of your strips.
| Quilt Size (Approx.) | Number of Blocks | Light Fabric (Yards) | Dark Fabric (Yards) | Binding (Yards) | Backing (Yards) |
|---|---|---|---|---|---|
| Crib (36" x 48") | 12 | 2 | 2 | ½ | 3 |
| Throw (60" x 72") | 30 | 4 | 4 | ¾ | 5.5 |
| Queen (84" x 96") | 56 | 7 | 7 | 1 | 8 |
| King (108" x 96") | 72 | 9 | 9 | 1 | 9 |
As a rule of thumb, it’s always smart to buy a little extra fabric—a fat quarter or so—just to be safe. It’s much better to have a bit leftover than to run out just before you finish
Alright, let's get to the fun part—turning that beautiful pile of fabric into stunning pineapple quilt blocks. This is where the magic really happens, and you have two fantastic ways to get there.
You can go with traditional strip piecing, which has a wonderful, rhythmic flow to it. Or, you can try foundation paper piecing (FPP), which is the absolute best friend of anyone who loves perfect, sharp points. Neither is "better" than the other; they just offer different journeys to the same gorgeous destination. It’s all about what you enjoy.
There’s a reason this is the classic approach. It feels intuitive and lets you get into a nice, relaxed rhythm. The whole idea is to sew fabric strips around a central square, press them open, trim the block, and then repeat.
The secret to success with this method is consistency. Your cutting has to be accurate right from the get-go. That initial center square is your foundation, and all your strips must be a uniform width. As you sew, be meticulous with your pressing. I’m a fan of pressing seams open to keep the block flat, but pressing to one side works too, as long as you stick with it.
After adding each round of strips, you'll trim the block. This is the crucial step that creates that signature pineapple look. A specialty pineapple trim ruler is a game-changer here; it makes the process a breeze and ensures your block stays square and your points stay sharp.
If you’re the kind of quilter who lives for precision, you are going to love foundation paper piecing. With FPP, you sew your fabric directly onto a printed paper pattern. Because you’re literally sewing on the lines, you get flawless accuracy every single time. It completely takes the guesswork out of angles and trimming.
To start, you’ll want to shorten your stitch length to about 1.5 or 1.8. This creates more perforations in the paper, making it so much easier to tear away cleanly at the end.
You’ll place your first fabric piece (the center) on the unprinted side of the paper, making sure it completely covers the area marked "1". Next, you place the second fabric piece on top, right sides together, and stitch along the line between sections 1 and 2. You just keep going like this, following the numbers on the pattern until your block is complete.
My best piece of advice for FPP is to trim your seam allowances to a scant ¼ inch after sewing each seam. It’s a simple little step, but it keeps your block from getting bulky and prevents fabric from getting caught where it shouldn't.
This flowchart shows the fundamental workflow for any quilt project, from picking fabrics to using the right tools for the job.
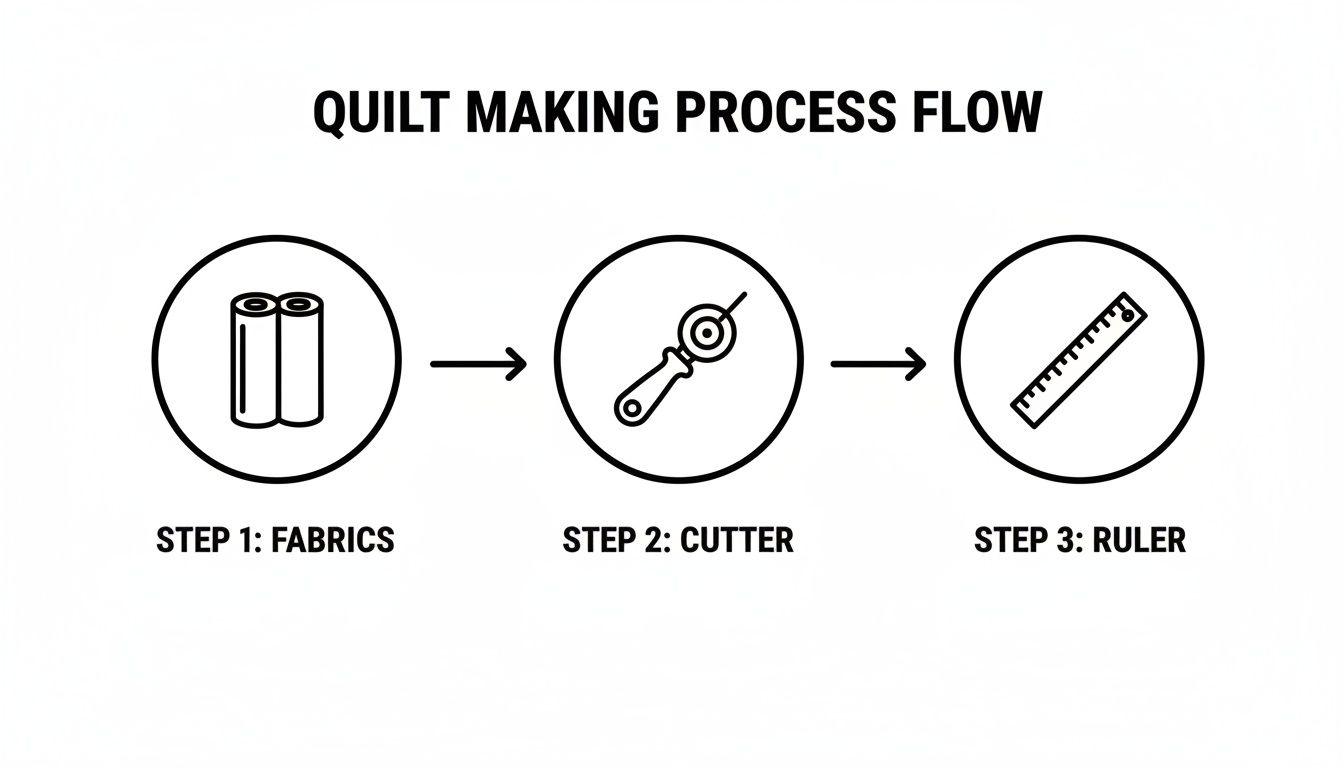
It’s a great reminder that no matter which piecing method you fall in love with, success always starts with quality materials and precise tools like a good rotary cutter and ruler.
No matter which path you take, your pressing and trimming habits are what will make or break your pineapple blocks. Seriously, these two steps are just as important as the sewing itself.
Focusing on these details will pay off in spades. You’ll end up with sharp, flat, and perfectly square pineapple blocks that will fit together like a dream when you assemble your quilt top.
You've done the hard part. That stack of perfectly pieced pineapple blocks is sitting there, just begging to become a quilt. This is my favorite part of the process—where the individual little masterpieces join forces to create something truly spectacular. Think of it less as assembly and more as the final act of design.
Before you even think about touching your sewing machine, lay everything out. A design wall is perfect for this, but a clean floor works just as well. This is your no-commitment playground. Arrange your blocks, step way back (I mean, all the way across the room), and just look. Squint your eyes. You’ll be amazed at how a simple swap of two blocks can change the whole visual flow of the quilt.
How you orient your pineapple blocks can completely transform the final quilt. There’s no right or wrong answer, just different effects.
A straight set is the most direct approach, with blocks aligned in a simple grid. Don't mistake simple for boring, though! This layout creates powerful, graphic lines that radiate across the quilt, giving it incredible energy and a modern feel.
If you're after a more traditional or dynamic look, consider an on-point layout. By turning each block 45 degrees, you create a cascade of diamonds and stars. It takes a little extra math and some setting triangles to fill out the edges, but the beautiful secondary patterns that emerge are often more than worth the effort.
This is where all that time you spent picking fabrics pays off. As you play with your layout, watch how the colors in neighboring blocks talk to each other.
Here’s a trick I swear by: Once you have a layout you like, snap a picture of it with your phone. Looking at the design as a small thumbnail helps your brain see the overall composition and color balance much more clearly than staring at it full-size.
Sashing, the fabric strips you place between blocks, is more than just a spacer. It can be a quiet frame that lets each intricate pineapple block shine, or it can be a bold pop of color that ties the whole design together. For a busy pattern like a pineapple quilt, sashing gives the eye a place to rest and keeps the design from feeling too overwhelming.
For a truly crisp, professional look, I highly recommend adding cornerstones. These are just little squares of fabric that sit at the intersection of the sashing strips. Not only do they add a lovely design detail, but they also make lining up your rows a breeze. It’s a simple trick that helps you avoid mismatched seams and ensures everything joins together perfectly.
Once you’ve settled on the perfect layout, it's time to sew. Work in rows, pressing your seams consistently as you go (I'm a press-to-the-side person, but pressing open works too). The most important thing when joining the rows is to pin your intersections carefully. Take the time to nest those seams where the block corners meet. This is the secret to getting all those points to match up beautifully for a polished quilt top you'll be incredibly proud of.
Once you've got the hang of the basic pineapple block, the real fun begins. That classic, high-contrast block is a stunner, no doubt, but think of it as just the starting point. The pattern is a perfect canvas for putting your own creative spin on things, letting you play with color, scale, and fabric to make a quilt that’s all you.
This is where you can let your fabric stash and your imagination run wild.

One of my all-time favorite versions is the scrappy pineapple quilt. If you have a scrap bin that's overflowing (and who doesn't?), this is your project. Instead of limiting yourself to a few carefully chosen fabrics, you get to dive into your collection and pull out all those beloved leftovers.
The key to making a scrappy pineapple quilt work is to keep a strong value difference between your light and dark "rounds." This is what makes the pineapple design pop, even with a riot of different prints. I find it easiest to just sort my scraps into two piles—"lights" and "darks." Don't overthink it! This way, the iconic pattern shines through the beautiful, planned chaos.
A scrappy pineapple quilt is like a visual diary of your quilting journey. Every little strip tells a story of a past project, turning your quilt into a beautiful scrapbook you can wrap up in.
Stepping away from the standard light-and-dark formula can completely change the vibe of your quilt. Color is such a powerful tool in quilting, and this block is a fantastic playground for it.
Here are a few ideas I've seen work beautifully:
Pineapple quilts don't have to be bed-sized! Shrinking the block down opens up a whole new world of fun, quick projects. Mini quilts are a fantastic way to try out a new color palette or hone your piecing skills without the commitment of a huge quilt.
When you scale the block down to, say, a finished 6-inch square, you can create intricate-looking pieces that are perfect for gifts or for decorating your own space.
A few mini-block project ideas:
Whichever path you take, the most important thing is to have fun and make the pattern your own. Let your creativity be your guide and don’t be shy about trying something new. The quilt you end up with will be a wonderful reflection of your personal style.
Let's be honest, even after years of quilting, some patterns can throw you a curveball. The pineapple block, with all its beautiful complexity, is definitely one of them. If you find your blocks are looking a little warped or just won't lie flat, the first two things I always check are my cutting and my pressing.
It's amazing how a tiny inaccuracy in your first few strips can snowball. With each round you add, that small error gets bigger, and suddenly you have a block that's doing its own thing. This is why spending an extra minute on precise, consistent cutting from the very beginning will save you a world of headaches later.
Pressing is the other half of the equation. I can't stress this enough: use a hot, dry iron and be consistent. Whether you press your seams open or to one side, stick with it. This simple habit keeps the fabric stable and prevents it from stretching out of shape, which is especially important on all those bias edges you'll find in a pineapple block.
Ah, the dreaded disappearing point. It’s one of the most common frustrations when you're aiming for that crisp, perfect look. When your points get buried in the seam, it almost always comes down to your seam allowance.
This is where a scant ¼-inch seam becomes your secret weapon. By sewing just a thread's width shy of a true quarter-inch, you give yourself that little bit of breathing room. It's just enough to make sure the point isn't lost when you press the seam.
My personal technique is what I call the "sew, flip, and check" method. After I stitch on a new strip, I quickly finger-press it open to take a peek. This lets me see if my point is perfect before I make it permanent with the iron.
And of course, there's trimming. If you're using traditional piecing methods, trimming after every single round is non-negotiable. It might feel repetitive, but it's the only way to ensure your block stays square and your edges stay true, protecting those beautiful points as you build your design.
When you first lay eyes on a pineapple quilt, it's easy to be a little intimidated by all those intricate points and layers. I get it! But before you talk yourself out of trying one, let's clear up a few common questions I hear all the time.
A lot of quilters look at the finished block and immediately ask if it's a difficult pattern. The honest answer? It's more about repetition and a bit of patience than any truly complex skill. If you can sew a straight line and are comfortable with trimming, you've got this. The magic is in the process, not in some secret, advanced technique.
This is probably the number one question I get asked. Can you make a pineapple block with your standard quilting rulers? Yes, you absolutely can. But a dedicated pineapple trim tool makes the whole process significantly easier and a whole lot more accurate.
These specialty rulers have markings designed specifically for trimming each round of "logs" perfectly. This ensures your block stays square and those beautiful points stay sharp without any guesswork. I always tell people to think of it as a small investment that saves a world of frustration down the road.
Honestly, if you're someone who loves precision, a good pineapple ruler is a game-changer. It takes the most fiddly step—the trimming—and makes it foolproof, letting you get into that lovely, rhythmic flow of piecing.
So, what’s the best way to actually put the block together? You'll see patterns for both traditional strip piecing and foundation paper piecing (FPP), and quilters often wonder which to choose.
Here's my take on it:
There’s no right or wrong answer. The best method is simply the one that you’ll have the most fun with.
Feeling ready to dive in? Here at High Country Quilts, we've got all the specialty rulers, gorgeous fabrics, and friendly advice to get you started on your own pineapple quilt. Come explore our collection and get inspired today!
At High Country Quilts we care deeply about community. With our experiences in retail, we know that a store is not only a place to shop but also a place for the community to gather and share. During this busy...

Hi! We’re Adam and Renee Wheaton, the new owners of High Country Quilts! For more than 40 years, we’ve owned and operated vacuum and sewing businesses. Following in Renee’s father’s footsteps after he retired from All Discount Vacuum and Sewing in Colorado...


Leave a comment