

We Love Our Quilting Community
At High Country Quilts we care deeply about community. With our experiences in retail, we know that a store is not only a place to shop but also a place for the community to gather and share. During this busy...


There's something truly special about starting a quilted bag project. It's more than just a sewing task; it's a chance to pour your creativity into something functional and beautiful. This guide is here to walk you through using patterns for quilted bags, whether you're dreaming of a big, roomy tote or a sleek little crossbody.
A quilted bag is so much more than an accessory—it's a piece of you. Unlike something you'd grab off a store shelf, a bag you make yourself tells a story with every stitch and fabric choice. You get to transform gorgeous quilting cottons into a piece of practical art you can carry every day. Think of this guide as a friend in your sewing room, here to give you the confidence to turn that pile of fabric into a bag you’ll absolutely love.
From totes to crossbody bags, their popularity isn't slowing down. It's interesting to see how interest follows the seasons. For example, searches for 'quilted tote bags' usually spike in May—right when we're all looking for bigger bags for summer outings. Crossbody styles, on the other hand, tend to get more popular around the holidays when we need something hands-free and convenient.
I’ll walk you through the whole process, from start to finish, breaking it down into manageable pieces that work for any skill level. By the end, you'll have everything you need to bring your vision to life.
Here's a peek at what we'll be diving into:
Creating a quilted bag is one of the most rewarding projects you can tackle. It’s the perfect blend of practical sewing skills and pure creative fun, and the right pattern is the key to making something that’s both beautiful and completely you.
Whether this is your very first bag or you’ve got a closet full of handmade totes, my goal is to give you a clear path forward. For more great ideas to sharpen your skills, feel free to browse our collection of https://hcquilts.com/blogs/tips-and-tricks.
Alright, let's get started on making something wonderful.
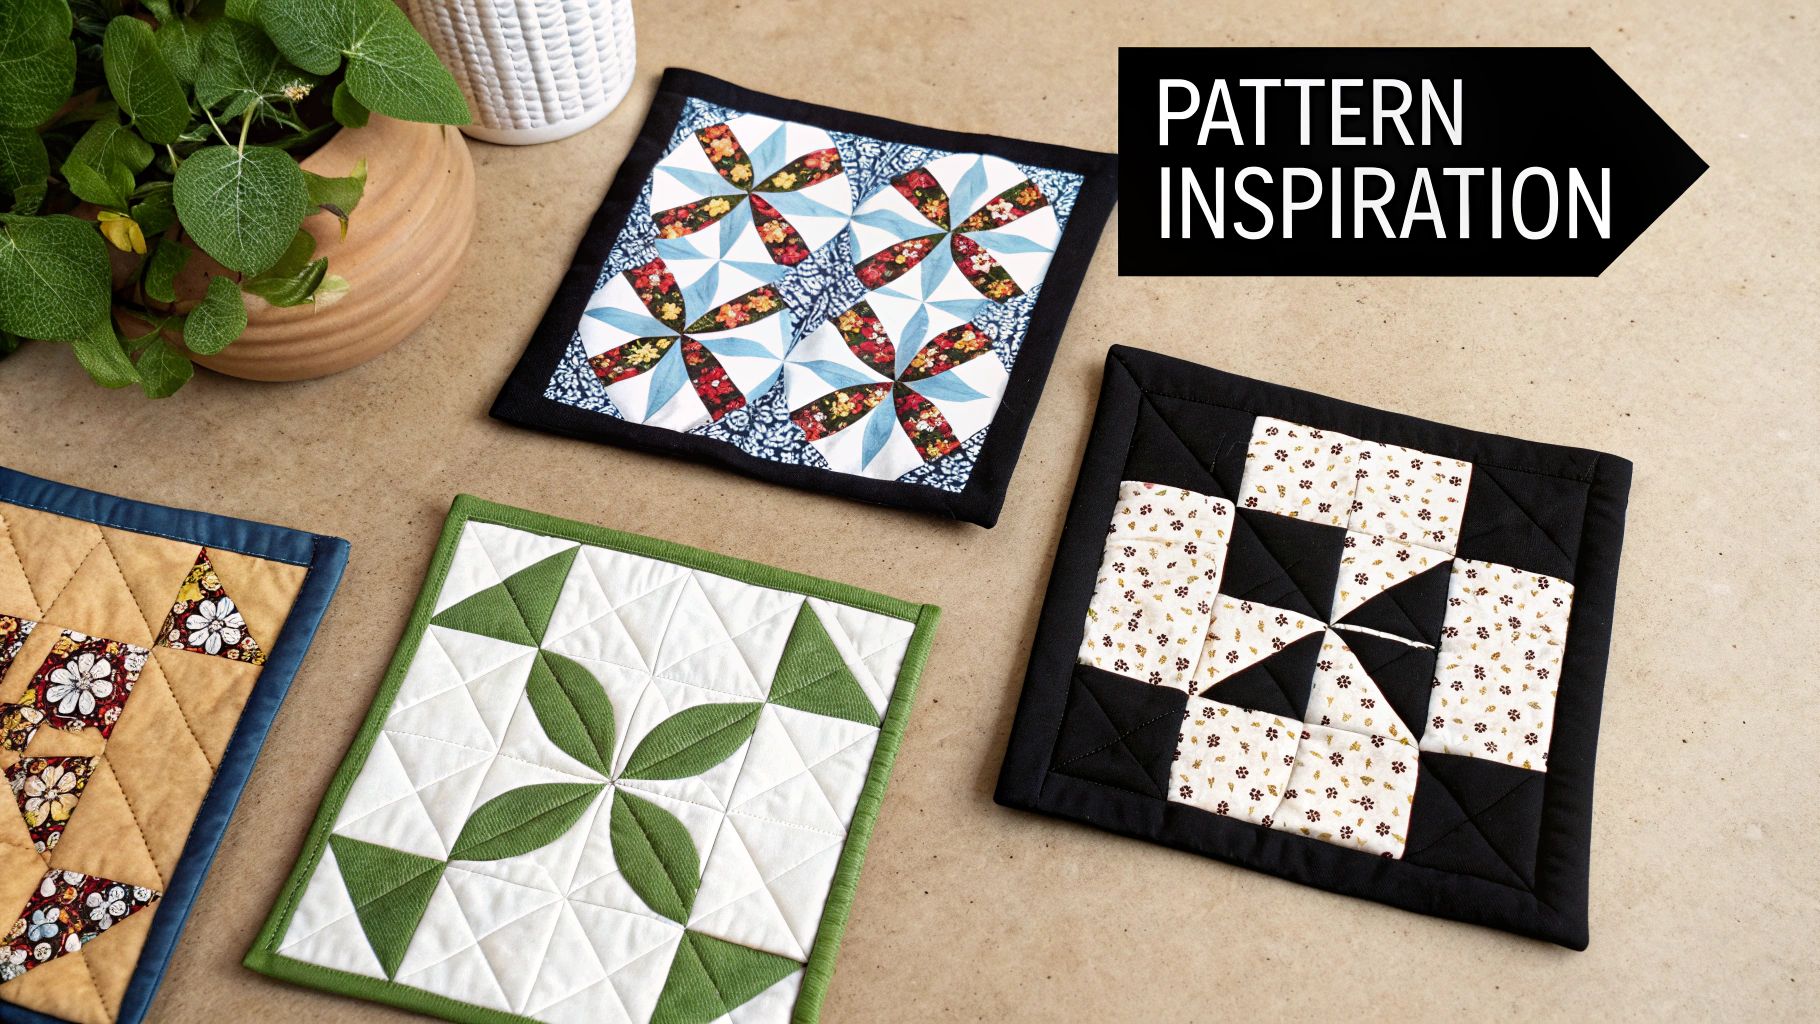
A fantastic quilted bag all starts with the right pattern. Think of it as your project's roadmap—it can be the difference between a fun, rewarding experience and a frustrating one. We've all been there: biting off more than we can chew with a complex design. Taking a moment to find a pattern that truly fits your skills is one of the best things you can do for yourself.
You’ll find a huge world of patterns for quilted bags out there, from free downloads by indie designers to glossy printed booklets from big-name brands. Each one has its own vibe. Digital PDF patterns are great because you get them instantly and they're often cheaper, but you will have to print and tape the pages together. On the other hand, traditional paper patterns are ready to go straight out of the envelope, which is a convenience many of us appreciate.
Ultimately, your skill level is the most important piece of the puzzle. Be really honest with yourself about what you’re ready to handle. Most patterns will give you a heads-up on the difficulty, with labels like "Beginner Friendly" or "Intermediate."
Before you even think about buying, take a good look at the pattern's information. For paper patterns, this is usually on the back of the envelope; for PDFs, it's in the online description. This little section is a goldmine that tells you exactly what you're getting into.
Here’s what you should be looking for:
A well-written pattern is like having a patient teacher sitting next to you. Look for one with clear, step-by-step instructions and plenty of diagrams or photos. A confusing pattern can trip up even a seasoned pro, so it’s always worth it to choose one known for its clarity.
So, how do you really know if a pattern is right for you? A beginner-friendly pattern will stick to simple shapes, minimal hardware, and straightforward construction. Think simple quilted rectangles that come together to form a basic tote—these are perfect for getting your feet wet. They usually steer clear of tricky elements like recessed zippers or a ton of interior pockets.
As you move into intermediate or advanced territory, you'll start seeing more complex techniques:
If you’re just starting out, please do yourself a favor and pick a simple design. It’s the best way to build your confidence. You can always add your own flair to a basic pattern! A fantastic way to make it uniquely yours is to add a custom touch, and you can even find a wonderful My Label Pattern to give your creation a truly professional finish.
Once you’ve got a few bags under your belt, you can start tackling those more intricate designs. The real key is to choose a project that challenges you just enough to be fun without becoming a source of stress.
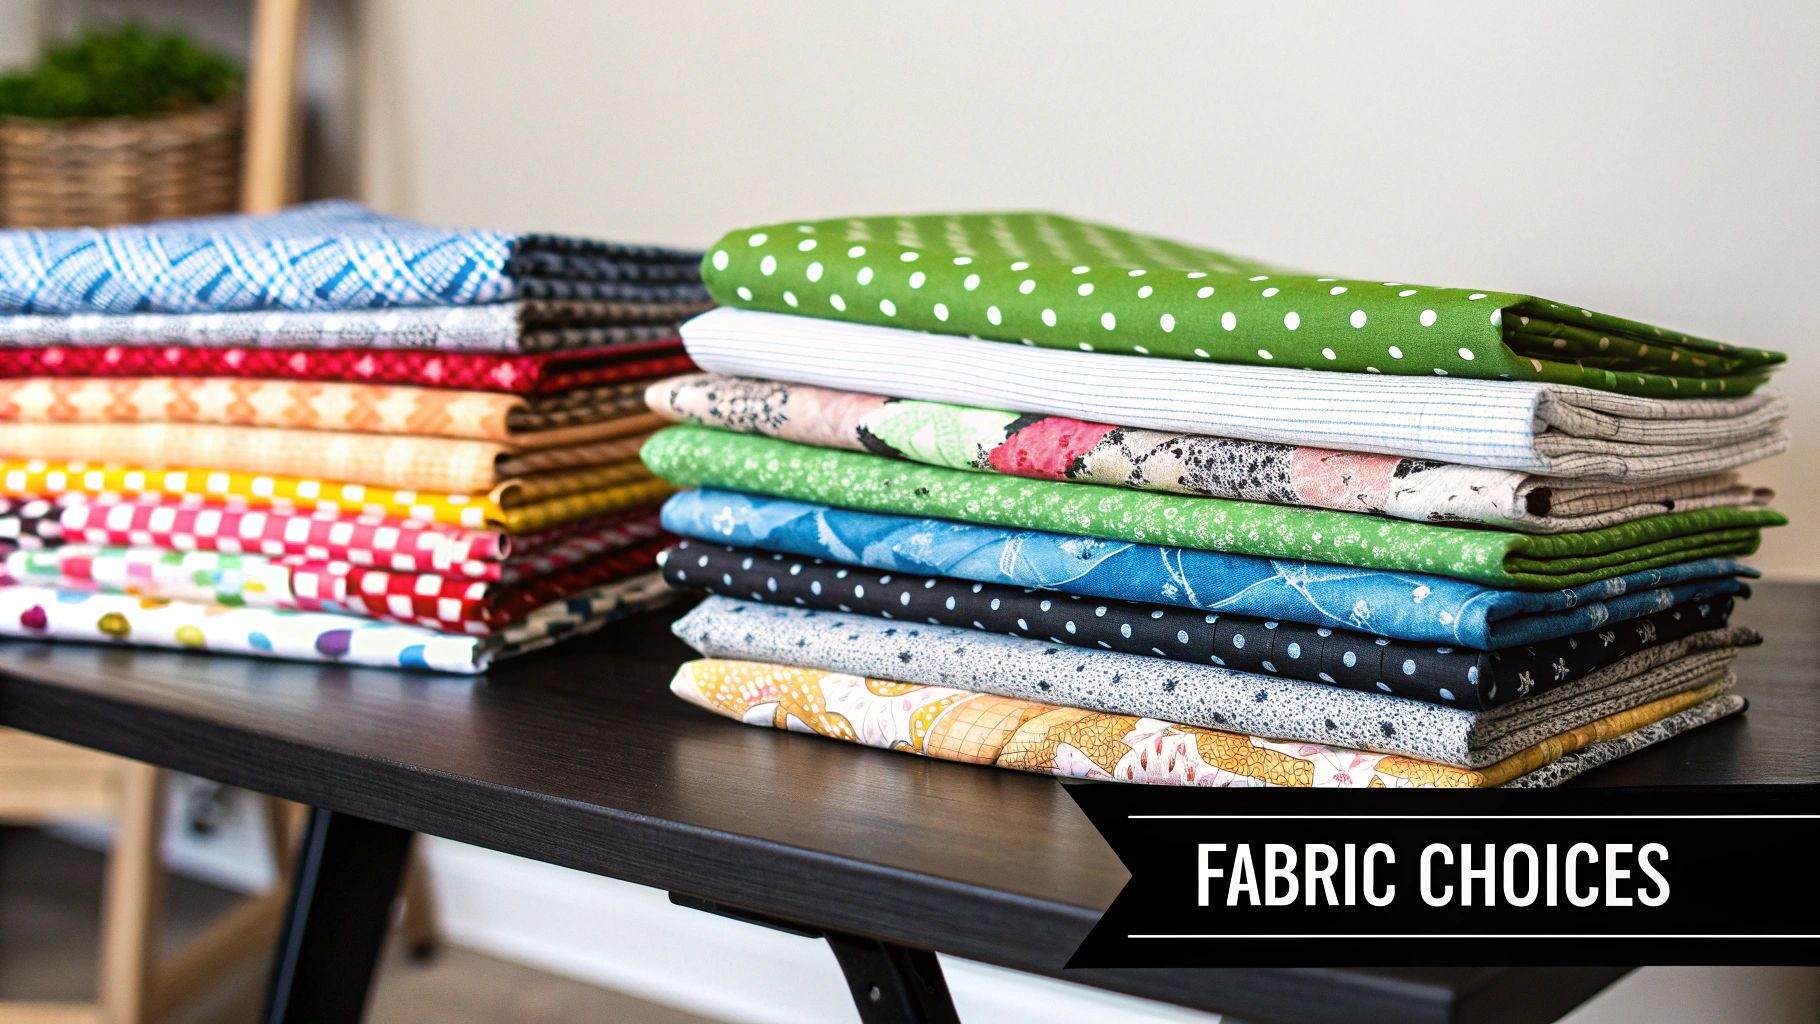
This is where the real fun begins. Picking out your fabrics and tools is what turns a pattern on a page into your unique creation. Walking into a fabric store can be a sensory overload, but if you go in with a plan, you can confidently choose the perfect ingredients for a beautiful and sturdy quilted bag.
The fabric, batting, and hardware you select will define the bag's personality and durability. Think of them as the foundation of your project. Making smart choices here means you'll end up with a bag that not only looks amazing but can handle whatever you throw at it (or in it).
The fabric for your bag's exterior is what everyone will see first. It sets the tone. Quilting cotton is the go-to for most of us, and for good reason—the color and print options are endless, it's a dream to sew with, and it holds a press beautifully.
If you're making something that needs to be a little more heavy-duty, like a market tote or a travel bag, don't be afraid to use tougher materials. Canvas, denim, or even a nice corduroy can make for a really robust and stylish exterior.
Don't skimp on the lining! It might be on the inside, but a quality lining is crucial. A flimsy fabric will wear out quickly and won't contribute to the bag's structure. I like to use high-quality cotton or a lightweight canvas. It's also a fantastic opportunity to use a fun, contrasting print that makes you smile every time you open your bag.
A well-structured bag relies on more than just fabric. The right interfacing or stabilizer is crucial for giving your bag body and preventing it from flopping over. This is especially true for totes and duffels that need to maintain their shape.
For adding that structure without creating too much bulk, a lightweight fusible interfacing is your best friend. Products like HeatnBond Light are perfect for giving your fabric panels just the right amount of support before you start quilting them.
To help you decide, here’s a quick guide to some of the most common materials you’ll encounter when making a quilted bag.
| Material | Best Use For | Key Characteristics | Pro Tip |
|---|---|---|---|
| Quilting Cotton | Exterior, Lining, Pockets | Lightweight, breathable, vast print selection, easy to sew. | Pre-wash your cottons to prevent shrinking after your bag is finished. |
| Canvas/Denim | Exterior, Straps, Bottom Panel | Highly durable, adds structure, great for heavy-use bags. | Use a size 90/14 or 100/16 denim needle to handle the thickness. |
| Cotton Batting | Bag Body | Soft, natural fiber, creates a classic crinkled quilt look after washing. | For a flatter, modern look, use a low-loft cotton batting. |
| Fusible Fleece | Bag Body | Adds soft structure and padding, fuses directly to fabric, easy to quilt. | Fuse it to your exterior fabric before quilting to make the process smoother. |
| Fusible Interfacing | Lining, Pockets, Small Pieces | Adds crispness and stability without bulk, prevents stretching. | Use a woven fusible interfacing for a fabric-like feel that still adds support. |
Choosing the right combination of these materials is what gives your bag its professional finish and long-lasting structure. Don't be afraid to mix and match to get the exact look and feel you want.
You could probably make a bag with just a needle and thread, but a few key tools will make the process infinitely more enjoyable and give you a far more professional result. I absolutely can’t live without these in my studio.
Beyond just having the right tools, keeping them organized makes a world of difference. When your workspace is tidy, your project just seems to flow better. If your sewing room could use a little help, it’s worth checking out some tips on how to organize your craft supplies to make your creative time more efficient.
The hardware is like the jewelry for your bag. Zippers, magnetic snaps, D-rings, and strap sliders aren't just functional—they provide a polished, professional finish. This is one area where you really don't want to cut corners. A sticky, cheap zipper can absolutely ruin a bag you've spent hours making.
Good hardware signals quality and style. In a bag market valued at over USD 183.2 billion globally, those little details are what make an accessory stand out. High-quality hardware helps your handmade creation look every bit as good as a high-end designer bag.
Alright, this is where the magic happens. All that time you spent picking the perfect pattern, finding just the right fabrics, and getting your tools in order is about to pay off. Putting the bag together is a step-by-step process, but if you break it down into smaller stages, you'll find it incredibly satisfying. We're about to turn those flat pieces of fabric into a gorgeous, finished bag.
The first few steps are all about the foundation. Getting things right here will save you a world of frustration later, so don't rush. Just enjoy the process of seeing the different parts of your bag start to come together. Think precision over speed.
Before you can even think about construction, you have to create the core material for your bag: the quilted panels. This means making a "quilt sandwich" by layering your exterior fabric, batting, and lining. Once they’re layered up, you’ll quilt them together.
The quilting itself is a fantastic place to get creative. You could go with simple straight lines, a classic crosshatch grid, or even try your hand at free-motion quilting for a more unique, organic texture. I can't recommend a walking foot enough for this part—it's an absolute game-changer. It pulls all three layers through your machine evenly, which is key to preventing those annoying puckers and shifts. The result is a beautifully flat, professional-looking panel.
A quick tip: Those quilting lines aren't just for looks. They're actually fusing the layers together, giving the finished bag its strength and structure. A panel with more dense quilting will feel much stiffer and more durable than one with just a few lines.
This visual guide breaks down these initial assembly stages perfectly.
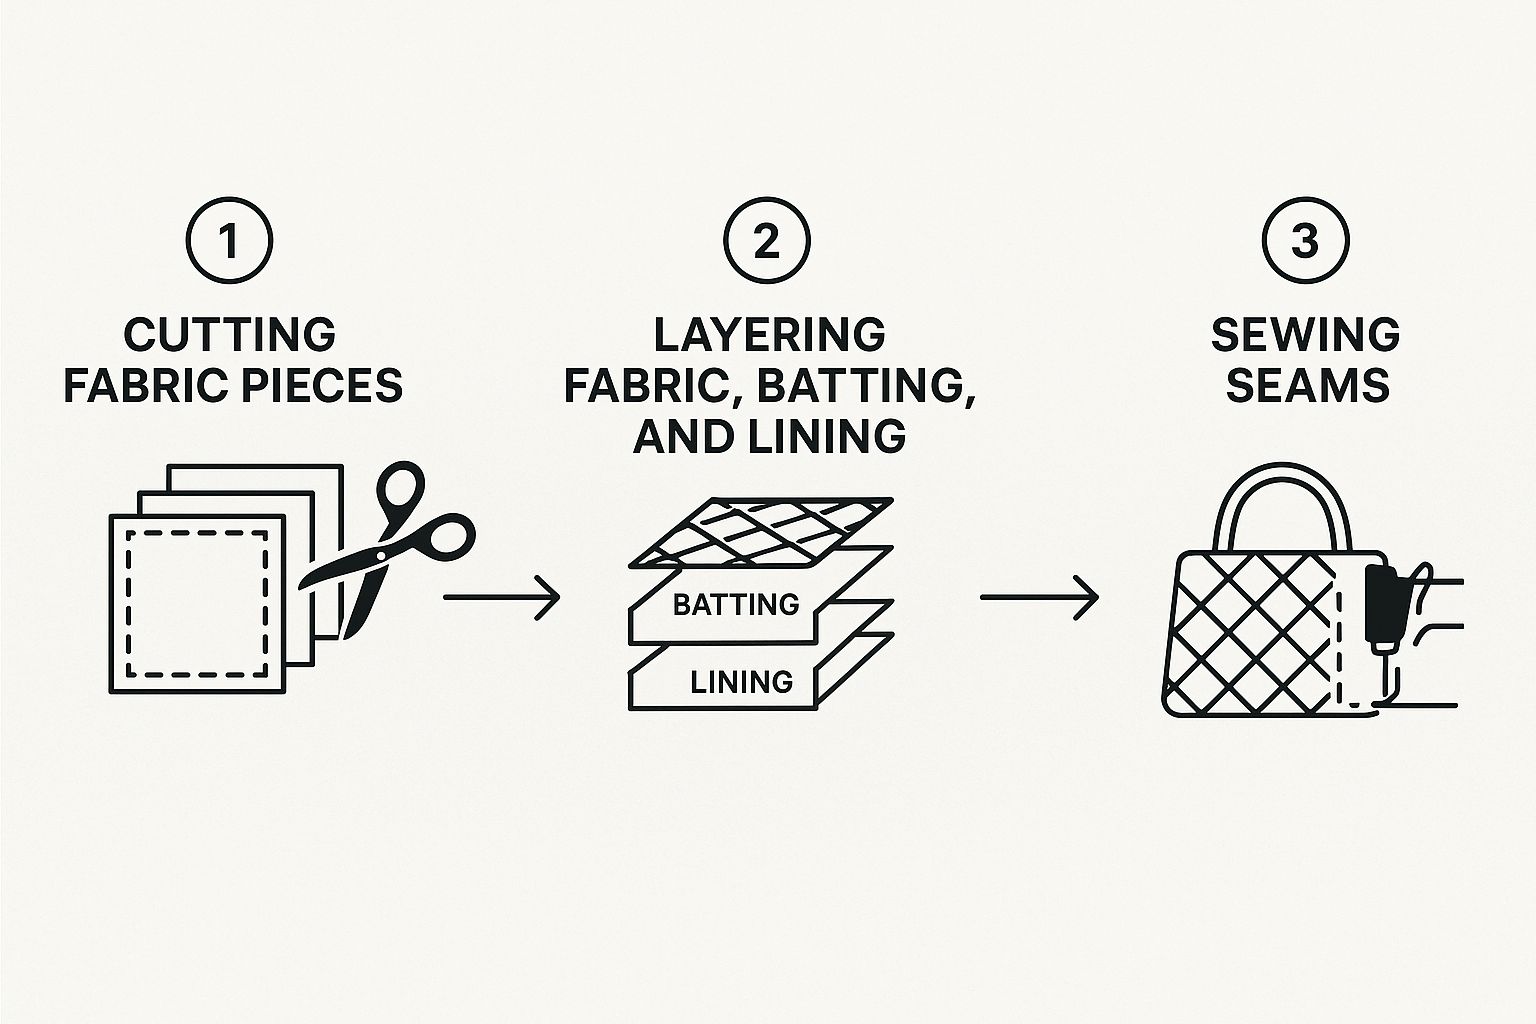
Seeing the process laid out like this—from cutting with precision to layering and finally sewing—really helps demystify the construction and shows how each step builds on the one before it.
Now that you have your panels quilted and trimmed to the exact size from your pattern, it’s time to start building the bag itself. You'll usually begin by sewing the main body panels together. Pay very close attention to the seam allowance your pattern calls for. For bags, it's often a beefier ½ inch to make sure the seams are strong enough to handle daily wear and tear.
Many quilted bag patterns use gussets or boxed corners to create that lovely depth and structure. Boxing a corner sounds a lot more intimidating than it is, I promise. It’s a simple technique where you pinch a corner flat, forming a triangle, and then sew a straight line across it. Just like that, you’ve created a flat bottom for your bag.
This is also the best time to attach your straps or handle tabs to the exterior. Trust me, it’s so much easier to do this while the bag is still flat instead of trying to wrestle with it once it’s all sewn together. Be sure to reinforce the stitching where you attach the straps; these are major stress points and need to be extra secure.
Adding the zipper and dropping in the lining are often the last big steps, and a neat job here is what separates a homemade bag from a truly handmade one. Zippers can be tricky, but a zipper foot makes all the difference. This little attachment lets your needle get right up against the zipper teeth, giving you a super clean and secure stitch. If you're looking for a tool that makes this job a breeze, a specialized Zipper Foot is a worthy investment.
The lining is usually put together the exact same way as the outer bag, just without the batting and quilting. Once you have both the exterior and the lining "bags" finished, you’ll pop the lining inside the exterior, with the wrong sides of the fabric facing each other.
The final touch is finishing that top raw edge. Typically, this means folding the seam allowances inward and topstitching all the way around the opening. Go slow and steady on this final seam—it’s the most visible one on the whole bag, and a straight, even line here is the perfect professional finish.
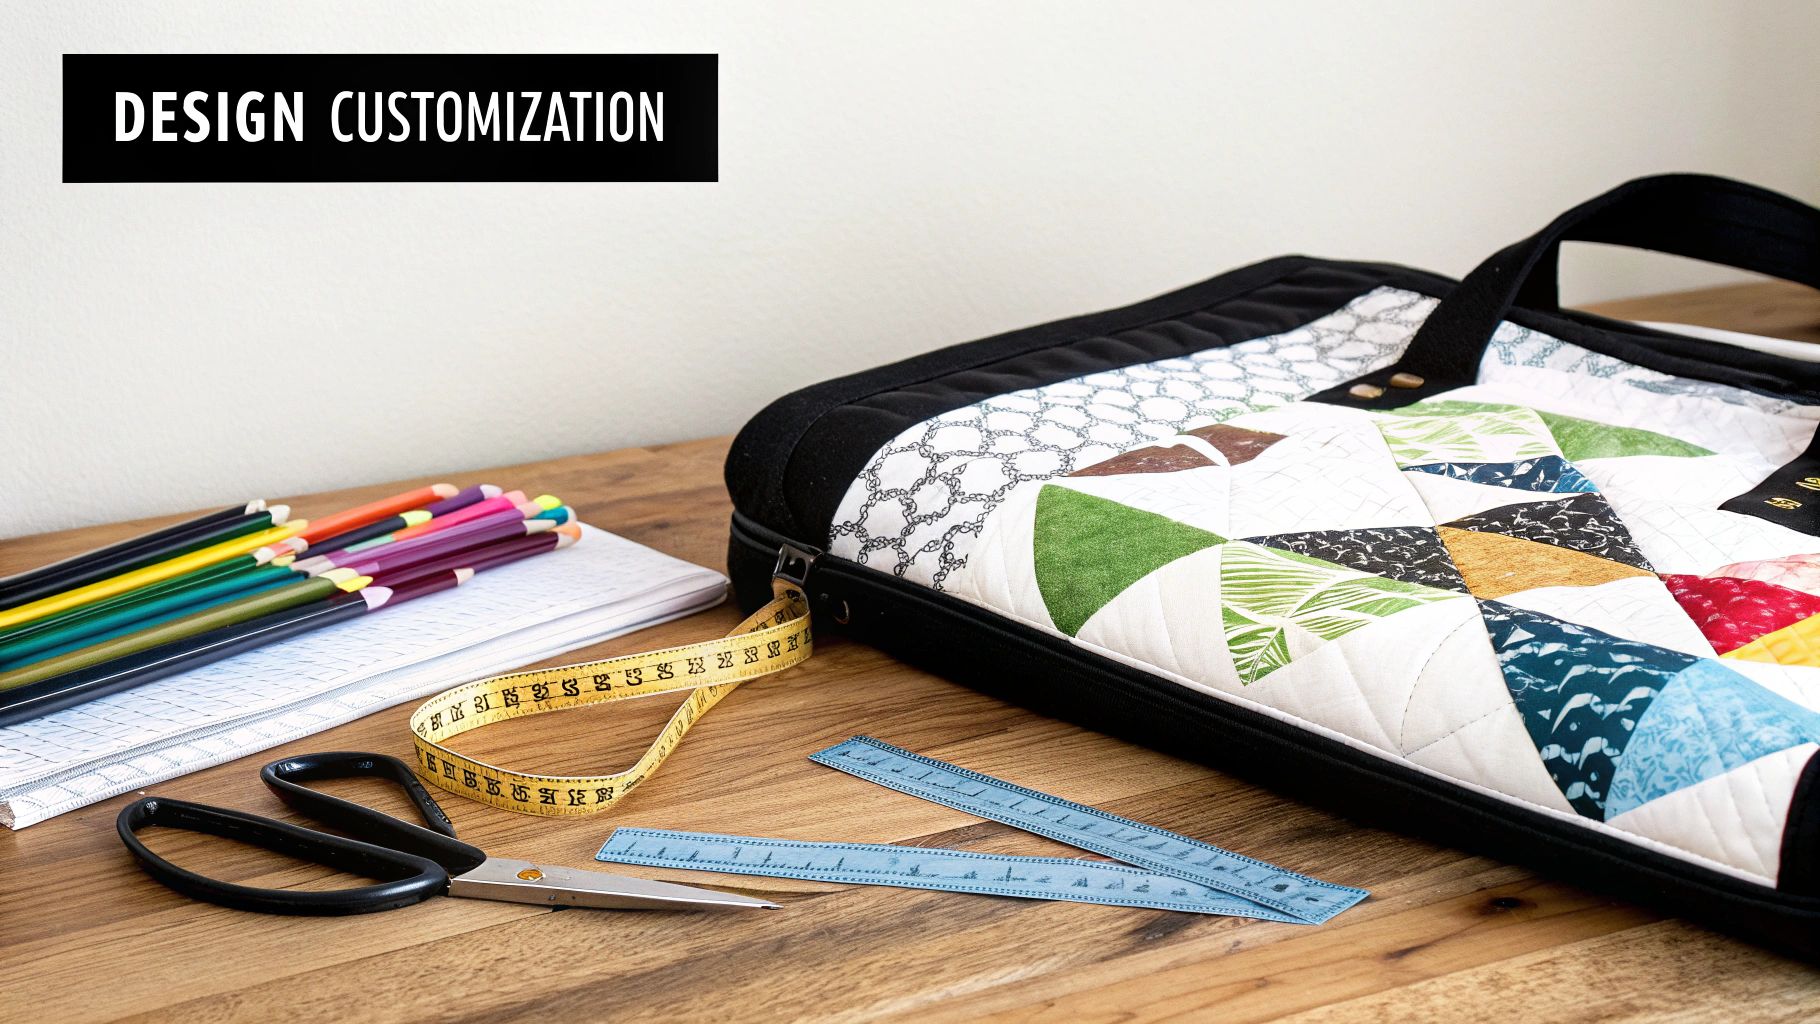
A great pattern is just the beginning—it’s the launchpad, not the destination. The real joy of making your own bags comes from putting your personal stamp on the design. I always tell my students to think of patterns for quilted bags as a flexible blueprint, just waiting for your creative spark.
You don't need to be a professional designer to make a bag that's perfectly you. Simple changes can completely transform a bag’s look and feel, and even the smallest tweaks can have a surprisingly big impact.
Let's start with some easy wins. These are the kinds of changes that are perfect for beginners but still deliver a huge payoff in both style and function.
Personalizing your projects isn't just a fun creative outlet; it's part of a larger trend. The global handbag market is booming, and a big reason is that people are hungry for unique designs that express their personal style. You can read more about the factors driving this trend over at ResearchAndMarkets.com.
Once you've gotten the hang of a few basic modifications, you can start exploring more advanced changes. These require a little more thought and planning, but they really open up the door to creating something truly original.
Resizing a pattern, for instance, is a game-changer. Say you find a pouch pattern you absolutely love, but it's just a bit too small. You can simply scale up the pattern pieces to make it bigger. The key is to remember to adjust everything proportionally—gussets, pockets, hardware placement, all of it.
Another one of my favorite things to do is kit-bashing, or combining elements from different patterns. Maybe you love the shape of one tote but prefer the pocket design from another. As long as you're careful with your measurements and adjust the pieces to fit together correctly, you can mix and match to build your perfect bag. If you're looking for smaller projects that are easy to practice on, you might like our guide to making in-the-hoop zippered pouches.
And don't forget the decorative touches! This is where you can really let your personality shine. Use appliqué to add a beautiful floral design, or try color-blocking with bold fabrics to create a modern, geometric look. These are the details that take a standard bag pattern and turn it into a piece of art that is one-hundred-percent yours.
Even the most detailed patterns can leave you with questions. When you're wrestling with patterns for quilted bags, it's totally normal to hit a roadblock, especially when you're suddenly dealing with thick layers and hardware you've never used before. Let's walk through some of the most common snags quilters run into.
You've probably been there: your sewing machine starts to groan and struggle, especially at a thick seam where a strap joins the main body. Your first instinct is to just force it through, right? We've all done it. But that's a quick way to snap a needle or end up with a mess of tangled thread.
The fix is usually much easier. Before you do anything else, switch to a heavier needle, like a 90/14 or even a 100/16. Then, just slow down. Seriously. When you get to those super thick spots, use the hand wheel to walk the needle through one stitch at a time. It gives you complete control and prevents the needle from bending or breaking.
"Which interfacing should I use?" I get this question all the time. The answer really depends on what you want the final bag to do. Are you picturing something soft and casual or a bag that could practically stand up on its own?
Here's my rule of thumb: match the stabilizer to the bag's function. A floppy market tote is charming. A floppy laptop bag is a disaster waiting to happen. Think about how the bag will be used before you even look at your interfacing options.
Oh, the frustration of a perfectly pieced bag ruined by a wavy zipper or puckered quilting. Let's sort that out. Puckering in your quilting is almost always a sign that your fabric layers are shifting. A walking foot isn't optional for this kind of work; it's essential. It grabs and feeds all three layers of your quilt sandwich through the machine evenly.
Wavy zippers are a different beast. That waviness happens when the zipper tape gets stretched out as you're sewing it in. My go-to trick is to use double-sided basting tape. Stick the zipper in place perfectly before you sew. It won't budge an inch, and you’ll get a flat, professional finish every single time.
Ready to start your next masterpiece? At High Country Quilts, we have all the fabrics, notions, and expert advice you need to bring your vision to life. Explore our collection at https://hcquilts.com.
At High Country Quilts we care deeply about community. With our experiences in retail, we know that a store is not only a place to shop but also a place for the community to gather and share. During this busy...

Hi! We’re Adam and Renee Wheaton, the new owners of High Country Quilts! For more than 40 years, we’ve owned and operated vacuum and sewing businesses. Following in Renee’s father’s footsteps after he retired from All Discount Vacuum and Sewing in Colorado...


Leave a comment