

We Love Our Quilting Community
At High Country Quilts we care deeply about community. With our experiences in retail, we know that a store is not only a place to shop but also a place for the community to gather and share. During this busy...


When it comes to quilting, the border is so much more than just a finishing touch. It's the grand finale, the element that pulls everything together and turns a lovely quilt top into a true masterpiece. Think of it as the perfect frame for a beautiful painting; it defines the design, adds structure, and gives you one last, wonderful opportunity to play with color and pattern.
Whether you opt for simple strips or an intricate pieced design, the right border makes all the difference.
A quilt border does a lot more than just cover the raw edges of your project. It's a key player in the overall design, guiding the eye and completing the quilt's story. A quilt without a border can sometimes feel a bit unfinished, almost abrupt—like a sentence missing its period. But with the right border, that central design feels perfectly contained, balanced, and ready to be admired.
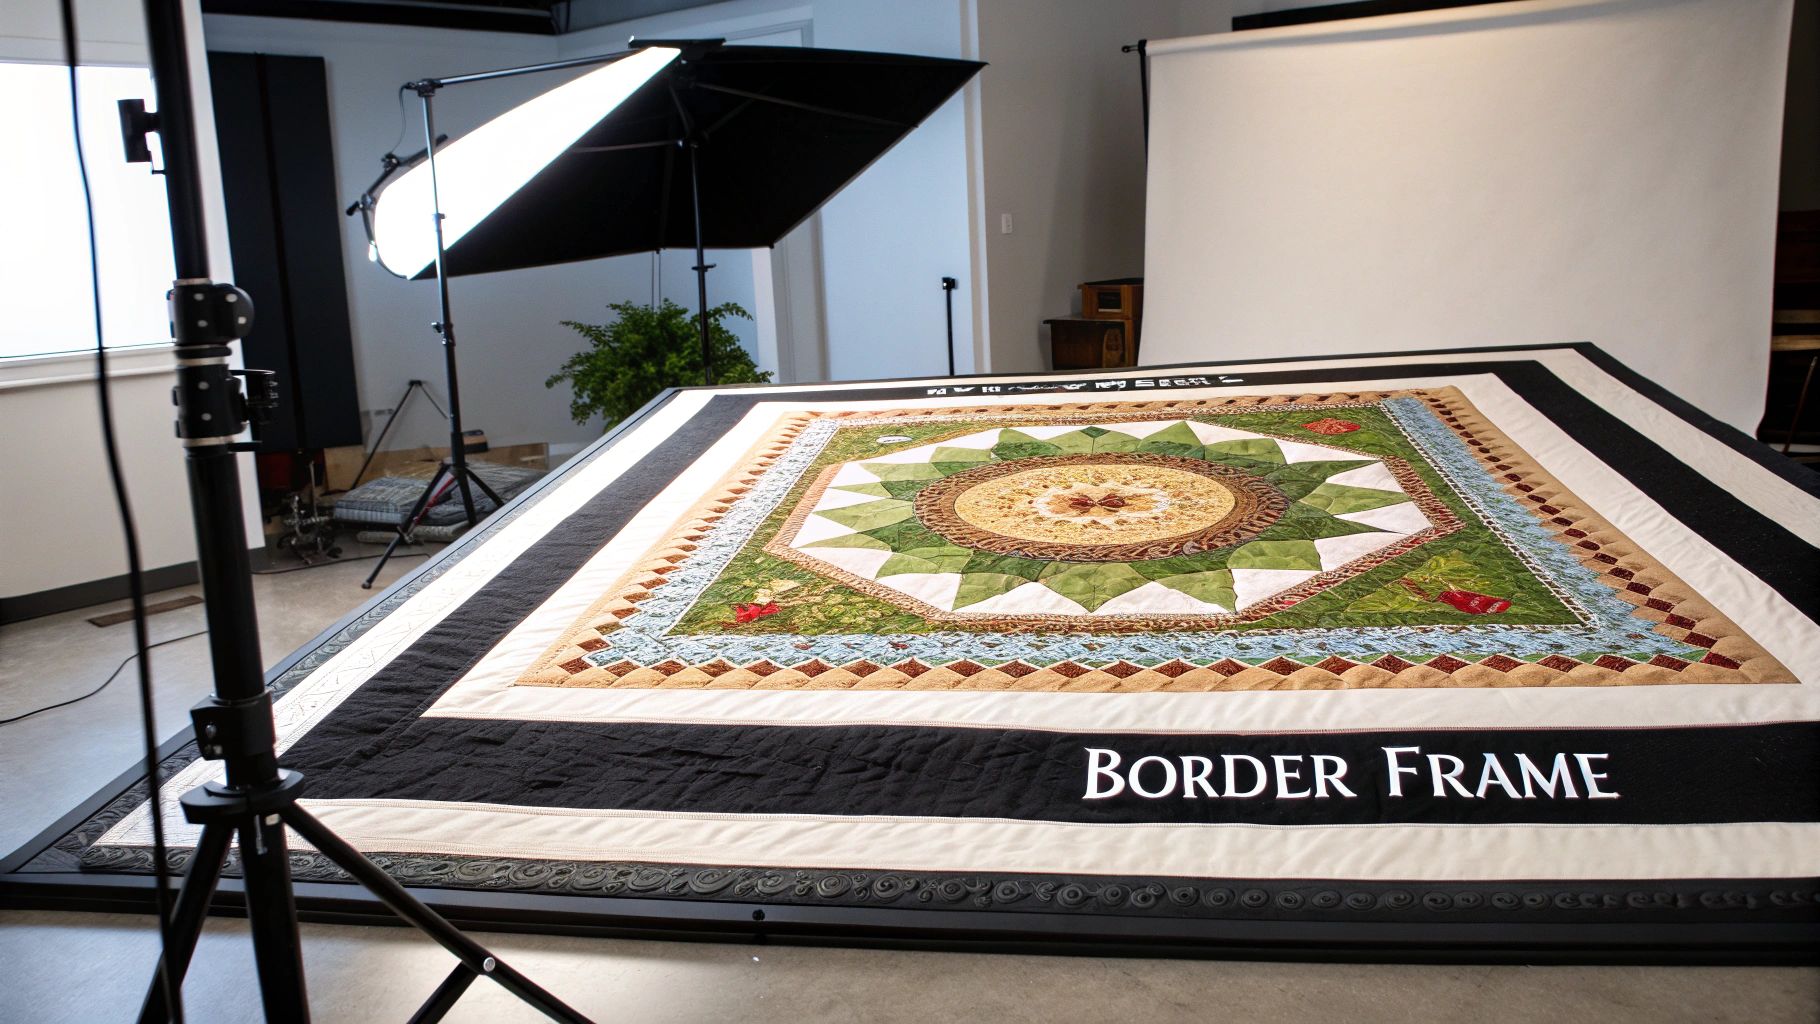
At its heart, a border creates a visual frame. This frame can be quiet and understated, letting a busy quilt top take center stage. Or, it can be a showstopper itself, adding a burst of energy and interest to a quilt made of simple blocks or one with a lot of open, negative space.
From a practical standpoint, borders are crucial. They help keep a quilt perfectly square and stop the edges from stretching or getting wavy over the years. Artistically, though, they’re a quilter’s playground. A well-chosen border pattern can do so much:
A thoughtfully chosen border is what separates a collection of blocks from a unified work of art. It’s the final brushstroke that makes the whole piece feel complete, turning your quilt into a true heirloom.
As we dive into this guide, we'll explore all sorts of patterns for quilt borders, from the simple and foundational styles perfect for beginners to more advanced techniques for quilters ready for a new challenge. Once you understand the "why" behind different border styles, you'll feel confident making choices that truly make your quilts sing.
When you start exploring quilt borders, you're really opening up a pattern book filled with classic, time-tested designs. Some styles have been quilters' go-to choices for generations, and for good reason. Getting to know these core patterns gives you a fantastic set of tools to frame any quilt top, whether you're after a little quiet elegance or a big, bold finish.
Let's walk through four of the most versatile and well-loved patterns you'll encounter.
The simplest and most familiar of them all is the straight border. Just think of it as the classic, clean matting you'd put on a framed picture. It’s usually just one or more strips of a single fabric, either a solid or a print. Its job is to give the eye a calm place to rest, letting the main quilt design be the star of the show.
Don't let its simplicity fool you; a straight border is a powerful tool. A dark border can act as a container, holding in a bright and busy quilt top. On the other hand, a light-colored border can make a smaller quilt feel much larger and more airy.
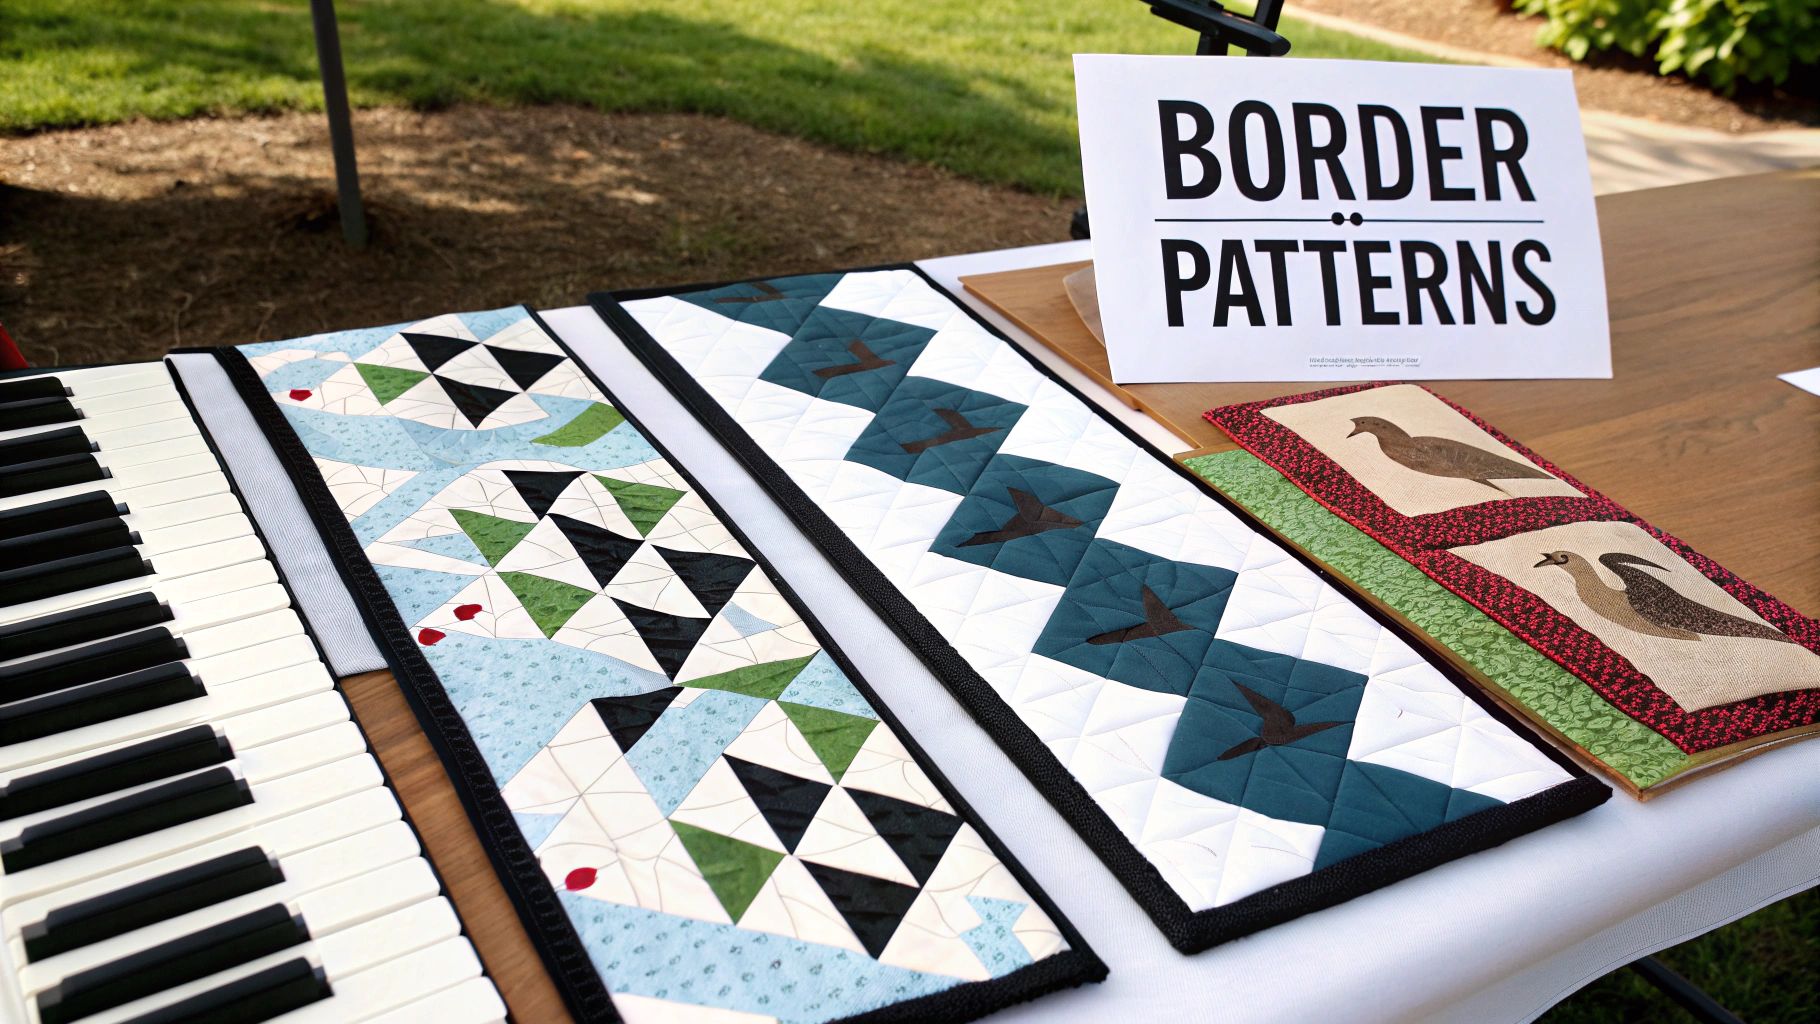
If you want a border that’s just bursting with energy and personality, you can't go wrong with the Piano Key border. This one is made by sewing a whole series of fabric strips together side-by-side, which ends up looking just like the keys on a piano. It's an absolutely brilliant way to use up leftover scraps from your quilt top, pulling the whole piece together with little pops of color and pattern.
This style adds such a fun, scrappy feel. It works especially well for:
Looking to add some sharp, geometric energy? The Sawtooth border is an excellent choice. It’s built from a series of repeating half-square triangles, creating a pointed, "toothy" edge that pulls your eye right into the center of the quilt. It’s a crisp, dynamic frame that manages to feel both traditional and totally modern at the same time.
The points can face inward or outward, and each direction gives a slightly different feel. This is a pieced border, so it does ask for a bit of precision, but the stunning finish is well worth the effort. The whole idea of pieced borders was a huge leap forward in quilting. Back in the 1840s, patchwork frames on medallion quilts set off a creative explosion in 19th-century American craft. Patterns like Log Cabin appeared in over 40% of quilts from the Civil War era that have survived to today. This thrifty technique started as a way to save expensive solid fabrics by framing embroidered centers with pieced strips. You can learn more about this rich history from these beautiful antique American quilt patterns.
Nothing says "movement" quite like a Flying Geese border. This iconic pattern is made from a series of rectangular units that look like a flock of geese flying in formation. It's a truly timeless design that wraps a beautiful, directional flow around your quilt.
A Flying Geese border can make a static quilt design feel alive. By arranging the "geese" to fly in the same direction, you create a visual current that carries the viewer's eye around the entire piece.
Quilters have loved this border for ages because it’s not only beautiful but also symbolic, adding another layer of story to your finished work. Each of these classic patterns brings its own unique voice, ready to help you complete your quilt’s story perfectly.
Choosing the right border is where a quilter's eye really comes into play. It's that final design decision that can take a quilt from good to absolutely stunning. Think of it like framing a piece of art; the right frame makes the artwork pop, while the wrong one can feel distracting or just plain off. Your border should be the perfect supporting act for the main show—your quilt top.
Getting this right really comes down to three things: scale, color, and balance. Once you get a feel for how these elements work together, you'll be able to confidently pick the perfect finishing touch for every project.
The width of your border dramatically changes the whole feel of a quilt. If it's too skinny, it can look like a timid little afterthought. Too wide, and it can completely swallow the beautiful piecing you worked so hard on. While there’s no secret mathematical formula, a fantastic rule of thumb is to look at the other elements in your quilt.
A good starting point is to match the width of your border to the sashing or the size of the blocks themselves. For instance:
Pro Tip: Before you cut a thing, audition your options! Lay your quilt top on a design wall or even just a clean patch of floor. Fold different widths of your potential border fabric and lay them alongside the quilt's edge. Seeing it in person is the most reliable way to know what just feels right.
Color is your secret weapon for setting the mood of the entire quilt. Your border fabric can either melt into the background, creating a seamless look, or it can stand out and make a bold statement. The big question to ask yourself is: do you want a quiet frame or a show-stopping one?
Here are a couple of ways to think about it:
To help you decide, we've put together this quick guide. Think about the overall style of your quilt top and see which border approach might be the best fit.
| Quilt Top Style | Recommended Border Type | Design Goal |
|---|---|---|
| Busy, intricate piecing (e.g., sampler) | Simple, single-fabric border | Provide a calm "resting place" for the eye. |
| Modern, minimalist with negative space | Pieced or appliqué border | Add a layer of interest and complexity. |
| Traditional, with strong color themes | Color-matched or contrasting border | Unify the design or create a dramatic frame. |
| Scrap quilt with many different fabrics | A dark, solid "stopper" border | Contain the energy and pull it all together. |
Ultimately, this table is just a starting point. The best choice is always the one that makes you happy when you look at your finished quilt!
Finally, take a step back and look at the overall "busyness" of your quilt top. The key here is to create visual harmony. If your quilt center is a riot of complex piecing and a dozen different fabrics, a simple border is almost always the way to go. A solid color or a tone-on-tone print gives the eye a much-needed place to rest and appreciate the work inside.
On the flip side, if you've made a quilt with lots of open space or very simple, large blocks, a more detailed border can be a fantastic addition. This is your chance to shine with a dynamic Sawtooth or a classic Flying Geese border! This interplay between simple and complex ensures that the center and the border elevate each other, creating a truly balanced and beautiful quilt.
Wavy, flared borders are probably the number one frustration I hear about from other quilters. But the fix is surprisingly simple, and it all comes down to how you measure. The secret to a perfectly flat, square quilt isn't in the pattern's cutting chart—it's in your measuring tape.
So many of us make the mistake of just measuring the raw edge of the quilt top and cutting our border strips to match. It seems logical, but it almost always leads to trouble. The outer edges of a quilt top naturally stretch a bit as you piece it together. If you cut your border fabric to fit that stretched edge, you’re essentially sewing a permanent wave right into your quilt.
The trick I learned years ago, and swear by to this day, is to measure the quilt top itself, not its wobbly edges. By taking your measurements through the stable center of the quilt, you get the true dimensions of your project. This one small shift in technique is the key to preventing those dreaded wavy borders and ensuring your quilt lays beautifully flat.
Here’s my step-by-step process for getting it right every time.
For the Side Borders:
Now that you've cut your two side borders to that precise average length, it’s time to attach them. Find and mark the center point of both the quilt's side edge and your border strip. Do the same for each end.
Pin the border to the quilt top, matching up the center marks first, then the end marks. You might notice a little extra fullness in the quilt top—that’s exactly what you want to fix! Gently ease that fullness in as you pin the rest of the strip, placing pins every few inches. Sew the borders on and press the seams toward the border.
This method forces the quilt top to conform to the correctly sized border, effectively squaring it up as you sew. It’s a proactive fix that stops wavy edges before they even start.
For any sewing project, from quilts to curtains, precise measurements are critical for a flawless finish. You can find more great tips in this helpful guide to precise measuring for fabric projects.
For the Top and Bottom Borders:
You’re going to repeat the exact same process for the top and bottom. Measure the width of your quilt top in three places (making sure to include the newly attached side borders in your measurement). Average those numbers, and cut your top and bottom strips to that final length. Attach them using the same pinning method.
The flowchart below can help you think through the design process of choosing your borders before you even get to the cutting mat, focusing on how scale, color, and complexity work together.
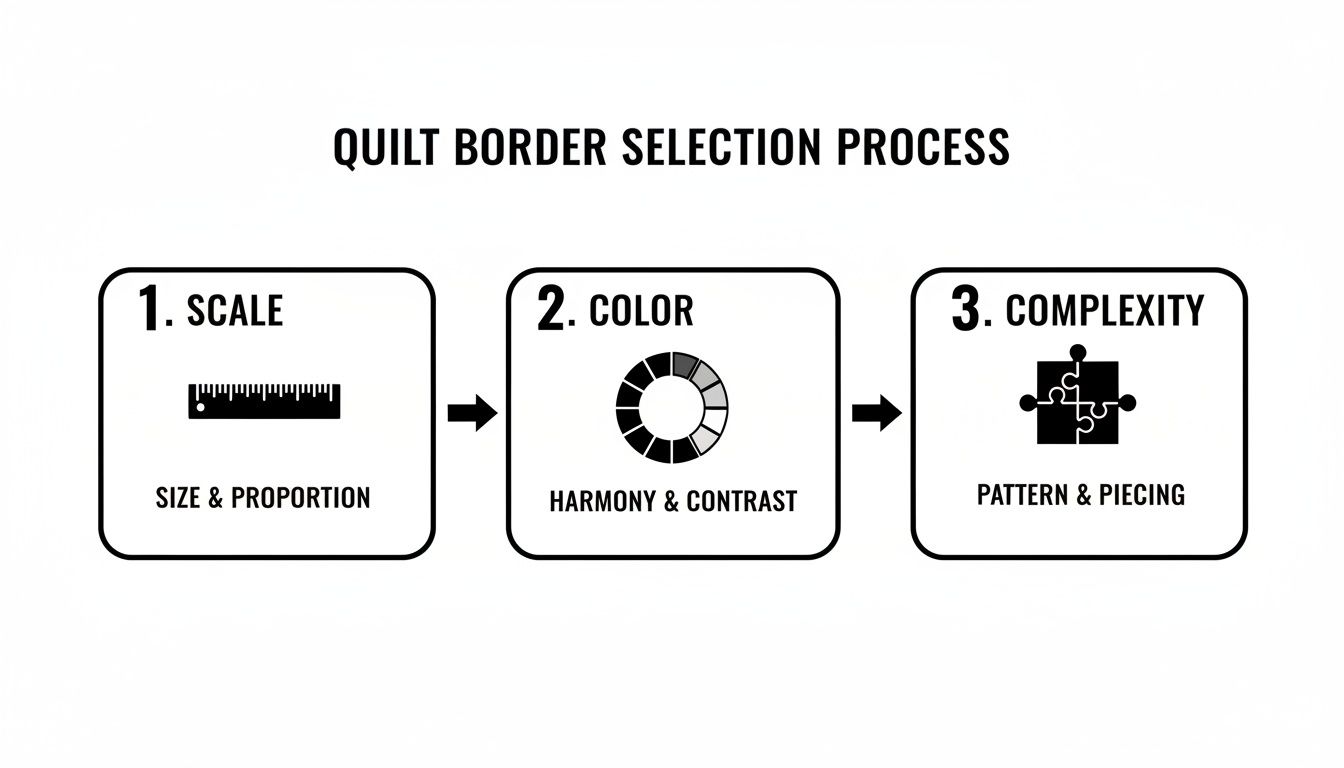
Thinking about these elements ahead of time is just as important as measuring correctly. When you get both the design and the technique right, your patterns for quilt borders will always frame your masterpiece perfectly.
If you want to give your quilt that seamless, gallery-worthy finish, mitered corners are the way to go. They create a continuous frame that just flows around the quilt, almost like a picture frame. This technique is a game-changer for patterns for quilt borders with directional prints, like stripes, ensuring the pattern turns the corner without a hitch. A mitered corner creates a clean, 45-degree diagonal seam that gives your quilt a sharp, polished edge.
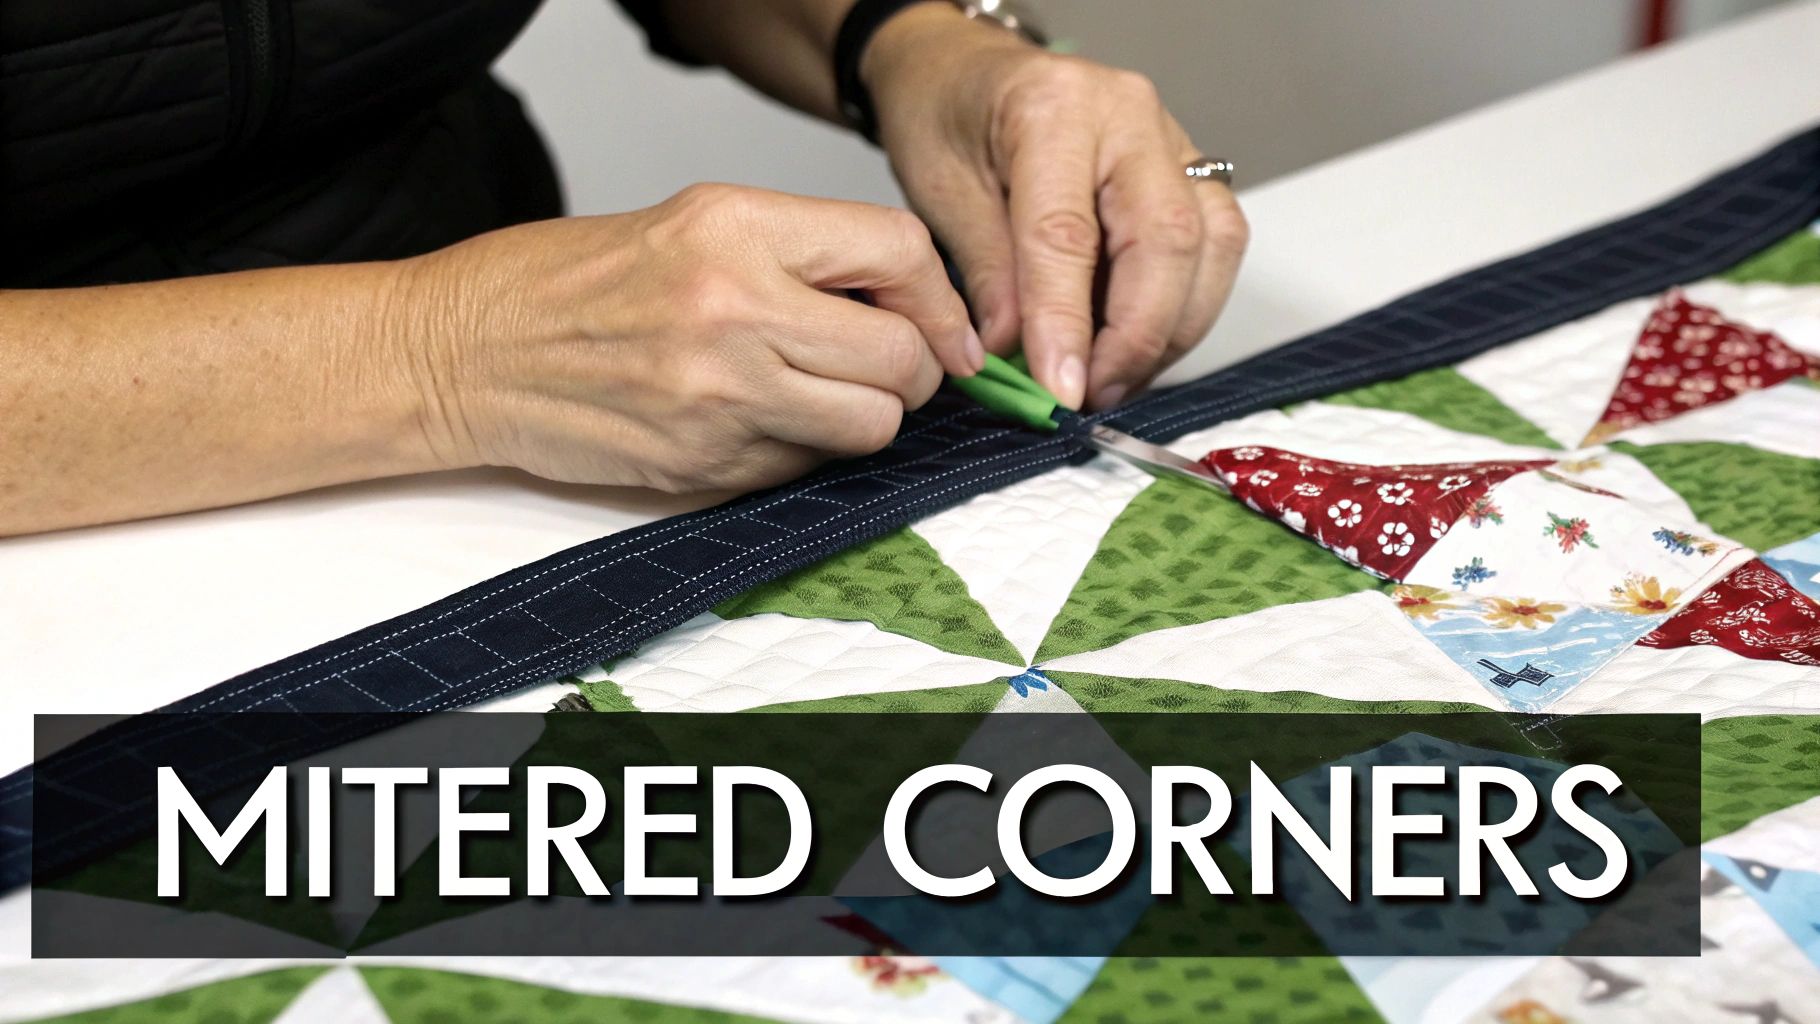
It’s a bit different from the standard butt-jointed corners where strips just meet at a right angle. Mitering involves joining two border strips on a diagonal. Yes, it takes a little more fabric and some precision, but the elegant result is absolutely worth the effort. The secret really comes down to careful prep and an accurate sewing line.
Creating that perfect mitered corner isn't as intimidating as it sounds once you break it down. Success starts with a perfectly square quilt top and cutting your border strips with plenty of extra length to play with—you'll need that extra fabric hanging past each corner to create the diagonal fold.
Here’s how it generally works:
Getting that flawless point just takes a little practice, but a few simple tips can really make a difference. After sewing the miter, always press your seams open. This helps the corner lie beautifully flat and cuts down on bulk, which your quilting foot will thank you for later.
Pinning is your best friend when mitering. Secure the border strips carefully before sewing the diagonal seam to prevent any shifting. Even a tiny slip can throw off the angle and leave you with a corner that just won’t lie flat.
And finally, just take your time. Rushing the marking or sewing step is the number one reason for wonky corners. Work carefully and patiently, and you’ll be adding this sophisticated finish to your quilting toolkit in no time.
Once you've mastered the basics, it's easy to start seeing your quilt's border not just as a frame, but as a main event in its own right. This is where you can really let your creativity shine, transforming the edges of your quilt into a stunning feature that adds a rich layer of artistry. Think of it like swapping out a simple picture frame for a beautifully carved, ornate one that becomes part of the art itself.
Two fantastic ways to achieve this are with Appliqué Borders and more complex Pieced Borders. Appliqué is perfect for adding graceful, organic shapes—think scrolling vines, delicate flowers, or even whimsical storybook figures dancing around the edge. This technique essentially lets you "draw" with fabric, giving you a wonderful sense of creative freedom.
A complex pieced border takes things a step further by weaving intricate quilt blocks right into the frame. Imagine a gallery of tiny sampler blocks marching around your central design, or a continuous, elaborate pattern that tells its own story. Suddenly, the border isn't an afterthought; it's an essential part of the quilt's narrative.
This idea of a story-telling border has deep historical roots. Quilters in the late 18th and early 19th centuries really pioneered this, using borders to evolve simple whole-cloth quilts into the patchwork masterpieces we admire today. This shift was most prominent between 1790-1835, when the framed medallion layout became the dominant style. In fact, it accounts for an estimated 60-70% of surviving quilts from that era in major collections.
Inspired by French broderie perse techniques, these quilters would painstakingly appliqué intricate chintz motifs onto their borders, creating luxurious frames that turned simple centers into works of art. It’s a fascinating part of quilting history, and you can explore it further with these insights on historical quilt patterns.
Viewing your border as an extension of the quilt's central theme unlocks a new level of creativity. It's an opportunity to echo motifs, extend patterns, or introduce a complementary design that completes the story.
Of course, these advanced patterns for quilt borders demand more planning and precision. But the payoff is a truly breathtaking quilt with undeniable heirloom quality. They challenge you to see the entire quilt top as one cohesive canvas, where every element, right up to the very edge, plays a crucial role in the final piece.
Even after years at the sewing machine, every quilter runs into a hiccup or two when it comes to framing a project. Let's walk through some of the most common questions I hear in the shop. Getting these right is all about building your confidence so your quilt borders turn out beautifully every time.
Ah, the age-old question of quilt math! Figuring out your border fabric is actually pretty simple once you get the hang of it, and it saves you from that dreaded fabric shortage (or a massive overbuy).
First, decide on the finished width you want for your border. Then, just add 1/2 inch for the seam allowances to get your final cutting width. Now, grab a tape measure and find the length and width of your quilt right through the center—this is your most reliable measurement, as the edges can sometimes stretch.
I always recommend adding a few extra inches to each of those measurements just to be safe. It gives you wiggle room for squaring up later. From there, you can calculate the total length of the strips you'll need and divide that by your fabric width (usually about 42 inches) to see how many strips you need to cut.
Don't panic! An unsquare quilt top is probably one of the most common issues quilters face. The key is to address it before you even think about attaching those borders.
Your best friends here are a large quilting ruler and a rotary cutter. Carefully trim the edges of your quilt top to make sure you have true 90-degree angles at each corner. Once you've squared it up, use the center-measurement technique we just talked about. This is the secret weapon for correcting any minor wonkiness that’s left. It essentially coaxes the quilt top to fit the perfectly cut border, pulling everything back into a nice, square shape as you sew.
Think of your border as a sturdy frame that gently guides your quilt top into its final, perfect shape. By measuring from the stable center, you're giving the whole project a strong foundation that prevents it from warping down the road.
Absolutely! Adding multiple borders is one of my favorite ways to create depth and really make a quilt pop. It’s a fantastic design trick.
A classic approach is to use a narrow inner border, often in a color that creates a sharp contrast. This acts like a "stop," giving the eye a clean line that separates the quilt's center from a wider, more elaborate outer border. The trick to making this work is to attach and measure each border one at a time. This keeps the whole quilt perfectly flat and square as you build it outward.
At High Country Quilts, we have all the tools, fabrics, and friendly advice you need to master any border technique. Come on in to explore our selection or sign up for a class to learn hands-on
At High Country Quilts we care deeply about community. With our experiences in retail, we know that a store is not only a place to shop but also a place for the community to gather and share. During this busy...

Hi! We’re Adam and Renee Wheaton, the new owners of High Country Quilts! For more than 40 years, we’ve owned and operated vacuum and sewing businesses. Following in Renee’s father’s footsteps after he retired from All Discount Vacuum and Sewing in Colorado...


Leave a comment