

We Love Our Quilting Community
At High Country Quilts we care deeply about community. With our experiences in retail, we know that a store is not only a place to shop but also a place for the community to gather and share. During this busy...


Imagine a sewing space where every spool of thread, yard of fabric, and essential notion has a dedicated home. A room where creativity flows as freely as your sewing machine's needle because you're not bogged down by clutter or endless searching. For passionate creators, from quilters piecing together intricate heirlooms to cosplayers crafting their next masterpiece, an organized sewing room is more than just tidy, it's the foundation of efficiency and inspiration. This comprehensive guide moves beyond generic advice to provide distinct, actionable strategies for achieving sewing room nirvana.
Whether you're working in a spacious studio or a cozy corner, these organized sewing room ideas will help you design a functional, beautiful, and highly productive creative sanctuary. We'll explore everything from implementing vertical storage with pegboards to creating mobile project stations, providing a detailed roadmap to conquer the chaos and reclaim your creative energy. The principles of creating an efficient workspace extend beyond just sewing, and you can find valuable insights on how to organize a home office to achieve a productive, clutter-free space.
This listicle will detail specific systems for managing your supplies, including:
Each idea is designed to be a practical building block, allowing you to customize your space, streamline your workflow, and spend more time creating and less time searching.
When floor space is a precious commodity, the most effective strategy for creating an organized sewing room is to look up. Vertical storage systems transform unused wall space into a powerhouse of organization, keeping essential tools and materials visible, accessible, and off your work surfaces. This approach utilizes components like pegboards, floating shelves, and wall-mounted organizers to create a custom-fit system for your unique needs.
This method is particularly valuable in small to medium-sized rooms, apartments, or multi-purpose spaces where every square foot counts. By moving storage vertically, you reclaim floor area for your sewing machine table, cutting mat, and ironing board, creating a more open and efficient workflow. It’s a solution frequently seen in professional cosplay studios and makerspaces, where a vast inventory of materials must be managed without cluttering the creative zone.
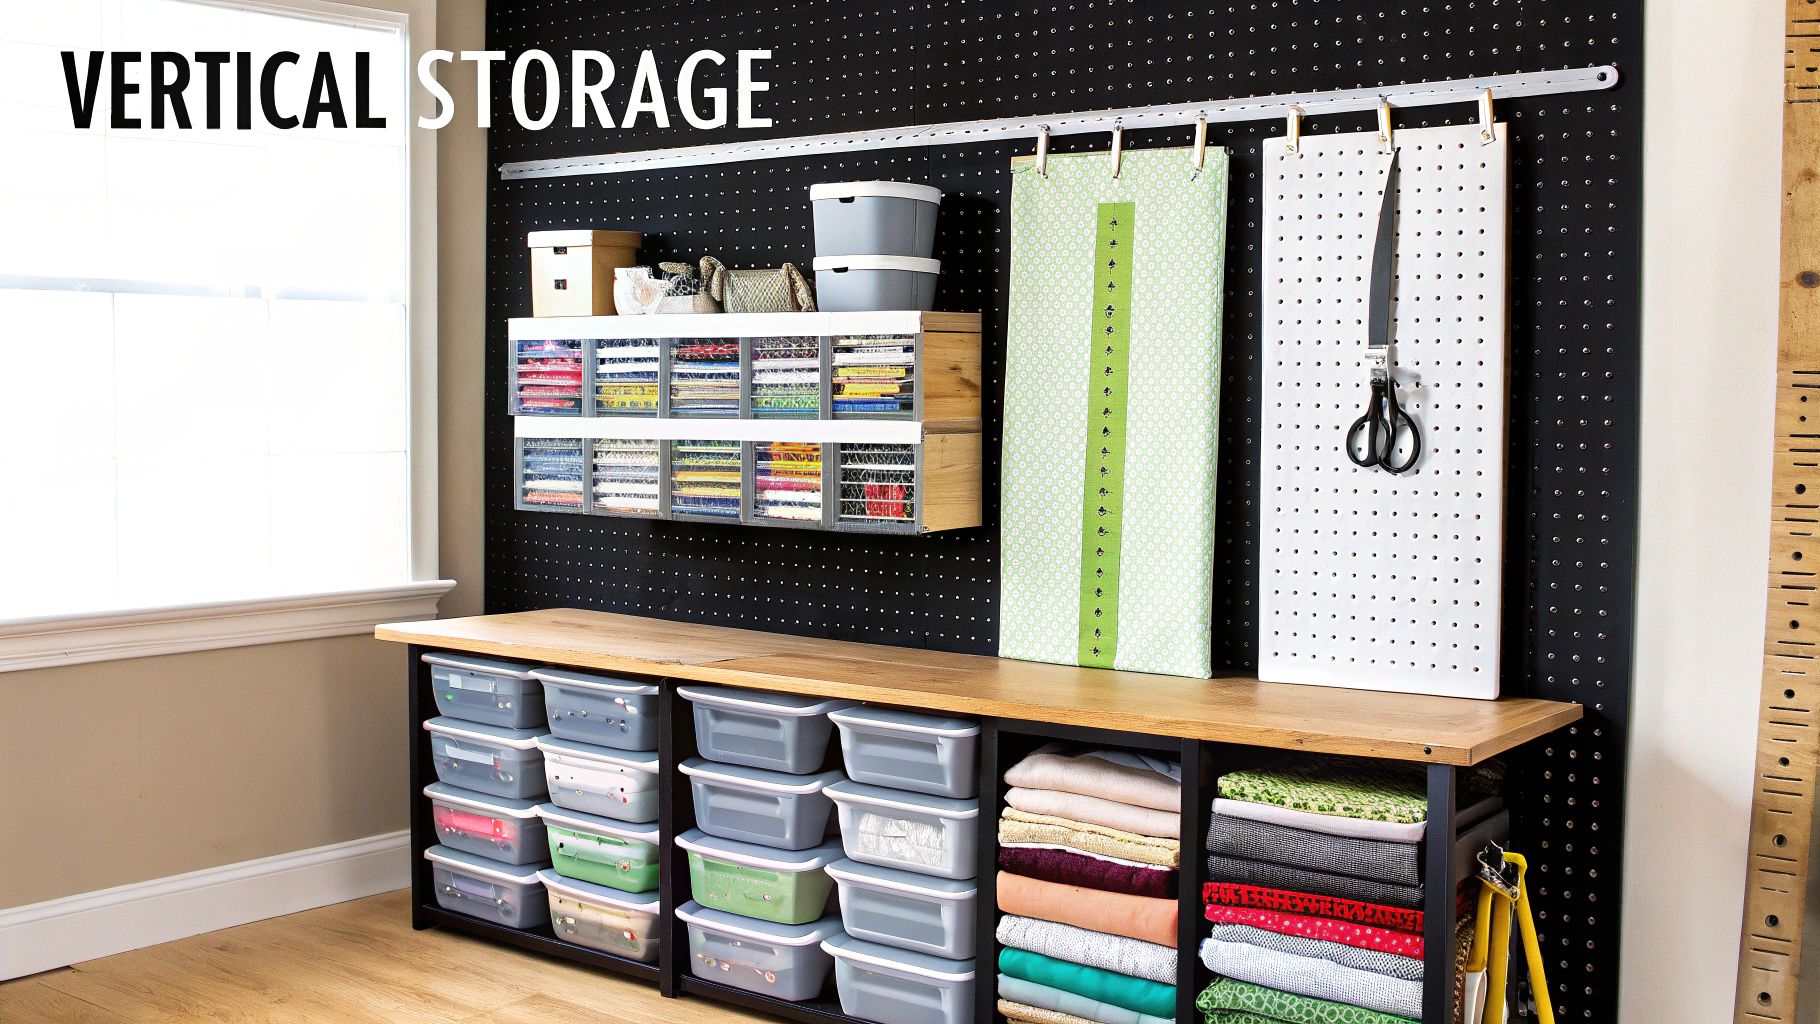
Getting started with a vertical system is straightforward. The key is to plan your wall layout based on your workflow and the items you use most frequently.
To maximize the benefits of your vertical storage, follow these best practices:
Many content creators and sewing influencers have mastered the art of vertical storage, often showcasing their setups through gifted collaborations on social media. For an inspiring visual guide on setting up a functional and beautiful pegboard system, see the video below.
Transforming your fabric stash from a chaotic pile into an inspiring resource begins with a simple, visually stunning method: color-coding. This system organizes fabrics by the color spectrum, making it both beautiful and highly functional. By arranging your materials from reds to violets or lights to darks, you can instantly find the exact shade you need, dramatically reducing search time and sparking new creative combinations.
This approach is especially powerful for quilters, cosplayers, and any sewist who works with a diverse palette of materials. Instead of digging through unsorted bins, you have a clear inventory at a glance, turning your fabric collection into a functional piece of art. The method, popularized by quilting bloggers and the Marie Kondo organization movement, brings a sense of calm and order to the creative process, making project planning more intuitive and enjoyable.
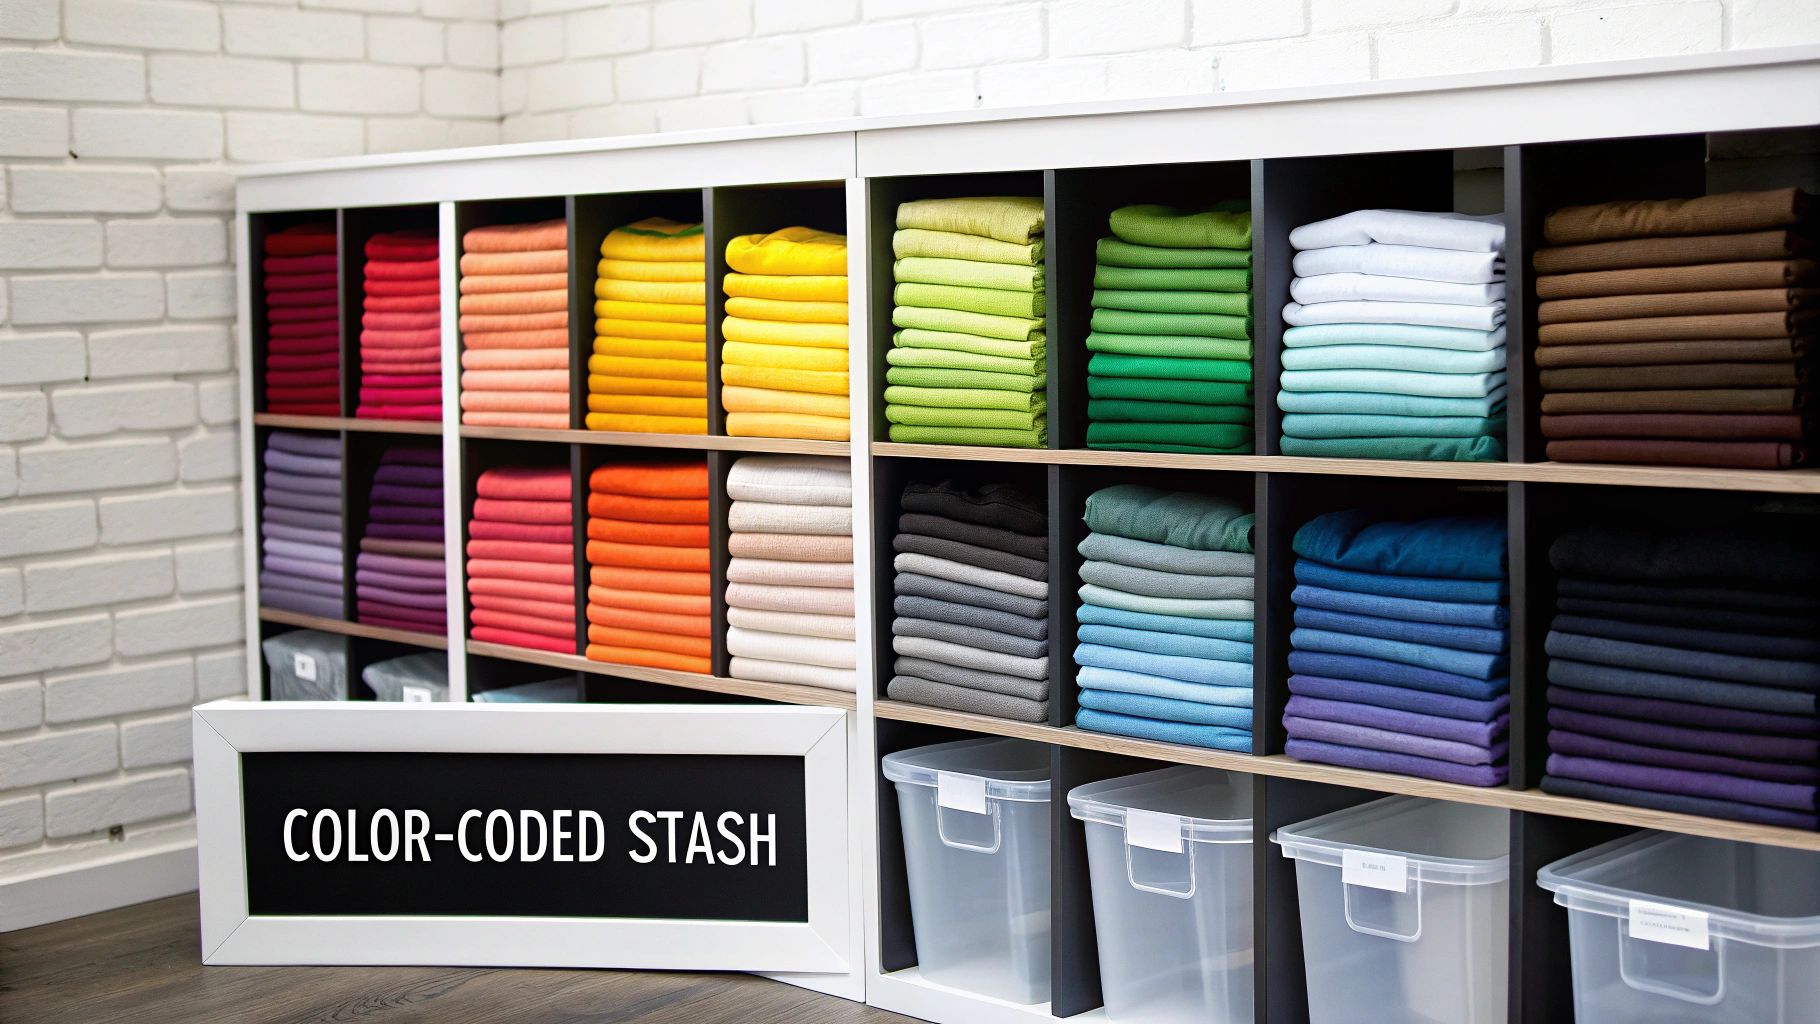
Setting up a color-coded fabric stash is a satisfying project that pays long-term dividends. The goal is to make your collection easy to see and access.
To get the most out of your color-coded system, consider these practical tips:
Many sewing influencers showcase their vibrant, color-coded studios, often built through user-generated content campaigns. For those interested in how creators partner with brands, you can explore the top UGC creator platforms that facilitate these collaborations.
While walls handle bulk storage, the chaotic world of small sewing notions requires a more detailed approach. Drawer divider systems bring order to the tiny, easily lost items like buttons, bobbins, zippers, and needles. By creating dedicated compartments within a drawer, you transform a jumbled mess into a functional, easy-to-navigate inventory system, saving precious time during a project.
This method is indispensable for any sewist but is particularly critical for those who work with a wide variety of embellishments, such as tailors, quilters, and cosplay artists. A well-organized drawer system prevents tangled threads, protects delicate items, and allows you to see your entire stock at a glance. It’s a foundational strategy seen in professional alterations shops and the meticulously organized craft rooms featured by home organization experts, where efficiency is paramount.
Setting up a drawer system is about categorizing your supplies logically. The goal is to give every small item a designated home, making it quick to find and just as easy to put away.
To get the most out of your organized drawers, a little strategy goes a long way:
Many organization brands have built their reputation on providing these exact solutions, often partnering with crafting influencers who showcase their setups. For those interested in how these collaborations work, an influencer gifting application form can provide insight into the process brands use to connect with content creators.
For sewists working in multipurpose rooms or who crave flexibility, mobile storage is a game-changing organizational strategy. Rolling carts and portable drawer units transform static supply stashes into dynamic, on-demand workstations. This approach allows you to bring your tools directly to your sewing machine, cutting table, or even another room, then tuck them away neatly to reclaim your space when the project is done.
This method is invaluable for anyone who doesn't have a dedicated sewing room, such as those crafting in a guest bedroom, living room corner, or dining area. It’s also a cornerstone of efficient design in community makerspaces and mobile classrooms, where layouts must adapt to different projects and user needs. Cosplayers frequently use these carts at conventions for on-the-go repairs, showcasing the ultimate fusion of organization and portability.
Integrating rolling carts into your sewing space is simple and immediately impactful. The key is to dedicate each cart to a specific purpose or project, preventing it from becoming a catch-all for clutter.
To get the most out of your mobile storage, consider these practical strategies:
The popularity of these carts has surged as sewing influencers and brands share their clever setups on social media. Many have received these items through collaborations, a common practice managed through the top influencer gifting platforms that connect brands with creators to showcase products in authentic settings.
A disorganized thread collection can lead to tangled messes, frustrating color-matching sessions, and even wasted materials. A dedicated thread organization system transforms your collection from a chaotic drawer into a functional and visually stunning display. By using wall-mounted racks, clear bins with spool holders, or custom pegboard setups, you create an accessible inventory of every color, weight, and type of thread you own.
This method is essential for quilters who require a vast palette of colors and for cosplayers who need precise thread matches for specific fabrics. It eliminates the guesswork and frantic searching, turning thread selection into an inspiring part of the creative process. Instead of hiding your threads away, this system makes them a central, organized feature of your sewing room.
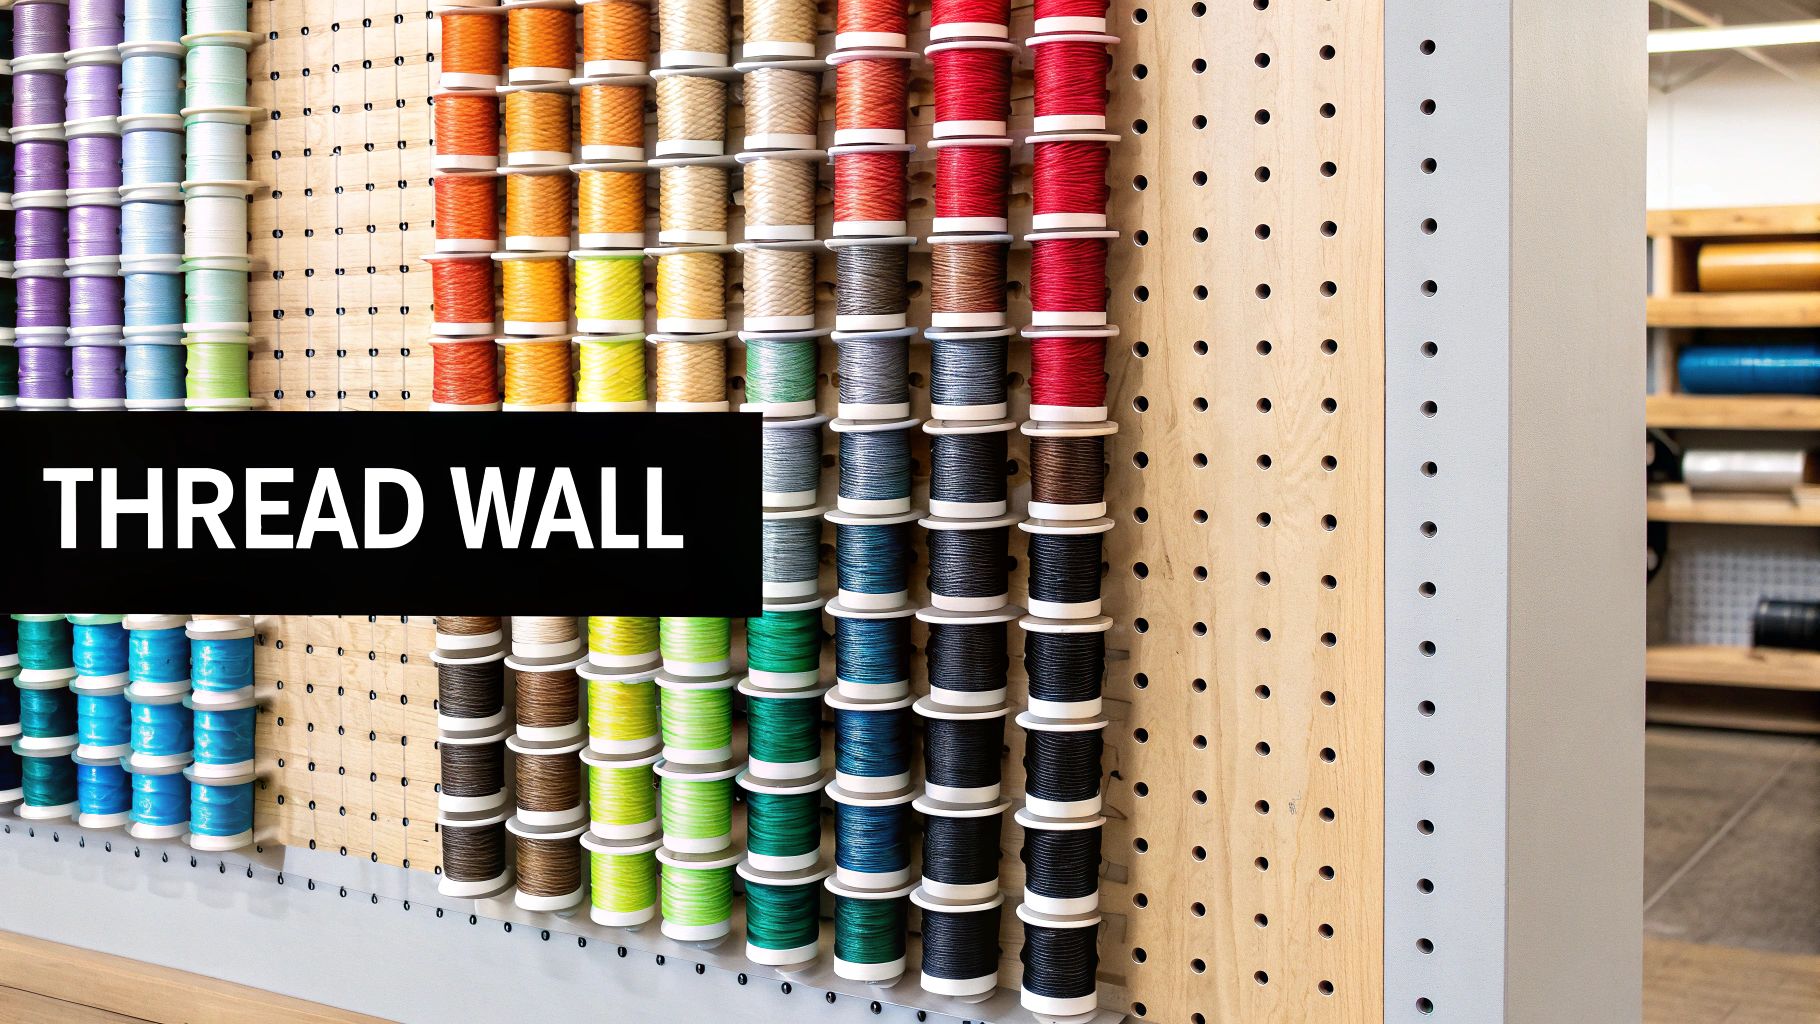
Choosing the right system depends on the size of your collection and your available space. The goal is to keep threads untangled, visible, and protected from dust and light.
To get the most out of your thread storage, focus on both organization and preservation:
Many sewists use their beautifully organized thread walls as a backdrop for filming tutorials and sharing their work online. To see how top creators present their spaces and materials, you can explore comprehensive courses on content creation that cover studio setup and visual branding.
A collection of sewing patterns, whether meticulously drafted, commercially printed, or digitally downloaded, is a valuable library of creative potential. Without a proper system, this library can quickly become a chaotic pile of envelopes and paper. Implementing a dedicated filing system for patterns and designs transforms this potential chaos into a searchable, well-preserved resource, preventing loss, damage, and the frustration of not finding the right pattern when inspiration strikes.
This methodical approach is indispensable for sewists who accumulate patterns over time, particularly quilters managing extensive design libraries and cosplayers juggling complex project files with numerous adaptations and reference materials. By creating a clear organizational framework, you protect your investment in patterns and save critical time during the project planning phase. This is a core practice in sewing schools and professional design studios where efficient access to resources is paramount for workflow.
Creating a system is about choosing a method that fits your space and how you conceptualize your projects. The goal is to make finding a pattern as simple as looking up a book in a library.
To get the most out of your pattern organization, consistency is key.
The rise of digital pattern platforms has made it easier than ever to build a vast collection. Embracing a systematic approach to storing these assets is a fundamental step in creating truly organized sewing room ideas that support creativity rather than hinder it.
For sewists who juggle multiple creations at once, a system organized by individual projects can be a game-changer. Project-based organization moves away from storing items by category (all thread in one place, all fabric in another) and instead groups everything needed for a specific work-in-progress into a dedicated kit or station. This method keeps your main workspace clear while ensuring you can pick up any project and start working immediately without a lengthy search for materials.
This approach is highly effective for quilters working on several quilts simultaneously or cosplayers managing multiple complex costume builds. Instead of a single, cluttered cutting table, you have defined zones, each containing the patterns, fabrics, notions, and specialty tools for one specific endeavor. This focus prevents cross-contamination of materials and drastically reduces the mental friction of switching between different creative tasks.
Setting up project stations is about creating self-contained kits. The goal is to gather every single component for a project into one portable and easily identifiable container or area, creating one of the most organized sewing room ideas for multitaskers.
To get the most out of your project-based system, thoughtful labeling and management are key:
For sewists who work with large quantities of fabric, from dedicated quilters to ambitious cosplayers, a simple pile of folded material quickly becomes unmanageable. A dedicated fabric bolt and yardage management system addresses this challenge by creating a structured, library-like approach to storing and tracking your textile collection. This method organizes fabric by type, project, or color, making it easy to see what you have at a glance.
This system is particularly critical for those who purchase fabric in bulk or manage an extensive stash. By treating your fabric inventory like a professional resource, similar to how quilt shops and costume studios operate, you prevent waste, avoid duplicate purchases, and protect your investment from damage. It’s an essential step up from basic bins, providing an organized sewing room solution that supports large-scale creative projects and maintains the integrity of delicate or expensive materials.
Creating an effective system involves choosing the right storage method for your space and fabric types, then consistently cataloging your inventory.
To get the most out of your fabric management system, focus on protection and tracking:
| Item | 🔄 Implementation Complexity | ⚡ Resource Requirements & Efficiency | ⭐ Expected Outcomes | 📊 Ideal Use Cases | 💡 Key Advantages |
|---|---|---|---|---|---|
| Vertical Storage Wall Systems with Pegboards and Wall-Mounted Shelving | 🔄 Medium — requires mounting and layout planning | ⚡ Moderate — pegboards, shelves, hardware; scalable | ⭐⭐⭐⭐ — maximizes usable space and visibility | 📊 Small–medium sewing rooms, cosplay studios with limited floor area | 💡 Maximizes vertical space; quick inventory; customizable; anchor heavy items low |
| Color-Coded Fabric Organization System | 🔄 Medium — time‑consuming setup and upkeep | ⚡ Low–Moderate — shelving/bins, labels, regular maintenance | ⭐⭐⭐⭐ — fast color selection; highly inspirational | 📊 Quilters, sewists with moderate–large stashes; social-media-focused studios | 💡 Speeds color matching; aesthetic display; requires discipline to maintain |
| Drawer Divider Systems for Notions and Small Supplies | 🔄 Low — easy to install and customize | ⚡ Low — dividers/containers; efficient use of drawer space | ⭐⭐⭐⭐ — prevents tangles and saves search time | 📊 Cosplayers and sewists needing organized notions and small supplies | 💡 Protects delicate items; portable; label sections; periodic tidying needed |
| Mobile Cart and Rolling Storage Solutions | 🔄 Low — plug‑and‑play; minimal installation | ⚡ Moderate — purchase of sturdy cart; wheels add mobility | ⭐⭐⭐ — flexible proximity storage; moderate capacity | 📊 Multipurpose rooms, teaching studios, mobile workshops | 💡 Portable and reconfigurable; lock wheels for stability; store heavy items low |
| Thread Organization Wall or Holder System | 🔄 Low–Medium — simple mounting or freestanding setup | ⚡ Low — racks or spindles; requires wall space for large collections | ⭐⭐⭐⭐ — excellent at-a-glance color matching and inventory control | 📊 Quilters, embroiderers, cosplayers with extensive thread collections | 💡 Prevents tangling/fading; decorative display; consider dust/UV protection |
| Pattern and Design Storage with Filing System | 🔄 Medium — cataloging physical + digital files takes effort | ⚡ Moderate — filing supplies and cloud/storage service costs | ⭐⭐⭐⭐ — protects patterns and speeds retrieval | 📊 Quilting studios, cosplay designers, educators managing many patterns | 💡 Use consistent naming, scan originals, maintain backups and master index |
| Project-Based Organization and Station Setup | 🔄 Medium–High — requires space planning and zoning | ⚡ Moderate — bins, shelving, labeled stations per project | ⭐⭐⭐⭐ — reduces context switching; improves progress tracking | 📊 Sewists juggling multiple WIPs, cosplay commissions, workshop tables | 💡 Keep project kits contained and labeled; include timeline/checklist |
| Fabric Bolt and Yardage Management System | 🔄 High — needs substantial space and specialized fittings | ⚡ High — shelving/bolts, possible climate control; time for inventorying | ⭐⭐⭐⭐ — preserves fabric and provides accurate yardage info | 📊 Professional/semi‑pro quilters, costume studios, fabric retailers | 💡 Track yardage digitally, protect from light/humidity, label bolts clearly |
Embarking on the journey to an organized sewing room is a transformative act of self-care for any creator. You've explored a comprehensive blueprint of actionable strategies, moving far beyond simple tidying tips. By implementing one or more of these specialized systems, you are not just clearing clutter; you are consciously designing a personalized engine for your creativity and productivity. This is about building an environment that works for you, not against you.
From the visual efficiency of a color-coded fabric organization system to the grab-and-go convenience of mobile cart solutions, each idea presented in this guide serves a distinct purpose. We've seen how vertical wall systems reclaim precious floor space and how dedicated project-based stations can streamline your focus, turning complex quilting projects into manageable, enjoyable steps. These are not merely abstract concepts; they are practical, proven organized sewing room ideas that respect your craft, your materials, and most importantly, your valuable time.
The most beautifully arranged sewing room will not stay that way on its own. The bridge between a one-time decluttering project and a perpetually inspiring creative space is maintenance. The key to long-term success is integrating small, consistent habits into your sewing practice.
Think of it not as a chore, but as the final, crucial step of any creative session. Just as you snip the last thread or press the final seam, returning your tools and supplies to their designated homes is part of the process. This shift in mindset is powerful.
Actionable Maintenance Plan: Schedule brief, regular resets. Dedicate just 10-15 minutes at the end of each sewing day, or a slightly longer 30-minute block at the end of each week, to put things away. This small investment prevents clutter from reclaiming your space and ensures your studio remains a source of joy and productivity.
As you move forward, keep these core principles at the forefront of your organization efforts:
Ultimately, a well-organized space does more than just look nice. It reduces friction between an idea and its execution. It honors the investment you've made in your fabrics, tools, and education. It transforms your sewing room from a place of potential chaos into a true creative oasis, a sanctuary where your imagination can flourish without limits. Now, take these insights, choose one area to begin, and start building the sewing room of your dreams, one organized bin at a time.
Ready to fill your newly organized space with high-quality fabrics and essential supplies? For quilters and sewing enthusiasts in the Atlanta area or shopping online, Famcut.com offers a curated selection of premium materials to bring your creative visions to life. Explore our collection and find the perfect inspiration for your next project at Famcut.com.
At High Country Quilts we care deeply about community. With our experiences in retail, we know that a store is not only a place to shop but also a place for the community to gather and share. During this busy...

Hi! We’re Adam and Renee Wheaton, the new owners of High Country Quilts! For more than 40 years, we’ve owned and operated vacuum and sewing businesses. Following in Renee’s father’s footsteps after he retired from All Discount Vacuum and Sewing in Colorado...


Leave a comment