

We Love Our Quilting Community
At High Country Quilts we care deeply about community. With our experiences in retail, we know that a store is not only a place to shop but also a place for the community to gather and share. During this busy...


Before you can even think about organizing your sewing supplies, you have to face the creative chaos head-on. This all starts with a thorough inventory and decluttering session. I'm talking about gathering every single item—from that giant fabric stash and tangled thread to your trusty tools and pattern collection—and sorting it all out. Only then can you decide what to keep, what to pass on, and what’s ready for the bin.
The path to a beautifully organized sewing room doesn’t begin with a trip to buy cute storage containers. It starts with a brutally honest look at what you already have. Just stuffing everything into pretty boxes is a temporary fix; it hides the clutter but doesn't solve the underlying problem. For a real reset, you need to pull every single thing out into the open.
I know, it can feel like a monumental task, but this is the most important step in the entire process. Seeing the sheer volume of your supplies laid out gives you a powerful perspective on your buying habits and what you actually use. This isn't just a cleanup. It’s about carefully curating a collection that fuels your current creative passions, not the ghosts of projects started years ago.
Over the last 10 years, the sewing supplies market has exploded from a small crafting niche into a multi-billion-dollar industry. With so many of us sewing for our homes and hobbies, the challenge of keeping it all organized is more common than ever. You can find more practical advice for managing your space on our blog at https://www.famcut.com/blogs/tips-and-tricks.
Okay, so you’ve pulled everything out. Now, fight the instinct to immediately start putting things away. The next move is to create broad categories to sort every last item into. This little bit of prep work makes the tough decisions that come later so much easier.
Think simple and intuitive. Here’s a quick-glance table to help you get started with your initial piles.
| Category | What It Includes | Common Sorting Mistake to Avoid |
|---|---|---|
| Fabric | All your yardage, remnants, scraps, and pre-cuts. | Lumping "special occasion" fabric with everyday cottons. Try to sub-sort by type later. |
| Thread | Spools, bobbins, embroidery floss, and serger cones. | Mixing machine thread with hand-sewing or embroidery floss. |
| Notions | Buttons, zippers, elastic, interfacing, snaps, and trims. | Throwing all small bits into one "miscellaneous" bin. Keep like with like. |
| Tools | Scissors, rotary cutters, rulers, pins, needles, and marking tools. | Combining cutting tools with measuring tools. They have different storage needs. |
| Patterns | Both your paper patterns and any digital ones you've printed out. | Forgetting to check for missing pieces before deciding to keep a pattern. |
Having these clear categories from the get-go prevents you from getting bogged down in the details too early. Just focus on getting everything into the right pile.
This infographic lays out the simple three-part process to get you rolling.

As you can see, making decisions about what stays and what goes is the final step of this phase. This approach keeps you from getting stuck before you even really start.
With your supplies neatly sorted into piles, it's time for the hard part: deciding what truly earns a spot in your creative sanctuary. Be realistic. Are you genuinely going to use that fabric you bought five years ago for a trend that's long gone? If not, it might be time to let someone else love it.
The goal is to build a functional, inspiring collection, not a museum of past projects. An organized space frees your mind to focus on creating, not searching.
Letting go of things that no longer serve you makes room for new ideas and fresh inspiration to flow. If you're looking for more general inspiration for tidying up, check out Crochetree's ultimate guide to organizing your craft space. Once the clutter is gone, you'll find it's a breeze to implement smart storage that actually works for you.
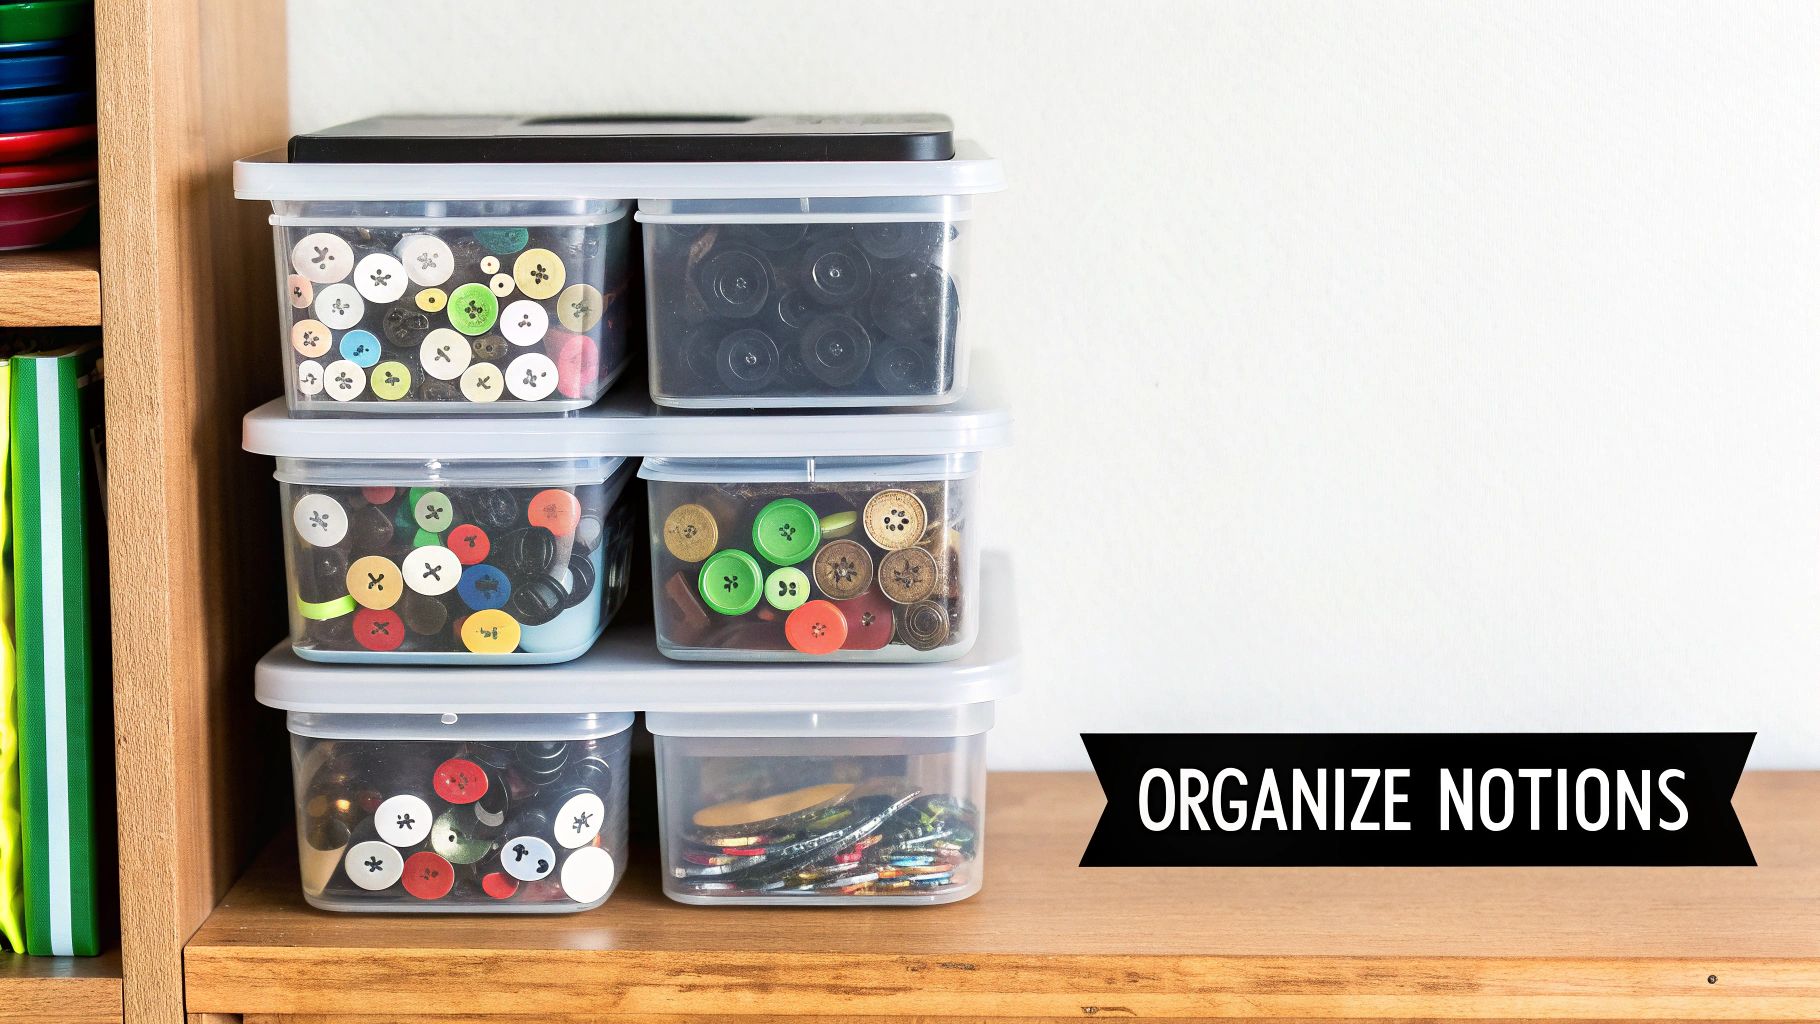
So, you've sorted through your mountains of supplies. Now comes the real challenge: taming all those little bits and bobs that make our projects possible. I’m talking about notions—the buttons, snaps, zippers, and hooks that are so easy to lose and even easier to overbuy simply because you can’t find the ones you already own.
The trick is to give every single item a dedicated, visible home. It's time to move past the classic, messy "notions drawer" and start thinking in terms of specific containers for specific things. Your mantra here should be visibility and accessibility. When you can see your entire collection of blue buttons at a glance, you’ll stop buying duplicates and can get back to sewing that much faster.
Tossing everything into one giant bin is a recipe for frustration. To get your sewing supplies truly organized, you need solutions that fit the item. And no, this doesn't mean you need to drop a ton of cash on custom organizers. Some of my favorite storage solutions are just cleverly repurposed everyday items.
Here are a few ideas that I’ve found work wonders:
Your sewing space should be an extension of your creative mind. When you can find what you need without a frustrating search, you preserve your creative energy for the project itself, not the prep work.
Taking the time to set this up transforms your workspace from a source of stress into a streamlined hub of productivity, with the right tools always within arm's reach.
Longer items like zippers, elastic, and ribbon bring their own brand of chaos. If you just toss them in a drawer, you're guaranteed to end up with a tangled mess. A few specific solutions can make a world of difference.
Try using shallow drawer dividers to separate your zippers by length and color. This keeps them lying flat and makes it incredibly easy to find the exact one you need. For spools of ribbon or elastic, a simple wooden dowel mounted inside a drawer or on a wall works beautifully—just unroll what you need. And speaking of a great workspace, having a reliable cutting surface is a must. A large, durable quilter's dual-side cutting mat protects your table and makes precision work so much easier.
Ultimately, the best system is one you'll actually stick with. Take a moment to think about how you work. Do you like having everything out in the open, or do you prefer it all neatly tucked away? Answering that one question will point you toward the perfect organization strategy for your personal style, ensuring your sewing space remains a joy to create in.
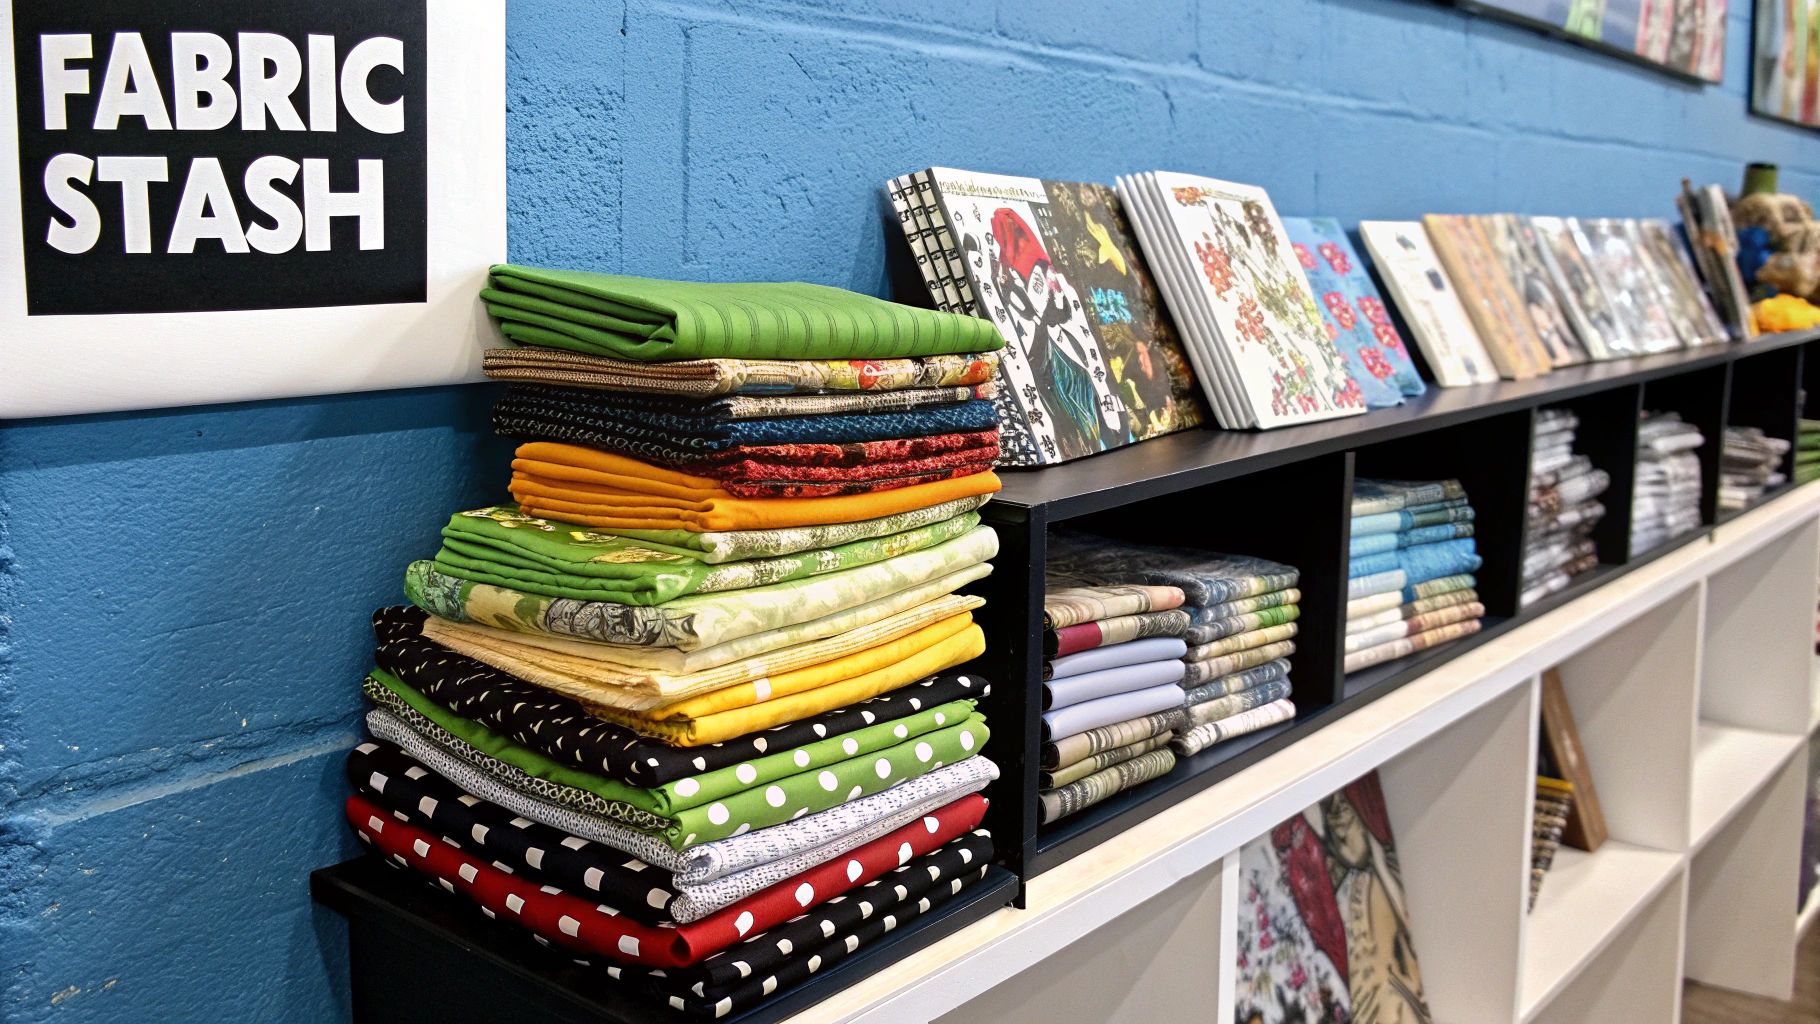
For most of us, fabric is the whole reason we fell in love with sewing. It's also the biggest source of chaos in our creative space. When your fabric stash feels more like a mountain than a curated collection, it's hard to find anything, let alone feel inspired to start a new project.
The secret isn’t some magic, one-size-fits-all solution. It's about turning that unruly pile into your own personal fabric "shop" by finding a storage method that actually works for your space and the kind of fabric you own.
Let's walk through a few techniques that seasoned sewists rely on. One of these will likely click for you.
The right storage system is about more than just being tidy—it's about protecting your investment. Storing fabric correctly prevents sun damage, keeps dust off, and avoids those permanent creases, so it’s pristine when you’re ready to sew.
Okay, so you've decided how to fold or roll your fabric. Now, where do you put it all? This is the classic sewing room dilemma: open shelves or closed containers?
It's interesting to see how this mirrors trends in the larger retail world. In the U.S., e-commerce now makes up over 20% of all sales in the fabric and sewing supplies industry. This shift forces brick-and-mortar shops to have impeccable inventory systems. As home sewists, we're essentially managing our own personal inventory, and the same principles apply.
Here’s a quick breakdown to help you figure out what's best for you:
| Storage Type | The Good Stuff | The Downsides |
|---|---|---|
| Open Shelving | Everything is visible and easy to grab. It also creates a beautiful, inspiring wall of color. | Your fabric is exposed to dust and potential sun fading. It can look messy if you don't keep it neat. |
| Closed Containers | Protects fabric from dust, light, and even pests. It gives your room a very clean, streamlined look. | It’s easy to forget what you have! This definitely requires good labeling to avoid the "out of sight, out of mind" trap. |
In the end, most of us land on a hybrid system. I keep my go-to fabrics on open shelves where I can see them, but my delicate silks and less-used yardage are stored safely in clear, labeled bins. It truly gives you the best of both worlds—protection for your fabric and easy access for your creativity.
Once your fabric is under control, the next battle is with the small stuff: your thread and tools. These are the items that can really get out of hand, turning a tidy space into a minefield of tangled thread and missing scissors. A little bit of smart organization here isn't just about appearances; it's about making your sewing time more productive and protecting your gear.
Believe it or not, how you store your thread matters. Sunlight and dust are its worst enemies, causing fibers to weaken and become brittle over time. With the global sewing thread market valued at around $3.79 billion, it’s clear we invest a lot in quality materials. It just makes sense to protect that investment.
For me, the key to thread storage is visibility. You need to see what you have. A wall-mounted thread rack is probably my favorite solution because it doubles as a piece of art. All your colors are on display, making it incredibly easy to grab the perfect match for your latest fabric find. No more digging through a messy box.
Bobbins are a whole other challenge. The goal is to stop them from unraveling into a bird's nest and, ideally, keep them with their matching thread spool. Here are a few simple tricks I swear by:
A well-organized thread system saves you time and money. When you can find the right color instantly, you avoid buying duplicate spools and can get back to your project faster.
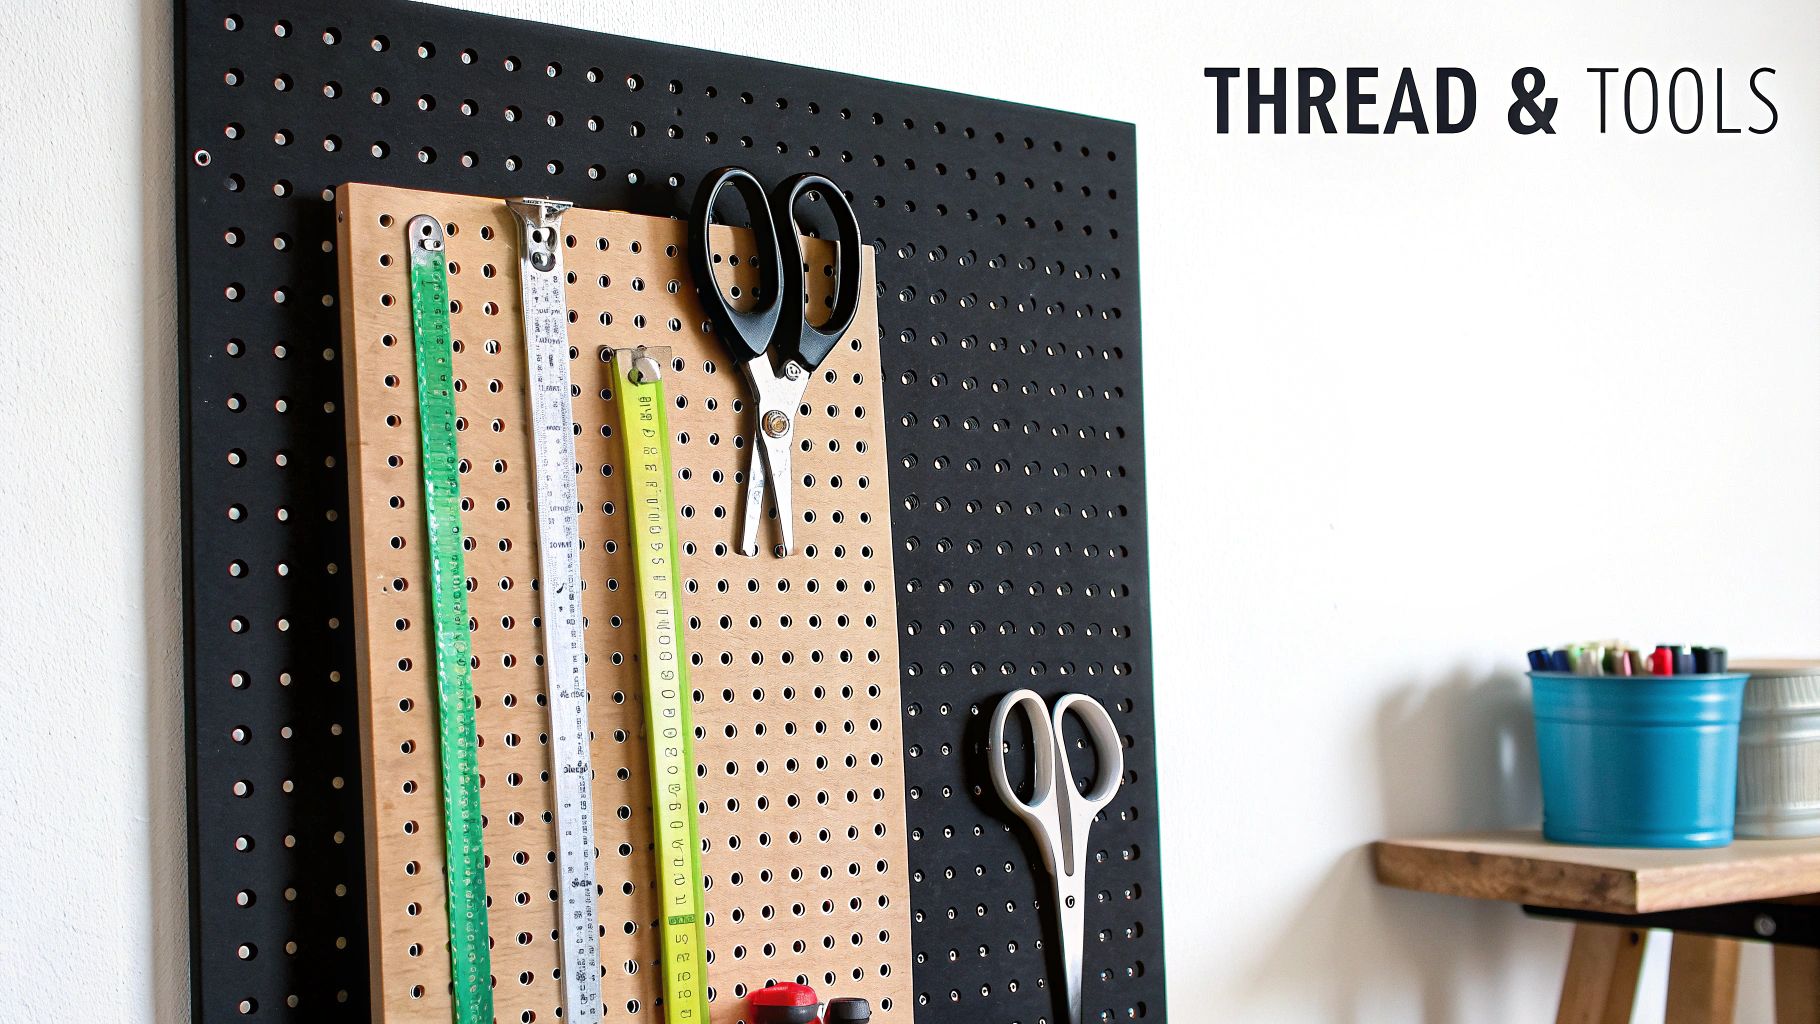
Now, let's talk about your tools. Your scissors, rotary cutters, and rulers are precision instruments, and they deserve better than being tossed into a drawer. That’s a surefire way to get dull blades, chipped rulers, and maybe even a cut finger. A solid plan for your tools needs to balance safety with accessibility. The principles in this guide on organizing your supplies effectively apply here, too—it’s all about having a designated home for everything.
A pegboard is an absolute game-changer for tool storage. You can set it up with different hooks and small baskets to hold everything from your favorite shears to marking chalk, all while keeping your cutting mat clear. For rulers, hanging them on hooks is the best way to prevent warping.
For sharp implements like rotary cutters and seam rippers, I highly recommend a drawer tray with dividers. It keeps them from rolling around and ensures you won't accidentally grab a blade when you're reaching for something else. This kind of thoughtful storage keeps your tools in prime condition for years of use.
Getting your sewing room organized feels incredible, doesn't it? But let's be honest, the real win is keeping it that way. After all the hard work of sorting and storing, the next step is building a few simple habits to stop the clutter from creeping back.
Think of it less as a chore and more as part of your creative process. With a little maintenance, your space stays a functional sanctuary, always ready for your next project, instead of becoming another overwhelming task on your to-do list.
To prevent your fabric stash from staging a hostile takeover of your sewing room, try adopting a simple rule: the 'one in, one out' policy. Every time you bring home a new piece of fabric, it's time to let one go. This keeps your collection from ballooning out of control and forces you to really think about what you want to keep.
Another game-changer is the "project box." Before you start a new work-in-progress, gather everything you'll need for it—the fabric, thread, pattern, and all the notions. You can even tuck in a handy little tool like the Oliso M3 Pro Mini Iron for quick presses at your cutting table.
Putting it all into one dedicated container has a couple of huge benefits:
This one simple trick completely changes your workflow. Instead of a static storage system, you have a dynamic way to manage the creative chaos, keeping it all contained in one portable box.
The best way to maintain order is to never let the mess get out of hand in the first place. I'm not talking about hours of deep cleaning, just a few minutes of consistent effort. Try scheduling a quick 15-minute reset at the end of every sewing session.
Think of this as the cool-down after a workout. Wiping down your machine, putting away tools, and sweeping up stray threads prevents small messes from turning into a weekend-long cleanup project.
During this time, just put your tools back where they belong, toss fabric scraps into their bin, and wind up any loose bobbins. Making this little tidying session a non-negotiable part of your sewing routine is the secret to keeping your creative haven ready for whenever inspiration strikes.
Even with a solid plan, you’re bound to hit a few snags when you start organizing your sewing supplies. That’s perfectly normal. Working through these common hurdles is what separates a system that looks good for a week from one that actually sticks for the long haul. Let's dig into some of the most frequent questions I hear from fellow sewists.
One of the biggest culprits of chaos? The pattern collection. It doesn't matter if you're a die-hard fan of classic paper patterns or you've gone all-in on digital downloads—taming them can feel like a never-ending battle.
Keeping your sewing patterns in good shape and easy to find is non-negotiable. For those classic paper envelopes, you don't need a fancy system; simple office supplies work beautifully. I've had great success with a basic filing cabinet and hanging folders, but sturdy magazine file boxes lined up on a shelf work just as well. The key is to find a system that clicks with how your brain works.
You could sort them by:
When it comes to PDF patterns, the organization has to happen on your computer. Create a really clear folder system, either on your hard drive or in a cloud service like Dropbox. A logical path might be something like Sewing Patterns > Dresses > [Brand Name]. Trust me on this: always, always save both the instructions and the tiled pattern files in the same folder. You’ll thank yourself later.
Here's a pro tip that has saved me countless times: use a simple spreadsheet. I use one to track every pattern I own, both physical and digital, along with its size range and fabric notes. It's a tiny bit of upfront work that has stopped me from buying the same pattern twice more times than I can count.
When you’re working with limited square footage, you have to start thinking vertically. A small sewing space doesn’t mean a messy one—it just means every single inch needs to work for you. The number one goal is to clear off your precious work surfaces.
Look at your walls. Look at the back of your door. An over-the-door shoe organizer with clear pockets is a game-changer for all those little notions and tools. I’m also a huge fan of installing a pegboard right above the sewing table. It’s perfect for hanging thread racks, rulers, and scissors where you can see them and grab them easily.
A rolling cart is another brilliant trick for tight quarters. You can load it up with everything for your current project—fabric, thread, zippers—and then just wheel it into a closet or corner when you're done for the day. And don't forget about those "hidden" spots. Shallow bins that slide under a bed are amazing for stashing fabric without cluttering up your closet.
Ah, the great pre-washing debate. If you ask any seasoned sewist, you’ll get a pretty firm "yes." Taking the time to pre-wash your fabric before you fold it and put it away is a habit that will save you from major heartbreak down the line. It gets all the potential shrinkage and color bleeding out of the way before you’ve invested hours cutting and sewing.
Once your fabric is washed, dried, and given a good press, it’s truly ready to go. This means when inspiration strikes, you can pull a piece from your stash and start cutting immediately. It’s an especially crucial step for natural fibers like cotton, linen, and rayon, which are notorious for shrinking. Sure, you could wait and wash it right before you start a project, but doing it all upfront makes the entire creative process so much smoother.
Here at Famcut.com, we know that an organized space is a creative space. We invite you to explore our huge selection of quality fabrics, must-have tools, and notions to round out your sewing sanctuary. Head over to https://famcut.com to find everything you need for whatever you're dreaming up next.
At High Country Quilts we care deeply about community. With our experiences in retail, we know that a store is not only a place to shop but also a place for the community to gather and share. During this busy...

Hi! We’re Adam and Renee Wheaton, the new owners of High Country Quilts! For more than 40 years, we’ve owned and operated vacuum and sewing businesses. Following in Renee’s father’s footsteps after he retired from All Discount Vacuum and Sewing in Colorado...


Leave a comment