

We Love Our Quilting Community
At High Country Quilts we care deeply about community. With our experiences in retail, we know that a store is not only a place to shop but also a place for the community to gather and share. During this busy...


So, you're ready to turn that pile of treasured T-shirts into a cozy, lasting memory? It can feel like a big project, but following a clear roadmap makes it a truly enjoyable and creative journey.
Think of this guide as having a friend from the shop right beside you. We'll demystify the whole process, sharing the same practical advice we give to quilters every day here at High Country Quilts.
This project is about more than just sewing fabric together—it’s about creating a tangible piece of your story. Every T-shirt, whether it’s from a concert, a family reunion, or a winning sports season, holds a special place in your heart. A quilt beautifully weaves them all together.
We’ll walk you through the key stages, giving you a clear plan so you can feel confident before making that all-important first cut.
Before you dive in, it helps to understand the big picture. T-shirt quilts are an amazing way to preserve memories, and they’ve become a huge part of the quilting world. You’re joining a passionate community of creators! In fact, T-shirt quilting is a popular niche within the broader quilting industry, which is valued at roughly $4.5 billion. You can find more in-depth quilting discussion to see just how big this craft has become.
Let's break the process down into four main stages:
A Quick Tip from the Shop: Always start with more shirts than you think you need. Having options gives you the freedom to design a more balanced and visually interesting layout. Some shirts just won't make the final cut, and that’s perfectly okay!
Think of us as your friendly, expert partner on this project. We'll cover everything from the essential supplies to those professional finishing touches, making sure your T-shirt quilt is something you'll be proud to show off for years to come.
Whether you're celebrating a graduation, honoring athletic achievements, or just clearing out a drawer full of favorites, you’re in the right place to begin. Let’s get started on creating an heirloom that tells your unique story.
Before you even think about making that first cut, let’s talk about getting your workspace set up for success. Having the right tools isn't just about making things easier; it honestly makes a huge difference in the quality of your finished quilt. Think of it like this: you wouldn't try to bake a gourmet cake with a plastic spoon and a paper plate. The same principle applies here.
We're going to be wrangling with stretchy, sometimes well-worn T-shirt fabric. A few key supplies are what I'd call non-negotiable if you want that flat, professional-looking finish we’re all aiming for. They turn potential headaches into a project you'll actually enjoy.
This is where the magic really begins, and your tools here are critical. T-shirt material wants to stretch and warp, but with the right gear, you can show it who's boss.
If you take away one piece of advice from us at High Country Quilts, let it be this: stabilizing the fabric is non-negotiable. If you skip it, your blocks will stretch out of shape as you sew, and getting your seams to line up will become a nearly impossible, frustrating task.
Once your T-shirt blocks are prepped and cut, it's time to piece them together. The goal here is to create strong, accurate seams that will hold up through years of washing and snuggling.
My Go-To Sewing Notions
For all our local customers sewing on a BERNINA, we can't recommend the Patchwork Foot #97D enough. That little guide on the side is a game-changer for keeping a perfect quarter-inch seam allowance every single time. It's that kind of accuracy that makes all your blocks fit together just right. A small investment in the right presser foot truly pays off in the end.
This is where a good quilt becomes a great one. I can't stress this enough: properly preparing your T-shirts is the most crucial step in the entire process. It sets the foundation for everything else, and getting it right now will save you from stretched fabric, wavy seams, and a ton of frustration later on.
We'll walk through exactly how to stabilize, center, and cut your shirts for a professional finish. It takes a bit of patience, but the payoff is a beautiful, flat quilt top that sews together like a dream.
T-shirt fabric is a knit, meaning it's designed to stretch—which is great for wearing, but a nightmare for quilting. Your secret weapon to tame that stretch is fusible interfacing. Honestly, this is a non-negotiable step.
Applying a lightweight, woven fusible interfacing to the back of each T-shirt graphic gives it stability. It basically turns that stretchy knit into a stable, woven-like fabric that’s so much easier to cut and sew. If you skip this, your blocks will warp and distort, making it nearly impossible to get your seams to line up.
Here’s how I get a perfect application every time:
A crucial step in preparing your t-shirts for a quilt involves understanding different t-shirt material types and how their properties (like stretch and drape) will impact your cutting and stabilization techniques. A thin vintage tee might need a gentler touch than a thick, modern athletic jersey.
This simple process is what ensures you get clean, accurate blocks.
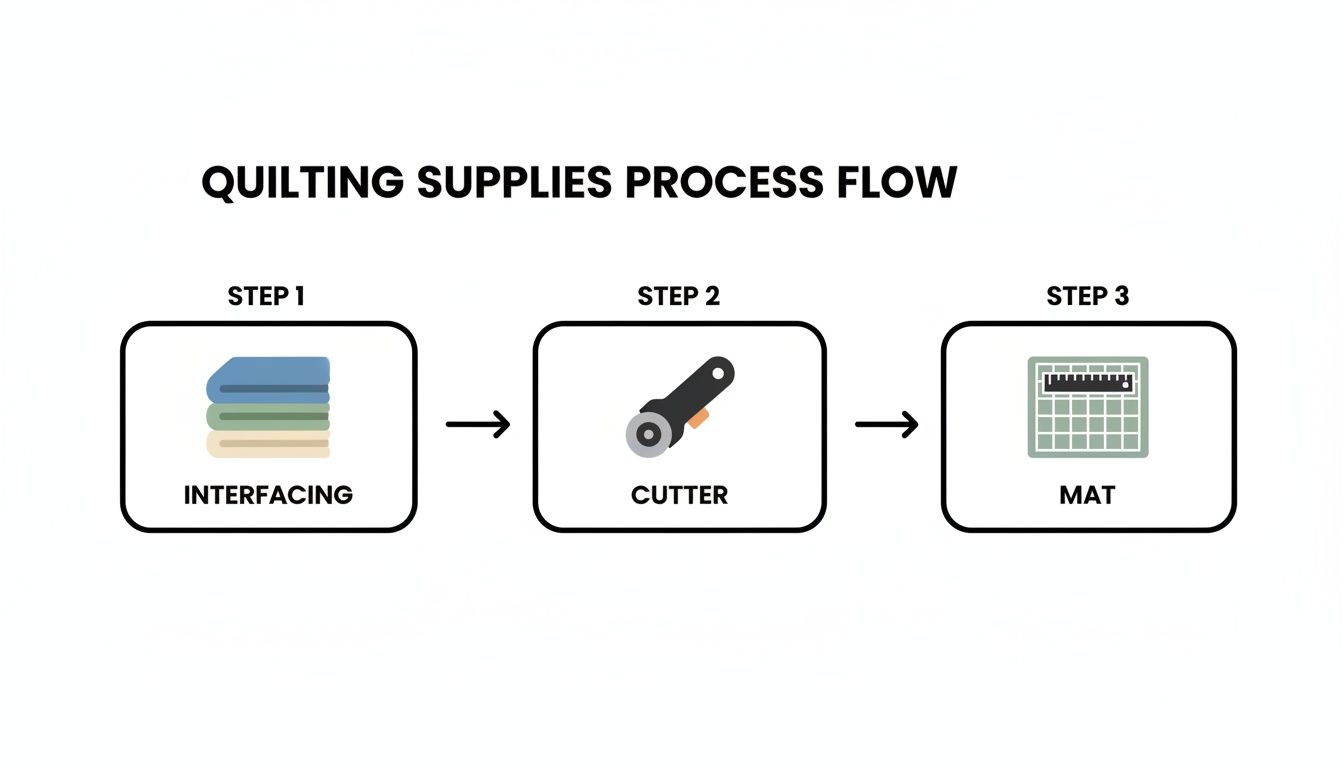
This workflow shows the essential tools that will help you transform a pile of stretchy shirts into perfectly quilt-ready fabric blocks.
Once your shirts are stabilized, it’s time to cut them into perfect squares. This precision is what allows your quilt top to piece together flawlessly. You’ll need a large square acrylic ruler (a 12.5" x 12.5" or 15.5" x 15.5" ruler works great for most shirts) and a sharp rotary cutter.
Lay a stabilized shirt on your cutting mat. Place your square ruler over the graphic, and take your time getting the design perfectly centered. I use the vertical and horizontal lines on the ruler to align with key elements in the graphic, like the top of a letter or the center of a logo.
When you’re happy with the placement, press down firmly on the ruler and use your rotary cutter to trim two adjacent sides. Without moving the fabric, carefully rotate the mat (or the shirt itself, if you don't have a rotating mat) and trim the remaining two sides. Just like that, you have a perfect block!
Planning your quilt's final size can feel a bit abstract at first. This table gives you a quick reference for how many blocks you'll need for common quilt dimensions, which is incredibly helpful for visualizing the project before you start sewing.
| Block Size | Number of Blocks | Layout (Blocks) | Approx. Quilt Size (inches) |
|---|---|---|---|
| 12.5" x 12.5" | 12 | 3 x 4 | 36" x 48" (Lap) |
| 12.5" x 12.5" | 20 | 4 x 5 | 48" x 60" (Large Lap) |
| 12.5" x 12.5" | 30 | 5 x 6 | 60" x 72" (Twin) |
| 14.5" x 14.5" | 16 | 4 x 4 | 56" x 56" (Square Throw) |
| 14.5" x 14.5" | 25 | 5 x 5 | 70" x 70" (Large Throw) |
| 14.5" x 14.5" | 36 | 6 x 6 | 84" x 84" (Queen) |
Remember, these sizes don't include any sashing or borders you might add, which would make the final quilt larger.
You’ll quickly find that not all T-shirts are created equal. You'll likely run into a mix of materials in your pile, and each one needs a slightly different touch.
Choosing a consistent block size is the easiest way to make a simple grid-style quilt. A 14-inch square (which finishes at 13.5 inches after sewing) is a fantastic starting point, as it’s large enough for most standard T-shirt graphics. Just remember to account for a 1/4 inch seam allowance on all sides when you're cutting. This careful prep work is the real secret behind a stunning T-shirt quilt that will last for years.
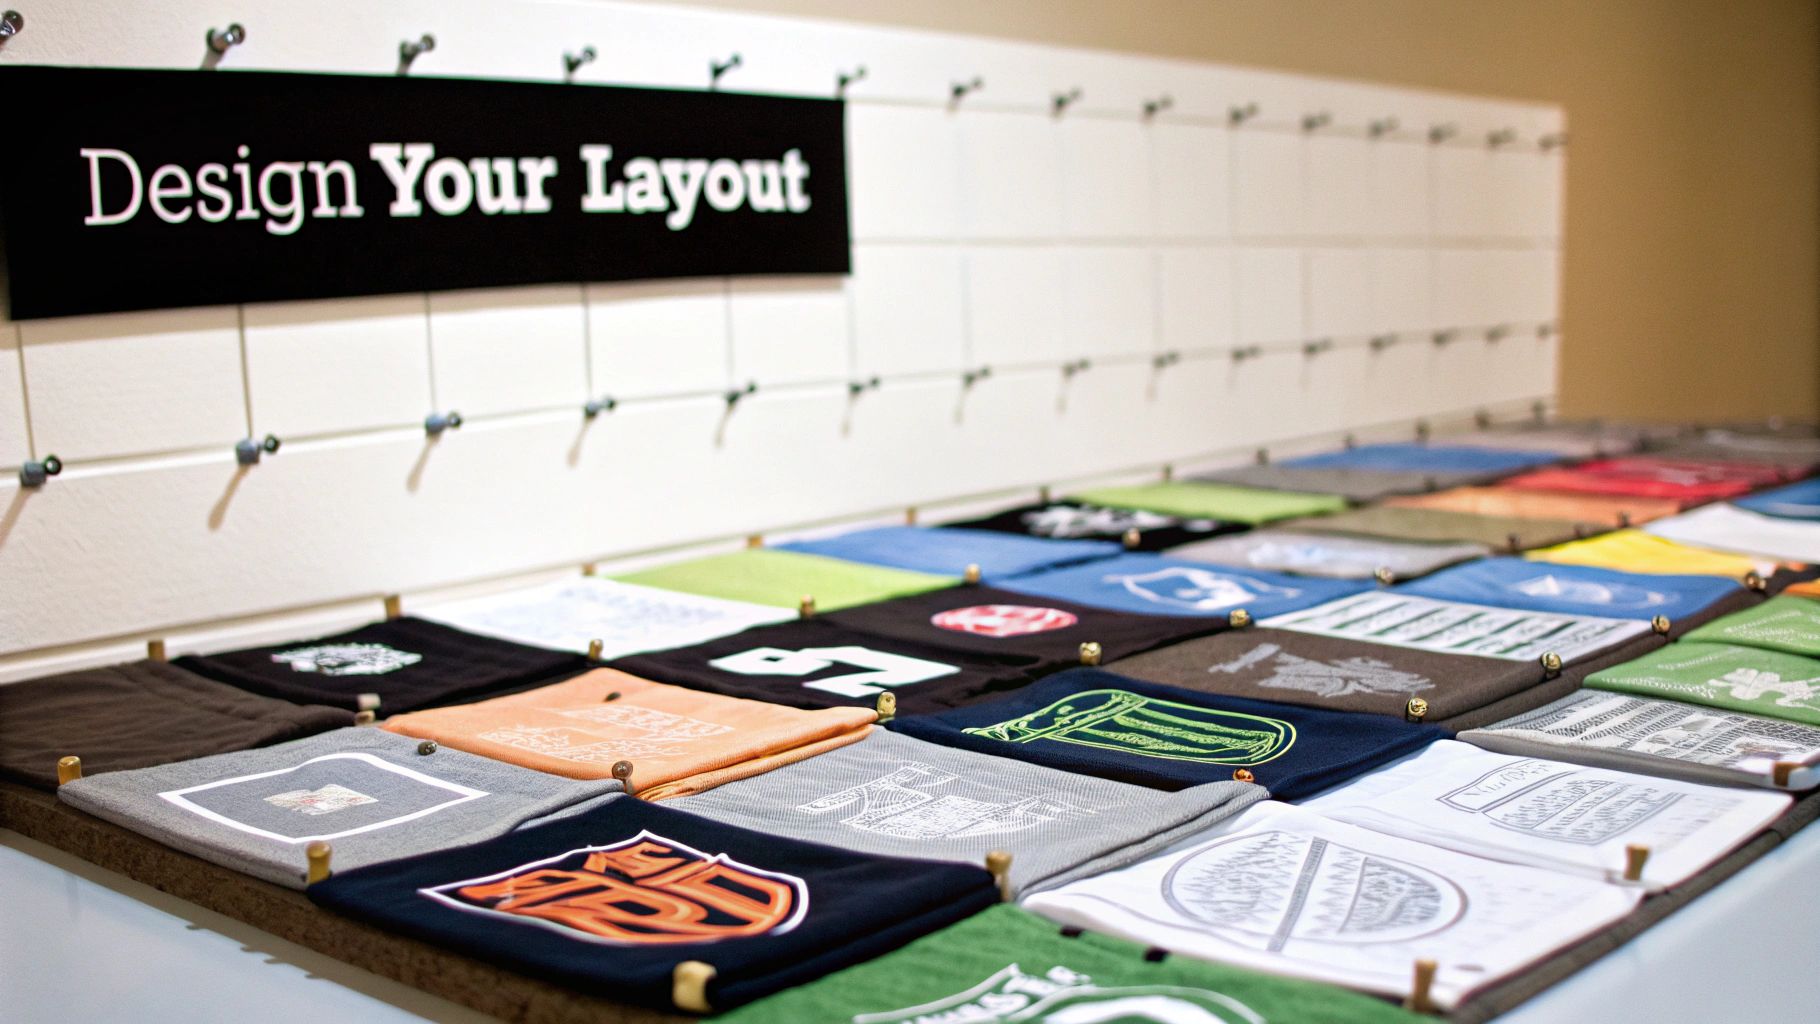
Imagine your T-shirts spread out on a spacious floor or pinned to a design wall—each graphic waiting to tell its part of your story. I always set aside an afternoon for this step, because nothing beats the thrill of seeing how colors and prints dance together before you sew a single seam.
Choose a spot where you can pause and walk around the layout. A dining table, a living room floor or even a hallway with masking-taped lines can work wonders. Shifting one block over or swapping two pieces often sparks fresh ideas.
The goal is a quilt that feels balanced, never crowded. So step back, snap a few photos, and let your eyes rest. This is where your quilt’s personality truly takes shape.
You don’t have to stick to a rigid grid. Here are a few ways I’ve mixed things up on past projects:
I once combined a grid on one side with a puzzle section on the other to highlight a cluster of concert tees. Feel free to experiment—your quilt should reflect your collection.
Getting the right balance is part intuition, part strategy. Here’s what I do:
Photographing your layout in black and white can be a game-changer. It strips away color distraction and shows you the value—how light or dark each block reads—so you instantly spot any areas that feel too heavy or too pale.
When you’re satisfied, take one more color photo. This snapshot becomes your roadmap when you move to the sewing machine—trust me, it saves countless “oops” moments later on.
With your layout locked in and reference photos on hand, it’s time to sew. My technique is built around joining blocks into rows, then stitching those rows together for a smooth, flat top.
Begin with your first row: place two blocks right sides together and stitch along the edge using a quarter-inch seam allowance. A BERNINA #97D walking foot helps keep those seams perfectly even.
Once sewn, press the seam allowances toward the darker fabric—this prevents any shadowing through lighter shirts. Keep adding blocks until your row is complete, then repeat for each remaining row.
Here’s a little pro tip for crisp intersections: alternate the pressing direction for each row.
By nesting your seams—seam allowances butt up against each other—you reduce bulk and get those corner points to align flawlessly. Pin at each nest, sew the long seams, and watch your quilt top come together with professional polish.
You've done the hard work of piecing your T-shirt quilt top, and it looks amazing! Now it's time for the magic part: turning that flat top into a real, three-dimensional quilt. This is where we build the "quilt sandwich"—a layered stack of your quilt top, the fluffy batting in the middle, and the backing fabric.
Getting these layers perfectly smooth and secure is probably the most critical part of the finishing process. A little patience here goes a long way. Trust me, a well-basted quilt is a dream to sew and makes the difference between a homemade project and a professional-looking heirloom.
The batting is the heart of your quilt; it's what provides the warmth and texture. The feel you're going for will guide your choice.
For your backing, you'll need a piece of fabric that's at least 4 inches larger than your quilt top on all four sides. This extra margin is crucial! A wide-back fabric, usually 108 inches wide, is a huge time-saver because you won't have to piece smaller cuts together to cover the back.
A little tip from experience: think about who will be snuggling under this quilt. A soft fleece or minky backing can make it incredibly cozy. Just be warned—those fabrics are slippery! If you go this route, don't be shy with your safety pins during the basting stage.
Basting is just a temporary way to hold your three layers together so they don't shift around while you're quilting. The best place to do this is on a large, clean floor where you can really spread out.
First, lay down your backing fabric with the wrong side facing up. Smooth it out until it’s perfectly flat. Use painter's tape to tape the edges to the floor, pulling it taut—but not so tight that you stretch the fabric out of shape.
Next, lay your batting over the backing, smoothing out any wrinkles. Finally, carefully center your quilt top, right side up, over the batting. That extra fabric you left on the backing and batting should now form a nice border all the way around your top.
You have a couple of great options for basting:
This is it! Quilting is what permanently joins the three layers and gives your quilt its final texture. With T-shirt quilts, the graphics are the main event, so simple quilting often looks best.
For beginners, I always recommend straight-line quilting with a walking foot. A walking foot is a lifesaver; it has feed dogs on the bottom that grip the top layers of fabric and move them through the machine at the same speed as the bottom layers, which is the secret to avoiding tucks and puckers. You can stitch "in the ditch" (right along your seam lines) or quilt a simple grid across the blocks.
Another charming and easy option is to tie the quilt. This is a classic, no-sew finish where you use a sturdy needle and embroidery floss to make small, secure knots at the corners where your blocks meet. It creates a cozy, traditional look and is both quick and durable.
Of course, if you're here in the Colorado Springs area and want to give your quilt a truly polished finish, we'd love to help. Bring your quilt top to us at High Country Quilts, and our professional longarm quilting services can add a beautiful, intricate stitch pattern that will turn your project into a treasured heirloom for years to come.
The binding is what truly finishes your quilt. It’s more than just a functional edge—it’s the frame for all those memories, protecting the seams and giving your T-shirt quilt a clean, professional look that will last for years.
Choosing a great binding fabric, usually a quality cotton or cotton-blend, is a fun final step. A pop of color can add a fantastic contrast to your T-shirt blocks. My best advice? Stick to a consistent width for your binding. It makes the whole process of trimming and attaching it so much smoother, and you'll end up with beautifully straight edges.
First things first, you need to figure out how much binding you'll need. Just measure all four sides of your finished quilt top and add them together. I always add at least an extra 10 to 12 inches to that total—this gives you plenty of room to join the ends and trim everything up nicely without any stress.
To join your strips into one long piece, sew them end-to-end with a diagonal seam. Using a 45-degree angle for this seam is a game-changer. It distributes the bulk from the seam allowance, making the join much flatter and stronger than a straight seam.
You’ve got two great options here, and honestly, neither one is "better" than the other—it just depends on the look you want and how much time you have. You can attach your binding by machine for a speedy, super-durable finish, or you can stitch it by hand for that classic, invisible look.
Getting those sharp, mitered corners just right can feel tricky at first, but it's all about one key move. Sew toward a corner, but stop stitching exactly 1/4 inch before you reach the edge. With the needle down, lift your presser foot, pivot the quilt, and fold the binding to create that perfect diagonal fold before continuing down the next side.
The secret to a perfect mitered corner isn't magic, it's just consistency. Keep your seam allowance precise, stop at the right point, and press everything carefully. It makes all the difference.
A twisted or wrinkly binding can be so frustrating after all your hard work. The good news is that it’s usually preventable. Taking a moment to double-check your work as you go will save you a ton of seam-ripping later.
And here’s a tip I learned the hard way: before you even think about sewing on the binding, trim away any excess batting and backing fabric so the edge of your quilt is perfectly flush. This simple step is crucial for getting a smooth, flat edge with no sneaky bumps underneath.
This is the final signature on your masterpiece! A quilt label transforms your project from a cozy blanket into a family heirloom. It's where you can document the story of the quilt for generations to come.
Take a few minutes to add the recipient's name, the date you finished it, or a special message before you attach the label. You can stitch it on by hand or machine to a back corner.
Thinking about the legacy of quilts is pretty amazing. The quilting market was valued at around $4.5 billion in 2025, a 150% jump in just 25 years. There are somewhere between 9 and 11 million quilters in North America alone! If you're curious, you can read more about these trends from the Craft Industry Alliance.
Here are a few ideas for creating your label:
Once your binding is on and your label is attached, your T-shirt quilt is officially complete. You’ve successfully turned a pile of old shirts into a beautiful and meaningful keepsake. Step back and admire what you've made
After teaching hundreds of people how to make these quilts at High Country Quilts, I've heard just about every question you can imagine. No matter how clear the instructions are, every project has its own little quirks. Let's tackle some of the most common ones I hear in the shop.
This is probably the #1 question people ask, often in a slight panic. Don't worry! It happens all the time, especially with concert or event shirts.
You have a couple of great options. Instead of trying to cram a huge graphic into a small square, let it be the star. You could design a "puzzle-style" or variable-block layout where that oversized shirt becomes a focal point. Another creative solution is to use that special shirt for the quilt's backing—a fun surprise on the other side!
Absolutely. You just need to decide how you want to feature them. You can simply pick the side you like best and save the other, or you can treat them as two entirely separate sources of fabric. Just cut them apart and make two different blocks for your quilt.
Memory quilts are all about the memories, not just the T-shirts. People often ask about including sweatshirts, sports jerseys, baby clothes, or even a favorite pair of flannel pajama pants. Yes, you can include them! The secret is in how you prep them.
The most important rule for a memory quilt? There are no rules. If an item holds a special meaning, we can almost always find a creative way to build it into your design.
Running short on shirts is another common hurdle, but it's actually a fantastic design opportunity. You can easily fill out your quilt top by adding blocks cut from coordinating cotton fabrics.
This is a perfect way to introduce a favorite color, a school color, or a fun pattern that complements the theme of your shirts. It adds wonderful visual interest and can break up the "busyness" of all the T-shirt graphics, giving the eyes a place to rest.
Ready to get started, or just need to talk through your project with an expert? Swing by High Country Quilts in Colorado Springs. We've got all the tools and advice you need to make your memory quilt a reality. You can also find everything you need on our website.
At High Country Quilts we care deeply about community. With our experiences in retail, we know that a store is not only a place to shop but also a place for the community to gather and share. During this busy...

Hi! We’re Adam and Renee Wheaton, the new owners of High Country Quilts! For more than 40 years, we’ve owned and operated vacuum and sewing businesses. Following in Renee’s father’s footsteps after he retired from All Discount Vacuum and Sewing in Colorado...


Leave a comment