

We Love Our Quilting Community
At High Country Quilts we care deeply about community. With our experiences in retail, we know that a store is not only a place to shop but also a place for the community to gather and share. During this busy...


Turning a pile of old t-shirts into a quilt is a fantastic project. It's about transforming those cherished memories—from concerts, teams, and vacations—into a cozy, functional heirloom that tells a story. Think of it as a scrapbook you can wrap yourself in.
This guide is your personal workshop for creating a beautiful t-shirt quilt from start to finish. We'll walk through everything together, from picking the right tools to adding those final, professional-looking stitches.
You'll quickly learn why stabilizing the t-shirt fabric is the secret weapon for a flat, durable quilt. We’ll also dive into how to plan a layout that really showcases the unique story behind your shirts. Many people use this process to preserve special memories, turning everything from old college tees to iconic club kits into lasting treasures.
Let's be honest, we all have that drawer. It's overflowing with shirts from marathons, family reunions, or favorite bands that we just can't bear to part with. A t-shirt quilt is the perfect way to declutter while giving those meaningful items a brand-new purpose. It’s a deeply personal project that results in a one-of-a-kind keepsake.
The best quilts aren't just made with fabric and thread; they're stitched together with memories and love. Each block tells a part of your story.
Whether you're a seasoned quilter or just dusting off your sewing machine, this guide has everything you need. Our goal is to give you the confidence and the practical skills to create something you'll be proud of. Before we dive into the fun part, let's get our supplies in order.
Here's a quick checklist of the tools and materials you’ll need to get started on your t-shirt quilt.
| Category | Item | Expert Tip |
|---|---|---|
| Preparation | T-Shirts | Choose shirts with meaningful graphics. 12-30 shirts is a good range for a throw-sized quilt. |
| Preparation | Lightweight Fusible Interfacing | This is the magic ingredient! Pellon SF101 is a popular, reliable choice for preventing stretch. |
| Cutting | Rotary Cutter & Self-Healing Mat | Far more accurate than scissors. A sharp blade is crucial for clean cuts. |
| Cutting | Acrylic Quilting Rulers | A square ruler (e.g., 12.5" or 15.5") is essential for trimming blocks perfectly. |
| Sewing | Sewing Machine | Any basic machine with a straight stitch will work. A walking foot is a helpful, but not required, accessory. |
| Sewing | Quality Cotton Thread | Choose a neutral color like gray or beige that blends with most colors. |
| Finishing | Sashing/Border Fabric | 100% cotton quilting fabric works best. It adds stability and a polished look. |
| Finishing | Batting & Backing Fabric | Cotton or an 80/20 cotton-poly blend for batting. Flannel or fleece makes for an extra-cozy backing. |
Having these items ready to go will make the entire process much smoother.
If you want your project to be a smashing success, focus your energy on these three things:
By paying attention to these details right from the start, you’re setting yourself up for a much smoother quilting experience and a final product you'll be thrilled to show off. Let's get started on your journey from t-shirts to treasure
Let’s be honest, the real magic of a t-shirt quilt happens before you even think about sewing. Getting your shirts prepped correctly is the absolute bedrock of the whole project. It’s what transforms those stretchy, well-loved tees into stable, predictable fabric that will lay flat and look fantastic for years to come.
First things first, you need to curate your collection. Lay all the potential shirts out on the floor and take a good look. How do the colors play together? Do the graphics create the story you want to tell? This is the time to be a little ruthless—some shirts might be too faded or just don't fit the vibe.
But what about that one super thin, super special shirt with a tiny hole? Don't toss it! As long as the design itself is intact, a good piece of interfacing can give it the strength it needs to join the quilt.
And for those shirts with a stubborn stain from that one concert or event? Taking a moment to try some effective stain removal techniques can make a world of difference in your finished quilt.
Every single shirt going into this quilt needs a trip through the washer and dryer. This isn't optional. Pre-washing gets rid of any grime but, more importantly, it pre-shrinks the fabric. If you skip this, you’re asking for puckered, distorted blocks the first time you wash the finished quilt.
Here’s a critical piece of advice: do not use fabric softener or dryer sheets. They leave behind a film that stops the fusible interfacing from getting a good grip on the fabric.
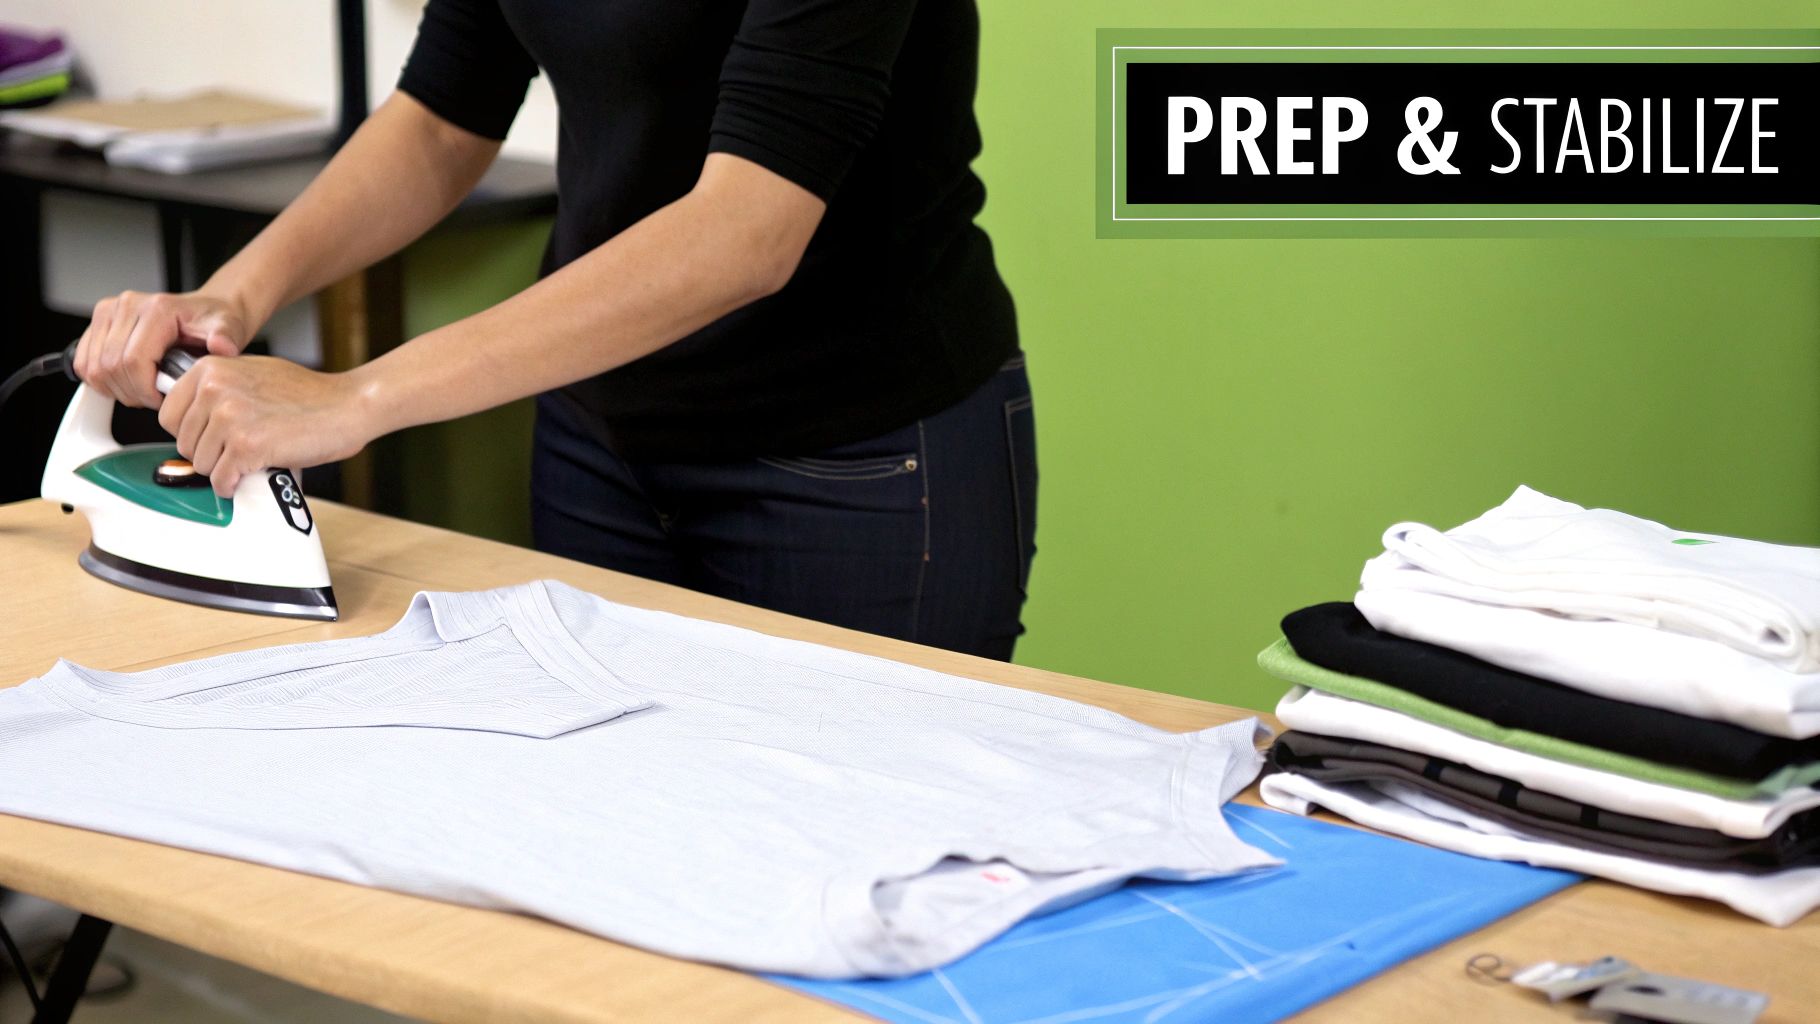
Once your shirts are clean and completely dry, it's time to iron. Get your iron hot and turn the steam off. You want to press out every single wrinkle, creating a perfectly flat canvas for the next step.
Expert Tip: Don't rush the ironing. A smooth, wrinkle-free shirt is the key to getting your interfacing to apply without any annoying bubbles or creases. This directly affects how clean and professional your quilt blocks will look.
This is where you tame the T-shirt. Knit fabric is, by nature, stretchy. Fusible interfacing is a backing material with a heat-activated glue on one side. When you iron it onto the back of the t-shirt, it completely removes the stretch, making it behave like a stable piece of woven cotton.
My go-to, and a favorite among most quilters, is a lightweight woven fusible like Pellon SF101 Shape-Flex. It gives the fabric the body it needs without making it stiff or bulky.
Here’s the right way to apply it:
Even those of us who have made dozens of these quilts can slip up during prep. Knowing what to avoid will save you a ton of headaches.
By taking your time with each of these prep steps, you're truly setting your project up for success. Good prep work leads to stable, square blocks that are a dream to piece together.
Alright, your shirts are prepped and stabilized, which means the most tedious part is behind you. Now comes the fun: this is where your pile of old t-shirts starts to actually look like a quilt. We're moving from prep work to the creative phase of designing the layout and cutting your blocks.
How do you want this quilt to feel? Are you picturing a neat, orderly grid, or something a bit more eclectic and free-spirited? The decisions you make right now will really define the final look of your project.
Before you even think about cutting, you need a game plan. The absolute best way to do this is to clear a big space on the floor or a bed and lay out all your stabilized shirt fronts. Live with it for a bit. Move them around, swap them out, and see how the colors and themes play off each other.
For t-shirt quilts, you generally have two main paths you can take:
My advice? If this is your first t-shirt quilt, stick with the classic grid. It keeps the math and the sewing simple, so you can really nail the fundamentals without getting overwhelmed.
Once you've settled on a layout, it's time to figure out how big to make your blocks. This isn't just a random number; the graphics on your shirts will tell you what size to use.
Hunt through your pile and find the shirt with the largest graphic. Get your ruler and measure its width and height. Now, add at least a 2-inch buffer to that measurement. So, if your biggest design is 12 inches across, you’ll want to cut your block to at least 14 inches. This gives you a nice, un-cramped border around the design.
For a classic grid, this single measurement becomes your standard for every single block. Easy. If you’re feeling adventurous and trying a mosaic, you’ll just repeat this process for each individual shirt, customizing the block size as you go.
There's a term in quilting called "fussy cutting," and it's simply the art of cutting your fabric to intentionally feature a specific part of the design. For us, it means getting that t-shirt logo perfectly centered in the block. This is what makes a quilt look polished and professional.
Here’s how to nail it:
Taking an extra 30 seconds to perfectly center each graphic is the single biggest thing you can do to elevate your quilt. It's a small detail that delivers a huge visual payoff.
You can use scissors, but if you want perfectly straight, accurate cuts, you need a rotary cutter, a self-healing mat, and a long acrylic ruler. This trio is the quilter's secret weapon for precision.
Start by laying your stabilized shirt piece flat on the mat. Place your acrylic ruler on top, right where you want to make the first cut. Plant your non-dominant hand firmly on the ruler, keeping your fingertips curled up and away from the edge.
With a bit of downward pressure, push the rotary cutter away from your body in one smooth, confident motion. Never, ever pull the cutter toward yourself—that’s how accidents happen. After the first cut, turn the mat (don’t move the fabric!) and repeat on the other three sides.
Once you’re done, your messy pile of shirts will be a neat, satisfying stack of perfectly cut blocks. You've got a plan, you've got your pieces, and you're officially ready to start sewing this thing together.
This is my favorite part of the process. Your carefully prepared t-shirt blocks are about to go from a neat stack of memories into an actual quilt top. It’s that magical moment where all the prep work really pays off, and you start to see the whole story come together.
The secret to making it look sharp and professional? A consistent seam allowance. Pretty much all quilting is done with a standard 1/4-inch seam allowance. If your sewing machine has a 1/4-inch foot, now's the time to pop it on. If not, no worries—a little piece of painter's tape on your machine makes a fantastic, perfectly straight guide.
You could just sew your blocks directly to each other, but adding sashing—those fabric strips between the blocks—is a game-changer. I rarely make a t-shirt quilt without it. Here’s why:
I find that 2.5-inch strips are a great starting point for sashing. Once sewn, they create a perfect 2-inch frame around the blocks. You'll first sew your blocks into rows with short sashing pieces, and then you'll join those rows with long sashing strips.
This simple diagram is a good reminder of the steps that got us here—from the initial idea to the perfectly cut blocks ready for assembly.
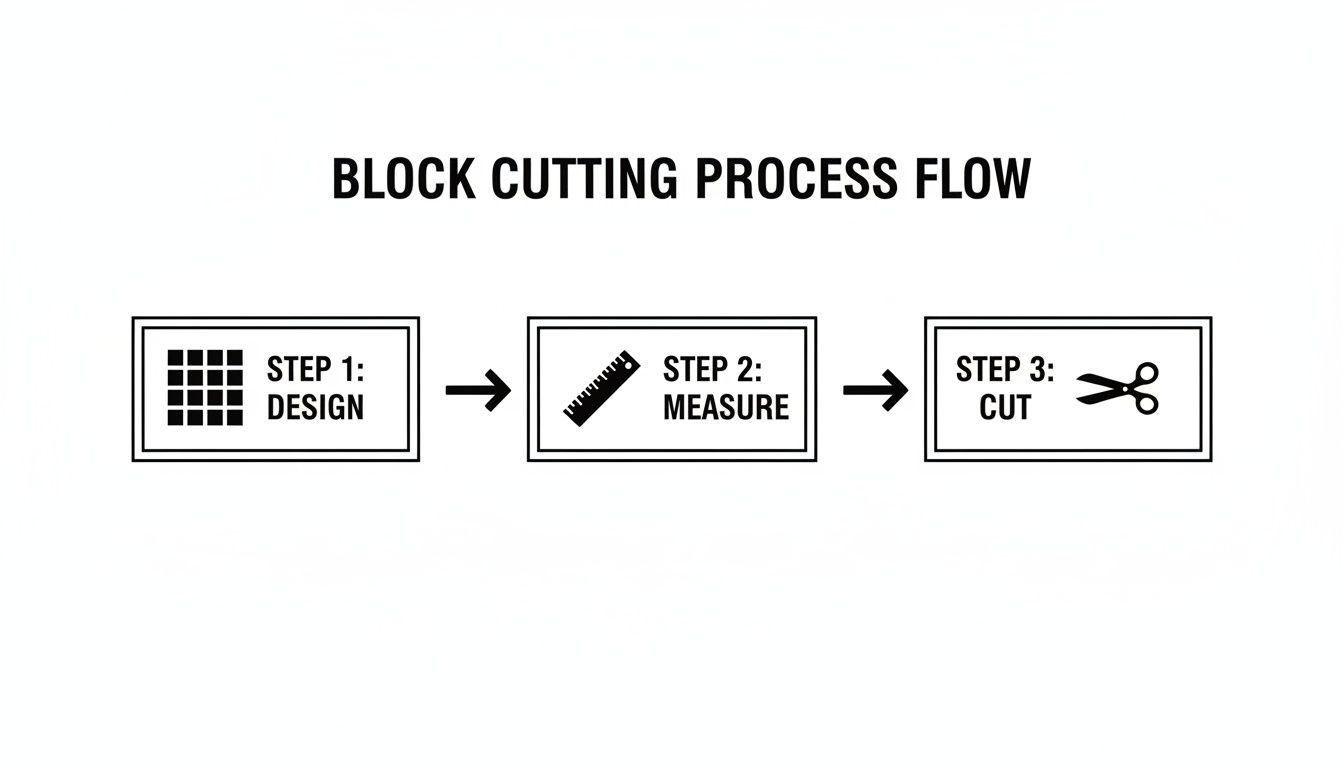
It all flows from one step to the next, and now we're ready for the fun part: sewing it all together.
Before you touch your sewing machine, lay out all your blocks on the floor exactly how you planned. This is your last chance to spot anything that looks off with the color flow or arrangement.
Just keep adding blocks and sashing strips this way until you’ve finished the row. Then, do the same for all the other rows, and remember to press your seams consistently as you go.
Pro Tip: When you're sewing long pieces like sashing, pins are non-negotiable. Pin generously! It stops the fabric layers from creeping and stretching, which is the key to getting your blocks to line up perfectly.
Want to add a little extra flair? Try cornerstones. These are small squares of fabric that sit at the intersection of your sashing strips. It's an optional touch, but it adds a pop of color and a really classic, polished patchwork feel.
If you go this route, cut your cornerstone squares to the same width as your sashing strips (so, 2.5 x 2.5 inches). When you make the long sashing strips that go between your rows, you’ll piece them together like this: Sashing - Cornerstone - Sashing - Cornerstone - Sashing. Sew that pieced strip between your rows, and the cornerstones should line up beautifully with your vertical sashing.
Borders are the final frame for your quilt top. Get them right, and your quilt will be perfectly square. Get them wrong, and you'll end up with wavy, stretched-out edges—the number one mistake I see beginners make.
Do not just take a long strip of fabric, sew it to the side of your quilt, and trim the extra. This is a guaranteed recipe for waves.
Here’s the foolproof method:
This technique forces your quilt top to fit the perfectly cut border, guaranteeing a flat, square finish. You’re joining a huge community of creators—the quilting industry just keeps growing as more people fall in love with making things by hand. If you're curious, you can dig into the latest data on the size of the quilting industry. Your beautiful quilt top is now officially part of this tradition and ready for the final steps
You’ve done the hard work of piecing your quilt top, and it looks fantastic. Now for the really satisfying part: turning that flat top into a cozy, three-dimensional quilt. This is where we’ll build the "quilt sandwich" and give your project those clean, professional edges.
Batting is the unsung hero of any quilt—it's the fluffy middle layer that provides warmth and weight. Walking into a fabric store can feel a little overwhelming with all the options, but for a t-shirt quilt, the choice is usually pretty simple. You're looking for something comfortable that won't be too heavy or a pain to quilt through.
Here are the most common choices I recommend:
Whatever you choose, buy a size that’s at least 4-6 inches larger than your quilt top on all four sides. This extra overhang is crucial and gives you plenty of wiggle room during the quilting process.
The backing is simply the fabric on the underside of your quilt. You can go one of two ways here: use a single, large piece of wide-back fabric, or piece together standard-width fabric to get the size you need.
Wide-back fabric, which usually comes in 108-inch widths, is by far the easiest route. It completely eliminates the need to sew a long seam down the middle of your backing. Trust me, it saves a lot of time and effort. Cozy flannel or soft Minky are fantastic choices for a t-shirt quilt backing.
If you do piece your backing, press the seam open instead of to one side. This small step makes a big difference by reducing bulk and helping the quilting process go much more smoothly. Just like the batting, your backing fabric should also be 4-6 inches larger than the quilt top on all sides.
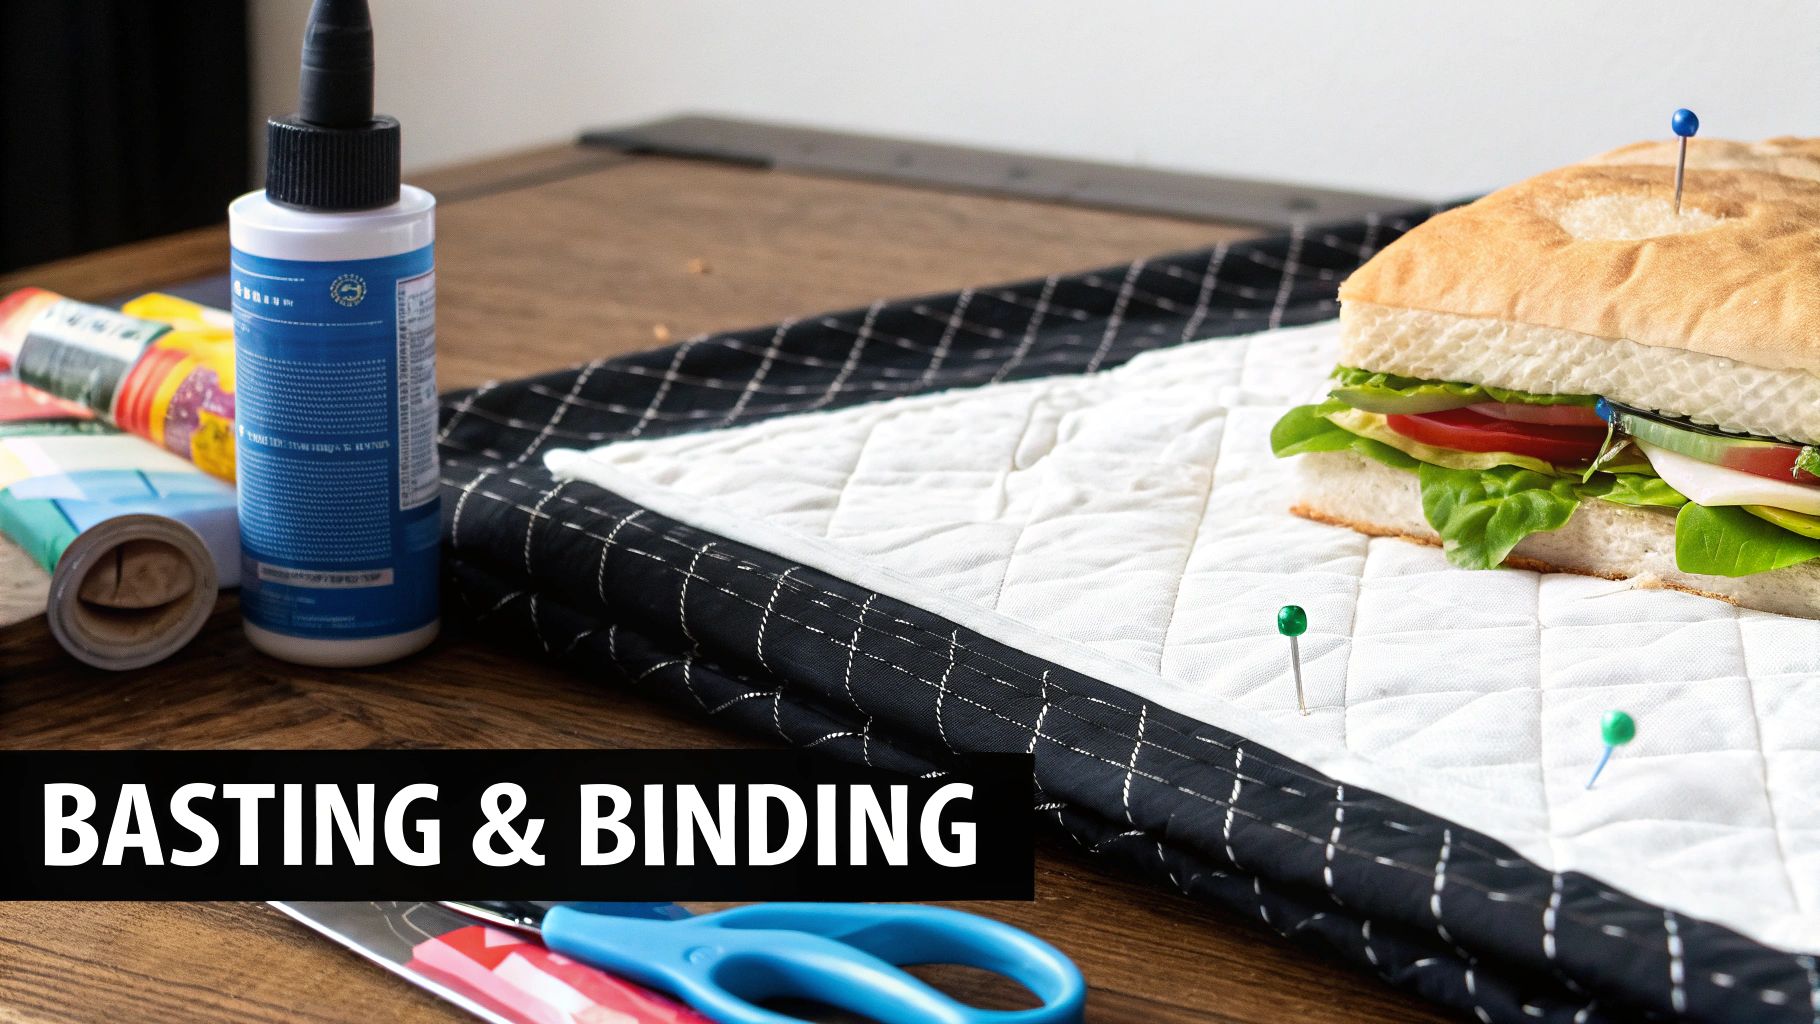
Basting is just a fancy word for temporarily securing your three layers—backing, batting, and quilt top—together. Don't skip this! It's what prevents the layers from shifting, bunching, or puckering while you're quilting.
The whole point of basting is to make your three layers act as a single, unified piece of fabric. A well-basted quilt is a joy to work on; a poorly basted one can be a source of endless frustration.
First, you'll need a large, clean floor space. Tape your backing fabric down, wrong side up, pulling it taut but not stretching it out of shape. Next, smooth your batting over the top, followed by your quilt top, right side up.
From here, you have a few ways to secure your sandwich:
Binding is the final frame for your quilt. It’s a fabric strip that wraps around the raw edges, giving you a durable and beautiful finish that will hold up for years of snuggling and washing.
First, you’ll need to make your binding. A standard width of 2.5 inches works perfectly. You’ll cut enough strips to go around the entire perimeter of your quilt and then sew them together end-to-end on a diagonal to reduce bulk where they join.
Once you have one long binding strip, press it in half lengthwise with the wrong sides together. You'll then sew the raw edge of this binding strip to the raw edge of the quilt top, using your walking foot and a 1/4-inch seam allowance.
After sewing the binding to the front, all that’s left is to wrap it around to the back of the quilt and stitch it down. You can do this by hand with a neat whipstitch for an invisible finish, or stitch it by machine for extra speed and durability. These finishing details are part of a craft that's always evolving; some interesting forecasts are even being made about general quilting trends for 2026 that consider new tools and styles.
With that final binding stitch, your t-shirt quilt is officially done! You’ve successfully turned a pile of memories into a warm, functional, and beautiful keepsake.
Even with a great tutorial, you're bound to hit a few head-scratchers when you're deep in a project like this. I've been there! This section is my brain dump of answers to the most common questions I hear from fellow quilters.
Think of it as your go-to guide for those little "what if?" moments. Getting these details right is what takes a project from good to great and helps you create a quilt you'll be proud of for decades.
This is a small choice that makes a huge difference. When you're just piecing the stabilized t-shirt blocks and adding sashing, a standard universal 80/12 or 90/14 needle will do the job perfectly. It’s got enough muscle for the interfaced fabric without being overkill.
But—and this is important—you absolutely must switch needles before you start quilting. Once you’ve layered your quilt top, batting, and backing, you're asking a lot more from your machine. I always upgrade to a sturdier 90/14 or even a 100/16 quilting or denim needle. These are built to power through thick layers, which means fewer skipped stitches, less frustration, and a much cleaner finish.
A fresh needle is the cheapest insurance you can buy for your quilt. Seriously, don't wait for it to get dull. Start with a brand new one before quilting, and you'll sidestep a world of headaches like thread nests and broken threads.
Of course! I actually love when quilts include a mix of garments. It adds so much texture and visual interest, telling a more complete story. You can absolutely incorporate sweatshirts, sports jerseys, polo shirts, and even woven flannels.
The secret is all in the prep work. Your goal is to make every block behave the same way. Heavier fabrics, like a thick sweatshirt, are usually stable enough on their own and don't need any interfacing. For anything thin, stretchy, or loosely woven—like a mesh sports jersey—fusible interfacing is non-negotiable. This gives every block a similar weight and stops them from stretching out of shape as you sew.
A Quick Guide to Mixing Fabrics
After all the love and hours you've poured into this project, you want it to last a lifetime. The good news is that proper care is pretty simple.
To keep it looking vibrant, always machine wash on a gentle or delicate cycle with cold water and a mild detergent. For the first couple of washes, I highly recommend throwing in a color catcher sheet. It’s a lifesaver for catching any bleeding dye, especially from new, dark, or brightly colored shirts.
When it comes to drying, low and slow is the way to go. You can either tumble dry on the lowest heat setting your machine has, or simply lay the quilt flat to air dry. The number one enemy of your t-shirt quilt is high heat, which can make the screen-printed designs crack, peel, and fade. Be gentle, and your quilt will keep those memories looking fresh for years.
At Famcut.com, we're passionate about helping you bring your creative visions to life, whether you're preserving memories in a quilt or diving into your next sewing adventure. Explore our resources and classes at https://famcut.com.
At High Country Quilts we care deeply about community. With our experiences in retail, we know that a store is not only a place to shop but also a place for the community to gather and share. During this busy...

Hi! We’re Adam and Renee Wheaton, the new owners of High Country Quilts! For more than 40 years, we’ve owned and operated vacuum and sewing businesses. Following in Renee’s father’s footsteps after he retired from All Discount Vacuum and Sewing in Colorado...


Leave a comment