

Free Fabric All Year: Our 2027 Fabric Punch Card
November 2–25 only: buy a $200 gift card in either store and get a free yard of fabric every month of 2027.

“Match the selvages and trim the end” is useful advice only when the fabric is already on grain. Otherwise, you can cut a beautifully straight edge across a distorted piece and carry that error into every strip.
Learning how to square up fabric before cutting means checking the weave, not just tidying the outline. Treat squaring as a repeatable cutting-table check, because washing, pressing and handling can change the alignment you just corrected.
A straight-looking raw edge isn't proof that your fabric is square. Squaring woven fabric means bringing its lengthwise and crosswise threads into a reliable relationship, then establishing an edge you can measure from.
The warp, or lengthwise grain, runs parallel to the selvage; the weft, or crosswise grain, should meet it at approximately 90 degrees, while true bias lies at 45 degrees, as explained in these textile-construction teaching materials. Bias has more flexibility and drape than straight grain, which makes it useful for curved binding but unsuitable as the reference for square cuts.
Commercial yardage may arrive cut off-grain or distorted by finishing, rolling and handling. A printed stripe can also distract you from the underlying threads, so don't assume the design or the shop-cut edge provides a dependable guide.
Build grain checks into these moments:
A small angular error repeated across many pieces can leave blocks that won't match neatly. Trimming more fabric away doesn't solve that underlying problem.
Quick test: Fold the fabric lengthwise with the selvages together and let it settle without pulling. If the cut ends don't meet evenly, investigate the grain before using either end as your measuring reference.
Start with the tools that reveal the threads: sharp scissors or snips, plus a pin or seam ripper. Scissors make a controlled opening at the selvage; the pin lifts a crosswise thread without cutting through its neighbors.
A ruler and mat come afterward. They help verify and preserve alignment, but neither can correct skew hidden beneath a neat fold.
| Tool | Role in squaring | Common mistake |
|---|---|---|
| Sharp scissors or snips | Clip the selvage about 1/2 inch to start the crosswise thread | Cutting too deep and severing several threads |
| Seam ripper or pin | Lift and isolate one or two crosswise threads to pull | Pulling too hard and puckering the whole width |
| Flat pressing surface | Keeps fabric flat for the fold check and re-press | Working on an uneven surface that bows the fold |
| Steam iron | Relaxes distortion and sets the edge after pulling | Pressing sideways along the bias and stretching the edge |
| 24-inch quilting ruler | Confirms the cut line and ends meet at right angles | Checking a fold that hasn't been pressed flat first |
| Self-healing cutting mat | Supports the fabric so the fold stays aligned | Cutting on a worn mat that grips and drags the fabric |
Choose a long acrylic quilting ruler, preferably at least the length shown above, with markings you can read against your fabric. Use its perpendicular lines to check the relationship between the fold and the prepared end, rather than lining everything up with the mat's grid.
A padded ironing board works for pressing, but support the remaining yardage so it doesn't hang and pull. Set the iron to a temperature safe for the fiber, then lift and lower it instead of sliding sideways.
You don't need a special machine. A stable, flat surface matters more than another gadget, and the rotary cutter stays closed until the grain check passes.
For cutting-table supplies, shop cutting tools at High Country Quilts.
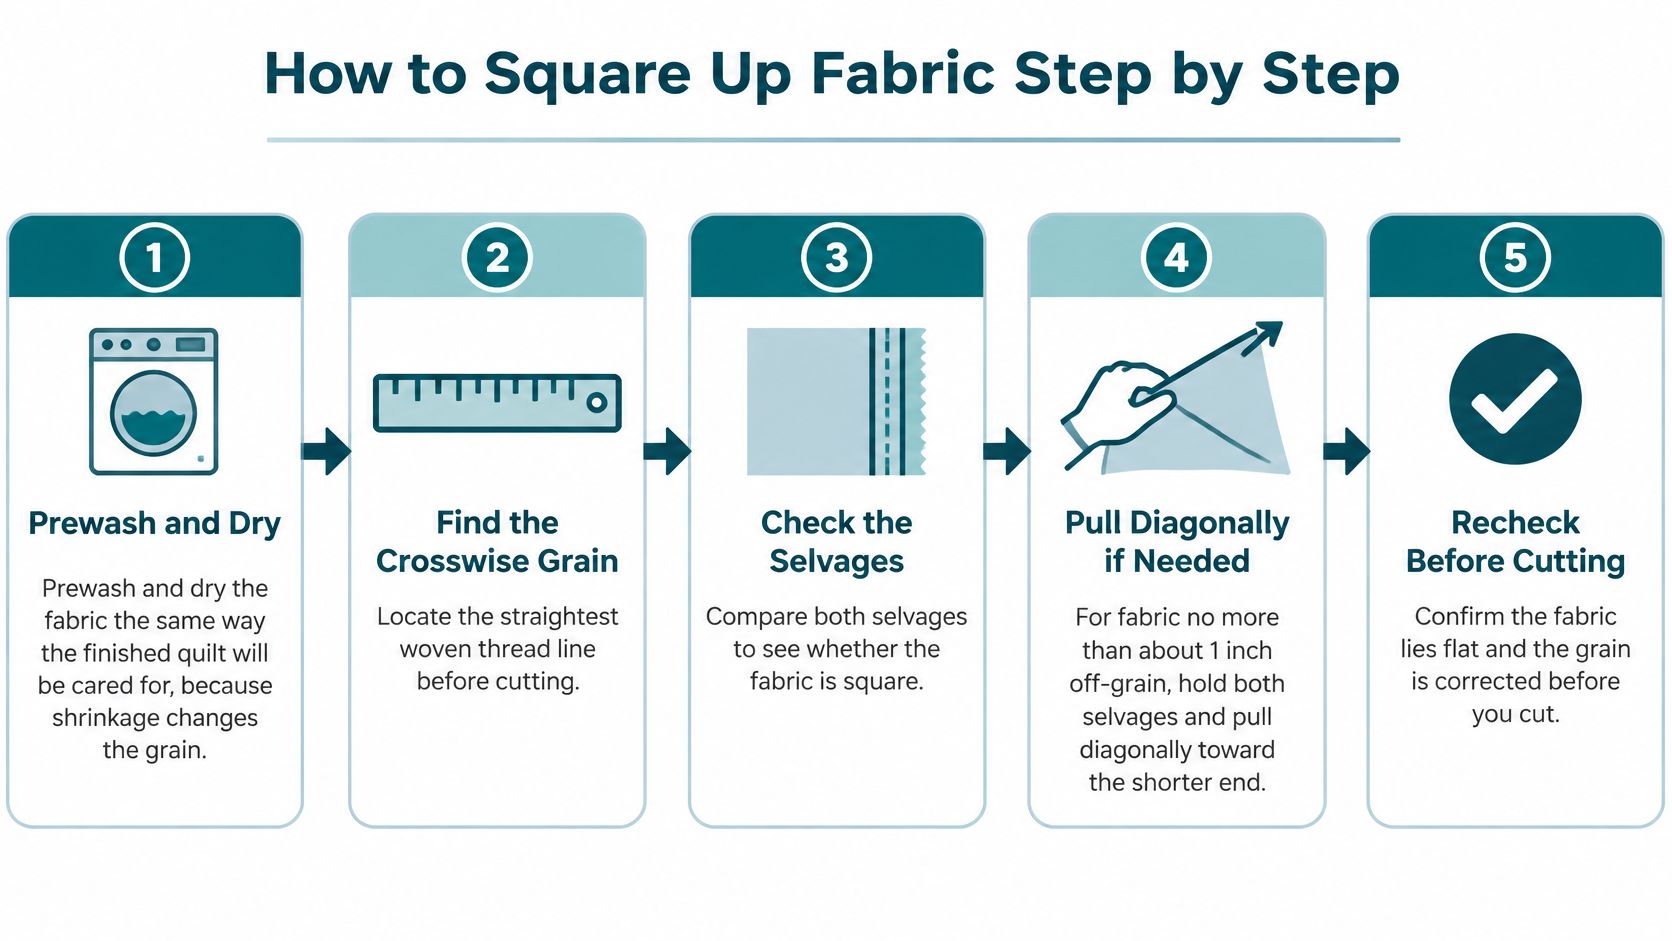
Check before care, then square after care. The first inspection identifies obvious distortion; the second establishes the dimensions and grain you'll cut. For washable quilting cotton, dry the fabric as you intend to dry the finished quilt, press it, then establish the final cutting reference.
Fabric-Fabric's prewashing guide describes cotton commonly shrinking about 3% to 5% during its first wash, with some constructions losing as much as a couple of inches across the width. Those aren't guarantees for every cotton, and they aren't a reason to subtract a standard allowance from your measurements.
Washing and drying release manufacturing tension, and tumble drying can cause more dimensional change than washing alone, as explained in Swinburne University's discussion of fabric shrinkage. That makes the drying method part of preparation, not an afterthought.
Squaring routine by fabric type
| Fabric | Prewash before squaring? | Squaring note |
|---|---|---|
| Quilting cotton | Yes, using the same care as the finished quilt | Re-square after drying and pressing |
| Linen | Yes, if the finished item will be laundered | Allow for potentially heavier shrinkage and re-square after washing |
| Wool | Follow the label, often dry clean | Use label-safe steam for alignment and avoid agitation |
| Rayon or viscose | Check the label, often dry clean | Handle gently; test steam because it stretches easily |
| Knits | Only if the label allows | Check rib or course lines against the fold and handle lightly |
| Dry-clean-only specialty fabric | No washing | Test a swatch before using any steam |
The woven-cotton thread-pulling method isn't a universal treatment for every textile. Knits need their own structural reference, and specialty fabrics shouldn't receive moisture or heat just because quilting cotton tolerates it.
For cotton projects that will share a household laundry routine, SouthShore Fine Linens offers a guide to washing cotton linens that can help you think through care before cutting.
Mark a rectangle on a swatch and record its length and width. Put it through the intended cleaning and drying process, then measure again without pulling it flat.
Washing may relax the weave, but it doesn't automatically create a square cutting edge.
Use the result to plan the full yardage preparation. After later laundering, inspect any uncut leftovers again rather than assuming yesterday's reference still holds.
For your next washable quilt project, browse quilting cotton at High Country Quilts.
A squared edge does not stay squared on its own. Washing relaxes the weave, pressing can push it out of line, and ordinary handling between sessions shifts the fold. Treat squaring as a check you repeat before every major cut, then set up calmly: ordinary woven quilting cotton, a surface large enough to support it, and the cloth resting relaxed rather than stretched between your hands.
A crosswise thread makes a more reliable reference than the original raw edge. Clip a small opening about 1/2 inch into the selvage, isolate one or two crosswise threads, and let their path across the width show you where the true crossgrain runs.
Don't tear the end as a shortcut. South Dakota State University Extension's grain-straightening guidance warns that tearing can stretch fabric or pull it off grain. An end that already came off the bolt torn and ruffled needs steam and gentle pressing before you can judge its alignment.
Once the fold check passes, lay the folded fabric on the mat and align the ruler perpendicular to the fold. SewingTrip's cutting guidance recommends trimming approximately 1/4 inch from the raw edge to create a clean reference cut.
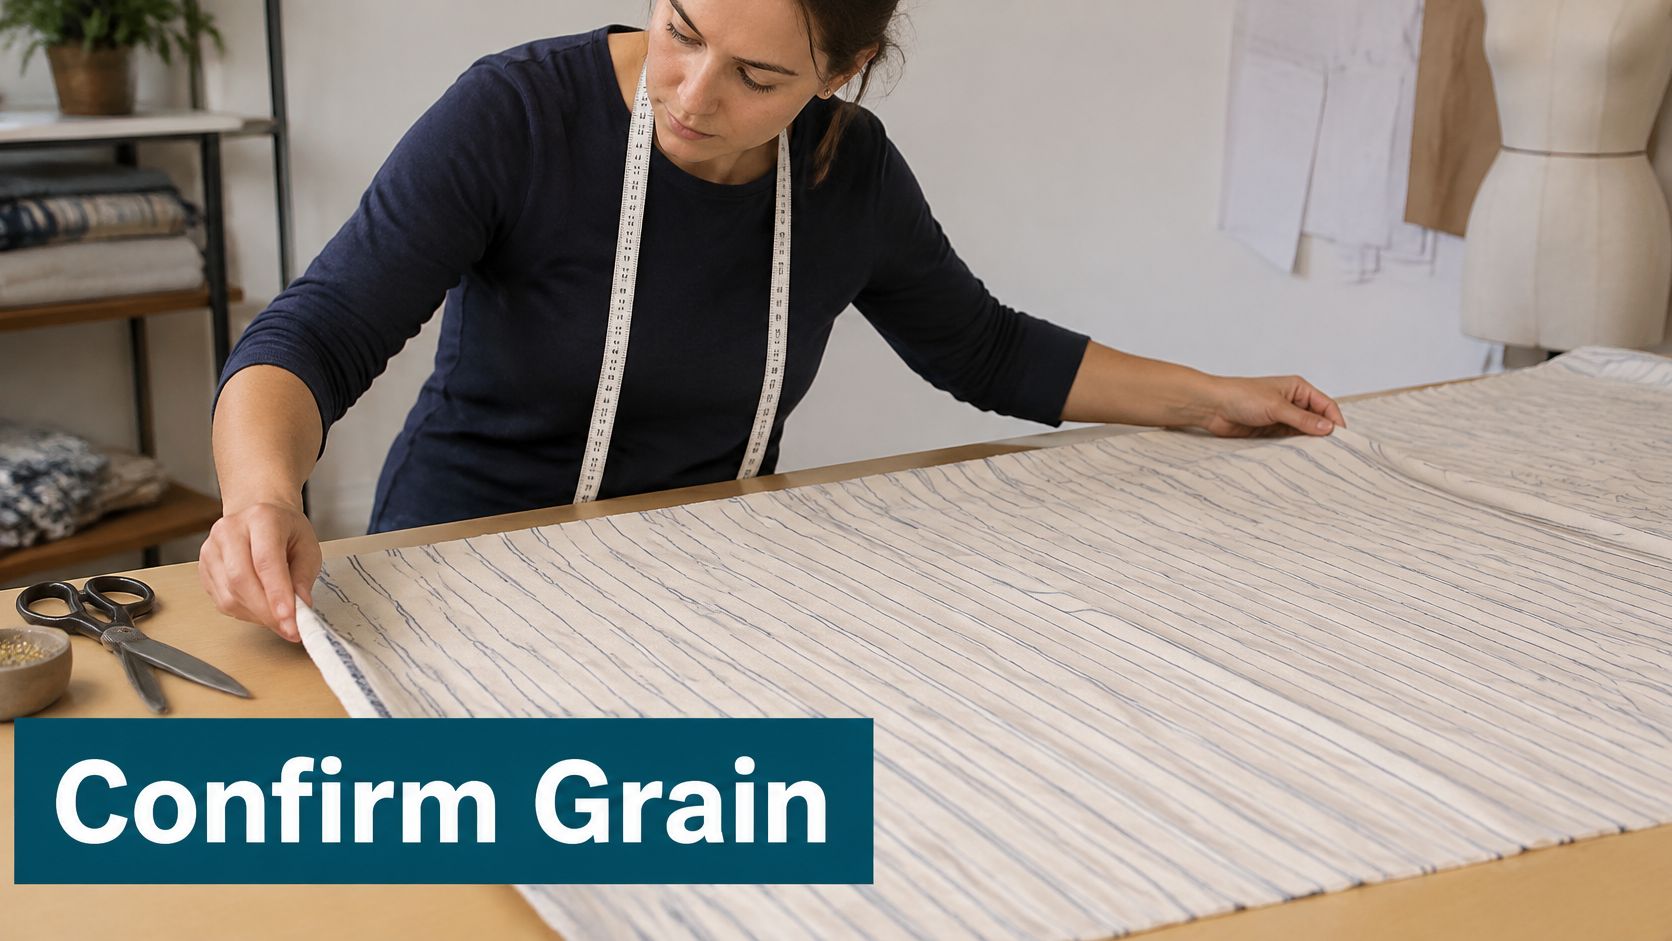
That trim cleans the edge. The weave still has to sit square underneath it, so before measuring pieces confirm ends that meet, a flat fold and selvages without ripples.
For blade handling and ruler placement after squaring, consult B-Sew Inn's rotary cutting guide. Prepare your next cutting session by browsing fabric and cutting tools at High Country Quilts.
Diagnose the mismatch before applying force. An uneven raw end, a stretched torn edge and a skewed weave can look similar when folded, but they need different corrections.
Give the fabric enough support that its own weight isn't pulling it sideways.
University of New Hampshire Extension recommends diagonal pulling toward the shorter end when fabric is no more than 1 inch off grain, with steam pressing as another aid. Treat that as a modest-distortion method, not permission to force badly skewed cloth into a rectangle.
Mark the original grain with removable chalk or a washable marker tested on a scrap. Visible reference marks help you judge whether you're correcting the weave or merely stretching the outside edges.
Off-grain problems and fixes
| Problem | Fix | Stop when |
|---|---|---|
| Up to about 1 inch off-grain | Hold both selvages and pull diagonally toward the shorter end, then steam | Ends meet at right angles |
| More than about 1 inch off-grain | Dampen, work in small increments across a broad surface, then recheck | Fabric starts to ripple |
| Torn or ruffled end | Steam-press the edge back into shape without pulling | Edge lies flat on the surface |
| Pattern grainline drifting | Pin one end, measure to the selvage and pivot until the far end matches | Measurements match at both ends |
| Lightweight or loosely knit fabric | Use gentle diagonal handling only and skip forced selvage matching | Any visible stretch appears |
For larger distortion, appropriate dampening and broad support are safer than gripping narrow points and pulling hard. Historical University of Nebraska Extension guidance on fabric preparation describes diagonal handling, dampening and assistance for large yardage.
Work in small increments, opening and checking between adjustments. A second person can support the far end without turning the exercise into a tug-of-war.
Stop signal: Ripples mean you should release tension and reassess, not pull harder.
Lightweight, loosely woven, directional and loosely knit materials deserve particular restraint. If gentle correction won't hold, don't sacrifice the fabric's structure just to make the selvages match.
A pattern grainline can drift even on well-prepared cloth. Pin one end of the line, measure its distance from the selvage, then pivot the other end until the measurements match.
Utah State University Extension's pattern-layout guidance uses this measurement-and-pivot approach and emphasizes checking alignment before cutting. The selvage identifies lengthwise grain; it doesn't certify that the entire piece is square.
Use the video as a visual companion, keeping the fabric's actual thread alignment as your deciding check.
Before the first cut, let the pressed fabric settle flat without tension. Match the selvages, inspect both prepared ends and check that the fold doesn't bow.
Don't cut straight after pressing if the cloth still looks stretched or ruffled. An unpressed fold can conceal a mismatch, and a worn mat that catches the underside can drag aligned layers apart as you position them.
For the transition from supported yardage to measured cuts, precision cutting with Lewis and Sheron Textiles offers useful context. Keep the same rule whether you're cutting long strips or individual blocks: don't cut until the fold check passes.
Our quilting rulers include Creative Grids, Tula Pink and AccuQuilt. Our notions and rulers include brands such as Bernina, and our threads include Aurifil and Isacord; the AccuQuilt GO! Cutting Mat 6"x12" is $36.99.
Choose the mat for the cutting system you're using, rather than assuming every cutting mat serves the same purpose. For help assembling a ruler, mat and notions suited to this routine, explore the cutting supplies at our shop.
High Country Quilts offers quilting fabric, cutting mats, rulers and notions to help you prepare fabric and make controlled, repeatable cuts. Visit High Country Quilts to choose your cutting-table essentials, then practice the thread-pull and fold check on your next piece of yardage before measuring the first strip.
November 2–25 only: buy a $200 gift card in either store and get a free yard of fabric every month of 2027.

Serger and BERNINA Mastery classes, longarm training, bag-of-the-month, Kids Sewing Club and a Highlands Ranch retreat. Here's what's on the calendar in November.

Free gifts, included packages and special pricing on the BERNINA 790 ULTRA, 990, Liberty Editions, L 890 serger and Q Series longarms, now through December 31.


Leave a comment