

We Love Our Quilting Community
At High Country Quilts we care deeply about community. With our experiences in retail, we know that a store is not only a place to shop but also a place for the community to gather and share. During this busy...


Sewing with stretchy fabrics really just boils down to a few core ideas: you need a stitch that can stretch, the right kind of needle, and the discipline to let the machine do the work without you pulling on the fabric. Once you get the hang of these basics, you open up a whole new world of comfortable, beautifully fitting clothes that actually move with your body.
Before you even touch your sewing machine, it’s so important to get to know the fabric you're about to work with. Stretchy fabrics, which are usually knits, are made in a totally different way than woven fabrics like cotton poplin or linen. Instead of having a tight grid of threads crossing over and under each other, knits are made from one continuous yarn looped together—think of a hand-knitted sweater, but on a much finer scale.
This loopy structure is exactly what gives them their signature stretch. It's fantastic for comfortable clothing, but it also creates some unique headaches for us home sewists. Knits are notorious for curling up at the edges, they can get stretched out of shape in a heartbeat, and they absolutely require seams that can stretch right along with them.
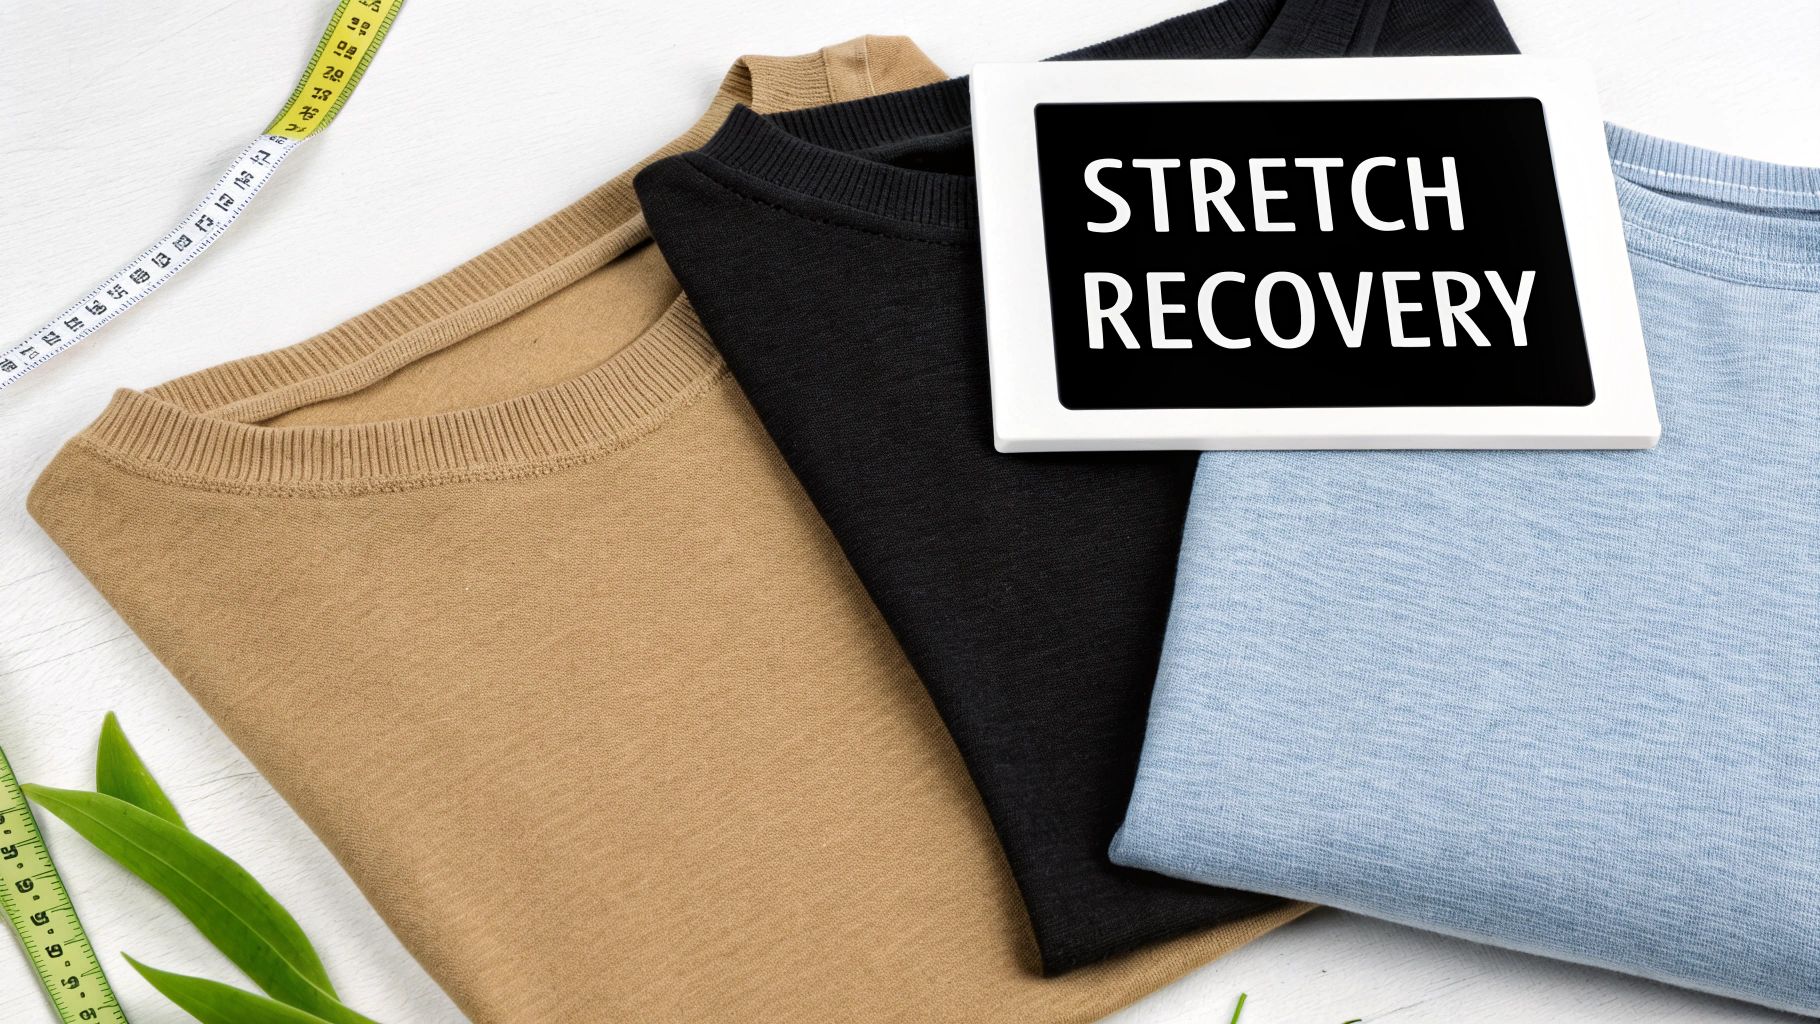
The two big concepts you need to wrap your head around are stretch percentage and recovery. Stretch percentage simply tells you how much a fabric can stretch past its original size. A fabric with 25% stretch is great for something like a relaxed-fit t-shirt, but for a pair of leggings, you'll want something with at least 50-75% stretch to allow for a full range of motion without the seams popping.
Recovery, though, is arguably even more critical. This is all about how well the fabric snaps back to its original shape after you stretch it.
My Two Cents: We've all seen it—saggy knees on leggings or a droopy, stretched-out neckline on a t-shirt. That’s what poor recovery looks like. Before you buy, always test it: stretch a small section and see if it snaps back cleanly without looking distorted or baggy.
Fabrics that have great recovery almost always have some spandex in them (you might also see it called Lycra or elastane). This amazing synthetic fiber is the secret sauce in modern stretch fabrics, giving them that spring-back elasticity and durability. The global demand for spandex shows just how essential it is for everything from activewear to everyday clothes.
Just like with wovens, knits have a grainline, but it’s a little different. The "grain" runs parallel to the selvedge (the finished edge of the fabric) and usually looks like fine vertical ribs, often called "wales," on the right side. It is absolutely non-negotiable to cut your pattern pieces along this grain.
So why is this a huge deal? If you cut your pieces off-grain, even by a little, the finished garment can twist and warp like crazy after you wash it. You’ve probably seen this on a cheap, store-bought t-shirt where the side seams start to spiral around your body—that’s a dead giveaway it was cut improperly, likely to save a few inches of fabric.
Here are a few ways to find the grainline:
Taking a few extra moments to get this right at the beginning will save you a world of frustration later. It’s the kind of foundational knowledge that separates a project you love from one that ends up in the bin. When you learn to respect the unique personality of knits, you're already halfway there.
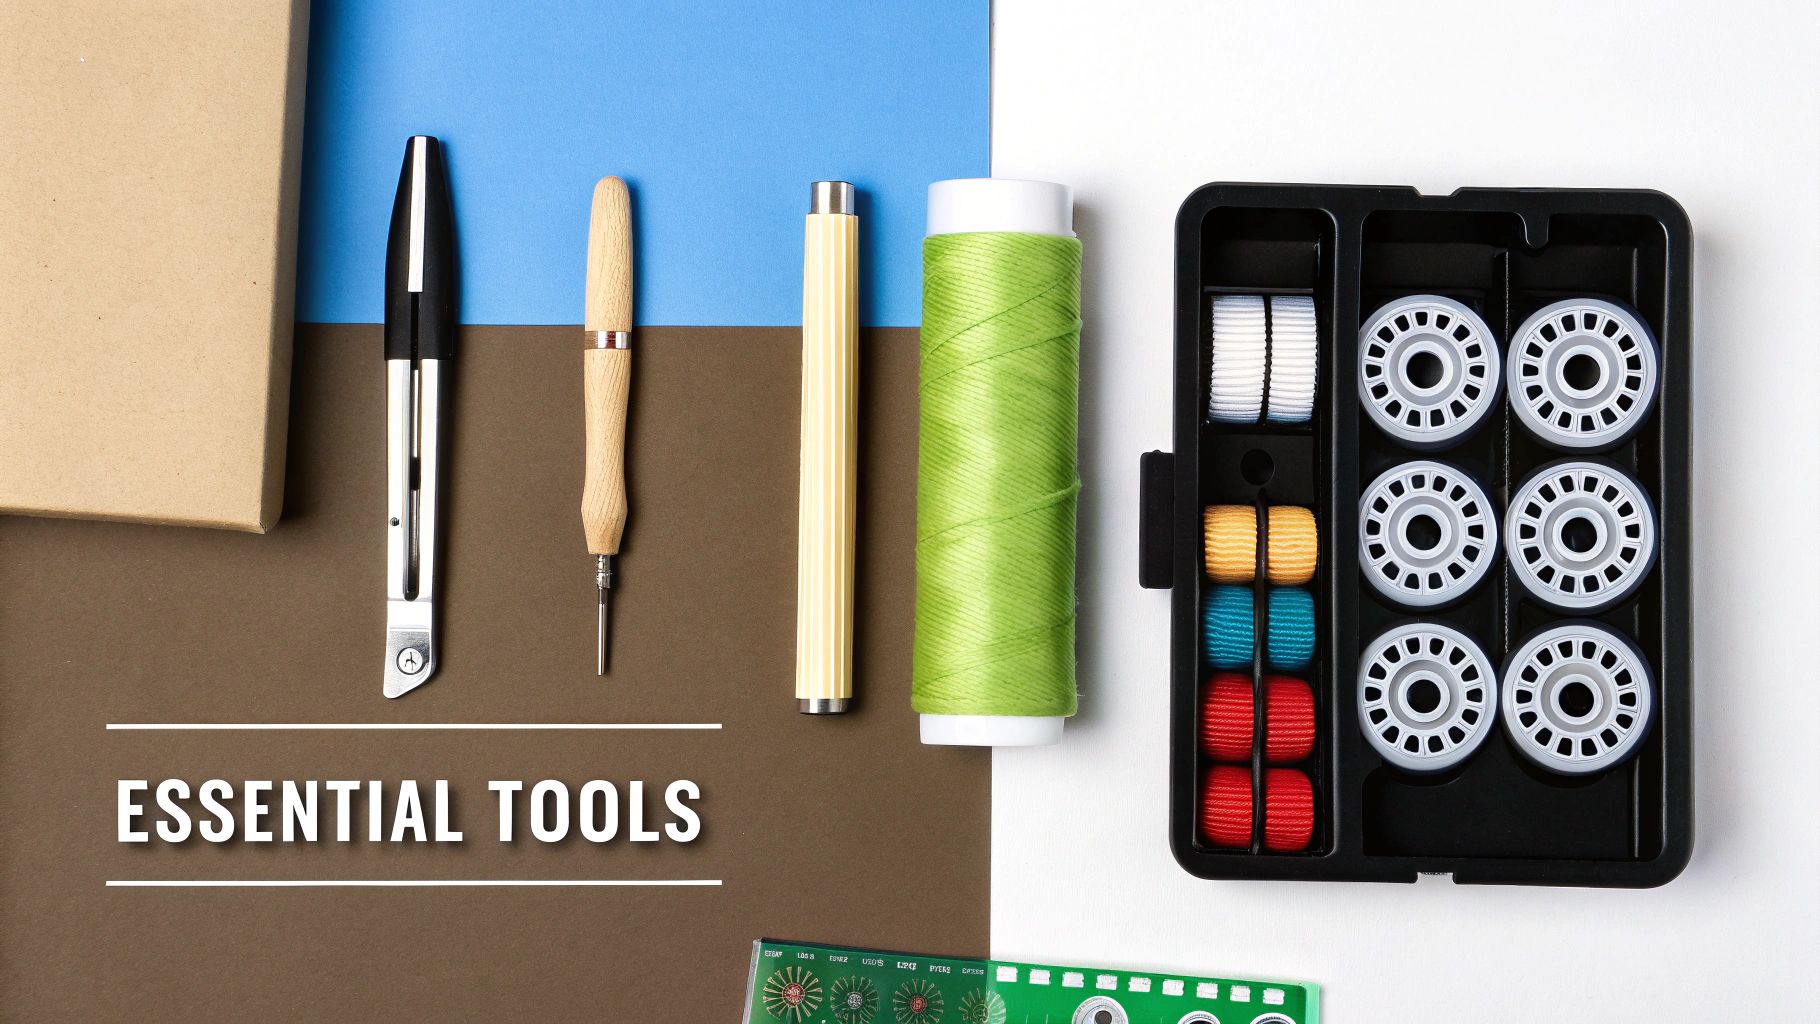
Jumping into your first knit project without the right gear is like trying to bake a cake without a measuring cup. You might get something edible, but it probably won’t be pretty.
Having the proper tools isn’t about being fancy; it’s about side-stepping the most common frustrations before they even start. The great news is you don’t need a whole new sewing room, just a few key items that make all the difference when learning how to sew stretchy fabric.
If you only change one thing, let it be this. Using a standard needle on knit fabric is where so many beginners run into trouble. A universal needle has a sharp point designed to pierce woven fabrics, but on a knit, it will shred the delicate looped fibers. This leads to skipped stitches, runs, and permanent holes in your garment.
You have two go-to options for sewing knits, and it's essential to know when to use which:
My rule of thumb: I always start with a ballpoint needle. If I see even one skipped stitch, I immediately switch to a stretch needle. And please, change your needle every 6-8 hours of sewing—a dull needle is just asking for trouble.
Your thread choice is just as critical as your needle. Standard cotton thread has virtually no "give." If you use it to sew a stretchy seam, the thread will be the first thing to snap when the garment is worn. This is why you see so many popped seams on store-bought t-shirt hems!
For knits, all-purpose polyester thread is your best friend. It has just enough natural stretch to create seams that can move and flex with the fabric. For most construction, you don't need to hunt down specialty "stretch thread"; a quality polyester thread from a brand like Gütermann or Coats & Clark is perfect.
How you handle your fabric before it even reaches the machine can make or break your project. Stretchy fabrics are notoriously shifty and can easily be distorted while you're cutting. This is where a couple of specific tools are game-changers.
A Rotary Cutter and Self-Healing Mat
Using a rotary cutter instead of scissors is a revelation for knits. It allows you to cut precisely without ever lifting the material off your table, which is the number one cause of wonky, stretched-out pattern pieces.
Pattern Weights
Pins are not your friend here. They can snag the delicate fibers and cause the fabric to pucker and warp as you lay out your pattern. Instead, use pattern weights to hold everything securely in place. You don't need to buy special ones—large washers from the hardware store, clean soup cans, or even your phone will work just fine.
By getting these few basics right, you're building a solid foundation for a much smoother and more enjoyable sewing experience.
Believe it or not, your regular sewing machine is more than capable of handling stretchy fabrics. The real magic happens when you know which settings to tweak. Taking a few minutes to get your machine properly set up is honestly the best thing you can do to avoid a headache later and get seams you can be proud of. Once you master these adjustments, you'll wonder why you ever found knits intimidating.
First things first, you need a stitch that can actually stretch. A standard straight stitch has absolutely no give, which means your seams will pop the second you pull on your finished garment. Your machine probably has a few built-in stitches designed just for this.
Your machine’s manual is always the best place to start, but most modern machines have a few go-to options for sewing knit seams. Before you touch your actual project, always, always test your stitch on a scrap of the same fabric. This lets you see exactly how it will look and behave, and you can fine-tune your tension without worry.
Here are the stitches I find myself turning to most often:
A Little Tip for BERNINA Owners: If your machine has the BERNINA Dual Feed system, now is the time to use it! This brilliant feature grabs the top layer of fabric and moves it at the exact same speed as the bottom layer. It's a game-changer for preventing knits from getting stretched out and wavy as you sew.
One of the most powerful yet overlooked settings on a sewing machine is the presser foot pressure. If you’ve ever ended up with wavy, "lettuce-edge" seams, it's probably because the presser foot was pushing down too hard and stretching your delicate fabric as it went.
Check if your machine has a dial or setting to adjust this. Try lightening the pressure a bit. You're looking for that sweet spot where there's just enough pressure to guide the fabric through evenly without squishing or distorting it. This simple adjustment can make a world of difference, especially with lightweight jerseys or slinky ITY knits.
It’s no surprise that mastering these fabrics is becoming more important. The market for four-way stretch fabric was valued at USD 3.5 billion in 2024 and is expected to more than double by 2034. For all of us sewing at home, these numbers just confirm what we already see: modern performance fabrics are everywhere. You can learn more about the industry trends from this four-way stretch fabric market report.
While you can get fantastic results with a sewing machine, if you have a serger (or overlocker), you have an incredible tool for sewing knits. The key feature here is the differential feed.
A serger actually has two sets of feed dogs that can move at different speeds, and the differential feed dial controls their ratio.
For most knit fabrics, setting your differential feed somewhere around 1.3 or 1.5 will give you a beautifully flat, professional-looking seam with zero waviness. It’s truly the secret to getting that polished, ready-to-wear finish.
Alright, with your machine all set up, it's time to dive into the fun part—actually sewing! This is where we shift from theory to practice, focusing on the handful of core techniques that will give your knit garments that polished, professional look. Honestly, knowing how to sew stretchy fabric the right way during construction is what elevates a project from "homemade" to "handmade."
The main goal here is simple: create seams that can stretch right along with the fabric. Choosing the right stitch is crucial, but how you guide the fabric through the machine is just as important. You have to let the machine's feed dogs do all the work. Resist the urge to push or pull the fabric—that's the number one reason seams end up stretched-out and wavy.
This quick diagram breaks down the three essential machine adjustments you'll make every time you start a new knit project.
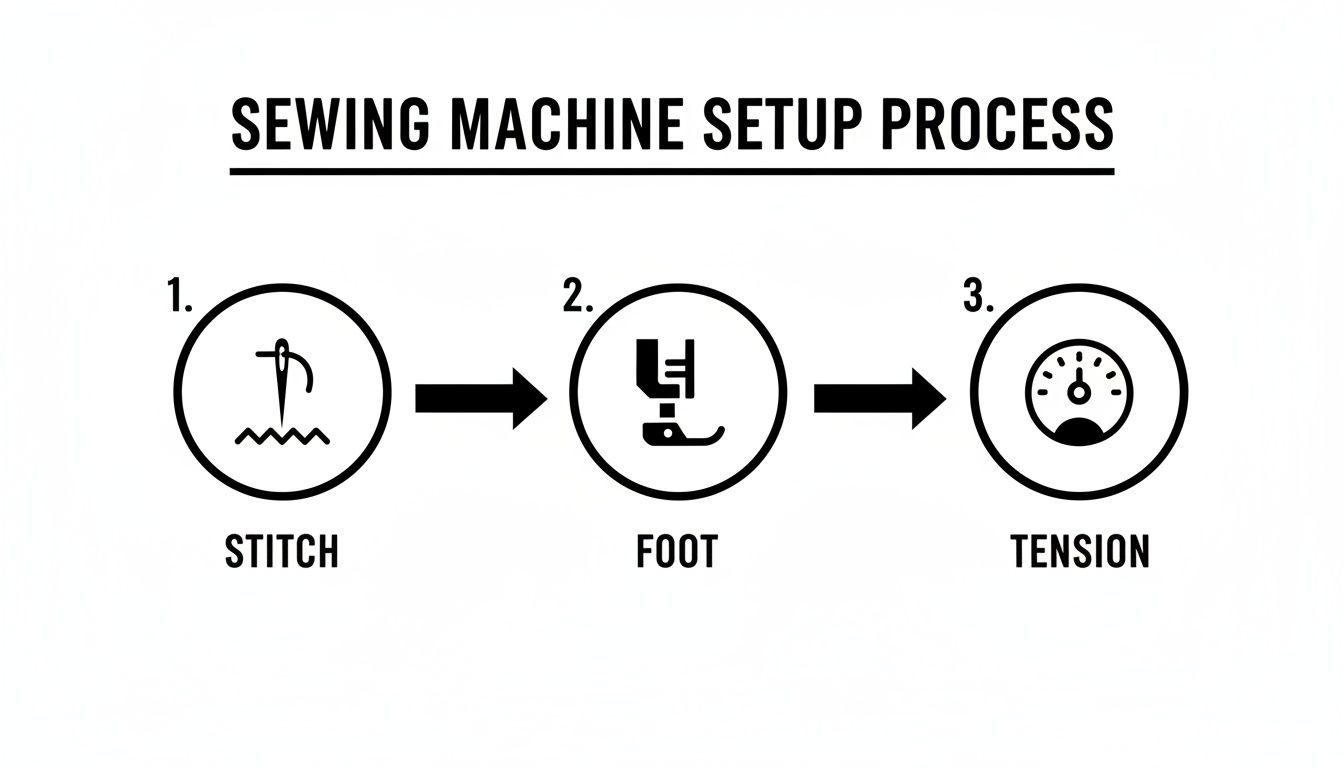
Think of it as your pre-flight checklist: pick your stitch, choose the right foot, and dial in your tension. Get these three right, and you're set for success.
The main construction seams are the skeleton of your garment. For things like side seams, shoulder seams, and setting in sleeves, I almost always turn to a narrow zigzag stitch. A setting around 0.5mm wide and 2.5mm long is a fantastic starting point for both durability and stretch.
Always, always test on a scrap of your project fabric first. Sew a few inches, then give the seam a firm (but not crazy) pull. Do you hear any little snapping sounds? If the thread breaks, your stitch is probably too straight, so try bumping up the zigzag width just a bit. If the stitches look loopy or loose, a small tension adjustment might be all you need.
Let's be real: hemming is where many knit projects go wrong. A bad hem can look wavy, get all puckered, or pop its stitches the first time you wear it. But you can absolutely get a beautiful, store-bought quality hem with a regular sewing machine.
Your New Best Friend: The Twin Needle
A twin needle is a game-changer for hemming knits. It works by creating two perfect, parallel lines of straight stitches on the top of your fabric, while the bobbin thread forms a zigzag on the underside. This clever setup gives the hem plenty of stretch.
To get the best results with it:
A little pro tip I’ve picked up over the years: using woolly nylon thread in the bobbin when you're hemming with a twin needle creates an incredibly soft and flexible finish. It's a small detail, but it adds a touch of luxury, especially on garments worn right against the skin.
Finding the perfect hem often comes down to matching the technique to the fabric. Some knits are stable enough for a simple twin needle, while others need a bit more support. This table breaks down some of the most common options.
| Hemming Method | Best For | Pros | Cons |
|---|---|---|---|
| Twin Needle | T-shirts, jerseys, lightweight knits | Creates a professional, ready-to-wear look. Stretchy and durable. | Can cause "tunneling" on some fabrics; requires a special needle. |
| Zigzag Stitch | Casual wear, athletic apparel, super-stretchy fabrics | Very easy and accessible. Provides excellent stretch. | Can look more "homemade" than other finishes. May create a wavy edge if not stabilized. |
| Stretch Blind Hem | Dress pants, skirts, medium-weight knits | Invisible from the right side for a very clean look. | Requires a special blind hem foot and some practice to master. Less stretchy than other options. |
| Coverstitch Machine | All knit types | The ultimate professional finish. Extremely durable and stretchy. | Requires a separate, specialized (and expensive) machine. |
Ultimately, the best hem is the one that works for your fabric and your machine. Don't be afraid to test a few different methods on scraps before committing to your final garment!
Getting neckbands and cuffs to lie perfectly flat is a classic sewing challenge. You want the band to gently hug the body without puckering the garment or looking strained. The secret here is all about even distribution.
Start by dividing both the band and the garment opening (your neckline or sleeve) into four equal sections. I use pins or a chalk marker for this.
Now, pin the band to the opening, matching up your four marked points. Here's the key: as you sew, you’ll need to gently stretch the band—and only the band—so it lies flat between each pin. It's critical that you don't stretch the garment fabric itself.
Using a walking foot (or the incredible BERNINA Dual Feed) is a massive help here. It grips both layers of fabric and feeds them through the machine evenly, which is the best way to prevent the garment piece from getting stretched out of shape. This method really is the ticket to a smooth, professional-looking band every time. And when you're ready to see just how effortless this can be, you can check out the range of BERNINA machines at High Country Quilts, many of which have this amazing fabric-handling technology built right in.
Even after years of sewing, I still run into a hiccup or two with knit fabrics. Their unique personality is part of what makes them fun, but it can also be a source of frustration. The good news is that most issues have surprisingly simple fixes.
Think of this as your personal troubleshooting guide. When something goes wrong, take a deep breath and resist the urge to get frustrated. Instead, let's work through a mental checklist of potential culprits. You'll usually find the solution is quicker and easier than you think.
Skipped stitches are, without a doubt, the number one complaint I hear when it comes to sewing knits. This annoying little problem happens when the machine's hook completely misses the thread loop from the needle, failing to form a stitch. It looks terrible, but it's almost always an easy fix.
Before you touch a single dial on your machine, check your needle. Seriously, 9 times out of 10, the needle is the problem.
If you've got a fresh, correct needle properly installed, your next step is to completely re-thread your machine. Don't just pull the thread through. Take both the top thread and the bobbin out and re-thread everything from scratch with the presser foot up.
Ah, the dreaded "lettuce edge." That wavy, stretched-out seam is another classic knit fabric problem. It happens when the fabric gets stretched as it’s being fed under the needle, and the stitches lock that unwanted stretch into place permanently.
My Personal Tip: The most common cause of wavy seams is, believe it or not, probably you. We all have a natural tendency to push or pull the fabric to "help" it along. You have to train yourself to let the machine's feed dogs do all the work. Your only job is to gently guide the fabric with your fingertips.
If you’re already practicing a hands-off approach, here are the machine adjustments that can make a huge difference:
"Tunneling" is that little ridge of fabric that pops up between the two lines of stitching when you're hemming with a twin needle. It's usually caused by the single bobbin thread pulling the two top threads together too tightly.
Luckily, this is another issue with a few straightforward fixes. The first thing I always try is lowering the top thread tension. You can also try lengthening your stitch a bit, to around a 3.0mm or 3.5mm. For a truly professional finish, stabilizing the hem allowance with a narrow strip of soft, fusible stretch interfacing before you sew is an excellent way to guarantee a flat result.
It's also interesting to know where our fabrics come from. The Asia Pacific region is a powerhouse in global stretchy fabric production, accounting for 40% of the narrow fabrics market share. China, in particular, is the world's largest spandex producer. This means a lot of the high-quality knits you'll find at shops like High Country Quilts benefit from this highly specialized manufacturing. You can dig deeper into the global supply chain with this narrow fabrics market report.
By methodically working through these issues, you'll not only fix the problem at hand but also build the skills and confidence to tackle any knit project that comes your way.
When you're first dipping your toes into the world of knit fabrics, it's natural to have a ton of questions. Trust me, over the years, we've heard just about all of them. Here are some straightforward answers to the questions we get asked most often by sewers taking on their first stretchy project.
Nope, not at all! While a serger (or overlocker) is fantastic for creating that clean, professional finish you see in store-bought clothes, your regular sewing machine is more than capable of sewing with knits.
The real key isn't the machine itself, but the stitch you choose. You need something that can stretch right along with the fabric. Most modern machines come with great built-in options like a narrow zigzag stitch, a "lightning bolt" stitch, or a triple straight stitch. Pair one of these with the right needle, and you'll get strong, flexible seams that won’t pop under pressure.
Ah, the dreaded "lettuce-edge" seam. This is one of the most common frustrations, and it almost always happens because the fabric is getting stretched as it’s fed under the presser foot. The number one rule is to let the machine do the work for you—resist the urge to push or pull the material as it sews.
If your machine has an adjustable presser foot pressure, try lightening it up a bit. An even better solution is a walking foot, which grips the top layer of fabric and feeds it through at the same rate as the bottom layer. (If you have a BERNINA, their built-in Dual Feed feature is a total game-changer for this). On a serger, this is exactly what the differential feed is for; a quick adjustment can fix it instantly.
One of my go-to tricks for really slippery, slinky knits is to slide a piece of tissue paper under the fabric while I sew. It adds just enough stability to stop the stretching and then tears away easily when you're done. This little hack has saved more than a few of my projects!
For a beautiful, stretchy hem on a standard sewing machine, a twin needle is your secret weapon. It creates two perfect, parallel rows of stitching on the top and a neat zigzag on the back, giving your hem plenty of give.
Just be sure to test it on a scrap piece first to get the tension right and avoid "tunneling" (where the fabric puckers up between the two stitch lines). Another fantastic method is to fuse a strip of soft, stretch interfacing inside the hem allowance before you sew. This stabilizes the edge and makes it incredibly easy to get a flat, professional-looking hem without any stretching or fuss.
You’re not alone—that notorious jersey knit curl can make cutting a pattern feel like a wrestling match. The best way to combat this is with a rotary cutter and a self-healing mat. This combination lets you cut precisely without ever having to lift or shift the fabric.
Instead of pins, which can distort the material, use pattern weights to hold everything down flat. If you're dealing with a fabric that curls like crazy, a light mist of spray starch along the edges can temporarily tame it for cutting. Just remember to test it on a scrap first to make sure it doesn’t leave any residue.
Ready to take on your next knit project with total confidence? At High Country Quilts, we have the tools, fabrics, and hands-on expertise to help you succeed. Come explore our amazing selection of BERNINA sewing machines, built to handle any fabric you can imagine. Check out everything we have to offer at https://hcquilts.com today
At High Country Quilts we care deeply about community. With our experiences in retail, we know that a store is not only a place to shop but also a place for the community to gather and share. During this busy...

Hi! We’re Adam and Renee Wheaton, the new owners of High Country Quilts! For more than 40 years, we’ve owned and operated vacuum and sewing businesses. Following in Renee’s father’s footsteps after he retired from All Discount Vacuum and Sewing in Colorado...


Leave a comment