

We Love Our Quilting Community
At High Country Quilts we care deeply about community. With our experiences in retail, we know that a store is not only a place to shop but also a place for the community to gather and share. During this busy...


Sewing with stretch fabrics is a whole different ball game. You'll need to swap your universal needle for a ballpoint needle, choose a stitch that can move with the fabric (like a narrow zigzag), and remember one golden rule: guide, don't pull. But honestly, the real secret to success with knits like jersey or spandex happens before you even sit down at your machine.
Before you even think about threading a needle, take a moment to really understand the fabric you're working with. Trust me, it's the most important step. All knits are not created equal, and picking the right one from the get-go will save you a world of frustration later.
You'll hear terms like "stretch percentage," "recovery," and "drape" thrown around. These aren't just fancy sewing words; they're the key to predicting how your finished garment is going to fit, feel, and move.
The first thing to figure out is whether your fabric has a two-way or four-way stretch. It's a fundamental difference that dictates what you can make with it.
Matching the stretch direction to what you're making isn't just a suggestion—it's pretty much non-negotiable if you want a garment that fits and functions properly.
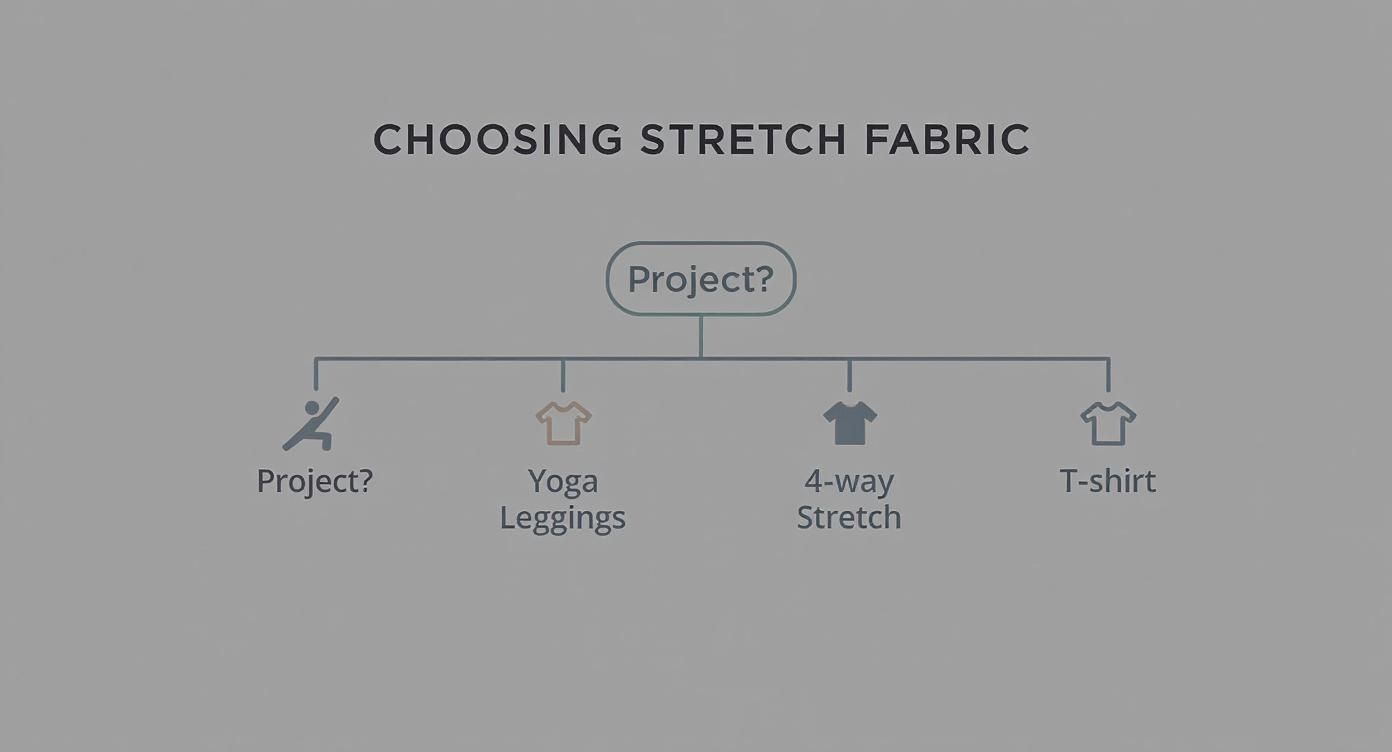
This chart really breaks it down: high-movement clothes demand that four-way stretch, while your standard everyday apparel is often perfectly fine with a two-way stretch.
Stretch direction is just the beginning. You also need to think about a few other key characteristics that can make or break your project.
First up is recovery. This is all about how well the fabric snaps back into shape after you stretch it out. Have you ever had a pair of knit pants that get saggy at the knees after one wear? That's a sign of poor recovery. For a garment that holds its shape, good recovery is a must.
Then there's drape, which is just a term for how the fabric hangs and flows. A floaty dress calls for a lightweight rayon jersey with a beautiful, soft drape. But if you're making something more structured, like a fitted jacket, a heavier scuba knit with less drape would be a much better choice.
The demand for these comfy, flexible fabrics is bigger than ever—in fact, the global stretch fabric market was valued at around $20 billion in 2022. It’s clear that knits are here to stay!
To give you a better idea of what to look for, I've put together a quick table of some of the most common stretch fabrics you'll find.
| Fabric Type | Key Characteristics | Ideal Projects |
|---|---|---|
| Cotton Jersey | Soft, breathable, moderate stretch | T-shirts, casual dresses, pajamas |
| Spandex Blends | Excellent stretch and recovery | Activewear, swimwear, leggings |
| Ponte de Roma | Stable, medium-weight, good structure | Dresses, trousers, blazers, skirts |
| Scuba Knit | Thick, spongy, smooth surface | Structured dresses, skirts, jackets |
| Rib Knit | Very stretchy, distinct ribbed texture | Cuffs, neckbands, form-fitting tops |
This is just a starting point, of course, but it helps to see how the fabric's personality lines up with the kind of project you have in mind.
If you're feeling a bit new to all this and want to build a solid foundation, check out these https://www.famcut.com/blogs/tips-and-tricks/free-sewing-lessons to boost your confidence. And for those ready to jump into a project, this guide to making your own hoodie from scratch is a fantastic resource that walks you through fabric choice and sewing techniques.
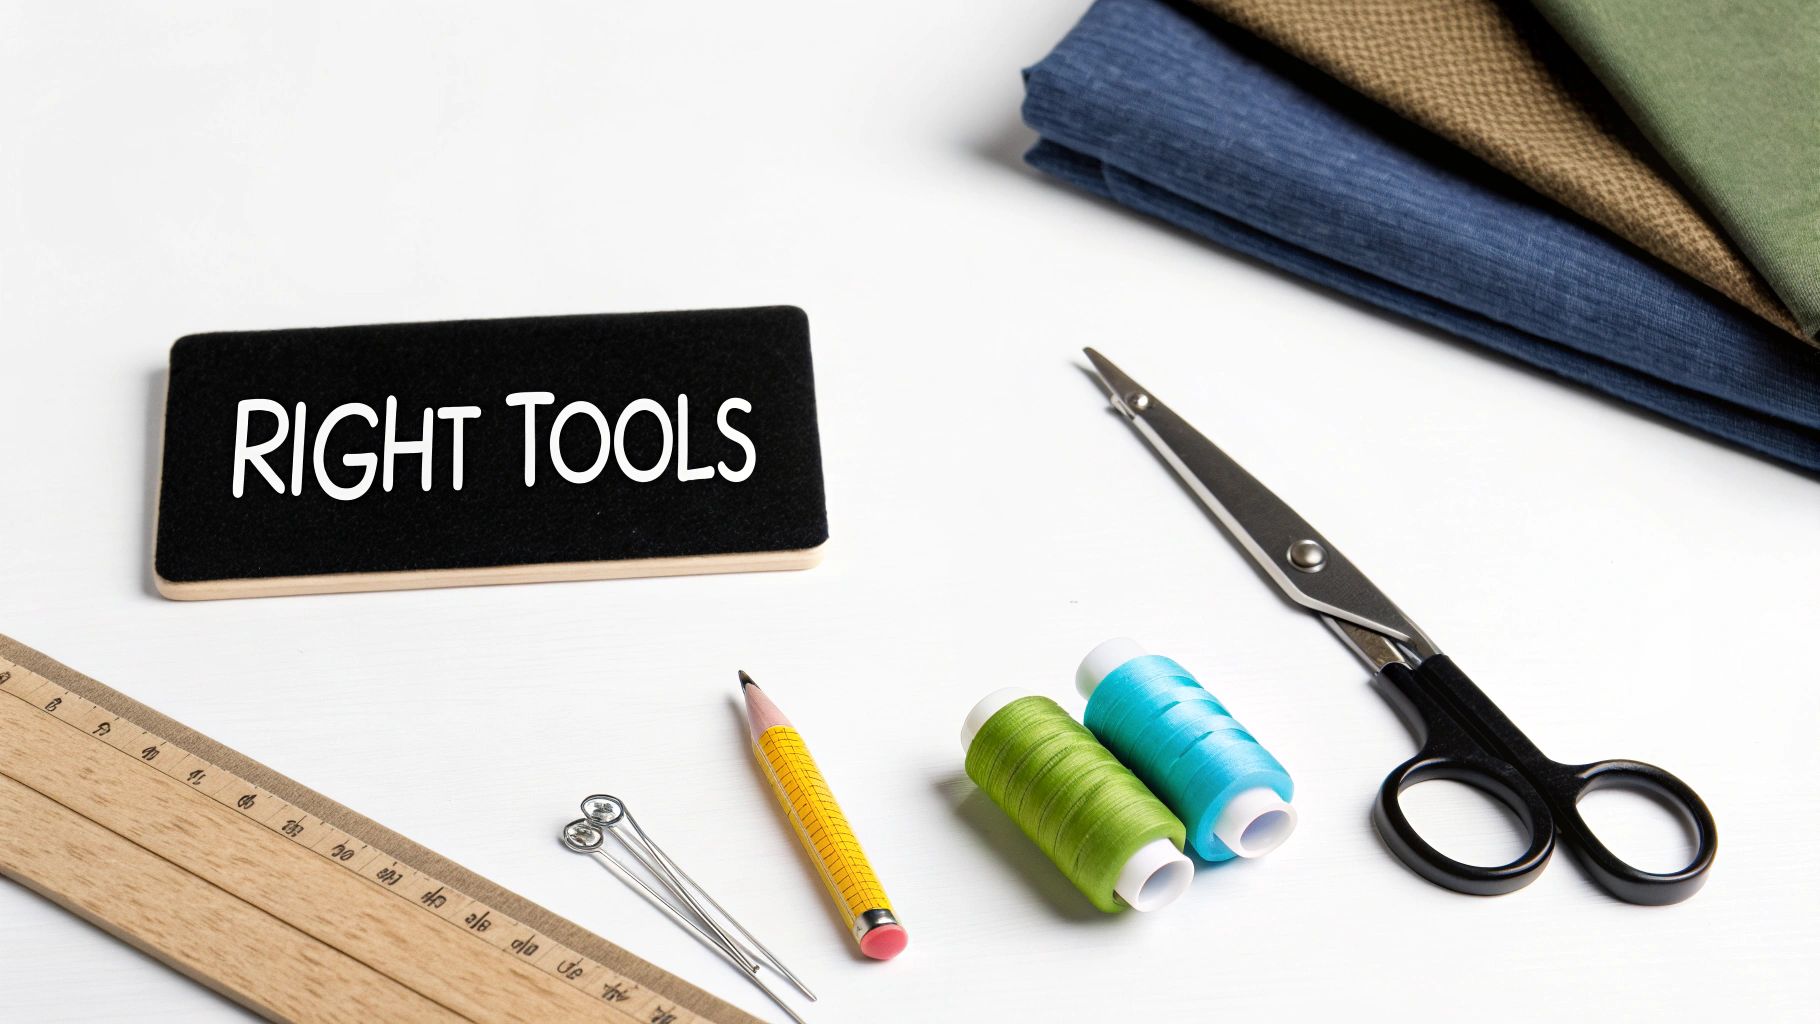
The difference between a frustrating afternoon of skipped stitches and a beautifully finished garment often comes down to your tools. When you're working with stretch fabrics, your standard sewing kit just won't cut it. You need to assemble a small arsenal of supplies designed to work with the fabric's elasticity, not against it.
First things first: change your needle. This is non-negotiable. A universal needle has a sharp point that can easily pierce, snag, or even tear the delicate fibers in a knit fabric, leaving tiny, permanent holes.
Instead, always reach for a ballpoint or a dedicated stretch needle. Both have a rounded tip that gently pushes the fabric's fibers aside as it sews, which is exactly what you need to maintain the integrity of your knit.
Your thread choice is just as critical. Standard cotton thread has almost no give, meaning your seams are likely to pop the first time you stretch your finished garment. I always recommend a good all-purpose polyester thread; it has just enough natural stretch to handle most projects. For really high-stretch seams, like on activewear or swimwear, using a wooly nylon thread in your serger's loopers is a total game-changer.
Believe it or not, issues like puckering and broken threads are reported by over 30% of sewers when they first tackle knits. If you're curious about the technical side, you can dig into some data on nylon stretch fabric challenges and solutions on archivemarketresearch.com.
Beyond the basics, a few other tools can make a world of difference. Pins can leave permanent holes or cause delicate knits to snag and run, which is why I've almost completely switched over to using clips. These handy Wonder Clips hold fabric layers securely without ever damaging the material.
A walking foot or a machine with a dual feed system is another piece of kit I can't live without. It grabs both the top and bottom layers of fabric and feeds them through the machine at the exact same rate. This is your secret weapon against those dreaded wavy, stretched-out seams.
Getting your sewing machine ready for knits is where the magic really happens. A few small tweaks can be the difference between a frustrating, puckered mess and a beautifully smooth, professional-looking seam.
Before you even think about touching your main project, grab a decent-sized scrap of the same fabric. This is your playground—your test lab. Spending a few minutes here dialing in your settings will save you a massive headache later.
Remember, a standard straight stitch is the enemy of stretch fabric. It has absolutely zero give, so the moment your fabric stretches, those threads will pop. You need a stitch that can move and flex right along with the material.
You don't need a high-end, computerized machine to sew knits well. Most modern sewing machines come equipped with a few fantastic stitch options designed specifically for this.
Take a look at your machine’s stitch selection dial for one of these:
I once spent ages fighting a wavy, stretched-out seam on a swimsuit. I thought my stitch was the problem, but it turned out to be the presser foot pressure. Just by reducing it slightly, the fabric could glide through without being distorted. It was an instant fix that transformed the entire seam.
Finally, take a moment to fine-tune your tension. If you see little loops on the bottom of your fabric, your top tension is too loose. If the loops are on top, it’s too tight. You're aiming for a perfectly balanced stitch where the top and bottom threads meet neatly between the fabric layers.
For those who find themselves sewing knits often and crave that truly store-bought finish, a serger is an incredible tool. If you're new to serging, this Essential Serger Reference Tool can really help take the mystery out of its settings.
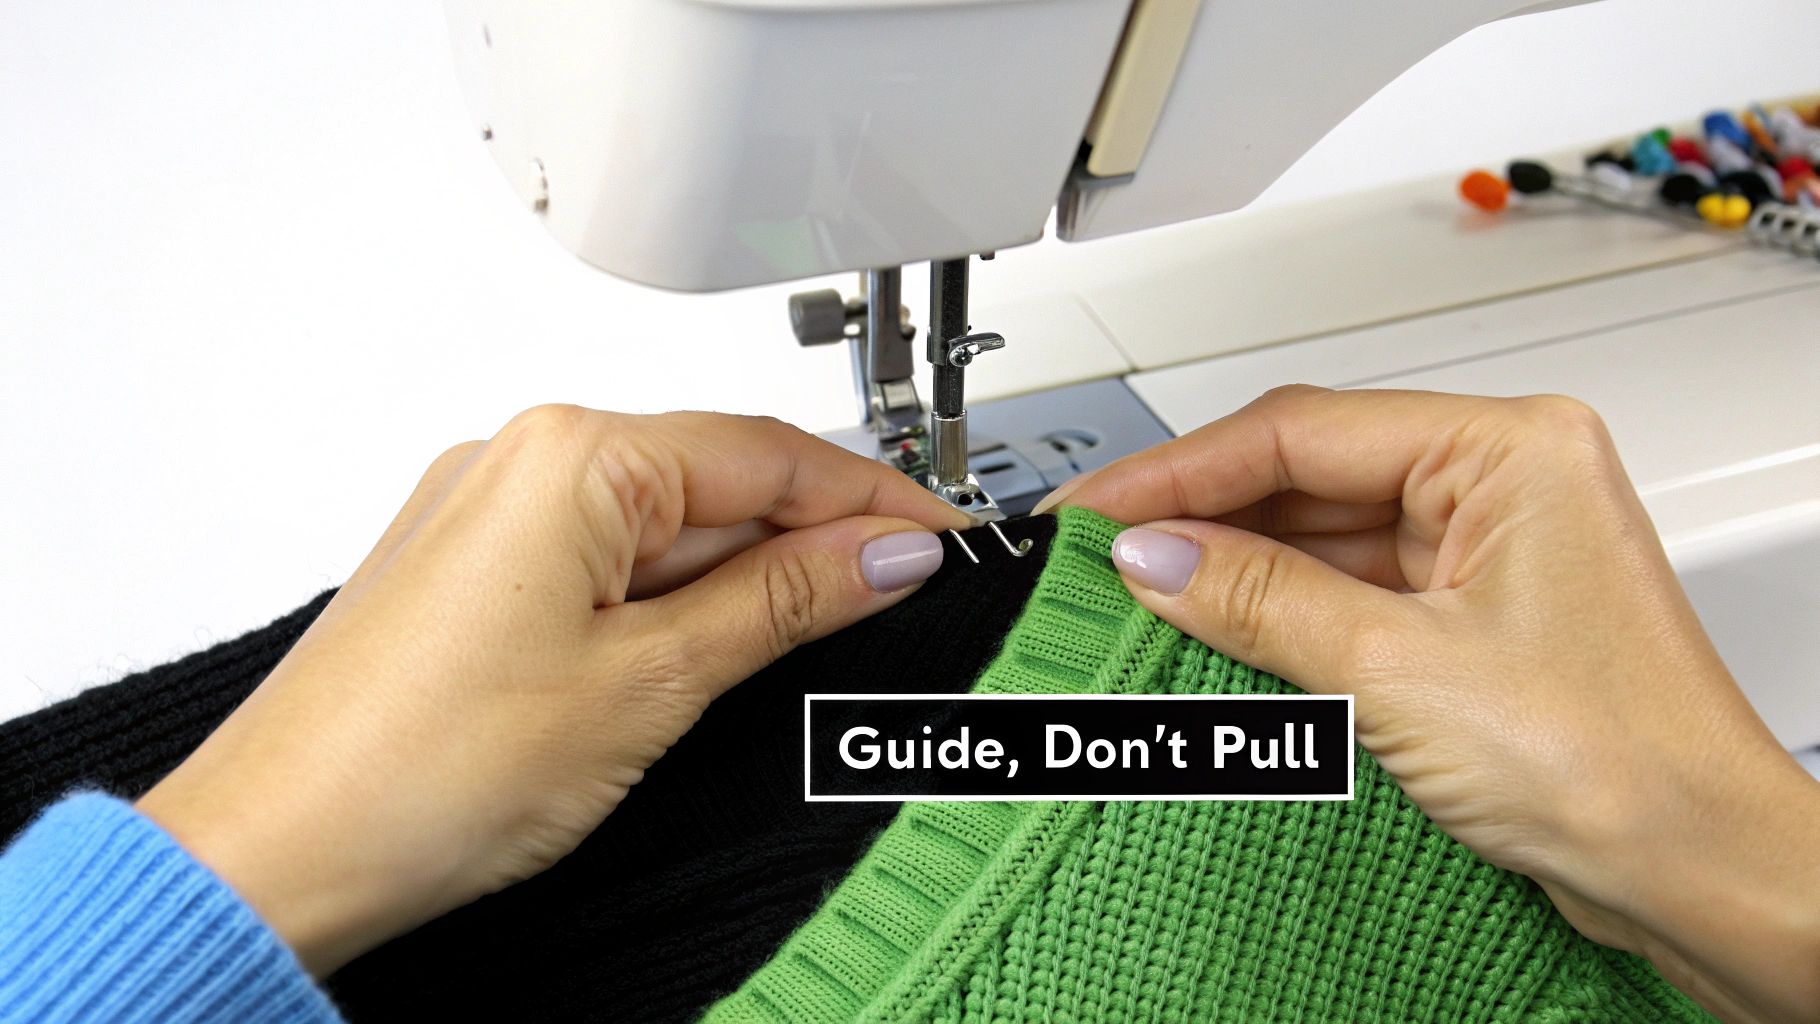
Alright, your machine is ready to go. Now comes the part that feels more like an art form: actually sewing the seam. The biggest mental shift you need to make when working with knits is to think of yourself as a guide for the fabric, not a pusher. Let the machine's feed dogs do their job.
Your only task is to gently steer the material under the needle. Whatever you do, resist the temptation to pull the fabric from behind or push it from the front. That's the number one mistake I see people make, and it's the fastest way to get wavy, stretched-out seams. Just rest your hands lightly on either side of the needle and let the machine do the work.
Let's put this into practice. Say you're attaching a neckband to a t-shirt. That band is cut slightly smaller than the neckline on purpose—it’s what helps the finished collar lie flat against your body.
As you sew, you’ll need to gently stretch the neckband piece to fit the neckline opening. The key here is to stretch only the neckband. The t-shirt fabric itself should feed through naturally without any stretching at all. This ensures the neckline snaps back into shape and won't gape open after you've worn it a few times. The same idea applies when you're setting in the sleeves of a knit top; you're easing, not forcing.
Here's a little trick I swear by for a professional finish: stabilize your shoulder seams. I just stitch a small piece of clear elastic right into the seam allowance as I sew. This tiny step makes a huge difference, preventing the shoulders from sagging and stretching out over time.
For seams that need even more give, like in activewear, you might want to look into specialty threads. We have a great guide on Gutermann’s versatile elastic thread that shows how it can really boost the durability and stretch of your projects.
One last tip: consider swapping your pins for sewing clips, particularly when you're working with slinky or delicate knits like rayon jersey. Clips are fantastic because they hold everything together firmly without leaving those tiny, permanent holes that pins can create.
Nothing screams "handmade" more than a wonky hem. A beautifully finished hem is what separates a homemade project from a professional-looking garment you'd be proud to wear anywhere. We’ve all been there—wavy, stretched-out seams that pop the first time you wear them. But those frustrations are completely avoidable once you know a few tricks of the trade.
For that classic, store-bought look on your knit t-shirts and dresses, your secret weapon is the twin needle. It's a game-changer. This nifty needle creates two perfect, parallel lines of stitching on the top, while the bobbin thread forms a zigzag on the underside. This gives your hem plenty of stretch and mimics the finish you see on clothes from a high-end coverstitch machine, but for a fraction of the cost.
Sometimes, the best stitch is no stitch at all. For a razor-sharp, clean edge on more stable knits like ponte or scuba, consider using fusible hem tape. It’s incredibly simple and effective.
After you press the hem allowance up, a small travel iron like the Oliso M3 Pro Mini Iron is fantastic for getting into tight spots with precision. Just tuck the tape inside the folded hem and press—you get a flawless finish with zero sewing.
Of course, your regular sewing machine has plenty of other great options for hemming knits:
A great hem isn't just about the stitching; it's about the prep work. Always, always press your hem into place before you even think about sewing it. This one small step stabilizes the fabric, prevents it from twisting under the needle, and makes getting a neat result so much easier.
Finally, let’s talk about finishing those internal seams. A clean inside makes your garment last longer and feel better to wear. A serger obviously gives the cleanest edge, but you can get a durable and tidy finish with your sewing machine too. A simple zigzag or an overcasting stitch along the raw edge will do a great job of preventing fraying and keeping your seams secure.
Even when you've done everything right, knit fabrics can still be a little unpredictable. Things like wavy seams, skipped stitches, or that weird tunneling effect are all part of the learning curve. The good news is, they're usually simple to fix. Don't let a little hiccup frustrate you; it’s just part of the process.
The most common complaint I hear is about that dreaded wavy or "lettuce-edge" seam. This almost always means the fabric was stretched out while you were sewing it. Your first suspect should be the presser foot pressure—if it's cranked up too high, it's literally squishing and stretching the fabric as it feeds. Try dialing back the pressure a bit. If you’re still getting waves, a walking foot can be a total game-changer, as it grips and feeds both layers of fabric at the same time.
Skipped stitches are another classic knit fabric problem. Before you even think about re-threading your machine or checking the tension, just change your needle. Seriously. A dull or wrong-type needle is the culprit behind this issue more than 90% of the time. Grab a fresh ballpoint or stretch needle; they’re designed to slip between the knit fibers instead of piercing them.
Still skipping? Take a look at the stitch you're using. A regular straight stitch has zero give, and when the fabric flexes, the machine can struggle to form the stitch properly, leading to skips.
I often see people think they need a serger to sew knits well. While a serger is fantastic for creating those professional-looking seams you see in stores, it's far from a requirement. You can get beautiful, sturdy results on a regular sewing machine with just the right needle, thread, and stitch.
At Famcut.com, we're here to help you on your creative journey with all the right tools and advice. You can explore our full range of sewing supplies to find exactly what you need.
At High Country Quilts we care deeply about community. With our experiences in retail, we know that a store is not only a place to shop but also a place for the community to gather and share. During this busy...

Hi! We’re Adam and Renee Wheaton, the new owners of High Country Quilts! For more than 40 years, we’ve owned and operated vacuum and sewing businesses. Following in Renee’s father’s footsteps after he retired from All Discount Vacuum and Sewing in Colorado...


Leave a comment