

We Love Our Quilting Community
At High Country Quilts we care deeply about community. With our experiences in retail, we know that a store is not only a place to shop but also a place for the community to gather and share. During this busy...


Making your first quilt is an exciting journey that unfolds in six key stages: choosing your materials, cutting the fabric, piecing the top together, creating the "quilt sandwich," quilting the layers, and finally, binding the edges.
Think of these steps as your roadmap. Following them turns a pile of fabric into something beautiful, functional, and uniquely yours. Let's walk through it together.
Welcome to the wonderful world of quilting! It might seem like a lot to take in at first, but I promise it's a craft that anyone can learn with a bit of patience. This guide is here to be your friendly companion, breaking down each step to help you build confidence as you go.
You’re joining a huge, creative community. Quilting has seen a massive resurgence, and it's not just a niche hobby anymore. The global quilt market was valued at an incredible USD 5.32 billion in 2024 and is projected to grow by about 5.7% each year through 2034.
That growth is fueled by people just like you, discovering the joy of making something by hand. With fiber production expected to reach 147 million tons by 2030, it’s clear this craft is here to stay. You can find more insights about the growing quilt market and see just how popular it has become.
Before we get into the nitty-gritty, it helps to understand the big picture. I like to think of any quilting project as having three main phases: design, preparation, and assembly.
This visual gives you a great overview of how an idea becomes a finished quilt.
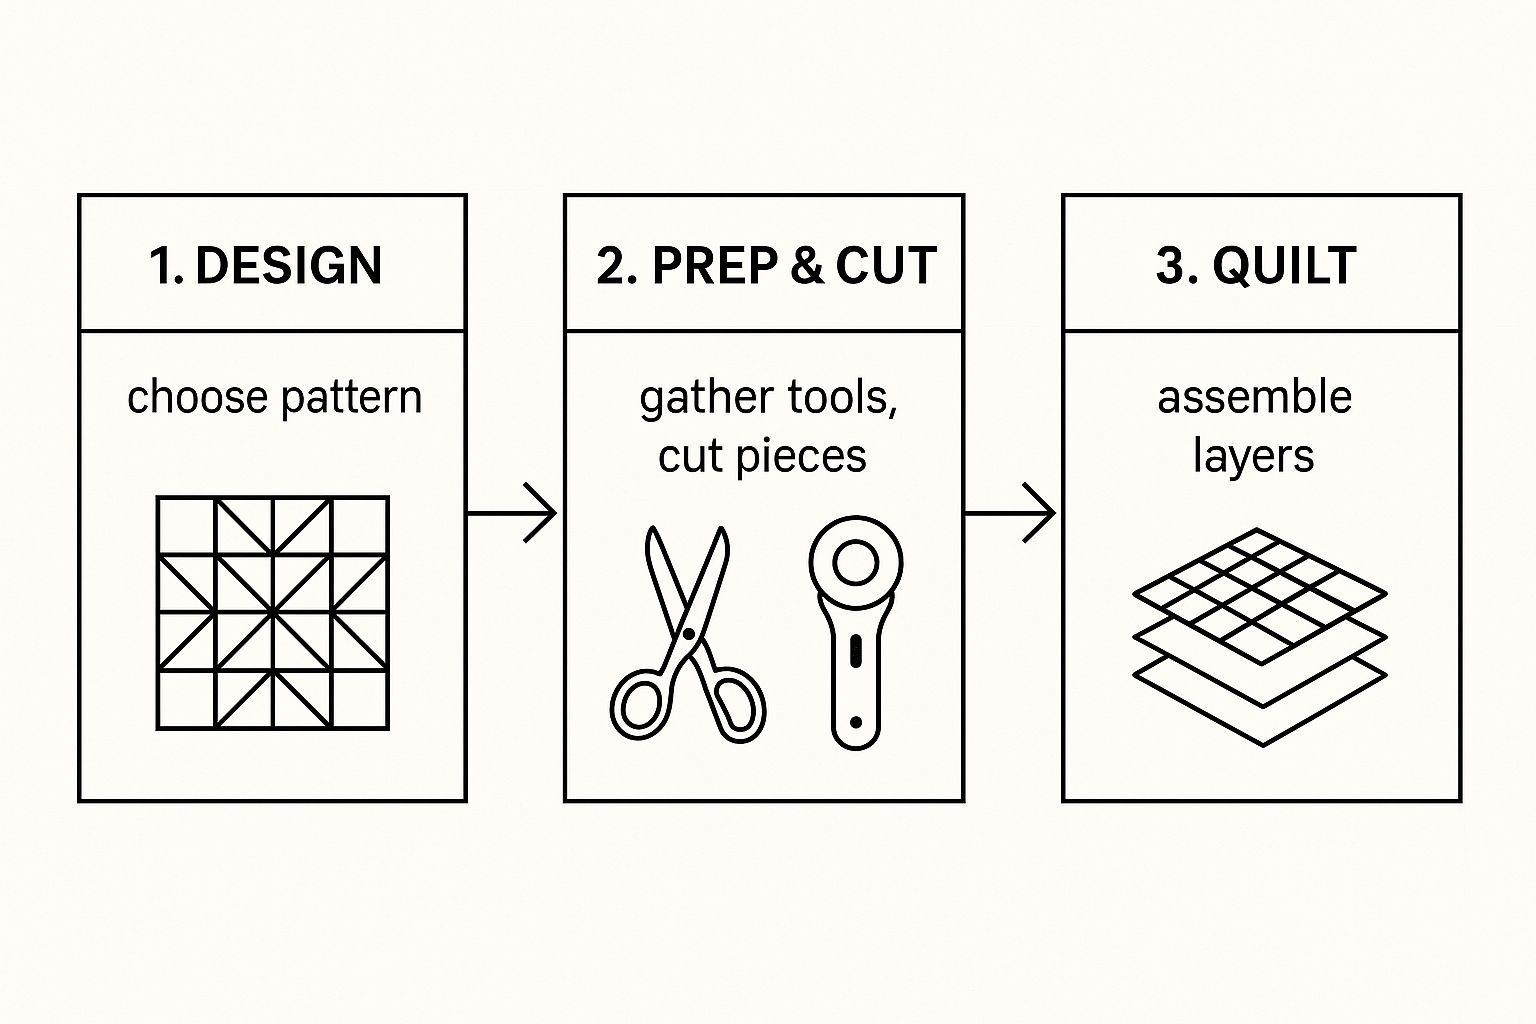
As you can see, each stage builds on the one before it. A little extra time spent on good preparation makes the final assembly so much smoother—a lesson every quilter learns, often the hard way!
My goal here is to give you everything you need to know, from the tools that genuinely make a difference to the techniques that will make your first quilt something you're truly proud of. Let's get you from "I want to try" to "I made this!"
Quilting is a journey of patience and precision, where every stitch tells a part of the story. The key is to embrace the process, celebrate small victories, and remember that even the most intricate quilt begins with a single piece of fabric.
By the time you finish this guide, you'll have a solid foundation and the skills to tackle that first project with excitement. So, let’s get started.
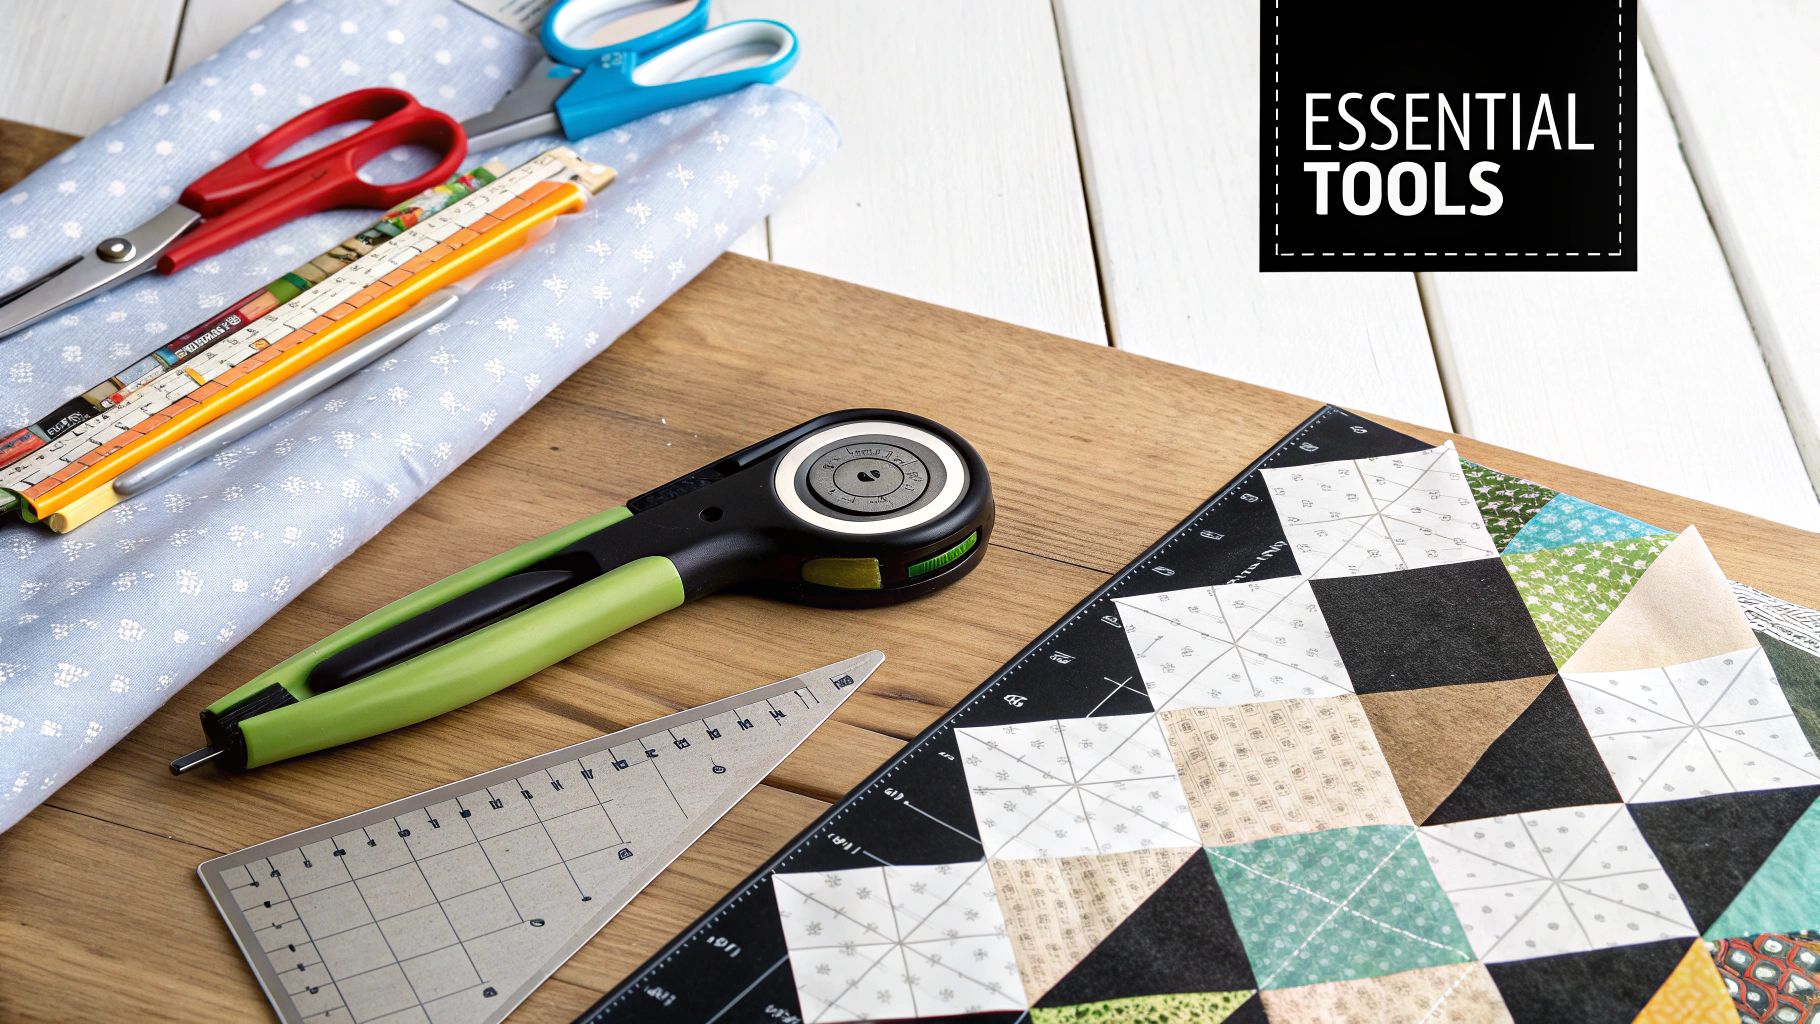
Before you sew a single stitch, you need to gather your gear. I always think of this part like prepping ingredients before you start cooking—having the right tools and materials ready not only makes the process smoother but also saves you from a world of frustration down the road.
This isn't just a shopping list. We're going to talk about why certain tools are non-negotiable and how picking the right fabric can set you up for success right from the get-go. Getting this foundation right is a huge part of learning how to quilt, and trust me, a little preparation makes all the difference.
A beautiful quilt starts with precision, and that precision begins the moment you cut your fabric. While you could technically use a pair of scissors, modern quilting has a much better system for getting those perfectly crisp, straight lines every single time.
This is where I introduce every new quilter to the "holy trinity" of cutting: the rotary cutter, a self-healing mat, and a good quilting ruler.
Using these three tools in unison is the real secret. You'll avoid the wobbly, uneven pieces that can completely derail a project before you even sit down at the sewing machine. The ruler holds the fabric steady while the cutter glides alongside it, giving you a level of accuracy that’s almost impossible to get with scissors alone.
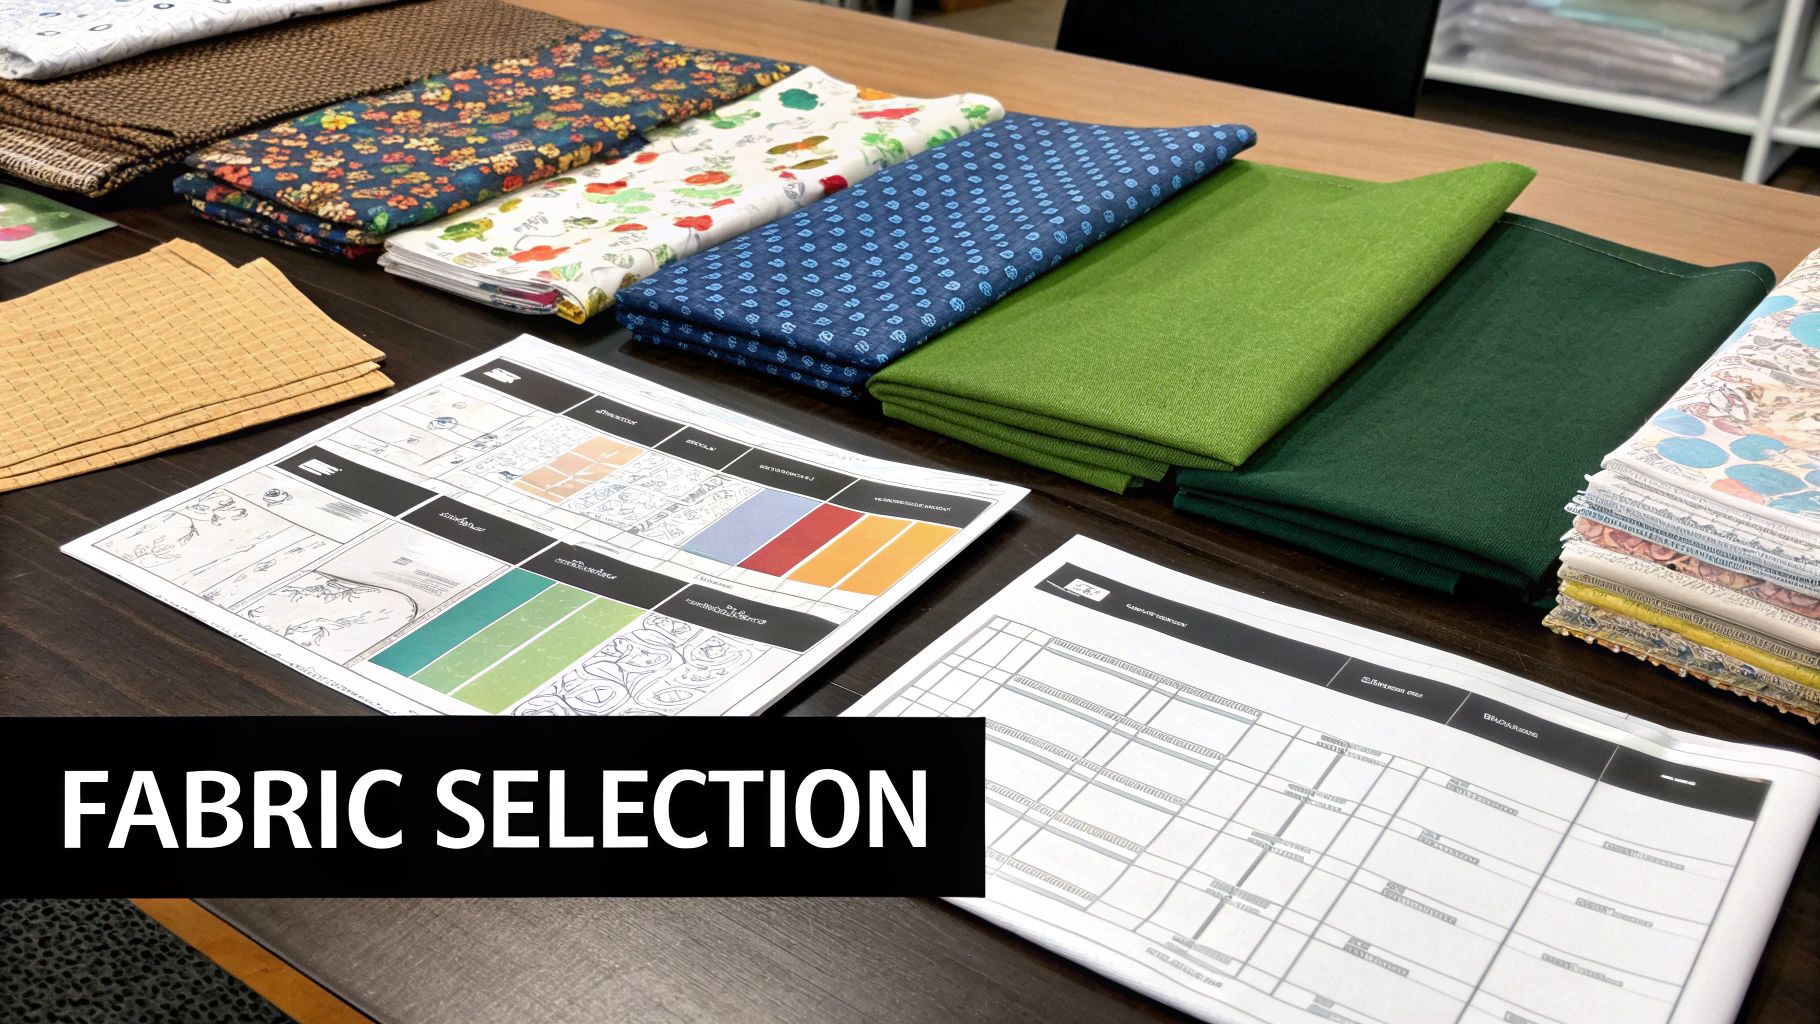
Walking into a fabric shop for the first time can feel a bit overwhelming, but for your first quilt, the choice is actually quite simple: 100% quilting cotton. This isn't just a friendly suggestion—it's a tried-and-true rule that will make your quilting journey so much easier.
Quilting cotton is milled specifically for this craft. It’s a stable, medium-weight fabric that holds its shape, presses like a dream, and is wonderfully easy to sew. Other fabrics, like flannel or linen, can be stretchy and slippery, presenting challenges that can frustrate even seasoned quilters. Stick with cotton to start.
When it comes to picking colors, don't be afraid to take a shortcut with pre-cut fabric bundles. They are a beginner’s best friend, offering coordinated collections in standard sizes.
| Pre-Cut Type | Typical Size | Common Use |
|---|---|---|
| Fat Quarters | 18" x 22" | Gives you a generous cut of fabric for various block sizes. |
| Jelly Rolls | 2.5" x 44" strips | Perfect for patterns built on strip-piecing. |
| Charm Packs | 5" x 5" squares | Ideal for simple patchwork and small, repeating blocks. |
Using pre-cuts means less time cutting and more time sewing, plus you know every piece is perfectly square right out of the package.
Finally, let’s talk about the little things that literally hold your quilt together.
Thread: Your best bet is a good quality 50-weight 100% cotton thread. A neutral color like cream, light gray, or beige is incredibly versatile and will blend beautifully with most fabrics. Steer clear of cheap, generic thread; it tends to be linty and can break easily in your machine, which is no fun for anyone.
Pins or Clips: You need a way to hold your fabric pieces together for sewing. Traditional quilter's pins are great, but many people (myself included) now swear by sewing clips. They don’t bend or distort the fabric, they’re easy to grab, and you’ll never accidentally sew over one and break a needle.
The real secret to a beautiful quilt isn't a single tool, but how you use them together. Accuracy starts with your cutting mat and ruler, flows through your sewing machine with a consistent seam, and ends with a flawlessly finished edge.
Batting: This is the fluffy heart of your quilt, giving it warmth and that wonderful texture. For a first project, you can't go wrong with cotton or an 80/20 cotton-poly blend batting. Both are easy to quilt through and give the finished quilt that classic, slightly crinkled look I love so much after it's been washed.
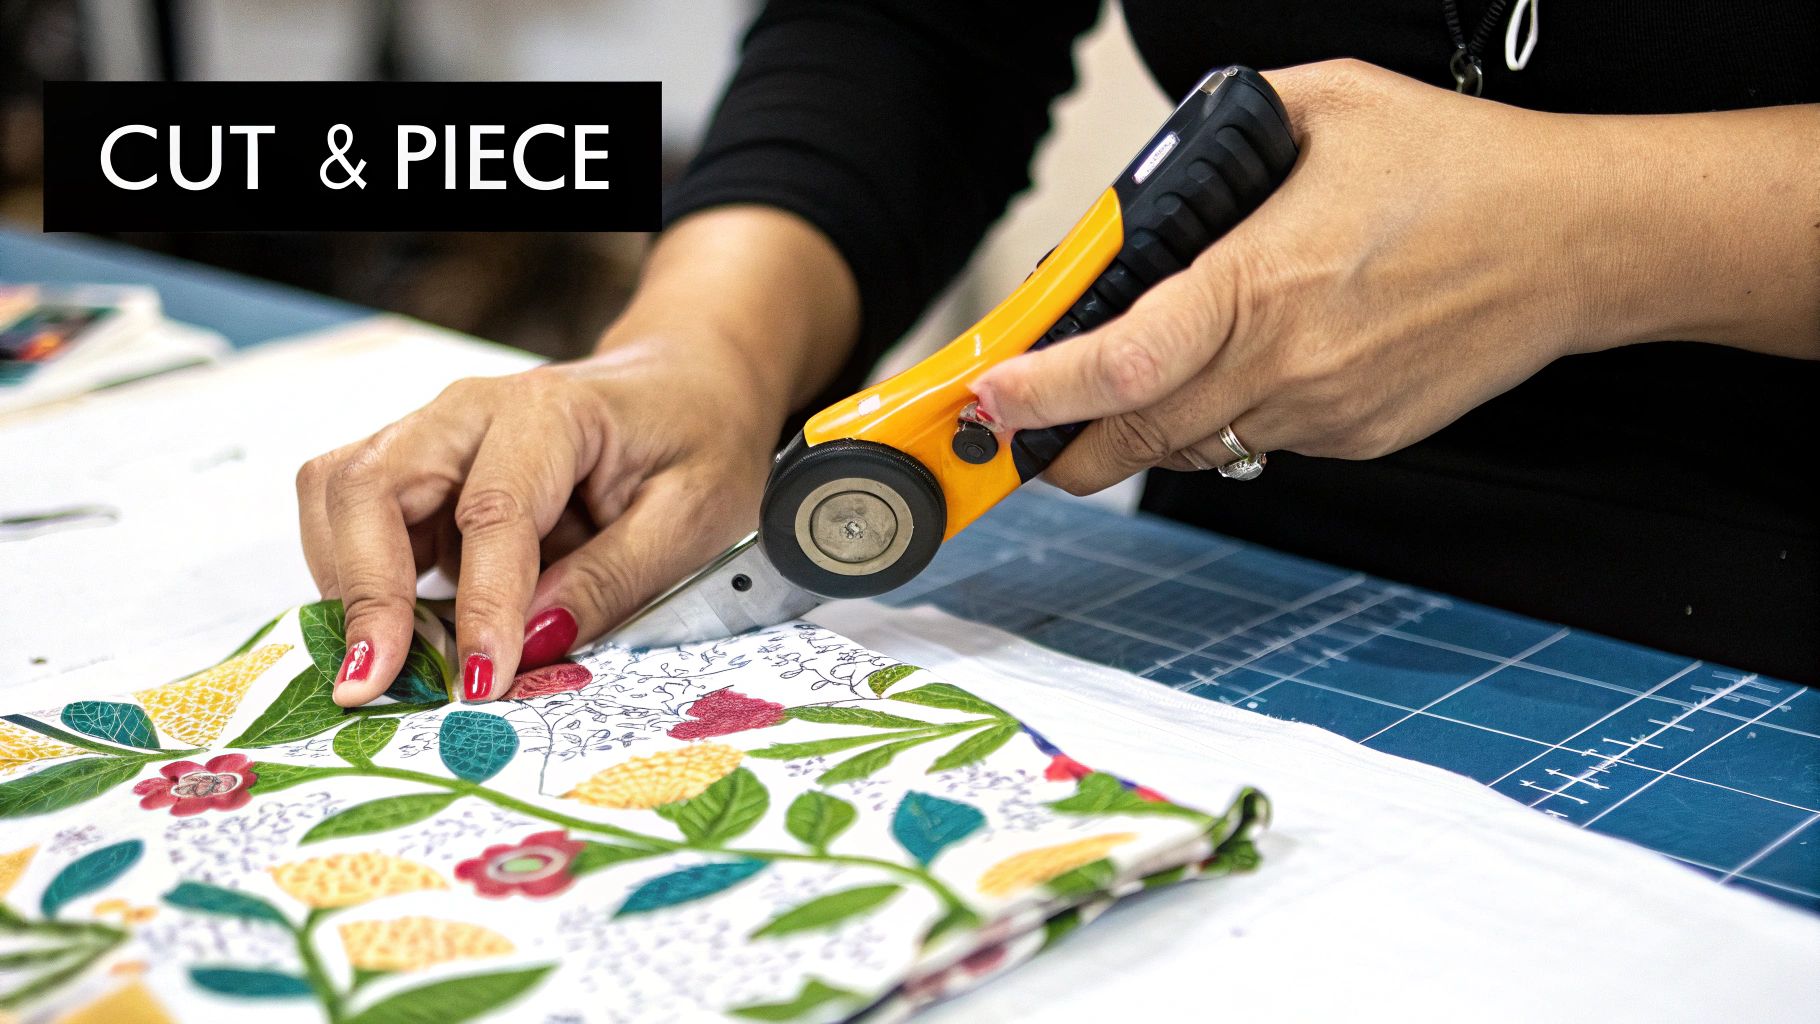
The secret to a great quilt isn't just in the sewing—it starts with a great cut. This is where your fabric transforms from a single piece into the puzzle pieces of your design. Believe me, taking your time here will save you a world of headaches later. Think of it as laying the foundation for a house; if the base is crooked, everything you build on top of it will be a struggle.
Lots of new quilters get a little nervous at this stage, especially when picking up a rotary cutter for the first time. But with a couple of key techniques and a little practice, you'll be cutting clean, precise shapes like a pro. We'll start with the most important—and most often skipped—step of all.
Before you even think about laying a ruler on that beautiful fabric, you have to prep it. This means pre-washing and ironing every single piece. I know, I know—it feels like an extra chore when you're just itching to start sewing, but this is a lesson many of us have learned the hard way.
Doing this prep work doesn't just make cutting easier. It fundamentally changes the final look and feel of your quilt. It’s a professional habit that truly makes a difference.
My Go-To Tip: I always use a spray starch or a starch alternative like Best Press when I iron. It gives the cotton a crisp, almost paper-like feel that stops it from shifting around while you're cutting. It's a game-changer.
You can't cut a straight piece from a crooked edge. Simple as that. Before you can start cutting your strips and squares, you need to create one perfectly straight "zero" line to measure everything from. We call this squaring up the fabric.
Take your fabric as it came off the bolt. You’ll have two selvage edges (the tightly woven sides) and two raw edges cut at the shop. Start by folding the fabric in half, bringing those two selvage edges together. Smooth it out so there are no ripples, making sure the fold is neat but not stretched.
Now, lay your big quilting ruler on the folded fabric. Line up one of the horizontal lines on your ruler with the bottom folded edge. This is how you know your ruler is perfectly straight. Slide it over to one of the raw, messy edges and use your rotary cutter to trim off a tiny sliver of fabric. Voila! That new cut is your perfectly straight, 90-degree starting point.
With a squared-up edge, you’re ready for the fun part. A word of advice: always use a sharp blade in your rotary cutter. It makes cutting feel like slicing through butter and gives you the cleanest lines with less effort.
Here’s my simple process for cutting strips:
This method gives you perfectly consistent strips every time, which is the key to seams that match up beautifully later on. It’s this kind of handmade precision that people are falling in love with again. The global market for four seasons quilts was valued at USD 3.71 billion in 2021 and is expected to reach USD 4.8 billion by 2025. This just goes to show how much people appreciate well-made, functional art for their homes. You can read more about these quilting market trends and see just how relevant this skill is becoming.
By the time you're done with this step, you’ll have a neat stack of perfect pieces, just waiting for the sewing machine.
Okay, this is where the real magic happens. You’ve got your neat stacks of fabric all cut and ready to go. Now, we get to start stitching them together and watch the design truly come to life.
If there’s one skill that will make or break your quilt, it's mastering the quarter-inch seam allowance. This is the undisputed standard in quilting for a simple reason: nearly every pattern is written with it in mind. Sticking to this precise measurement is what makes your blocks turn out the right size, so all your points and corners line up beautifully down the road.
Before you even think about sewing your quilt pieces, you need to get your machine set up for success. Trust me, "eyeballing it" is a recipe for wonky blocks. A consistent seam comes from a reliable guide.
Most sewing machines come with a standard foot, but a dedicated quarter-inch foot is an absolute game-changer for quilters. This little tool has a metal guide on the side; you just run the edge of your fabric along it, and boom—a perfect seam every time.
Don't have one? No problem. You can easily make your own guide. Just stack up a few sticky notes or place a strip of painter's tape on your machine bed, exactly a quarter-inch from the needle.
Here’s a quick test to check your setup:
It should measure exactly 4.5 inches wide. If it's off, adjust your guide and try again. Taking a few minutes to get this right now will save you a massive headache later when your blocks don’t fit together.
Once your seam allowance is dialed in, it's time to sew. One of the best time-saving tricks in any quilter's toolkit is chain piecing. Instead of sewing two pieces, stopping, cutting the thread, and starting the next pair, you just feed them through your machine one after another without a break.
Let's say you have a pile of twenty pairs of squares to join. You'll sew the first pair, but instead of stopping, you’ll guide the next pair right up behind it and keep on stitching. You'll end up with a long, connected "chain" of sewn pairs. Then, you can snip them all apart at once. Not only is this way faster, but it also saves a surprising amount of thread.
The real beauty of chain piecing is how it helps you find a rhythm. It turns a repetitive task into a smooth, meditative process that's both efficient and incredibly satisfying.
What you do with your iron is just as important as what you do with your sewing machine. Proper pressing is the secret to flat blocks and crisp points. The golden rule here is to press your seams to one side—usually toward the darker fabric. We don’t press seams open like in dressmaking because it can weaken the quilt over time.
For a simple checkerboard pattern, you'd alternate pressing directions by row:
When you go to sew these rows together, the seams will "nest" or lock into each other perfectly. This little trick is one of the biggest secrets to getting those sharp, professional-looking points that make a quilt truly shine.
With your blocks all pieced, lay them out on a design wall or a large, flat surface to arrange your rows. Pin the blocks together, paying close attention to where the seams meet—that nesting technique will make this part a breeze. Sew the blocks into long strips, one row at a time.
Once all your rows are complete, you’re ready for the final assembly. Pin the first two rows together, again making sure all those vertical seams are lined up perfectly. Sew them with that consistent quarter-inch seam, press the long seam to one side, and then add the next row. Keep going until your quilt top is one glorious piece of patchwork.
Take a moment to step back and admire what you've made. You did it—you've officially created a quilt top
You've done the hard work of piecing, and now you have a beautiful, finished quilt top. Go ahead, take a moment to admire it! But it’s not quite a quilt just yet. The next step is to turn that flat top into a cozy, three-dimensional blanket by creating what quilters call the "quilt sandwich."
This is where we layer your decorative top, the fluffy batting in the middle, and the backing fabric. Once they're all layered up, we'll secure them together and finally begin the actual quilting—the stitching that holds everything in place and adds that wonderful texture. This is the stage where your project truly comes to life.
Making a good quilt sandwich is all about getting three large pieces of fabric perfectly smooth and aligned. You'll need a large, clean floor space or a couple of tables pushed together for this. The goal here is to banish every single wrinkle or bump before you even think about sewing.
Here’s how you’ll stack your layers, from the bottom up:
A crucial tip: Your backing and batting should be at least 4 inches larger on all sides than your quilt top. This extra fabric is your safety net, giving you plenty of wiggle room for any shifting that might happen during the quilting process.
Once your sandwich is assembled, you need to temporarily fasten the layers so they don't slide around while you sew. This process is called basting. For beginners, there are two fantastic, straightforward methods to choose from.
| Basting Method | Pros for Beginners | Cons to Consider |
|---|---|---|
| Safety Pins | Inexpensive and easy to find. They’re reusable and make it simple to fix a pucker if you spot one. | Can be a bit time-consuming. You have to be mindful to remove them as you sew to avoid hitting one with your needle. |
| Basting Spray | Super fast and gives you an even hold across the entire quilt. Plus, no pins to remove while you're sewing. | You need a well-ventilated area, and it can get a little messy. It's a one-and-done product, so it's less economical over time. |
If you go with safety pins, look for curved quilter's safety pins—they are much easier to open and close through the layers. Place one pin every 4-5 inches (about the width of your hand) all over the quilt, starting from the center and working your way out. If you're using spray, just follow the can's instructions carefully, usually working in sections.
My two cents for beginners? Start with safety pins. Yes, it takes longer, but the process forces you to slow down and really make sure every section is perfectly smooth. It’s a great way to build good habits right from the start.
With your sandwich basted and secure, it's time for the magic—the quilting itself! We'll stick to the most beginner-friendly technique around: straight-line quilting with a walking foot.
A walking foot is a special attachment for your sewing machine that basically has its own set of feed dogs on top. It works in tandem with your machine's bottom feed dogs to grip and pull all three layers of your quilt through at the exact same rate. This is the key to preventing the top layer from shifting and creating those frustrating puckers, a common headache for new quilters using a standard presser foot.
For your first project, keep the stitch design simple. Straight lines—whether they run vertically, horizontally, or diagonally—always look clean and modern. An easy way to start is to use your pieced seams as a guide, quilting about a quarter-inch away on one or both sides of each seam line. Some people call this "stitching in the ditch," and it’s a fantastic way to practice.
Before you start on your actual quilt, always test your stitch length on a small practice sandwich made from your scraps. I find that a slightly longer stitch length, around 3.0 mm, usually looks best.
Managing the bulk of the quilt can feel awkward at first. Just roll up the side you're not working on and let it rest on your lap or a nearby table. This keeps the weight from pulling on your needle and distorting your stitches. Take it slow, enjoy the process, and soon you’ll have a beautifully textured, finished quilt.
You're in the home stretch! The final touch for any quilt is the binding. Think of it as the frame for your beautiful work—it neatly encases all the raw edges of your quilt sandwich, giving it a durable and polished look that truly says "I'm finished."
This last step can feel a little daunting, especially after pouring so much effort into your quilt top. But don't worry, I'll walk you through a straightforward method that gives you a gorgeous finish every single time. We’ll go from cutting the strips to getting those crisp, mitered corners just right.
First things first, we need to figure out how much fabric you'll need for the binding. Just measure the perimeter of your quilt by adding up the lengths of all four sides. Once you have that number, add an extra 20 inches or so. This little bit of insurance gives you plenty of wiggle room for joining the strips and turning the corners without any stress.
For a classic binding, you'll be cutting your fabric into 2.5-inch wide strips. Here’s a quick and easy way to calculate how many you’ll need:
Once you've got your strips cut, it's time to join them into one long, continuous piece. The best way to do this is with a diagonal seam, which helps distribute the bulk and makes the join nearly invisible. Just lay two strips perpendicular to each other with the right sides together, then sew diagonally from one corner to the other. Trim the excess fabric a quarter-inch from your stitch line and press the seam open. Keep doing this until all your strips are one.
Almost there! Now, take your super-long strip and press it in half lengthwise, with the wrong sides of the fabric facing each other. You now have a perfect, double-fold binding strip ready to go.
With your binding prepped, it's time to sew it onto the quilt. We’ll start by attaching it to the front of your quilt with your sewing machine. I highly recommend using a walking foot for this part; it's a lifesaver for keeping all those layers from shifting around.
Find the middle of one side to begin, but leave about a 10-inch tail of unsewn binding before you start stitching. Line up the raw edges of your folded binding with the raw edge of your quilt top and sew it down with a quarter-inch seam allowance.
Now for the part that often trips up beginners: the corners. Getting those sharp, mitered corners is easier than it looks, I promise.
Just repeat that process for every corner. When you make it back to where you started, stop about a foot away from your starting stitches. You'll have two tails. Simply overlap them, trim them so they meet perfectly, and sew them together to create a seamless loop. Then, you can finish stitching that last bit of binding down.
Time to flip your quilt over. The final step is to wrap the binding around to the back and stitch it down. You can do this by machine, but hand-stitching is the traditional route and creates a beautiful, invisible finish. It’s also a wonderfully relaxing way to wrap up your project.
Hand-finishing the binding is my favorite part of the quilting process. It's a quiet, meditative moment to reflect on the work you've done and add that final, personal touch of craftsmanship.
Using a thread that matches your binding fabric, fold the binding over the raw edge to the back. You want it to just barely cover the line of machine stitching you made earlier. Secure it in place with a simple whipstitch or a blind stitch, making sure to only catch a few threads of the backing fabric with each tiny stitch.
Sourcing the right tools and fabrics for these final steps is so much easier for quilters today. The internet has opened up a world of specialty threads, unique fabrics, and helpful tutorials. Online shops have grown incredibly fast, offering a huge variety and helpful customer reviews that can guide beginners. You can discover more about how the quilt market is evolving for modern makers like us.
Once you’ve stitched all the way around, take a step back and admire your work. Your quilt is officially complete
Once you start cutting fabric and sitting down at your machine, you're bound to have questions pop up. It happens to every single one of us! Think of these as the rites of passage for new quilters—the little things that can feel like big hurdles at first.
Getting a handle on these common queries early on will save you a ton of frustration and help you build great habits from your very first stitch.
Let's walk through some of the questions I hear most often from people just starting out. Understanding the "why" behind these tips is the key to remembering them.
Do I really need to pre-wash my fabric?
I know, I know—it feels like an extra, tedious step when you're excited to start. But for beginners, I always say yes. Pre-washing accomplishes two very important things: it gets any potential shrinking out of the way before you sew, so your finished quilt doesn't get all puckered and wonky. It also rinses out excess dye that could otherwise bleed onto your lighter fabrics. A little time at the washing machine now can prevent a lot of heartache later.
What's the easiest quilt pattern to start with?
You can't go wrong with a classic patchwork quilt made from simple squares. It's the perfect training ground. A project like this lets you focus entirely on the core skills: getting comfortable with your rotary cutter for accurate cuts, sewing a dead-on quarter-inch seam, and learning how to press your seams properly. A basic checkerboard pattern or a simple rail fence design are fantastic first projects that look great and build a rock-solid foundation.
Why aren't my points matching up? This is probably the most common frustration for new quilters! Nine times out of ten, the culprit is either an inaccurate quarter-inch seam or how you're pressing. Make sure you're using a quarter-inch foot or a seam guide on your machine to keep that seam allowance perfectly consistent. Also, pressing your seams to one side—and alternating the direction with each row—allows them to "nest" together snugly, which makes lining up those points almost effortless.
Can I actually quilt on my regular sewing machine?
Absolutely! You do not need a giant, expensive longarm machine to make a beautiful quilt. Your standard home sewing machine is more than capable of getting the job done, especially for your first several projects.
The one tool I highly recommend is a walking foot. This special attachment replaces your regular presser foot and helps grip and feed all three layers of the quilt sandwich through the machine evenly. It's the secret to preventing all that frustrating shifting and puckering. A walking foot basically turns your everyday machine into a quilting workhorse.
At High Country Quilts, we're here to help you every step of the way. Whether you need the perfect fat quarter bundle, a reliable new machine, or just a bit of advice from a friendly face, we're your community hub. Check out our fabrics and sign up for a class at High Country Quilts.
At High Country Quilts we care deeply about community. With our experiences in retail, we know that a store is not only a place to shop but also a place for the community to gather and share. During this busy...

Hi! We’re Adam and Renee Wheaton, the new owners of High Country Quilts! For more than 40 years, we’ve owned and operated vacuum and sewing businesses. Following in Renee’s father’s footsteps after he retired from All Discount Vacuum and Sewing in Colorado...


Leave a comment