

We Love Our Quilting Community
At High Country Quilts we care deeply about community. With our experiences in retail, we know that a store is not only a place to shop but also a place for the community to gather and share. During this busy...


At its heart, hand quilting is the simple act of creating a "quilt sandwich"—your top, batting, and backing—and then using a needle and thread to stitch through all three layers. It's a meditative craft where you master a consistent, simple stitch to form beautiful patterns that secure your quilt and transform fabric into a cherished heirloom.
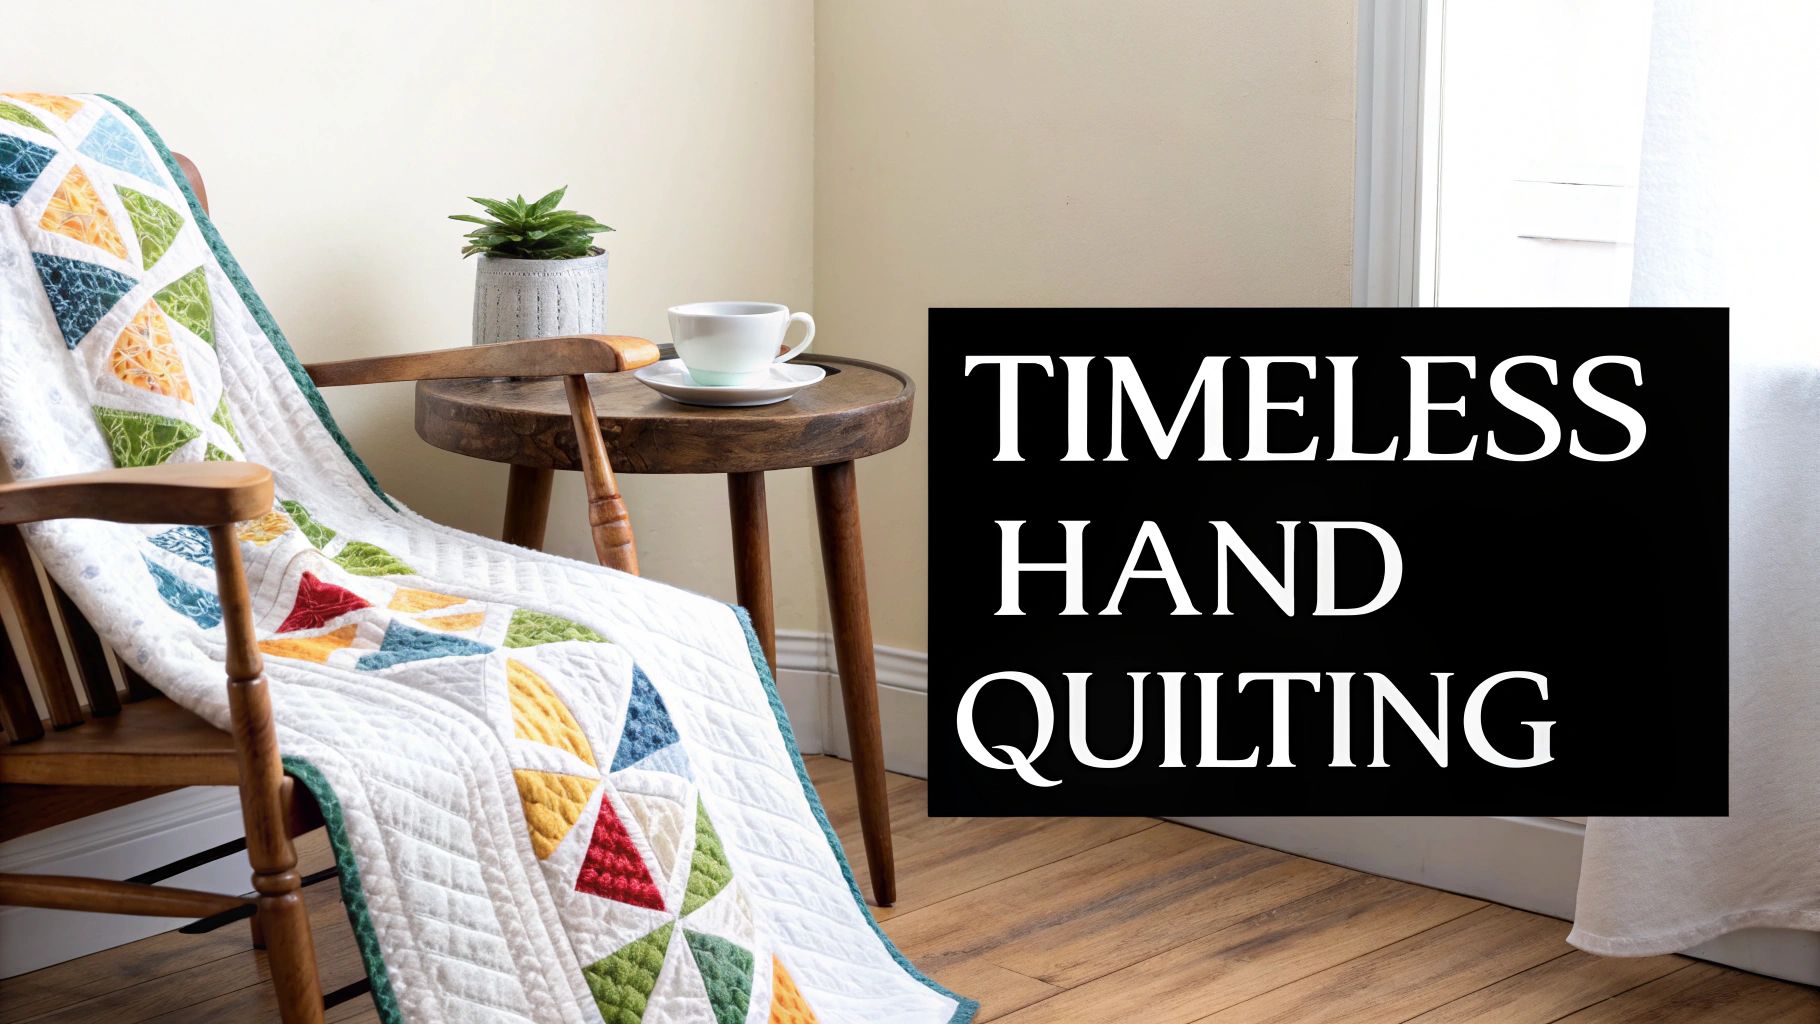
In a world that seems to be moving faster every day, there’s something truly special about slowing down to create something with your own two hands. Hand quilting connects you to a timeless tradition, turning simple fabric and thread into a work of art that tells a story. Every single stitch is a personal mark, a small moment of intention you weave right into the cloth.
It’s a world away from the rapid hum of a sewing machine. Hand quilting is a quiet, rhythmic practice. It gives you a level of creative control that's hard to match, letting you guide the needle with incredible precision. This personal touch is exactly what gives hand-quilted pieces their unique charm and heirloom quality. It’s no wonder so many people are rediscovering this skill, not just for the beautiful results but for the calming process itself.
Think of this guide as your trusted companion as you learn how to quilt by hand stitch. We'll walk you through every stage, making sure you feel confident and inspired from the moment you pick up your needle to the final stitch. Our goal is to demystify the techniques and give you the knowledge to create something you’ll be truly proud of.
Here’s a quick look at what we’ll cover together:
We believe quilting is more than just a craft; it’s a way to build community and create lasting memories. At High Country Quilts, we’re here to support you with expert advice, local classes, and all the supplies you need to begin. Consider this your starting point for a fulfilling journey.
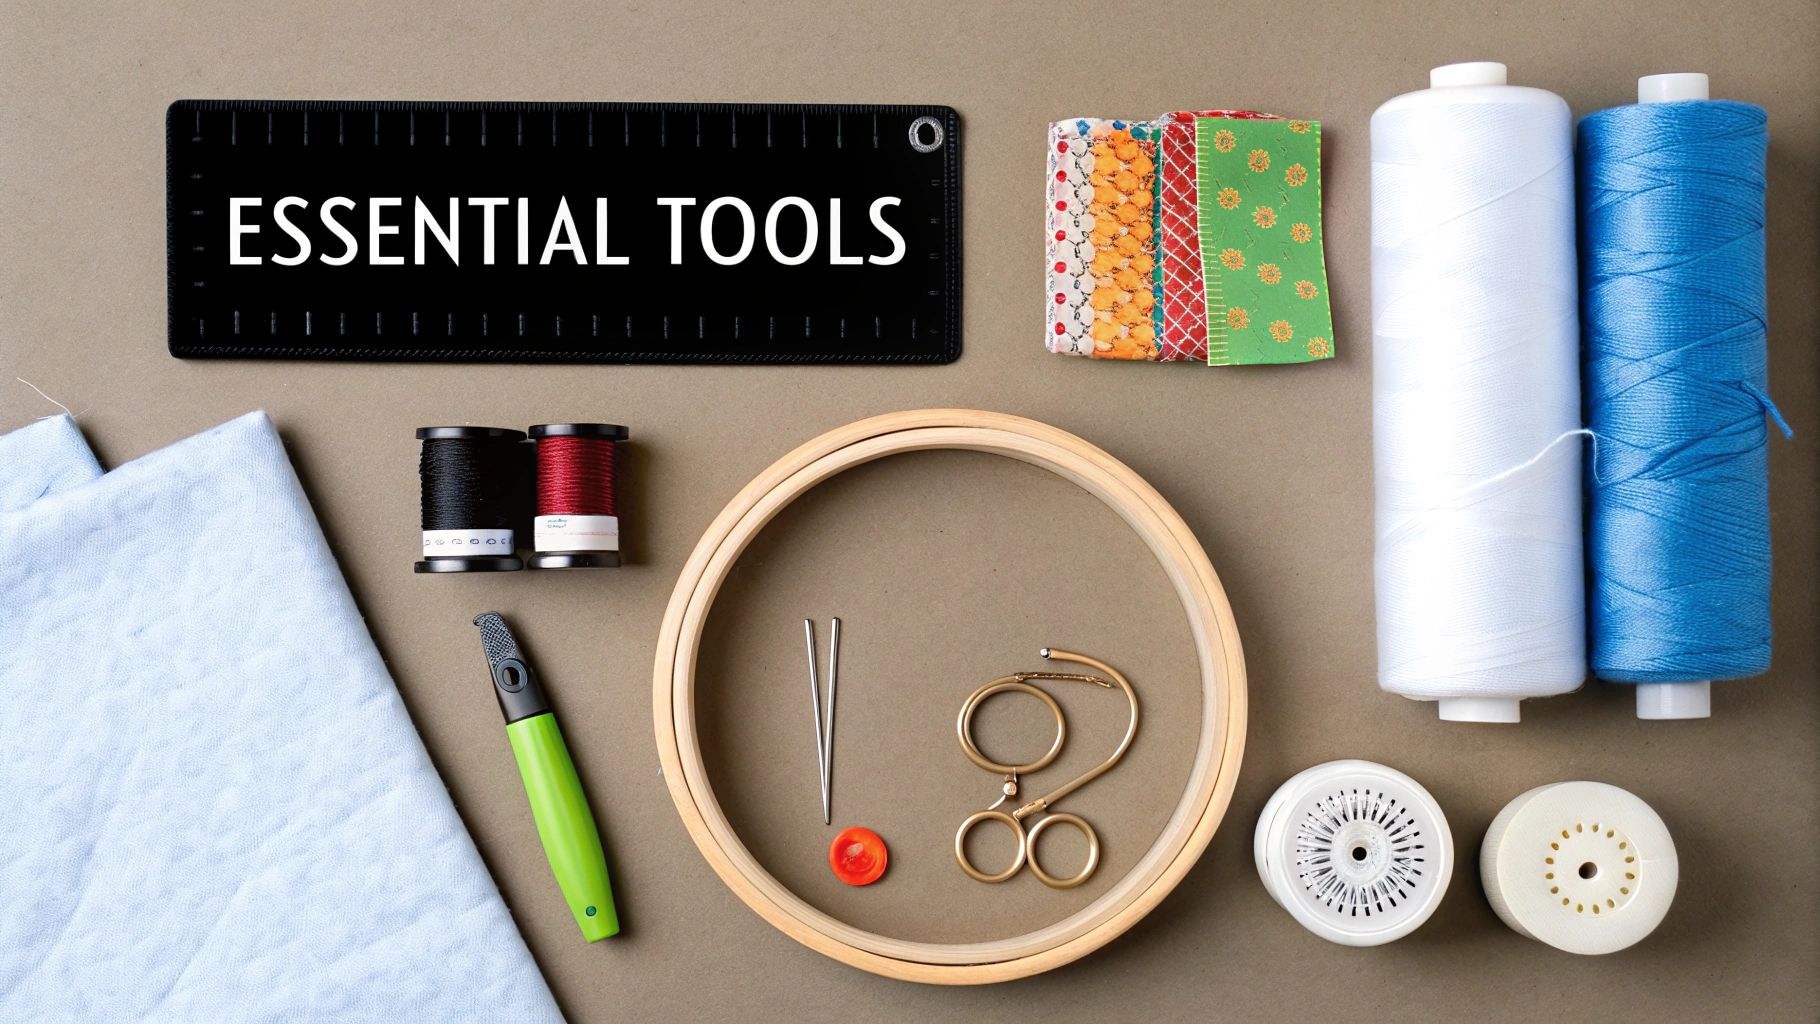
Before you can make that first satisfying stitch, you need to gather your gear. Walking into a quilt shop can feel a bit overwhelming with so many gadgets and gizmos, but the truth is, you only need a handful of reliable tools to get started. Investing in quality basics from the get-go will make your quilting journey so much smoother and more enjoyable.
Hand quilting is a beautiful, patient craft, and it's part of a massive global community—the market is projected to hit $6.96 billion by 2031. If you're curious about the industry's growth, you can read the full industry analysis on reanin.com.
Despite its big-business side, the real magic of hand quilting lies in its simplicity. You don't need a fancy machine or expensive software, just a few well-chosen supplies. Let's break down exactly what you need to build your starter kit.
Here’s a quick-glance table of the must-have items to get you started on the right foot. Think of this as your personal shopping list.
| Tool/Material | Recommended Type | Why It Matters for Beginners |
|---|---|---|
| Needles | "Betweens," sizes 7-9 | These short, sturdy needles give you the control needed for small, even stitches. Starting with a 7-9 is much less intimidating. |
| Thimble | Metal or leather, fitted to your finger | It’s not just for looks! A thimble protects your finger, letting you quilt comfortably for hours without getting sore. |
| Thread | 100% cotton, hand-quilting specific | Cotton thread wears just like your cotton fabric. Look for a "glazed" finish to prevent annoying tangles and knots. |
| Quilting Hoop | 14-inch to 18-inch wooden hoop | A hoop keeps your fabric layers taut, which is the key to avoiding puckers and achieving beautiful, uniform stitches. |
| Marking Tool | Washable fabric pen or chalk pencil | This helps you follow your chosen design. Always test on a scrap of fabric first to make sure the marks disappear completely. |
| Scissors/Snips | Small, sharp scissors for thread only | A dedicated pair of sharp snips ensures clean cuts every time and prevents your thread from fraying. |
Getting these basics right will set you up for success and make the whole process feel less like a chore and more like the creative escape it's meant to be.
If there’s one tool to obsess over, it’s your needle. For hand quilting, the needle of choice is a "between." They're shorter and sturdier than regular sewing needles, designed specifically for navigating through three layers of fabric with precision.
Betweens are sized from 1 to 12—and here’s the tricky part—the higher the number, the smaller the needle.
Your thimble is the needle's trusty sidekick. Its job is to protect the middle finger of your stitching hand as you push the needle through the quilt sandwich. Whether you choose metal, leather, or silicone, the fit is everything. It should feel snug but not tight. Please don't skip this—a good thimble is the difference between quilting for hours and quitting after 20 minutes with a sore finger.
Pro Tip from High Country Quilts: When you're at the shop, try on a few different thimbles. A metal thimble with a ridged top is a classic for a reason. That little ridge gives you a perfect spot to catch the eye of the needle, giving you leverage to push it through smoothly.
Your thread is what holds it all together, so choosing the right kind is crucial. You can't go wrong with a high-quality 100% cotton thread. Since your quilt top and back are likely cotton, using cotton thread means everything will shrink and wear at the same rate over the years.
Look for a spool specifically labeled "hand quilting thread." It usually has a special coating or glaze that helps it glide through the fabric without tangling. It’s a small detail that saves you from a world of frustration.
To get those perfect stitches, you need consistent tension, and that's where a quilting hoop comes in. It holds your "quilt sandwich" (the top, batting, and backing) taut while you work.
A lightweight wooden hoop is the perfect starting point. It’s portable, affordable, and does the job beautifully.
Last but not least, you’ll need a few tools to help you plan your work and finish it cleanly. You'll need a way to draw your quilting design onto your fabric top before you start stitching.
Here are a few great options:
Finally, grab a small, sharp pair of scissors or thread snips. The key here is to keep them only for cutting thread. Using them for paper or other materials will dull them quickly, and a dull blade frays thread. A clean snip makes threading your needle and finishing your knots so much easier.
With these tools in hand, you're ready to build your quilt sandwich and make that very first stitch
The real secret to a beautifully hand-stitched quilt isn’t just about the stitching itself—it’s all in the prep work. This is where we create the "quilt sandwich," which is simply the three layers that make up your quilt: the quilt top, the batting in the middle, and the backing fabric. Taking your time here is probably the single best thing you can do to avoid those frustrating puckers and shifted fabric later on. It truly makes all the difference.
First things first, you need a large, flat surface. For most of us, that means a nice, clean floor. A big dining table can work too, but you need enough space to lay the whole quilt out flat without any of it hanging over the sides. This solid foundation is absolutely key for getting a smooth result.
Start by laying your backing fabric down, wrong side facing up. Use painter’s tape to secure it to the floor. The trick is to pull it taut, but don't stretch it out of shape. I always start taping from the middle of each side and then work my way out to the corners. This method helps create really nice, even tension across the whole piece.
With your backing all taped down and smooth, it's time for the batting. Gently unroll your batting over the backing and use your hands to smooth it out from the center outwards. You're just trying to get rid of any wrinkles or air pockets, making sure the batting is lying completely flat and relaxed.
Finally, lay your gorgeous quilt top over the batting, right side up. Get it centered just right and then repeat that smoothing process one last time. You want to be sure all three layers are perfectly lined up and free of wrinkles. As a rule of thumb, your quilt top and backing should be a bit larger than your batting to give you some wiggle room for any shifting that happens during quilting.
Don’t rush the smoothing! Every little wrinkle you smooth out now is a pucker you won't have to fight with later. Seriously, take a few extra minutes to just run your hands over the entire surface. Your future self will thank you.
Basting is just the term for temporarily holding these three layers together while you do the actual quilting. There are a few different ways to do it, and the best method often just comes down to personal preference or the specific project you're working on.
Pin Basting
This is a super common and reliable method using curved safety pins made just for quilting.
Thread Basting
The traditional way, using a needle and a long piece of contrasting thread to make big running stitches across the quilt.
Spray Basting
Using a temporary spray adhesive for fabric can be a game-changer.
For anyone just starting to learn how to quilt by hand stitch, I usually recommend pin basting. It’s straightforward, forgiving, and a great way to get a feel for the process.
Once your sandwich is basted, the final prep step is marking your quilting pattern. This roadmap is what you'll follow with your needle and thread. Whether you're planning simple straight lines or a fancy feather design, marking it out first helps ensure a polished, consistent finish.
A few popular marking tools you'll see are:
Here's a pro tip: always test your marking tool on a scrap of your actual quilt fabric first. This quick check makes sure the marks will show up well and—more importantly—that they'll come off completely later. With your quilt basted and marked, you're officially ready for the best part: making that very first stitch.
Now for the magic. With your quilt sandwich all basted and ready, it's time to make the stitches that will bring it to life. This is the moment you transform three separate layers of fabric and batting into a single, cohesive piece of art. Forget any intimidating jargon you might have heard; we're going to break down the essential movements so they feel natural and rhythmic.
Learning how to hand quilt is all about mastering a few key motions. Once you find your groove, you’ll be amazed at how quickly you can fill a quilt with beautiful, consistent stitches. The goal isn’t perfection on day one—it's about finding a comfortable and repeatable motion that works for you.
This diagram just shows that simple, layered construction of the quilt sandwich we prepared earlier.
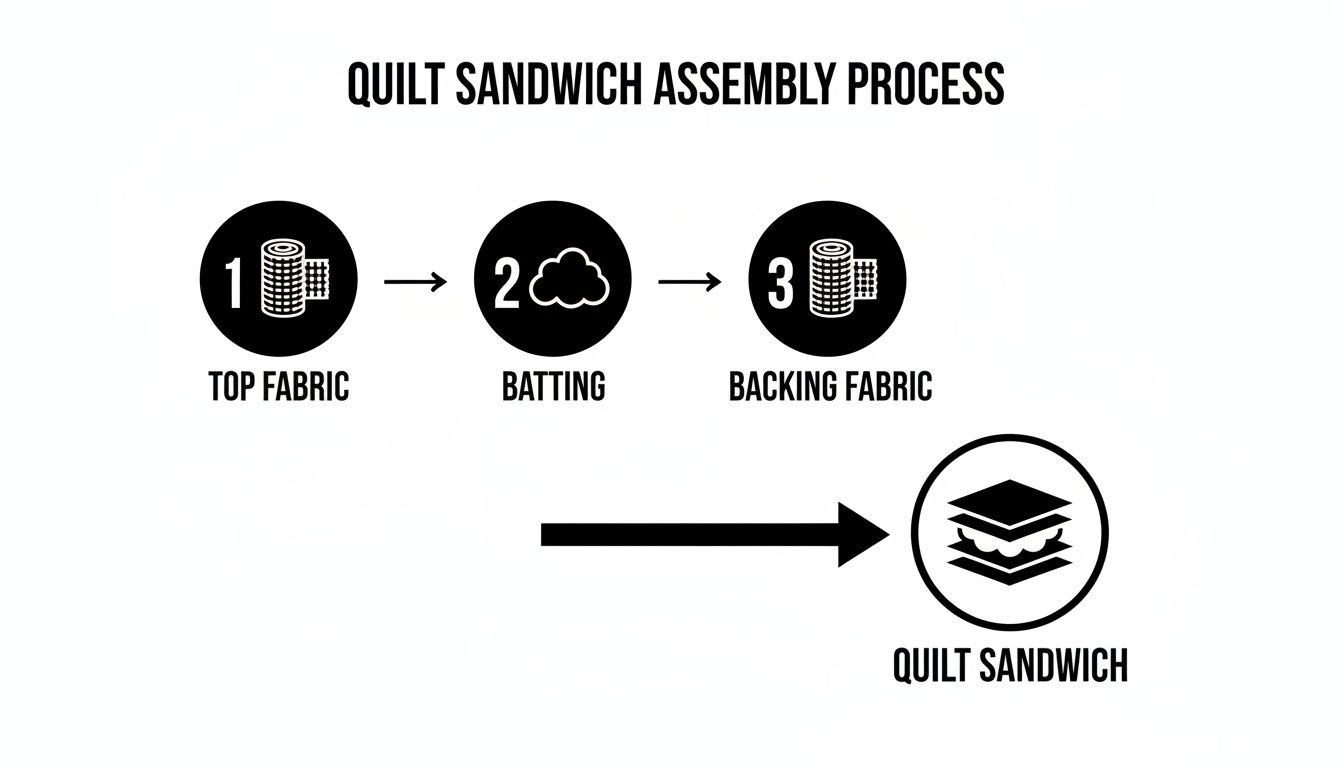
This step ensures that your top, batting, and backing are perfectly aligned before you even think about making a single stitch.
A clean start and a secure finish are the real hallmarks of great hand quilting. The quilter's knot is a special little trick that lets you hide the beginning and end of your thread inside the batting layer. This makes your work look seamless and professional from both the front and the back.
Here’s how you create that nearly invisible start:
That little "pop" is one of the most satisfying sounds in hand quilting! To end a line of quilting, you just do the reverse: make a small knot close to the fabric, take a final stitch into the batting, and snip the thread flush with the quilt top. The tail is hidden forever.
The rocking stitch, sometimes just called the quilter's stitch, is the fundamental technique for hand quilting. It’s an efficient motion that allows you to load several small, even stitches onto your needle at once before pulling the thread through. It's this rhythmic movement that makes hand quilting both so meditative and surprisingly efficient.
Picture this: your non-stitching hand is underneath the quilt in the hoop, supporting the fabric. Your stitching hand, with its thimble-clad finger, is on top.
The key is to use the tension from the hoop to your advantage. Let your bottom finger guide the needle back up as your top finger pushes it down. It’s a dance between your two hands, and finding that rhythm is everything.
Once you have a few stitches loaded, gently pull the needle and thread all the way through, smoothing the fabric as you go. Your goal here is to create stitches that are consistent in length, not necessarily tiny. For beginners, aiming for 6-8 stitches per inch is a fantastic and totally achievable goal.
While the rocking stitch will be your go-to, a couple of other stitches are incredibly useful to have in your back pocket.
The Running Stitch
This is the simplest stitch of all. It's basically the same as the rocking stitch but is often done with a longer needle and without that pronounced rocking motion. It's perfect for creating a more rustic, visible "big stitch" look, especially when you're using a thicker thread like a 12wt cotton.
The Ladder Stitch
This invisible stitch is your secret weapon for flawlessly attaching the binding to the back of your quilt. It creates a nearly invisible seam by catching just a few threads from the binding edge and a few from the quilt backing, alternating back and forth in a "ladder" pattern.
The enduring appeal of these simple stitches is a testament to their effectiveness. For those learning hand quilting at shops like High Country Quilts, which specializes in fabrics and BERNINA support, it's clear why starting with the basics remains timeless. You'll want a sturdy thimble, sharp "between" needles (sizes 9-12), and a good 40-weight cotton thread. Hand quilting has an incredible history, dating back to ancient Egypt around 3400 BCE. In America, it boomed during the 19th century, with over 4 million quilts produced annually by the Civil War era for practical use and fundraising, sewing communities together much like today's guild events. You can explore more about quilting's rich heritage in the latest quilting market trends survey.
Mastering these foundational techniques is your first major step. Practice the quilter's knot and the rocking motion on a small scrap piece, and you’ll build the muscle memory you need for your first full project.
Every single quilter I know, myself included, has hit a few snags along the way. It’s easy to get frustrated, but try to think of these little challenges as part of the journey. Honestly, figuring out how to fix them is what turns you into a really confident stitcher.
Let’s talk through some of the most common issues that pop up when you're learning how to quilt by hand stitch. From knotted thread to sore fingers, there's always a way through it.
There's nothing quite like getting into a good stitching groove, only to be stopped by a stubborn knot. If you feel like you’re constantly fighting a tangled mess, it usually comes down to two things: the length of your thread and the type of thread you're using.
It’s tempting to cut a super long piece of thread to avoid re-threading your needle so often, but this almost always backfires. Anything longer than about 18 inches is just asking for trouble. As you stitch, that long tail twists and drags through the fabric over and over, which is what causes those pesky knots.
The thread itself can also be the culprit. If you’re using a standard all-purpose sewing thread, it just doesn’t have the right finish for handwork and can create a lot of friction.
My Go-To Fix: A little thread conditioner goes a long way. I run my thread through a block of beeswax or a product like Thread Heaven a couple of times. It puts a light, smooth coating on the thread that helps it glide through the quilt layers like a dream, cutting down on tangles dramatically.
It’s completely normal to want those tiny, perfect stitches you see on antique quilts right from the start. But trust me on this: consistency is far more important than size. If your stitches are all over the place, it's usually just a sign that you haven’t quite built the muscle memory for your chosen quilting stitch yet.
Forget about counting your stitches per inch for now. Your only goal should be making each stitch the same length as the one before it. It’s all about finding a comfortable rhythm.
Seeing little puckers or pleats form along your quilting lines is so frustrating. Nine times out of ten, this problem traces all the way back to how the quilt was basted.
When the three layers of your quilt sandwich aren't held together securely, the needle can push the top fabric forward as you stitch, causing it to bunch up. Good, thorough basting is your absolute best defense against puckers.
Quick Pucker-Prevention Checklist
Think of these problems as rites of passage for every hand quilter. Working through them is exactly how you build the skill and intuition that will make your next project even better.
You’ve placed the last stitch. All those hours of careful work have finally come together, and the main quilting is done. This is a huge moment, but we're not quite at the finish line yet. Now comes the final, crucial step: framing your masterpiece.
Finishing your quilt is what turns it from a project into a polished, durable heirloom. This process involves trimming the excess batting and backing, squaring up the edges, and attaching the binding. It’s the final flourish that says, “I’m complete.”
Before you can even think about binding, you need to give your quilt perfectly straight edges and crisp, 90-degree corners. We call this "squaring up," and it's a non-negotiable step for getting that professional look.
Grab a large cutting mat, a long quilting ruler, and a fresh blade in your rotary cutter. Lay your quilt out as flat as you can and find a straight seam line within your quilt top to align your ruler with. Once aligned, trim away the excess batting and backing to create a clean, straight edge. Rotate the quilt and do this for all four sides. Take your time here—a perfectly square quilt makes attaching the binding a million times easier.
The binding is simply a narrow strip of fabric that neatly encases the raw edges of your quilt sandwich. While you can buy pre-made binding, making your own lets you choose the perfect fabric to complement your design.
As you approach a corner, stop sewing about a ¼-inch away from the edge. This little gap is the secret to creating a perfect mitered corner.
Don't let mitered corners intimidate you! The technique looks fancy, but it's just a couple of simple folds. When you get to the corner, fold the binding strip up and away from the quilt at a 45-degree angle, then fold it back down along the next side. This creates a neat little fabric flap that will become a crisp, beautiful miter when you turn the binding to the back.
Once the binding is sewn by machine to the front of the quilt, it's time for one last cozy session of hand stitching. Flip the folded edge of the binding around to the back of the quilt and get ready to secure it.
Using a ladder stitch or a slip stitch, carefully and almost invisibly tack the binding down to the quilt's backing. This final, meditative step is what gives a hand-quilted project its signature artisan touch.
It’s this dedication to craftsmanship that's fueling a growing passion for handmade goods. The global quilt market was valued at $695.84 million in 2024 and is projected to reach $1.15 billion by 2030. If you're curious, you can explore more insights into the quilt market's growth. Your beautifully hand-finished binding is a perfect example of why these treasured items are so special.
As you start your hand-quilting journey, you're bound to run into some questions. It’s all part of the process! Here are a few of the most common things we get asked in the shop, along with some practical advice from our own experience.
The honest-to-goodness answer? It truly depends. Think of it less like a race and more like a relaxing marathon.
The biggest factor is, of course, the size of your quilt. A little baby quilt might come together over a few weekends, taking maybe 20-40 hours. But a sprawling king-sized masterpiece with intricate designs? That could easily become a long-term companion, taking hundreds of hours to complete.
Your design's complexity also makes a huge difference. Simple, straight lines are much quicker than dense, decorative patterns like feathers or echoing curves. The real magic of learning how to quilt by hand stitch is found in the rhythm and the process, so try to embrace the journey.
When you’re just starting, forget about tiny, perfect stitches. Consistency is so much more important than length. Seriously. Your goal should be to get your stitches looking as even and uniform as possible.
Aim for a comfortable 6-8 stitches per inch to begin. This is a fantastic, achievable goal. As you practice and build that muscle memory, you'll naturally find your stitches getting smaller and more refined, perhaps moving toward 10-12 stitches per inch. The key is finding a rhythm that works for you, ensuring the stitches look just as good on the back as they do on the front.
A little piece of advice we always share: The rocking stitch takes time to master. Your first stitches won't look like your hundredth, and that's completely normal. Focus on progress, not perfection.
Absolutely! This is a fantastic and very popular way to work. You really get the best of both worlds.
Many quilters I know will use their machine for the "heavy lifting"—piecing the top and maybe stitching in the ditch to secure the main seams. It’s a huge time-saver and adds a lot of stability right from the start.
Then comes the fun part: adding all the beautiful, decorative stitching by hand. This hybrid approach lets you enjoy the slow, meditative part of quilting where it counts most, adding that unmistakable handmade texture and artistry. It’s a wonderful blend of efficiency and craft.
After pouring all that love and time into a quilt, you want to make sure it lasts. The key is to always be gentle.
We recommend washing on a delicate cycle with cold water and a mild detergent made for quilts. If it’s a particularly special piece, pop it into a large mesh laundry bag for an extra layer of protection in the machine.
When it comes to drying, air drying is your best friend. Lay the quilt out flat on a clean sheet or some towels, or drape it over a non-rusting railing. Try to avoid clothespins, as they can pull and distort the fabric. And please, avoid the high heat of a machine dryer! It can cause the cotton and batting to shrink, which can pucker your beautiful stitches.
Feeling inspired to begin your own hand-quilting adventure? Stop by High Country Quilts for the best fabrics, needles, and threads. We'd love to help you get everything you need for your first project. You can also find a great starter kit on our website at https://hcquilts.com.
At High Country Quilts we care deeply about community. With our experiences in retail, we know that a store is not only a place to shop but also a place for the community to gather and share. During this busy...

Hi! We’re Adam and Renee Wheaton, the new owners of High Country Quilts! For more than 40 years, we’ve owned and operated vacuum and sewing businesses. Following in Renee’s father’s footsteps after he retired from All Discount Vacuum and Sewing in Colorado...


Leave a comment