

We Love Our Quilting Community
At High Country Quilts we care deeply about community. With our experiences in retail, we know that a store is not only a place to shop but also a place for the community to gather and share. During this busy...


The basic idea is simple: sort your fabrics by color, wash them on a gentle cycle with a mild detergent, and toss in a color catcher to trap any loose dyes. This one step is the secret to preventing shrinkage and color bleeding, making sure your finished quilt stays flat, vibrant, and beautiful for a lifetime.
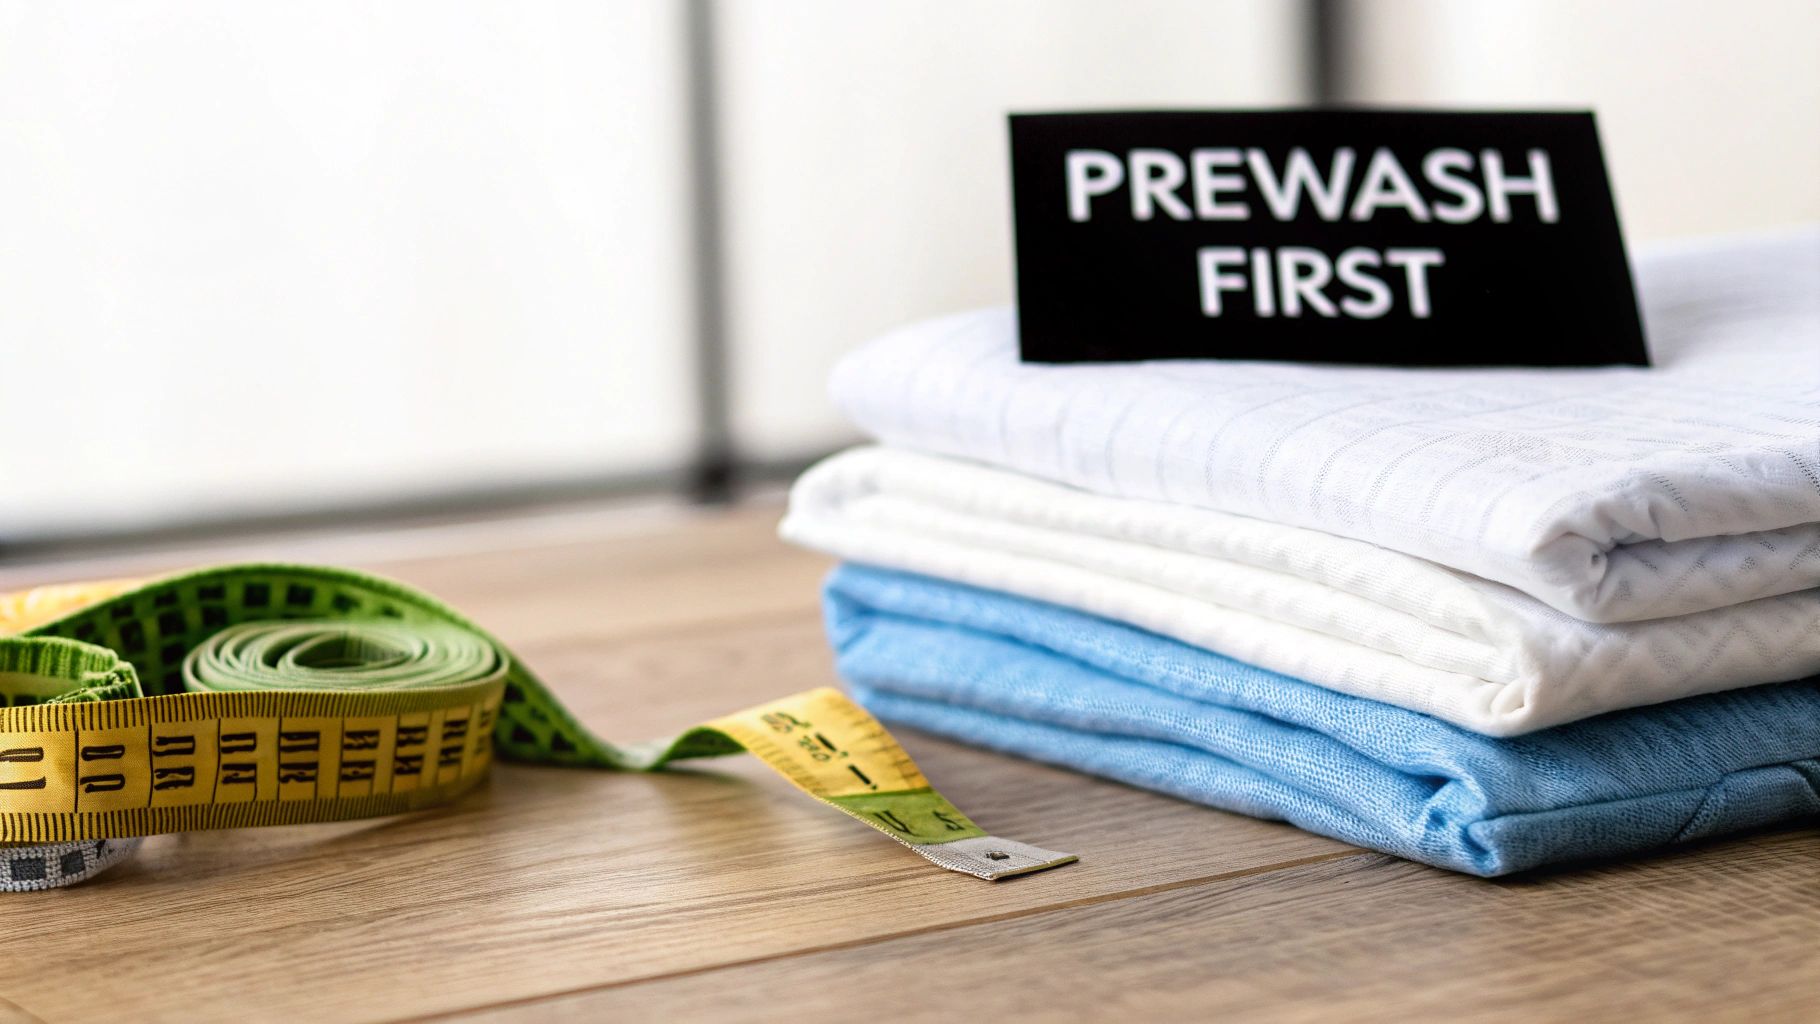
Ask any group of quilters about prewashing, and you’ll likely spark a lively debate. Some swear by the crisp, straight-from-the-bolt feel of new fabric, while others wouldn't dream of letting scissors touch a yard that hasn't been washed first. So, is it just an old-fashioned rule, or is there a real method to the madness?
Honestly, prewashing is one of the best quality-control steps you can take. It tackles three big problems that can seriously mess with all your hard work.
Picture this: you've poured hours into piecing a gorgeous quilt top, only to watch it pucker and warp after its first wash. It’s a quilter's worst nightmare, and it’s usually caused by fabric shrinkage. Not all fabrics shrink the same, and even bolts from the same collection can shrink at different rates.
Prewashing has been a core quilting practice since the 1970s revival in the U.S., a time when the community grew from a few thousand to over 9 million active quilters by 2022. There's a good reason for it. An unwashed piece of 100% cotton can shrink 3-5%, and some batiks can shrink by as much as 7%! That’s enough to completely distort your blocks. Prewashing can eliminate up to 90% of that potential shrinkage, keeping your piecing precise. You can read more about the quilting market's evolution and trends if you're curious.
Another huge win for prewashing is preventing colors from running. Those beautifully saturated fabrics—especially deep reds, rich blues, and vibrant batiks—are notorious for releasing extra dye in their first wash.
Think of prewashing as an insurance policy against a rainbow-colored disaster. It gives those fugitive dyes a chance to rinse out before they have a chance to stain the lighter, contrasting fabrics in your quilt.
Fabric goes on a long journey from the mill to your sewing room. To keep it looking crisp and wrinkle-free on the bolt, it's treated with various chemicals, starches, and sizing agents. While these make the fabric feel nice in the store, they aren’t always great for your project.
Here’s why washing them out is a good idea:
Taking the time to prep your fabric properly is the key to creating beautiful projects that last, from complex bed quilts to thoughtfully designed quilted play mats. By prewashing, you’re setting yourself up for a smoother, more predictable quilting experience and a finished piece you can be proud of for years.
Before a single drop of water touches that gorgeous new fabric, a little prep work can save you a world of hurt. Think of it as setting up your station—getting everything in place makes the whole process smoother and protects your fabric from fraying or, even worse, bleeding color everywhere.
You really don't need a lot, but what you do need is important. A gentle, pH-neutral detergent is non-negotiable; anything too harsh can be rough on cotton fibers and dull your vibrant colors. Just as crucial are color catchers. I swear by these things. They’re little sheets that act like magnets for loose dye, and I never, ever prewash a new fabric without tossing at least two of them into the machine.
Probably the biggest headache with prewashing is dealing with the tangled, stringy mess that can happen along the raw edges. The fabric's weave starts to come undone in the wash, and you end up with a bird's nest. Luckily, there are a couple of super simple ways to prevent this.
The quickest fix? Grab a pair of pinking shears and snip about a quarter-inch off each raw edge. That zigzag cut creates short little threads that just can't unravel and tangle. It’s a game-changer. If you have a fabric that looks particularly prone to fraying (think looser weaves or flannel), just run a quick zigzag stitch along the raw edges with your sewing machine. It’s a few extra minutes of work that pays off big time.
This next step is absolutely essential, especially if you're working with those beautiful, deeply saturated colors. I'm looking at you, radiant reds, royal blues, and rich purples. They're notorious for bleeding dye, and this simple test can save your entire project from a pink-tinged disaster. Seriously, it's the best five-minute insurance policy you'll ever find.
Here's my go-to method for checking if a fabric is colorfast:
This simple test takes all the guesswork out of the equation. Knowing you have a bleeder before it gets into a wash with your pristine whites and pale yellows means you can handle it properly.
And if you do find a bleeder? Don't stress. It just means that fabric gets its own special treatment. Wash it completely on its own or with other, very similar dark colors. Be sure to throw in a few extra color catchers to soak up all that runaway dye. Taking this one proactive step ensures your quilt’s colors stay bright, crisp, and exactly where you intended them to be.
Once you've done your prep work and tested your fabrics, it's time to head to the laundry room. Getting into a consistent machine-washing routine is the secret to perfectly prepared fabric every single time. After a few runs, this whole process will feel like second nature.
First things first: sort your fabrics. Just like you do with your clothes, separate your quilting cottons into color groups. I find three piles work perfectly: lights, mediums, and darks. This simple step is your best line of defense against bleeding dyes, especially those notorious reds and deep indigo blues that just love to run.
With your fabrics sorted, let's get the machine ready. For pretty much all quilting cottons, you'll want to use the gentle or delicate cycle. The reduced agitation is much kinder to the fabric, preventing the raw edges from fraying into a tangled mess and keeping the fibers strong.
Next up is water temperature. This can feel like a balancing act. Hot water is a recipe for shrinkage and dye loss, but cold water sometimes struggles to wash out all the sizing chemicals from the factory. I've found that a cool or warm water setting is the sweet spot—it gets the fabric clean without being overly harsh.
The soap you choose really does make a difference. I always reach for a gentle, pH-neutral detergent. Harsher detergents can be tough on cotton, slowly stripping the color and weakening the fibers with each wash.
And don't forget your color catchers! Even if a fabric passed your bleed test with flying colors, I still toss one or two sheets into every load. Think of them as cheap insurance; they're fantastic at grabbing any stray dye that escapes before it can ruin your lighter-colored fabrics. If you're working with something you know is a heavy bleeder—like a super-saturated batik or a vibrant hand-dyed fabric—you might want to bring in a dye fixative like Retayne to really lock those colors in.
This flowchart gives you a great visual recap of the prep work that happens before your fabric even sees the inside of the machine.
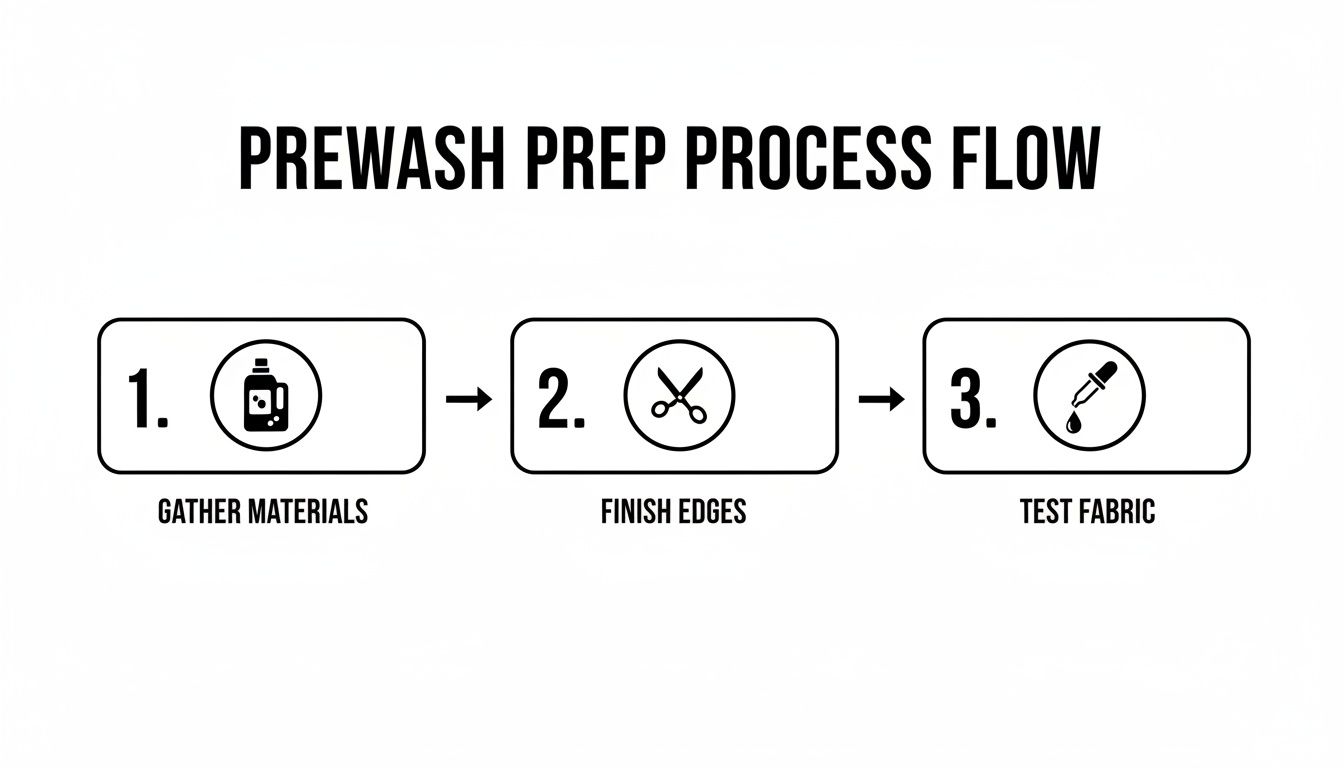
As you can see, gathering your supplies, finishing those edges, and testing for colorfastness are the building blocks of a successful prewash.
One last thing—make sure your washer is clean! Lingering detergent residue or mildew can easily transfer onto your beautiful new fabrics. Taking the time for maintaining a clean washing machine is a small step that protects your investment.
Not all fabrics are created equal. While quilting cotton is forgiving, other materials need a little extra TLC. Here’s a quick reference table to help you nail the settings for different fabric types you might use in your quilts.
| Fabric Type | Water Temperature | Cycle Setting | Special Instructions |
|---|---|---|---|
| Quilting Cotton | Cool to Warm | Gentle / Delicate | Use color catchers. |
| Flannel | Cool | Gentle / Delicate | Expect significant lint; clean the filter afterward. |
| Linen / Linen Blends | Cold | Gentle / Delicate | Wash separately to avoid lint transfer. |
| Batiks | Cold | Gentle / Delicate | Always use multiple color catchers; high dye content. |
| Rayon | Cold | Hand Wash / Delicate | Place in a mesh bag to prevent stretching/damage. |
This isn't an exhaustive list, of course, but it covers the most common fabrics you'll encounter. When in doubt, always err on the side of caution with a colder, gentler wash.
Pro Tip: Don't crowd the washing machine. Your fabric needs plenty of room to swish around in the water to get properly cleaned and rinsed. An overstuffed machine is a shortcut to a wrinkled, tangled-up ball of fabric.
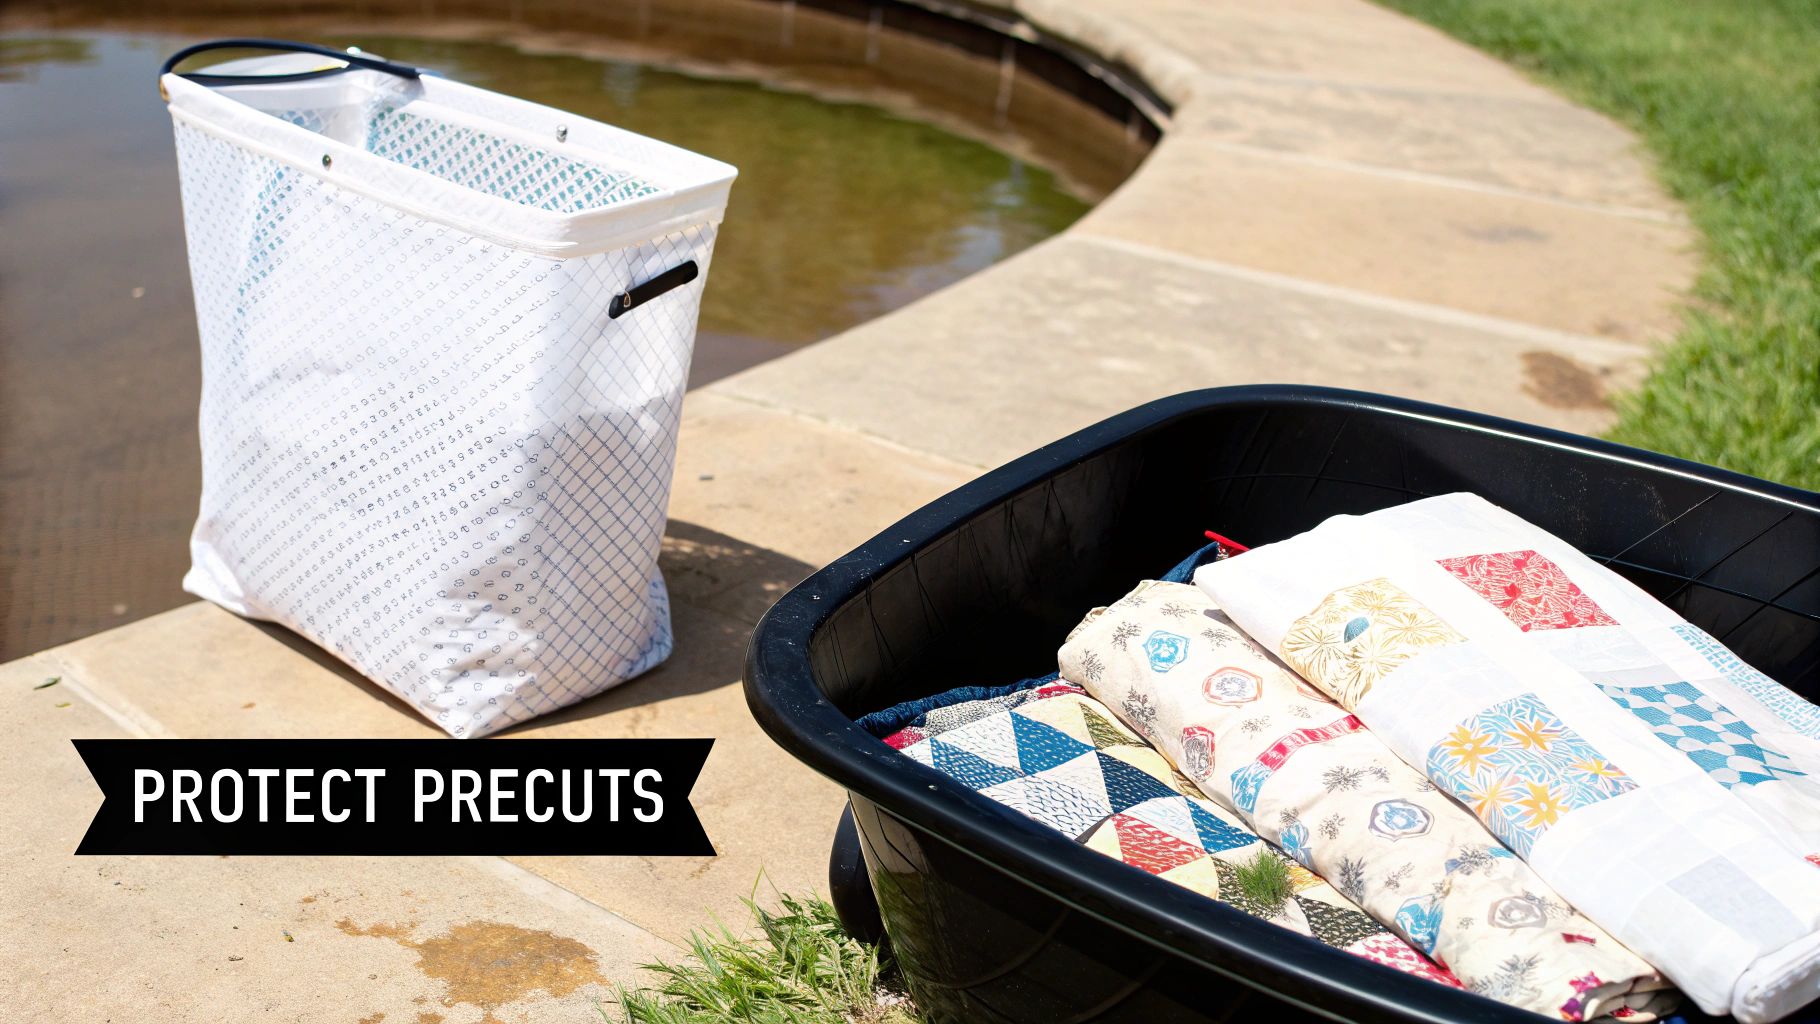
Not everything in your quilting stash is a simple yardage cut from the bolt. We all love the convenience of precuts—charm packs, layer cakes, and jelly rolls are a quilter's dream. But they also come with a unique headache: how do you wash them without creating a tangled, frayed-up disaster? It's a real fear, but so are the risks of skipping the wash and dealing with bleeding dyes and stiff starches later.
The quilting world has absolutely exploded, with the global market hitting USD 4,730.7 million in 2023. A huge part of that growth comes from the popularity of precuts. In fact, these bundles can account for 30-40% of a quilt shop's fabric sales. They're undeniably convenient, but their small size and all those exposed raw edges make them notoriously delicate. If you're interested in the business side of things, you can explore detailed market research on quilting to see just how big this trend is.
So, what's the secret to prewashing quilting fabric that's already cut into tiny pieces? It's simpler than you think: a mesh laundry bag. This little tool is an absolute lifesaver for keeping your precuts contained and preventing them from twisting into a shredded mess in the washing machine.
Just pop your charm squares or jelly roll strips into the bag, zip it shut, and toss it in the wash. I recommend using a gentle cycle with cool water and a mild detergent. The mesh bag lets the water and soap work their magic while protecting those fragile raw edges from the machine's agitation.
Using a mesh bag for precuts is non-negotiable. It’s the single best way to ensure your fabrics get clean without sacrificing their shape or turning your washing machine into a thread nest.
Of course, some fabrics are just too fragile for a machine, even on the gentlest cycle. Think of soft flannels, drapey rayons, or some of those beautiful but loosely woven cottons. These materials demand a more hands-on approach to prevent stretching, distortion, and a ton of fraying. For these special cases, hand washing is your safest bet.
Here’s the soak-and-squeeze method I use for my most delicate fabrics:
This careful process gets rid of the sizing and any loose dye while keeping the fabric's structure intact. For drying, I like to roll the wet fabric up in a clean towel to blot out most of the water. After that, you can either lay it flat or hang it to air dry the rest of the way. It’s a little extra effort, but it ensures your beautiful, delicate fabrics are perfectly prepped for your next quilt.
The wash cycle is done, but don't get out that rotary cutter just yet. How you dry and press your fabric is every bit as critical as the wash itself. This is where you set yourself up for success, creating flat, stable pieces that are an absolute dream to work with.
You’ve got two main choices here: machine drying or air drying. Tossing your fabric in the dryer on low heat or a delicate setting is quick and leaves the cotton feeling soft. Personally, I often prefer to air dry by hanging it over a line or laying it flat. It’s the gentlest way to go and wrings out any last bit of potential shrinkage.
Want a pro tip that will completely change how you iron? Pull your fabric from the dryer while it’s still slightly damp. Seriously, don't wait for it to be bone dry. That little bit of moisture makes pressing a breeze. Your iron will glide across the surface, smoothing out every last wrinkle without a fight.
Getting your fabric perfectly flat and back on-grain is essential for accurate cutting, and ironing it while damp is the key. This gives you that smooth, flawless surface you need before you can even think about piecing.
"I tell every new quilter to press their fabric before it’s completely dry. It’s the difference between fighting with stubborn creases and getting a beautifully crisp finish that makes your whole project more accurate."
It's this attention to detail that separates a good quilt from a great one. With the quilting world expected to grow from USD 6.2 billion in 2024 to USD 9.4 billion by 2032, it's clear people care about quality. Prewashing and proper pressing tackles the typical 4-6% shrinkage in cottons, a non-negotiable step for the roughly 30 million sewists in the US who value lasting results. You can find more details about the thriving quilt market on reanin.com.
When you prewash, you rinse away all the factory sizing, which is what gives new fabric that stiff feeling. The result is wonderfully soft cotton, but sometimes, you miss that stiffness—it makes rotary cutting so much more precise.
Luckily, it's easy to add back. A light mist of spray starch or a sizing alternative while you press is all it takes.
Using one of these gives you the best of both worlds: clean, pre-shrunk fabric that has the stability it had right off the bolt. Once it's all pressed, fold it neatly, and you're finally ready for the fun part—making that first cut for your beautiful new quilt.
Even after you've prewashed hundreds of yards of fabric, a new project can throw you a curveball. It’s totally normal to have questions pop up, especially when dealing with different materials or a special quilt. We've been there!
So, let's tackle some of the most common questions quilters ask. Think of this as a little chat over the cutting table to help you get those tricky details right and start every project with confidence.
This is a big one, and the short answer is: usually not. Most modern batting is made to be used right out of the package. It's designed with a minimal shrinkage rate—typically just 1-3%—which is what gives you that classic, slightly crinkled, well-loved look after you wash the finished quilt for the first time.
Of course, there are always exceptions. If you're going for a super flat, modern aesthetic with absolutely zero puckering, then prewashing your batting is a smart move. Just be sure to check the manufacturer's instructions on the package first.
If you decide it needs a wash:
Fabrics with metallic threads or sparkly bits need a little extra TLC. Heat and rough handling are the enemy here, as they can easily damage or completely strip away that beautiful finish. For these special fabrics, hand washing is really the only way to go.
Stick with cool water and a mild detergent, using that gentle "soak and squeeze" method we talked about for delicates. And whatever you do, stay away from the machine dryer. The high heat can literally melt the metallic elements. Instead, air dry the fabric flat or hang it up, making sure it's out of direct sunlight.
When you're working with specialty fabrics, always let the most delicate part call the shots. The metallic print is far more fragile than the cotton it's printed on, so its care instructions win.
I'd strongly advise against it. It's always best to wash different fabric types separately. Cottons, flannels, and rayons all behave differently in water—they absorb it and release dye at their own pace. For example, if you've ever washed new flannel, you know it creates an epic amount of lint that will cling to your smooth quilting cottons for dear life.
Washing different substrates together can also lead to uneven shrinkage, which can throw off your whole project. Sticking to like-with-like is a simple rule that saves a lot of headaches later. This careful prep work really pays off. It's a key part of quality control, especially as fabric production keeps growing. In Colorado's crafting community, for instance, proper prewashing helps counteract high-altitude drying quirks that can amplify shrinkage by 2%.
On a global scale, the reshoring of textile manufacturing in North America is adding USD 400 million in capacity, with a focus on prewash-ready performance fabrics. The industry is booming, projected to grow from USD 1,123.99 million in 2022 to USD 2,660.72 million by 2030 at a 13.1% CAGR. Prewashing fits right into this picture by aligning with sustainability goals, helping to reduce remake waste by as much as 30%. You can dive deeper into these trends by checking out the latest quilt market report.
Sorting out these common questions should help you fine-tune your prewashing process, making sure you're ready for any beautiful fabric that finds its way into your stash.
At High Country Quilts, we believe that a great quilt starts with perfectly prepared fabric. Whether you're a seasoned expert or just starting your quilting journey, our extensive collection of high-quality fabrics, notions, and BERNINA machines has everything you need to bring your creative vision to life. Stop by our Colorado Springs shop or explore our offerings online to get inspired for your next project.
At High Country Quilts we care deeply about community. With our experiences in retail, we know that a store is not only a place to shop but also a place for the community to gather and share. During this busy...

Hi! We’re Adam and Renee Wheaton, the new owners of High Country Quilts! For more than 40 years, we’ve owned and operated vacuum and sewing businesses. Following in Renee’s father’s footsteps after he retired from All Discount Vacuum and Sewing in Colorado...


Leave a comment