

We Love Our Quilting Community
At High Country Quilts we care deeply about community. With our experiences in retail, we know that a store is not only a place to shop but also a place for the community to gather and share. During this busy...


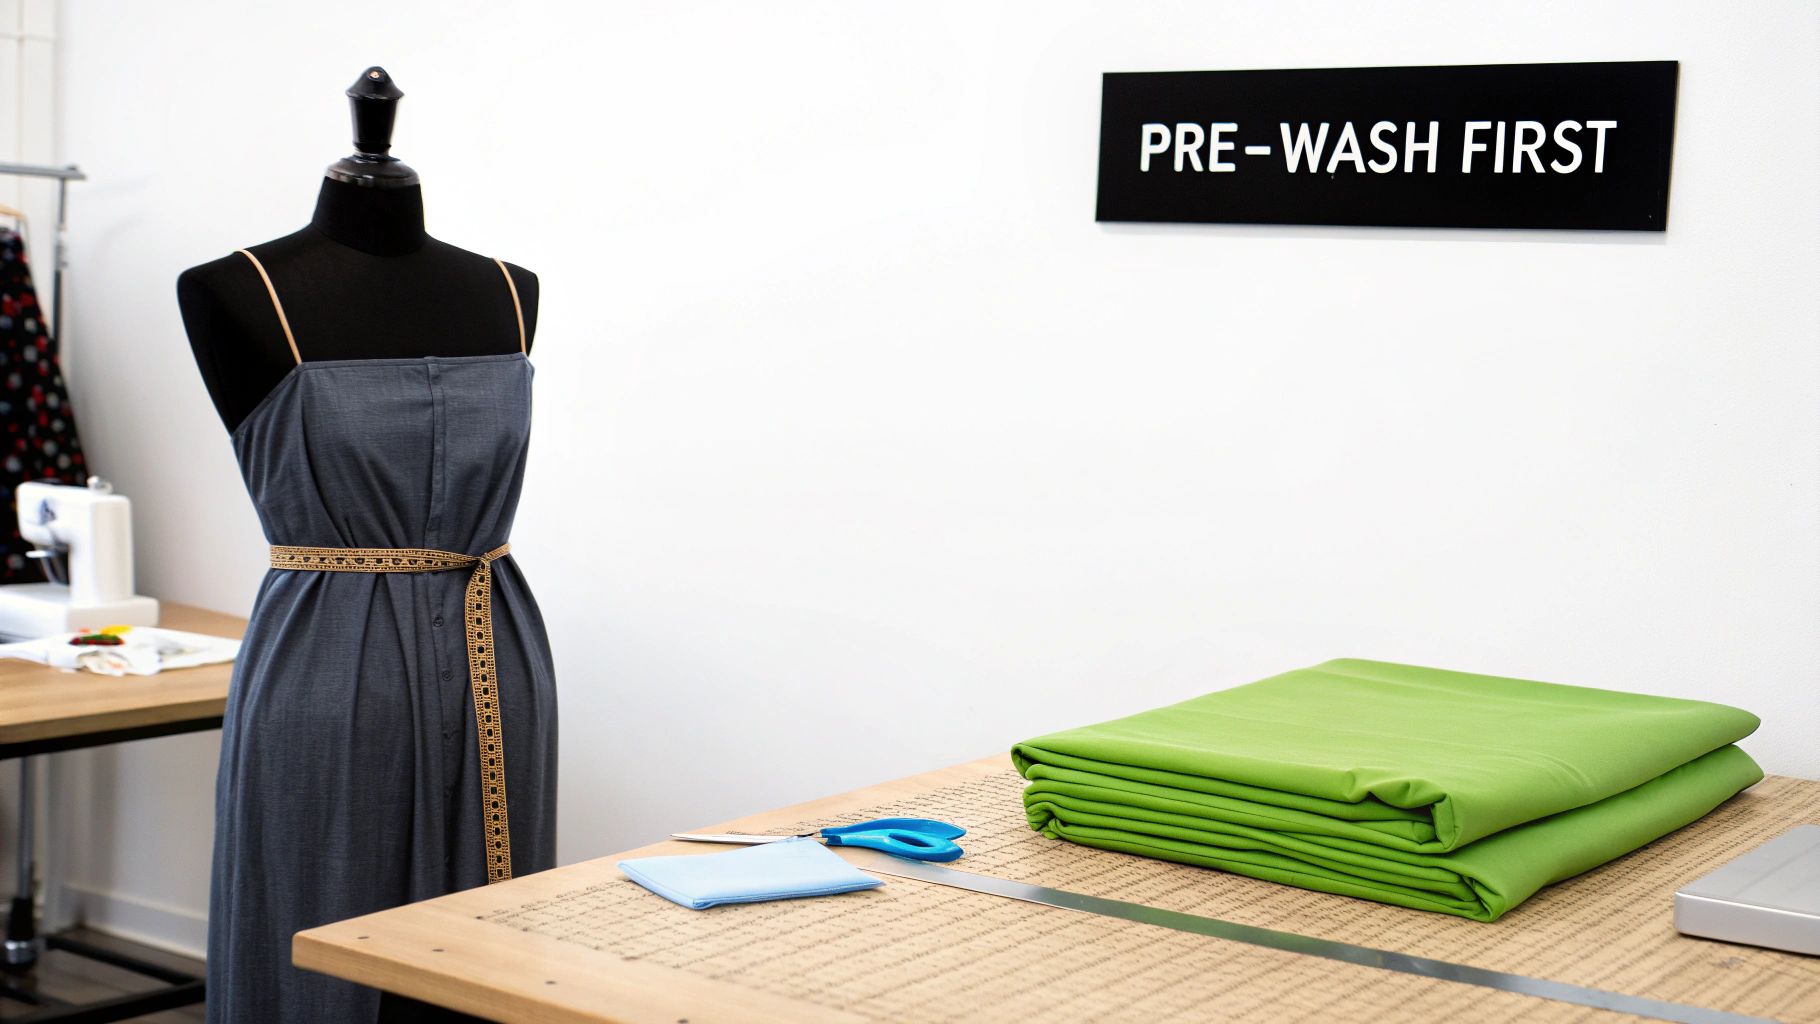
The golden rule of pre-washing is simple: wash and dry your new fabric exactly how you plan to care for the finished item. This one step is the foundation for a successful project, preventing a world of hurt later on. It tackles shrinkage, gets rid of excess dye, and washes away any chemicals from the manufacturing process.
The end result? Your project fits and looks perfect from its very first day.
I get it. You've just brought home a gorgeous piece of fabric and the creative energy is buzzing. The temptation to skip straight to cutting is real. But trust me, skipping the pre-wash is a gamble you don't want to take. Think of it less as a chore and more as the essential prep work that protects all the time and love you're about to pour into your creation.
We've all heard the horror stories—a perfectly fitted dress that shrinks into a doll-sized garment after one wash. That's definitely the number one reason to pre-wash, but it's not the only one. Your new fabric has picked up a few invisible passengers on its journey from the mill to your sewing table.
I learned this lesson the hard way many years ago. I made a beautiful cotton sundress, taking my time to get the fit just right. Feeling impatient, I skipped the pre-wash. After its first trip through the laundry, it came out a full size smaller and was uncomfortably tight across the bust. It was completely unwearable. That one mistake taught me that pre-washing is absolutely non-negotiable.
The risk of shrinkage isn't just an anecdote; it's a measurable fact. Natural fibers like cotton are particularly known for it. Some cottons can shrink between 2%–5% in length and a shocking 4%–8% in width during that first wash.
Proper fabric prep is critical for the durability of any item, especially things that need frequent cleaning like washable play mats. Even fabrics labeled "pre-shrunk" can still shrink by up to 2%. That might not sound like much, but it's enough to warp a precisely pieced quilt block or ruin the fit of a tailored garment.
Pre-washing isn’t just about following rules; it’s about taking control of your materials. You’re essentially teaching the fabric how to behave for the rest of its life, locking in its size and shape before you even make the first cut.
By getting all the shrinking, bleeding, and relaxing out of the way upfront, you guarantee that the masterpiece you create stays the size and shape you intended it to be, wash after wash. It’s a simple investment of time that pays off every single time.
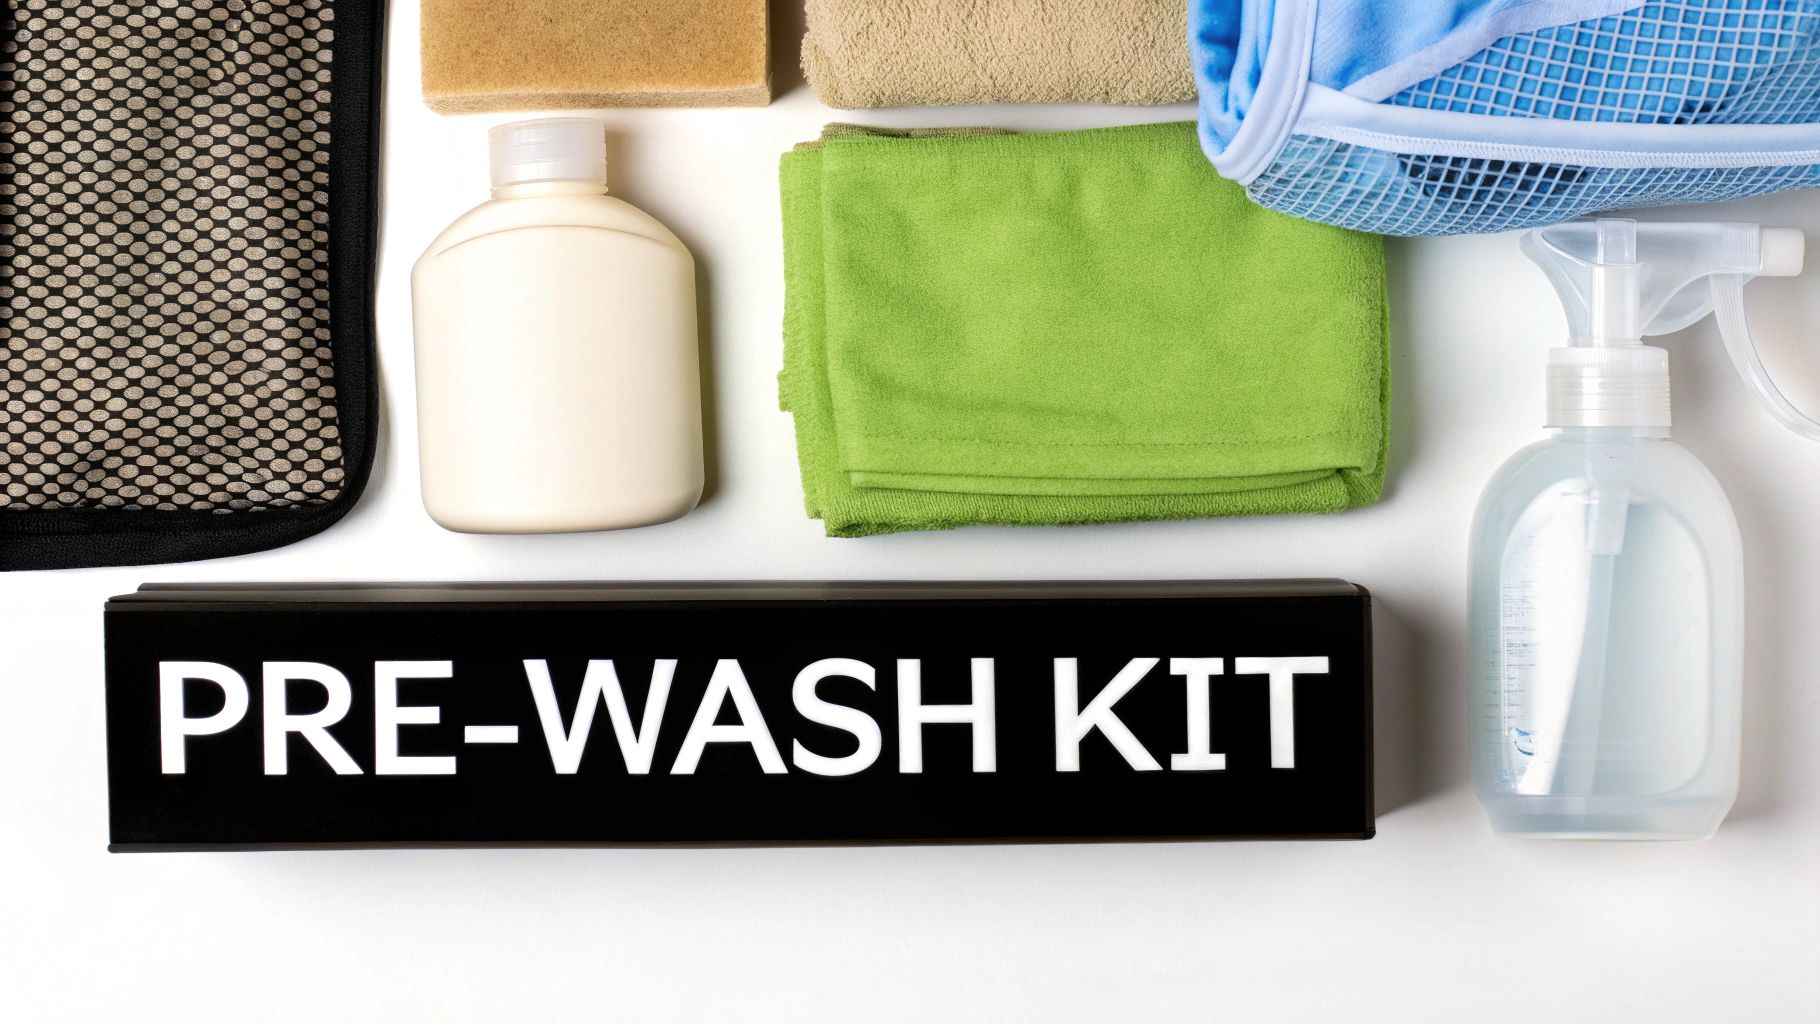
Before your beautiful new fabric even sees a drop of water, it pays to get your supplies in order. Having a dedicated pre-washing kit makes the whole process smooth and predictable, taking the guesswork out of the equation. This isn't just about grabbing your everyday laundry detergent; it's about using the right tools to protect your fabric investment.
After all, the goal is to get the fabric ready for sewing while keeping its color, texture, and structure intact. A few key items will help you wash everything from sturdy denim to the most delicate silks without a single regret. Let’s get your kit assembled.
The most important part of your toolkit is, without a doubt, the cleanser. Your standard, heavy-duty laundry detergent is usually way too harsh for new fabrics. It’s often packed with aggressive enzymes and optical brighteners that can strip dyes and completely change the fabric's feel.
What you really want is a pH-neutral, gentle formula. These detergents are made to be kind to fibers, so they clean without ruining the material’s original color and texture. Look for products labeled as a "delicate wash" or anything free of dyes and perfumes. For precious materials like wool or silk, a no-rinse wash can be a game-changer, as it cleans effectively with minimal agitation.
Beyond the soap, a few simple accessories can save you from a world of hurt. These are the little things that seasoned sewists swear by for getting perfect, project-ready fabric every time.
Think of your pre-washing kit as an insurance policy for your project. Using the right detergent, along with tools like color catchers and mesh bags, isn’t just an extra step—it’s how you guarantee your fabric is perfectly prepped for cutting and sewing.
One of the most frustrating parts of pre-washing is ending up with a tangled, frayed mess. All those loose threads can knot together and even cause you to lose an inch or two of precious fabric. Thankfully, a little prep work solves this problem completely.
Pinking shears are the classic, quick-and-dirty solution. That zigzag cut they make shortens the threads along the raw edge, which makes them far less likely to unravel in the wash.
If you’re working with a fabric that frays at the slightest touch—like linen or a loose-weave cotton—it’s worth taking an extra minute to run a zigzag stitch along the raw edges with your sewing machine. A serger works even better if you have one. This tiny bit of effort makes a massive difference.
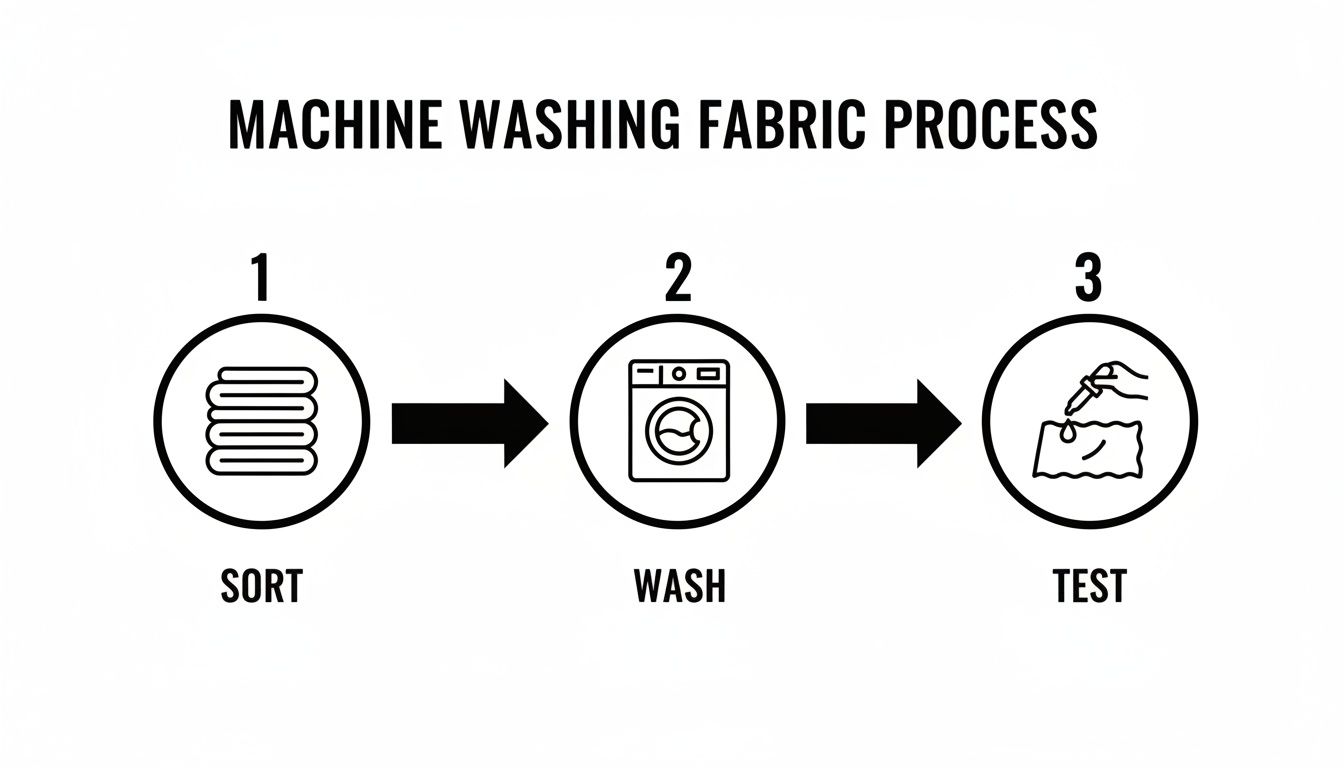
Tossing fabric in the washing machine and hitting "start" seems simple enough, but there's a real art to getting it right. A proper pre-wash sets you up for professional results, and it all starts with sorting—a step that's about much more than just separating your lights and darks.
Think of your machine as a powerful tool. You wouldn't use a sledgehammer to tap in a tiny nail, and you shouldn't wash heavy denim with a whisper-thin cotton voile. My goal here is to help you confidently use your machine to prep any fabric, from sturdy quilting cottons to those notoriously finicky rayons.
The golden rule of pre-washing is to sort your fabrics by weight and type, not just by color. Why? Because washing fabrics of similar weights together prevents the heavy-hitters from beating up on the lightweights during the agitation and spin cycles.
Just picture a yard of rough denim tumbling around with a delicate rayon. The denim's weight and texture can absolutely wreck the rayon's finer fibers. You'll end up with pilling, or even small tears, before you've even threaded your needle.
This little bit of prep work ensures every fabric gets the treatment it needs without getting damaged by an incompatible laundry partner.
Once everything is sorted, it's time to choose your settings. This is where the core principle of pre-washing really comes into play.
Wash and dry your fabric now exactly how you plan to wash and dry the finished garment.
Making a cotton dress you know you'll wash in warm water and tumble dry on medium? That's precisely how you should pre-wash the fabric. This simple trick forces the fabric to do all its shrinking, stretching, and potential color-bleeding before you've invested hours making something beautiful.
Here’s a quick rundown on settings:
Remember, the goal isn't just to get the fabric clean—it's to stabilize it. By mimicking the final care instructions, you're essentially "training" the fabric for its future life.
Before you commit a gorgeous, deeply-saturated fabric to a full wash, please do yourself a favor and run a quick colorfastness test. This little check can save you from the heartache of a laundry disaster where one rogue fabric bleeds all over everything else.
Here’s the simple process I use:
If your fabric fails the test, you'll need to wash it all by itself, maybe even a few times with some color catcher sheets thrown in, until the rinse water runs clear.
Understanding how to properly wash materials is a skill that applies beyond just garment sewing. For example, if you're looking at home decor, it's helpful to seek out items like machine washable sofa covers that are specifically designed for easy care, reinforcing just how important it is to know how different fabrics will behave in the wash.
Your washing machine is a powerhouse for sturdy fabrics like cotton and most synthetics, but some materials need a much softer touch. If you're working with silk, wool, fine lace, or certain rayons, tossing them in the machine is a recipe for disaster. The aggressive spin cycle can easily stretch, snag, or otherwise ruin these beautiful textiles.
This is where hand washing comes in. It’s not just an old-fashioned alternative; it's the absolute best way to protect the integrity, texture, and shape of your most delicate fabrics. You get total control over the process, ensuring your materials are perfectly prepped for whatever amazing project you have planned. And trust me, it’s much quicker and easier than it sounds.
While the diagram below focuses on machine washing, the core principles of sorting, washing, and testing are universal.
Think of hand washing as a more controlled, manual version of this process. You're still applying the same logic, just with a gentler hand.
First things first, grab a clean basin, sink, or tub. You want something large enough for the fabric to move around without being bunched up. A critical first step is to fill the basin with water before you add the fabric. Why? Because the direct force of a running tap can stretch delicate fibers out of shape.
Make sure you swish the detergent around until it’s completely dissolved in the water. You never want to pour soap directly onto your fabric.
Now you’re ready for the fabric. Gently submerge it in the soapy water, pushing it down until it's completely saturated. Then, just let it be. For most pre-washing jobs, a good 15 to 30-minute soak is all it takes to release any finishing chemicals or excess dye.
Whatever you do, resist the urge to scrub, twist, or wring the fabric. The goal here is gentle persuasion, not brute force.
Once it has soaked for a bit, you can create a soft current in the water by swishing the fabric back and forth with your hands. Another good technique is to lightly squeeze the material in a rhythmic, pulsing motion. This subtle movement is plenty to clean the fabric without distorting the weave.
If you didn't use a no-rinse formula, you'll need to drain the soapy water and refill the basin with fresh, cool water. Gently press the fabric against the side of the basin to work the suds out. You may need to repeat this a couple of times until the water runs clear.
Never, ever wring out delicate fabrics. It's the fastest way to permanently stretch and ruin them. Instead, support the full weight of the saturated fabric as you lift it from the water.
Here’s the pro trick for getting the water out safely:
When you unroll it, your fabric will be perfectly damp—not dripping wet—and ready for drying without any of the damage caused by twisting.
Once your fabric is washed, you're only halfway there. The way you dry and press your material is just as critical as the wash itself, locking in its final dimensions and giving you a perfectly smooth, stable surface to work with.
Think of it as your final chance to get every last bit of shrinkage out before you make that first cut. Getting this part right means no hidden wrinkles or subtle distortions will throw off your pattern layout later.
As a rule, you should dry your fabric the same way you plan to dry the finished item. But there are a few tricks of the trade to prevent over-drying, which can fry the fibers and set in wrinkles that are nearly impossible to remove. Gentleness is key.
You've got three main options, and each one suits different types of fabric.
Here’s a pro tip for machine drying: pull the fabric out when it’s still slightly damp. Bone-dry fabric from a hot dryer is often stiff and full of stubborn creases. Catching it at that "almost dry" point makes pressing a thousand times easier.
First things first: pressing and ironing are not the same thing. Ironing is that back-and-forth sliding motion we all do on a wrinkled shirt. That motion can easily stretch and distort your fabric’s grain—a disaster for sewing.
Pressing is a simple up-and-down motion. You lift the iron, place it down, hold for a moment, and lift it again. This uses heat and steam to smooth the fibers and lock them into place without pulling them askew. Always start with a lower temperature on your iron and slowly increase the heat only if you need to.
| Fabric Type | Iron Temperature Setting | Steam Recommendation |
|---|---|---|
| Cotton | High | Yes, plenty of steam helps |
| Linen | High | Yes, use lots of steam |
| Wool | Medium | Yes, often with a press cloth |
| Silk | Low to Medium | Use steam sparingly or dry |
| Rayon | Low to Medium | Press on the reverse side |
| Synthetics | Low | No steam, can cause water spots |
It's also crucial to press with the grain. That means moving your iron in the same direction as the lengthwise threads (the ones running parallel to the selvage). This keeps everything straight and ensures your pattern pieces will hang and drape beautifully.
The Ultimate Pressing Goal: You want to press your fabric until it is completely "bone dry." Any leftover moisture, no matter how small, can cause a little more shrinkage down the line. A thoroughly dry, perfectly pressed piece of fabric is the only foundation you can trust for accurate cutting.
Pressing several yards of fabric can feel like you're wrestling an octopus. The key is to work in manageable sections. I usually fold my fabric lengthwise with the selvages together, just like it was on the bolt. Press one side, then flip it over and do the other.
For extra-wide fabric, like a quilt backing, you might need to fold it again. Just make sure you open up those folds and press out the creases before you call it a day. After I'm done, I like to let the pressed fabric cool down on a flat surface or drape it over a hanger for a bit. This gives the fibers time to relax and fully stabilize, giving my project the most accurate start possible.
Even the most seasoned sewists have a pre-washing story that went wrong. It's almost a rite of passage! You might end up with a shrunken piece of fabric fit for a doll, a tangled web of threads, or a tragic color-bleeding incident. The good news? Most of these mishaps are totally preventable, and many are even fixable.
Let's walk through some of the most common pre-washing blunders. Think of this as your personal troubleshooting guide—a way to turn a potential fabric disaster into a lesson learned.
This is the classic one. You carefully pre-washed that gorgeous wool or cotton, only to pull it out of the dryer and find it’s mysteriously shrunk. The culprit, almost every single time, is heat. Water that’s too hot or a dryer on a high setting will shock the fibers into tightening up.
You tossed a vibrant red cotton in with a lovely pale yellow, and now you have a pile of fabric in a rather unfortunate shade of peach. This happens when excess dye, not properly set at the mill, washes out and stains everything else in its path.
To sidestep this entirely, make it a habit to wash deeply saturated colors—think reds, navys, and blacks—all by themselves for their first wash. Tossing in a couple of color catcher sheets is also cheap insurance against dye migration; they work like magnets for any loose dye floating around in the water.
Don’t let one bad experience make you shy away from using bold, beautiful colors! A quick five-minute colorfastness test and the simple habit of sorting your fabrics will save you from any future bleeding disasters.
Have you ever pulled a piece of linen or a loose-weave cotton from the washer and found it’s turned into a web of threads? Fraying can steal precious inches from your fabric and leave you with a tangled mess that’s a nightmare to press.
The secret here lies in a little prep work before the fabric hits the water. Simply finish the raw edges. The quickest way is with a pair of pinking shears, which creates a zigzag pattern that keeps most threads in check. For fabrics that are really prone to unraveling, it's worth taking two extra minutes to run a zigzag stitch on your sewing machine or serge the raw edges. It’s a tiny step that prevents a massive headache.
It happens—fabric can pick up a faint smudge at the store or during shipping that you don't even see until it comes out of the wash. The problem is, the heat from the dryer can set that stain for good.
Always give your fabric a quick once-over before washing. Addressing spots beforehand is crucial. The market for pre-wash stain removers is huge for a reason, with global sales reaching about USD 3.05 billion in 2023. A single treatment can diminish a stain by 60%–85%, which shows you just how powerful a quick pre-treatment can be. You can find more data on the effectiveness of these products over at Future Market Insights.
Even after years of sewing, certain questions about fabric prep pop up again and again. Let's dig into some of the most common dilemmas sewers and quilters run into before starting a new project.
My advice? Absolutely. Think of "pre-shrunk" as "shrink-resistant," not shrink-proof. These fabrics have been treated to reduce shrinkage, but they can still draw up by another 2% or so.
That might not sound like much, but for a tailored garment or a quilt with dozens of seams, that 2% can spell disaster. Pre-washing also gets rid of any leftover sizing or chemicals from the factory, which gives you a truer sense of the fabric's final drape and hand-feel. It's a simple step that prevents a lot of potential frustration down the road.
Wrestling with a giant cut of quilt backing in a standard washing machine is a classic sewing struggle. The trick is to prevent it from twisting into a single, massive knot. I've found that folding the fabric loosely, accordion-style, before putting it in the machine works wonders. This helps it move more freely during the cycle.
The golden rule here is to avoid cramming the machine. Big pieces of fabric need room to agitate and rinse properly. If you're working with something truly enormous, your best bet might be a quick trip to a laundromat with commercial-sized machines.
Those small, project-ready cuts like fat quarters and charm squares can be a nightmare in the wash. They fray like crazy and can even get sucked into the machine's filter if you're not careful.
You've got a couple of solid options to keep them safe:
Once they're done washing and drying, a quick pass with a hot iron will get them perfectly flat and ready to use.
At Famcut.com, we believe a beautiful project starts with perfectly prepped fabric. Find high-quality materials and unique cosplay supplies for your next masterpiece.
At High Country Quilts we care deeply about community. With our experiences in retail, we know that a store is not only a place to shop but also a place for the community to gather and share. During this busy...

Hi! We’re Adam and Renee Wheaton, the new owners of High Country Quilts! For more than 40 years, we’ve owned and operated vacuum and sewing businesses. Following in Renee’s father’s footsteps after he retired from All Discount Vacuum and Sewing in Colorado...


Leave a comment