

We Love Our Quilting Community
At High Country Quilts we care deeply about community. With our experiences in retail, we know that a store is not only a place to shop but also a place for the community to gather and share. During this busy...


If there's one maintenance task that can make or break your sewing experience, it's oiling your machine. It's a simple step, but absolutely critical. We're talking about applying just a few drops of specialized oil to key friction points, which allows all those intricate internal metal parts to glide smoothly instead of grinding against each other. This is the real secret to a quiet machine and beautiful, even stitches.
Think of sewing machine oil like engine oil for your car—without it, things start to seize up. The constant metal-on-metal friction inside your machine generates heat, causes parts to wear out prematurely, and leads to all sorts of frustrating stitch problems.
There's a common myth that modern machines don't need maintenance. While it's true some computerized models have self-lubricating parts, nearly every machine has high-friction areas that still need your attention, especially around the bobbin case and hook race.
Oiling your machine isn't just a chore; it’s a small investment of time that pays off immediately. The difference is night and day.
In fact, skipping this simple step is one of the top reasons for machine failure. Industry data shows that up to 30% of sewing machine breakdowns—both at home and in factories—are caused by poor lubrication.
Simply put, a few drops of oil can be the difference between a smooth sewing session and a trip to the repair shop. It’s the easiest way to ensure your machine serves you reliably for years.
This principle of regular care applies to all precision instruments. It highlights the importance of maintaining delicate antique mechanisms like grandfather clocks to keep them running accurately for generations. When you learn how to oil your sewing machine correctly, you're embracing a fundamental practice that leads to better performance and far fewer headaches.
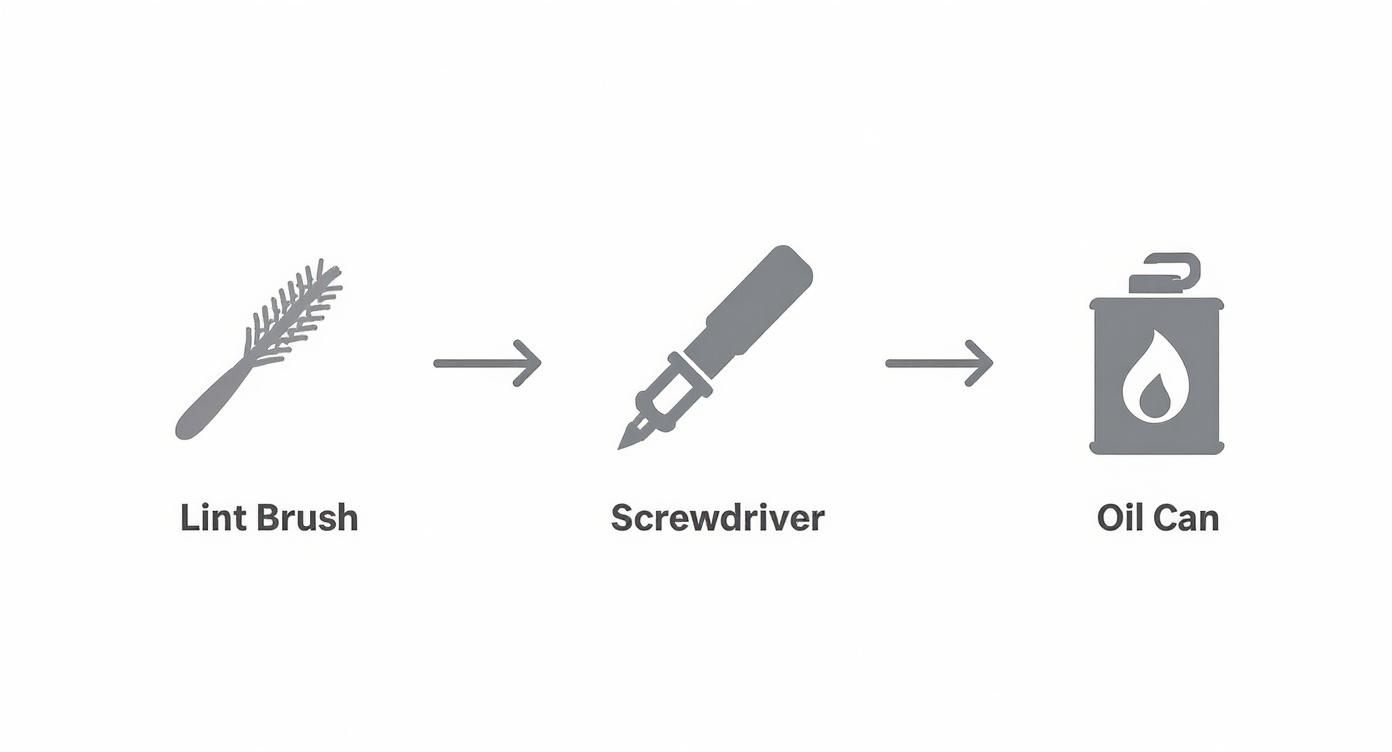
Before you start, let's get your little maintenance station set up. Having everything you need within arm's reach makes the whole process so much smoother and cleaner. You don’t need a huge, complicated toolkit—just a few simple items that you likely already have around your sewing space.
Think of this as your machine’s personal spa kit.
The goal here is simple: get the old gunk out and put a little fresh oil in. That’s it. To do that well, you’ll want to have these items handy.
Okay, let's talk about the most critical supply: the oil itself. This is one area where you absolutely cannot cut corners. I've seen firsthand what happens when people grab the wrong stuff, and it's not pretty.
Please, whatever you do, steer clear of the hardware store aisle. General-purpose products like WD-40, 3-in-1 oil, or—I can't believe I have to say this—cooking oil are completely wrong for a sewing machine. WD-40 is actually a solvent that will strip away lubricant, and the others contain waxes and additives that gum up over time, turning into a sticky, dust-collecting sludge that can seize up your machine's delicate parts.
A good sewing machine oil is crystal clear and very thin. It's specifically made to lubricate high-speed metal parts without gumming them up or, just as importantly, staining your fabric.
When you're shopping, the bottle should be clearly labeled "Sewing Machine Oil." It's a highly refined, pure mineral oil made for exactly this purpose. Spending a few dollars on the right oil is the cheapest insurance policy you can buy for your machine. The repair bill from using the wrong stuff will always cost you far, far more.
Alright, let's roll up our sleeves and get into the most important part of keeping your sewing machine happy. The whole process is really just two key phases, and the order is crucial: first, you clean out all the gunk, and then you add a little oil. Always clean before you oil.
Before you do a single thing, though, the most important step is to unplug your machine from the wall. I can't stress this enough. It’s a non-negotiable safety rule. You don’t want the machine accidentally whirring to life while your fingers are near the needle.
With your machine safely powered off, you can get started. The first thing I always do is remove the presser foot and the needle. This just gets them out of the way and gives you a clear, open workspace.
Next, grab your screwdriver and take off the needle plate—that's the little metal plate your fabric glides across. If you haven't done this in a while, you might be shocked at what you find underneath. This is ground zero for lint, dust, and tiny thread bits, which can pack together into a dense, felt-like mess.
Using a small, stiff lint brush, gently sweep out all that debris from around the feed dogs (the little teeth that pull your fabric) and the entire bobbin area. Really get in there and be thorough. It's tempting to use canned air, but I strongly advise against it. All that does is blow the lint deeper into your machine's gears, where it can cause real problems down the road. A brush is always your best bet.
After you've brushed everything out, take a soft, dry cloth and give the area one last wipe to pick up any lingering dust. Now your machine is prepped and ready for oil.
Now that everything is sparkling clean, it’s time to oil. The absolute golden rule here is that less is always more. Seriously. You only need a single, tiny drop of oil in a very specific spot. Over-oiling is just as bad as not oiling at all; it can leave oil spots on your fabric and actually attracts more lint.
On most home sewing machines, the main place you'll need to oil is the hook race. This is the circular metal track where your bobbin case sits. When you sew, the hook spins at an incredible speed to create stitches, and that generates a lot of friction.
Pro Tip: Put just one small drop of oil on the hook race. Then, manually turn the handwheel toward you a few times. This simple action helps spread that tiny drop of oil evenly across the whole track, ensuring everything runs smoothly and quietly.
Your specific machine might have other oiling points, often marked with little holes or arrows. This is where your user manual is your best friend—it will have a diagram showing you exactly where to put a drop of oil. Never guess.
This isn't a new idea, of course. Oiling has been part of machine maintenance since the very beginning. If you look at vintage sewing machine manuals from the late 1800s, you'll see meticulous diagrams pointing out dozens of oiling points needed to keep those beautiful old machines from seizing up.
Once you’ve applied the oil, put the needle plate, presser foot, and needle back on. But don't jump right into your next quilt! The final step is to take a small scrap of fabric and sew a few lines. This little "scrap leader" will soak up any excess oil, protecting your real project from stains and confirming your machine is running perfectly.
Figuring out the right oiling schedule for your sewing machine isn't a simple, one-size-fits-all answer. The truth is, it really comes down to two things: your specific machine model and how much you actually use it. It's one of the most common questions we get, and finding the right rhythm for your machine takes a little bit of personal detective work.
Your first and most important stop should always be your machine's manual. It's the ultimate authority. The manual will tell you flat-out if your model even needs oiling from you. Many modern, computerized machines are built with self-lubricating parts or have sealed gears that you should absolutely leave alone. On the other hand, those wonderful vintage mechanical workhorses often thrive on regular, hands-on oiling to keep their all-metal parts gliding smoothly.
Once you’ve confirmed your machine needs oil, the next piece of the puzzle is how often you sew. I like to compare it to a car—the more miles you put on it, the more frequently it needs an oil change. The same idea applies to your machine. The more it runs, the more lubrication it needs to fight off friction and wear.
While your manual is king, having a general guideline can help you build a routine that works for you.
Daily or Frequent Sewist: Are you at your machine nearly every day? Maybe you're a quilter tackling a big project. Your machine is putting in a lot of hours. A great habit is to give it a quick brush-out after each project and a proper oiling after every 8 to 10 hours of active sewing.
Weekend Hobbyist: If you sew a few times a month, a full clean-and-oil session every three to four months is typically enough to keep everything running beautifully.
Occasional Sewer: Do you only pull out your machine for holiday projects or the odd mending job? Aim to clean and oil it every six months. Even when it’s just sitting, old oil can get gummy and dust can work its way into the moving parts.
The real secret is consistency. If you wait until you hear that dreaded clunking or grinding, friction has already started to cause wear. Proactive care is always, always better than a reactive repair.
To make it even easier, here’s a quick-glance table to help you find your rhythm. Remember, this is a starting point—always defer to what your machine's manual recommends.
| Sewing Frequency | Cleaning Schedule | Oiling Schedule |
|---|---|---|
| Daily / Power User | After every project | Every 8-10 hours of sewing |
| Weekend Hobbyist | Every 1-2 months | Every 3-4 months |
| Occasional Sewer | After each use | Every 6 months |
This simple schedule can make a huge difference in how your machine performs over the long haul.
This isn't just a matter of preference; it’s about protecting your investment and ensuring your machine lasts for years, not just seasons. When you look at the bigger picture, the impact is clear. Poor lubrication is a surprisingly common culprit for machine problems. In fact, industry data suggests that issues stemming from inadequate oiling account for roughly 12% to 15% of all warranty claims and service repairs. You can discover more insights about the sewing machine market on Grandview Research.
That statistic really highlights how crucial a single drop of oil is.
Ultimately, learning how to oil your sewing machine is only half the battle. Knowing when to do it is what turns a good machine into a great one that you can pass down through generations. By listening to your machine and sticking to a schedule that matches your sewing habits, you’re creating the perfect conditions for smooth, flawless stitches every single time.

Even when you're careful, things can sometimes go a little sideways after oiling your sewing machine. Learning to spot the signs of trouble and correct common missteps is just as important as knowing where to put the oil in the first place. Let’s walk through what to look out for.
Your machine will absolutely tell you when it's thirsty for oil. If you start hearing any unusual clunking, grinding, or squeaking, it's practically screaming for lubrication. Another big clue is a stiff handwheel or a machine that just feels sluggish—that's friction building up where it shouldn't.
I see this all the time: over-oiling. It’s so easy to think that more oil equals a happier machine, but it’s actually the other way around. Excess oil inevitably finds its way onto your fabric, leaving behind stubborn stains that can completely ruin a project. Worse, it’s a magnet for lint, creating a grimy sludge that gums up the very parts you’re trying to protect.
If you've gone a bit overboard, don't worry. It's an easy fix.
The golden rule is simple: One single drop is enough. You’re aiming for a micro-thin film of lubrication, not a puddle. This one tip will save you from stained projects and that dreaded lint-and-oil gunk.
Doing your own maintenance is empowering, but it's also smart to know your limits. Learning how to oil your sewing machine solves a ton of common problems, but some things really do need an expert’s touch. It's time to step back and call for help when you see certain symptoms.
Persistent problems after you've done a thorough clean and oil are a major red flag. For example, if your machine keeps making a loud clanking sound, it might be a timing issue where the hook and needle have fallen out of sync. That's a delicate fix requiring specialized tools and training.
Here are other signs that it's time to see a pro:
When you hit a wall like that, our certified technicians at High Country Quilts can step in. We can diagnose those deeper mechanical issues and give your machine the precise care it needs to get back to perfect working order.
Even with the best instructions, you're bound to have a few questions when you first start oiling your own machine. It's totally normal! Let's walk through some of the most common things people ask us at the shop.
Please don't! This is probably the most important thing to remember. Never, ever use a general household lubricant like WD-40, 3-in-1 oil, or heaven forbid, cooking oil on your sewing machine.
Those products are not made for the delicate, high-speed parts inside your machine. Over time, they turn into a thick, gummy sludge that attracts lint like a magnet and can completely freeze up the mechanisms. Stick to clear, high-quality oil that is specifically made for sewing machines—it’s the only way to go.
It happens to the best of us! Over-oiling is a classic rookie mistake. The first sign is usually an unwanted oil spot on your beautiful fabric, which is incredibly frustrating. Too much oil also creates a grimy paste with lint and dust, especially around the bobbin area.
If you think you've gone overboard, just grab a soft cloth and carefully wipe away any visible drips or pools of oil. Then, take a scrap piece of fabric and run the machine for a minute or two. This little trick helps blot up any lingering excess before you start on your actual project.
Here's the golden rule we teach everyone: A single drop is almost always enough. You're aiming for a super-thin, almost invisible layer of lubricant, not a puddle. Keep that in mind, and you'll avoid stained quilts and messy clean-ups.
That’s a great question, and the answer is: it depends entirely on your model. Many of the newer computerized machines have self-lubricating systems or sealed parts that you're not meant to touch. In fact, trying to oil one of these can do more harm than good by messing with sensitive electronics.
That said, some computerized models still need a little love. You might have a specific port for the hook race, for example, that requires a single drop of oil every now and then. There's only one way to know for sure: always check your sewing machine's manual. It is your ultimate guide and will tell you if, where, and when to oil your specific machine.
Your machine is pretty good at telling you when it's thirsty! The most obvious clue is sound—if it suddenly starts sounding clunky, squeaky, or grindy, that’s a cry for help. You might also notice the handwheel feels stiff or that the machine just seems sluggish.
But really, the best approach is to get on a regular schedule based on how much you sew, rather than waiting for problems to pop up. Think of it as preventative care to keep things running smoothly.
When a problem goes beyond what a good cleaning and oiling can fix, the expert technicians at High Country Quilts are always here for you. From a simple tune-up to a major repair, we’ve got the tools and know-how to get your machine back in perfect stitching order. Stop by the shop or explore our services online.
At High Country Quilts we care deeply about community. With our experiences in retail, we know that a store is not only a place to shop but also a place for the community to gather and share. During this busy...

Hi! We’re Adam and Renee Wheaton, the new owners of High Country Quilts! For more than 40 years, we’ve owned and operated vacuum and sewing businesses. Following in Renee’s father’s footsteps after he retired from All Discount Vacuum and Sewing in Colorado...


Leave a comment