

We Love Our Quilting Community
At High Country Quilts we care deeply about community. With our experiences in retail, we know that a store is not only a place to shop but also a place for the community to gather and share. During this busy...


Before you even think about threading your machine, let's talk about setting yourself up for success. Getting your materials in order is hands-down the most important first step in making a gathered skirt you'll actually love to wear. Think of it as your sewing mise en place—it makes the entire process smoother and a whole lot more fun.
The heart and soul of any gathered skirt is the fabric. You're looking for something with a bit of life and movement, as stiff, heavy fabrics can create bulky gathers that just don't hang right.
Here are a few of my go-to choices that never disappoint:
My Golden Rule: Always, always, always pre-wash and dry your fabric before you cut a single thing. Natural fibers like cotton and linen are notorious for shrinking—sometimes up to 10%! Skipping this step is the fastest way to sew a beautiful skirt that's a full size too small after its first trip through the laundry.
Now that you've got your fabric sorted, let's pull together the tools for the job. Having everything within arm's reach means you can stay in the creative flow without having to stop and search for something.
Here's a quick rundown of what you'll need to get started. I've included some recommendations based on my own experience to help you choose the right tools for a truly polished result.
| Item | Beginner Recommendation | Why It Matters |
|---|---|---|
| Fabric | 2-3 yards of a lightweight woven like cotton lawn or a stable rayon. | You need enough fabric for the desired fullness. Lightweight fabrics create soft, flowing gathers instead of bulky ones. |
| Matching Thread | A quality all-purpose polyester thread (e.g., Gutermann, Coats & Clark). | Good thread is strong and prevents frustrating breaks while you're sewing, especially when pulling up your gathers. |
| Sewing Machine | Any basic machine with a straight stitch. | You don't need a fancy machine! A simple, reliable one is all it takes to master this project. |
| Needle | Universal needle (size 80/12) for cotton/linen, or Microtex (size 70/10) for rayon. | Using the right needle for your fabric prevents skipped stitches, snags, and puckering, giving you a clean, professional look. |
| Measuring Tape | A flexible tailor's tape measure. | Crucial for taking accurate body measurements (waist) to ensure a perfect fit from the very beginning. |
| Cutting Tools | A rotary cutter and self-healing mat are ideal, but sharp fabric shears work too. | A rotary cutter makes cutting long, straight skirt panels incredibly fast and precise. |
| Pins or Clips | A tin of sharp glass-head pins or a handful of sewing clips. | Essential for holding your fabric pieces together accurately, especially when working with slippery materials or matching seams. |
Having these specific items on hand will make a massive difference. For instance, a rotary cutter and self-healing mat are absolute game-changers for cutting the long, straight rectangles needed for a skirt. They're so much faster and more accurate than trying to wrangle fabric with scissors.
And don't overlook the small stuff! Using the right sewing machine needle—like a sharp microtex for delicate rayon challis—is one of those tiny details that elevates your project from "homemade" to "handmade." It's these thoughtful choices that will make you proud to say, "I made this!"
This is where the real magic happens. Gathering is the technique that transforms a flat rectangle of fabric into a skirt with lovely, soft folds and beautiful movement. It might sound a bit fiddly, but I promise it's straightforward. We'll walk through three tried-and-true methods, so you can pick the one that feels right for you and your machine.
The whole process is simpler than you think: pick your fabric, measure it out, and then start sewing.
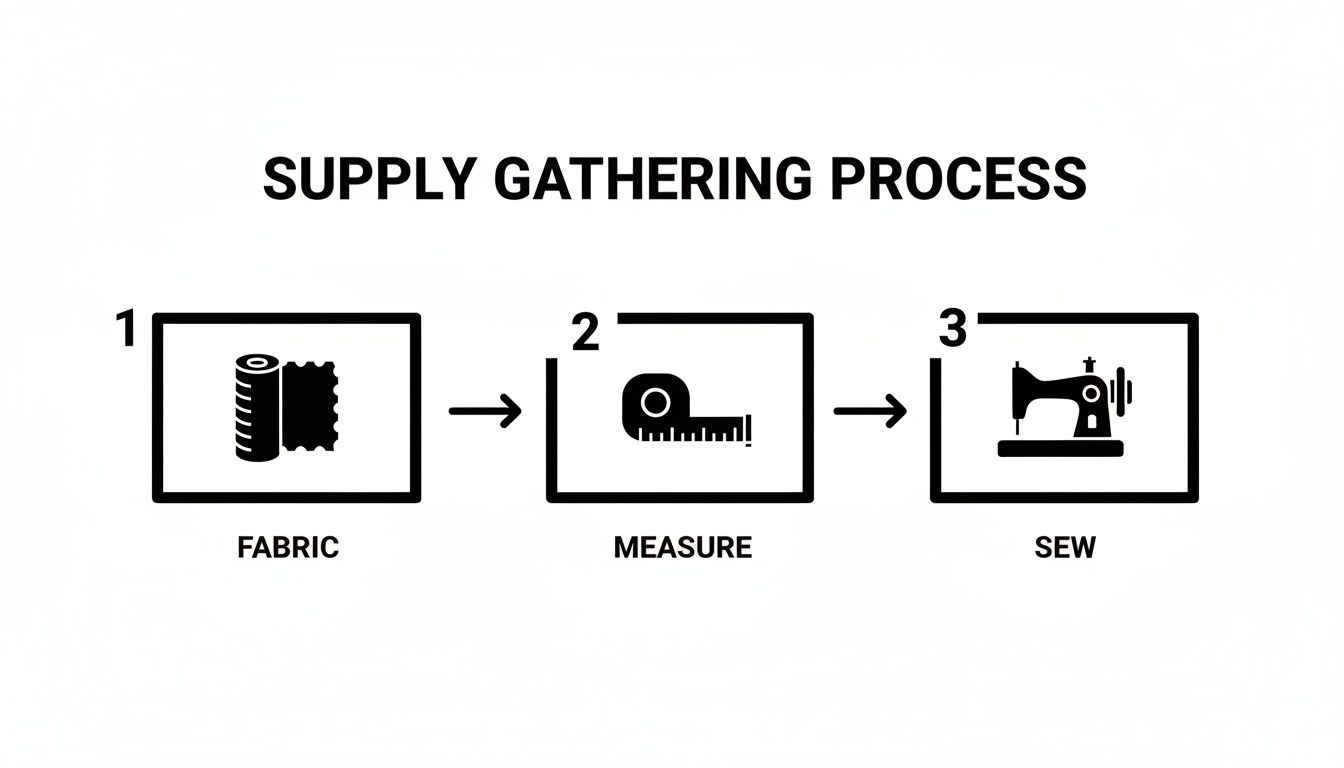
Remembering this simple flow helps keep things in perspective. A great finished skirt starts with good choices long before you ever touch the sewing machine pedal.
This is the classic, go-to technique for a reason. It gives you fantastic control over your gathers, helping you get them perfectly even for a really polished look.
First things first, you'll need to adjust your sewing machine. Set it to the longest stitch length it has. A long stitch is key because it creates a loose stitch that's easy to slide and gather.
Now, you'll sew two parallel lines of these long stitches right along the top edge of your main skirt piece.
Crucially, do not backstitch! Instead, leave long thread tails at the beginning and end of each row—I usually leave about 4-6 inches. To create the gathers, you just grab the two top threads on one side and gently pull, coaxing the fabric down the threads.
A Quick Tip from Experience: I almost always find it easier to pull the bobbin threads (the ones on the bottom) rather than the top needle threads. They seem less likely to snap. Also, if you’re working with a super wide piece of fabric, break it up. Sew your gathering stitches in two or three sections. That way, if a thread breaks, you don't have to start all the way over.
This is a fantastic little hack, especially when you're gathering a ton of fabric. It’s quick, and because you’re pulling a sturdy cord instead of a delicate thread, the risk of it breaking is practically zero.
Grab a piece of strong, thin cord—dental floss or crochet thread work perfectly—and cut it so it's a bit longer than the width of your fabric panel.
Next, set your machine to a wide zig-zag stitch. Lay the cord along the top edge of your fabric, making sure it’s inside the seam allowance. You’re going to sew the zig-zag stitch over the cord, but be careful that your needle never actually pierces the cord. The cord needs to be able to slide freely inside that zig-zag tunnel you're creating.
To gather, all you have to do is pull the cord. The fabric bunches up beautifully. It's an incredibly satisfying method and a real time-saver for tiered skirts or anything with lots of ruffles.
Sometimes, especially with very delicate or slippery fabrics like silk or chiffon, the best tool is your own hand. This method gives you the ultimate control, which can be a lifesaver with tricky materials.
Thread a hand-sewing needle with a single, strong thread (doubling it up and knotting it is a good idea). Simply sew a neat running stitch along the top edge of your fabric. The more even you can make your stitches, the more uniform your gathers will be.
Just like the machine method, you can sew a second parallel row for extra stability. When you get to the end, just give the thread a gentle pull, and your gathers will form.
Okay, your fabric is gathered and looking gorgeous! Now for the fun part—turning that flat piece of fabric into an actual skirt. This is where you’ll really see it start to take shape. We're going to sew the main seam and then create a simple, comfy elastic waistband.
This method is super straightforward, which makes it perfect if you're tackling your first gathered skirt. Let's get it assembled.
Grab your big fabric rectangle and fold it in half so the right sides are facing each other. You're basically matching up the two shorter ends, which will become your side seam.
Line up those raw edges and pin them together. You’re forming a simple tube that will soon be the body of your skirt.
Now, sew down that pinned edge. A standard 5/8 inch (1.5 cm) seam allowance works perfectly here. Don't forget to backstitch at the start and finish to lock everything in. To keep the inside from fraying over time, you’ll want to finish this seam—either with a serger if you have one or a simple zig-zag stitch. Once that’s done, give the seam a good press, either open or to one side.
The casing is the little tunnel you'll create at the top of the skirt to house the elastic. A tidy casing is the secret to a waistband that looks and feels great.
Start by folding the top raw edge of the skirt down about 1/4 inch (6 mm) toward the wrong side of the fabric. Press it flat with your iron. This first little fold tucks away the raw edge for a clean finish inside.
Fold that same edge down again, but make this fold deeper. The exact width here depends on your elastic; you want the casing to be about 1/4 inch (6 mm) wider than the elastic itself. So, if you're using 1-inch wide elastic, your second fold should be about 1 1/4 inches deep.
Pro Tip: Don't skip the pressing! A crisply pressed casing is so much easier to sew neatly. Pin the folded edge down all the way around the top of the skirt.
Stitch along the very bottom of the folded casing, getting as close to that inner fold as you can. Here’s the important part: leave a 2-inch gap in your stitching. This is the opening you'll need to thread the elastic through.
Getting the elastic length right is key to comfort. Too tight and it’ll dig in; too loose and your skirt won’t stay put. The best way to measure is to wrap the elastic snugly around your natural waist where the skirt will sit. Then, cut it 1 inch shorter than that measurement to account for the overlap when you join the ends.
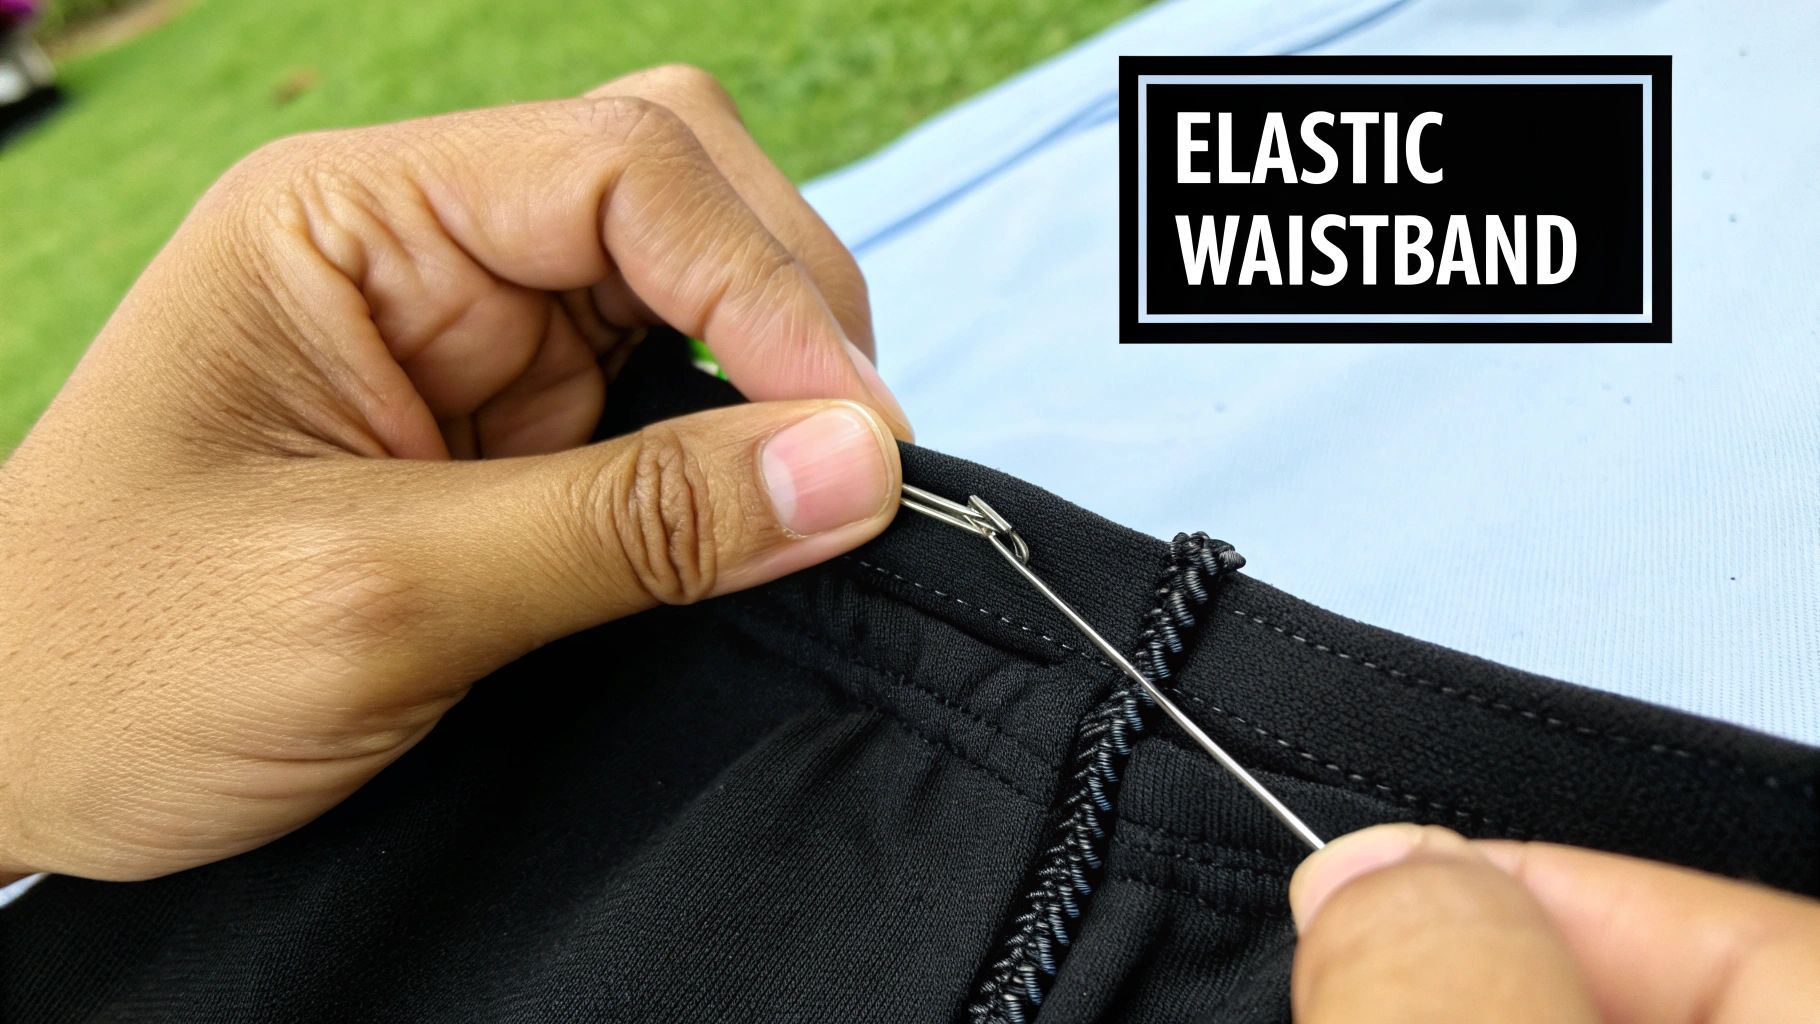
Now for a classic sewing trick: attach a large safety pin to one end of your elastic. This little tool makes threading it through the casing a breeze.
Feed the safety pin into the 2-inch gap you left and start working it all the way around the waistband. You'll need to bunch up the fabric and then smooth it out as you go. Just try to keep the elastic from getting twisted inside the casing.
Once your safety pin pops out the other side, pull both ends of the elastic out. Overlap them by about 1 inch and sew them together securely. I usually sew a little box shape here for extra strength.
Let the joined elastic slip back into the casing. Give the skirt a good shake to distribute the gathers evenly, and then all you have to do is sew that 2-inch gap closed. And just like that, you have a fully wearable skirt, ready for hemming
We’re in the home stretch! These final steps are what separate a good-looking skirt from a great one. Taking a little extra care here is what gives your project that polished, professional look and makes sure it will last through countless wears and washes.
The most visible finishing touch is, of course, the hem. But before you even touch your iron or sewing machine, there’s one non-negotiable step: let the skirt hang for at least 24 hours. Seriously, don't skip this. Fabric, especially if any part is cut on the bias, needs time to relax and stretch into its final shape. Rushing this part is a surefire way to end up with a wonky, uneven hemline down the road.
Once your skirt has hung overnight, it’s time to get that hemline perfectly even. The easiest way is to put the skirt on and have a friend mark the length for you. After that, you’re ready to sew a classic double-fold hem—it’s sturdy, neat, and hides the raw edge beautifully.
Here’s my go-to method:
This technique gives you a clean finish on both the inside and outside of your skirt. It’s a small detail that makes a massive difference in the overall quality.
Don't forget to give your waistband a final bit of attention! If you've ever had the elastic roll or twist inside its casing, you know how annoying it can be. Luckily, there’s a super simple fix: "stitch in the ditch."
Just sew a short, vertical line of stitching right in the side seam, going through all the layers of the casing and the elastic. This anchors the elastic, preventing it from ever twisting. For extra security, I often add two more small anchor stitches at the center front and center back, too.
These finishing details are what truly complete your garment. The care you take in hemming and securing the waistband is a hallmark of quality craftsmanship, turning a simple sewing project into a piece you'll be proud to wear for years.
The love for big, billowy skirts isn't new. Back in 1915, fashion saw skirts become incredibly full—a 26-inch waist could explode into a hem measuring 120 inches around! You can imagine the fabric and finishing work that went into those. You can see more of these stunning historical silhouettes over on the Wearing History blog.
Once you've mastered the basic gathered skirt, the real fun begins. This is where you can start to play with the design and create something that's truly you. Let’s move beyond a simple rectangle of fabric and look at a few ways to add style, function, and personality to your new favorite skirt.
These variations can completely transform the silhouette. Whether you're adding the practicality of pockets or the drama of a few extra tiers, these skills will open up a whole new world of creative sewing.
Let's be real—a skirt with pockets is just better. In-seam pockets are my go-to because they're surprisingly simple to add and disappear right into the side seams, so you get all the function without any extra bulk.
You'll need four pocket pieces for this. You can easily find a free pattern online or even draft a simple curved shape yourself. The trick is to attach them before you sew your main side seams.
Here’s the basic flow:
It's a clever little technique that creates a perfectly hidden pocket. Trust me, it’s a small step that makes your handmade clothes infinitely more wearable.
Are you working with a sheer or lightweight fabric like a cotton voile or a delicate eyelet? Adding a lining is the perfect solution. It gives you the coverage you need while making the whole skirt feel more substantial and high-quality.
The quickest way to do this is to simply treat your lining fabric and main fabric as one single layer. Just lay the lining underneath your main "fashion fabric" with the wrong sides touching. Pin them together along the top waist edge, and then gather them both at the same time. This is a fast and effective method that works great for simple elastic-waist projects.
For a more professional finish, consider making a separate, slightly less full skirt from your lining fabric. You'll attach this separate lining only at the waistband. This lets the outer layer move more freely and creates a beautiful, airy effect.
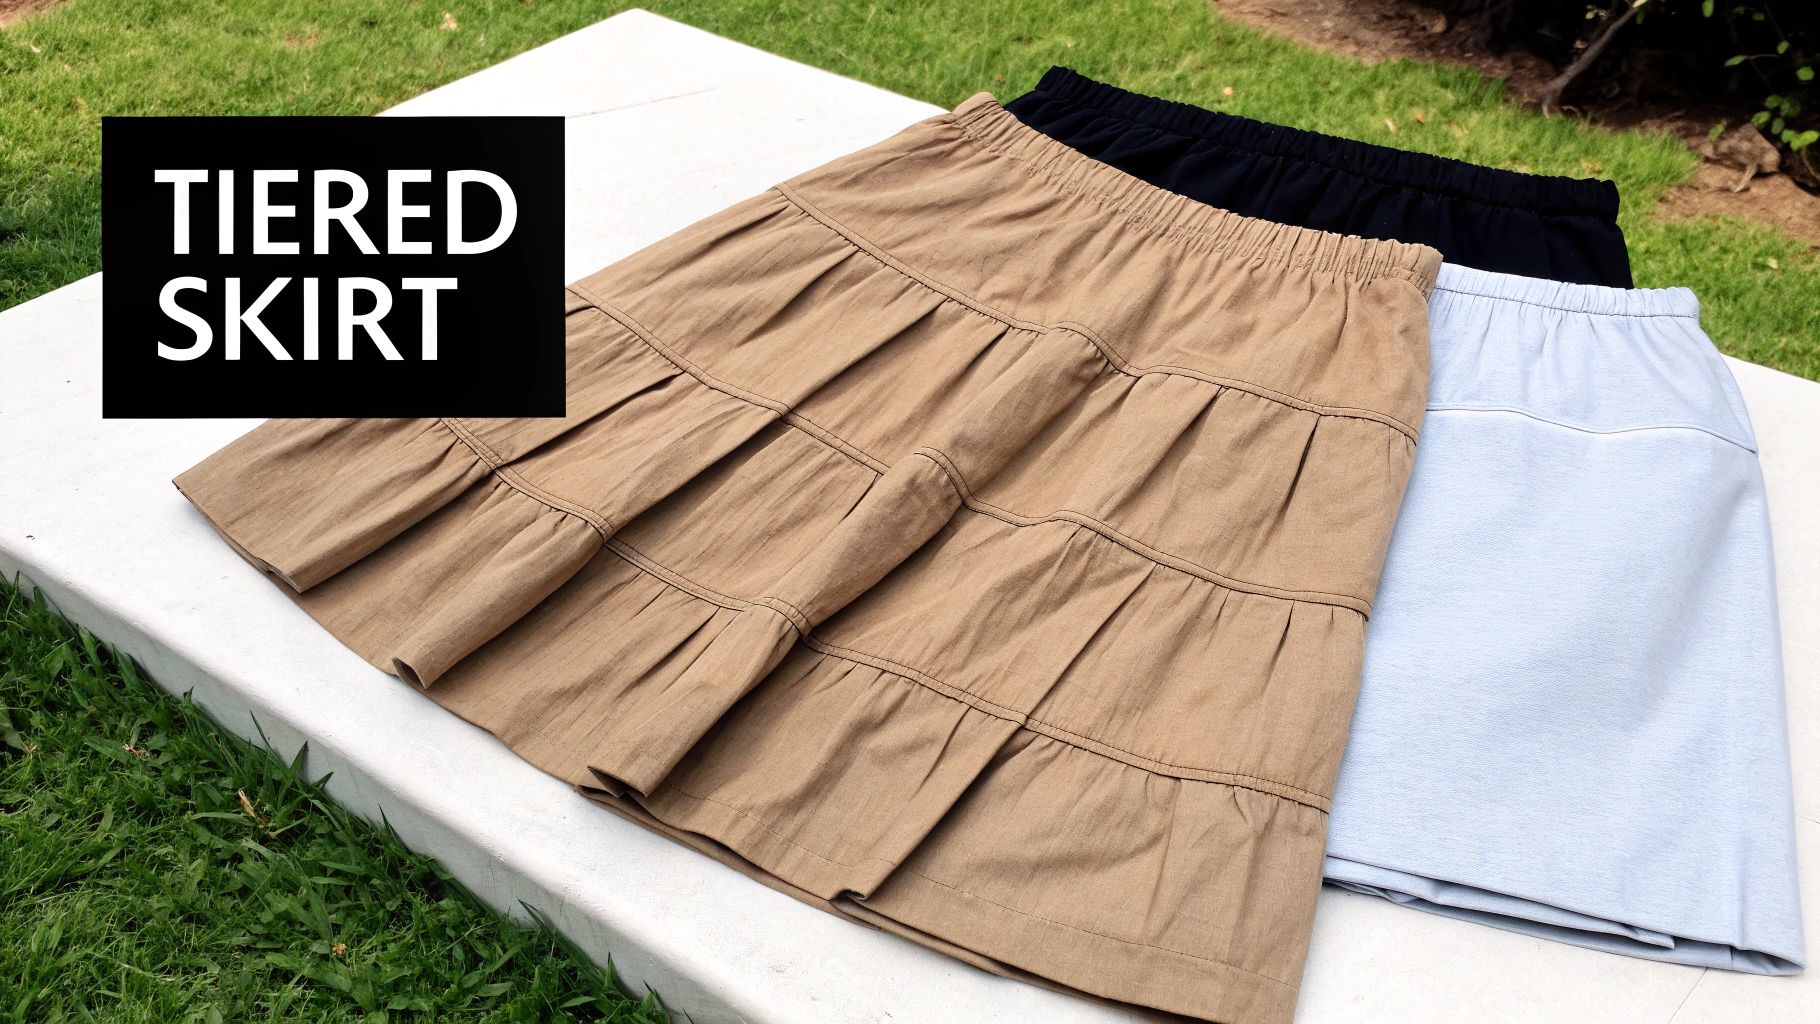
For a skirt with incredible volume and movement, you have to try making a tiered skirt. The look is pure boho chic, and the concept is pretty straightforward: you just create multiple gathered panels and join them together. The key is that each tier has to be wider than the one above it to create that beautiful, cascading effect.
A good rule of thumb for the gathering ratio is 1.5 times the width of the previous tier. So, if your top tier (the one attached to the waistband) is 40 inches wide, your second tier would need to be 60 inches wide to get that lovely, flouncy shape.
This love for dramatic, layered skirts actually has deep historical roots. Back in the 1850s, skirts reached an incredible peak, with some designs featuring three to seven deep flounces. This added 50-70% more fabric to the garment, resulting in skirts that could weigh as much as 10 pounds! You can see some amazing examples of these 1850s skirt styles over at Historical Sewing.
Even with a project as fun and straightforward as a gathered skirt, a few questions always pop up. I get these all the time, so I’ve pulled together some quick answers to help you navigate those little hurdles and keep your sewing momentum going.
This is the big one, and the honest-to-goodness answer is: it all depends on how much "poof" you want!
A really great starting point, especially if this is your first go, is to use fabric that's 1.5 to 2 times your waist measurement. So, if your waist is 30 inches, you'd look for a piece of fabric between 45 and 60 inches wide. This will give you a beautiful, soft gather that isn't too bulky to handle.
Want something with more drama and swoosh? Go for it! You can easily bump that up to 2.5 or even 3 times your waist measurement for a seriously full look. Just keep in mind that more fabric means more gathering work. I'd recommend starting small and working your way up to a fuller skirt on your next project.
Oh, the dreaded uneven gathers. We've all been there! It’s one of the most common frustrations, but thankfully, it's usually a simple fix. Most of the time, the culprit is just trying to wrangle too much fabric at once.
Here’s a little trick I swear by: break it down. Instead of trying to gather the entire skirt panel in one long go, divide it into quarters and mark each spot with a pin. Sew your gathering stitches from one pin to the next, stopping and starting a new line of stitching for each section. This way, you’re only pulling up a manageable amount of fabric at a time, which gives you so much more control and leads to perfectly even gathers.
You absolutely can, but just know that it's going to behave a little differently. Woven fabrics like cotton lawn or poplin have a certain crispness that helps them hold the shape of the gathers beautifully. Knits, on the other hand, are stretchy and soft, so they’ll create more of a draped, fluid look that hangs closer to the body.
If you decide to go with a knit fabric:
Full, voluminous skirts actually have such a cool backstory. Think of the iconic 1950s circle skirt—it was a true symbol of post-war celebration after years of fabric rationing. Some of Christian Dior's "New Look" designs used incredible amounts of fabric, really setting the stage for styles that were all about fullness and movement. You can dive deeper into the history of these sweeping skirts to see how they captured the spirit of the era. By mastering the gathered skirt, you’re connecting to a pretty wonderful piece of fashion history.
Ready to start your next creative project? Famcut.com is your go-to source for cosplay supplies, quality fabrics, and sewing expertise in the Atlanta area and beyond. Find everything you need at https://famcut.com.
At High Country Quilts we care deeply about community. With our experiences in retail, we know that a store is not only a place to shop but also a place for the community to gather and share. During this busy...

Hi! We’re Adam and Renee Wheaton, the new owners of High Country Quilts! For more than 40 years, we’ve owned and operated vacuum and sewing businesses. Following in Renee’s father’s footsteps after he retired from All Discount Vacuum and Sewing in Colorado...


Leave a comment