

We Love Our Quilting Community
At High Country Quilts we care deeply about community. With our experiences in retail, we know that a store is not only a place to shop but also a place for the community to gather and share. During this busy...


Diving into pattern making is like getting the keys to your own fashion kingdom. You're no longer limited by what's on the rack; you can create clothes that fit your body and your unique style perfectly. But before you can bring those ideas to life, you need to set up your workshop.
Every great project starts with the right set of tools. When it comes to drafting patterns, this is especially true. Having the proper equipment isn't just about making things easier—it's about ensuring the accuracy and precision that separate a homemade garment from a handmade masterpiece. Think of these tools as your creative partners, each playing a crucial role in turning a flat piece of paper into a three-dimensional garment.
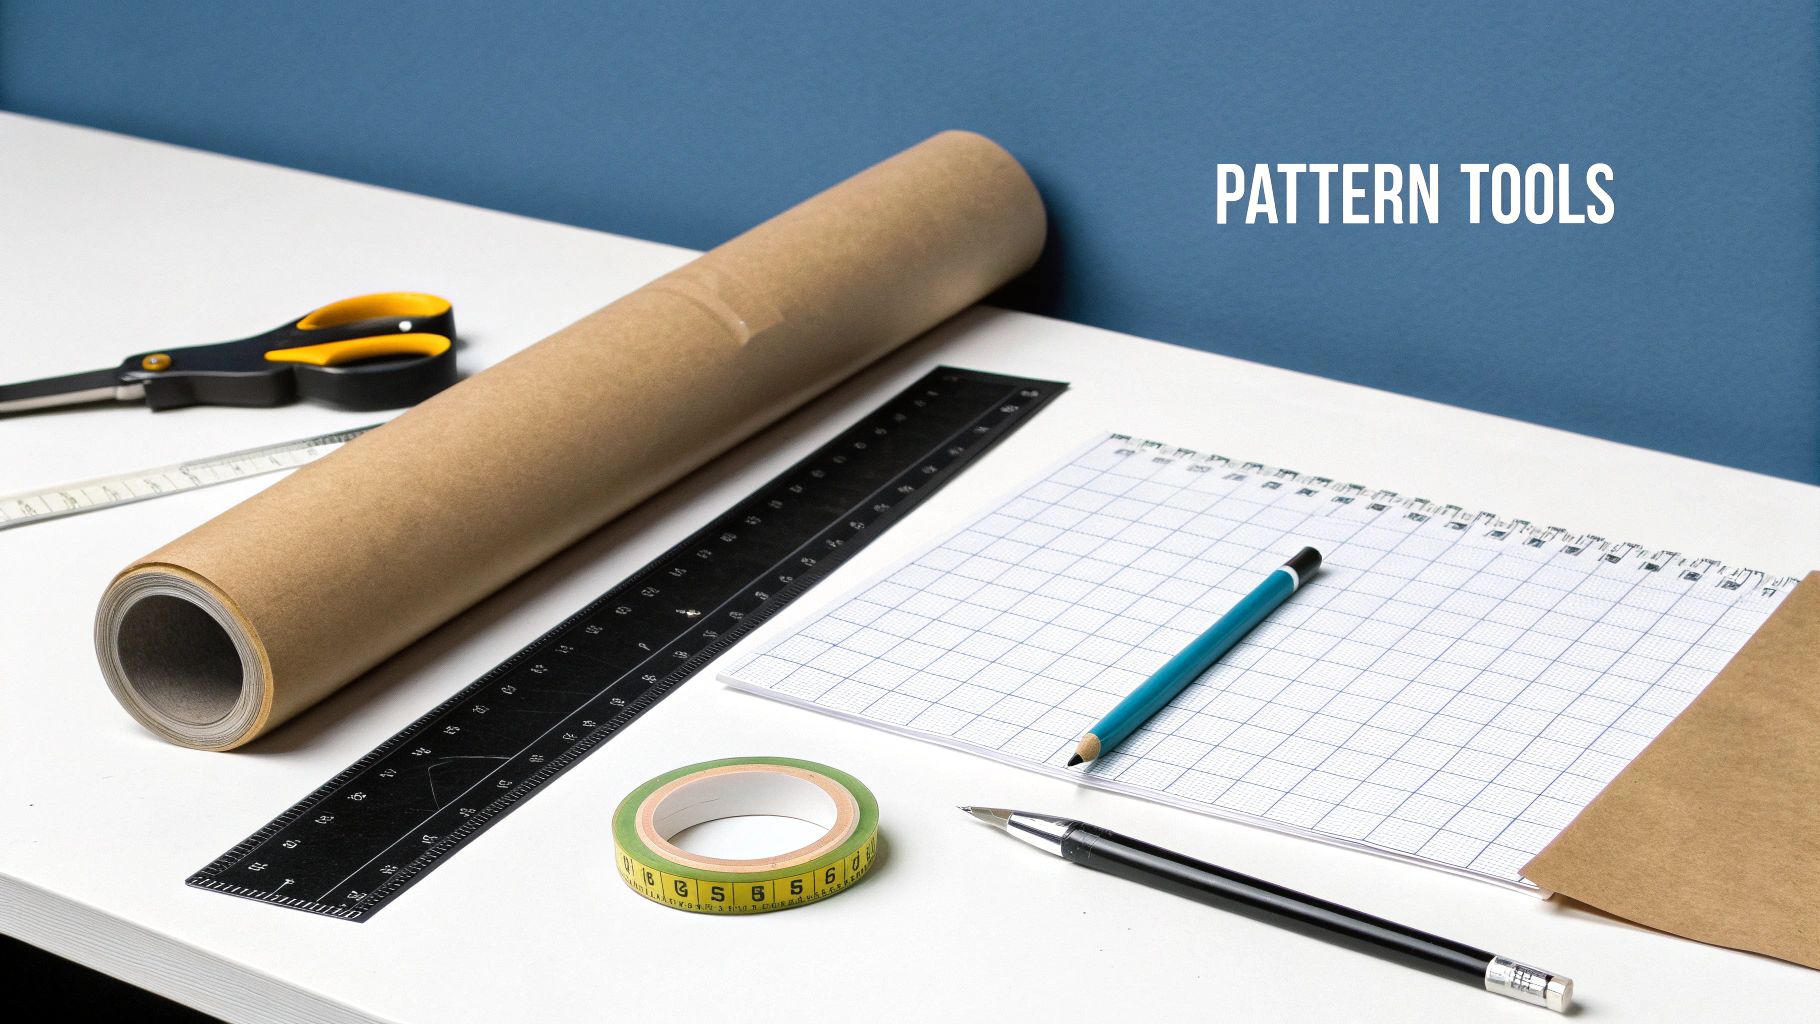
The paper you use is the very canvas for your design. Different types serve different purposes, and it's smart to have a few options on hand.
Kraft Paper: This is your go-to for durability. It's a sturdy, thick brown paper perfect for drafting your foundational patterns—what we call "slopers" or "blocks." Because they're the templates you'll use over and over, you want them to last.
Medical Exam Paper: Don't sleep on this one! It’s an incredibly affordable and effective option for tracing patterns or making adjustments. It's thin, wide, and comes in big rolls, making it a workshop staple.
Swedish Tracing Paper: This stuff is magic. It’s a unique, fabric-like paper that you can actually sew together. It’s perfect for quickly testing a pattern's fit (a "toile" or "muslin") without having to cut into your precious fashion fabric.
Once you have your paper, you need tools that can create crisp, accurate lines. A clear 2" x 18" grid ruler is absolutely essential for drafting straight lines, checking grainlines, and adding seam allowances with precision.
But garments aren't all straight lines. For those beautiful, natural curves, you'll need a French curve for shaping necklines and armholes and a hip curve to get that smooth, gradual line from the waist to the hip. These specialized rulers are what give your patterns a professional, anatomical shape.
A sharp mechanical pencil is a must for drafting, but you'll also want a tracing wheel and carbon paper. This classic combo is fantastic for transferring your finished pattern lines onto a fresh sheet of paper or directly onto your mock-up fabric. If you're looking for more guidance on the entire process, this design guide for garment creation is a great resource.
What's a Sloper?
The core of all pattern making is the sloper (or block). Think of it as a basic, custom-fit shell of a garment—like a bodice, skirt, or sleeve—with no style lines or extra room (ease). It's a perfect map of a person's body, and it's the foundation from which you'll create every single design.
While nothing beats the hands-on feel of paper and pencil, it's worth noting the industry's shift toward digital tools. CAD (Computer-Aided Design) software has become a game-changer since the 1990s, allowing for faster prototyping and dramatically reducing the 20-30% fabric waste often seen with manual methods. Whether you decide to go digital or stick with traditional techniques, a solid understanding of these foundational tools is where it all begins.
Let’s be honest: even the most elegant pattern will be a complete disaster if it’s based on the wrong numbers. The secret to a garment that fits like a glove isn't about complicated formulas or expensive software. It all starts with the humble, yet critical, task of taking accurate body measurements. Think of this as the foundation of your entire project—get it right, and everything else falls into place.
Before you even pick up a pencil, you need the right tool for the job. Grab a quality measuring tape that's flexible but won't stretch out over time. A flimsy or stretched-out tape is a one-way ticket to a wonky fit.
For the truest measurements, the person being measured should be in form-fitting clothes (like leggings and a tank top) or simply their undergarments. Trying to measure over bulky jeans or a thick sweater will add "phantom inches" and throw off your entire pattern.
Posture is key here. Stand naturally—relaxed, but upright. Don't slouch, but don't puff out your chest either. Just be comfortable, with your feet slightly apart. If you can, grab a friend to help. Twisting and turning to measure your own back or inseam is nearly impossible to do accurately.
My Favorite Trick: The Waistline String
Finding the natural waist can be tricky. Is it at your belly button? A little higher? To nail it down every time, tie a piece of string or thin elastic around the torso. Now, bend from side to side a few times. The string will magically settle into the smallest part of the waist. Leave it there! It's your anchor point for almost every vertical measurement.
While a full couture fitting might involve 50+ measurements, you only need a handful of key ones to draft your basic blocks. As you measure, pull the tape so it's snug against the body, but not so tight that it digs in. For any measurement that goes around the body, make sure the tape is perfectly parallel to the floor.
These are your go-to numbers for any kind of top, dress, or jacket.
Now for the lower half. It’s all about the hips and length.
Get all these numbers down on paper or in a spreadsheet right away. Having an organized chart to refer back to is so much better than trying to remember what you measured an hour ago. Now, with this solid data, you’re ready to actually start drafting.
With your measurements down on paper, it's time to turn those numbers into something tangible. We're going to draft your foundational patterns, what we in the industry call slopers or blocks.
Don't think of these as patterns for a finished garment just yet. A sloper is more like a second skin—a perfect, custom-fit template of your body, created without any seam allowances or stylistic details. From these four core pieces (bodice, sleeve, skirt, and pants), you can engineer just about any design you can dream up.
The bodice block often seems like the most intimidating one, but I promise it's just a logical process. You’ll start by drawing a simple rectangle using your bust and back length measurements as the frame. Everything else gets plotted within this initial shape.
The real pattern-making magic begins when you start carving into that rectangle to reflect a human body. For instance, your back width measurement tells you exactly how wide to make the upper back. The bust point is absolutely critical—it marks the precise apex for the bust dart, which is what allows the fabric to curve smoothly over the chest instead of pulling awkwardly.
This whole process really boils down to three simple, crucial stages.
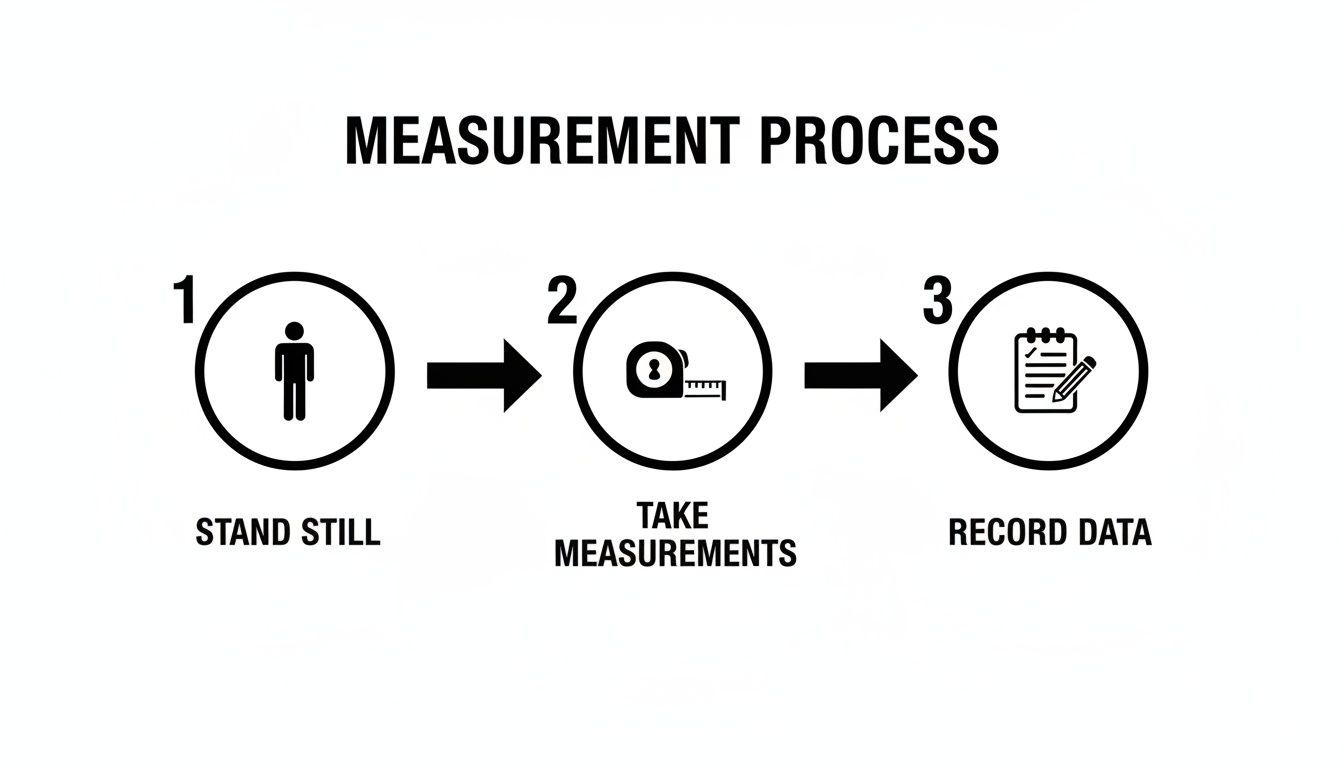
It’s a good reminder that precision at every step, from how you stand to how you write down the numbers, is what leads to a sloper that actually works.
Once your key points are marked, you’ll grab your French curve to connect the dots and form the armscye (the armhole) and the neckline. It feels a bit like a sophisticated connect-the-dots game, where every line you draw helps sculpt the flat paper into a shape that mirrors your own torso.
After the complexities of the bodice, the skirt block is a welcome breath of fresh air. In fact, it's the perfect one to start with if you want a quick confidence boost. You only need two primary measurements to get going: your waist and hip circumference.
Start by drawing a vertical line for your center front that matches your desired skirt length (say, from your waist to your knee). From that line, you'll draw horizontal lines for your waist and hips, positioned according to your waist-to-hip measurement. The hip line, naturally, will be the widest point.
The shape of the skirt comes from the difference between your waist and hip measurements. We handle that difference with darts.
Finally, take your hip curve ruler and draw a nice, smooth line from the waist down to the hip. This creates that elegant curve that makes a skirt fit so beautifully.
A well-drafted sloper is the ultimate problem-solver. If you consistently struggle with commercial patterns—think gaping necklines or sleeves that are too tight—creating your own block solves those issues at their source. It's a bit of work upfront that saves you from endless alterations later.
The sleeve block is designed to fit perfectly into the armscye you just drafted on your bodice block, so you can't really make one without the other. Your first step is to take your tape measure and carefully measure the entire curve of the front and back armscye on your bodice sloper.
That total armscye length, plus your bicep measurement and desired sleeve length, are the key ingredients. The most important—and sometimes trickiest—part is drafting the sleeve cap, which is the curved top of the sleeve that gets set into the armhole. The cap height is determined by a formula that uses your armscye and bicep numbers. A taller cap gives you a sharp, tailored-looking sleeve, while a shorter, flatter cap creates a more relaxed, casual fit.
You'll use your French curve again to blend the points into a graceful "S" shape that follows the armhole curves. A perfectly drafted sleeve cap should have about 1 to 1.5 inches of ease—meaning it's slightly bigger than the armhole itself. This little bit of extra fabric is what lets your arm move freely, and it gets gently eased into the armhole during sewing.
Drafting pants is a bit like combining the techniques for a skirt with the much more complex shaping of the crotch curve. Honestly, that curve is what makes or breaks the fit of any pair of pants. The single most important measurement here is your crotch depth (the distance from your waist down to the chair you're sitting on).
You'll draft the front and back pieces separately. The back piece needs to be wider and have a deeper crotch curve to accommodate, well, your seat. The basic workflow looks like this:
Once you have these four foundational slopers finished, you've officially created a reusable, custom-fit pattern toolkit. You now hold the master templates for bringing any of your future design ideas to life.
Okay, you've drafted your slopers, and they fit you perfectly. That's a huge milestone! Now for the really fun part. Think of those slopers not as a finished pattern, but as your personal, custom-fitted canvas. This is where you get to stop being a drafter and start being a designer, manipulating these basic shapes to create style, volume, and unique details.
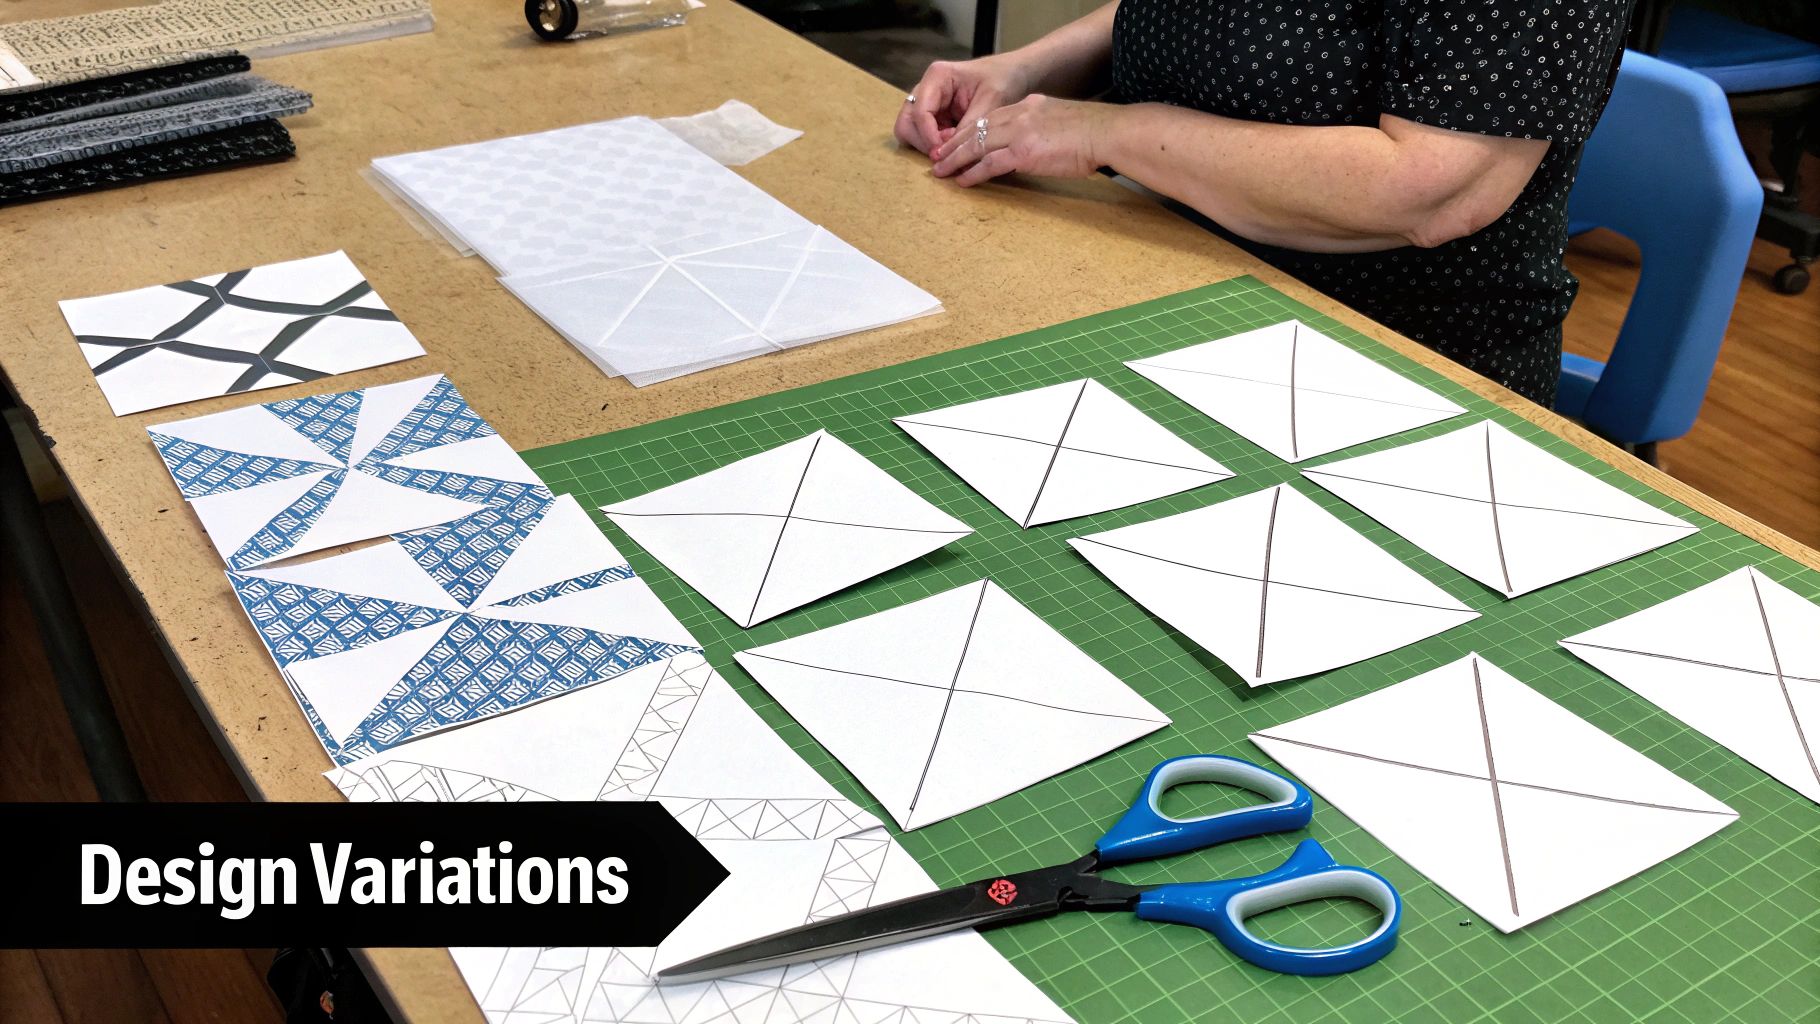
There are two classic methods for this creative work: the slash-and-spread technique and the pivot technique. They can both achieve similar results, but over time, you’ll probably find you prefer one over the other for certain jobs. The whole point is to add or move fullness in a strategic way without messing up that core fit you worked so hard to achieve.
This technique is as literal as it sounds, which makes it a fantastic way to visually understand how you’re changing the pattern’s shape. It’s my go-to for turning a basic pencil skirt into a flared A-line or adding gathers to a sleeve cap for that perfect puff.
Let’s say you want to give your straight skirt sloper a bit of a gentle flare. Here's the basic rundown:
You can apply this same principle to just about any pattern piece. Slash and spread a sleeve to get a romantic bishop sleeve or do it on a bodice to create soft gathers under the bust.
Darts are non-negotiable for getting a good fit, but they don't have to stay put. By moving the dart's volume around the pattern, you can create beautiful style lines like princess seams or elegant French darts.
For example, imagine you want to get rid of the waist and bust darts on your bodice front, converting them into a single princess seam that flows from the armhole. The process involves pivoting the volume from the side bust dart into the waist dart. Then, you'd redraw that entire seam line as a graceful curve that completely absorbs all the original dart shaping. The darts are gone, but the essential shaping is still there, just hidden in a seam.
A pattern block is really just a two-dimensional map of a three-dimensional body. Every line you change or move is a design decision that impacts how the final garment will look, feel, and hang. This is your chance to tell the fabric exactly what you want it to do.
Before you even think about putting your new pattern on fabric, you have to add two absolutely critical elements: seam allowances and the grainline. Forgetting this is a classic rookie mistake that can unfortunately ruin a project before it even starts.
So, what happens when you create a pattern you absolutely love and want to make it for a friend who's a different size? That’s where pattern grading comes in. Grading is the technical process of making a pattern proportionally larger or smaller while keeping the original shape and fit intact.
While manual grading is a time-honored skill, many designers today are turning to digital tools. The whole world of pattern making has gone digital, with the global pattern drafting software market exploding from USD 320 million in 2023 to a projected USD 720 million by 2032. Digital pattern making can slash production time by up to 30%, which is a massive gain in efficiency.
For the amazing cosplay creators in our Famcut community, this often means getting comfortable with programs like CLO 3D or Optitex, which let you use 3D visualization to perfect intricate designs before a single scrap of fabric is cut. You can dive deeper into these industry shifts in the 2025 USFIA Fashion Industry Benchmarking Study.
By getting comfortable with these manipulation techniques, you're giving yourself the power to go way beyond basic blocks and start creating garments that are truly and uniquely yours.
Even when you've measured meticulously and drafted with care, you're going to run into fitting puzzles. Let’s be clear: this is a completely normal, even essential, part of the process. Think of these moments not as mistakes, but as your pattern teaching you how to translate a flat piece of paper into a garment for a real, three-dimensional body.
The most common issues almost always show up as tell-tale drag lines on your test garment or muslin. These lines of tension are like little arrows pointing you directly to the source of the problem. Your job is to learn how to read them and tweak your paper pattern before you ever cut into your beautiful final fabric.
When you see those wrinkles and pulls on your muslin, don't get discouraged. Get curious. Let's dig into a few of the usual suspects and figure out how to fix them right on the pattern.
A Gaping Neckline: This often happens with V-necks or scoop necks. If the fabric is standing away from your body instead of lying flat, it means the edge of the neckline is simply too long. The fix is to remove a small wedge of paper from the pattern right at the neckline, which effectively shortens it and pulls it in for a snug fit.
Tight Sleeves: Feel a little constricted around your bicep? It means your sleeve block is too narrow for your arm. To fix this, just slice your sleeve pattern down the middle vertically, spread the two halves apart to add the width you need, and then re-trace the new, wider sleeve shape.
Pulling Across the Bust: This is a big one. If you see horizontal drag lines stretching across the fullest part of the bust, it’s the classic sign that you need a Full Bust Adjustment (FBA). Learning this adjustment is a game-changer for so many people. An FBA involves a bit of pattern surgery—slashing and spreading the bodice piece to add more room for the bust without making the waist or shoulders bigger.
A surprising number of fitting headaches can be traced back to tiny errors made during the initial drafting. One of the most common culprits is mismatched seam lengths—when two seams that are supposed to join, like a sleeve cap and an armscye, are different lengths.
Before you cut anything, always "walk" your seams. This means standing your measuring tape on its edge and carefully measuring the length of each seam line on your paper pattern. If one is longer than the other (and isn't designed that way for easing), you need to adjust one to match.
Pro Tip: Never just assume your lines are perfect. After you draft a block, double-check key measurements against your chart. Does the pattern's final waist measurement actually match what you recorded? A quick check now can save you hours of frustration later.
Developing these troubleshooting skills is what will truly elevate your craft. The tailoring industry, which is projected to hit USD 9.82 billion globally by 2025, is built on this very ability to create a perfect fit. In fact, for the US apparel market, precise patterns have been shown to slash costly online returns by as much as 25%. Mastering your slopers isn't just a hobby; it’s a powerful skill, a point you can explore further in these seamstress marketing statistics.
Pants can feel like the final boss of pattern making, and the most notorious problem area is the crotch curve. If you see drag lines smiling up from the crotch or fabric pulling uncomfortably across the back, the curve is crying out for an adjustment.
Fixing these issues is a cycle: adjust the paper, sew another quick muslin, and check the fit again. With each tweak, you’ll get closer to that "aha!" moment and a pattern that feels like it was made just for you. This is how you build both your confidence and your pattern-making prowess.
Diving into pattern making is exciting—it opens up a whole world of custom-fit clothes and creative designs. But it’s natural to have a few questions when you're starting out. Here are the answers to some of the things we get asked most often.
This is a classic question, and the best way to think about it is architecture versus sculpture.
Pattern drafting is the architectural approach. You're working in two dimensions, using your body measurements, a set of rulers, and a bit of math to draw the pattern pieces flat on paper. It's precise and technical, which makes it perfect for creating foundational blocks (or slopers) and anything with a structured fit, like tailored pants or a sharp blazer.
Draping, on the other hand, is like sculpting with fabric. You work in three dimensions, pinning and shaping fabric directly onto a dress form. You let the material guide you as you create the design, then you mark your lines and transfer that 3D shape back to a flat paper pattern. Draping is intuitive and feels more organic, which is why it’s the go-to method for fluid, flowing gowns or anything with unusual, asymmetrical shapes.
You absolutely can! A lot of people call this "cloning" or "reverse-engineering" a garment. It's an amazing way to replicate a favorite dress or a pair of jeans that fits you like a glove. The basic idea is to carefully lay out each part of the garment—a sleeve, a front panel, a back panel—and trace its shape onto paper, making sure to get every seam and dart.
Here's a pro tip that’s easy to forget: you have to add the seam allowances back in. When you trace a finished piece of clothing, you're tracing along the stitch lines. Your new pattern needs that extra fabric for sewing, so be sure to add your preferred seam allowance (usually 1/2 to 5/8 inch) around all the traced pieces.
Just a quick note on this: while it's a fantastic skill for personal use, remember that commercial clothing designs are copyrighted. So, keep any patterns you clone for your own wardrobe.
Definitely not. While the pros use powerful (and pricey) programs like CLO 3D and Optitex, you don’t need to drop a ton of money to get started. There are some incredible, accessible tools out there that are perfect for hobbyists and beginners.
I usually recommend people check out these options:
Getting comfortable with these tools is a great way to learn the ropes of digital drafting before deciding if you need to upgrade for more complex cosplay or design projects.
This is a great question because when you make your own patterns, you're in complete control.
The industry standard you'll find in most commercial patterns is 5/8 inch (1.5 cm). A lot of home sewers, however, find that a 1/2 inch (1.25 cm) seam allowance is a little neater and easier to manage on a home machine.
My advice? For areas where you might want a little wiggle room for fitting—like the side seams on a bodice or trousers—give yourself a generous 1 inch (2.5 cm) allowance. For hems, you'll want even more, usually somewhere between 1 and 2 inches, depending on the look you're after. The most important thing is just to be consistent. Pick a standard for your main seams and stick with it.
At Famcut, we're here to help you at every stage of your creative process. From stocking the best materials to offering local classes to sharpen your skills, we're your Atlanta-area home for all things sewing. Whether you're drafting your first pattern or building an ambitious cosplay, we've got your back.
Check out everything we have to offer over at the official Famcut website.
At High Country Quilts we care deeply about community. With our experiences in retail, we know that a store is not only a place to shop but also a place for the community to gather and share. During this busy...

Hi! We’re Adam and Renee Wheaton, the new owners of High Country Quilts! For more than 40 years, we’ve owned and operated vacuum and sewing businesses. Following in Renee’s father’s footsteps after he retired from All Discount Vacuum and Sewing in Colorado...


Leave a comment