

We Love Our Quilting Community
At High Country Quilts we care deeply about community. With our experiences in retail, we know that a store is not only a place to shop but also a place for the community to gather and share. During this busy...


So, you want to build your own cosplay props? It’s an incredible feeling to bring a character’s weapon or gear to life with your own two hands. The idea of starting from scratch can feel like a huge mountain to climb, but trust me, every master prop maker started exactly where you are now.
We're going to break down the entire process—from that first spark of an idea to the final, convention-ready piece. You don’t need a massive, expensive workshop to create something amazing. This guide is all about using accessible tools and straightforward techniques to get stunning results right from your garage or craft room.
At its core, making props is really just creative problem-solving. It’s a fantastic mix of art, engineering, and a little bit of magic, where you figure out how to turn a 2D image from a game or anime into something you can actually hold.
The best part? You're not alone. The community around this hobby is absolutely massive and incredibly supportive.
Prop making is so much more than a niche hobby; it’s a global community of passionate creators. You can see just how many people are picking up heat guns and Dremels in the market's explosive growth, which is a testament to the shared love for bringing fictional worlds to life.
The numbers don't lie. In 2023, the global market for anime cosplay costumes and props was valued at around USD 4.2 billion. It's expected to more than double, hitting a projected USD 9.7 billion by 2032. That's a clear sign you’re stepping into a vibrant, creative field that’s only getting bigger. You can find more details about this market growth and its trends if you're curious.
Think of this guide as your personal mentor. We'll walk you through every critical step, making sure you build a solid foundation of skills before you tackle that dream build.
By the end, you'll have the skills to create props that not only look fantastic but also make you incredibly proud when you show them off.
Here's a quick look at the fundamental stages you'll master for making your first prop.
| Stage | Key Focus | Beginner Tip |
|---|---|---|
| Planning | Gathering references and creating a scale pattern. | Print multiple views of the prop. Tracing over images is a great way to start your pattern. |
| Material Selection | Choosing the right material (foam, Worbla, etc.) for the job. | Start with EVA foam! It's cheap, forgiving, and you only need basic tools to work with it. |
| Building | Cutting, shaping, gluing, and assembling the core structure. | A sharp blade is your best friend. Change your utility knife blades often for clean, easy cuts. |
| Finishing | Sealing, priming, painting, and adding details. | "Plasti Dip" spray is a fantastic, easy-to-use primer for foam that flexes without cracking. |
These four stages form the backbone of nearly every prop build, from a simple dagger to a massive sci-fi rifle. Master them, and you'll be able to tackle almost anything.

Every great prop starts with a plan, not a piece of foam. Seriously. I can't tell you how many times I've seen people (and been guilty of it myself) dive straight into cutting materials, only to get frustrated and waste time and money. Spending a little extra time upfront to gather references and sketch out a blueprint is the secret weapon of every experienced maker.
Think of it like being a detective. Your mission is to understand the object you’re building from every possible angle before you even pick up a knife.
First things first, you need to build a solid visual library for your prop. Don't just grab the first cool promo shot you see and call it a day. You'll want to hunt down images of the prop from the front, back, sides, top, and bottom—every angle you can find.
A tool I absolutely swear by for this is PureRef. It’s a free program that gives you a giant digital canvas where you can drag and drop all your images. You can zoom in on the tiniest details, make notes, and keep everything in one tidy spot instead of scattered across a dozen browser tabs.
Be sure to pull images from different sources:
A classic rookie mistake is building an entire prop based on one dramatic, action-posed illustration. Artists often exaggerate proportions for effect. If you base your build on multiple, more neutral references, your final prop will look much more accurate and grounded in reality.
With your reference board full, it’s time to deconstruct the prop into simple, manageable shapes. That ridiculously intricate fantasy sword isn't a single object; it's a blade, a crossguard, a grip, and a pommel all assembled together.
Look at your references and start picking out those core components. Is the crossguard just a few layered rectangles? Is the pommel a sphere with a cone on top? Mentally (or with a pen on a printout) break the prop down into its basic geometric parts. This makes the whole project feel way less intimidating and gives you a clear roadmap for making your patterns.
If you’re looking for more general inspiration for your creative projects, we’ve put together a bunch of tips and tricks for makers that you might find helpful.
Getting the scale right is crucial. It’s what makes a prop look like a real weapon instead of a toy. A sword that’s too short will look dinky, but one that’s too long will be a nightmare to carry around at a con.
The best way to nail the scale is to find a reference shot of the character holding the prop. Use a known measurement on your own body—like your height, or the length of your forearm—as a starting point. By comparing that to the character in the image, you can figure out the correct proportional size for the prop. This ensures your creation looks like it was made just for you, which is exactly what you want.
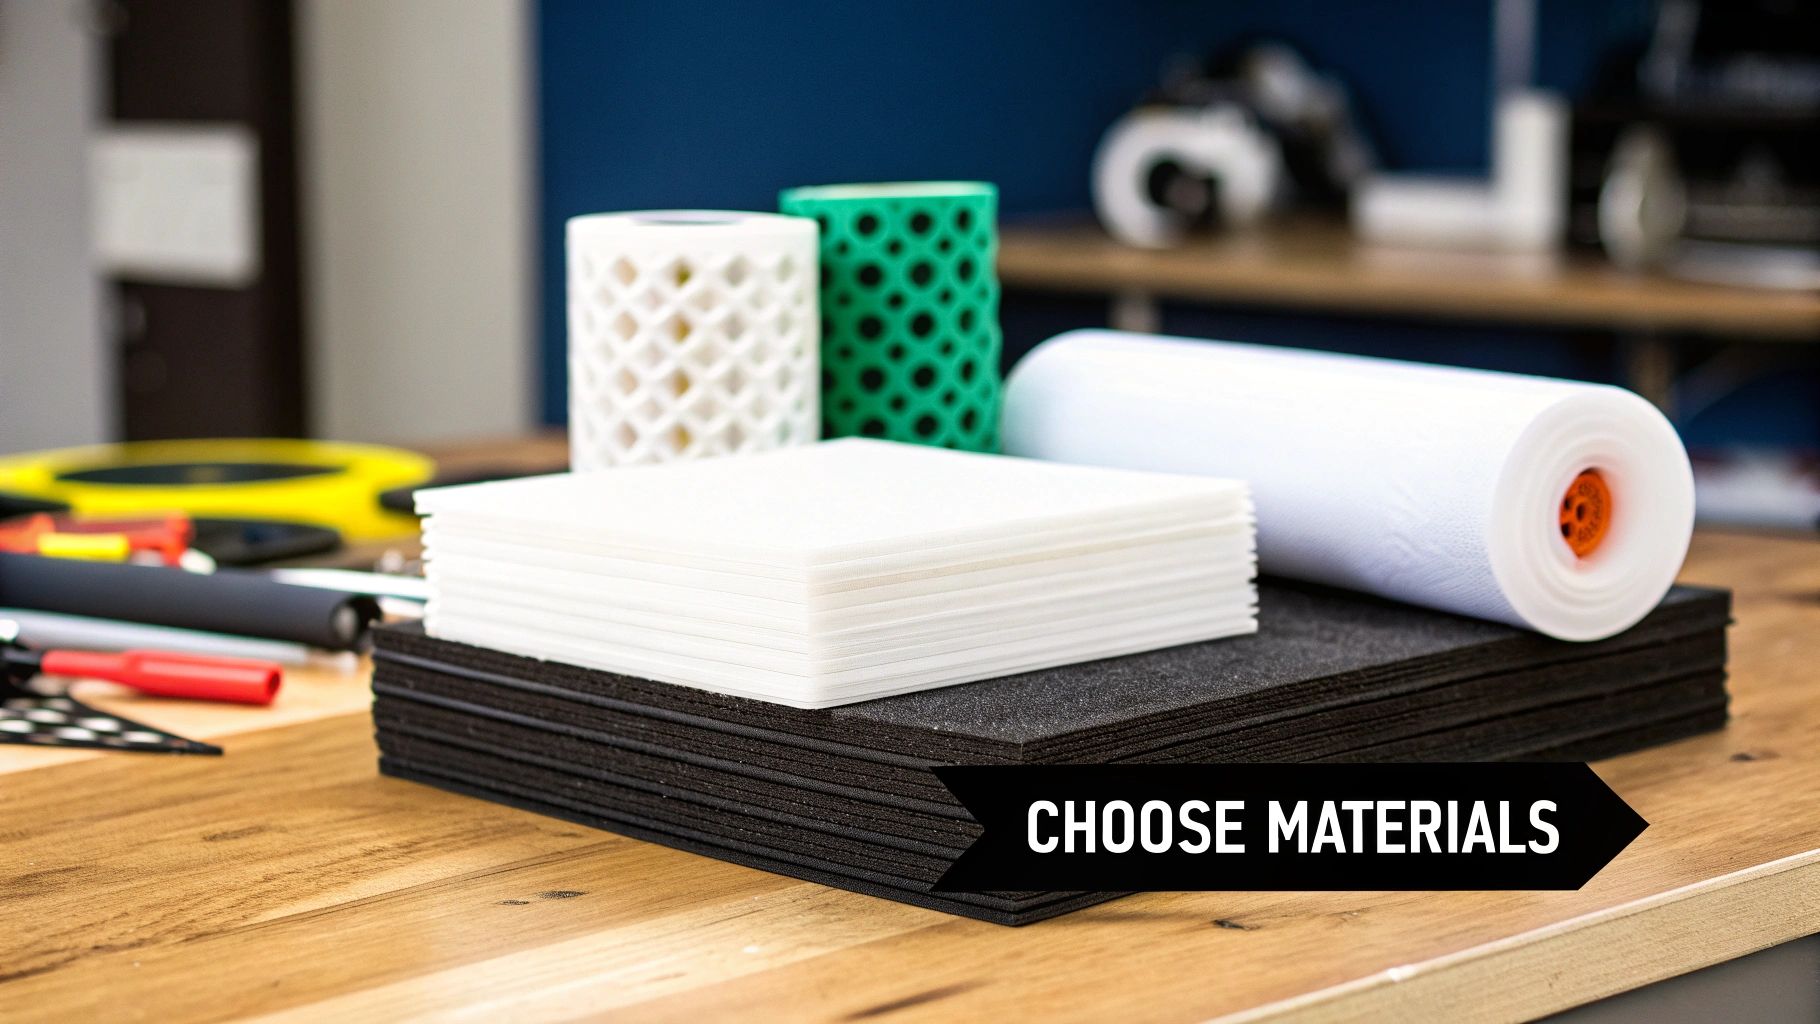
The material you choose is the very soul of your prop. It dictates how heavy that giant buster sword will feel after eight hours on a convention floor and how well it survives an accidental bump into a doorway. Let's walk through the most common choices so you can head to the craft store feeling like you know exactly what you’re doing.
If there's one material that’s become the go-to for prop making, it's EVA foam. It’s the undisputed champion for both beginners and seasoned pros, and for good reason. This stuff is lightweight, relatively cheap, and incredibly forgiving to work with.
But not all foam is created equal. You'll find it in various densities and thicknesses, and knowing the difference is key. High-density foam (often sold as "L200" or those black puzzle-piece floor mats) is firm and holds detail beautifully, making it perfect for swords, shields, and structural pieces. Low-density foam is softer, more flexible, and great for wrapping around curves.
Here’s a simple way to think about it:
Honestly, learning how to make cosplay armor or props usually starts right here. Foam is the perfect playground for practicing your cutting, shaping, and gluing skills before you dive into pricier materials.
Ever see a prop with unbelievably fine details, elegant curves, or a rock-hard finish? You're probably looking at a thermoplastic. Materials like Worbla and Thibra are plastic sheets that become soft and almost clay-like when you hit them with a heat gun. Once they cool, they harden into a rigid, durable shell.
Worbla is fantastic for layering over a foam core to create a strong, paintable surface. You can also press it into molds to crank out identical, detailed pieces—think gems for a crown or decorative bits for a sword hilt. The best part? You can heat up the scraps and mush them back together, meaning there's almost zero waste.
The trade-off is that thermoplastics cost more than foam and have a steeper learning curve. You have to manage your heat carefully to avoid bubbling or burning the material. They're best reserved for projects that demand serious durability and complex, fine details.
Thermoplastics are like sculpting clay that hardens into armor. They give you a level of detail and strength that's tough to achieve with foam alone, making them a go-to for professional-level builds.
In the last few years, 3D printing has completely transformed prop making. It allows you to create pieces with a level of precision and complexity that would be maddening to attempt by hand. This is the ultimate route for perfectly symmetrical parts, intricate mechanical-looking greeblies, or props with internal mechanisms.
The most common filaments you'll run into are:
The main downsides are the initial cost of a printer and the sheer time it can take to print large pieces. You'll also be spending a good chunk of time sanding and finishing your prints to hide the layer lines and get that smooth, professional look.
The growing popularity of these advanced techniques is a huge part of why the cosplay community is thriving. In fact, the global cosplay costume market was valued at around USD 19.83 billion in 2024 and is projected to hit nearly USD 28.89 billion by 2031, with skills like 3D printing and advanced foam crafting fueling that growth.
To help you decide, here’s a quick-glance comparison of the most common materials you'll encounter.
| Material | Best For | Difficulty | Cost |
|---|---|---|---|
| EVA Foam | Swords, armor, large & lightweight props | Beginner | $ |
| Worbla | Detailed armor, durable shells, embellishments | Intermediate | $$$ |
| 3D Prints (PLA/PETG) | Highly detailed small parts, complex shapes | Intermediate | $$ |
| Cardboard | Quick mock-ups, simple beginner props | Beginner | $ |
| Resin | Casting gems, clear elements, small details | Advanced | $$$ |
Ultimately, the best material is the one that fits your budget, your skill level, and the specific needs of your project. Don't be afraid to mix and match! A foam sword with a Worbla-wrapped hilt and 3D-printed details can look absolutely incredible.
Having the right materials is only half the battle. Your tools are what will actually turn that pile of foam and plastic into a work of art. The good news? You don't need a professional-grade workshop to get started. You can build an incredible prop-making toolkit with just a few key items, but learning to use them safely is the most important skill you'll ever pick up.
Think of your workshop—whether it's a dedicated room or just a corner of the garage—as your creative sanctuary. Keeping it safe and organized isn't just a suggestion; it's a must. Before you even think about plugging in a heat gun, let's go over the ground rules that every pro maker lives by. This isn't about being overly cautious; it's about making sure you can enjoy this hobby for years to come.
You can pull together a really effective prop-making kit for under a hundred dollars, so don't feel like you have to buy everything at once. Just start with the absolute must-haves that you'll reach for on almost every single project.
Here's what you truly need:
Once you’ve got those essentials, the next tool I'd strongly recommend is a rotary tool (most people just call them by the brand name, Dremel). This little powerhouse is a complete game-changer for sanding smooth, organic curves, carving in fine details, and grinding down rough seams with incredible precision.
Let's be real: making props often involves materials that kick up nasty dust and chemical fumes. Your health has to be your number one priority. These aren't just suggestions; these are the rules you need to follow every time you work.
Always work in a well-ventilated area. Whether you're slathering on contact cement, heat-sealing foam, or hitting your prop with spray paint, you need good airflow. Crack open a window, set up a box fan, or—even better—work outside whenever possible to keep from breathing in all that gunk.
Your single most important piece of safety gear is a respirator. A simple paper dust mask just won't cut it. When you're sanding foam, wood, or 3D prints, or using any kind of adhesive or spray paint, you need a respirator with cartridges rated for both organic vapors and particulates. And it's not enough to just own one; you need to know it fits correctly. A guide on Fit Mask Testing for Workplace Safety can be incredibly helpful for understanding how to ensure you're actually protected.
Finally, always wear safety glasses. It only takes one tiny fleck of foam or a stray splash of glue to cause a serious eye injury. Craft smart, and you'll be able to craft for a long, long time. This mindset also translates to the durability of your creations. With the cosplay costume rentals market projected to grow from USD 321 million in 2024 to USD 513 million by 2032, there’s a rising demand for props that are built to last. This trend is pushing makers to innovate, proving that a well-built, sturdy prop is more valuable than ever.
Alright, you've got your patterns ready and a pile of materials waiting. Now for the fun part—actually building the thing. This is where your 2D plans leap off the page and start taking shape in the real world. It feels like magic, but it’s really just a set of core skills that you'll use on almost every project you tackle.
The first move is getting your paper patterns onto your material, which for most of us means EVA foam. Don't rush this. A sloppy trace or a shaky cut now will create gaps and alignment issues down the line. I like to use masking tape to hold my patterns firmly in place, but a light mist of spray adhesive also works wonders to stop any slipping.
When you trace, grab a fine-tipped pen or, my personal favorite, a silver marker that pops on dark foam. Thick markers create fuzzy lines, leaving you guessing where the real edge is. Once everything is traced, it's time to cut. A fresh, sharp blade in your utility knife is non-negotiable here.
A classic rookie mistake is trying to muscle through thick foam in one go. That’s a recipe for ragged edges and, honestly, it’s not safe. Instead, make several light passes, letting the blade do the heavy lifting. To get a perfect 90-degree straight edge, you have to keep that blade completely vertical. It takes a bit of practice, but it's the secret to clean seams that glue together like they were made for each other.
This simple workflow—cut, glue, sand—is the absolute heart of prop making.
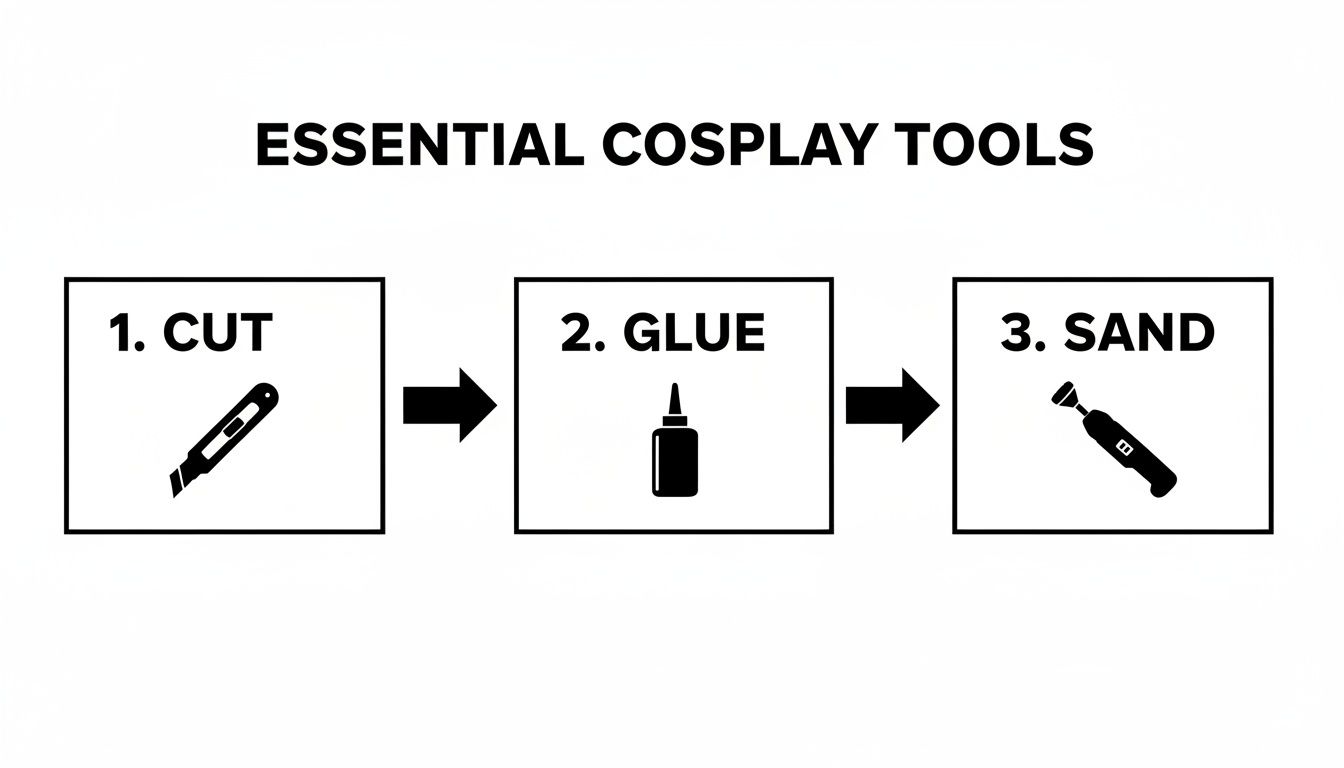
You’ll find yourself repeating this sequence over and over again, turning basic shapes into seriously complex forms.
Props are rarely just flat cutouts. They have curves, angles, and dimension. This is where your heat gun becomes your best friend. Gently warming EVA foam makes it soft and pliable, perfect for creating organic shapes. Just bend the foam how you want it, hold it there until it cools down, and it will lock that new shape in permanently.
Want those sharp, deadly-looking edges for a sword or an axe? You need to master bevel cuts. This just means cutting the foam at an angle, usually around 45 degrees. You can eyeball it by angling your knife, or use a specialty tool if you need perfect consistency. When you glue two of these beveled edges together, you get that crisp line that screams "metal blade."
Another game-changer is scoring. Make a shallow cut that doesn’t go all the way through the foam, then give it a quick blast with the heat gun. The cut will pop open, creating a clean channel that’s perfect for panel lines or other engraved details.
Pro Tip: Instead of just stacking flat foam pieces for details, take a moment to bevel the edges of your top layers before gluing them down. This one small step adds so much depth and makes your work look far more professional and less like a craft project.
If you’re building something big—a massive greatsword, a wizard’s staff, a heavy sci-fi rifle—foam alone isn't going to cut it. It’ll be floppy and fragile. The solution is a strong internal core, what we call an armature. Think of it as the skeleton of your prop, giving it the backbone it needs to survive a hectic con.
You can find everything you need for an armature at your local hardware store:
Putting an armature in is simple. Just carve a channel into your foam pieces before you glue them together. Lay the rod or pipe inside the channel, add a healthy amount of contact cement, and then sandwich it all together. This internal support is the difference between a prop that lasts one outing and one that lasts for years. Building these structural skills is just as vital as the artistic finishing touches. In many ways, it's like learning the fundamentals of sewing; for a solid foundation in pattern work and assembly, checking out some free sewing lessons can offer a surprisingly useful perspective.
By combining these techniques—precise cuts, smart shaping, and a solid internal core—you'll turn simple foam sheets into a durable and impressive prototype, ready for the final paint and weathering.
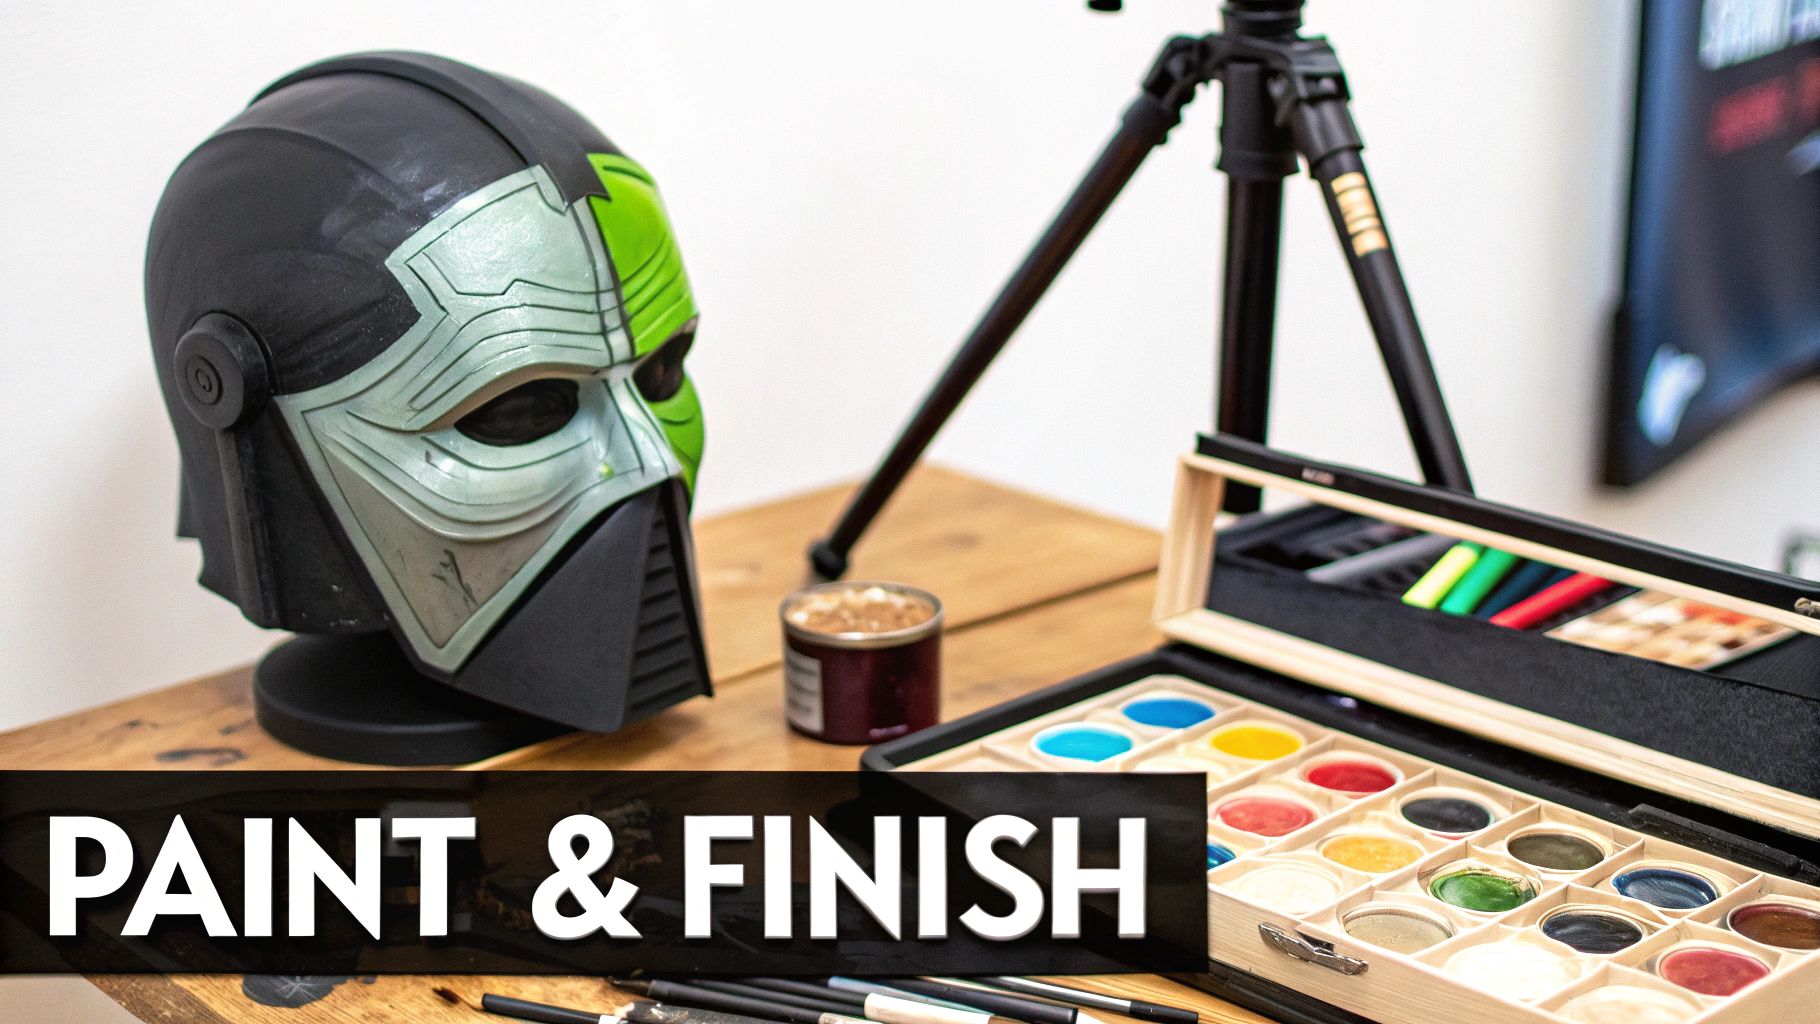
This is where all your hard work comes together. A great paint job can transform a well-built prop into something that looks like it was ripped straight from the screen. It tells a story, hinting at a history of epic battles or ancient magic.
But hold on. Before you even think about cracking open a pot of paint, you have to seal your prop.
This is non-negotiable, especially with EVA foam. Foam is basically a sponge; it will drink up your paint, leaving you with a patchy, uneven mess. Sealing creates a non-porous barrier, giving you a smooth canvas so your colors look vibrant and clean.
You've got a couple of go-to options for sealing foam: spray-on rubber coatings and flexible primers. They both get you to a paint-ready surface, just in slightly different ways.
No matter which route you take, the goal is a perfectly uniform, smooth base. Once it's sealed, hit it with a light coat of primer. A neutral gray is almost always a safe bet—it makes your final colors pop and helps everything stick.
With your prop sealed and primed, it's time to lay down your base colors. For big, sweeping areas, spray paint is your friend for quick, even coverage. But for anything requiring more finesse, you can't beat acrylic paints and a good set of brushes.
Always apply your main colors in thin, even layers. Your first coat might look a little weak or transparent—that’s normal! Building up the color slowly is the key to avoiding drips and achieving a rich, professional finish.
Having a solid grasp of how colors work together is a massive advantage here. If you want to level up your painting game, exploring color basics for makers is a fantastic starting point.
Once those base colors are bone dry, the real fun begins. This is where you add depth, realism, and personality with weathering and fine details. You're turning a clean prop into something that looks like it has a history.
A sword fresh from the factory is fine, but one that looks like it’s seen a few dozen skirmishes? That has character. Weathering is how you get that authentic, lived-in look.
After pouring all that time and effort into your prop, the last thing you want is for your paint job to get scratched to hell at a convention. A final clear coat is the last, crucial step.
Pick a finish that makes sense for the material you’re faking—matte for old wood or leather, satin for most metals, and a high gloss for things like polished gems or a "wet" look. Durability is also a factor. For heavy-duty protection, you could even learn about ceramic coatings, though different materials call for different solutions.
A few light, even coats of a clear spray sealant will lock in your hard work and keep your prop looking incredible from the moment you suit up to the last photo of the day.
Even the most meticulously planned project can hit a snag. It happens to all of us. Here are a few quick answers to some of the most common problems I see people run into, so you can push through those tricky moments and get back to building.
First off, don't panic! A bad cut is rarely a project-ender. We’ve all been there—the knife slips, you get a wavy edge, and suddenly your perfect line is gone.
For small gaps or slightly uneven edges, a flexible filler is your absolute best friend. I personally swear by products like Kwik Seal or similar paintable caulks. You just smooth it into the crack, let it dry completely, and then sand it flush. It creates a surprisingly seamless repair.
If you've made a more significant mistake, like cutting a chunk out by accident, the best solution is often a patch job. Just carefully cut out the messed-up section into a clean shape, then cut a new piece of foam to fit perfectly. Glue it in place, and with a bit of careful sanding, no one will ever know it wasn't perfect from the start.
Ah, the classic "con-crunch" repair. It's practically a rite of passage for cosplayers. The key is being prepared. Always, always pack a small emergency repair kit before you head to an event. It will save you so much stress.
Here’s what I keep in my own on-the-go kit:
With just these three things, you can handle most common prop emergencies and get yourself back on the convention floor in no time.
A quick tip from experience: No prop is indestructible. A small repair kit is your best insurance policy against the bumps, drops, and general chaos of a busy event. Learning how to make props also means learning how to fix them on the fly.
Yes, one hundred percent. You do not need a fortune or a workshop full of fancy thermoplastics to create something amazing. Some of the most impressive props I've seen were made with incredibly humble materials.
EVA foam floor mats are a fantastic, budget-friendly place to start. You can also get surprisingly far with cardboard and paper mache, especially for building up basic shapes and solid structures.
My advice? Spend your money where it counts: a good, sharp craft knife, a reliable adhesive like contact cement, and decent paints. If you can master the core techniques using cheaper materials, you'll be a much more skilled and resourceful prop maker in the long run.
At Famcut.com, we're firm believers that creativity shouldn't have a high price tag. We offer the tools, materials, and guidance to help you bring any cosplay vision to life, no matter the size of your project or your wallet. Check out our selection and get everything you need for your next build today
At High Country Quilts we care deeply about community. With our experiences in retail, we know that a store is not only a place to shop but also a place for the community to gather and share. During this busy...

Hi! We’re Adam and Renee Wheaton, the new owners of High Country Quilts! For more than 40 years, we’ve owned and operated vacuum and sewing businesses. Following in Renee’s father’s footsteps after he retired from All Discount Vacuum and Sewing in Colorado...


Leave a comment