

We Love Our Quilting Community
At High Country Quilts we care deeply about community. With our experiences in retail, we know that a store is not only a place to shop but also a place for the community to gather and share. During this busy...


When it comes to finishing a quilt, the classic method involves a bit of teamwork between you and your machine. You'll first attach the binding to the front of the quilt with your sewing machine, and then wrap that folded edge around to the back to secure it with a nearly invisible hand stitch. This hybrid approach gives you the best of both worlds: the speed of the machine and the polished, heirloom quality of a hand-finished edge.

There’s a certain kind of quiet satisfaction that comes from taking those final stitches on a quilt by hand. While machine binding is undeniably faster, learning how to hand sew quilt binding gives you a level of control and precision that’s tough to match. The reward is a clean, seamless edge where no stitches show on the front, giving your quilt a truly professional look.
For many of us, this final step is a cherished ritual. It’s a meditative process, a chance to slow down and connect with your work one last time before calling it done. This technique is more than just a way to finish the edges; it’s an art form that can elevate your project from a cozy blanket to a future heirloom.
The appeal of this traditional method is easy to understand. Hand sewing creates a soft, flexible edge that holds up beautifully through years of washing and snuggling. It’s also the perfect opportunity to nail those crisp, mitered corners that are the signature of a well-made quilt.
The benefits really speak for themselves:
Even as the global quilting market grows, this appreciation for traditional craftsmanship remains strong. The sewing and quilting market is projected to jump from USD 5.8 billion in 2024 to USD 10.5 billion by 2033. This trend shows just how much people still value those personal, handcrafted details. You can dive deeper into the growth of the quilting industry and its market trends to see how this passion is shaping the craft.
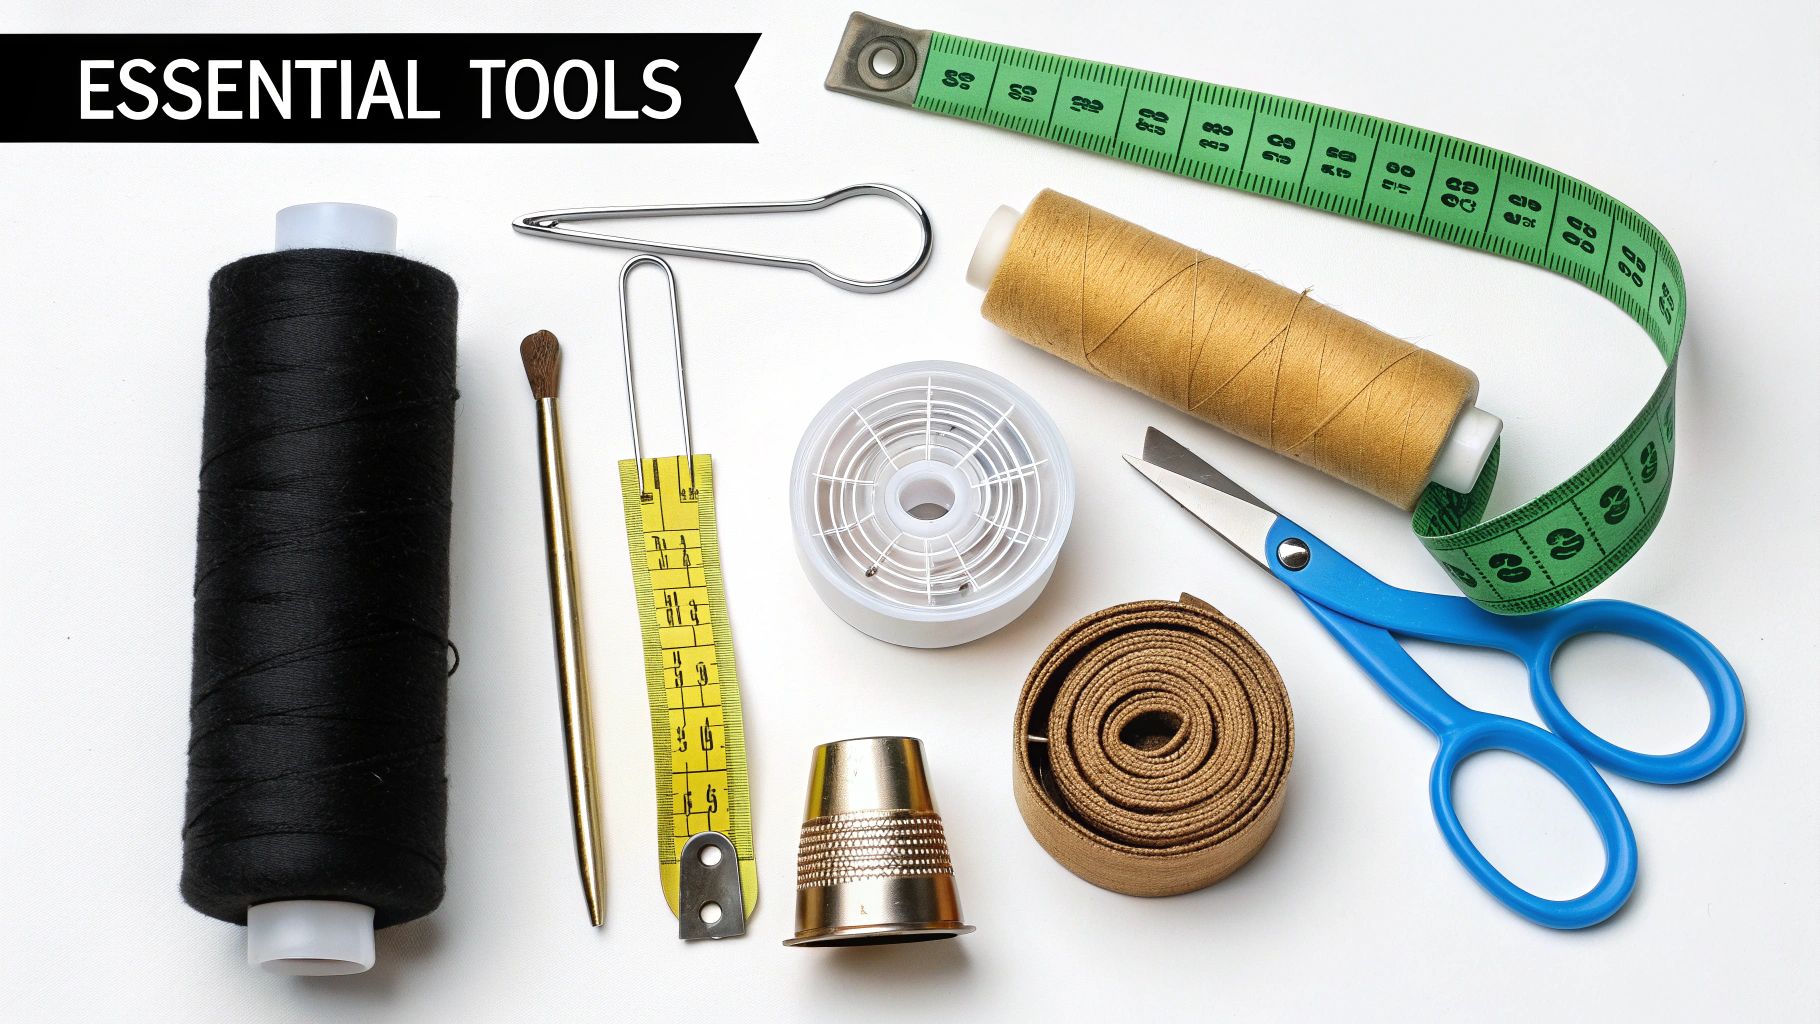
Before you even think about that first stitch, let's talk about setting yourself up for success. Having the right tools on hand can transform binding from a chore into a genuinely relaxing and satisfying finale for your quilting project.
You don’t need an entire craft store, but a few specific, high-quality items will make a world of difference. Getting these details right—from the fabric and thread to the perfect needle—is what gives a quilt that beautifully polished, professional finish.
For binding strips, the gold standard width is 2.5 inches. It's the perfect size to wrap securely around the quilt's edge, giving you a durable finish that isn’t too bulky. To calculate how much fabric you'll need, just measure the perimeter of your quilt (add up all four sides) and then add an extra 12-15 inches. This little bit of extra gives you plenty of room for joining the ends and neatly turning the corners without any stress.
Now, let's talk thread. The right thread is the key to making your hand-stitching practically invisible.
A common rookie mistake is to match the thread to the binding fabric. It seems logical, but this can make every little stitch pop against the quilt back. Matching the thread to the backing is how you get that truly invisible, professional-looking finish.
The right needle will save your fingers—and your sanity. You're looking for something sharp, thin, and easy to handle. Over here at High Country Quilts, we all have our personal favorites, but they all share a few key qualities.
A sharp needle is a must-have. It needs to glide through the multiple layers of your quilt sandwich without a fight.
Finally, a few other notions will make the process much smoother. I highly recommend binding clips instead of pins; they hold everything securely without poking you or leaving tiny holes in your fabric. A good thimble is non-negotiable for protecting your finger, and a little bit of thread conditioner (or even beeswax) works wonders to prevent frustrating tangles and knots.
To make things even easier, here's a quick-reference table of the tools I swear by. Having these items in your sewing kit will make your binding experience so much better.
| Tool | Recommended Type | High Country Quilts Pro-Tip |
|---|---|---|
| Binding Fabric | Quality quilting cotton | Cut on the bias for quilts with curved edges; straight-grain is fine for square quilts. |
| Thread | 50wt cotton | Always choose a color that blends with your backing fabric, not your binding. |
| Needles | Milliner's/Straw Needles (size 10 or 11) | Their slight flexibility helps you "scoop" the fabric for more consistent stitches. |
| Clips | Wonder Clips or similar binding clips | Use a clip every 2-3 inches to keep the binding taut and perfectly aligned as you sew. |
| Thimble | Leather or metal | Find one that fits snugly. It takes getting used to, but it will save your fingertip! |
| Scissors | Small, sharp embroidery scissors | Keep a pair dedicated just to this step for clean, precise thread snips. |
Having these specific tools ready to go means you can settle in, put on some music or a podcast, and really enjoy the final, meditative process of finishing your quilt by hand.
A beautiful hand-stitched finish starts with a perfectly prepped foundation. Before you even think about threading that hand-sewing needle, your binding needs to be made and attached to the quilt with care. This machine-sewing step is what sets you up for success with the final, relaxing handwork.
First things first, you have to decide what kind of binding you need: straight-grain or bias.
If your quilt is all straight lines and sharp 90-degree corners, straight-grain binding is your best friend. You just cut your strips along the fabric's grain. It’s simple, efficient, and doesn't waste fabric.
But, if you've got any curves—scallops, rounded corners, you name it—bias binding is non-negotiable. Seriously. It's cut on a 45-degree angle to the grain, which gives it a natural stretch. This bit of give is what lets it hug those curves smoothly without any weird puckers or stiff folds.
Unless you're binding a potholder, you'll need to join several strips of fabric to get a piece long enough to go all the way around your quilt. The slickest way to do this is with a diagonal seam. This little trick spreads the bulk of the seam allowance out, so you don't end up with a noticeable lump in your finished binding.
Here's how I get that seamless join every time:
Just keep doing this until all your strips are one long, continuous piece. The final prep step is to fold the whole thing in half lengthwise (wrong sides together) and give it a good press. Now you've got a perfect double-fold binding strip, ready to meet your quilt.
Alright, time to attach this binding to the front of your quilt. This machine-sewn step is the anchor for your hand stitching, so you want it to be strong and straight.
I always start sewing somewhere in the middle of one side, leaving a good 8 to 10-inch tail of unsewn binding at the beginning. You'll need this tail later to join the ends neatly. Just line up the raw edges of your folded binding with the raw edge of the quilt top.
Pop on your walking foot—it’s a lifesaver here—and stitch the binding down with a consistent 1/4-inch seam allowance. Sew all the way down the side until you’re exactly 1/4 inch from the corner, then stop and backstitch. (We'll tackle the corners in the next section!)
The part that trips up so many quilters is joining the two ends of the binding into a perfect, continuous loop. My pro tip? Leave yourself a huge gap to work in—at least 15 inches between where you start and stop sewing. It feels like a lot, but it gives you room to maneuver without fighting the whole quilt.
Once you’ve gone around all four sides and are approaching your starting point, stop about 15 inches away, leaving another 8 to 10-inch tail. Now you've got two tails and a gap. Just overlap them, trim them so they overlap by the exact width of your binding (for example, 2.5 inches), and join them with that same diagonal seam method from before.
Once they're joined, the binding should lie perfectly flat in the gap. All that's left is to machine-stitch that open section down. With that, your binding is securely attached and ready to be turned to the back for the fun part: hand sewing.
With your binding machine-sewn to the front, you're ready for the magic. This is my favorite part of the process—where a quilt truly gets its finished, polished look. We'll be using the ladder stitch, sometimes called a slip stitch. It’s the secret behind those beautiful, strong, and completely invisible seams that give a quilt that professional, heirloom quality.
First things first, give the binding a quick press with an iron, folding it away from the quilt top. This little step is a game-changer; it sets a crisp fold that makes wrapping the binding to the back so much easier and neater.
Now, simply fold the binding over the quilt's raw edge. You want the folded edge on the back to just cover the line of machine stitching. I like to use binding clips every few inches to hold it all perfectly in place while I work.
Ready to sew? Start by anchoring your knotted thread inside the binding's fold. Just poke your needle up through the very top edge of that fold. This simple trick hides the knot completely, giving you a clean start.
The ladder stitch has a lovely, meditative rhythm once you get into the groove. You're essentially creating a hidden "ladder" of thread between the two layers of fabric.
Keep this two-step motion going all the way around the quilt. Every few inches, I give my thread a gentle tug. This snugs the stitches up, pulling the binding tight against the backing and making your thread seem to vanish right into the fabric.
The infographic below shows the simple flow for getting your binding ready before you even get to this hand-stitching stage.
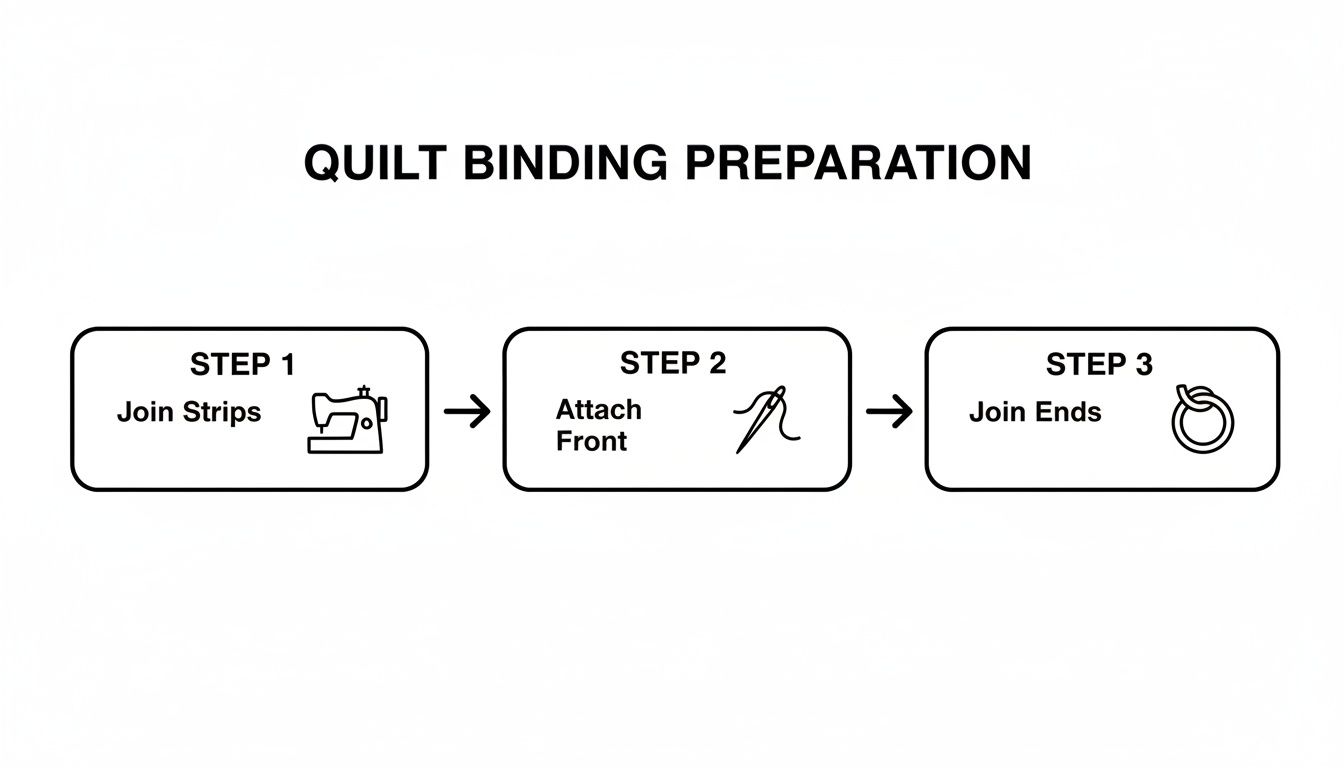
It’s a great reminder that a beautiful hand-sewn finish really starts with a solid, well-prepared foundation.
The real key here is managing your thread tension. You’re aiming for stitches that are snug enough to be invisible but not so tight that the fabric starts to pucker. If you see puckers, you’re pulling too tight. If your stitches are showing, they’re probably a bit too loose.
This kind of mindful handwork has seen a huge resurgence. Hand-finishing a binding became a go-to technique for what felt like everyone during the COVID-19 pandemic, with some industry anecdotes suggesting it became a favorite method for 40% of quilters. There's just something incredibly therapeutic about the quiet, meticulous process. If you're interested in quilting trends, you can explore the quilting market survey results for more insights.
Key Takeaway: The secret to a truly invisible ladder stitch is consistency. Aim for evenly spaced stitches, about 1/4-inch apart, and keep your tension steady. This repetition is what creates a durable seam that just melts right into the fabric.
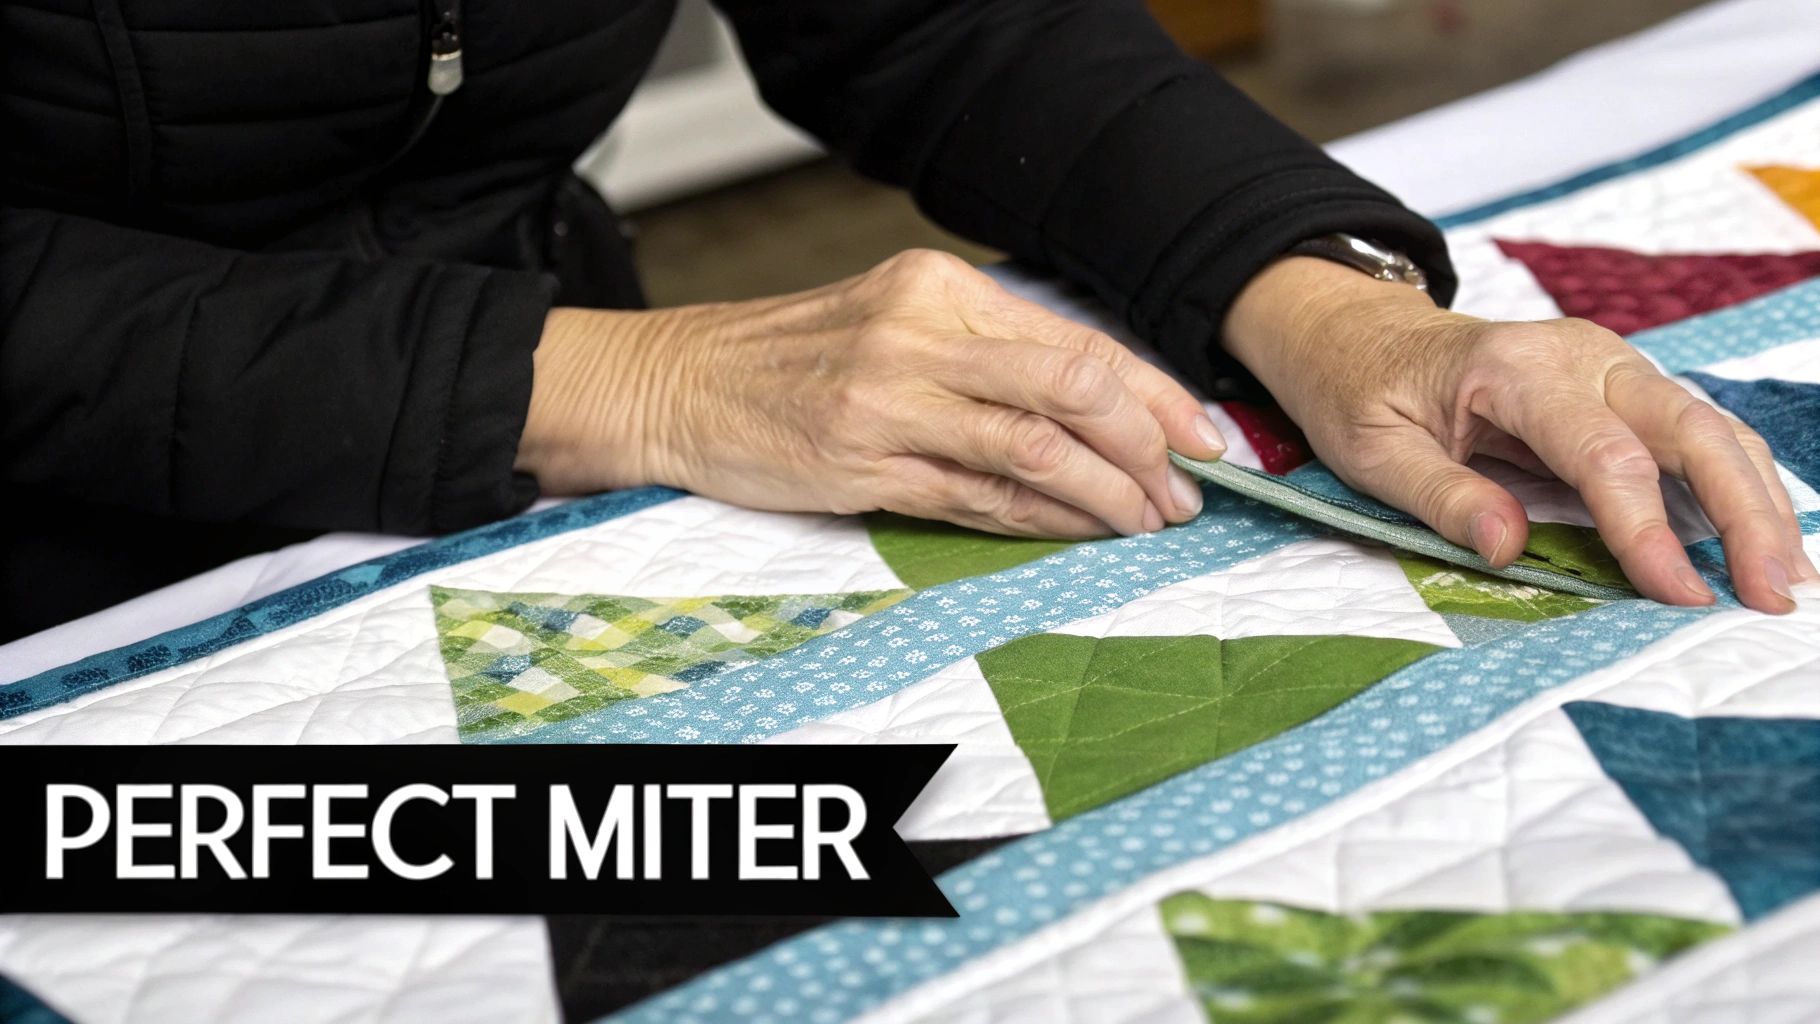
Crisp, flat corners are the true sign of a beautifully finished quilt. I know they can look intimidating, but creating a perfect mitered corner by hand is really just a matter of getting the fold right before you take a single stitch. Once you nail the simple geometry, it becomes second nature.
As you’re hand-stitching down a side with your ladder stitch, stop about an inch before you hit the corner. Don't knot off your thread just yet—let the needle and thread hang loose. This little bit of slack gives you room to work without pulling the fabric tight.
Now, take the unsewn part of the binding strip and fold it straight up, away from the quilt. You're aiming to create a sharp 45-degree angle at the corner. The raw edge of the binding should now form a continuous, straight line with the edge of the next side of the quilt you're about to sew.
Hold that 45-degree fold in place with your finger. Now, simply fold the binding strip straight back down over your finger, making sure its raw edge lines up perfectly with the raw edge of the quilt's next side. This simple up-and-down maneuver is what creates that perfect mitered flap on the front.
Pop a binding clip right on the corner to hold everything securely. When you flip the quilt over to the back, you’ll see the binding is now positioned perfectly. All you need to do is gently tuck and fold the corner fabric to create that same neat miter on the back, and clip it in place.
My secret for a non-bulky miter? It all comes down to that initial fold. When you fold the binding up and then back down, you create a little fabric pocket. That pocket is designed to neatly contain the corner's bulk, which is what allows everything to lie so beautifully flat once you stitch it down.
With your corner all clipped and ready, you can get back to stitching. Continue your ladder stitch right up into the corner, adding a few extra, tiny stitches where the two sides of the binding meet. This just adds a little reinforcement.
Once you turn the corner, your first couple of stitches on the new side are the most important. Make sure you stitch through the mitered fold itself, catching all the layers of fabric inside. This locks the entire corner together and is a crucial step in learning how to hand-sew quilt binding that will actually last.
Proper hand finishing isn't just for looks; it really adds to the quilt's longevity. It’s interesting to see data showing that hand-sewn quilts can retain their shape up to 35% better after washing than fully machined ones. Durability is a big deal, especially since 70% of the quilt market is for home use—a sector that's only getting bigger. You can find more insights on the expanding quilting industry and its trends if you're curious.
If you notice your corner is looking a little puffy, don’t panic. Just use the tip of your needle to gently poke any excess fabric inside the miter before you stitch it closed. Taking a moment for this tiny adjustment is often the difference between a good corner and a great one.
Even after you've got the hang of the ladder stitch and mitered corners, a few nagging questions can pop up. That's totally normal. In quilting, it's often the tiny details that make the biggest impact, so let's walk through some of the most common issues that come up when you're hand-finishing a quilt.
One of the first things people ask is, "What if I mess up or my stitches look wonky?" First off, don't panic! This is where hand-stitching really shines. Unlike a machine-sewn seam, hand stitches are incredibly forgiving.
If you look back and see a stitch that's too loose or a little pucker has formed, you don't have to rip out the whole thing. Just use the tip of your needle to carefully pick out the last few stitches until you get back to the trouble spot. Then, you can simply re-sew that little section, paying attention to your tension and spacing. It's one of the real joys of finishing by hand.
Another area where questions come up is just managing the thread itself. I hear this one all the time: "How long should my thread be?" A great rule of thumb is to use a length of thread that runs from your fingertips to your elbow, which is usually around 18 to 24 inches.
If you go any longer, you're just inviting frustrating knots and tangles. It's so much faster to use a shorter piece and start a new thread occasionally than it is to stop every few minutes to untangle a mess.
When it is time to start a new thread, here's how to do it seamlessly:
Many quilters worry about durability. Is hand sewing really as strong as machine stitching? The answer is a definite yes! A well-done ladder stitch creates an incredibly strong and flexible edge that will hold up to years of cuddling, washing, and general love. In fact, that handcrafted touch is becoming a real mark of quality and sustainability in the quilting community.
This move toward more mindful practices is a big deal. Hand-sewing techniques can cut down on machine energy use by as much as 90% for each quilt you make. And with fabric costs always on our minds, careful hand methods can also reduce fabric waste by around 15%. This all contributes to a quilt's longevity—a carefully hand-bound quilt can easily last 50 years or more, compared to the roughly 20-year lifespan of some machine-finished quilts. You can dig deeper into this trend by checking out these market takeaways on the quilt industry.
A Pro Tip for Puckering: If you notice the fabric around your binding starting to pucker, it's almost always a sign that your stitches are too tight. Try to consciously relax your hands and pull the thread so it's just snug, not stretched taut. Sometimes, just taking a five-minute break can help you reset your tension.
With a little bit of practice, these small troubleshooting fixes will become second nature. Every quilt you bind helps build your muscle memory and confidence, turning these common questions into skills you'll have for a lifetime.
Here at High Country Quilts, we believe every stitch tells a story. Whether you need the perfect fabric for your binding, a new BERNINA machine to speed up your prep, or a class to refine your skills, we are here to support your creative journey. Visit us in Colorado Springs or explore our offerings online at https://hcquilts.com.
At High Country Quilts we care deeply about community. With our experiences in retail, we know that a store is not only a place to shop but also a place for the community to gather and share. During this busy...

Hi! We’re Adam and Renee Wheaton, the new owners of High Country Quilts! For more than 40 years, we’ve owned and operated vacuum and sewing businesses. Following in Renee’s father’s footsteps after he retired from All Discount Vacuum and Sewing in Colorado...


Leave a comment