

We Love Our Quilting Community
At High Country Quilts we care deeply about community. With our experiences in retail, we know that a store is not only a place to shop but also a place for the community to gather and share. During this busy...


Before you can dive into the satisfying rhythm of hand-stitching your quilt binding, you need to set yourself up for success. Gathering the right tools isn't just a preliminary step; it's the foundation for a smooth, enjoyable process and a beautiful, professional finish. Having everything you need within arm's reach prevents frustration and helps you create that heirloom quality you're aiming for.
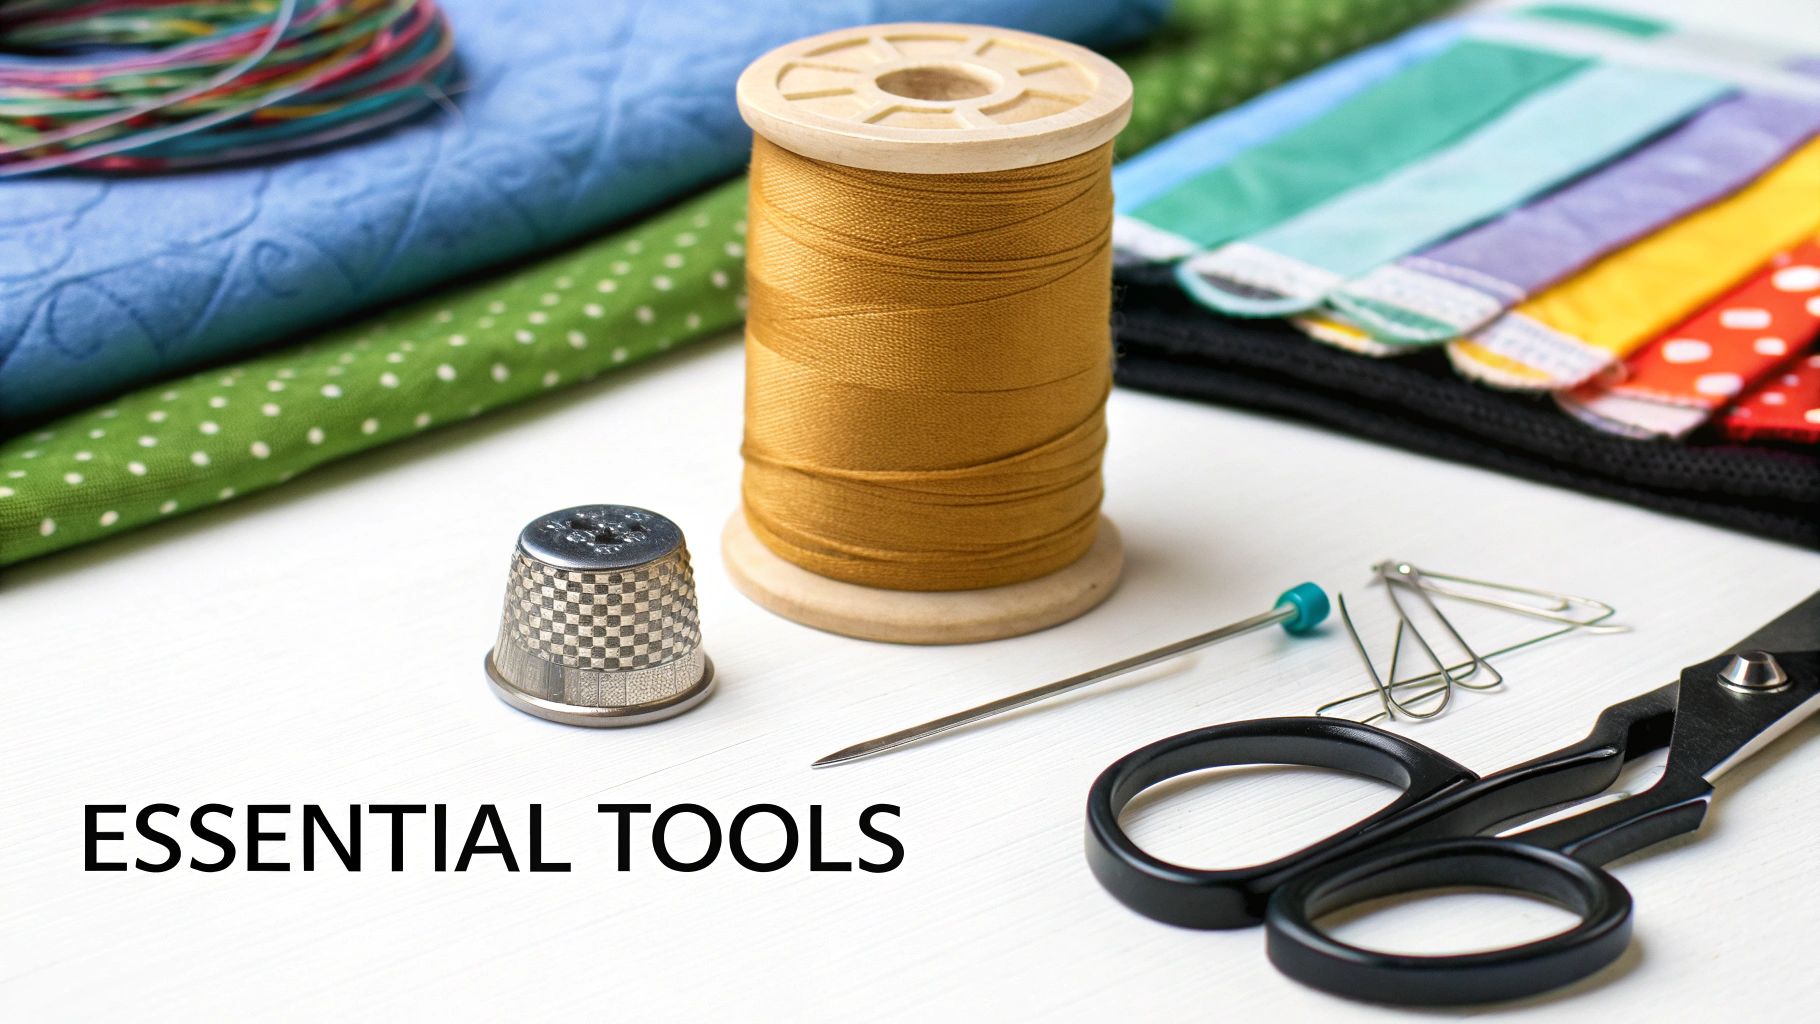
The secret to a great hand-sewing experience isn't about having a massive stash of supplies. It's about having the right ones. While your standard sewing kit has its place, a few specialized items can make a world of difference when you're finishing a quilt.
Your needle is your most important partner in this process. To get those tiny, nearly invisible stitches we all strive for, I always reach for a No. 9 sharp or a similar milliner's needle. They’re slender with a very sharp point, which means they glide through all those layers of fabric without a fight.
Of course, the needle is only half the equation. You'll want to pair it with a good quality 40 or 50-weight cotton thread. This weight is the quilter's standard for a reason—it’s strong enough to last but fine enough to disappear into the fabric. Pro tip: always choose a thread color that matches your quilt backing, not the binding, as this will help your stitches become even more inconspicuous.
Keeping your binding folded over and perfectly in place while you stitch is non-negotiable. While classic pins will get the job done, many quilters (myself included) have become converts to quilting clips.
For a throw-sized quilt or larger, I’d recommend having at least 50-100 clips. This lets you secure an entire side at once, making sure nothing shifts out of place as you stitch your way around the perimeter.
A few final items will round out your toolkit and save you a lot of grief. First, a quality thimble is an absolute must. It protects your finger from the constant pressure of pushing the needle through thick layers, allowing you to sew comfortably for hours.
And never, ever underestimate the power of a pair of sharp scissors or a fresh blade in your rotary cutter. Clean, precise cuts are everything, from preparing your initial binding strips to trimming the quilt sandwich. Starting with perfectly neat edges makes the entire binding process so much easier and gives you those crisp, mitered corners you want.
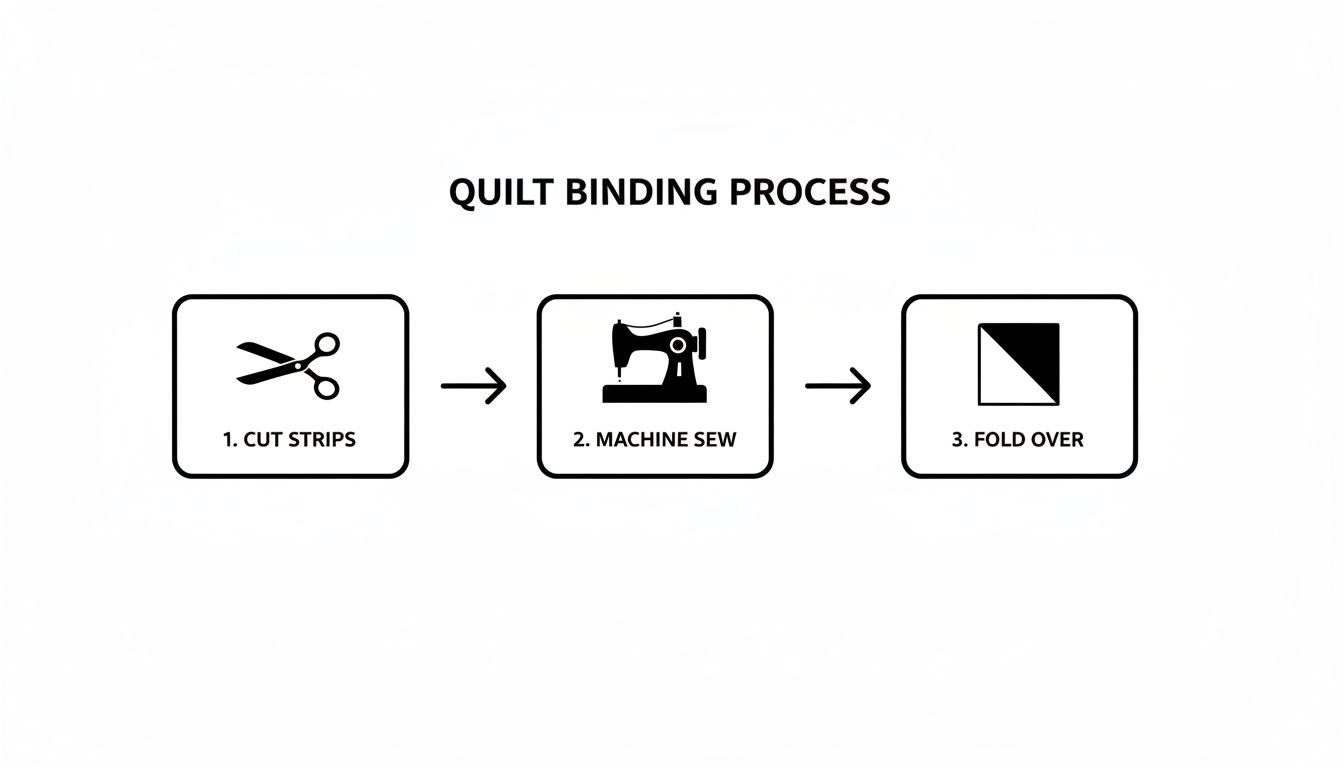
A gorgeous hand-sewn finish really starts with a solid foundation. Before you even think about threading that hand-sewing needle, the most important step is to attach your binding to the front of the quilt with your sewing machine. This machine-first approach gives you a straight, stable edge that makes the hand-stitching part so much easier and look way more professional.
First things first, let's figure out how much fabric you'll need. Just measure the full perimeter of your quilt (add up all four sides) and then add an extra 15 inches to that number. Trust me, you'll be glad you have this little bit of wiggle room for joining the ends and getting around the corners without a panic.
Precision here will save you headaches later. For most quilts with straight edges, cutting your strips 2.5 inches wide along the straight of grain is the gold standard.
But what if your quilt has scalloped or curved edges? In that case, you'll need to cut your strips on the bias—that’s at a 45-degree angle to the grainline. This gives the fabric just enough stretch to hug those curves beautifully without any puckering or pulling.
To make one long, continuous binding strip, you'll join your smaller strips together with a diagonal seam. Here’s my go-to method:
This little trick creates a much less bulky seam than a straight one, spreading the fabric out so you don't get a noticeable lump in your finished binding. Once all your strips are joined, press the entire long piece in half lengthwise with the wrong sides together. Now you’ve got a perfect double-fold binding, ready to go.
With your binding prepped and pressed, it's time to head to the machine. Line up the raw edges of your binding with the raw edge of your quilt top. Make sure to leave a tail of about 8-10 inches loose before you start sewing—you'll need this for joining the ends later.
I can't recommend a walking foot enough for this step. If you have one, use it! Sew the binding down with a consistent 1/4-inch seam allowance. A walking foot is a total game-changer because it pulls the top and bottom layers of your quilt sandwich through the machine at the same speed, which stops any annoying shifting or stretching.
This is the tried-and-true method that sets you up for success. It’s actually rooted in quilting history, where quilters prepared 2 to 2.5 inch strips and sewed them to the front before hand-finishing the back. Today, it’s pretty much the standard. Some estimates suggest that 60% of quilters who hand-bind their heirloom projects use this machine-first technique, and it's easy to see why. It can result in up to 30% greater durability through wash cycles compared to fully machine-bound quilts. You can discover more about the rich history of quilting techniques to see how these methods have evolved over time.
My Pro Tip: The whole point of this machine-sewing step is to create a perfectly straight, secure anchor for your hand stitching. Take your time and keep that seam allowance consistent. Your future self will thank you when the hand-sewing part feels like a breeze and the result is a beautifully clean finish.
The width you cut your initial strips determines the final look of your binding. A wider binding can create a bold frame, while a narrower one offers a more delicate finish. Here's a quick guide to help you decide.
| Starting Strip Width | Finished Binding Width (approx.) | Best For |
|---|---|---|
| 2 inches | 1/4 inch | Delicate, antique-inspired look, wall hangings |
| 2.25 inches | 3/8 inch | A popular modern, slightly narrower look |
| 2.5 inches | 1/2 inch | The most common "standard" size for all quilts |
| 2.75 inches | 5/8 inch | A slightly bolder, more substantial frame |
Ultimately, the choice is yours! Don't be afraid to experiment on a small practice piece to see which width you prefer for your project.
Nothing says “expertly finished quilt” quite like a crisp, clean mitered corner. They can look a bit tricky, I know, but getting that perfect 45-degree angle is actually a simple process once you nail the technique. Let’s turn what can be a point of stress into something you can do with total confidence.
The secret to a great mitered corner starts when you’re machine-sewing the binding to the front of your quilt. As you sew toward a corner, you need to stop at just the right moment.
Stop sewing exactly 1/4 inch from the edge of the quilt. I always backstitch here just to lock those stitches in, then take the quilt out from under the needle.
Now for the magic folding part.
Take the binding strip and fold it straight up, away from the quilt, so it creates a sharp 45-degree angle right at the corner. The raw edge of the binding you just folded should now make a perfectly straight line with the raw edge of the next side of the quilt.
Holding that first fold in place, bring the binding strip straight back down over itself. Line up its raw edge with the raw edge of the quilt side you're about to sew. That first fold is now tucked neatly underneath, creating a little fabric triangle that forms the miter.
Pop a quilting clip or a pin on there to keep it all from shifting. Now you can get back to your machine. Start stitching right at the top edge of that fold and continue down the next side, keeping that consistent 1/4-inch seam allowance. That little two-step fold is the entire trick to a perfect miter on the front.
Okay, your binding is attached, and you're ready to start the relaxing part: the hand sewing. As you slip stitch along the back and get close to a corner, take your last stitch just before you hit the corner seam itself. Now it's time to create that beautiful miter on the back.
Here’s how I get a perfect miter every time on the back side:
Pro-Tip: I keep a stiletto or a turning tool handy for this part. Before I take that first stitch, I gently poke the fabric in the corner to make sure it's a sharp point. It helps get rid of any bulk and ensures the corner lays beautifully flat for that truly professional look.
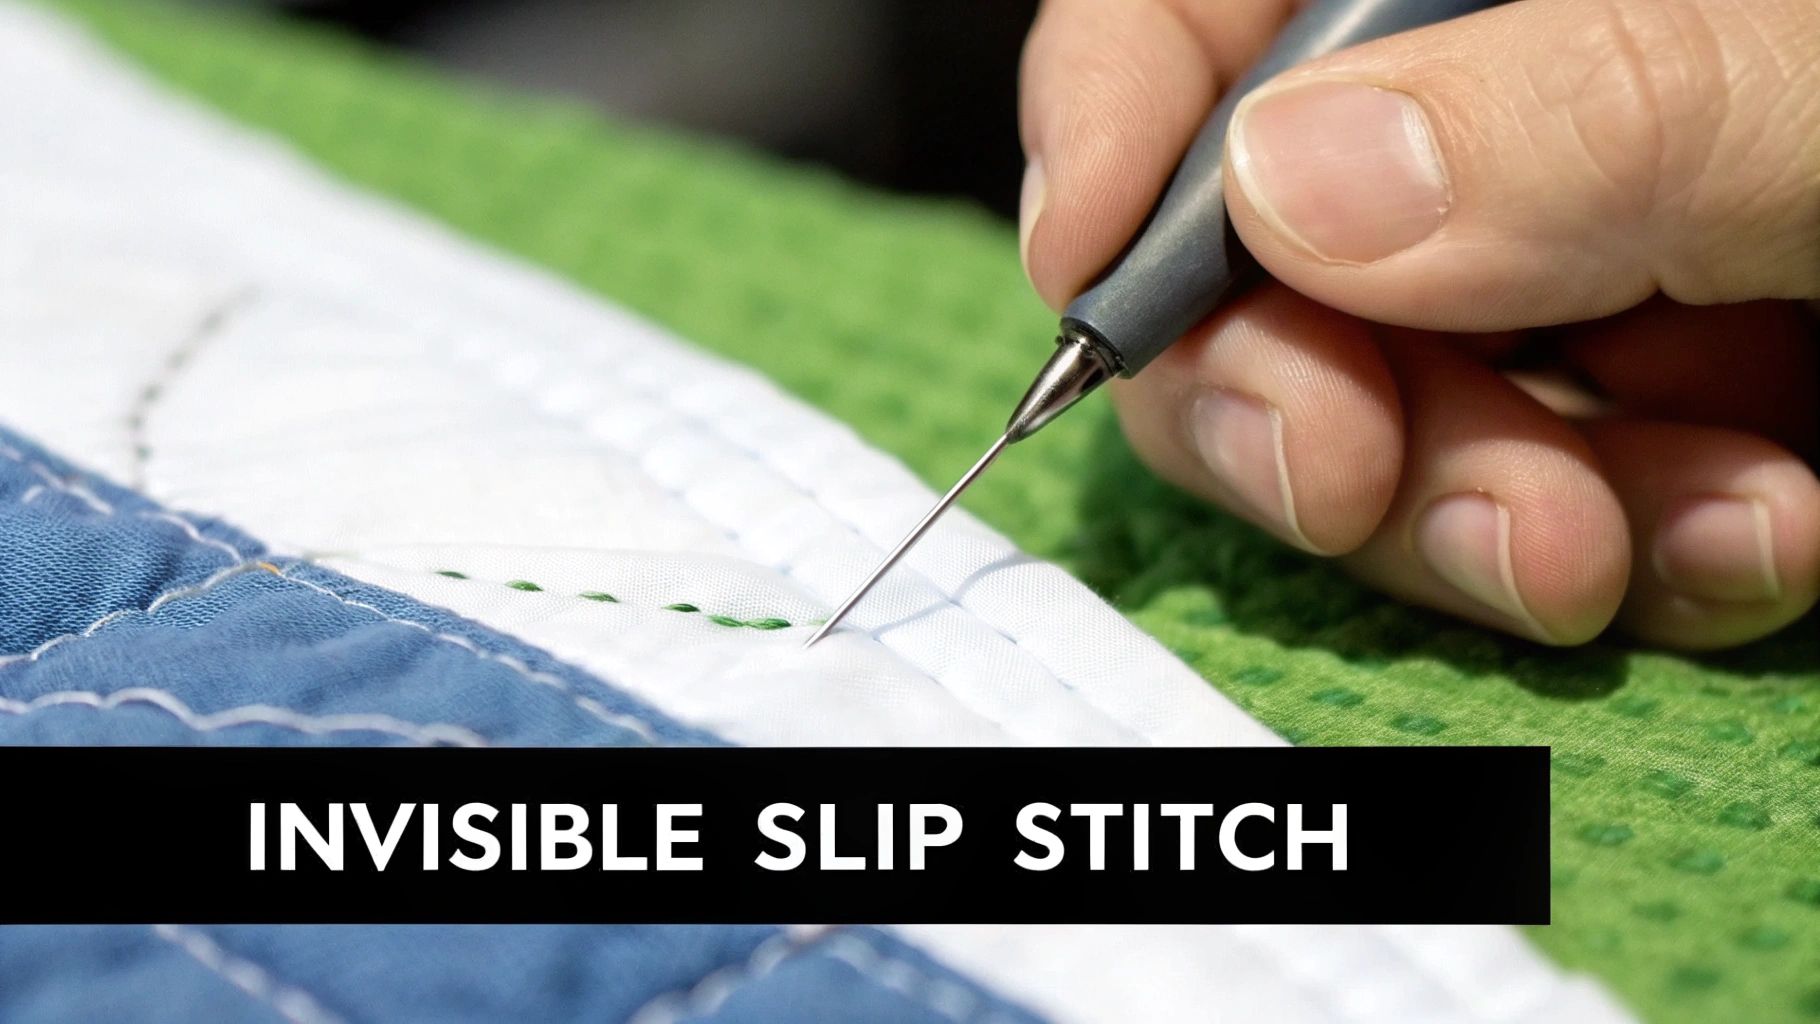
This is where the magic happens. All your hard work comes together in these final stitches, creating that beautiful, heirloom finish that makes a quilt truly special. For this, we turn to the classic slip stitch, sometimes called a ladder stitch. It’s a quilter’s best friend because it anchors the binding to the quilt back with a strong, secure, and practically invisible seam.
So, what makes it so special? Unlike a whipstitch that wraps over the fabric edge, the slip stitch cleverly travels inside the fabric folds. It’s this subtle difference that transforms a quilt from simply handmade to professionally finished. Settle in, because this rhythmic, meditative process is the final act of love you'll give your quilt.
First things first, let's get your thread ready. Cut a single strand about 18 inches long—I find the distance from my fingertips to my elbow is a good measure. Anything longer tends to get tangled, which is just frustrating. Tie a small, secure quilter's knot at the end.
Now, we need to bury that knot so it never sees the light of day. On the back of your quilt, tuck your needle under the folded edge of the binding. Guide it inside the fold for about a quarter of an inch, then bring the needle out. Give the thread a gentle tug, and you’ll feel the knot pop into the binding, hidden away perfectly.
Once you find your rhythm, the slip stitch is wonderfully simple. You’re basically creating a hidden "ladder" of thread between the two layers of fabric.
Here’s the motion:
Keeping your stitches small and even is the key. I always aim for about 10-12 stitches per inch. This creates a tough, durable edge that will hold up beautifully through years of snuggling and washing. It’s that little bit of extra care that makes all the difference.
This isn't some new-fangled technique; it has deep roots in quilting history. Early quilters perfected stitches like this out of pure necessity to make sure their quilts survived cold winters. It’s no surprise that the National Quilt Museum reports 85% of quilters still prefer hand-sewn bindings for their competition quilts, all for that control and flawless finish. Today, you can even find places like Famcut.com in Atlanta offering classes that blend these time-honored methods with modern tools. You can learn more about quilting's incredible journey from medieval necessity to modern art form by exploring its rich history.
The best part about the slip stitch is how forgiving it is. As long as you take your time, your stitches will melt into the fabric and disappear. You’re not just finishing a quilt; you're creating a clean, polished edge that looks just as good on the back as it does on the front, ensuring it will be treasured for years to come.
The final hurdle in finishing your quilt is joining the beginning and end of the binding strip. Getting this right is what creates that flawless, continuous look that truly elevates your work. It can feel a little intimidating, I know, but with a clear plan, you can create a join so neat, you’ll have trouble finding it later.
We’ll walk through a couple of my favorite methods. The first is a simple overlap, which is perfect for your first few projects. The other is a more polished diagonal seam that gives you a truly invisible finish.
If you're new to hand-sewing quilt binding, this method is a fantastic confidence builder. It’s wonderfully straightforward and gets the job done without any fuss.
As you stitch your binding almost all the way around your quilt, stop sewing when you have a gap of about 10-12 inches left. This will leave you with two long “tails” of binding—one from where you started and one from where you stopped.
This does create a slightly thicker spot on the quilt's edge, but it's a quick and really effective way to finish up.
For a completely seamless look, the diagonal seam is the gold standard. It perfectly mimics the diagonal seams you used to join your initial binding strips, which helps distribute the bulk for a perfectly flat and professional finish.
You’ll start with the same 10-12 inch gap and two tails.
Lay the starting tail flat along the quilt edge. Now, take the ending tail and lay it directly over the top of the starting tail. The trick is to figure out exactly where to cut. Trim the top (ending) tail so it overlaps the bottom (starting) tail by the exact width of your binding strip. So, if you used 2.5-inch strips, that overlap needs to be precisely 2.5 inches.
This precise measurement is the absolute key to success. Don't try to eyeball it! Grab a clear quilting ruler to get it just right, otherwise you risk a join that's either too tight and puckers, or too loose and looks baggy.
Now, open up both tails and place them right sides together, forming a 90-degree angle—just like when you first pieced your binding. Mark a diagonal line from corner to corner and sew right on that line.
Before you trim anything, do a quick "test fit." Gently fold the binding into place along the quilt edge to double-check that it fits the remaining gap perfectly. If it looks good, trim the excess fabric, leaving a 1/4-inch seam allowance, and press the seam open.
All that's left is to fold the binding back into its double-fold shape, align it with the quilt edge, and stitch that final section closed. Just like that, your binding is a perfect, continuous loop.
Even with the best instructions, you’re bound to have a few questions as you sit down with your needle and thread. That's a normal part of the process! Let's walk through some of the most common questions quilters have when they're first tackling hand-sewn binding.
With a perfectly good sewing machine sitting right there, why take the time to hand sew? For many quilters, it comes down to the final look and feel. Hand-sewing creates an incredibly soft and pliable edge because you don’t have that stiff line of machine stitching on the back. It’s a traditional technique that produces a true heirloom-quality finish, and that extra time spent is often what makes a quilt feel truly special.
Help! My stitches are showing on the front!
This is probably the most frequent frustration for beginners, but the fix is simple. If your stitches are visible on the front of your quilt, you're almost certainly taking too big of a "bite" into the quilt backing with your needle.
Think tiny. You only need to catch a thread or two of that backing fabric to create a strong, secure stitch. By keeping your stitches shallow, they'll disappear completely, giving you that coveted invisible finish.
What about quilts with curved or scalloped edges?
Binding a non-traditional edge can feel intimidating, but the secret is all in the prep work. For any edge that isn't a straight line, you absolutely must use bias binding. Fabric cut on the bias has a natural stretch that a straight-grain cut just doesn't. This stretch is what allows the binding to hug those curves and corners smoothly, without any awkward puckers or folds.
The gold standard for a traditional finish involves using 2.5-inch wide fabric strips, yielding a 3/8-inch finished binding. This process, taught to hundreds of students yearly, relies on an invisible slip stitch to create a durable, beautiful edge.
It's a fair question—can tiny hand stitches really hold up? The answer is a resounding yes. A well-executed hand-sewn binding is often even more resilient than its machine-sewn counterpart.
Believe it or not, durability tests have shown that hand-bound quilts can endure over 500 washes, significantly more than the roughly 300 washes a typical machine-bound quilt can handle. The small, flexible hand stitches can absorb stress and movement without breaking. Reinforcing this, a 2022 survey revealed that 75% of over 10,000 art quilters use hand-binding specifically for its superior finish and impressive longevity. You can explore more about the strength and history behind these techniques by checking out these insights from quilting traditions.
At Famcut.com, we're passionate about helping you master every step of your creative journey. Whether you need high-quality materials for your next quilt or expert-led classes to refine your skills, find everything you need at https://famcut.com.
At High Country Quilts we care deeply about community. With our experiences in retail, we know that a store is not only a place to shop but also a place for the community to gather and share. During this busy...

Hi! We’re Adam and Renee Wheaton, the new owners of High Country Quilts! For more than 40 years, we’ve owned and operated vacuum and sewing businesses. Following in Renee’s father’s footsteps after he retired from All Discount Vacuum and Sewing in Colorado...


Leave a comment