

We Love Our Quilting Community
At High Country Quilts we care deeply about community. With our experiences in retail, we know that a store is not only a place to shop but also a place for the community to gather and share. During this busy...


Welcome to the world of free motion quilting, or FMQ as you'll often hear it called. This is where you get to turn your sewing machine into a paintbrush and literally 'draw' with thread. The magic happens when you lower your machine's feed dogs and pop on a special darning or free motion foot. This simple change gives you complete control to move the fabric in any direction, creating designs that are entirely your own.
This guide is designed to walk you through everything, from setting up your machine to stitching with confidence.
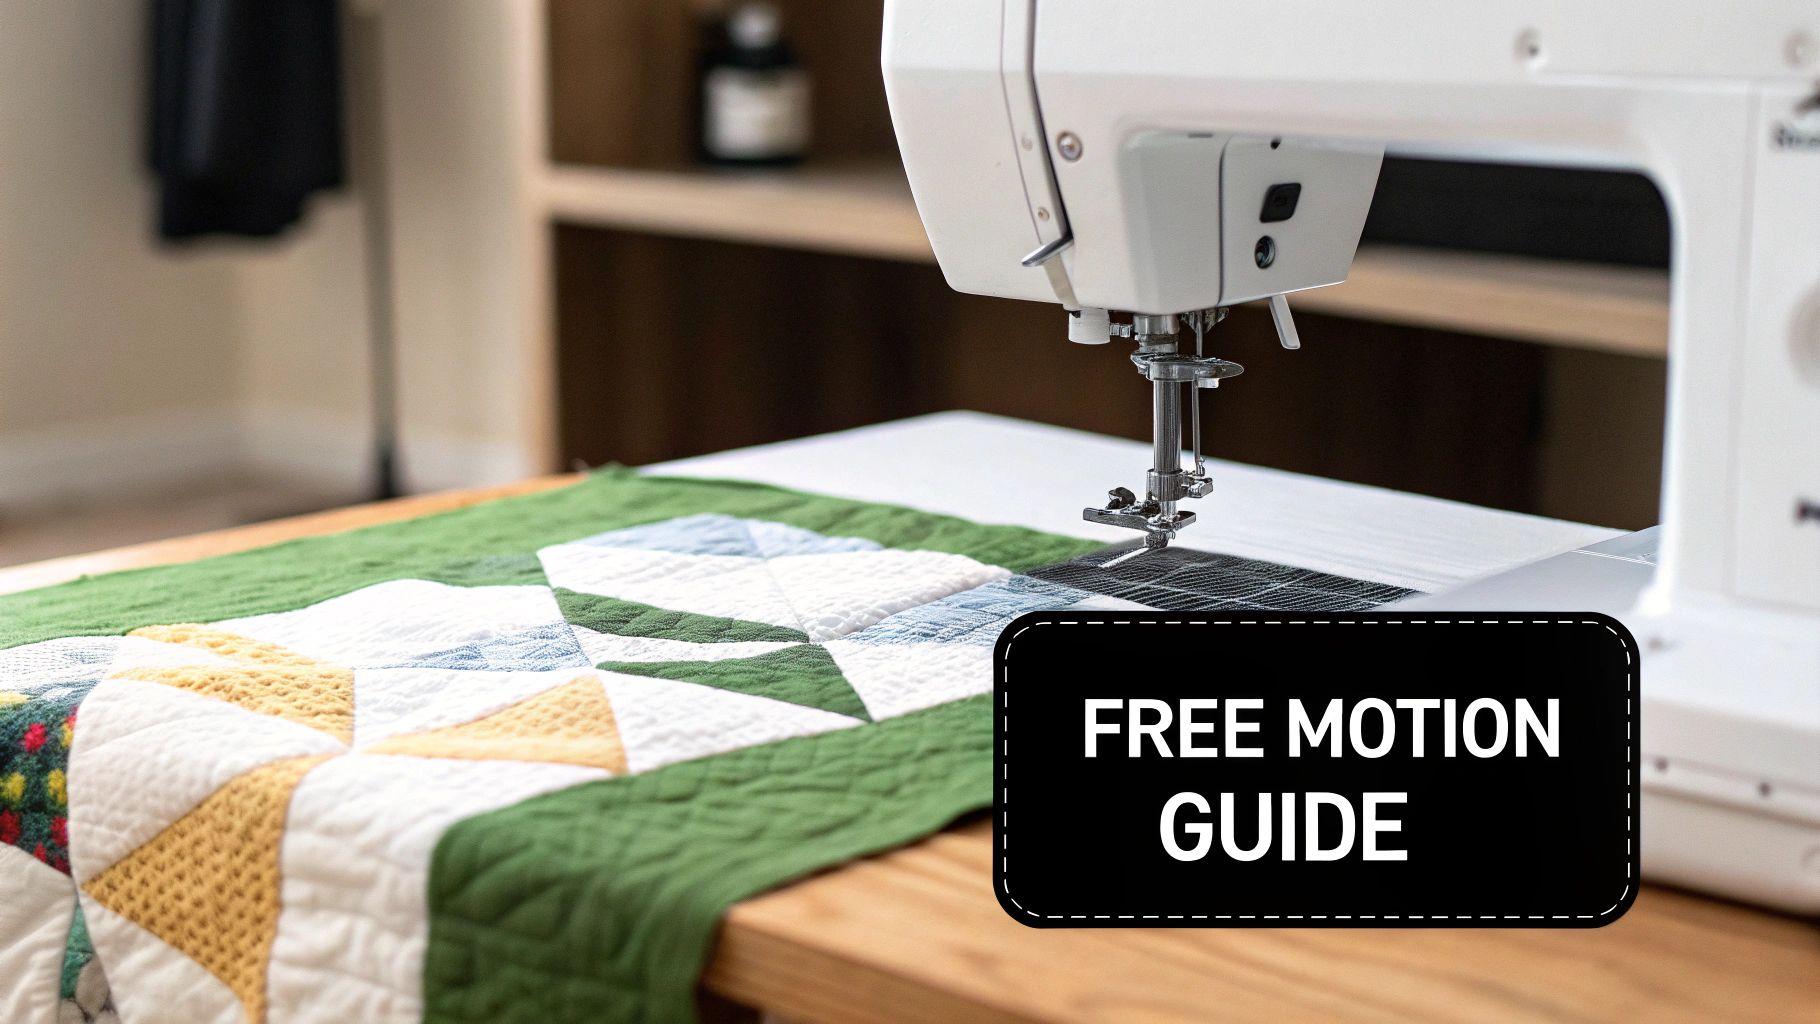
At its heart, free motion quilting is the art of stitching through all three layers of your quilt sandwich—the top, batting, and backing—on a sewing machine. But instead of the machine pulling the fabric forward, you are the one guiding it. This is what adds that incredible, personal touch that simple piecing can't match, turning a beautiful quilt top into a true work of art.
One of the best things about FMQ is that you don't need a fancy, expensive machine to start. Most standard home sewing machines are more than capable, making this a fantastic skill for quilters of all levels to pick up.
Quilting has a deep and fascinating history, but the ability to do it with this much freedom on a home machine is a relatively modern invention. The quilting boom of the 1970s really pushed innovation forward, changing how people approached the craft. Before then, quilts were often machine-pieced, but the actual quilting was a slow, painstaking hand process. Think about it: a Victorian crazy quilt could take up to 1,500 hours of hand-stitching! FMQ completely changed the game, slashing the time it took to finish a quilt without sacrificing the artistry. You can find some great background on sewing's impact on quilting over at suzyquilts.com.
Free motion quilting is more than just a finishing step; it's a way to infuse your personality directly into the fabric, making every quilt truly your own.
I've designed this tutorial to take the mystery out of free motion quilting and help you build real confidence. It doesn't matter if you're holding a quilt sandwich for the first time or just want to brush up on your technique—there's something here for you.
Here's a quick look at what we'll cover:
This whole process is about practice and patience. If you feel like you need to solidify your basic machine skills first, exploring some free sewing lessons can give you a fantastic foundation.
Alright, let's get started on turning those beautiful quilt tops into finished treasures.
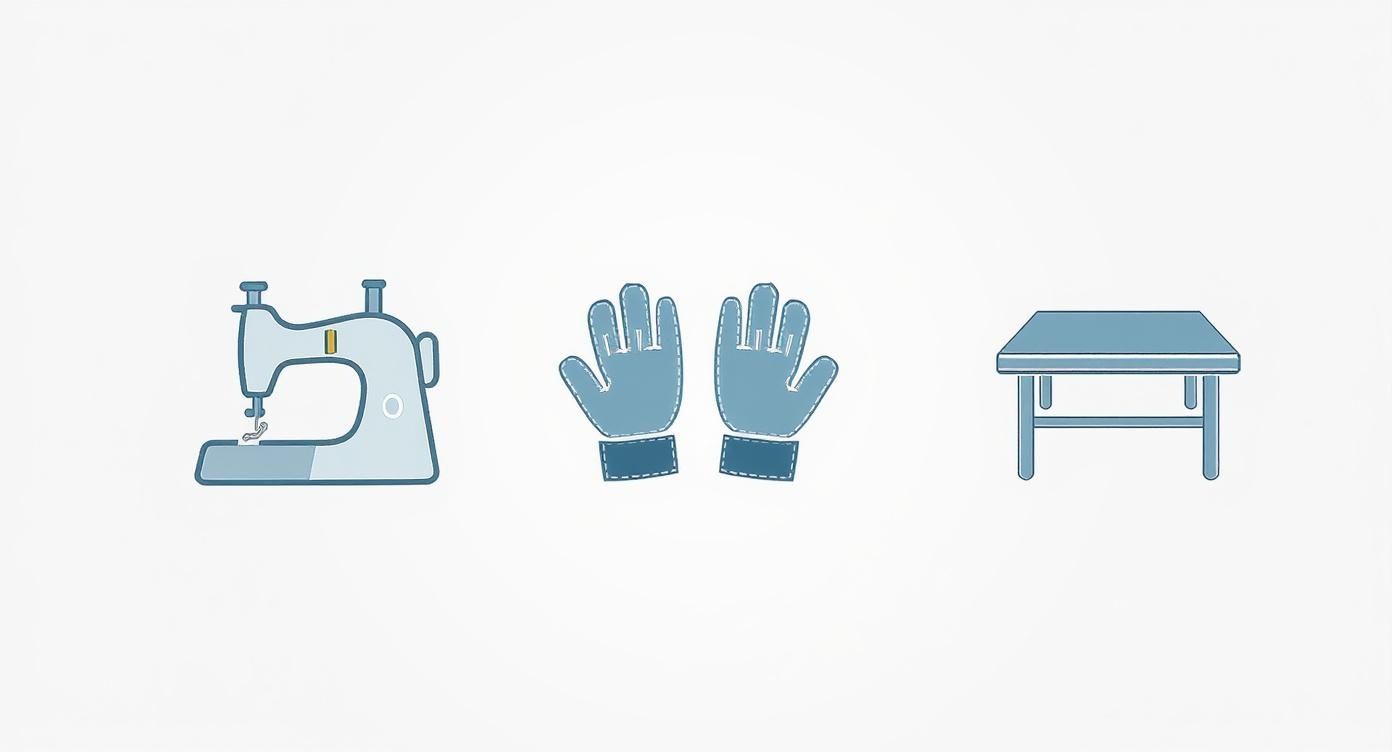
Before you can start "drawing" with your thread, you’ve got to get your toolkit in order. Honestly, having the right gear on hand is probably the biggest factor in setting yourself up for a smooth, enjoyable quilting session. Think of it as your pre-flight checklist—getting these items sorted out first prevents a whole world of frustration later.
The good news? You don't need to go out and buy a brand-new, top-of-the-line machine. Most of the essentials are simple add-ons to the sewing machine you already know and love. Let's walk through the non-negotiables and the "nice-to-haves" that really make a difference.
Your standard presser foot is designed to do one thing really well: hold the fabric flat while the feed dogs pull it through. For free-motion quilting, we need to do the exact opposite. That’s where a free-motion quilting foot, sometimes called a darning foot, becomes your best friend. It's an absolute must-have.
This special little foot hovers just above the fabric. It gives just enough pressure to help form a perfect stitch when the needle is down, but it lifts right back up with the needle. This simple action is what allows you to move your quilt in any direction you want—sideways, backward, or in those beautiful, graceful curves.
You'll find a few different styles out there:
If you’re just starting, you can't go wrong with a simple open-toe foot. It’s a fantastic, versatile option that will serve you well for most projects.
Trying to move a bulky quilt sandwich smoothly under the needle can feel incredibly awkward at first. It's common for your hands to slip, which leads to jerky movements and those dreaded uneven stitches. This is precisely why so many quilters swear by their quilting gloves. They are a total game-changer.
These aren't your average garden gloves. They're made of thin, breathable fabric and feature fantastic grippy material on the fingertips. That extra grip lets you guide the quilt with a much lighter touch, which reduces the strain on your hands, shoulders, and back. You’ll be stunned at how much more control you have over tiny details and long, flowing curves.
Pro Tip: Look for gloves that fit snugly but aren't tight. You want them to feel like a second skin so you can still feel the fabric and maintain that tactile connection to your work.
To quilt comfortably for any length of time, you need a large, flat surface. When part of your quilt hangs off the edge of your sewing table, its weight creates drag. You end up constantly fighting against that pull, and that drag is a major cause of wonky stitches and sore muscles.
An extension table is the perfect solution. It's a flat acrylic or plastic surface that fits right around your machine's free arm, creating a single, large, level workspace. Your quilt just glides over it, making your job of guiding it so much easier. No extension table? No problem. In a pinch, you can stack up books or large quilt rulers around your machine to create a similar effect.
Before we move on, let's quickly recap the must-have supplies. I've put together a simple checklist to help you get started.
| Tool | Primary Function | Why It's Important |
|---|---|---|
| Free-Motion Quilting Foot | Allows multi-directional movement | Essential for moving the quilt freely without feed dogs. |
| Quilting Gloves | Provide grip and control | Reduces hand fatigue and helps guide the quilt smoothly. |
| Extension Table | Creates a large, flat surface | Prevents drag from the quilt's weight, ensuring even stitches. |
| Quilting/Topstitch Needles | Piercing multiple layers cleanly | Prevents skipped stitches, shredded thread, and fabric damage. |
| High-Quality Thread | Forms strong, beautiful stitches | The right weight and material ensure durability and aesthetics. |
Having these items ready will make your first steps into free-motion quilting feel less intimidating and a lot more fun.
The final pieces of your free-motion puzzle are your needle and thread. Don't underestimate them! These small components have a massive impact on how your stitches look and how well your quilt holds up over time.
For needles, it's time to step away from the universal ones. Look for needles specifically labeled Quilting or Topstitch in sizes like 80/12 or 90/14. They have a stronger shaft and a slightly rounded point designed to pass through all those layers without shredding the fabric or your beautiful thread. My number one rule? Always start a new quilting project with a fresh needle!
Thread choice is just as critical. A good quality 40 or 50-weight cotton thread is the go-to standard for most quilting. It’s strong enough to last but fine enough to blend beautifully into your quilt top. For really delicate work or micro-stippling, a lighter 60-weight cotton thread can create a stunning, subtle texture.
With the craft's popularity booming—there are now an estimated 21 million quilters worldwide—the availability of high-quality materials has never been better. It's part of what has allowed this beloved art form to grow and flourish.
A successful free-motion quilting project starts long before you make the first stitch. Trust me, taking the time to set up your machine and properly assemble your quilt sandwich is the secret to avoiding those all-too-common headaches like puckered fabric and wonky stitches. Think of it as building a strong foundation.
First things first, let's get your sewing machine ready. With free-motion quilting, you're in charge of moving the fabric, not the machine. To do that, you need to get the feed dogs—those little metal teeth that normally pull your fabric forward—out of the picture.
On most modern machines, there's a simple switch or lever that drops them down. If you're working on a vintage machine, you probably have a little cover plate that you can snap right over them. Not sure where to find it? Your machine's manual is your best friend here.
Once the feed dogs are down, the next non-negotiable step is to swap out your standard presser foot for a free-motion quilting foot (sometimes called a darning foot). This foot is a game-changer. It hovers just above the fabric, giving you the freedom to glide your quilt in any direction you want—sideways, backward, or in beautiful, sweeping curves.
Finally, you need to tackle the stitch length setting. Since your hands and the machine's speed will now determine the length of each stitch, you should set the machine's stitch length to zero. This tells the machine to back off and lets you take full creative control.
This infographic gives a great visual breakdown of the key adjustments you'll want to make.
It really highlights how the right foot, gloves for grip, and a supportive table work together to make the whole process smoother and put less strain on your body.
With your machine prepped and ready, it's time to build your "quilt sandwich." This is just the quilter's term for the three layers that make up your project.
Here's what you'll be working with:
The absolute key to a smooth, pucker-free finish is making sure these three layers are secured together without any wrinkles or slack. We call this process basting. A poorly basted quilt is a recipe for frustration, as the layers will shift and bunch up under the needle.
I can't stress this enough: a well-basted quilt is the single most important thing you can do to prevent puckers. Take your time with this step. You'll be so glad you did when your quilt glides effortlessly under the needle.
There are a few solid ways to baste your quilt, and the best one for you often comes down to personal preference and the size of your project.
Pin Basting
This is the old-school, tried-and-true method using special curved safety pins. The curve makes them much easier to pop open and closed without disturbing your layers. To do it right, start from the center and work your way out, placing pins about a hand's-width apart (roughly 4-5 inches) all over the quilt. It's a reliable and reusable method, but I'll admit, it can be tough on the fingers and takes a while.
Spray Basting
For a much faster approach, you can use a temporary spray adhesive. You just lightly spray the batting, smooth on your quilt top, and then do the same on the other side with the backing. It’s incredibly quick and means you won't have to navigate around pins as you quilt. The main drawbacks are the ongoing cost of the spray and the need for a well-ventilated space to work.
Fusible Basting
Another great option is to use a fusible batting, which has a light, heat-activated adhesive on both sides. You just layer everything up, press it with an iron, and the layers fuse together. This creates a really secure hold with zero pins or spray fumes. Products like Hobbs Heirloom 80/20 Fusible Batting are fantastic because they offer great stability while still feeling soft, making it a perfect choice if you want to be absolutely sure your layers won't budge.
No matter which method you pick, the technique is the same: always start in the middle and smooth outward. This pushes any potential wrinkles or air bubbles to the edges. With a perfectly prepped machine and a securely basted quilt, you are ready to start stitching
Okay, this is where the magic really begins. All that prep work was leading up to this moment—where you stop setting up and start stitching. The big goal here isn't perfection, but finding a comfortable, natural rhythm.
Think of it like a dance between your hands and your machine's needle. You want to sync their speeds perfectly. When they move in harmony, you'll get gorgeous, even stitches. But if your hands are racing and your needle is plodding along, you’ll end up with long, loopy stitches. And if the needle is flying but your hands are stuck in the mud? You’ll create tiny, dense little knots. Finding that sweet spot is everything.
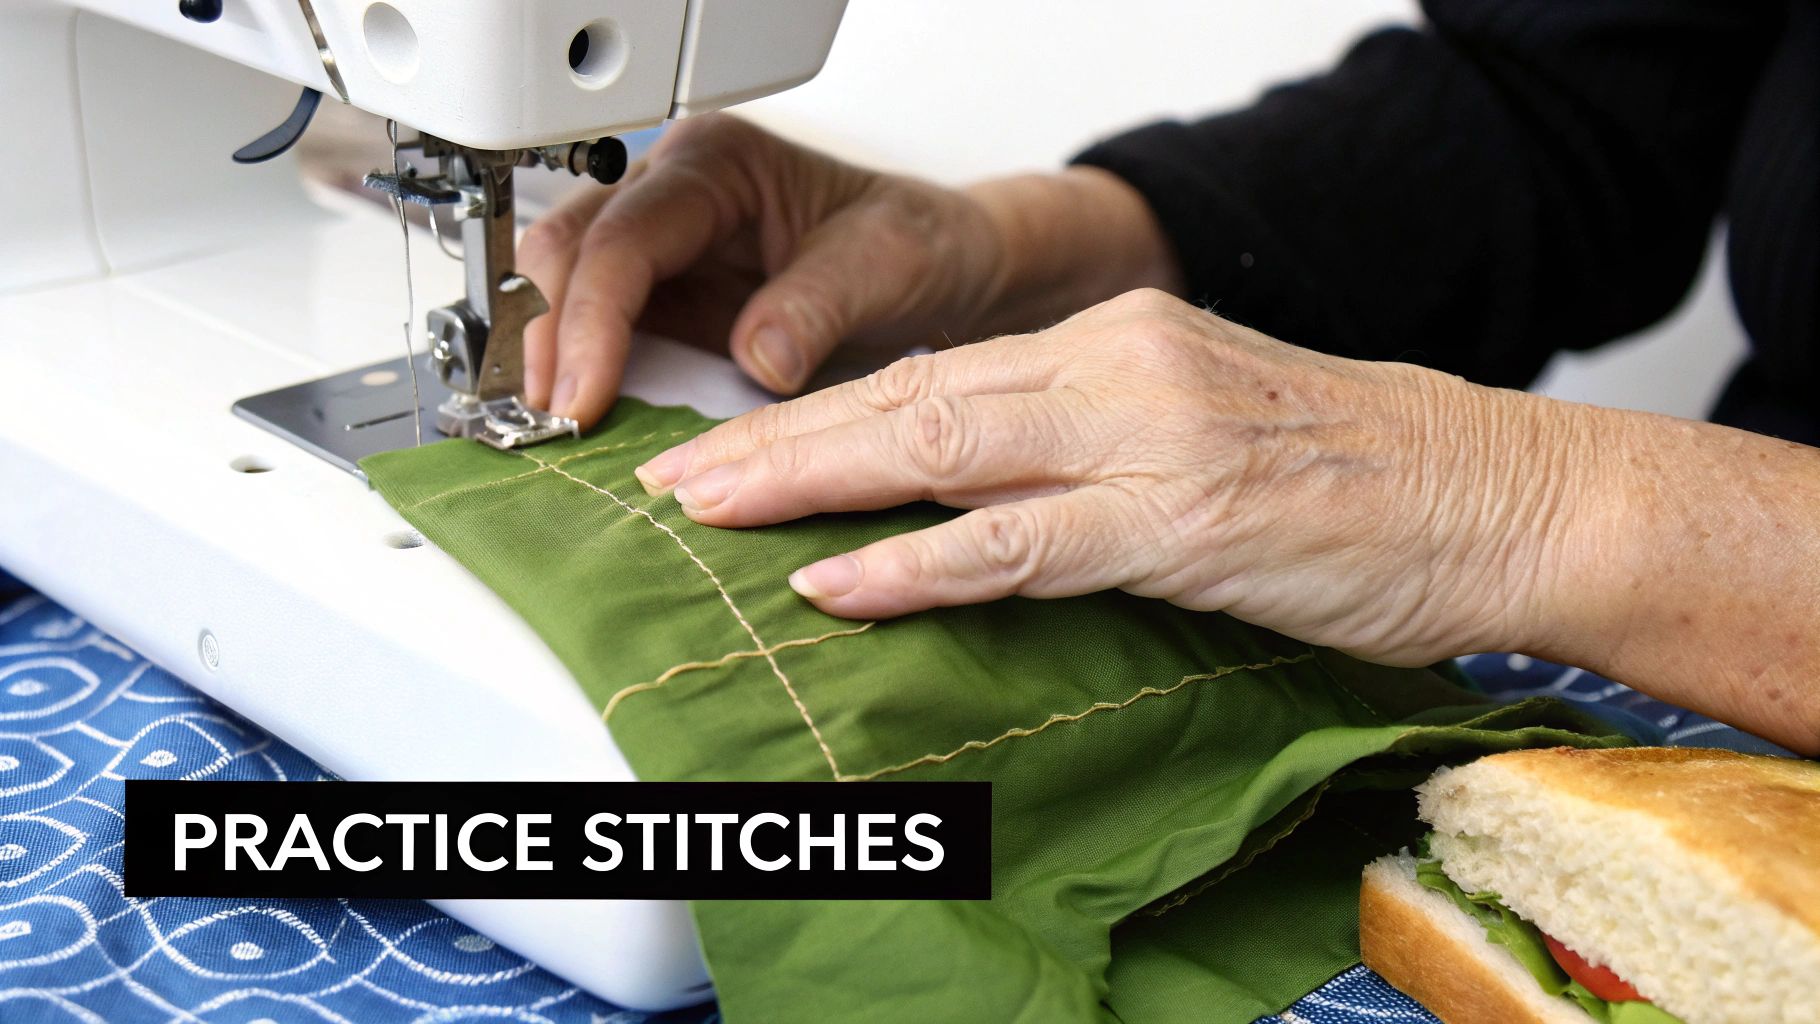
Before you even think about touching that beautiful quilt top you’ve spent hours on, grab some practice quilt sandwiches. These are just small scraps of fabric with batting in between. This is your playground, a no-pressure zone to build that all-important muscle memory without any risk.
My best advice? Approach your first few tries like you’re doodling with a pen and paper. The machine's needle is your stationary pen, and you’re moving the paper (your fabric) to "draw" the lines.
Forget about making flawless patterns right now. Just focus on creating smooth, continuous motion. A slightly wobbly but fluid line is far better than a series of jerky starts and stops.
Also, check your posture. It’s so easy to tense up, hunching your shoulders and gripping the quilt for dear life. Before you start, take a deep breath, let your shoulders drop, and maintain a light but firm touch on the fabric. A relaxed body gives you far more control.
Think of your first practice session as pure play. You're not creating a masterpiece; you're just getting a feel for how the fabric moves under the needle. Let go of the need for it to be perfect and just have fun.
Once you’re comfortable just moving the fabric around, it's time to try a few basic patterns. These are the building blocks for just about every complex design you'll ever want to tackle. They're specifically chosen to teach you essential movements, like how to handle curves and change direction gracefully.
Here are a few classic designs that every beginner should master:
As you practice these designs, you’ll start to feel that connection between your foot on the pedal and your hands on the quilt. A consistent speed is the secret sauce for great stitch quality.
Some quilters swear by the "pedal to the metal" approach—running the machine at a constant high speed and adjusting their hand movements to match. Others, like myself, often prefer a medium, steady pace that feels more controllable.
There's no single right way to do it. It's about what works for you. Use those practice sandwiches to experiment.
Try quilting the same simple meander at three different speeds:
Watch how your stitch length changes with each attempt. You’ll quickly discover a rhythm that feels natural and gives you the look you want. This synchronization is the absolute core of free-motion quilting.
Let's be honest—staring at a blank quilt top can be intimidating. If the idea of coming up with a design on the fly makes you nervous, you are not alone. This is where quilting stencils become a beginner's best friend.
Stencils take all the guesswork out of the design process. You simply mark the pattern on your fabric before you start, giving you a clear path to follow. This lets you focus 100% of your attention on the physical motion of quilting and getting your rhythm down, without the added pressure of creating the design at the same time.
For anyone looking to build confidence with a beautiful, repeatable pattern, a swirl stencil can be a fantastic starting point. Think of stencils as training wheels; they provide support and structure, helping you build muscle memory until the movements become second nature. Before you know it, you'll feel ready to ditch the guide and start quilting truly freehand.
https://www.youtube.com/embed/LbGK19LUIW0
Even after years of quilting, some days just don't go as planned. You'll be in the zone, stitching away, and suddenly… a problem. The good news is that most free motion quilting frustrations have simple solutions. Think of this as your go-to guide for figuring out what's wrong and, more importantly, how to fix it so you can get back to creating.
Most of the classic culprits—skipped stitches, puckered fabric, or those infamous thread nests on the back—boil down to just a few common issues. Once you learn what to look for, you can turn a headache into a quick fix.
There’s nothing worse than getting into a good quilting rhythm only to have your top thread snap or find ugly gaps in your stitch line. When this happens, it's your machine's way of telling you that the thread is under too much stress. Before you panic, just stop and check the basics.
Your needle should always be the first thing you investigate. A dull, bent, or wrong-sized needle is behind a surprising number of quilting woes. I always start a new project with a fresh needle. A 90/14 Topstitch or Quilting needle is my go-to, as it’s built to handle the demands of moving through multiple layers.
If a new needle doesn't solve it, your threading is the next likely suspect.
Occasionally, the thread itself is the problem, especially if it’s an older spool or a specialty type. For finicky metallic or slippery synthetic threads, applying a lubricant for quilting thread can be a game-changer. It helps the thread glide through the machine without catching.
Flipping your quilt over to find a massive bird’s nest of tangled thread is a rite of passage for every quilter. While it looks like a bobbin disaster, this issue almost always points to your upper tension—9 times out of 10, the bobbin is innocent!
This mess occurs when the top thread has zero tension, causing it to pool on the underside as the bobbin hook fruitlessly tries to form a stitch. The most frequent reason? Forgetting to lower the presser foot before starting to sew. When the foot is up, the tension discs are wide open, letting the top thread run wild.
If your presser foot was definitely down and you're still having issues, it's time to fine-tune your tension settings.
Quilter's Insight: Always check the back of your quilt! The top can look absolutely perfect while a complete disaster is unfolding underneath. Checking the first few inches of stitching can save you from having to unpick an entire section later.
Little "eyelashes" on the back of your quilt are a sign that your top tension is too loose; the top thread is getting pulled down. To fix it, you'll want to slightly increase your upper tension by turning the dial to a higher number. Always test on a scrap piece before going back to your quilt.
On the other hand, if you see little dots of bobbin thread on the top of your quilt, your upper tension is too tight. Just decrease your upper tension by turning the dial to a lower number until the stitches lock neatly in the middle of the batting.
Let's be honest, sometimes it feels like you're chasing a ghost in the machine. A single symptom can have a few different causes. This quick-glance table can help you narrow down the possibilities and get straight to the solution.
| Problem | Potential Cause(s) | How to Fix It |
|---|---|---|
| Skipped Stitches | - Dull, bent, or wrong size needle. | - Install a new needle (90/14 Quilting or Topstitch). |
| - Incorrectly threaded machine. | - Completely rethread the machine with the presser foot up. | |
| Thread Shredding or Breaking | - Needle is old or has a burr. | - Change to a new needle. |
| - Poor quality or old thread. | - Try a different brand or a new spool of thread. | |
| - Top tension is too tight. | - Lower the upper tension setting. | |
| "Bird's Nest" on Back | - Machine threaded with presser foot down. | - Rethread with the presser foot up. |
| - Forgot to lower the presser foot to sew. | - Always lower the presser foot before you start stitching. | |
| Puckered Fabric | - Quilt layers were not basted securely. | - Re-baste the area, adding more pins or adhesive spray. |
| - Pushing or pulling the fabric too hard. | - Relax your hands and guide the quilt gently. | |
| Uneven Stitches | - Moving the quilt at an inconsistent speed. | - Practice on a scrap to find a consistent rhythm. |
| - "Fabric drag" from the quilt's weight. | - Support the quilt with an extension table or nearby surface. |
This isn't an exhaustive list, but it covers the most frequent issues you'll run into. Working through these steps systematically will solve the vast majority of your free motion quilting troubles.
Fabric puckering is what happens when one layer of your quilt sandwich moves or stretches more than the others while you're quilting. This is almost always a sign that your quilt wasn't basted securely enough. If the layers can shift independently, they will.
To head this off, be generous with your basting. If you're using pins, place them every 4-5 inches apart. If you prefer a spray adhesive, make sure you have smooth, even coverage.
Another sneaky cause of puckers is "fabric drag," which happens when the weight of the quilt itself pulls against your needle.
Once you start this quilting adventure, you’re going to have questions. It’s only natural! Everyone wonders about the same things when they're figuring out how to guide a quilt under a needle for the first time. I’ve put together answers to the most common questions I hear, hoping to clear up any confusion so you can quilt with confidence.
Think of this as a conversation with a quilting friend. We'll cover the big topics—from your machine's capabilities to keeping your shoulders from aching—and get you ready to tackle your projects.
This is the big one, and the answer is almost always a happy yes! You absolutely do not need a fancy, expensive long-arm machine to start. The sewing machine sitting in your craft room right now is probably perfectly capable of free motion quilting.
You just need to check for two key features:
Pull out your machine's manual and look up how to do these two things. If your machine can do both, you're all set to begin.
When you’re piecing a quilt top, your machine does all the work of keeping the stitches perfectly even. But with free motion, that responsibility shifts entirely to you. The length of your stitches is now a dance between two things: the speed of your hands moving the quilt and the speed of the needle going up and down.
The secret to consistent stitches isn't about being perfect; it's about finding a rhythm. When your hands and your foot (on the pedal) are moving at a steady, synchronized pace, your stitches will naturally become more even.
This is exactly why practice sandwiches are your best friend. They give you a no-pressure way to experiment. Try quilting fast, try quilting slow, and find that sweet spot where the motion feels smooth and comfortable for you. The even stitches will follow once you find your groove.
Walking into the batting aisle can feel a bit overwhelming, but I always give beginners the same advice: keep it simple. You want a batting that behaves well so you can focus on learning to stitch, not on fighting a stretchy or bulky quilt.
For your first few projects, I highly recommend a low-loft cotton or an 80/20 cotton-poly blend. Both are fantastic choices for a few key reasons:
These battings give your finished quilt a wonderful, soft drape without being a headache to work with.
Ah, the dreaded "quilter's hunch." It's a real problem! It’s so easy to get lost in your work and realize hours later that your neck and shoulders are screaming at you. Good ergonomics are just as vital as your quilting technique.
First, check your setup. Your chair and table should be at a height where you can sit up straight with your feet on the floor, not hunched over your machine. Pay attention to your shoulders; we have a tendency to tense them up around our ears without even noticing. Consciously take a deep breath and let your shoulders drop.
Breaks are non-negotiable. Set a timer and get up to stretch every 20-30 minutes. Just a minute of rolling your shoulders and stretching your neck can make a huge difference. An extension table is also a game-changer—it supports the weight of your quilt, keeping it level with the machine bed and taking an enormous amount of strain off your arms and back.
At Famcut.com, we're passionate about providing you with the tools, materials, and knowledge to succeed in all your creative projects. Explore our wide selection of quilting supplies and fabrics today. Find everything you need for your next masterpiece at https://famcut.com.
At High Country Quilts we care deeply about community. With our experiences in retail, we know that a store is not only a place to shop but also a place for the community to gather and share. During this busy...

Hi! We’re Adam and Renee Wheaton, the new owners of High Country Quilts! For more than 40 years, we’ve owned and operated vacuum and sewing businesses. Following in Renee’s father’s footsteps after he retired from All Discount Vacuum and Sewing in Colorado...


Leave a comment