

We Love Our Quilting Community
At High Country Quilts we care deeply about community. With our experiences in retail, we know that a store is not only a place to shop but also a place for the community to gather and share. During this busy...


If your sewing room looks like a fabric store exploded, you're in good company. Let's be honest, a growing stash is the sign of a healthy, creative habit! But getting a handle on it with smart fabric storage solutions is about more than just being tidy. It’s about protecting your beautiful fabrics, saving yourself from frustrating searches, and creating a space that actually makes you want to sew.
The right system can take that chaotic pile and turn it into an inspiring library of textures and colors, all waiting for your next project.
A fabric stash has a way of growing, doesn't it? One minute you have a neat little stack, and the next, it's a mountain of unsorted fat quarters, tangled yardage, and mystery scraps. That kind of clutter doesn't just get in the way—it can kill your creative momentum and even damage your fabrics from exposure to dust, sunlight, or pests.
I like to think of organizing my fabric like curating a personal gallery. You chose every single piece for a reason, and storing it properly is how you honor that potential. It's about building a workflow where the moment inspiration strikes, you can walk right over and pull out the perfect material instead of digging for an hour. That simple shift from chaos to calm makes all the difference.
Without a plan, that beautiful collection can quickly become a source of stress. Putting a real system in place does more than just clear up some floor space; it gives you back time and protects your materials.
There's no one-size-fits-all answer for fabric storage. The best method for you really depends on your space, how much fabric you have, and what kinds of materials you love to work with.
Many sewers find their solution in versatile modular storage systems—and they're not alone. It's a massive global market that hit US$ 3.82 billion in 2025 and is expected to climb to US$ 5.13 billion by 2032. If you're curious, you can find more details on these organizing trends over at Coherent Market Insights.
This guide is all about helping you build a system that just clicks for you, making every part of your creative space—from your worktable to your cutting mat—work better. Speaking of which, our guide on choosing the right Quilters Select Dual Side Cutting Mat can help you set up the perfect foundation for your workspace.
Let's be honest—choosing the right fabric storage is a lot like picking a quilt pattern. What works beautifully for one person’s sewing room might be a complete disaster for another. The best system for you really comes down to three things: the size of your collection, the kinds of fabric you love, and the space you actually have.
Think of it as designing a personal library for your fabric. Are you the type who loves to browse open shelves, seeing all the "spines" of your folded fabrics at once? Or do you get more of a thrill from opening a perfectly labeled box filled with curated treasures? There's no single right answer, just the one that makes your creative process easier and your space feel more functional.
Let's walk through the most popular options to find your perfect match.
If you’re a visual person who gets inspired by color and pattern, open shelving can be a dream come true. Picture your walls lined with a rainbow of neatly folded fabrics, just waiting to spark your next brilliant idea. It’s practical and beautiful.
A well-organized open shelf system transforms your fabric from a simple supply into a functional art installation. It puts your passion on display, making it easier to "shop your stash" and find inspiration in the colors and patterns you already own.
For sewers who are more concerned with protecting their fabric than displaying it, enclosed bins are a tried-and-true solution. These are the real workhorses of fabric storage, offering a safe and secure home for all your materials.
Clear plastic bins are a fantastic compromise. They let you see what's inside at a glance while keeping everything sealed away from dust and moisture. They're also stackable, which is a huge win for making the most of vertical space in a small room. Opaque bins offer even more protection from light, but you absolutely need a solid labeling system to make them work.
To figure out what's best for you, consider your stash size, available space, and budget with this handy decision guide.
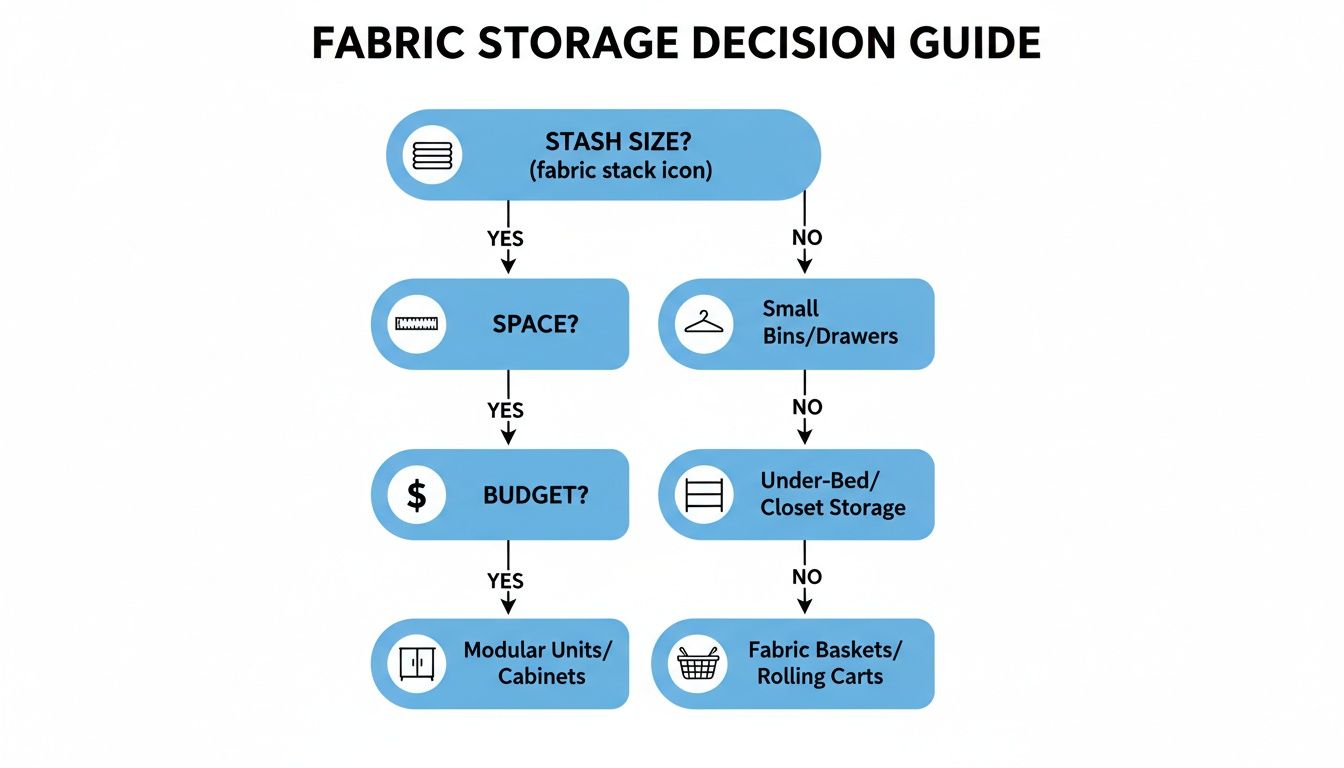
This flowchart can really help point you toward the most practical solution for your situation, whether that’s shelves, bins, or a mix of different methods.
What do you do with all those precious fat quarters, charm packs, and ever-growing scrap piles? This is where drawers and filing cabinets really shine. An old metal filing cabinet, especially one with nice deep drawers, can be an unexpectedly perfect organizer.
Simply fold your fat quarters over a small piece of cardboard, and you can "file" them just like documents. It makes flipping through your collection a breeze, letting you see every single piece without messing up the whole stack. For smaller cuts, a set of flat-file drawers or a multi-drawer rolling cart is ideal for sorting by color, size, or designer. For more ideas, this guide to choosing the perfect storage cabinet has some great tips.
When you're storing larger cuts—think anything from one yard up—creases are the ultimate enemy. Folding fabric over and over can create permanent lines that are a nightmare to iron out. The answer? Store them on mini-bolts or as rolls.
You can easily make your own mini-bolts using comic book boards or acid-free cardboard. Just wrap the fabric neatly around the board and secure it with a pin. This keeps the material perfectly smooth and lets you stack it on a shelf just like books. For really delicate or bulky fabrics like velvets and upholstery, rolling them onto a cardboard tube and storing them vertically in a tall basket is the best way to prevent crushing.
If you care about keeping your fabrics in top shape, you probably also appreciate quality materials. You can learn more about them in our post on how to sew sustainable projects.
To make things even clearer, let's look at a side-by-side comparison of these methods.
This table breaks down the most common storage methods, weighing their pros and cons across a few key factors. It's a quick way to see which approach might fit your needs and habits best.
| Storage Method | Best For | Pros | Cons | Avg. Cost |
|---|---|---|---|---|
| Open Shelving | Large, colorful collections | Highly visible, easy access, decorative | Exposes fabric to dust, light, and pests | $ - $$ |
| Enclosed Bins | Protecting delicate or valuable fabrics | Excellent protection, stackable, keeps dust out | Reduced visibility, requires labeling | $ - $$ |
| Filing Cabinets | Fat quarters and precuts | Excellent organization, easy to browse | Can be bulky, requires specific folding | $$ - $$$ |
| Mini-Bolts/Rolls | Yardage and delicate fabrics | Prevents creases, professional look | Time-consuming to set up, requires boards/tubes | $ |
In the end, the most effective systems often borrow from several different methods. You might use open shelves for your everyday cottons, enclosed bins for your wools and seasonal fabrics, a filing cabinet to tame your fat quarter addiction, and mini-bolts for those special occasion silks. By matching the storage method to the fabric and your workflow, you can create a space that doesn’t just store your stash—it inspires you to create.
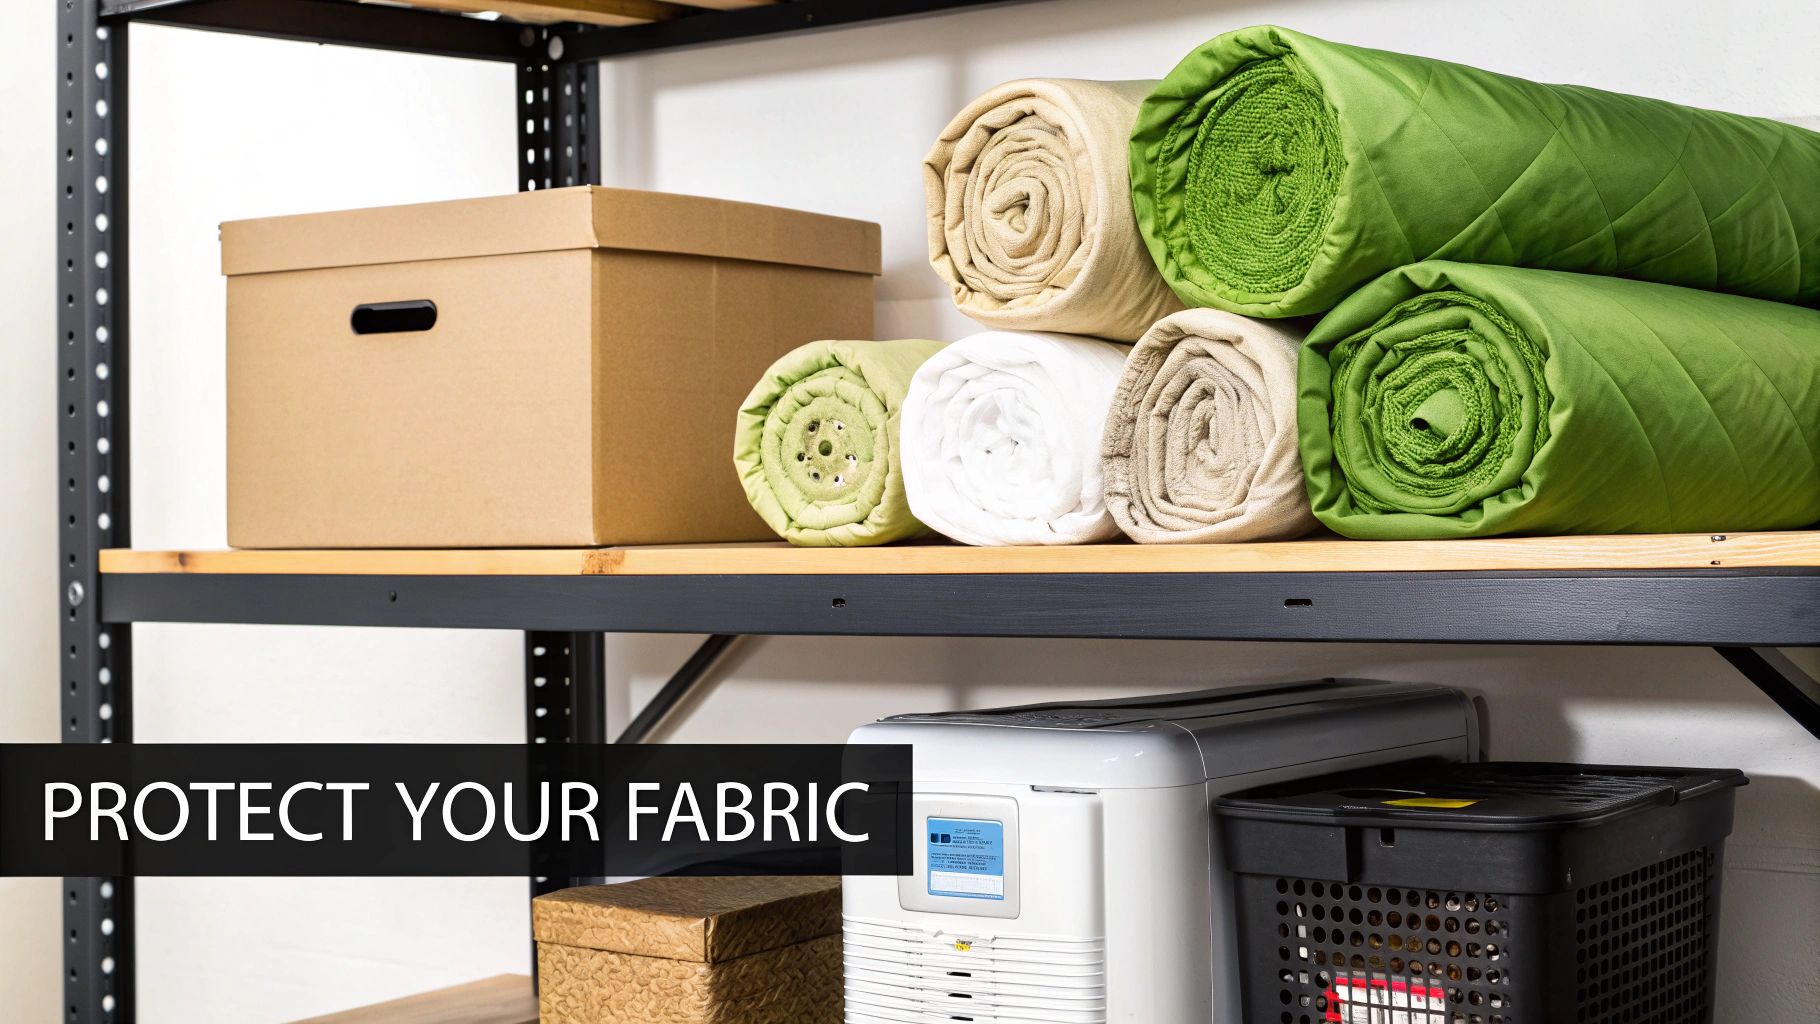
Smart fabric storage is so much more than just tidying up a room. It's your first line of defense in keeping your materials beautiful and ready for that next perfect project. Think of yourself as a fabric guardian. Your mission is simple: protect your collection from its four biggest enemies—sunlight, pests, humidity, and extreme temperatures.
Each one of these can cause irreversible damage. Sunlight will fade those brilliant colors to sad, dull shades. Humidity invites mildew and musty smells, while pests can turn a prized silk into their next meal. Creating a safe harbor for your stash is the only way to ensure it stays in pristine condition for years to come.
The dream storage spot is cool, dark, and dry. But let's be realistic—not everyone has a dedicated sewing room. Many of us are working with basements, attics, or a corner of a multi-purpose room. The good news is you can create a protective micro-environment almost anywhere.
Take a look at your storage area. Is it right next to a sunny window or up against a damp basement wall? Constant, direct sunlight will literally bleach and weaken fibers over time. Storing your fabric in opaque bins or inside a closet is a simple but incredibly effective solution.
If your space is prone to moisture, a small, inexpensive dehumidifier can be a total game-changer. It keeps the air dry, stopping mold and mildew in their tracks before they can permanently stain and ruin your fabrics.
To wash or not to wash before storing? It's a question every sewer asks. From my experience, pre-washing is a critical step for long-term preservation. Fresh-from-the-store fabrics are often coated with chemicals, starches, and sizing from the manufacturing process.
Those substances are basically a dinner bell for pests like silverfish and moths. Over time, the chemicals themselves can also cause the fabric to yellow or degrade. A good wash removes these pest attractants and any dirt the fabric picked up in transit. It’s an extra step, for sure, but one that really pays off, especially for natural fibers. When you’re dealing with big cuts, like our Natural Muslin Wideback Cotton Fabric, pre-washing ensures it stays perfect.
Choosing acid-free storage materials is one of the most important investments you can make for your heirloom fabrics. Standard cardboard boxes and tissue paper contain acids that can leach into your fabric over time, causing yellowing and brittleness.
Switching to acid-free boxes, boards, and tissue paper completely neutralizes this threat. This is non-negotiable for delicate silks, vintage textiles, or any fabric you want to pass down one day. It’s what museums do, just scaled down for your sewing room.
How you fold or roll your fabric directly impacts its lifespan. Sharp, hard creases put a strain on fibers that can eventually break them, leaving permanent marks that no amount of ironing can fix.
If your collection is large and valuable, you might even store it off-site. Ensuring it's protected from theft or damage is another key consideration, and you can get great advice on finding secure storage solutions to keep your investment safe.
So, you've got the perfect bins, shelves, and containers. That's a huge step, but it’s only half the battle. Now comes the real magic: creating a system—a personal fabric catalog—that lets you find the exact piece you need the moment inspiration strikes. Without a solid organizational plan, even the tidiest storage can feel like a maze you can't solve.
Think of it like a library. Just tossing books onto shelves isn't helpful; you need a system like the Dewey Decimal System to find anything. Your fabric stash is your personal library of creativity, and it deserves the same thoughtful approach.
There’s no single "right" way to organize fabric. Honestly, the best system is the one that clicks with how you think and create. Let's walk through some of the most popular methods real-world sewists and quilters swear by.
By Color: This is, hands down, the most visually satisfying method. Arranging fabrics in a beautiful rainbow gradient on open shelves or in clear bins literally turns your stash into a piece of art. It’s a dream for quilters who build their palettes visually and need to find that one specific shade of periwinkle right now.
By Fabric Type: Sorting by material—all your cottons together, your silks in another spot, your knits somewhere else—is incredibly practical. It ensures you’re grabbing the right kind of fabric for your project and makes it so much easier to remember things like pre-washing needs or proper iron temperatures.
By Designer or Collection: If you're someone who loves to collect specific fabric lines (we see you!), organizing by designer or collection is pure joy. It keeps those perfectly coordinated prints together, making it a breeze to pull for a quilt or garment without having to hunt down every last piece.
By Project: This is a genius, forward-thinking approach. You group all the fabrics you've bought for a specific future project into one dedicated bin or bag. It’s like creating little quilt kits for your future self, saving you from that frantic search for materials when you’re finally ready to start.
Don't feel like you have to stick to just one! Many of us use a hybrid system. You might sort your main cotton stash by color but keep your precious silks and velvets in their own separate, protected bins.
Once you've settled on a system, labeling is your new best friend. A clear, consistent labeling strategy is what turns a pile of pretty fabric into a functional, searchable catalog. It completely eliminates the guesswork and saves you from pulling down every single box just to find one fat quarter.
Even simple, handwritten tags attached to your bins or shelves can work wonders. If you want to get more detailed, you can create labels that include info like fabric type, yardage, and even the designer. Trust me, that little bit of extra detail is a huge time-saver down the road.
Think of your labeling system as the bridge connecting your physical stash to your creative ideas. A well-labeled collection lets you "shop your stash" like a pro, which means fewer duplicate purchases and more projects made with the beautiful fabrics you already own.
For those who love to bring a little tech into their craft room, a digital inventory is the ultimate next step.
Creating a digital catalog of your fabric might sound like a huge chore, but the payoff is incredible. Just imagine being at the fabric store and being able to pull up your phone to see if you already have a similar floral print at home. It’s a game-changer for preventing impulse buys and planning projects when you're out and about.
You can use a simple spreadsheet or find a dedicated app for stash organization. Here’s a basic way to get started:
This digital system lets you search and filter your entire collection in seconds. To make managing the physical swatches just as slick, a tool like the Famcut Swatch This card set helps you keep track of every fabric with professional-looking sample cards. When your digital and physical systems work together, you'll always have a perfect, real-time view of all your creative resources.
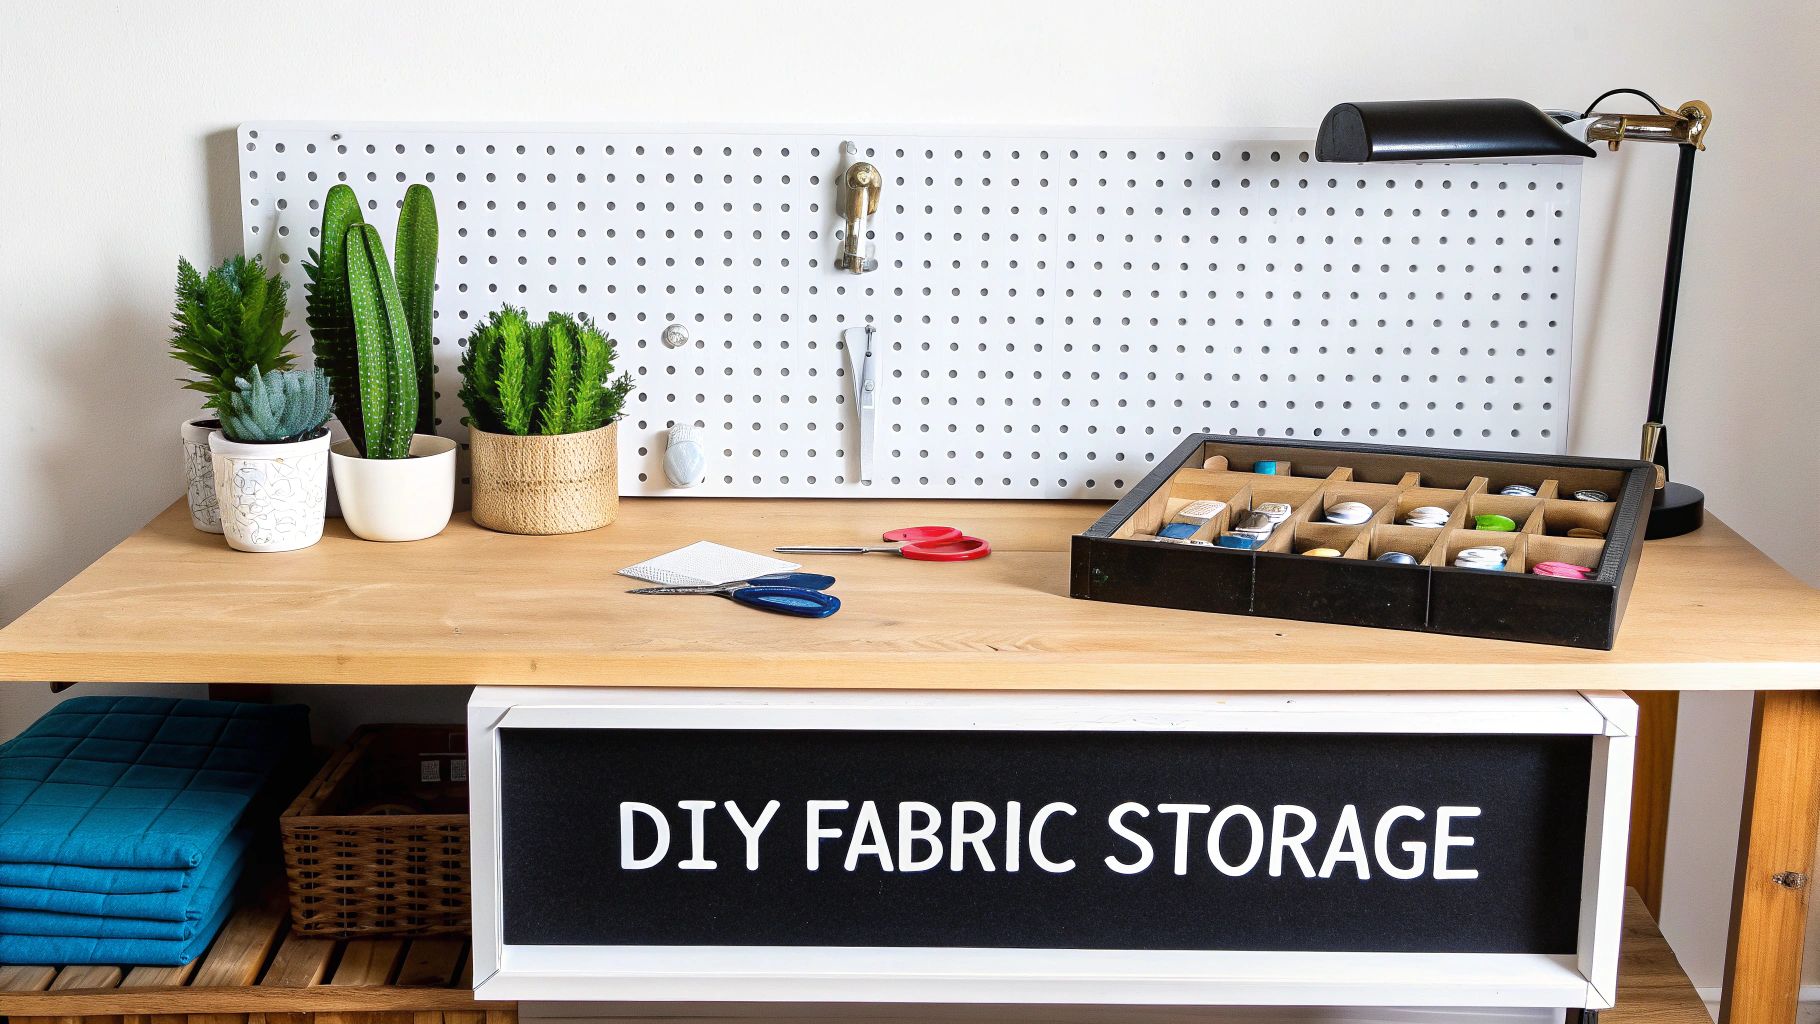
An organized sewing room doesn't have to break the bank. If you're the kind of crafter who loves the process as much as the finished quilt, creating your own fabric storage solutions can be just as rewarding as any sewing project. It’s a chance to make your space truly yours.
Why spend a fortune on custom cabinets when you can get incredible results with a bit of clever thinking? Repurposing everyday items or tackling a simple weekend build lets you tailor your organization to your exact needs. Let's get into a few smart projects that will take your fabric stash from chaotic to curated.
We all love the tidy, professional look of a fabric shop, and you can easily bring that vibe home. The secret? Creating your own mini-bolts to wrap yardage, which keeps everything uniform and crease-free. The surprise MVP for this project is comic book boards. They’re acid-free, sturdy, and the perfect size for making your fabric library a reality.
When you wrap your fabric this way, you prevent those deep, set-in wrinkles that are so frustrating to iron out. Plus, stacking them on a bookshelf lets you see the "spine" of each fabric at a glance, making it a breeze to find exactly what you're looking for.
To create your own mini-bolts, you'll need:
Just fold your fabric lengthwise until it’s a little narrower than the board, then wrap it on snugly and pin the end. To get those clean, straight folds, a good ruler is your best friend. Using a tool like the Quilters Select Non-Slip Ruler helps you square up your fabric perfectly before you even start wrapping.
Your next brilliant fabric organizer might already be sitting in your house or waiting for you at a thrift store. Some of the most charming and effective storage solutions come from simply looking at everyday objects in a new light.
A sturdy wine rack, for instance, is absolutely perfect for holding rolled-up fat quarters or larger scraps. Each little cubby is an ideal home for a fabric roll, keeping them all visible and easy to grab. Another great hack is using a hanging shoe organizer with clear pockets—it’s fantastic for sorting precuts, organizing notions, or even storing spools of thread.
Repurposing is about more than just saving money. It's about building a storage system that feels like you. It adds character to your creative space and reminds you that resourcefulness is at the heart of what we do.
Got an awkward corner or a blank wall that's just begging for a purpose? Building your own simple shelving is a total game-changer. You don't need to be a woodworking expert to put together functional, custom-fit storage. Basic bracket shelves or plywood cube units can be a fun weekend project.
The best part about a DIY build is that you're in complete control of the dimensions. You can create shelves with the exact height needed for your new mini-bolts or build cubbies perfectly sized for your favorite bins. Slap on a coat of paint, and it will look like it was always meant to be there, ensuring every inch of your space is working as hard as you do.
Once you get the basics of organizing down, the real questions start to bubble up. It's the little details, the "what ifs" and "how should Is," that can truly make or break a storage system. This is where we get into the nitty-gritty and tackle those common hurdles that sewers and quilters face when trying to tame their fabric collection.
Think of this as your personal troubleshooting guide. We're here to solve those tricky problems, from dealing with that mountain of tiny scraps to making sure your unfinished projects don't get lost in the shuffle. Let's clear up those lingering questions so you can build a storage system that actually works for you.
Ah, the beloved UFOs (Unfinished Objects). We all have them, waiting patiently for their moment in the spotlight. The trick to actually finishing them is to make it incredibly easy to pick them back up again. You want to create a self-contained kit for your future self, so everything you need is in one place.
A fantastic way to do this is with clear, project-sized bins or even those big zippered pouches. For each project, gather all its components: the pattern, every last cut fabric piece, any special thread or notions, and maybe a reference photo. This one simple step saves you from that frantic search for a missing block or that specific piece of interfacing weeks or months down the road.
Make sure you label each box or bag clearly. A good label might include:
This system doesn't just keep you organized; it makes jumping back into an old project feel so much less intimidating.
Fabric scraps are the joyful confetti of a creative life, but that confetti can quickly turn into an overwhelming avalanche. Taming the scrap pile requires a real strategy. Ditching the single, chaotic "scrap bin" in favor of a sorting system is the key to making them usable again.
For the tiny pieces, clear glass jars or small, see-through drawers are brilliant. They keep all the little bits contained but still visible, which is perfect for anyone who does appliqué or paper piecing. Many quilters have great success sorting these scraps by color, creating a beautiful and functional rainbow of inspiration.
For your larger, more irregularly shaped scraps, think about a dedicated set of bins sorted by size or fabric type. You could have one for "strips," another for "chunks big enough for a 5-inch square," and a third for "awkward shapes." This bit of pre-sorting will save you a massive amount of time when you're digging around for just the right piece for a scrappy quilt.
Your scrap storage shouldn't be an afterthought; it should be an inspiration station. By organizing your scraps thoughtfully, you turn them from clutter into a readily available palette for your next masterpiece.
Plastic tubs are easily one of the most popular fabric storage solutions, and for good reason! They offer fantastic protection from dust, pests, and moisture. But—and this is a big but—not all plastic is created equal, and how you use them really matters.
If you're storing valuable or heirloom fabrics for the long haul, try to find containers made from polypropylene. It's a much more stable plastic and is less likely to off-gas chemicals over time. No matter what, always make sure your fabric is completely clean and dry before you seal it away to prevent any chance of mildew.
It's also a good idea to avoid cramming fabric too tightly into any container. Natural fibers need a little bit of room to breathe to stay in prime condition. For fabrics you're storing for years, popping the lids open every so often for some air circulation can help maintain their integrity. For your everyday cottons and synthetics, though, standard clear plastic bins are a perfectly safe and practical choice.
Knowing what you have is just as important as how you store it. A good inventory system stops you from accidentally buying the same fabric twice and makes "shopping your stash" a genuine pleasure. You've got a few great options here, from simple pen-and-paper methods to more detailed digital ones.
A low-tech but super effective method is the classic swatch binder.
If you're more digitally inclined, a simple spreadsheet or a dedicated stash-tracking app can be a total game-changer. These tools let you add photos and searchable tags, so you can check what you own from anywhere—even while you're standing in the middle of the fabric store.
At Famcut, we know that a well-organized space is the foundation of creativity. We hope these tips help you build a fabric storage system that brings you peace of mind and sparks endless inspiration for your next project. Explore our full range of high-quality materials and tools.
At High Country Quilts we care deeply about community. With our experiences in retail, we know that a store is not only a place to shop but also a place for the community to gather and share. During this busy...

Hi! We’re Adam and Renee Wheaton, the new owners of High Country Quilts! For more than 40 years, we’ve owned and operated vacuum and sewing businesses. Following in Renee’s father’s footsteps after he retired from All Discount Vacuum and Sewing in Colorado...


Leave a comment