

We Love Our Quilting Community
At High Country Quilts we care deeply about community. With our experiences in retail, we know that a store is not only a place to shop but also a place for the community to gather and share. During this busy...


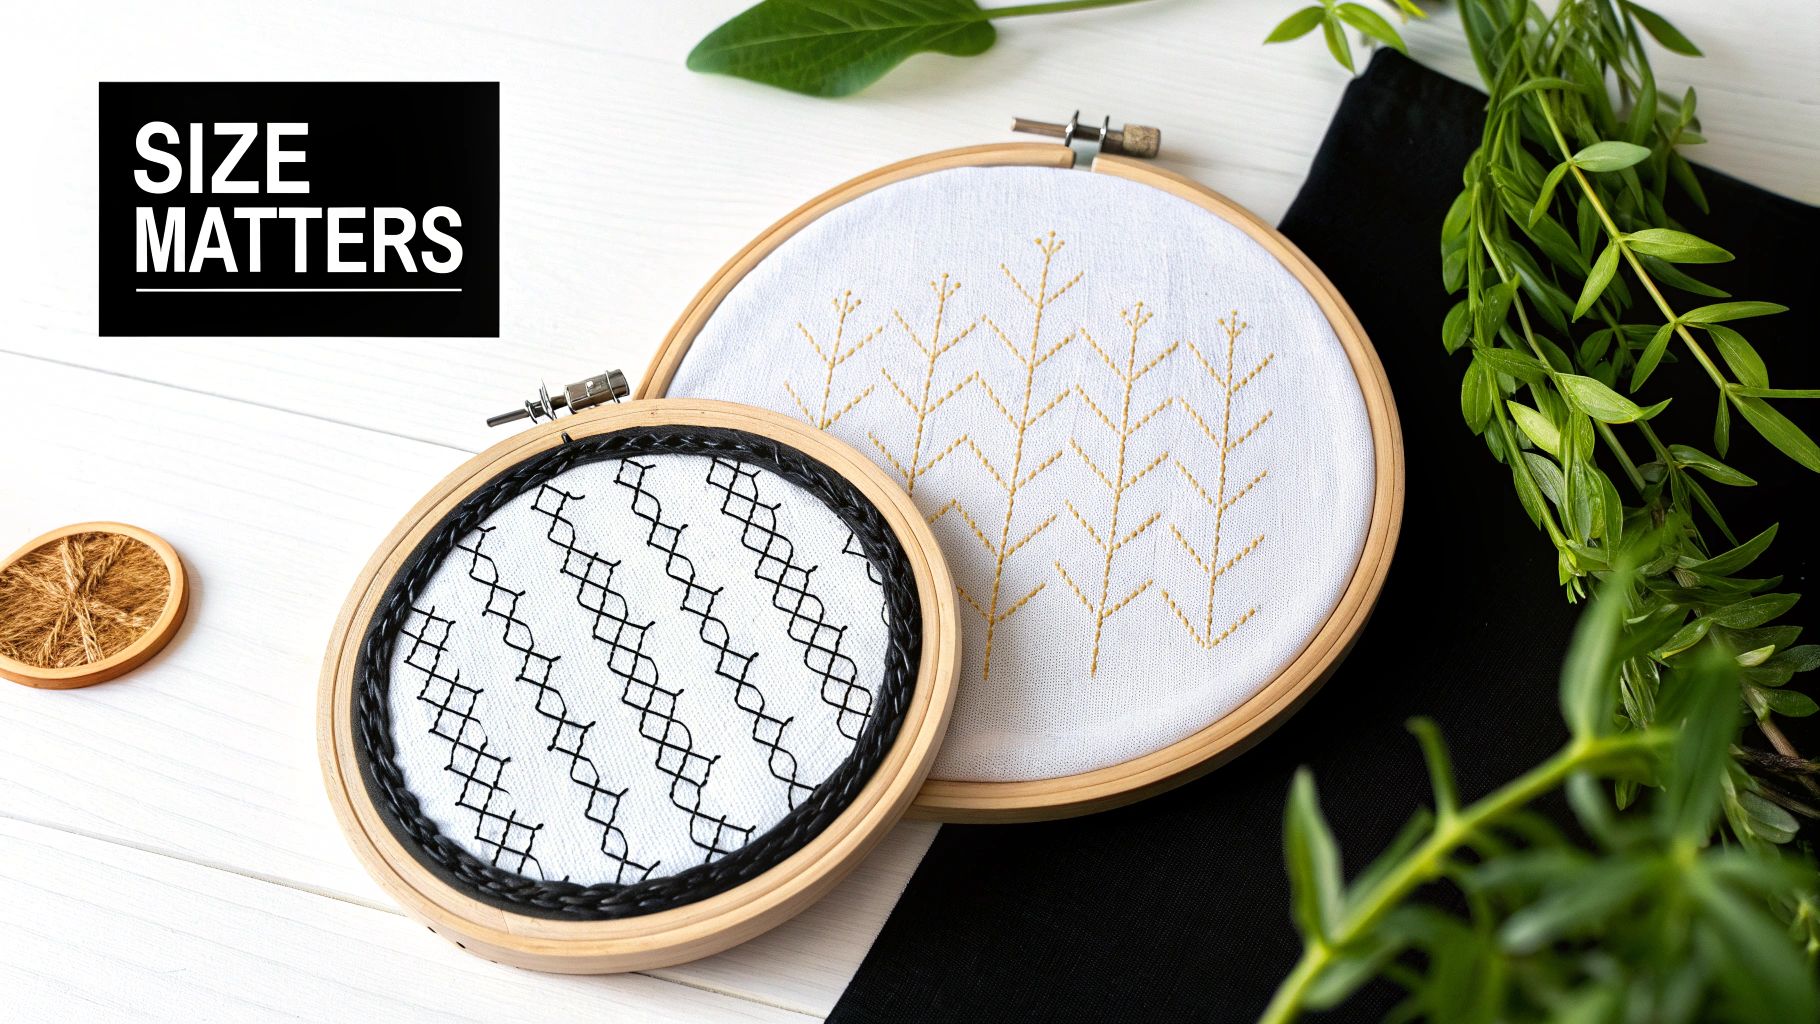
Walk into any craft store, and you'll see a whole wall of embroidery hoops. They come in all sorts of sizes, from tiny 3-inch circles perfect for a tiny monogram to massive 12-inch or greater frames built for quilting projects or large-scale machine embroidery. Picking the right one isn't just a suggestion; it's the very first step toward getting that perfect, professional finish you're after. It's all about keeping your fabric taut and your stitches looking beautiful.
Think of your embroidery hoop as the foundation for a house. If the foundation is weak or the wrong size, the whole structure will be unstable, no matter how beautifully you build the rest of it. The main job of a hoop is to hold your fabric at the perfect tension. Without it, you get puckering, loose stitches, and a whole lot of frustration.
When your fabric is pulled "drum tight," your needle glides through smoothly. This is the secret to creating those crisp, clean stitches and preventing distorted, loopy patterns. It's especially important when you're working with tricky fabrics or intricate designs. The right hoop makes the work relaxing; the wrong one can turn it into a battle.
Choosing the right size hoop does more than just hold your fabric in place—it truly sets you up for a successful project from the start. If you grab a hoop that’s way too big for your design, you'll struggle to keep the tension even across the whole piece, and you'll likely end up with a saggy middle.
On the other hand, a hoop that's too small is just as problematic. You’ll have to constantly move and re-hoop your project, which not only slows you down but also risks crushing the stitches you’ve already made and messing up the alignment. Your choice here really affects both the quality and speed of your work.
A well-chosen hoop is your silent partner in the creative process. It provides the stability and tension needed for every stitch to land exactly where it should, ensuring your vision comes to life without a single pucker.
Before we get into measuring hoops and pairing them with projects, it helps to have a good feel for the craft itself. If you're new to this or just want a refresher, understanding the fundamentals of embroidery will make it crystal clear why tension is so non-negotiable.
Once you see that connection, you'll start to develop an instinct for picking the right tool for the job, whether you're working on:
This guide will walk you through everything you need to know about embroidery hoop sizes. By the end, you'll feel confident starting every project on the strongest possible foundation.
Walking down the notions aisle, it’s easy to get a little turned around by all the different embroidery hoop sizes. When you see a package labeled "6-inch hoop," what does that number really mean? It’s simpler than you think, but it’s a critical detail every stitcher needs to know: the size on the package refers to the diameter of the inner ring.
That’s your true workable area. The outer ring is just there to create the tension. Getting this right from the start saves you the headache of realizing your beautiful design is just a smidge too big for the hoop you’ve chosen. The inner ring is what dictates the absolute maximum size of any design you can stitch in one go.
The handy tools we use today have come a long way. Early on, stitchers in the 1400s used basic rectangular frames to stretch their fabric. Things got more interesting in 17th-century India with the rise of tambour embroidery, which brought us the circular hoops we recognize. They were named after the French word for drum, tambour, because of the fantastic, drum-tight tension they created.
The technique spread across Europe, but the real game-changer came in 1903. That’s when Helen Harmes patented the first adjustable hoop, opening up embroidery to countless home sewers. This one innovation made managing fabric tension so much easier that historians estimate it boosted household embroidery participation by 30-40% between 1900 and 1920. It's a pretty cool story! You can actually read more about the history of the embroidery hoop on pieceworkmagazine.com to see how these simple tools evolved.
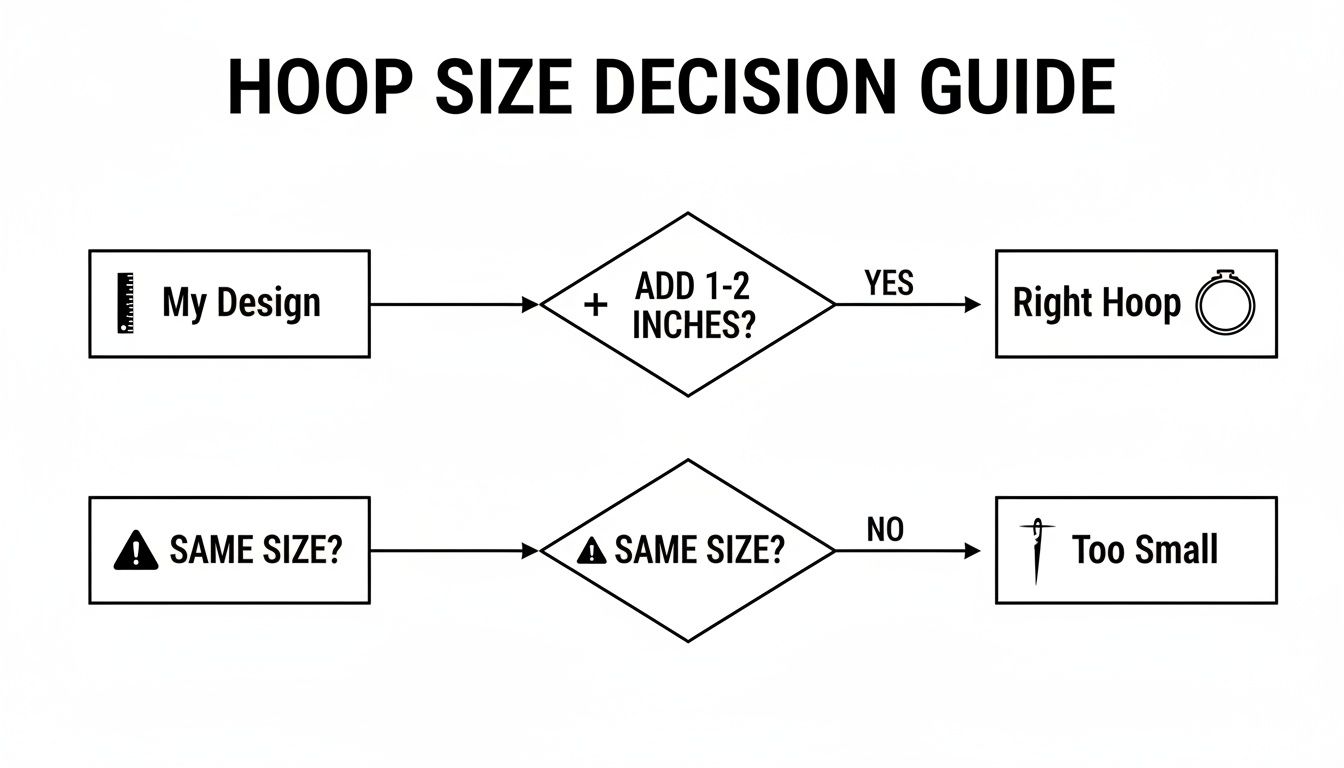
Here’s the best way I’ve found to think about choosing a hoop size: treat it like you’re framing a picture. You’d never cram a 5x7 photo into a 5x7 frame with no breathing room, right? You’d pick a larger frame to give it a nice, even border. Embroidery works the exact same way.
As a rule of thumb, your hoop should always be 1 to 2 inches larger than your actual design. That extra space isn't just for looks—it’s a crucial buffer zone that makes your life a whole lot easier.
Key Takeaway: The "picture frame" rule is your best friend. Always grab a hoop that gives you at least a one-inch margin on all sides of your embroidery design. Trust me, it makes all the difference.
This margin gives you plenty of room to work without your needle bumping into the edge of the hoop. Even more importantly, it keeps the presser foot on your BERNINA machine from smacking into the frame, which is a fast way to break a needle, damage your machine, or ruin a project you've spent hours on. It’s a simple habit that will save you a world of frustration.
Okay, let’s make this real. Say you have a gorgeous floral pattern that measures 4 inches by 4 inches. Using our "picture frame" rule, you’ll want to reach for a hoop that’s at least 5 or 6 inches in diameter.
Here's a breakdown of why that choice matters so much:
Once you get the hang of remembering that the listed size is all about the inner ring and you consistently apply that 1-to-2-inch margin rule, you’ll be able to pick the perfect hoop every time. It’s a foundational bit of knowledge that gets every project started on the right foot, with your fabric held securely and your stitching area ready to go.
Picking the right hoop size feels like a small detail, but it’s one of the most practical decisions you'll make for any project. It directly impacts the quality of your stitches and your overall enjoyment. Think of it like a chef choosing the right knife—you wouldn't use a giant cleaver for delicate garnishes, and a tiny paring knife won't get you far with a watermelon.
The goal is to build your intuition so you can confidently grab the perfect hoop every time. Hoops generally fall into three buckets: small, medium, and large. Let's break down where each one shines so your next project is smoother and more successful.
A simple rule of thumb can save you a lot of headaches: always choose a hoop that’s 1 to 2 inches larger than your actual design. This gives you the clearance you need for the machine's foot and prevents the fabric from getting snagged.
As you can see, trying to squeeze a design into a hoop that's too snug is a recipe for frustration. It often leads to needle breaks, puckered fabric, or a distorted final result. That little bit of extra space makes all the difference.
Small hoops, which are typically 3 to 5 inches across, are the specialists in your toolkit. Their compact size gives you fantastic control for projects that require fine, meticulous detail. Because there's less fabric to manage, it's far easier to achieve and maintain that perfect, drum-tight tension for crisp, clean stitches.
These smaller sizes are your go-to for tasks like:
It’s no surprise they’re so popular, especially for those just starting out. Hoops under 5 inches account for about 40% of sales in craft stores, making them a staple for detailed hand and machine work.
If you’re building your embroidery collection, a medium-sized hoop is the best place to start. Ranging from 6 to 8 inches, these are the true workhorses. They strike a perfect balance, offering enough space for most common designs without ever feeling bulky or hard to handle.
A 7-inch hoop, for instance, can tackle the majority of patterns you'll find online or in kits, yet it's still comfortable enough to hold for longer stitching sessions. This versatility is why they’re the most popular choice, capturing around 35% of the market share. They're perfect for wall art, tote bag decorations, and just about any standard pattern work.
The global embroidery hoop market hit an impressive USD 500 million in 2024, and it's projected to climb to USD 700 million by 2033. This growth is fueled by a massive surge in DIY crafting, which is wonderful news for local shops like High Country Quilts that champion the creative community. You can discover more insights about embroidery hoop market trends on maggieframes.com.
When your creative vision gets bigger, your hoop needs to keep up. Large hoops, measuring 9 inches and up, are built for projects where you need to cover a lot of ground. Their biggest advantage is minimizing the need to re-hoop your fabric—a tricky process that can easily distort existing stitches and throw off your alignment.
These larger hoops are absolutely essential for:
While they make up about 25% of the market, these larger sizes are indispensable for serious quilters and machine embroiderers who demand efficiency and a flawless finish on their most ambitious projects.
To make things even easier, here's a quick-reference chart to help you grab the right hoop from your collection or when you're shopping with us at High Country Quilts.
| Hoop Size (Diameter) | Best For Projects Like | High Country Quilts Pro Tip |
|---|---|---|
| 3-5 inches | Monograms, shirt collars, baby clothes, detailed logos | Perfect for getting into tight spots on finished garments. The smaller frame prevents unwanted fabric stretching. |
| 6-8 inches | General patterns, tote bags, pillowcases, wall art | This is the "Goldilocks" range. If you're buying your first hoop, a 7-inch one is a fantastic, do-it-all choice. |
| 9-12 inches+ | Quilt blocks, jacket backs, large table linens, machine work | Minimizes re-hooping on big projects, which is key to avoiding distortion. Essential for machine embroidery quilts. |
This guide should give you a solid starting point. The more you stitch, the more you'll develop a feel for what works best for your specific style and projects.
When you make the leap from hand stitching to machine embroidery, the world of hoops changes quite a bit. It’s a whole new ballgame. Machine hoops aren't just simple wooden or plastic rings; they're specialized tools engineered to communicate perfectly with your specific machine, like the wonderful BERNINA models we use here at High Country Quilts.
Unlike hand hoops, these are not one-size-fits-all. You can't just borrow a hoop from a friend's machine and expect it to work on yours, even if they're from the same brand.
The most critical thing to understand is the embroidery field. You can think of this as your machine’s maximum workspace—it’s the largest single design it can stitch out before you have to move and re-hoop the fabric. Every machine has a defined field, and the hoops you use absolutely must be compatible with it. If you try to attach a hoop that’s too big or isn't recognized, the machine simply won't let you proceed. It's a built-in safety feature.
For those of us working with BERNINA machines, this means choosing a hoop that the machine is programmed to recognize. The machine's brain needs to know the exact dimensions of the hoop you've attached so it can stitch out the design flawlessly. This is how it keeps the needle safely inside the working area, preventing any damage to the hoop, your needle, or the machine itself.
Machine embroidery hoops also come in a few different flavors to tackle different jobs:
It's amazing to see how much this part of the craft is growing. The embroidery hoop market was valued at an impressive USD 500 million in 2024 and is expected to climb to USD 700 million by 2033. This boom, largely fueled by a renewed passion for DIY crafts since 2020, means we're seeing more and more innovative tools, like magnetic hoops, hitting the market. You can discover more insights about the booming embroidery market at verifiedmarketreports.com.
Great machine embroidery always starts with proper hooping. For hand embroidery, you often hear the term "drum tight," but for machine work, we're aiming for something a little different: smooth and taut, but never stretched. If you stretch the fabric when hooping, it will naturally try to pull back to its original shape once you take it out, causing puckering and distorting your beautiful design.
Here’s a quick rundown of how to get it right every time:
Getting this technique down is the secret to avoiding common headaches like thread nests, messy stitches on the back of your fabric, and misaligned patterns. When you hoop correctly, you're setting your machine up for success and paving the way for professional-quality results on every single project.

Getting your fabric tension just right is the secret sauce for clean, pucker-free embroidery. I always tell people to think of it like tuning a guitar. If the strings are too loose, the music sounds muddy and off. It’s the same with fabric—if it isn't taut, your stitches won't look crisp and defined, no matter what size hoop you're using.
The goal is to get your fabric "drum-tight." You want it so firm and even that if you gave it a little tap, you'd hear a faint, satisfying thump. This solid foundation ensures every stitch forms perfectly and lays flat, preventing any distortion of the fabric's weave. Honestly, it’s the most important step for beautiful work.
The size of your hoop has a surprisingly big impact on how easy it is to get that perfect tension. It really just comes down to physics. Smaller hoops, like your go-to 3 to 5-inch ones, have a much smaller area to control. This makes pulling the fabric evenly taut from all sides a whole lot simpler.
On the other hand, larger hoops—anything 9 inches or bigger—can be a real challenge. With so much fabric to manage, the center is much more likely to sag, kind of like a big trampoline dipping in the middle. You'll need to be extra careful and methodical when hooping to make sure the tension is consistent all the way from the edge to the center of your design.
The perfect tension is all about balance. Your fabric needs to be tight enough for a stable stitching surface, but not so stretched that you’re warping the grain. If you pull it too tight, the design will shrink and pucker the moment you take it out of the hoop.
Learning to hoop fabric properly is a skill that will pay you back on every single project. Once you get a consistent method down, you'll avoid all those common headaches like puckering or loose, loopy stitches.
Here's a simple process that works every time:
Even with a great technique, some fabrics just don't want to cooperate. Silks and rayons are notorious for slipping right out of the hoop, while very delicate fabrics can get damaged if you crank the hoop down too hard.
One of the best tricks in the book is to bind your inner hoop. Just wrap the inner ring with a thin strip of cotton twill tape or even a bit of bias tape. This simple step gives the hoop some extra grip, helping it hold on tight to slippery fabrics and keeping your tension perfect from the first stitch to the very last.
So, we've walked through everything from measuring hoops and matching them to your projects, all the way to getting that perfect drum-tight tension. The good news? Choosing the right embroidery hoop size isn't a guessing game anymore. It’s a skill, and now you have the knowledge to make the right choice every single time.
Think of the principles we've covered as the foundation for any great stitching project. Keep these simple rules in your back pocket, and you’ll sidestep some of the most common headaches embroiderers face.
Before you thread that first needle, run through this quick mental checklist. It'll set you up for success from the get-go.
An online guide is a fantastic start, but nothing beats the real thing. The best way to find your perfect hoop is to see it, feel it, and hold it up to your fabric in person.
And that's where we come in. Here at High Country Quilts in Colorado Springs, our team isn't just selling supplies—we're passionate quilters and sewers who use these tools every single day. We genuinely love this craft.
Bring your project in, whether it's a finished quilt top, a piece of fabric, or just an idea sketched on a napkin. We can help you physically match the right embroidery hoop sizes to your materials and give you the kind of advice you only get from years of experience.
Thinking about a new BERNINA machine or a new accessory? We can show you exactly which hoops work with which machine and how to get the most out of your setup. Our goal is to be more than just a shop; we want to be your creative partner.
Come join one of our classes or community events to practice your skills in a fun, supportive space. Let's create something beautiful together.
Even with a good guide, you’re bound to have questions once you sit down with a needle and thread. It’s completely normal! Getting to know the ins and outs of embroidery hoop sizes can feel a little confusing at first, but let's clear up a few of the questions we hear all the time here at High Country Quilts.
Getting these little details right is what helps you stitch with confidence. It makes the whole process smoother and, most importantly, more fun.
If you could only have one hoop in your collection, I'd point you toward a 7-inch hoop every time. It really is the sweet spot. It’s large enough to handle most standard designs for things like wall art or tote bags, but still small enough that it won't feel heavy or awkward to hold for longer stitching sessions.
There's a reason it's a bestseller! Down the road, you'll definitely want to collect a few different embroidery hoop sizes, but a good 7-inch hoop is the dependable workhorse you’ll find yourself grabbing over and over again.
That’s a definite no—they’re built for completely different jobs. Hoops for hand embroidery, usually made of wood or a simple plastic, are designed for one thing: holding your fabric taut while you hold the hoop. They close with a basic little screw.
Machine embroidery hoops, on the other hand, are specialized pieces of equipment. They have specific brackets and connectors that snap or lock directly into your machine, like a BERNINA. This is what allows the machine to move the fabric with absolute precision. Trying to stick a hand hoop in your embroidery machine wouldn't just fail; it could seriously damage it.
Think of it this way: a hand hoop is like a simple picture frame you hold. A machine hoop is a calibrated, precision-engineered part of the machine itself. They aren't interchangeable.
This is a classic problem, especially with silky or lightweight fabrics like rayon that just don't want to stay put. If you find your fabric constantly going slack, the best trick in the book is to bind your inner hoop.
It’s an easy fix that works wonders. All you have to do is wrap the inner ring of your hoop tightly with a thin strip of cotton twill tape or even some bias tape. This creates just enough friction and cushion to grip the fabric securely, so you don't have to crank down the screw and risk marking up your material.
Don't worry, this happens all the time, especially when you're working on a big quilt or an ambitious piece of artwork. The technique you're looking for is called re-hooping. You just stitch one section of the design at a time. When you finish, you carefully un-hoop the fabric, shift it over, and hoop the next section.
The most important thing to remember with re-hooping is to be gentle. Try your best not to hoop over stitches you've already completed, as the pressure can flatten or damage your beautiful work. For machine embroiderers, this is where multi-position or "jumbo" hoops come in—they're designed to help you perfectly align large, connected designs that go beyond your machine's normal stitch field.
Ready to find the perfect hoop for your next masterpiece? At High Country Quilts, our team is always here to offer personalized advice and help you select the ideal tools from our extensive collection. Visit us online to explore our full range of quilting and sewing essentials at https://hcquilts.com.
At High Country Quilts we care deeply about community. With our experiences in retail, we know that a store is not only a place to shop but also a place for the community to gather and share. During this busy...

Hi! We’re Adam and Renee Wheaton, the new owners of High Country Quilts! For more than 40 years, we’ve owned and operated vacuum and sewing businesses. Following in Renee’s father’s footsteps after he retired from All Discount Vacuum and Sewing in Colorado...


Leave a comment